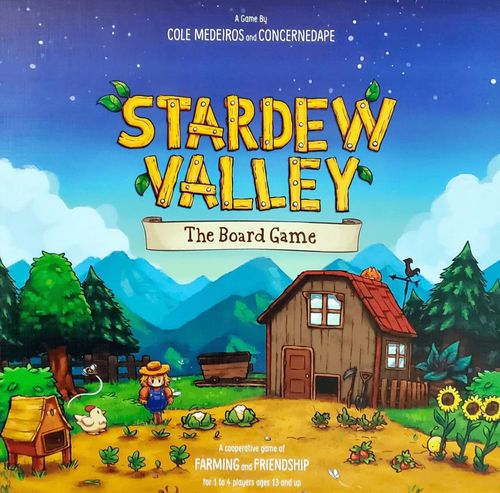
Stardew Valley: The Board Game
Stardew Valley: The Board Game Rulebook
Table of Contents
Table of Contents
- List of Components
- Setup
- Goals & Bundles
- Community Center Bundles in Detail
- How to Play
- Actions in Detail
- Water Crops (Farm Action)
- Collect from Animals (Farm Action)
- Buy Animals (Ranch Action)
- Buy & Plant Seeds (Town Action)
- Make a Friend (Town Action)
- Reveal & Donate to Bundles (Town Action)
- Open Geodes (Forge Action)
- Donate to Museum (Forge Action)
- Buy Buildings (Mountain Action)
- Explore the Mine (Mountain Action)
- Fishing (Forest/Beach/Mountain Action)
- End of Turn Effects
- Additional Things
- Adjusting Game Difficulty
- Adjusting Game Length
- Solo Play Rules
- Quick Rules Reference
- Answers to Common Questions
- Getting Married
- Symbol Reference Sheet
List of Components
- Board (1)
- Rulebook (1)
- Player Pawns (4)
- Spouse Pawn (1)
- Stardew Dice (3)
- Animal Dice (3)
- Starting Player Token (1)
- Player Mats (4)
- Starting Tool Cards (19)
- Gold Tokens (10x 1's, 8x 5's, and 3x 10's)
- Heart Tokens (10)
- Villager Cards (31)
- Season Cards (84)
- Mine Level Cards (12)
- Map Cards (40)
- Goal Cards (8)
- Building Tiles (9)
- Animal Tiles (8)
- Bundle Cards (26)
- Profession Upgrade Cards (64)
- Item Cards (49)
- Epic Item Cards (17)
- Event Cards (38)
- Mine Event Cards (16)
- Joja Tiles (13)
- Crop Tiles (48)
- Ore/Geode Tiles (16)
- Bug Meat Tiles (4)
- Forageable & Tree Tiles (60)
- Tile Tray, aka "the Supply" (1)
- Animal Resource Tiles (24)
- Stone Tiles (4)
- Organizer (1)
- Artifact/Mineral Bag (1)
- Artifact & Mineral Tiles (40)
- Fishing Bag (1)
- Fish, Trash & Treasure Tiles (60)
Setup
1. Basic Components. Place the board in the middle of the table. Place beside it the Stardew Dice, Animal Dice and Spouse Pawn. Shuffle and place the following decks facedown, along with the stack of Joja Tiles: Villagers, Items, Epic Items, Events, Mine Events.
2. Tile Tray and Resource Bags. Place the Tile Tray near the board. It contains resource tiles for crops, animals and more. Place the 2 bags near the Tile Tray. Put all Artifacts & Minerals into the gray bag, and all the Fish Tiles into the blue bag. This is where you'll draw Artifacts & Minerals or Fish from when needed. (See the Starting Layout for how to organize this tray.)
3. Plant Your First Crop. Put 1 Parsnip (a Spring Crop from the Tile Tray) in the second field slot. Note: Crops are double sided, the front is normal and the back is Quality. Crops are always planted normal side up.
4. Place Forageables and Trees. Mix the 11 Spring Forageable tiles and put 1 facedown in each Foraging Spot on the board. Place the 4 Spring Tree Tiles onto the Tree Spots, leaf side up. Place remaining Forageables and Trees nearby for future use.
5. See Which Fish Are in Season. Draw 5 random tiles from the Fishing Bag and put 1 in each slot on the Fish Track. Always fill empty slots starting with the rightmost empty slot.
6. The Mine. Sort the Mine Level Deck by number so that Level 1 is on top and Level 12 is on the bottom. Place this stack faceup onto its space on the board, so that Level 1 is showing.
Shuffle the Map Cards Deck and draw 1. Place this revealed Map Card faceup on the board in its space next to the Mine Levels.
7. The Season Deck. Build the Season Deck (see details below) and place it facedown in the season space on the board. For your first game, it's recommended that you use only the Standard Season Cards. The Standard Season Card symbol appears in the bottom right of some Season Cards.
8. The Community Center. For each Community Center Room, draw 1 random Bundle that matches the room. Do not look at it. Place each Bundle facedown onto its matching room. Set the remaining cards aside, as you most likely won't need them.
9. Grandpa's Goals. Shuffle the Goal Deck and draw 4 cards. Place these faceup on Grandpa's Letter at the top of the board. These are your goals for the game.
10. Animals and Buildings. Create 2 stacks of Animal Tiles near the left edge of the board, separated by type: Coop or Barn Animal. Place the Coop Building Tile on top of the Coop Animal stack, and the Barn Building Tile on top of the Barn Animal stack. Randomly draw 2 other Building Tiles to place beside the Coop and Barn. Return the rest to the box.
11. Player Setup. Each player selects a Player Mat to determine their Profession and takes the matching colored pawn. Then each player chooses which Starting Tool Deck to claim (Watering Can, Hoe, Fishing Rod or Pickaxe) and places it on their Player Mat with Level 0 faceup on top.
12. The Pet Token and Starting Gold. Whoever recommended playing the game chooses the Starting Player and gives them the Pet Token. The group decides which pet they prefer, cat or dog. The players as a team collectively start with a total of 3 Gold.
Building the Season Deck
For your first game, find the 16 Standard Season Cards. Separate these by season into 4 piles.
Turn the cards facedown and randomize the order of each season's cards. Place each set of 4 on top of its matching Season End Card (also facedown).
Now you'll have 4 facedown piles each with 4 Standard Season Cards on top of a Season End Card. Stack them to form the Season Deck.
Starting Layout
The board and its surroundings are set up with: Grandpa's Goals at the top; Heart Tokens, Gold Tokens, Stardew Dice and Animal Dice beside the board; the Building Tiles (with Animal Tiles stacked below) and the 2 random Building Tiles; the Animal Tiles; the Forageables & Trees for next seasons; the Fishing Bag; the Forageable & Tree Tiles on the board; the Starting Crop (Parsnip); the Starting Fish Tiles on the Fish Track; and the Starting Gold.
The Tile Tray (the Supply) contains 4x of each Crop, Animal Product, Bug Meat, Stone, Ore/Geode.
The Pet Token (first player marker) goes to the Starting Player.
Also laid out are: the Community Center Bundles; the Map Card Deck; the Mine Level Deck; the current Map Card; the Mine Event Deck; the Profession Upgrade Decks; the Joja Tiles; the Item Deck; the Epic Item Deck; the Artifact/Mineral Bag; the Spouse Pawn; the Season Deck; the Event Deck; the Villager Deck; and each player's Player Pawn, Starting Tool Deck and Player Mat.
Goals & Bundles
There are 2 types of objectives: Grandpa's Goals and Community Center Bundles.
4 of Grandpa's Goals are revealed at the start of the game. All of them must be completed in order to win.
They can be any of the following:
- Have 10 Gold per player
- Reach the bottom level of the Mine (Level 12)
- Donate 2 items to the Museum per player (Artifacts or Minerals)
- Have 2 animals per player
- Have 3 friends per player
- Catch 1 Legendary Fish per player
- Build 1 Building per player
- Upgrade Starting Tools 2 times per player
A Note About Player Count. Many requirements in the game scale based on player count. Goals and Bundles require more effort when there are more players, but you'll also have more actions as a team. The "number of players" icon appears throughout the game.
There are 6 Community Center Rooms pictured on the board. Each must be restored in order to win.
To restore a room you must reveal and complete 1 of several Bundles that relate to the room. Each Bundle requires a unique type of donation. To complete a particular Bundle, you must donate to it a number of times equal to the number of players. When you have completed 6 Bundles, 1 related to each of the 6 rooms, the Community Center is restored!
Bundle Example: Once players donate Spring Forageable tiles equal to the number of players, the Crafts Room is restored.
Bundles Start Out Hidden
At the start, you won't know exactly how to restore the Community Center because Bundles begin the game facedown. This will be explained later in greater detail, but essentially, resources are gifted to villagers to gain hearts, and hearts are spent to reveal (turn faceup) each room's Bundle Card.
Community Center Bundles in Detail
The Crafts Room requires Forageables and materials found by moving around the Valley. (Forageables from a particular season. Any 2 materials.)
The Pantry requires Farm goods from crops and animals. (Seasonal Crops or Animal Products. Quality Crops or Animal Products.)
The Fish Tank requires certain types of fish obtained by fishing at the Lake, River or Ocean. (Different types of fish.)
Important! Legendary Fish can be donated to any fishing Bundle.
The Bulletin Board requires different types of goods as well as Heart Tokens gained by giving gifts to villagers. (Resources and Heart Tokens.)
Important! Progress toward these Bundles requires 1 Heart Token and 1 resource per player.
The Vault requires donations of Gold. Remember these amounts are multiplied by the number of players! (An amount of Gold.)
The Boiler Room requires Mine resources like Ore, Minerals or Bug Meat. (Various resources from the Mine.)
How to Play
Each round in the game follows these steps:
- Season Phase: Draw a Season Card and carry out its instructions.
- Planning Phase: Players discuss their plans and place their pawns at any location.
- Action Phase: Beginning with the Starting Player, each player takes a turn.
Once your turn is complete, place your pawn back on the Farmhouse. You may then choose 1 type of End of Turn Effect (listed on the board beside the Farmhouse) and trigger it as much as you are able (see End of Turn Effects for details about these effects). Once each player has taken a turn, the round ends and a new round begins.
Use the Farmhouse graphic on the board to hold your pawn between turns.
The game ends when players complete their objectives (victory!) or when the final Season Card is drawn (Joja has won...).
Step 1 - Season Phase
The player with the Pet Token draws a Season Card and follows its instructions from top to bottom. Festival Cards have a single effect written on the card, whereas each Regular Season Card shows a unique sequence of icons. (The three types of Season Card are Regular, Festival and Season End.) Each icon triggers an effect:
- Quality Crop. Flip any planted crop so that its Quality side is faceup.
- Rain. Move all planted crops 1 space to the right. Anything that moves off the track is harvested and goes to the Starting Player.
- Fish Move. Discard the 2 rightmost Fish Tiles from the Fish Track. Slide tiles remaining to the right to fill the empty slots and draw new tiles to populate the vacant slots. Legendary Fish are not discarded, but instead returned to the bag.
- Gift. Each player chooses 1 of their befriended villagers and activates their Gift Ability. Then trigger the effect of all non-villager cards with Gift Symbols.
- The Pet Wanders. The Starting Player passes the Pet Token to the player on their left.
- Green Crow. Choose 1 of your crops in a green field to be discarded (Note: Field 3 is both red and green).
- Red Crow. Choose 1 of your crops in a red field to be discarded (Note: Field 3 is both red and green).
- Event. The Starting Player draws an Event Card and resolves its effects.
- Joja. Draw a Joja Tile and place it on its corresponding space on the board. These have no immediate effect, but make the affected location less useful.
- Shipping Bin. Players may trade and sell resources. The Gold value of tiles is shown in the bottom right.
For details on how Season End Cards work, see the Season End Cards section.
Step 2 - Planning Phase
Players may trade item cards or resource tiles during this phase, as well as discuss their intentions for the turn. Each player then places their pawn onto any location (this does not count as movement). Once everyone is happy with their placement, proceed to the Action Phase.
Step 3 - Action Phase
Players take actions and move on the board. The Starting Player (the player with the Pet Token) begins and must finish all of their actions before the next person starts their turn. Play proceeds clockwise. Players choose, during their turn, how they would like to carry out actions. They may either do:
ACTION + ACTION — Take 2 actions at your current location. No movement is allowed (unless by using some special ability).
OR
ACTION + MOVE + ACTION — Take 1 action at your current location, then move 1 space along a path, then take 1 action at your new location.
When you complete your last action, you return your pawn to the Farmhouse and may trigger any 1 End of Turn Effect as much as you like. Once everyone has gone, the round ends.
Movement Allows Foraging
Whenever a player moves their pawn along a path, they may take 1 of the facedown Forageable or Tree Tiles (not both) from an area that shares a border with that path. This is automatic and does not count against the allowance of 2 actions per turn. Most Forageable Tiles and some Trees can be harvested from more than 1 path.
If you reveal an Artifact/Mineral tile, look at the icon on the bottom right to see if you've found an Artifact or a Mineral. Discard the tile and draw from the Artifact & Mineral Bag, keeping the resource type that was specified.
- Location. While here, players can choose to do any of these 3 actions.
- Paths. Allows players to move between locations and forage.
- Forageable Tile. Revealed and claimed by moving along any of the 3 adjacent paths.
- Forageables are revealed via movement and then placed into your inventory.
- Trees work the same as Forageables but are not considered Forageables. All trees become Wood when claimed.
- Artifact/Mineral tiles grant Artifacts or Minerals, and are then discarded.
Actions in Detail
When you take an action, you may choose from any available action at your current location. A player may change their mind from what they declared in the Planning Phase - this is OK (although a player may not change their location now except via movement during their turn or by using a special ability). A player is not required to take an action. Note that some abilities require you to spend an action to use them. This can be done from any location unless specified otherwise.
The Town location represents the Town; here players can visit Pierre's General Store, the Community Center or the Stardrop Saloon.
The locations and their actions are:
- Farm: Water Crops, Collect from Animals
- Forest: River Fishing
- Ranch: Buy Animals
- Town: Reveal & Donate to Bundles, Buy & Plant Seeds, Make a Friend
- Mountain: Explore the Mine, Buy Buildings, Lake Fishing
- Forge: Open Geodes, Donate to Museum
- Beach: Ocean Fishing
Water Crops (Farm Action)
Spend 1 action to move all crops currently planted in the field slots 1 space to the right. If a crop moves off the track, it is harvested and goes into your inventory. If you have no inventory space, you must first discard a resource to make room, or discard the crop.
When watered, all planted crops move 1 space to the right toward harvest.
Crows! Crops never wither, but can be eaten by crows! When a Crow Icon appears on the Season Card, choose a crop in a field matching its color (see colored bar above fields). That crop is discarded.
Collect from Animals (Farm Action)
Spend 1 action to roll 3 Animal Dice. Each Animal Tile you own generates 1 resource each time it is activated. An Animal Tile is activated once for each die that matches its icon. For example, if players have 2 cows, a roll of 1 Cow icon would grant 2 Milks. A roll of 2 Cow icons would grant 4 Milks, and so on.
Animal Tiles have a Regular side and a Happy side.
Happy Animals. Animals flipped to their Happy side generate Quality animal resources. Animals can be flipped to Happy by an End of Turn Effect (see End of Turn Effects).
Buy Animals (Ranch Action)
Spend an action to visit Marnie and buy animals. All animals are available to choose from once you have the building that they require (the Coop or Barn). Multiple animals can be purchased with a single action if you have enough Gold.
An Animal Tile shows: the Building required for this animal; the Cost to buy this animal; the number of Hearts you must discard to flip over to the Happy side; the Resource generated each time you activate this animal; and the Icon that must be rolled to activate this animal.
Buy & Plant Seeds (Town Action)
Spend 1 action to visit Pierre's General Store where you can buy seeds and sell resources, as many as you wish. Seeds (Crop Tiles of the current season only) cost 1 Gold each and are planted immediately upon purchase into an empty field. The crop's watering cost shows which numbered field it must be placed into. Normally only 1 Crop Tile may be in each field slot (no stacking!).
The watering cost on the crop shows which numbered field it goes into.
Selling Resources. While at Pierre's you can also sell any resources from your inventory for Gold. This can be done in any order with planting seeds. On most turns, you'll be able to sell goods via the Shipping Bin on Season Cards, but sometimes that isn't available, in which case you'll want to use this action if needed.
The Gold value shown on a crop is the value when sold. But remember that all crops only cost 1 Gold each to plant!
Make a Friend (Town Action)
To make a friend, spend 1 action in Town and reveal the top card of the Villager Deck. If you are able and wish to do so, gift them a resource to make them your friend, otherwise discard them. To give a gift, discard a resource from your inventory and then keep the Villager Card and earn Heart Tokens.
Example: Penny loves crops! Example: Penny hates Ore, Geodes, Artifacts & Minerals.
How many Heart Tokens you earn depends on the gift type and the current season:
- Loved. Earn 2 Hearts.
- Liked. A giftable resource not pictured on the card earns 1 Heart.
- Hated. Cannot be gifted to this villager.
- If the current season matches their birthday: earn 1 extra Heart.
A Villager Card also shows their birthday season, indicates that they can be married, and shows their Gift Ability.
Important! Any resource can be gifted as long as it isn't Hated and does not display the "No Gift" icon.
Gift Abilities. When a Gift Symbol appears on a Season Card, each player may choose 1 of their friends and activate the villager's Gift Ability. A Gift Symbol can appear during the Season Phase.
To get married, see the Getting Married section.
Reveal & Donate to Bundles (Town Action)
Spend 1 action to visit the Community Center, where you may reveal and/or donate as much as you are able. Revealing Bundles requires you to spend Heart Tokens. Completing Bundles requires you donate the resources listed on the Bundles. Remember that to restore the Community Center, you must reveal and complete 1 Bundle per room (for a total of 6 Bundles).
Revealing Bundles. To reveal a Bundle, discard a number of Heart Tokens equal to the number of players. Then either:
- Reveal (turn faceup) the leftmost, facedown Bundle Card, OR
- Replace a revealed Bundle Card with a new faceup Bundle Card matching the room.
Hearts x Number of players = Reveal or replace a Bundle Card.
Sometimes, you'll discover a Bundle is too hard, or maybe impossible! So you'll need to replace it.
Bundles are room specific. If you replace a Bundle, make sure that the back of the card matches with the target room. If you replace a Bundle that has had some resources donated to it, that progress and those donations are lost (discard the donations).
Completing Bundles. A Bundle is completed when players have donated the correct amount of resources to it; the number of donations needed is equal to the number of players (see Goals & Bundles and Community Center Bundles in Detail for details). Place donated resources onto the Bundle Card to show progress. You may place resources onto a Bundle even if you don't have enough to complete it. Once its requirement has been met, clear away the resources (return them to the supply or discard) and remove the Bundle Card from the board. The room is restored!
Place resources on the Bundle Card when donating. Bundle-specific Donation x Number of players. Complete to restore a room!
When you complete a Bundle, reveal a reward item and give it to any player: the first 5 Bundles completed grant regular items... the final Bundle grants an Epic Item!
Open Geodes (Forge Action)
If you have Geodes in your inventory, you may visit Clint to open them.
Spend 1 action to break open any number of Geodes. For each Geode, roll 1 Stardew Die. Consult the chart on the board to see your result and discard the Geode (though if the result is Ore you can just flip the Geode over).
Possible results: Gain 1 Stone; Gain the specific Ore shown; Gain 1 Mineral; Gain 1 Artifact; Gain 1 item.
Donate to Museum (Forge Action)
If you have Artifacts or Minerals, you may visit Gunther to donate them to the Museum.
Spend 1 action to donate any number of Artifacts or Minerals from your inventory to the Museum. Each tile donated earns you 1 Heart Token. Each tile must be placed into an empty slot that matches the letter on the left-hand side of the tile. The Museum has 8 slots, each with a letter (A - H).
For each tile you donate, earn 1 Heart. For example, an Artifact marked "B" can only go into the B slot. Tiles with "?" can go into any slot.
The Museum grants up to 2 Epic Items, 1 per column filled!
Buy Buildings (Mountain Action)
If you have enough materials (Wood and Stones) and Gold, you may visit Robin to construct Buildings. Spend 1 action and discard the required amount of materials and Gold listed on any Buildings you wish to construct. Then take the appropriate Building Tiles.
Buildings, like animals, are shared among all players. Buildings require materials. A Building Tile shows its Gold cost, the materials required, and the effect of the Building.
Explore the Mine (Mountain Action)
The Mine is a source for Stones, Ore, Geodes and more, but beware of dangerous monsters! Spend 1 action at the Mountain location to roll 2 Stardew Dice and see what you encounter...
The current Map Card shows what the outcome of your roll will be. Use the results of your roll to indicate a row and column (you choose which die symbol is used for column and which for row) and trigger the grid space where they meet.
Example: If you rolled a Stardrop and a Heart, you could gain 1 item or 1 Ore.
- Stone. Gain 1 Stone (sometimes 2).
- Bug Meat. Gain 1 Bug Meat.
- Ore. Gain 1 available Ore (sometimes 2). The Mine Level Card specifies available Ore types.
- Geode. Gain 1 available Geode (sometimes 2). The Mine Level Card specifies available Geode types.
- Staircase. Descend: Reveal the next Mine Level Card and place a new Map Card.
- Item. Gain 1 Item Card.
- Monster. Trigger the Monster Ability on the current Mine Level Card.
- Mine Event. Draw 1 Mine Event Card and resolve its effect.
The Mine Level Card displays which level you're on, what Ore and Geodes are available and the effect of monsters.
Monsters are shown on the Mine Level Cards. If your result on the Map Card is a skull, trigger the Monster Ability on the Mine Level Card.
Staircases help you reach the lower levels, but don't forget that Stones can be used as an End of Turn Effect to descend (spend a number of Stones equal to the number of players). Any time you descend, reveal the next Mine Level and replace the Map Card (if on Level 12, only change the Mine Map card).
Fishing (Forest/Beach/Mountain Action)
Fishing allows you to catch fish and occasionally gain items. To fish, visit 1 of the 3 fishing locations and spend 1 action: River (Forest), Ocean (Beach) or Lake (Mountain).
Fish Track. To catch a fish, you must be in the fishing location matching one or more of the fish on the Fish Track (denoted by their tile colors and icons) and then fulfill the catch requirements to claim tiles. After each Fishing Action is completed, slide tiles to the right to fill empty slots and then fill remaining empty slots from the Fishing Bag.
Example: There are 2 fish available in the Lake, 2 in the Ocean and 1 in the River.
How to Catch Fish. When you take a Fishing Action, roll all 3 Stardew Dice. Each die generates 1 symbol: Heart, Junimo or Stardrop. To catch a fish in the same location as you are, spend the symbols from the rolled dice to fulfill the catch requirements of one or more fish on the Fish Track (it is possible to catch more than 1 fish, but remember that each die can only be put toward a single fish).
Roll all 3 Stardew Dice to try and catch fish. For example, the Red Mullet's catch requirements are a Heart and a Junimo.
Legendary Fish. There are 4 Legendary Fish in the Fishing Bag. They are caught like normal fish. The major difference is that Legendary Fish are never discarded from the Fish Track due to Fish Track movement from Season Cards. If Fish Track movement would push them off the board, instead return them to the Fishing Bag. When sold, donated or gifted they are discarded as usual.
Legendary Fish can be used towards any fishing bundle, sold for Gold or gifted for Hearts. The "Catch Legendary Fish" Goal only requires you catch them, not keep them.
Crab Pot. For all purposes, Crab Pot Fish are treated like other fish except that they are not caught using Stardew Dice. Instead during a Fishing Action, for every Bug Meat you discard, you may take a Crab Pot Fish that matches your current fishing location. This is in addition to your regular fishing roll, so it is possible to catch Crab Pot Fish and other fish during a single action.
Crab Pot Fish require Bug Meat to catch instead of Stardew Dice symbols. Discard Bug Meat to catch Crab Pot Fish.
Trash. If you catch no fish of any kind, you may take a Trash Tile from the Fish Track. Trash is not generally useful, but removing it frees up a slot from the Fish Track (and like all tiles can be discarded from inventory whenever you wish).
Treasure Chests. If you catch a fish to the immediate left of the Treasure Chest Tile, discard the Treasure Chest Tile and gain an item. Catch the fish to the left to gain an item.
The Fishing Bag. This contains all fishing-related tiles: Regular Fish, Crab Pot Fish, Legendary Fish, Trash Tiles and Treasure Chest Tiles. Draw from this bag whenever you need to replenish the Fish Track. Fishing tiles are never returned to the Fishing Bag, except for Legendary Fish discarded via Fish Track movement.
Legendary Fish discarded from the Fish Track are returned to the Fishing Bag... but in all other instances, Fish Tiles are not returned to the bag.
End of Turn Effects
When a player ends their turn and returns to the Farmhouse, they may choose 1 type of End of Turn Effect to trigger. The player may perform this effect as many times as they are able.
- Build Staircase. Discard a number of Stones equal to the number of players to descend in the Mine (see Explore the Mine).
- Pet Animals. Discard an amount of Heart Tokens that is equal to the number of Hearts displayed on an owned Animal Tile to flip it over to its Happy side.
- Remove Joja. Discard 1 Heart Token or 5 Gold to remove a Joja Tile from any space.
- Upgrade Starting Tool. Discard the resource listed on your Starting Tool to advance it to its next level.
Additional Things
Starting Tools & Inventory
At the start of the game, each player chooses a Starting Tool. Keep all cards associated with your chosen tool stacked faceup in decreasing numerical order (Level 0 on top) on your Player Mat. The mat also has spaces that indicate where Profession Upgrades, items and resources are kept. You are normally limited to 2 upgrades, 2 items and 6 resources and must choose what to keep if you gain more. There is no limit to Epic Items, friends or kept Event Cards.
Your Starting Tool begins at Level 0; replace it with higher level cards as you upgrade it. Resource Tiles go into their slots. The Player Mat shows your profession, and holds up to 2 Profession Upgrades and up to 2 items.
Season End Cards
In the Season Deck there are 4 Season End Cards: 1 each for Spring, Summer, Fall and Winter. When it is drawn, follow the instructions on the card:
- Remove all Forageable Tiles and Trees from the board and place the next season's Trees and Forageables in the appropriate spots.
- Now each player draws 2 Profession Upgrades that match the Profession on their Player Mat. They look at the cards and may keep 1 (if they already have 2 Profession Upgrades, they may discard 1 to make space).
- Finally, draw the next Season Card, which will be a Regular or Festival card. Carry out its instructions and then move on to the Planning and Action Phases as usual.
Resources & Cards
Players can gain a number of assets. These are made up of resources (tiles) and cards. Each tile takes up 1 inventory space (tiles cannot be stacked). When discarded, tiles from the Tile Tray should return to the tray, while other tiles (fish, forageables, artifacts or minerals) should be discarded into piles beside the board.
Resources. These are tiles which can be held in your inventory slots. They are often sold, donated or gifted to villagers. There are 8 basic types: Crops, Forageables, Fish, Animal Products, Ore, Geodes, Artifacts, Minerals.
Other Tiles. These other tiles also go into your inventory. The biggest difference is that these cannot be gifted to villagers: Materials, Trash, Monster Loot.
Common Items. These items are gained in many ways. They can be traded during the Planning Phase. A player may only hold 2. Note: When you discard an item to keep another item, you may not activate the "Discard to Use" ability.
Epic Items. These are rare. A player may hold as many of these as they like. They can be traded unless they say otherwise.
Profession Upgrades. Each player gains 1 Profession Upgrade at the end of each season. These upgrades may not be traded, and each player may only ever have 2. If you gain a double-sided card, choose which side is up and therefore active. Cards with Gift abilities are triggered when the Gift Symbol appears on Season Cards, just like Items and Epic Items.
Joja Tiles
Occasionally, a Season Card will call for a Joja Tile to be drawn and placed. To do this, draw from the stack of facedown Joja Tiles and reveal it. The icon shows which board action it affects. Place it near this action as a reminder. From now on, it will alter or possibly block the target action until it is removed. (The Joja icon on the Season Cards places a Joja Tile; the tile itself shows where to place it.)
Removing Joja Tiles. Removing a Joja Tile is an End of Turn Effect. Discard 1 Heart Token or 5 Gold to remove any Joja Tile from the board. Remove with 5 Gold or 1 Heart Token (not both!).
Adjusting Game Difficulty
Game Modes
The basic game is described in the rules above, but players may wish to make a game easier for teaching new players, or harder for advanced players. The game ends the instant your objectives are complete. Choose a mode at the start of the game:
"Seedling" is great for teaching the game, or striving for a personal record without the stress!
- Complete 4 of Grandpa's Goals only
"Honest Farmer" is the standard way to play.
- Complete 4 of Grandpa's Goals
- Complete 6 Bundles, 1 per Room, to restore all 6 Community Center Rooms
"Artisan" is the advanced mode, providing experienced players with the greatest challenge.
- Complete 4 of Grandpa's Goals
- Complete 6 Bundles, 1 per Room, to restore all 6 Community Center Rooms
- No Joja Tiles remain on the board
Optional Season Cards
In the setup described at the start of this rulebook, you were instructed to use the Standard Season Cards. This provides the most consistant and predictable experience. When you become more familiar with the game, you may wish to try a Season Deck with a few more surprises. To do so, create each season by drawing 4 random Season Cards from all 20 available for each season.
Extra Challenge: Artisan Scoring
If you want an even greater challenge, build your Season Deck to include more cards with the Joja symbol. Play on "Artisan" difficulty (you cannot win unless all Joja Tiles are cleared). Your score, if you win, is equal to the number of Joja Tiles removed.
Making the Game Easier
If you would like to make the game easier, try starting with 1 or more Community Center Bundles revealed faceup.
Adjusting Game Length
A normal game that spans an entire year with 20 cards in the Season Deck will usually take about 40 minutes per player. If you desire a quicker game, try this:
- Each season has only 2 Season Cards instead of 4 (in addition to the Season End Card).
- Only reveal and complete 2 of Grandpa's Goals instead of 4.
- Randomly choose 3 Community Center Rooms and place Bundles facedown for them. The Community Center is considered "restored" after these 3 Bundles are completed.
Solo Play Rules
Stardew Valley: The Board Game is easily playable solo. The only difference is with Professions; you are not limited to the Profession on your Player Mat. Instead when you gain a Profession Upgrade at the end of a season, draw 3 cards from any combination of the 4 Profession Decks and reveal them simultaneously. You may choose 1 to keep and discard the others.
Quick Rules Reference
Phases of a Round
Season Phase: The Starting Player (denoted by the Pet Token) draws and resolves a Season Card. If it's a Season End Card, remember that you immediately draw the next Season Card after the Season End Card has been resolved.
Planning Phase: Players discuss what they'd like to do, and then each places their pawn on any location. They may freely trade resources and items during this phase.
Action Phase: Beginning with the Starting Player, players move and take actions, following one of the options below:
- Action + Action
- Action + Move + Action
Once a player finishes their turn, they return their pawn to the Farmhouse. They may choose 1 type of End of Turn Effect to trigger as much as they are able. Play then proceeds to the next player until all players have completed their turn, upon which the round ends and a new round begins.
Quick Setup Checklist
- Shuffle Villagers, Joja Tiles, Items, Epic Items, Events and Mine Events.
- Plant 1 Parsnip.
- Place Spring Forageables and Trees on board.
- Populate the Fish Track.
- Stack Mine Level Cards faceup.
- Shuffle Map Cards and reveal 1 faceup.
- Build the Season Deck.
- Place 6 Community Center Bundles facedown.
- Reveal 4 of Grandpa's Goals.
- Stack Animal Tiles under Coop and Barn.
- Draw 2 random Building Tiles.
- Each player chooses a Profession (Player Mat).
- Each player chooses a Starting Tool.
- Give Starting Player the Pet Token.
- Players collectively start with 3 Gold.
- Draw the first Season Card and begin!
Summary of Actions
Water Crops: Move all planted crops in your fields 1 space to the right. Crops that leave the track are harvested.
Collect from Animals: Roll the Animal Dice. Each die symbol activates all matching animals, and each animal generates 1 resource each time they are activated.
Buy & Plant Seeds: Spend Gold to plant Crop Tiles in your fields, 1 Gold per crop planted. Place each crop directly into a field matching its watering number. You can only plant crops into empty fields. May also sell resources during this action.
Make a Friend: Draw 1 Villager Card. If you choose to gift them a resource, gain Heart Tokens and keep the card as a friend.
Reveal & Donate to Bundles: Spend Heart Tokens to reveal facedown Bundles, and donate resources to revealed Bundles.
Explore the Mine: Roll 2 Stardew Dice and use them to determine a result on the current Map Card.
Buy Buildings: Spend Gold and resources to build Buildings.
Buy Animals: Spend Gold to buy any animals for which you have the required Building (Coop or Barn).
Open Geodes: Roll 1 Stardew Die per Geode and consult the Geode Table on the board for your reward.
Donate to Museum: Place Artifacts or Minerals from your inventory into Museum Slots with matching letters.
Go Fishing: May spend Bug Meat to catch Crab Pot Fish, 1 Crab Pot Fish per piece of Bug Meat. Then roll all 3 Stardew Dice and determine if you can catch anything at your location. If not, you may take a Trash Tile. Then refill the Fish Track.
Answers to Common Questions
- Crops in fields do not wither when the season changes.
- Items and resources cannot be traded during the Action Phase.
- Trash & Fiber are not very useful, but can be discarded at any time.
- The pet only moves when the Season Card triggers it to move.
- "Catch Legendary Fish" Goal: You do not need to keep Legendary Fish.
- "Make Friends" Goal: It's not required for each player to have friends.
- Gold and Heart Tokens are communally shared by all players.
- Stone, Gold and Heart Tokens are not limited by components.
- When you descend at Mine Level 12, only change the Map Card.
- Treat Festivals like Regular Season Cards when building the Season Deck.
- Whenever any tile is "gained" it goes into your inventory unless discarded.
Getting Married
In order to get married, you must first gain the Mermaid's Pendant Epic Item. You may attach it to 1 of your villager friends who displays the Mermaid's Pendant icon. You are now married! Take the Spouse Pawn. During the Planning Phase, you may put the Spouse Pawn onto any space. During your turn, your spouse may take 1 action at their location before or after you have taken all your actions. They have access to your inventory of resources as well as any cards and abilities you possess. Spouse may not trigger End of Turn Effects.
Symbol Reference Sheet
Resource Types
Crop, Forageable, Fish, Animal Product, Ore, Geode, Mineral, Artifact.
Other Tile Icons
Spring, Summer, Fall, Winter, Legendary, Crab Pot, Trash, Monster Loot, Not Giftable, Quality, Materials.
Location Actions
- Water Crops
- Collect from Animals
- Buy & Plant Seeds
- Make a Friend
- Reveal & Donate to Bundles
- Explore the Mine
- Buy Buildings
- Buy Animals
- Open Geodes
- Donate to Museum
- Go Fishing
End of Turn Effects
- Build Stairs
- Pet Animals
- Remove Joja
- Upgrade Starting Tool
Season Card Symbols
- Flip Planted Crop to Quality
- Water Crops
- Move Fish Track 2 Spaces
- Trigger Gifts
- Pass the Pet Token
- Lose a Green Field Crop
- Lose a Red Field Crop
- Draw an Event
- Place a Joja Tile
- Trade & Sell Resources
Mine Symbols
- Gain Stone
- Gain Bug Meat
- Gain Available Ore
- Gain Available Geode
- Descend to Next Level
- Gain Item
- Trigger Monster Ability
- Draw Mine Event Card