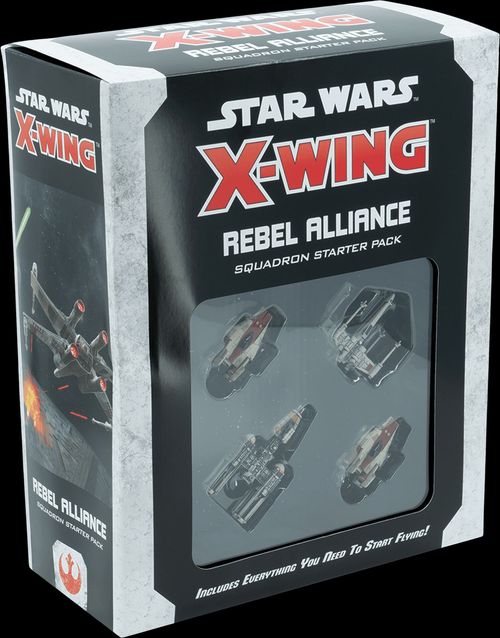
Star Wars: X-Wing (Second Edition) – Rebel Alliance Squadron Starter Pack
Official rulebook: Atomic Mass Games · PDF
Star Wars: X-Wing (Second Edition) – Rebel Alliance Squadron Starter Pack Rulebook
Table of Contents
Table of Contents
- Fundamental Concepts
- Ship Layout
- Setup
- Play
- Additional Rules
- Actions
- Types of Actions
- Special Weapons
- Charges and the Force
- Destroying Ships
- Fleeing the Area
- Repairing Damage Cards
- Upgrade Cards
- Force Charges
- Increasing and Decreasing Maneuver Difficulty
- Partial Maneuvers
- Advanced Maneuvers
- Timing and Abilities
- Hyperspace Markers
- Additional Token Rules
- Other Tokens
- Bombs
- Mines
- Dropping and Launching Devices
- Moving Through and Overlapping Obstacles
- Obstruction
- Squad Building
- Scenarios
- Quick Reference
Fundamental Concepts
Before learning the steps of the game, it is important to understand these basic concepts, since they are referenced in multiple sections.
Ships
Thematically, in X-Wing, the players control the decisions of their pilots, choosing how they navigate their ships and which targets they attack. Each SHIP in the game is represented by a ship card, a ship token, and a plastic miniature, base, and peg(s).
Each ship card includes a variety of information about the ship, from the types of attacks it can perform to its defensive capabilities.
Each ship and maneuver dial has a ship type (e.g., TIE/ln Fighter). Each ship assembly is paired with a dial of the corresponding ship type, which is used to plan its movement.
Friendly and Enemy
Many abilities refer to FRIENDLY and ENEMY ships, which are relative terms. A ship is friendly to all of the ships in its own squad, and it is an enemy ship to all of the opposing squad's ships. Additionally, a ship is friendly to itself.
Obstacles
OBSTACLES are markers that present additional challenges for pilots and create variation in the play area from game to game. Rules for moving through and overlapping obstacles are found on page 18.
Device
Each DEVICE upgrade card allows a ship to drop or launch a specific type of DEVICE and provides additional rules for how they behave. Detailed rules for devices are found on page 18.
Objects
Ships, obstacles, and devices are all OBJECTS. The exact position of objects in the play area is tracked and restricted by game effects.
- Ships can acquire locks on objects.
- Ships can move through objects.
Standard Loadouts
Some ship cards are STANDARD LOADOUTS. Standard loadout cards are larger than normal ship cards and list all the ship's equipped upgrades. Some standard loadouts have unique ship abilities, upgrade abilities, and action bars. Standard loadout ships cannot equip any additional upgrades.
Initiative
Each ship has an initiative value on its ship card and token. Initiative represents the pilot's reflexes, skill, or even luck.
Numerous elements of the game refer to initiative, but its primary function is to determine the order in which ships act. The rules often instruct ships to act in INITIATIVE ORDER, which means the ships take turns in numeric order. The rules will always specify whether to start with the lowest initiative (ascending order) or the highest initiative (descending order).
If a player has two or more ships with the same initiative, that player decides the order in which they act.
If both players have ships with the same initiative, those ships act in PLAYER ORDER. The player who receives the first player marker during setup is the FIRST PLAYER; their ships of that initiative act first. Then the other player's ships of that initiative act.
Measuring Range
To determine the distance between two objects, X-Wing uses a range ruler. The range ruler is divided into three numbered range bands.
To measure range between two objects, place the range ruler over the point of the first object that is closest to the second object, then aim the other end of the ruler toward the point of the second object that is closest to the first object. While measuring range from ships, measure from the plastic base, not from the miniature. An object is AT the range that corresponds to the range band that falls over the closest point of the second object.
Two objects (ships, obstacles, devices) that are touching are at range 0 of each other. Likewise, an object is at range 0 of itself.
The X-wing is at range 0 of the closer TIE fighter because their bases are touching. The X-wing and the farther TIE fighter are at range 2 of each other, because the closest point of that TIE fighter is inside the "2" range band.
An object is BEYOND a range if no part of it falls between the object being measured from and the specified range.
The TIE fighter is beyond range 1 and at range 2 of the X-wing. The asteroid is beyond range 1, beyond range 2, and at range 3 of the X-wing.
Deficit
If the squad point total of a player's squad is less than the maximum allowed squad value, subtract the total squad point value of their squad from the maximum to determine that player's DEFICIT before the game begins.
- At the start of the game, each player earns mission points equal to their opponent's deficit.
Mission Points
MISSION POINTS determine who wins the game. Each scenario details how mission points are earned. Standard Scenarios can be found at atomicmassgames.com/xwing-documents.
- Players track their mission points with VICTORY COUNTERS.
Scenario Feature
A SCENARIO FEATURE is a type of marker that is placed into the play area to facilitate scenario play. Scenario features are objects but cannot be moved, attacked, damaged, locked, or destroyed unless specifically stated in a scenario rule. Scenario features do not obstruct attacks.
Ship Sizes
The ships included in the squadron starter pack are all small ships with a base size of about 1-9/16" (4cm) long. The rules of X-Wing are written for small ships, so there are no special exceptions for small ships. Some expansion ships are medium and large ships which behave similarly to small ships with a few exceptions; see the Rules Reference for more details.
Scenarios
SCENARIOS lay out specific objectives and goals that players must achieve during the battle in order to win the game. Players can either randomly select a scenario to play or choose one if all players agree.
There are many different types of scenarios available in other X-Wing expansions, but the Standard Scenarios represent the most common scenarios used in games of X-Wing. Standard Scenarios can be found at atomicmassgames.com/xwing-documents.
Ship Layout
The labelled parts of a ship card:
- A. Pilot Name and Subtitle
- B. Initiative
- C. Faction
- D. Ship Stats
- E. Action Bar
- F. Text Box
- G. Ship Type
- H. Upgrades
Setup
Before playing a game, each player chooses the ship and upgrade cards they wish to use; this process is known as SQUAD BUILDING. Detailed squad building rules are found on page 18.
After the players select a scenario, they set up by resolving the following steps:
- Gather Forces: Each player places their ships and upgrade cards on the table in front of them. For each ship that has a shield value, charge limit, or Force capacity, place the corresponding shields or charges above the ship and/or upgrade cards. All players assign ID tokens to each of their ships.
- Determine Player Order: Randomly determine the first player as follows: a. Each player rolls three attack dice. The player with the most critical results is the first player. b. In the case of a tie, the first player is the player with the most focus results. c. If there is still a tie, the first player is the player with the most hit results. d. If there is still a tie, players reroll the dice and follow the above rules until the tie is broken.
Note: the source prints the dice in steps a to c as icons; they are rendered above as the words for those icons (critical, focus, hit). 3. Establish Play Area: Establish a 3' x 3' (91 cm) play area on a flat surface or use a playmat such as the X-Wing Starfield Playmat. Then players pick opposite edges of the play area to be their player edges. 4. Place Obstacles: In player order, players take turns choosing an obstacle and placing it into the play area until all six obstacles have been placed. Obstacles must be placed beyond range 1 of each other and beyond range 2 of each edge of the play area. The gray area on the figure on the right shows where obstacles can be placed. 5. Place Forces: Players place their ships into the play area in initiative order from lowest to highest initiative, using player order as a tiebreaker. Players must place ships within range 1 of their player edge. 6. Prepare Other Components: Shuffle the damage deck and place it facedown outside the play area. If the players have more than one damage deck, each player uses their own deck. Set the round dial to "1" and place it near the play area.
Then the supply of range rulers, templates, dice, and tokens is created near the play area.
Play
X-Wing is played over a series of twelve rounds. Each round consists of five phases:
- Planning Phase: Players choose maneuvers for their ships using maneuver dials and determine which player will be the first player for the round.
- System Phase: Some ships can resolve specific abilities.
- Activation Phase: Each ship moves and performs actions.
- Engagement Phase: Each ship may perform an attack.
- End Phase: Circular tokens are removed from ships and some charges recover.
After each End Phase, players start a new round, beginning with the Planning Phase. Players continue to resolve rounds until the game ends.
Phase 1: Planning Phase
During this phase, each player uses a maneuver dial to secretly set a maneuver for each of their ships. Each type of ship has a different dial that thematically reflects its unique capabilities.
A maneuver indicates how a ship will move. It has three components: speed (the number), bearing (the arrow), and difficulty (the color). The speed and bearing determine the distance and angle of the maneuver; difficulty is explained later. Each maneuver corresponds to a template that displays the same speed and bearing.
Figure caption: This template corresponds to both the [1 straight] and [1 Koiogran turn] maneuvers.
Figure caption: This dial is set to the [3 straight] maneuver.
To set a maneuver for a ship, the player takes a dial corresponding to that ship and rotates it until the arrow points at the maneuver they would like to set. Then the player assigns the dial to its corresponding ship by placing it facedown in the play area next to that ship.
After all ships have dials assigned to them, players roll to determine the first player for the round as described in Setup. Then play proceeds to the System Phase.
Phase 2: System Phase
Some ships have special abilities that indicate they are used during the System Phase. All of these abilities are resolved in initiative order, starting with the lowest initiative.
Example of Executing a Maneuver
- The player revealed a blue 2 right bank maneuver. Then they take the 2 right bank template from the supply.
- The player places the template in the play area in front of the ship, sliding the template between the front guides.
- The player picks up and places the ship at the opposite end of the template, sliding the rear guides of the ship into the template.
- The maneuver is blue, so the player removes 1 stress token and returns it to the supply.
Example of Position Marker Usage
It can be difficult to precisely move one ship over another ship. When players desire a higher level of precision, they can use a position marker to track ship positions. In the example, a TIE fighter is in the path of the X-wing's maneuver. To precisely measure the X-wing's final position, a position marker is used to indicate the position of the TIE fighter.
Figure captions, in the order printed: "The TIE fighter is in the way of the X-wing's movement." Then: "Next, complete the maneuver. Now, replace the TIE fighter and remove the position marker." Then: "Mark the TIE fighter's position. Then, remove the ship."
Phase 3: Activation Phase
During this phase, each ship activates one at a time. Ships activate in initiative order, starting with the lowest initiative.
When a ship activates, resolve the following steps:
- Reveal Dial: The ship's assigned dial is flipped faceup and placed next to its ship card.
- Execute Maneuver: The ship executes the maneuver selected on the revealed dial.
- Perform Action: The ship may perform one action.
After all ships have activated, play proceeds to the Engagement Phase.
Executing a Maneuver
When a ship executes a maneuver, the player uses a template to change the ship's position. Then, the ship may be affected by the maneuver's difficulty.
To move the ship, the player follows these steps:
- Take the template that matches the maneuver from the supply.
- Set the template between the ship's front guides so that it is flush against the base.
- Pick up and place the ship at the opposite end of the template, sliding the rear guides of the ship into the template.
- Return the template to the supply.
After moving the ship, the player checks the difficulty (color) of the maneuver. If the maneuver is red, the ship gains one stress token. If the maneuver is blue, the ship removes one stress token.
A ship is STRESSED while it has one or more stress tokens. A stressed ship cannot set or execute red maneuvers, and it cannot perform actions.
After a ship gains a token (such as a stress token), it is placed next to the ship. As the ship moves, the tokens move with it.
Performing Actions
Choosing and performing actions are some of the most impactful decisions a player makes during the game. Actions provide several benefits, primarily the ability to reposition or to enhance offensive or defensive capability during the Engagement Phase.
Detailed rules for actions can be found on page 11.
Phase 4: Engagement Phase
During this phase, each ship engages one at a time. Ships engage in initiative order, starting with the highest initiative. When a ship engages, it may perform one attack, therefore, ships with high initiative get to attack first. After all ships have had the opportunity to engage during the Engagement Phase, the players proceed to the End Phase.
To understand how to perform an attack, players must first understand arcs and targeting restrictions.
Arcs
Each ship has four ARCS printed on its ship token: front, back, left, and right. Ships attack from their printed FIRING ARC, which is the arc on the ship token that is shaded. The color of the shading corresponds to the faction of the ship.
Targeting Restrictions
To target a ship, two conditions must be met:
- The target ship's base must be in the attacker's firing arc.
- The target must be at range 0–3.
The attacker measures to the closest point of the target that is in the attacker's firing arc; this measurement is called the ATTACK RANGE.
Example of Targeting
The TIE fighter is attempting to attack the X-wing. Part of the X-wing's base is in the TIE fighter's firing arc, so the first requirement is satisfied. The closest point of the X-wing's base that is in the firing arc is at range 2, so the second requirement is satisfied. Thus, the TIE fighter can attack the X-wing.
Note that although the attack range is range 2, the two ships are at range 1 for all other purposes (outside the firing arc).
Example of an Attack
- Luke Skywalker has an initiative of "5" and Academy Pilot has an initiative of "1," so Luke engages first during the Engagement Phase and can perform an attack.
- Academy Pilot is in Luke's firing arc. The Rebel player measures range from Luke to Academy Pilot. The attack range is 2.
- Luke rolls attack dice equal to his attack value, getting one blank result and two hit results.
- Academy Pilot rolls defense dice equal to their agility value, getting one focus result, one evade result, and one blank result.
- The focus and blank results have no effect. The evade result cancels one hit result. One hit result remains uncanceled, so the attack hits.
- Since one hit result was not canceled, Academy Pilot suffers one damage. They do not have any active shields, so they are dealt one facedown damage card next to their ship card.
Critical Damage Markers: Some of the faceup damage cards have lingering game effects. If a ship is dealt a faceup damage card with a persistent effect, place a critical damage marker next to it to remind players of that persistent effect.
Performing an Attack
To perform an attack, a ship follows these steps:
-
Declare Target: Measure range to any number of enemy ships and determine which enemy ships are in the attacker's firing arc. Choose one of those ships to become the defender.
-
Attack Dice: The attacking player rolls attack dice (red) equal to the attack value on the attacking ship's ship card. Then, the defending player may use their abilities that modify the attack dice, followed by the attacking player.
- While performing a primary attack at attack range 0, attack dice cannot be added.
- While performing a primary attack at range 0, the attacker's dice cannot be modified, except by the defender.
-
Defense Dice: The defending player rolls defense dice (green) equal to the agility value on the defending ship's ship card. Then, the attacking player may use their abilities that modify the defense dice, followed by the defending player.
- While defending at range 0, enemy ships cannot reduce the number of defense dice you roll, cancel your results, or modify your results.
-
Neutralize Results: Each evade result cancels one hit or critical result, removing both dice from the dice pool. All hit results must be canceled before critical results are canceled.
The attack HITS if at least one hit or critical result remains; otherwise, the attack MISSES.
-
Deal Damage: The defender suffers damage equal to the remaining hit and critical results.
-
Aftermath: Abilities that trigger after an attack are resolved.
Suffering Damage
Damage causes ships to lose shields or be dealt damage cards. There are two types of damage: hit (regular) damage and critical damage.
For each damage a ship suffers, it loses a shield by flipping the shield to its inactive side. If it does not have an active shield remaining, it is dealt a damage card instead. For hit damage, the card is dealt facedown; for critical damage, the card is dealt faceup and its text is resolved. All hit damage is suffered before critical damage.
A ship is destroyed when the total number of (faceup and facedown) damage cards it has equals or exceeds its hull value. Destroying ships is explained on page 14.
Phase 5: End Phase
During the End Phase, players remove all (green and orange) circular tokens from their ships in the play area, and some charges on cards may flip to their active side. All of these components are explained later in the "Additional Rules" section.
If both players have at least one ship remaining, the first player advances the round dial and play proceeds to the next round.
Winning the Game
After this phase ends, the players check to see if somebody has won the game. Each scenario details its individual victory conditions and rules for earning mission points; the player with the most mission points at the end of the game wins!
Additional Rules
After players understand the basic rules, they are ready to learn the game's remaining concepts.
Actions
Actions represent things a pilot can do, such as repositioning slightly or flying defensively.
A ship may perform one action during the Perform Action step of its activation (during the Activation Phase). The actions available to a ship are listed in the action bar on the right side of its ship card.
In addition to the action during the Perform Action step, card abilities may instruct the ship to perform additional actions. There is no limit to the number of actions a ship can potentially perform; however, a ship cannot perform the same action more than once per round.
Some upgrade cards have an action bar that lists one or more actions. These actions are added to the ship's action bar and therefore are standard actions that the ship can perform.
Some action icons are red. After a ship performs one of these actions, it gains a stress token. A ship that is stressed for any reason cannot perform actions or execute red maneuvers.
Linked Actions
Some ships have actions linked to other actions on their ship cards. A ship can perform a linked action after it performs the action to the left of the linked action.
Purple Actions
As a cost to perform a purple action, the ship performing the action must spend one force charge.
Types of Actions
The actions included on ship or upgrade cards in this product are described below.
Focus
Focus represents the pilot clearing their mind of distractions, allowing them to act in harmony with the galaxy and improve their combat ability.
When a ship performs a focus action, it gains a focus token, which is placed next to that ship. While attacking, a ship can spend a focus token during the Attack Dice step to change all of its focus results to hit results. While defending, a ship can spend a focus token during the Defense Dice step to change all of its focus results to evade results.
All unspent focus tokens are removed during the End Phase.
Calculate
When a ship performs the calculate action, it gains one calculate token, which is a green, circular token. A ship may spend a calculate token to change 1 of its focus results to a hit or critical result.
Evade
Evade represents the pilot flying erratically or unpredictably to make it harder for enemy ships to hit them.
When a ship performs an evade action, it gains an evade token, which is placed next to that ship. While defending, a ship can spend an evade token during the Defense Dice step to change one of its blank or focus results to an evade result.
Just like focus tokens, all unspent evade tokens are removed during the End Phase.
Reload
When a ship performs the reload action, it reloads by performing the following steps:
- Choose one of the ship's equipped Torpedo, Missile, or Payload upgrade cards that has fewer active charges than its charge limit.
- That card recovers one charge.
- The ship gains one disarm token.
The source prints these upgrade types as icons; the names are those of the same icon set as used in the X-Wing Rules Reference.
Barrel Roll
Barrel rolling allows a pilot to move their ship laterally and adjust their position. When a ship performs a barrel roll action, it follows these steps:
- Take the 1 straight template.
- Place the short edge of the template flush against the left or right side of the ship's base. The template must be placed with the middle line of the template aligned with the hashmark on the side of the base.
- Lift the ship off the play surface, then place the ship so that the hashmark on the other side of the base is aligned to the front, middle, or back of the other short end of the template.
A ship cannot barrel roll if it would overlap another ship or if it would move through or overlap an obstacle.
Figure caption: A TIE fighter barrel rolls to the right and slightly forward, slightly backward, or straight across.
Boost
Boost represents a pilot activating additional thrusters to move farther forward. When a ship performs a boost action, it follows these steps:
- Choose the 1 left bank, 1 straight, or 1 right bank template.
- Set the template between the ship's front guides.
- Place the ship at the opposite end of the template and slide the rear guides of the ship into the template.
A ship cannot boost if it would overlap another ship or if it would move through or overlap an obstacle.
Figure caption: An X-wing boosts to the left, straight, or to the right.
Rotate
Pilots can rotate to alert a gunner or aim one of the ship's turret-mounted armaments. When a ship performs the rotate action, it rotates the turret arc indicator to select any other standard arc.
Lock
Lock represents the ability of a ship's computer to obtain a target lock, tracking the target's movement and assisting with attacks against it. When a ship performs a lock action, it follows these steps:
- Measure range from the locking ship to any number of ships.
- Choose a ship at range 0–3.
- Assign a lock token to that ship with the lock's number matching the ID token of the locking ship.
A ship is LOCKED while it has at least one lock token assigned to it. While a ship attacks a ship it has locked, during the Attack Dice step, it can spend its lock to reroll one or more of its attack dice. A ship can only maintain one lock at a time; if it locks again, it must remove the previous lock.
Figure caption: The X-wing performs a lock action; it measures range to all ships, then chooses a ship to lock onto. The player chooses the only TIE fighter in range and assigns it the "1" lock since the X-wing has the "1" ID token.
Card Actions
Some cards, such as damage and upgrade cards, have abilities that include the "ACTION:" header. A ship may resolve one of these abilities as an action.
Figure caption: an example "ACTION:" header reads "ACTION: Spend 1 charge to repair 1 facedown damage card."
Bullseye Arc
All ship tokens have a BULLSEYE ARC printed inside of their front arc. This narrow arc has no inherent effect, but some card abilities refer to it.
Figure caption: The X-wing is in the TIE fighter's firing arc at range 1 and in the TIE fighter's bullseye arc at range 2.
Turret Arcs
There are two types of turret arc indicators, single turret and double turret. During setup, a ship with a primary or special weapon adds the corresponding turret arc indicator to its base.
The standard arc that the turret arc indicator is pointing towards is a firing arc. While a ship performs a primary attack, it can attack a target that is in its arc.
A ship with a double turret arc indicator is treated as having two arcs in opposite directions.
Figure captions: This HWK-290 is able to attack to the right. This Modified YT-1300 is able to attack both to the left and to the right.
Range Bonuses
A pilot's accuracy can be dramatically affected by range—it is much easier to shoot a nearby enemy than a distant one.
While a ship attacks at range 1, it rolls one additional attack die. Conversely, while a ship defends at range 3, it rolls one additional defense die.
Figure caption: Against the TIE fighter at range 1, the X-wing rolls 1 additional attack die. Against the TIE fighter at range 3, that TIE fighter rolls 1 additional defense die.
Special Weapons
Special weapons have the following characteristics:
- Arc Requirement: This indicates the arc this weapon attacks from. The target must be in this arc for the weapon to be used.
- Attack Value: This is the number of attack dice the attacker rolls.
- Range Requirements: The attack range must match one of the ranges listed for the weapon to be used.
- Range Bonus Indicator: If there is a missile symbol present, range bonuses are not applied while attacking with this weapon.
If there is a symbol in parentheses in the header, that symbol indicates an additional ATTACK REQUIREMENT. This means that the attacking ship needs to have performed that action. For example, a focus symbol means that the attacker needs a focus token, while a lock symbol means the attacker needs to have a lock on the defender.
Unlike the PRIMARY WEAPON (the red number and firing arc symbol on a ship card), upgrade cards with the "ATTACK:" header, such as Proton Torpedoes, are special weapons. A ship can perform an attack with a special weapon instead of using its primary weapon.
Figure caption: Example of Attack Header with a lock requirement. The header reads "ATTACK (lock): Spend 1 charge. Change 1 hit result…" (the printed example is cropped at that point).
Figure caption: Proton Torpedoes, equipped to an X-wing.
Charges and the Force
Many upgrade cards represent a limited resource, such as a weapon with finite ammo. These cards hold standard charges, which limit how often the ability can be used.
Each card with a CHARGE LIMIT (the golden number) starts the game with a number of charges equal to the charge limit. Each charge starts on its active side. The card's ability will instruct the player how and when to spend charges from that card. When a charge is spent, it is flipped to its inactive side.
During the End Phase, each card with a charge limit recovers one charge if it has a small arrow next to its charge limit. When a charge is recovered, it is flipped to its active side.
Destroying Ships
A ship is destroyed when it has a number of damage cards that equals or exceeds its hull value. A destroyed ship is placed on its ship card.
The timing of when a destroyed ship is removed from the play area depends on when the ship was destroyed:
- If a ship is destroyed outside of the Engagement Phase, it is removed immediately.
- If a ship is destroyed during the Engagement phase, it is removed after all ships that have the same initiative as the currently engaged ship have engaged. This is called the SIMULTANEOUS FIRE rule, which represents that ships with the same initiative are essentially attacking at the same time.
Fleeing the Area
After a ship executes a maneuver, if any part of the ship's base is outside the play area, the ship FLEES. Much like being destroyed, a ship that flees is removed from the game.
Repairing Damage Cards
If an effect instructs a player to repair a damage card, they can repair either a faceup or facedown damage card. To repair a faceup damage card, that card is flipped facedown. To repair a facedown damage card, that card is discarded to the damage card discard pile.
Upgrade Cards
Upgrade cards represent the different ways pilots customize their ships, such as incorporating an astromech or equipping ordnance. These cards can provide special abilities or alternative ways to attack.
There are many types of upgrades, as distinguished by the icon on the left side of the card.
Upgrade cards are equipped before a game starts. The Squad Building section on page 18 describes the process for equipping upgrades.
When a ship equips an upgrade card, it is placed partially beneath the ship card or another equipped upgrade so that only the text and art on the upgrade card are visible.
Force Charges
Some pilots can exert their influence over the Force. Pilots who can use the Force have a FORCE CAPACITY (the purple number) and force charges.
Force capacity and force charges operate identically to charge limits and charges, but force charges have an additional function. While attacking, a ship can spend any number of force charges during the Attack Dice step to change that number of its focus results to hit results. While defending, a ship can spend any number of force charges during the Defense Dice step to change that number of its focus results to evade results.
Increasing and Decreasing Maneuver Difficulty
There are three levels of difficulty for maneuvers: red, white, and blue. If an effect increases the difficulty of a maneuver, blue goes to white, and white goes to red. Meanwhile decreasing the difficulty of a maneuver, red goes to white, and white goes to blue.
Partial Maneuvers
Ships often FULLY execute maneuvers, which means nothing prevents the ship from being placed at the end of the template. Even when a ship MOVES THROUGH another ship, which means the template is placed on top of that ship, the moving ship still fully executes the maneuver.
However, a ship is sometimes unable to be placed at the end of the template because it would OVERLAP another ship. This causes the moving ship to PARTIALLY execute its maneuver, which means it moves a shorter distance.
To partially execute a maneuver, follow these steps:
- Move the ship backward along the template until it is no longer overlapping another ship's base. While doing so, adjust the position of the ship so that the hashmarks in the middle of both sets of guides remain centered over the line down the middle of the template.
- Once the ship is no longer on top of any other ship, place it so that it is touching the last ship it backed over. (This may result in the ship not leaving its initial position.) Then after the Check Difficulty step, it suffers an effect based on what ship it overlapped that initially forced it to partially execute the maneuver.
- If the overlapped ship was a friendly or allied ship, roll an attack die. On a hit or critical result, the ship suffers one damage. Then the ship skips its Perform Action step.
- If the overlapped ship was an enemy ship, if the maneuvering ship is not stressed, it may immediately perform a focus or calculate action (the second action icon as printed, read as calculate) from its action bar, treating the action as red. Then the ship skips its Perform Action step.
- The ship cannot perform any additional actions during its activation.
- If there was a simultaneous overlap of friendly or allied and enemy ships, resolve the effect for overlapping a friendly or allied ship.
Figure caption: Example of Overlapping Multiple Ships. 1. The X-wing attempts to perform a speed 2 maneuver (bearing icon as printed), but there might be some problems as there appear to be other ships along its path. 2. Although the X-wing safely moves through the Y-wing, it has overlapped the TIE/ln Fighter and must partially execute the maneuver. 3. After partially executing the maneuver, the X-wing is now overlapping the first ship, so it must back up farther. 4. The X-wing backs up until it would not be on top of any ship. It is placed touching the last ship that it backed over, the Y-wing. Then the X-wing resolves the effect of overlapping an enemy ship.
Figure caption: These hashmarks are used to align the ship when it partially executes a maneuver.
Advanced Maneuvers
Some maneuvers are advanced maneuvers, which have additional effects. The advanced maneuvers in the squadron starter pack are described below.
Koiogran Turn
The Koiogran Turn bearing advances a ship straight forward, rotating 180º at the end of the template. This maneuver is executed like a straight maneuver of the same speed, but the player slides the ship's front guides into the end of the template instead of the rear guides.
If the ship cannot fully execute the maneuver, it does not rotate 180º.
Tallon Roll
The left Tallon Roll and right Tallon Roll bearings advance a ship at a tight curve to one side, rotating 90º at the end of the template. This maneuver is executed like a left or right turn maneuver of the same direction, but before the player places the ship at the opposite end of the template, the ship is rotated an additional 90º in the same direction as the maneuver. The player places the ship so that the hashmark on the side of the base is aligned to the left, middle, or right of the end of the template.
If the ship cannot fully execute the maneuver, it does not rotate 90º.
Figure caption: An X-wing executes a Tallon Roll and has three possible final positions.
Segnor's Loop
The left Segnor's Loop and right Segnor's Loop bearings advance a ship at a shallow curve to one side, then turn it around. This uses the same template as the left bank and right bank maneuvers.
If the ship cannot fully execute the maneuver, it does not turn around.
Stationary
The stationary bearing does not move the ship from its current position. This maneuver does not use a template, but the ship does count as having executed a maneuver.
Reverse Straight and Reverse Bank
Reverse maneuvers move a ship backward instead of forward. At the start of the maneuver, instead of sliding the template between the front guides of the ship's base, slide it between the rear guides. Additionally, when the ship is moved, the player slides the ship's front guides into the end of the template instead of the rear guides.
Dial ID tokens: The Dial ID tokens included in all products are used in conjunction with the Maneuver Dial Upgrade Kits, which are available for each faction (sold separately).
Timing and Abilities
If two or more abilities resolve at the same time (e.g., "At the start of the Engagement Phase"), the abilities are resolved in player order. The first player resolves all of their own abilities with that timing before the other player resolves their own abilities with that timing.
Hyperspace Markers
Some scenarios and game modes instruct players to place a HYPERSPACE MARKER. Hyperspace markers are used to place objects into the play area after setup, and the scenario or game mode rules detail how they function.
- When a scenario or game mode calls for multiple hyperspace markers, they are identified by the printed numeral in the center of the marker.
Additional Token Rules
Besides focus, evade, lock, and stress tokens, there are many different types of tokens that are used to track effects. Below is a list of concepts related to the gaining and spending of tokens:
- When a ship is instructed to GAIN a token, a token from the supply is placed in the play area next to that ship.
- When a ship is instructed to SPEND a token or there is an instruction to REMOVE a token from a ship, a token of that type is returned from that ship to the supply.
- When a ship is instructed to TRANSFER a token to another ship, that token is removed from the ship and the other ship gains it.
Additionally, the color and shape of tokens help to remind players of their effects and the time when they are removed. The squadron starter pack contains green, orange, and red tokens, but some expansions contain blue tokens.
- Green Tokens: These tokens are circular, have positive effects, and are removed during the End Phase.
- Orange Tokens: These tokens are circular, have negative effects, and are removed during the End Phase.
- Blue Tokens: These tokens are square, have positive effects, and are removed as specified by the token's effect.
- Red Tokens: These tokens are square, have negative effects, and are removed as specified by the token's effect.
Other Tokens
Below are two other tokens included in the squadron starter pack that are gained from various card effects.
Disarm Tokens
A ship is DISARMED while it has at least one disarm token, which is an orange, circular token. A disarmed ship cannot perform attacks. As a circular token, all disarm tokens are removed during the End Phase.
Ion Tokens
A ship is IONIZED while it has a number of ion tokens relative to its size: one or more for a small ship, two or more for a medium ship, and three or more for a large ship. Ion tokens are red tokens.
A ship that is ionized cannot acquire or maintain locks. When a ship becomes ionized, it breaks all locks it is maintaining.
During the Activation Phase, an ionized ship activates as follows:
- The ionized ship reveals its dial as normal.
- During the Execute Maneuver step, the ionized ship executes an ION MANEUVER with the same direction shown on its dial. An ion maneuver is a blue speed 1 bank or straight [left bank, straight, or right bank] maneuver.
- If an ionized ship's dial shows a stop maneuver (the stationary bearing), they perform their ion maneuver as a [1 straight] maneuver.
- The bearing, difficulty, and speed of this maneuver cannot be changed unless an ability explicitly affects the ion maneuver.
- During the Perform Action step, the ship can perform only the focus action.
- At the end of a ship's activation, if it executed an ion maneuver, it removes all of its ion tokens.
Additionally:
- An ionized ship cannot perform any action except the focus action.
- If a ship that was ionized during the Planning Phase is no longer ionized at the beginning of its activation, it activates as normal.
Strain Tokens
A ship is STRAINED while it has at least one strain token. While a strained ship defends, it rolls 1 fewer defense die. The strain token is a red token.
- After a strained ship applies the effect to roll 1 fewer defense die this way, it removes 1 strain token.
- After a strained ship executes a blue maneuver, it removes 1 strain token.
Bombs
Bombs are devices that detonate at the end of the Activation Phase, affecting nearby ships.
Mines
Mines are devices that detonate when a ship moves through or overlaps them, affecting that ship.
Dropping and Launching Devices
To DROP a device, follow the steps below:
- Take the template indicated on the upgrade card.
- Set the template between the ship's rear guides.
- Place the device indicated on the upgrade card into the play area and slide the guides of the device into the opposite end of the template. Then remove the template.
To LAUNCH a device, follow the steps below:
- Take the template indicated on the upgrade card.
- Set the template between the ship's front guides.
- Place the device indicated on the upgrade card into the play area and slide the guides of the device into the opposite end of the template. Then remove the template.
Moving Through and Overlapping Obstacles
Obstacles do not cause ships to partially execute maneuvers—if a ship overlaps an obstacle, it does not move backward along the template. Obstacles act as hazards that can disrupt and damage ships.
If a ship moves through or overlaps an obstacle, it suffers different effects depending on the type of obstacle:
- Asteroid: The ship suffers one damage. Roll one attack die. On a hit or critical result, the ship suffers an additional damage.
- Debris Cloud: The ship is assigned one stress token. Roll one attack die. On a hit result, the ship suffers one damage. On a critical result, the ship suffers one damage.
- Gas Cloud: The ship breaks all its locks and all locks on it and then is assigned one strain token. Roll one attack die. On a hit result, the ship is assigned one ion token. On a critical result, the ship is assigned three ion tokens.
- While a ship is at range 0 of an asteroid, debris cloud, or gas cloud, the ship cannot perform attacks. (The source prints "gas loud" here; read as "gas cloud".)
- While a ship is at range 0 of a gas cloud, the ship cannot acquire locks and cannot be locked.
Obstruction
An attack is OBSTRUCTED if the attacker measures range through one or more obstacles. If an attack is obstructed, the defender rolls one additional defense die during the Defense Dice step.
Ships can also obstruct attacks, but unlike obstacles, this has no inherent effect. Card abilities may cause an effect to occur for an attack obstructed by a ship.
Squad Building
Players build squads using SQUAD POINTS and LOADOUT POINTS. Standard games use a squad point limit of 20. Each ship in a player's squad can be equipped with a number of upgrades based on the ship's LOADOUT VALUE.
Point costs for all ships and upgrades, as well as upgrade slots for all ships in X-Wing, can be found at atomicmassgames.com/xwing-documents.
Faction
Ships in X-Wing are divided by FACTION, indicated by the faction icons on the face of the cards. All ships in a player's squad must be from the same faction.
Builder Keywords
Some ships have BUILDER KEYWORDS. These keywords are required to equip certain upgrades.
Squad Points
Each ship card has a squad point cost associated with it. This value is used during squad building to build lists that are legal for different game modes.
Loadout Points
Each upgrade card has a loadout point cost associated with it. This value is used during squad building to build lists that are legal for different game modes.
Loadout Value
Each ship has a loadout value that determines how many upgrade cards it can equip. A ship cannot equip more upgrades than its loadout value.
- Standard loadout ships do not have a loadout value and are always equipped with the upgrades printed on their card.
Upgrades
Upgrades represent the different ways pilots customize their ships, such as incorporating an astromech or equipping ordnance.
- Each ship has an upgrade bar, which is a list of upgrade icons that limit the types of upgrades the ship can equip.
- Each upgrade card has a cost. The combined cost of all upgrades equipped on a ship cannot exceed that ship's loadout value.
- A ship cannot equip more than one copy of an upgrade card with the same name.
- Some upgrade cards have restrictions listed in their restrictions field. These restrictions can refer to faction, ship size, ship types, and builder keywords. Only ships that match the restrictions of an upgrade can equip it.
Limited
Some cards are LIMITED, as identified by one or more bullets (•) to the left of their name. A squadron cannot have more copies of a card that share the same name than the number of bullets in front of that name. This rule is used for all modes of play.
For example, "•Luke Skywalker" has one bullet in front of his name, so a player can have only one card named "Luke Skywalker" in their list, either as a ship card or an upgrade card.
Scenarios
Below you will find the 4 scenarios for Standard play. Players may choose what scenario they play each game or may randomize the scenario as they see fit.
Assault at the Satellite Array
Scenario Setup (the source box heading for the objective text below reads "Scenario Setup"; transcribed as printed)
Take control of the Satellite Array before enemy forces do.
- Setup icon: 5 satellites
Scenario Setup
Play Area: 3' x 3'. Obstacles: 6 (Asteroid, Debris Field, Gas Cloud)
Players complete Setup as normal, with the following exceptions.
Place Obstacles: At the start of the Place Obstacles step of Setup, place one satellite in the center of the play area (centered at range 4.5 of all board edges). Then, starting with the first player, players take turns placing the remaining four satellites at range 3 of the center satellite and beyond range 2 of each other satellite. The first satellite placed by each player must be placed at range 2–4 of their board edge. The second satellite placed by each player must be placed at range 2–4 of their opponent's board edge. Once all five satellites have been placed, players place obstacles as described in Setup. Obstacles cannot be placed overlapping a satellite.
Scoring
- At the start of the game, each player earns mission points equal to their opponent's deficit.
- Starting on the second round, at the start of the End Phase, each player earns 1 mission point for each satellite under their control. A player controls a satellite if they have more ships at range 0–1 of the satellite than any other player. When determining control of a satellite, medium and large ships each count as two ships.
- When a ship is destroyed or removed from the game, the opposing player earns mission points equal to the squad point value of that ship.
Victory
- At the end of the End Phase, if only one player has ships remaining in the play area, they win the game immediately.
- At the end of the End Phase, if one player has 20 or more mission points and has more mission points than their opponent, the game ends.
- At the end of the twelfth round, the game ends.
- At the end of the game, if both players have at least one ship remaining in the play area, the player with the most mission points wins.
Scenario Rules
Scenario Feature: A scenario feature is a type of marker that is placed into the play area to facilitate scenario play. Scenario features are objects but cannot be moved, attacked, damaged, locked, or destroyed unless specifically stated in a scenario rule. Scenario features do not obstruct attacks.
Satellite: A satellite is a scenario feature.
Chance Engagement
Mission Objectives
Defeat enemy forces to force a retreat from the sector.
Scenario Setup
Play Area: 3' x 3'. Obstacles: 6 (Asteroid, Debris Field, Gas Cloud)
- Setup icon: 1 satellite
Players complete Setup as normal, with the following exceptions.
Place Obstacles: At the start of the Place Obstacles step of Setup, place one satellite in the center of the play area (centered at range 4.5 of all board edges). Then, players place obstacles as described in Setup. Obstacles cannot be placed overlapping a satellite.
Scoring
- At the start of the game, each player earns mission points equal to their opponent's deficit.
- Starting on the second round, at the start of the End Phase, a player earns 1 mission point if they contest the satellite. A player contests the satellite if they have one or more ships at range 0–2 of the satellite. If only one player is contesting the satellite, that player scores one additional mission point.
- When a ship is reduced to half its health (combined total hull and shields, including any modifications to hull and shields via cards such as Hull upgrade or Shield upgrade), the opposing player immediately gains mission points equal to half the squad point value of the destroyed ship, rounded down.
- When an enemy ship is destroyed or removed from the game, the opposing player gains mission points equal to half the squad point value of that ship, rounded up.
- If no mission points were scored earlier in the game from a ship that has been removed from the game being reduced to half its health, the opposing player gains mission points equal to the squad point value of that ship instead.
Victory
- At the end of the End Phase, if only one player has ships remaining in the play area, they win the game immediately.
- At the end of the End Phase, if one player has 20 or more mission points and has more mission points than their opponent, the game ends.
- At the end of the twelfth round, the game ends.
- At the end of the game, if both players have at least one ship remaining in the play area, the player with the most mission points wins.
Scenario Rules
Scenario Feature: A scenario feature is a type of marker that is placed into the play area to facilitate scenario play. Scenario features are objects but cannot be moved, attacked, damaged, locked, or destroyed unless specifically stated in a scenario rule. Scenario features do not obstruct attacks.
Satellite: A satellite is a scenario feature.
Salvage Mission
Mission Objectives
Retrieve as many supply caches as possible before the enemy.
Scenario Setup
Play Area: 3' x 3'. Obstacles: 6 (Asteroid, Debris Field, Gas Cloud)
- Setup icon: 5 supply caches (printed as "5 suppply caches"; spelling corrected here)
Players complete Setup as normal, with the following exceptions.
Determine Player Order: At the end of the Determine Player Order step of Setup, the first player becomes the red player, and the second player becomes the blue player. Each player flips their player markers to the matching color side.
Place Obstacles: At the start of the Place Obstacles step of Setup, place one supply cache in the center of the play area (centered at range 4.5 of all board edges). Then, starting with the first player, players take turns placing the remaining four supply caches at range 3 of the center supply cache marker and beyond range 2 of each other supply cache. The first supply cache placed by each player must be placed at range 2–4 of their board edge. The second supply cache placed by each player must be placed at range 2–4 of their opponent's board edge. Once all five supply caches have been placed, players place obstacles as described in Setup. Obstacles cannot be placed overlapping any supply cache.
Scoring
- At the start of the game, each player earns mission points equal to their opponent's deficit.
- Starting on the second round, at the start of the End Phase, earn 1 mission point for each supply cache on a friendly ship's card.
- When a ship is destroyed or removed from the game, the opposing player earns mission points equal to the squad point value of that ship.
Victory
- At the end of the End Phase, if only one player has ships remaining in the play area, they win the game immediately.
- At the end of the End Phase, if one player has 20 or more mission points and has more mission points than their opponent, the game ends.
- At the end of the twelfth round, the game ends.
- At the end of the game, if both players have at least one ship remaining in the play area, the player with the most mission points wins.
Scenario Rules
Scenario Feature: A scenario feature is a type of marker that is placed into the play area to facilitate scenario play. Scenario features are objects but cannot be moved, attacked, damaged, locked, or destroyed unless specifically stated in a scenario rule. Scenario features do not obstruct attacks.
Supply Cache: A supply cache is a scenario feature. Ships can use the scenario action to interact with these scenario features starting on the second round.
Scenario Action: [Tow]: Scenario actions are white actions that are available to every ship in the play area during scenario play. A ship can perform a scenario action only during its Perform Action step. Therefore, a ship cannot perform a scenario action if it is granted an action at any other time.
Tow: When a ship performs a tow action, choose a supply cache at range 0–1. Remove the chosen supply cache from the play area and place it on the ship's card. A ship can have only one supply cache on its card. Then, place one of your player markers next to the ship's miniature to show that it is towing a supply cache. If there is no supply cache in range, the action fails. After a ship performs a tow action, it removes any cloak tokens it has.
At the end of a ship's activation, a ship may choose to jettison its supply cache. If it does, remove the supply cache from the ship's card, then the opposing player places it in the play area anywhere in the play area at range 1 of that ship.
While a ship is towing a supply cache, it cannot perform barrel roll, boost, cloak, or SLAM actions, or gain cloak tokens.
When a ship that is towing a supply cache suffers a damage or is destroyed, the supply cache is jettisoned. Remove the supply cache from the ship's card, then the opposing player places the marker in the play area at range 1 of that ship.
When a ship that is towing a supply cache is placed in reserves, the supply cache is jettisoned from the ship's position before the ship is placed on its ship card.
When a ship that is towing a supply cache flees the battlefield, the supply cache is jettisoned from the ship's position before it executed its maneuver.
Scramble the Transmissions
Mission Objectives
Scramble the transmissions from the satellites to deny enemy forces valuable information.
Scenario Setup
Play Area: 3' x 3'. Obstacles: 6 (Asteroid, Debris Field, Gas Cloud)
- Setup icon: 3 satellites
Players complete Setup as normal, with the following exceptions.
Determine Player Order: At the end of the Determine Player Order step of Setup, the first player becomes the red player, and the second player becomes the blue player. Each player flips their player markers to the matching color side.
Place Obstacles: At the start of the Place Obstacles step of Setup, place one satellite in the center of the play area (centered at range 4.5 of all board edges). Then, starting with the first player, players take turns placing the remaining two satellites at range 3 of the center satellite and beyond range 2 of each other satellite. When a player places a satellite, it must be placed at range 2–4 of their opponent's board edge. Once all three satellites have been placed, players place obstacles as described in Setup. Obstacles cannot be placed overlapping a satellite.
Scoring
- At the start of the game, each player earns mission points equal to their opponent's deficit.
- Starting on the second round, at the start of the End Phase, each player earns 1 mission point for each satellite they control. The player whose marker is on each satellite controls that objective.
- When a ship is destroyed or removed from the game, the opposing player earns mission points equal to the squad point value of that ship.
Victory
- At the end of the End Phase, if only one player has ships remaining in the play area, they win the game immediately.
- At the end of the End Phase, if one player has 20 or more mission points and has more mission points than their opponent, the game ends.
- At the end of the twelfth round, the game ends.
- At the end of the game, if both players have at least one ship remaining in the play area, the player with the most mission points wins.
Scenario Rules
Scenario Feature: A scenario feature is a type of marker that is placed into the play area to facilitate scenario play. Scenario features are objects but cannot be moved, attacked, damaged, locked, or destroyed unless specifically stated in a scenario rule. Scenario features do not obstruct attacks.
Satellite: A satellite is a scenario feature and may only have one player marker on it at a time. Ships can use the scenario action to interact with these scenario features starting on the second round.
Scenario Action: [Scramble]: Scenario actions are white actions that are available to every ship in the play area during scenario play. A ship can perform a scenario action only during its Perform Action step. Therefore, a ship cannot perform a scenario action if it is granted an action at any other time.
Scramble: When a ship performs a scramble action, choose a satellite at range 0–1 and place one of your player markers on the chosen satellite. If the chosen satellite has another player's marker on it, remove it before placing your own. If there is no satellite in range, the action fails.
While a satellite is marked with a player's marker, that player controls the satellite.
Quick Reference
The Game Round
- Planning Phase: Each player secretly plans their ships' maneuvers by assigning them facedown dials. Then players randomly determine the first player for the round.
- System Phase: In ascending order of initiative, each ship that has an effect that says it can be used during the System Phase resolves those abilities.
- Activation Phase: In ascending order of initiative, each ship reveals its dial, executes its maneuver, and may perform one action.
- Engagement Phase: In descending order of initiative, each ship may perform one attack.
- End Phase: Players remove all circular tokens.
Range Bonus
When attacking with a primary weapon, or a special weapon with the range bonus icon:
- Range 1: the attacker rolls one additional red attack die.
- Range 3: the defender rolls one additional green defense die.
For a special weapon with the missile range bonus icon, the range bonus does not apply.
List of Actions
- Barrel Roll: Move sideways with 1 straight template.
- Boost: Move forward with 1 left bank, 1 straight, or 1 right bank template.
- Calculate: Gain 1 calculate token.
- Cloak: Gain 1 cloak token.
- Coordinate: A friendly ship at range 1–2 performs an action.
- Evade: Gain 1 evade token.
- Focus: Gain 1 focus token.
- Lock: Acquire a lock on a ship at range 0–3.
- Jam: A ship at range 1 gains 1 jam token.
- Reinforce: Gain 1 fore or aft reinforce token.
- Reload: Recover 1 charge on a Torpedo, Missile, or Payload upgrade.
- Rotate: Rotate your turret arc indicator.
- SLAM: Execute a maneuver with the same speed.
List of Tokens
Calculate, evade, focus, reinforce, cloak, lock, disarm, jam, tractor, ion, strain, and stress tokens, plus the shield, standard charge, force charge, critical damage, and condition markers, are illustrated in the source.
Performing an Attack
- Declare Target a. Measure Range b. Choose Weapon c. Declare Defender d. Pay Costs
- Attack Dice a. Roll Attack Dice b. Defender Modifies Attack Dice c. Attacker Modifies Attack Dice
- Defense Dice a. Roll Defense Dice b. Attacker Modifies Defense Dice c. Defender Modifies Defense Dice
- Neutralize Results a. Evade Results Cancel Hit Results b. Evade Results Cancel Critical Results c. Determine Whether Attack Hits
- Deal Damage a. Defender Suffers Hit Damage b. Defender Suffers Critical Damage
- Aftermath a. Resolve "After Defending" Abilities b. Resolve "After Attacking" Abilities c. Possibly Perform Bonus Attack