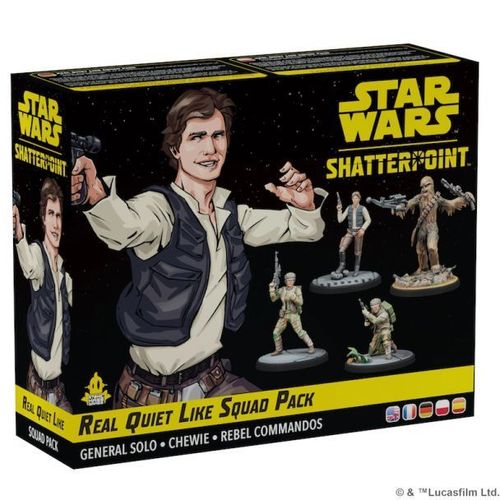
Star Wars: Shatterpoint – Real Quiet Like Squad Pack
Star Wars: Shatterpoint – Real Quiet Like Squad Pack Rulebook
Table of Contents
Table of Contents
Unit Cards
General Solo
Unit card, front (cost, faction, Force and type line as printed)
- Unit Name: General Solo
- Unit Type: Han Solo • Primary Unit (person icon)
- Squad Points (SP): 8
- Faction icon: Rebel Alliance
- Force (orange starburst icon): 3
Abilities: not shown on the card scan supplied; not transcribed.
Chewie
Unit card, front (cost, faction, Force and type line as printed)
- Unit Name: Chewie
- Unit Type: Chewbacca • Secondary Unit (person icon)
- Point Cost (PC): 4
- Faction icon: Rebel Alliance
- Force (orange starburst icon): 0
Abilities: not shown on the card scan supplied; not transcribed.
Rebel Commandos
Unit card, front (cost, faction, Force and type line as printed)
- Unit Name: Rebel Commandos
- Unit Type: Supporting Unit (three-person icon)
- Point Cost (PC): 4
- Faction icon: Rebel Alliance
- Force (orange starburst icon): 0
Abilities: not shown on the card scan supplied; not transcribed.
Stance Cards
Each Stance Card lists the Unit's Ranged (pistol) and Melee (lightsaber) columns, its weapon Expertise Charts, its defense chart, and its Combat Tree. A Stance's name is printed at the top of the card, and the Unit's name is printed at the bottom. In the Ranged column, a crosshair-in-circle with a number gives the Range of the Unit's pistol. Each column also shows a grey downward-triangle with a number and a blue square with a number. The card prints these values as icons only, so they are reproduced here by position, and the base rulebook defines what each one measures.
Smug Scoundrel (General Solo)
- Ranged (pistol) column: Range 4; grey triangle 6; blue square 5.
- Melee (lightsaber) column: grey triangle 6; blue square 6.
DL-44 Blaster (ranged attack Expertise Chart)
| Roll | Result |
|---|---|
| 1 | one circled-star symbol |
| 2–3 | two circled-star symbols |
| 4+ | three circled-star symbols |
Point Blank (melee attack Expertise Chart)
| Roll | Result |
|---|---|
| 1 | one circled-star symbol |
| 2–3 | one circled-star symbol, one spiked-star symbol, one four-way move symbol |
| 4+ | two circled-star symbols, one spiked-star symbol, one four-way move symbol |
Lucky Dodge (defense Expertise Chart, headed by the diamond icon)
| Roll | Result |
|---|---|
| 1 | one orange spiked-star symbol changed to a black bow-tie symbol |
| 2–3 | one orange circled-star symbol changed to a black bow-tie symbol, one orange spiked-star symbol changed to a black bow-tie symbol |
| 4+ | one orange circled-star symbol changed to a black bow-tie symbol, two orange spiked-star symbols each changed to a black bow-tie symbol |
Smug Scoundrel Combat Tree
The Combat Tree is a grid of Options joined by paths. The three orange Options in the left column are the starting Options. Rows are listed top to bottom and columns left to right.
- Row 1: column 1, orange, triple-bar forward arrow over a burst; column 2, water-drop over a burst; column 3, spiked burst over a plus-cross; column 4, empty; column 5, three spiked bursts.
- Row 2: column 1, orange, blaster shot over a burst; column 2, triple-bar forward arrow; column 3, empty; column 4, four-way move over two bursts; column 5, empty.
- Row 3: column 1, orange, exclamation mark over a burst; column 2, two plus-crosses; column 3, triple-bar forward arrow over a plus-cross; column 4, empty; column 5, triple-bar forward arrow over two plus-crosses.
- Paths: row 1 columns 1 to 3 are joined in a line; row 2 columns 1 and 2 are joined; row 3 columns 1 to 3 are joined. Row 2 column 2 joins row 1 column 3 and row 3 column 3 by double diagonal paths. Row 2 column 4 joins row 1 column 3, row 3 column 3, row 1 column 5 and row 3 column 5 by double diagonal paths.
Gunslinger (General Solo)
- Ranged (pistol) column: Range 4; grey triangle 7; blue square 5.
- Melee (lightsaber) column: grey triangle 6; blue square 5.
DL-44 Blaster (ranged attack Expertise Chart)
| Roll | Result |
|---|---|
| 1–2 | one circled-star symbol, one spiked-star symbol |
| 3 | one circled-star symbol, two spiked-star symbols |
| 4+ | two circled-star symbols, two spiked-star symbols |
Point Blank (melee attack Expertise Chart)
| Roll | Result |
|---|---|
| 1–2 | one circled-star symbol, one spiked-star symbol |
| 3+ | one circled-star symbol, two spiked-star symbols |
Lucky Dodge (defense Expertise Chart, headed by the diamond icon)
| Roll | Result |
|---|---|
| 1 | one orange spiked-star symbol changed to a black bow-tie symbol |
| 2–3 | one orange circled-star symbol changed to a black bow-tie symbol, one orange spiked-star symbol changed to a black bow-tie symbol |
| 4+ | one orange circled-star symbol changed to a black bow-tie symbol, two orange spiked-star symbols each changed to a black bow-tie symbol |
Gunslinger Combat Tree
The starting Option is the single orange Option, in row 2 at the left edge. Rows are listed top to bottom and columns left to right.
- Row 1: column 2, two spiked bursts; column 3, exclamation mark over a burst.
- Row 2: column 1, orange, two spiked bursts; column 4, triple-bar forward arrow over a burst; column 5, two spiked bursts.
- Row 3: column 2, triple-bar forward arrow over a burst; column 3, four-way move over a burst.
- Paths: the orange Option joins row 1 column 2 and row 3 column 2 by double diagonal paths. Row 1 columns 2 and 3 are joined. Row 1 column 3 joins row 2 column 4 by a double diagonal path. Row 3 columns 2 and 3 are joined. Row 3 column 3 joins row 2 column 4 by a double diagonal path. Row 2 columns 4 and 5 are joined.
Disarming (Chewie)
- Ranged (pistol) column: Range 5; grey triangle 6; blue square 5.
- Melee (lightsaber) column: grey triangle 7; blue square 5.
Bowcaster (ranged attack Expertise Chart)
| Roll | Result |
|---|---|
| 1 | two spiked-star symbols |
| 2+ | two circled-star symbols |
RRRAAWWWG! (melee attack Expertise Chart)
| Roll | Result |
|---|---|
| 1–3 | one circled-star symbol, one spiked-star symbol |
| 4 | one circled-star symbol, one spiked-star symbol, one orange circled-star symbol changed to a black bow-tie symbol |
| 5+ | one circled-star symbol, one spiked-star symbol, two orange circled-star symbols each changed to a black bow-tie symbol |
Walking Carpet (defense Expertise Chart, headed by the diamond icon)
| Roll | Result |
|---|---|
| 1–2 | one ring-target symbol, one plus-cross symbol |
| 3 | one ring-target symbol, one orange spiked-star symbol changed to a black bow-tie symbol, one plus-cross symbol |
| 4+ | one ring-target symbol, one orange circled-star symbol changed to a black bow-tie symbol, one plus-cross symbol |
Disarming Combat Tree
The starting Option is the orange Option at the top-left. Rows are listed top to bottom and columns left to right.
- Row 1: column 1, orange, triple-bar forward arrow over a burst; column 2, exclamation mark over a burst; column 3, water-drop over a burst; column 4, blaster shot over two bursts; column 5, three plus-crosses.
- Row 2: column 2, two spiked bursts; column 3, triple-bar forward arrow over a burst; column 4, two spiked bursts.
- Paths: row 1 columns 1 to 5 are joined in a line. The orange Option joins row 2 column 2 by a double diagonal path. Row 2 columns 2 to 4 are joined in a line. Row 2 column 4 joins row 1 column 5 by a double diagonal path.
Commando Training (Rebel Commandos)
- Ranged (pistol) column: Range 5; grey triangle 7; blue square 5.
- Melee (lightsaber) column: grey triangle 6; blue square 4.
A-280 Blaster Rifle (ranged attack Expertise Chart)
| Roll | Result |
|---|---|
| 1 | one spiked-star symbol |
| 2–3 | two spiked-star symbols |
| 4+ | one circled-star symbol, two spiked-star symbols |
Combat Knife (melee attack Expertise Chart)
| Roll | Result |
|---|---|
| 1–2 | one spiked-star symbol, one black zigzag symbol |
| 3+ | one circled-star symbol, one spiked-star symbol, one black zigzag symbol |
Camo (defense Expertise Chart, headed by the diamond icon)
| Roll | Result |
|---|---|
| 1–2 | one ring-target symbol |
| 3+ | one ring-target symbol, one four-way move symbol |
Commando Training Combat Tree
The starting Option is the orange Option at the top-left. Rows are listed top to bottom and columns left to right.
- Row 1: column 1, orange, forward-arrow icon over a burst; column 2, triple-bar forward arrow over a burst; column 3, blaster shot over a burst; column 4, four-way move over two bursts; column 5, plus-cross over two bursts.
- Row 2: column 3, triple-bar forward arrow; column 4, spiked burst over two plus-crosses.
- Paths: row 1 columns 1 to 5 are joined in a line. Row 1 column 2 joins row 2 column 3 by a double diagonal path. Row 2 columns 3 and 4 are joined. Row 2 column 4 joins row 1 column 5 by a double diagonal path.
Notes on This Transcription
- The source is the seven card-scan pages only: three unit card faces and four Stance Cards. No rules insert, Order Card or Unit Stat Card back was among them, so none is transcribed.
- The unit card faces in the scans show cost, faction, Force, name and type line. Their ability text, tags, Stamina and Durability values are not visible in the scans and are not included.
- Stat and chart values are printed as icons and numbers only. They are reproduced by position. The Combat Tree paths were read from the full-resolution card images.
- Symbol names above are descriptive, since the card symbols are icons. The base rulebook defines what each effect and die result does.