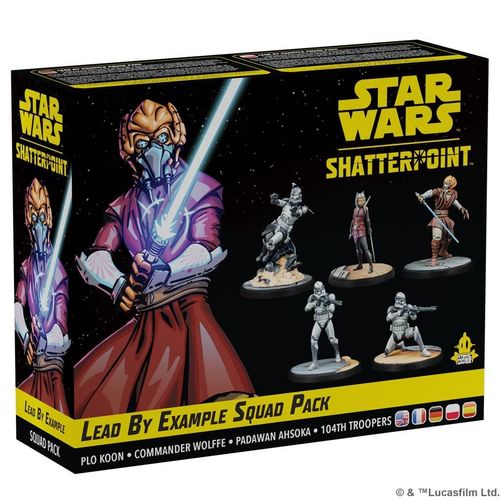
Star Wars: Shatterpoint – Lead by Example Squad Pack
Star Wars: Shatterpoint – Lead by Example Squad Pack Rulebook
Table of Contents
Table of Contents
Unit Cards
Padawan Ahsoka Tano
Unit card (front)
- Unit Name: Padawan Ahsoka Tano
- Unit Type: Ahsoka Tano • Secondary Unit (person icon)
- Point Cost (PC): 4
- Faction icon: Galactic Republic
- Force (orange starburst icon): 0
Unit card (back)
- Tags: Force User • Galactic Republic • Jedi • Padawan
- Stamina (red medical-cross icon): 8
- Durability (blue heartbeat-line icon): 2
Abilities
Race Ya [crosshair-in-circle icon]
At the start of this Unit's activation, choose an allied Galactic Republic Primary Unit or an allied Jedi Primary Unit. One character in the chosen Unit may [dotted-arrow icon].
She is Fearless [starburst-in-circle icon]
Each character in this Unit may [curved-arrow icon]. This Unit may use this ability two times during its activation instead of the normal one.
Deflect [round-arrows icon]
After a [pistol icon] attack targeting a character in this Unit is resolved, it may use this ability. If the attack roll contained one or more [bow-tie icon] results, the attacking Unit suffers [two claw-mark icons].
Getting Ahead of Yourself Again, Snips [round-arrows icon]
After an allied Galactic Republic Supporting Unit within [Range icon] 3 makes a combat action, this Unit may use this ability. One character in this Unit may [curved-arrow icon], then may make a 5 dice [lightsaber icon] attack targeting one of the same enemy characters within [Range icon] and LOS.
Jedi Master Plo Koon
Unit card (front)
- Unit Name: Jedi Master Plo Koon
- Unit Type: Plo Koon • Primary Unit (person icon)
- Squad Points (SP): 8
- Faction icon: Galactic Republic
- Force (orange starburst icon): 3
Unit card (back)
- Tags: Force User • Galactic Republic • Jedi
- Stamina (red medical-cross icon): 10
- Durability (blue heartbeat-line icon): 3
Abilities
I Know If We Work Together, We Will Stay Alive [crosshair-in-circle icon]
At the start of this Unit's activation, choose an allied Galactic Republic Unit. Each character in the chosen Unit may [dotted-arrow icon]. Then, if the chosen Unit was a Trooper or Padawan, one character in this Unit may [dotted-arrow icon].
Force Push [two starburst icons]
Choose a character in this Unit and an enemy character within [Range icon] 3 of that character. The chosen enemy character is Pushed [Range icon] 3 Away from the chosen allied character.
Deflect [round-arrows icon]
After a [pistol icon] attack targeting a character in this Unit is resolved, this Unit may use this ability. If the attack roll contained one or more [bow-tie icon] results, the attacking Unit suffers [two claw-mark icons].
We Can Do This the Simple Way or the Difficult Way [gear-in-circle icon]
While this Unit is not Wounded, when another allied Galactic Republic character within [Range icon] 3 is targeted by an attack, this Unit may gain [exclamation-mark icon]. If it does, the defending character may use this Unit's [diamond icon] Expertise Chart during the attack. Then, after the attack is resolved, if the defending character was a Trooper or Padawan, one character in this Unit may [dotted-arrow icon] Toward the attacker.
CC-3636 Commander Wolffe
Unit card (front)
- Unit Name: CC-3636 Commander Wolffe
- Unit Type: CC-3636 Commander Wolffe • Secondary Unit (person icon)
- Point Cost (PC): 4
- Faction icon: Galactic Republic
- Force (orange starburst icon): 0
Unit card (back)
- Tags: Clone Trooper • Galactic Republic • Wolfpack
- Stamina (red medical-cross icon): 9
- Durability (blue heartbeat-line icon): 2
Abilities
Flank 'em! [crosshair-in-circle icon]
At the start of this Unit's activation, choose an allied Clone Trooper Unit. Each character in the chosen Unit may [up-arrow icon].
Run and Gun [starburst-in-circle icon]
Each character in this Unit may [dotted-arrow icon]. If any characters [dotted-arrow icon], this Unit immediately makes a focus action.
Pack Hunter [striped-circle icon]
When a character in this Unit makes a [crossed-swords icon] attack targeting an enemy character that is Engaged with another allied Clone Trooper character, it adds 2 dice to the attack roll.
Wolfpack [striped-circle icon]
While this Unit is not Wounded, when an allied Clone Trooper character makes an attack targeting an enemy character within [Range icon] 5 of another allied Clone Trooper Unit, the attacker's [starburst icon] results cannot be modified by enemy effects.
104th Wolfpack Troopers
Unit card (front)
- Unit Name: 104th Wolfpack Troopers
- Unit Type: Supporting Unit (three-person icon)
- Point Cost (PC): 4
- Faction icon: Galactic Republic
- Force (orange starburst icon): 0
Unit card (back)
- Tags: Clone Trooper • Galactic Republic • Trooper • Wolfpack
- Stamina (red medical-cross icon): 8
- Durability (blue heartbeat-line icon): 2
Abilities
Run and Gun [starburst-in-circle icon]
Each character in this Unit may [dotted-arrow icon]. If any characters [dotted-arrow icon], this Unit immediately makes a focus action.
Coordinated Fire: [round-arrows icon] [drop icon]
When a character in another allied Galactic Republic Unit makes an attack as part of a combat action, before dice are rolled, this Unit may use this ability. If the targeted character is within [Range icon] 5 of a character in this Unit, the target Unit gains [drop icon].
Pack Hunter [striped-circle icon]
When a character in this Unit makes a [crossed-swords icon] attack targeting an enemy character that is Engaged with another allied Clone Trooper character, it adds 2 dice to the attack roll.
Stance Cards
Each Stance Card lists the Unit's Melee and Ranged stats, its weapon Expertise Charts, and its Combat Tree. A Stance's name is printed at the top of the card, and the Unit's name is printed at the bottom. The Ranged column shows the Range of the Unit's pistol attacks where one is printed. A dash means the Unit has no value for that stat. In each weapon column, the grey triangle gives the Attack value and the blue square gives the Defense value.
Entries with an arrow (→) change one die result to the result shown after the arrow, as the base rulebook describes.
The Combat Tree is a graph of Options joined by paths. Each Option below is listed by its position on the grid (row by row, left to right), with its icons, and the paths are described as drawn.
Form V Djem So (Jedi Master Plo Koon)
- Ranged (pistol) column: Attack dash (no value), Defense 5.
- Melee (lightsaber) column: Attack 7, Defense 5.
Lightsaber (attack Expertise Chart)
| Roll | Result |
|---|---|
| 1 | one circled-star symbol |
| 2 | two circled-star symbols |
| 3+ | two circled-star symbols, one damage icon |
Tenacious Defense (defense Expertise Chart)
| Roll | Result |
|---|---|
| 1–2 | two ring-target symbols |
| 3 | two ring-target symbols, one plus-cross symbol |
| 4+ | two ring-target symbols, one plus-cross symbol, one curved-turn arrow |
Form V Djem So Combat Tree
- Top row, left: orange Option with a triple-bar forward arrow and two damage icons.
- Top row, centre: Option with two damage icons.
- Top row, right: Option with two damage icons.
- Middle row, left: Option with a triple-bar forward arrow and one damage icon.
- Middle row, right: orange Option with a circled down-arrow icon and no damage icon.
- Bottom row, left: orange Option with a curved turn-arrow icon and two damage icons.
- Bottom row, centre: Option with two plus-cross icons and two damage icons.
- Bottom row, right: Option with a four-way move-arrow icon and one damage icon.
The two Middle-row Options are each joined by paths to four neighbouring Options: the left Middle-row Option to the top-left, top-centre, bottom-left and bottom-centre Options; the right Middle-row Option to the top-centre, top-right, bottom-centre and bottom-right Options. The two Middle-row Options are not joined to each other.
Form III Soresu (Jedi Master Plo Koon)
- Ranged (pistol) column: Attack dash (no value), Defense 6.
- Melee (lightsaber) column: Attack 5, Defense 6.
Lightsaber (attack Expertise Chart)
| Roll | Result |
|---|---|
| 1–2 | two spiked-star symbols |
| 3 | one circled-star symbol, one spiked-star symbol |
| 4+ | one circled-star symbol, two spiked-star symbols |
Tenacious Defense (defense Expertise Chart)
| Roll | Result |
|---|---|
| 1–2 | two ring-target symbols |
| 3 | two ring-target symbols, one orange circled-star symbol changed to a spiked-star symbol |
| 4+ | two ring-target symbols, one orange circled-star symbol changed to a spiked-star symbol, one orange circled-star symbol changed to a black bow-tie symbol |
Form III Soresu Combat Tree
- Leftmost Option (orange): two damage icons.
- Next Option, to its right: plus-cross icon and one damage icon.
- Next Option, to its right: triple-bar forward arrow, curved turn-arrow icon and one damage icon.
- Upper Option, above and to the right of that Option: round-arrows icon and one damage icon.
- Upper-right Option: forward-arrow icon above a triple-bar forward arrow icon and one damage icon.
- Lower Option: plus-cross icon, triple-bar forward arrow icon and one damage icon.
- Lower-right Option: plus-cross icon and two damage icons.
The leftmost three Options are joined in a line. The third Option joins the upper Option and the lower Option, each of which joins its right-hand neighbour in the same row.
Practical Strategist (CC-3636 Commander Wolffe)
- Ranged (pistol) column: Range 4 (shown with the Range icon), Attack 7, Defense 5.
- Melee (lightsaber) column: Attack 6, Defense 5.
DC-17 Blaster Pistol (ranged attack Expertise Chart)
| Roll | Result |
|---|---|
| 1 | one spiked-star symbol |
| 2 | two spiked-star symbols |
| 3+ | one circled-star symbol, three spiked-star symbols |
DC-17 Blaster Pistol (melee attack Expertise Chart)
The card prints this chart under the melee (lightsaber) column with the same name as the ranged chart, and it is transcribed as printed.
| Roll | Result |
|---|---|
| 1–2 | one circled-star symbol, one spiked-star symbol |
| 3–4 | two circled-star symbols, one spiked-star symbol |
| 5+ | two circled-star symbols, two spiked-star symbols |
Phase II Clone Armor (defense Expertise Chart)
| Roll | Result |
|---|---|
| 1–2 | one ring-target symbol |
| 3+ | two ring-target symbols |
Practical Strategist Combat Tree
- Top row, leftmost: orange Option with a triple-bar forward arrow and one damage icon.
- Top row, second: Option with a pistol icon and one damage icon.
- Top row, third: Option with a triple-bar forward arrow and one damage icon.
- Top row, fourth: Option with a forward-arrow icon and one damage icon.
- Top row, rightmost: Option with a triple-bar forward arrow and one damage icon.
- Bottom row, second: Option with two damage icons.
- Bottom row, third: Option with a drop icon and one damage icon.
- Bottom row, fourth: Option with one damage icon.
- Bottom row, rightmost: Option with two damage icons.
The top row's Options are joined in a line from leftmost to rightmost. The leftmost top Option joins the second Option of the bottom row, and the bottom row's Options are joined in a line from the second to the rightmost.
Jar'Kai (Padawan Ahsoka Tano)
- Ranged (pistol) column: Attack dash (no value), Defense 5.
- Melee (lightsaber) column: Attack 7, Defense 5.
Lightsabers (attack Expertise Chart)
| Roll | Result |
|---|---|
| 1–3 | two spiked-star symbols |
| 4 | two circled-star symbols |
| 5+ | two circled-star symbols, one spiked-star symbol |
Acrobatics (defense Expertise Chart)
| Roll | Result |
|---|---|
| 1–2 | two ring-target symbols |
| 3+ | two ring-target symbols, one curved turn-arrow |
Jar'Kai Combat Tree
- Top row, leftmost: orange Option with a triple-bar forward arrow and one damage icon.
- Top row, second: Option with a curved turn-arrow icon and one damage icon.
- Top row, third: Option with an exclamation-mark icon and one damage icon.
- Top row, fourth: Option with a triple-bar forward arrow and one damage icon.
- Middle row, third column: Option with two plus-cross icons.
- Middle row, rightmost: Option with a triple-bar forward arrow and two damage icons.
- Bottom row, leftmost: orange Option with a plus-cross icon and one damage icon.
- Bottom row, second: Option with a four-way move-arrow icon and two damage icons.
- Bottom row, third: Option with an orange drop icon and no damage icon.
- Bottom row, fourth: Option with two damage icons.
The top row's Options are joined in a line, and so are the bottom row's Options. The top row's third Option joins the middle Option, which joins the bottom row's third Option. The top row's fourth Option joins the rightmost middle Option, which joins the bottom row's fourth Option. The middle Option and the rightmost middle Option are not joined to each other.
Strength in Numbers (104th Wolfpack Troopers)
- Ranged (pistol) column: Range 5 (shown with the Range icon), Attack 5, Defense 5.
- Melee (lightsaber) column: Attack 5, Defense 4.
DC-15 Blaster (ranged attack Expertise Chart)
| Roll | Result |
|---|---|
| 1–2 | one spiked-star symbol |
| 3+ | one circled-star symbol, one spiked-star symbol |
Advanced Combat Training (melee attack Expertise Chart)
| Roll | Result |
|---|---|
| 1–3 | one circled-star symbol |
| 4+ | one circled-star symbol, one spiked-star symbol |
Phase II Clone Armor (defense Expertise Chart)
| Roll | Result |
|---|---|
| 1–2 | one ring-target symbol |
| 3+ | two ring-target symbols |
Strength in Numbers Combat Tree
- Top row, leftmost: orange Option with a drop icon.
- Top row, second: Option with a triple-bar forward arrow and one damage icon.
- Top row, third: Option with a forward-arrow icon and one damage icon.
- Top row, fourth: Option with a triple-bar forward arrow and one damage icon.
- Middle row, rightmost: Option with a triple-bar forward arrow and no damage icon.
- Bottom row, leftmost: orange Option with a pistol icon.
- Bottom row, second: Option with two damage icons.
- Bottom row, third: Option with an up-arrow icon and no damage icon.
- Bottom row, fourth: Option with two damage icons.
The top row's Options are joined in a line, and so are the bottom row's Options. The top row's fourth Option joins the middle rightmost Option, which joins the bottom row's fourth Option.