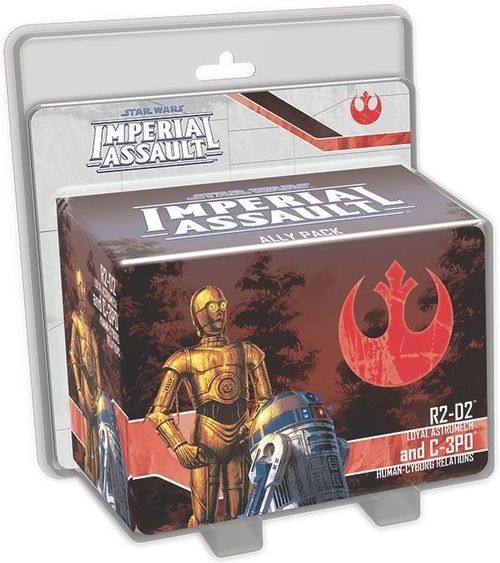
Star Wars: Imperial Assault – R2-D2 and C-3PO Ally Pack
Star Wars: Imperial Assault – R2-D2 and C-3PO Ally Pack Rulebook
Table of Contents
Table of Contents
Components and Integration
This pack provides R2-D2 and C-3PO plastic figures that can be used to replace their ally tokens when playing a mission. The other components in this expansion are incorporated as follows:
- Add the R2-D2 and C-3PO Deployment cards to the supply of Deployment cards.
- If you own the Twin Shadows expansion, add the Side Mission card to the pool of green Side Mission cards. The heroes can choose this card when building the Side Mission deck at the start of a campaign.
- Shuffle the Skirmish Mission cards into the Skirmish Mission deck. These cards use the "Wasteland Outpost" map (see below).
- Add the Command cards to the pool of cards that a player can use to build his Command deck.
- Add the Condition card to the pool of Condition cards.
Component Breakdown
- 2 Plastic Figures (R2-D2 and C-3PO)
- 3 Deployment Cards (C-3PO and 2 R2-D2)
- 5 Command Cards (Hard to Hit, Single Purpose, Devotion, Terminal Network, Etiquette and Protocol)
- 1 Side Mission Card (Open to Interpretation)
- 2 Skirmish Mission Cards (Wasteland Outpost)
- 1 Condition Card (Weakened)
The text of the Deployment cards and Command cards is printed on the cards themselves and is not reproduced on the rules sheet at a legible resolution, so it is not transcribed here.
Weakened
Weakened is a new condition whose effects are detailed on its Condition card. Since this expansion does not include condition tokens for Weakened, a coin or other suitable substitute may be used instead.
Weakened (Harmful)
- While attacking, apply -1 [attack symbol] to the attack results.
- While defending, apply -1 [defense symbol] to the defense results.
- Discard this condition at the end of your activation.
"You"
If an effect corresponding to a figure instructs "you" to claim a token, gain VPs, or manipulate cards, or refers to "your" army or figures, "you" refers to that figure's player.
Deployment Card Restrictions
Some Deployment cards can only be used in one style of play in Imperial Assault. A Deployment card marked with a Campaign Deployment Icon can only be used in a campaign, while a Deployment card marked with a Skirmish Deployment Icon can only be used in a skirmish.
The R2-D2 (Loyal Astromech) Deployment cards in this pack are marked with the Campaign Deployment Icon and the Skirmish Deployment Icon respectively, as shown on the sheet.
Skirmish Mission: Wasteland Outpost
The Wasteland Outpost skirmish map is printed on the sheet, with a Holocron, Crate and Tunnels key. It is used with the two Skirmish Mission cards in this pack (see Components and Integration above).
Map tiles: 02B, 03B, 05B, 08B, 09B, 10B, 11B, 13B, 14B, 17B (3), 18B (3), 21A, 24B, 25B, 28B, 29B, 31A, 32A, 35B, 36A (3), 38A, 39B (2).
Volatile Materials
- Card subtitle: not legible at scan resolution; not transcribed.
- Text:
- A small figure can spend 1 movement point and suffer 1 damage while on a tunnel to place his figure on an empty space containing a tunnel of the same color.
- Doors are locked. A figure can attack a door (Health: 10, Defense: 1 defense symbol).
- If a player controls the blue terminal, his figures can interact with it to discard 1 crate.
- End of each Round: Each player gains [VP digit illegible on the scan; reads as 1 or 5] VPs for each crate he controls.
Note: the "VP" digit on the End of each Round line of Volatile Materials could not be read with confidence on the scan (a 1 or a 5). Verify against the printed card before relying on it.
Second Skirmish Mission card
The sheet shows two Skirmish Mission cards, but the second card's face is covered by Volatile Materials and its name and text cannot be read on the scan. It is not transcribed here; refer to the printed card.
Side Mission: Open to Interpretation
The Open to Interpretation side mission map is printed on the sheet. It requires the Twin Shadows expansion.
Map tiles: 04B, 06B (first icon); 11B, 13B, 14B (2), 18B (2), 22B, 23B, 27B, 28B, 29B, 36B (3), 39B (second icon).
Deployment and Setup
- Initial Groups: Imperial Officer, Stormtrooper (2).
- Reserved Groups: Trandoshan Hunter.
- Open Groups: 3.
- Special Setup: Increase threat by twice the threat level and resolve an optional deployment. Heroes control R2-D2 (Loyal Astromech) and C-3PO (Human-Cyborg Relations) as allies at no threat cost.
Event Summary
- Round 7: End of Mission
- 2 terminals discarded: Alarms
- Door to Storage Room or Operations room opens: Guards
- Hologram translated, C-3PO defeated, or all heroes wounded: End of Mission
Mission Briefing
"Here we go again…" C-3PO continues to mutter protests as you march toward the hologram facility. Even having your protection doesn't seem to calm his nerves. He is right to be nervous; with such valuable information, this facility is bound to be well guarded.
- Apply additional health to C-3PO equal to twice the threat level. While C-3PO is defending, apply +1 defense symbol to the defense results.
- R2-D2's "Service" ability recovers surge symbols equal to the threat level instead of 1 surge symbol.
- The door to the Viewing Room is locked. Other doors are locked to Imperials.
- Rebel mission tokens represent tunnels. A small figure can spend 1 movement point while on a tunnel to place his figure on an empty space containing a tunnel of the same color.
- A healthy hero can interact with a terminal to discard that terminal. When all terminals are discarded, open the door to the Viewing Room.
- The neutral mission token represents a hologram. C-3PO can interact with the hologram to translate it.
- The mission ends when C-3PO translates the hologram, at the end of Round 7, when C-3PO is defeated, or when all heroes are wounded.
Alarms
When 2 terminals are discarded:
"You continue to slice through the door controls, seemingly making good progress. Unfortunately, that progress is also noticed by the Imperials, who trigger alarms that blare loudly in your ears as more defenses activate."
- Deploy the reserved Trandoshan Hunter group to any green point.
- Increase threat by the threat level.
Guards
The first time a door to the Storage Room or Operations Room opens:
C-3PO gasps as troops continue to press the attack.
"When I reminded Command that I was fluent in over six million forms of communication, I didn't know this is what they had in mind!"
- Increase threat by the threat level and resolve an optional deployment to any red point.
- The red deployment points are now active.
End of Mission
When C-3PO translates the hologram:
Under the protection of your covering fire, C-3PO translates and stores the information contained in the hologram.
"...and I think Command will find it most pleasing," he relates to you after you execute your escape. "Thank you again for your protection. If there is ever a way Artoo or I could be of assistance, we would be most pleased to help."
- Heroes receive R2-D2 (Loyal Astromech) and C-3PO (Human-Cyborg Relations) as allies.
- The Imperial player receives 2 influence.
At the end of Round 7, when C-3PO is defeated, or when all heroes are wounded:
A well-placed blaster bolt flies true and hits C-3PO, deactivating him. You can only retreat with his body and hope he can be repaired.
Additional Rewards
- Each player receives 1 XP. Heroes receive 100 credits per hero. The Imperial player receives 1 influence.