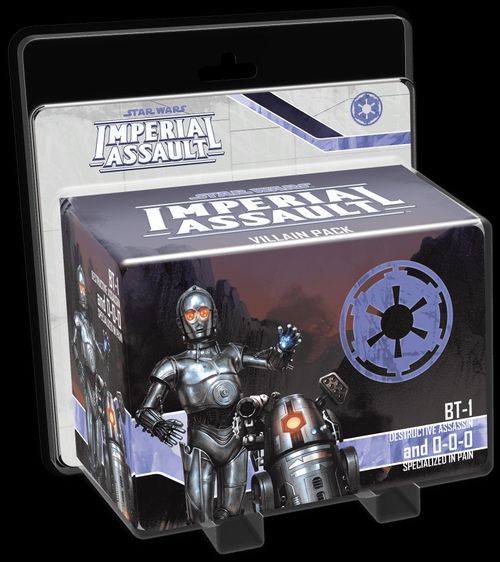
Star Wars: Imperial Assault – BT-1 and 0-0-0 Villain Pack
Star Wars: Imperial Assault – BT-1 and 0-0-0 Villain Pack Rulebook
Table of Contents
Table of Contents
Pack Contents and Setup Changes
Component breakdown (as printed on the sheet):
- 2 Plastic Figures (BT-1, 0-0-0)
- 3 Deployment Cards (BT-1, 0-0-0, Trusted Ally)
- 3 Agenda Cards (Devious Droids)
- 1 Condition Card (Weakened)
- 5 Command Cards (Eerie Visage, Ballistics Matrix, Terminal Protocol, Shared Experience, Brace for Impact)
- 2 Skirmish Mission Cards (Tarkin Initiative Labs)
Using the pack:
- Add the Deployment, Condition, and Command cards to their supplies.
- The Imperial player can choose the "Devious Droids" Agenda set when building his Agenda deck at the start of a campaign.
- Shuffle the Skirmish Mission cards into the Skirmish Mission deck. These cards use the "Tarkin Initiative Labs" map (see below).
Skirmish Attachments
Some skirmish upgrade Deployment cards list the word "Attachment" above their abilities. These cards can be attached to other Deployment cards as follows:
- When deploying units during skirmish setup, if a player has one or more "Attachment" cards included in his army, he places each of these cards on one of his non-upgrade Deployment cards.
- Each Deployment card can have only one "Attachment."
- Abilities on "Attachment" cards apply to all figures in the corresponding group.
- Many attachments require the group to have a specific trait, such as "TROOPER." Attachments with these restrictions cannot be played on a group that does not have the trait.
When a group with an "Attachment" card is defeated, the opposing player scores VPs equal to the deployment cost of the "Attachment" card in addition to the VPs he scores from the defeated group's Deployment card.
Neutral Deployment Cards
Deployment cards with a Neutral Icon and card back do not belong to an affiliation. When creating an army for a skirmish, a player may choose to include Neutral Deployment cards as if they belonged to his affiliation. Neutral Deployment cards cannot be used in a campaign.
(The sheet shows the Neutral Icon: a dark, star-like emblem printed beside this paragraph.)
Re-Draw
Some Command cards have ability text that allows a player to RE-DRAW it. Re-draw abilities are active while the card is in the discard pile. When a player re-draws a Command card, he takes that card from his discard pile and places it in his hand. That card may be played again normally.
Skirmish Mission: Tarkin Initiative Labs
The printed skirmish map for this mission is reproduced on the sheet as an image. Its printed labels are the map title "TARKIN INITIATIVE LABS", the subtitle "Skirmish Map", and the legend below.
Map legend (as printed):
- B markers: blue deployment points.
- Coloured circular tokens: Experimental Weapon (four tokens, shown in blue, yellow, red and green, each with the Imperial emblem).
The sheet gives no mission briefing, setup or victory text for this skirmish mission; that text is on the Skirmish Mission cards, which are not on this sheet.
Side Mission: Etiquette and Torture
Deployment and Setup
- Initial Groups: Imperial Officer (2), Royal Guard.
- Reserved Groups: 0-0-0 (Specialized in Pain), BT-1 (Destructive Assassin), Stormtrooper.
- Open Groups: 3.
- Special Setup: Increase threat by twice the threat level and resolve an optional deployment.
Event Summary
- Round 6: End of Mission.
- Door to Corridor opens: Further Guards.
- Door to Interrogation Room opens: Specialized in Pain.
- Door to Cell opens: Explosive Entry.
- All doors open: No Escape.
- Both captives claimed, captive defeated, or all heroes wounded: End of Mission.
Mission Briefing
A light on your datapad blinks faster as you approach the location where the Rebel operatives are being held. As you round a corner, you hear an officer shout, "Intruder alert!" and you are ambushed by the prison's guards.
- Doors are locked. A hero can attack the doors to the Corridor, Interrogation Room, and Cell (Health: Threat Level, Defense: 1 ▼). When the door to the Cell opens, the door to the Hall will open.
- Neutral mission tokens represent captives (Health: 5, Defense: 1 [defense icon]). Captives are neutral figures. At the start of a Status Phase, each captive adjacent to a hero may move up to 3 spaces. When a captive enters the entrance, heroes claim that captive.
- If a captive is adjacent to a healthy hero, it cannot suffer [icon].
- Once per activation, a hero can suffer 1 [icon] to push an adjacent captive up to 2 spaces.
- The mission ends when both captives have been claimed ([claim icon]), when all heroes are wounded, when a captive is defeated, or at the end of Round 6.
Further Guards
When the door to the Corridor opens:
- Deploy the reserved Stormtrooper group to any blue point.
- Increase threat by the threat level.
- The blue deployment points are now active.
Specialized in Pain
When the door to the Interrogation Room opens:
A black protocol droid with shocking red eyes stands over a Rebel operative splayed on a torture table. "Oh, I'm sorry," the droid says. "We're terribly busy at the moment; could you come back another time?" He raises his electrified palm.
- Deploy the reserved 0-0-0 to the yellow point.
- Each Rebel figure gains 2 movement points.
Explosive Entry
When the door to the Cell opens:
- Open the door to the Hall.
- Deploy the reserved BT-1 to the red point.
- Increase threat by the threat level and resolve an optional deployment.
No Escape
When all doors are open:
- At the end of each Round, increase threat by the threat level.
End of Mission
When both captives have been claimed:
With rocket explosions at your heels you drag the captives to safety beyond the facility, gasping and wheezing. A search is initiated, but you maintain a well-hidden position until the red glow of 0-0-0's eyes disappears.
- Heroes receive 100 credits per hero.
At the end of Round 6, when all heroes are wounded, or when a captive is defeated:
As you fumble and scramble through the chaos of the battle trying to find a safe escape, you look back. You see the operatives you were tasked with saving back in the custody of stormtroopers, being dragged before 0-0-0 and BT-1 once more. The droids' displays glow maliciously red.
- The Imperial player receives 0-0-0 (Specialized in Pain) and BT-1 (Destructive Assassin) as villains.
Additional Rewards
- Each player receives 1 XP. Heroes receive 100 credits per hero. The Imperial player receives 1 influence.
Transcription Notes
- Card text not on the sheet. The sheet names the pack's Command cards (Eerie Visage, Ballistics Matrix, Terminal Protocol, Shared Experience, Brace for Impact), its Deployment cards (BT-1, 0-0-0, Trusted Ally), Agenda cards (Devious Droids), the Weakened Condition card and the Skirmish Mission card Abandoned Research (the second Skirmish card, named in its art), but their ability text is printed on the cards and is not reproduced here. This file contains only the sheet's own rules.
- Icons. Icons are written as words where the sheet's text names them (threat, defense, deployment, experimental weapon). Four icons on the sheet are shown in brackets because their meaning could not be read from the scan: the defense icon on the captive token, the two icons in the captive rules ("cannot suffer [icon]" and "suffer 1 [icon]"), and the claim icon in the mission-end rule.
- Card number strips. Each side's footer lists printed card numbers (Skirmish side: 02A, 06A, 13A, 14A(2), 15A, 19A, 20A, 25A, 26A, 27A, 28A, 31A, 32A(2), 34A, 35A(3), 37B, 38B, 39B(3); Side Mission side: 21A, 22A, 23A, 24A, 25A, 27A, 31A, 32A(2), 33A, 36A(3)). These are card-index references, not rules, and are not transcribed as rules text.
- Layout. The sheet's skirmish map and component art are images and are described above, not reproduced.