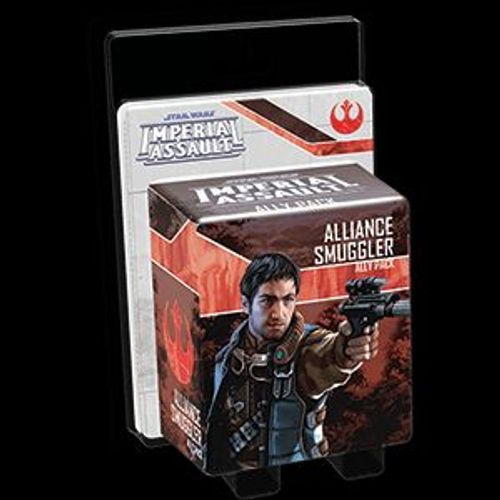
Star Wars: Imperial Assault – Alliance Smuggler Ally Pack
Star Wars: Imperial Assault – Alliance Smuggler Ally Pack Rulebook
Table of Contents
Table of Contents
Component Breakdown
- 1 Plastic Figure (Alliance Smuggler)
- 3 Deployment Cards (2 Alliance Smuggler, Smuggler's Run)
- 4 Command Cards (Smuggled Supplies, Heart of Freedom, Self-Defense, Smuggler's Tricks)
- 1 Side Mission Card (Precious Cargo)
- 2 Skirmish Mission Cards (Imperial Command Hub)
Adding the Pack to Your Game
- Add the Deployment cards to their supply.
- Add the Side Mission card to the pool of green Side Mission cards. The heroes can choose this card when building the Side Mission deck at the start of a campaign.
- Shuffle the Skirmish Mission cards into the Skirmish Mission deck. These cards use the "Imperial Command Hub" map (see below).
- Add the Command cards to the pool of cards that a player can use to build his Command deck.
Skirmish Attachments
Some skirmish upgrade Deployment cards list the word "Attachment" above their abilities. These cards can be attached to other Deployment cards as follows:
- When deploying units during skirmish setup, if a player has one or more "Attachment" cards included in his army, he places each of these cards on one of his non-upgrade Deployment cards.
- Each Deployment card can have only one "Attachment."
- Abilities on "Attachment" cards apply to all figures in the corresponding group.
- Many attachments require the group to have a specific trait, such as "Trooper." Attachments with these restrictions cannot be played on a group that does not have the trait.
When a group with an "Attachment" card is defeated, the opposing player scores VPs equal to the deployment cost of the "Attachment" card in addition to the VPs he scores from the defeated group's Deployment card.
Imperial Command Hub (Skirmish Map)
The skirmish mission cards in this pack use the "Imperial Command Hub" map. The map is printed on the sheet with these labels:
- Key: A brown square marked A with a token icon is labelled Datalink. A blue square marked B with a token icon is labelled Energy Cell.
- Markers on the map: the map shows one brown A square and four blue B squares.
- Labels: "Desert Path" runs diagonally across the map, and "Hangar" is labelled in the lower-centre area. Three stormtrooper-icon labels read 17B, 11B and 17B above the Desert Path, and one reads 19A at the Hangar.
- Map tiles: 01B, 02B, 03B, 10B, 11B, 14B(2), 17B(2), 18B(3), 19A, 20A, 36A, 38A(2).
The sheet does not print the mission's setup or objective rules for this map; those are on the two Skirmish Mission cards.
Side Mission: Precious Cargo
Deployment and Setup
- Initial Groups: Stormtrooper.
- Reserved Groups: Imperial Officer, Trandoshan Hunter.
- Open Groups: 4.
- Special Setup: Increase [threat icon] by twice the threat level and resolve an optional deployment.
The map is labelled with a stormtrooper-icon 31B at the Hall. Its map tiles are 02B, 14B, 15B, 16B, 18B, 22B, 23B, 24B, 29B, 31B, 32B(2), 35B(2), 36B(2), 39B(2).
Event Summary
- Round 7: End of Mission
- First door opens: Allegiance
- Second door opens: Surrounded
- Third door opens: Well-Protected
- Fourth door opens: Final Force
- Heroes depart or all heroes wounded: End of Mission
Mission Briefing
A dingy facility lies in disrepair on the top of a hill. A squad of stormtroopers patrol the perimeter, weapons readied.
Your comlink crackles with an unfamiliar voice: "Tagg Ronin here; that was my ship that got shot down. I was able to slip past the outer patrol, but I'll need some more firepower to finish the job. See what you can do about getting past those guards and then we can get in, grab what we need, and get out before they even know what hit them."
- When a hero withdraws, he is incapacitated instead. When activating, he receives only 1 action and can only use that action to perform a move.
- Neutral mission tokens represent caches. A Rebel figure can retrieve a cache ([cache icon]). If there is an Imperial figure on or adjacent to that cache, apply -1 surge to the test results.
- The Rebel mission token represents the extraction point.
- When all of the caches have been retrieved and all heroes are on or adjacent to the extraction point, the heroes depart.
- The mission ends when the heroes depart ([depart icon]), at the end of Round 7, or when all heroes are wounded.
Allegiance
When the first door opens:
- Deploy the Alliance Smuggler to the Hall as an ally under the heroes' control.
- Apply additional Health to the Alliance Smuggler equal to the threat level.
Surrounded
When the second door opens:
- The blue deployment point is now active.
- Increase [threat icon] by the threat level and resolve an optional deployment.
- Deploy the reserved Trandoshan Hunter group to the Entrance.
Well-Protected
When the third door opens:
- The red deployment points are now active.
- Deploy the reserved Imperial Officer to any red point.
- Increase [threat icon] by 2 plus the threat level and resolve an optional deployment.
Final Force
When the fourth door opens:
- The yellow deployment point is now active.
- Increase [threat icon] by the threat level and resolve an optional deployment.
End of Mission
When the heroes depart:
You run out the back door of the facility to find a new tramp freighter, this time with heavier defenses, waiting for you to load in the cargo. The crew shouts at you to hurry as you sprint toward the ship. Imperial blaster bolts whiz past you as you escape.
- Heroes receive the Alliance Smuggler as an ally.
At the end of Round 7 or when all heroes are wounded:
Blaster fire impacts all around you as you and Tagg are overrun. You're forced to abandon the mission and even the supplies you've already claimed. When you arrive at your transport, you must explain to the crew why they will only be carrying passengers and not cargo.
- The Imperial player receives 2 influence.
Additional Rewards
- Each player receives 1 XP. Heroes receive 100 credits per hero. The Imperial player receives 1 influence.
Transcription Notes
- The source is a two-page scan. Each page was rendered at 150 dpi and the small text was re-read at 300 dpi.
- Icons with no name printed on the sheet are shown in brackets: [cache icon], [depart icon], [threat icon]. The surge icon is written as "surge", matching the base game's wording.
- The map labels above are transcribed as printed. The sheet does not say what the stormtrooper-icon labels represent.