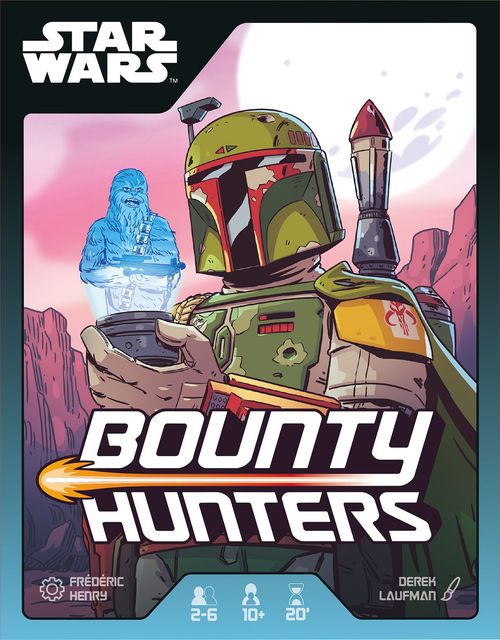
Star Wars: Bounty Hunters
Star Wars: Bounty Hunters Rulebook
Table of Contents
Table of Contents
Components
- 1 rulebook
- 4 Zone cards: Target, Bounty Hunter, Contract, Jawa Market
- 44 Target cards
- 63 Bounty Hunter cards
- 44 Contract cards
- 44 Jawa Market cards
- 42 Imperial Credit tokens
- 1 Player Aid card
- 1 score pad
Setup
- Place the 4 Zone cards in a row in the middle of the play area. Sort the cards into 4 decks according to their color (green, red, blue, grey) and shuffle them separately. Place them face down above the matching Zone cards. Leave a space for a discard pile below each Zone card.
- Place the Imperial Credits conveniently nearby.
- The player who watched a Star Wars movie most recently becomes the "Guild Master" and receives the Player Aid card. The Guild Master's task is to coordinate the players, ensuring that everyone performs their actions at the same time.
- The front of the Player Aid shows the sequence of steps that make up each game turn.
- The back of the Player Aid shows a summary of how the game ends and related bonuses.
- All players may refer to the Player Aid during the game.
- Note: The Guild Master role is unnecessary if everyone is familiar with the rules of Bounty Hunters. The Player Aid must remain accessible to all players, however.
- Each player draws 1 card from each of the 4 decks to form a starting hand of 4 cards. Never show the cards in your hand to another player.
In Bounty Hunters, the action unfolds right in front of you! Hunt Targets you have chosen yourself, with the help of your own Bounty Hunter and Droid cards.
Gameplay
Each game turn is divided into three consecutive steps. All players perform each step simultaneously:
- Draw a card
- Choose a card
- Pass your hand
The Guild Master sets the tempo by reading aloud the relevant section of the Player Aid at the start of each step. Always wait for all players to finish the current step before moving on to the next one. The Guild Master is responsible for ensuring that everyone plays at the same time.
Step 1: Draw a Card
Draw a 5th card from any of the decks and add it to your hand.
Note: Each deck contains specific cards. At the start of the turn, draw from whichever deck best suits your chosen strategy.
Step 2: Choose a Card
Choose a card from your hand and do one of two things:
A. Sell the card B. Play the card
For more coordination, place the chosen card face down in front of you. Once every player has done so, reveal your cards simultaneously. Don't pass your remaining cards just yet! Keep them with you instead.
A. Sell the card
Discard the chosen card (placing it face-up on the discard pile below the matching deck's Zone card) and collect 1 Imperial Credit.
Note: All types of cards may be discarded in this way. Imperial Credits are used to activate Jawa Market cards (see B).
B. Play the card
Place the chosen card in front of you, face up.
- If no cost is shown on the card, activate it immediately by placing it upright (i.e. aligned vertically).
- If the card has a cost (Jawa Market card), you must pay that cost to activate the card. If you are unable to activate the card immediately, or prefer not to, reserve it by placing it on its side (i.e. aligned horizontally).
After selling or playing a card, you may activate any or all previously reserved Jawa Market cards, paying their cost.
Example: Ginny does not have enough Credits to activate the card she chose to play. She places the card on its side to indicate that it is simply reserved. During a subsequent turn, on step 2, in addition to her normal action, she may spend Imperial Credits to activate any reserved cards. Those cards will then be positioned upright in front of her and the Imperial Credits will be spent by returning to the reserve.
Step 3: Pass Your Hand
Give the remaining 4 cards in your hand to the player on your left and collect the 4 cards passed to you by the player on your right.
When all players have completed these 3 steps, a new turn begins. Repeat the 3 steps in sequence until the last turn of the game (see End of the Game).
Cards
The four decks are designated as follows: the Target deck, the Bounty Hunter deck, the Jawa Market deck and the Contract deck.
Target Cards (Target Deck)
Each Target card shows:
- Points scored at the end of the game.
- Target shield values, shown as three bars (green, blue and orange), each containing a number.
- The number of cards featuring this character in the deck.
- Some cards trigger an immediate bonus on capturing the Target (see Capturing a Target).
To capture Targets, you can use Bounty Hunter and Droid cards, also known as attack cards.
Bounty Hunter Cards (Bounty Hunter Deck)
Each Bounty Hunter card shows Bounty Hunter attack values and points deducted at the end of the game.
Bounty Hunter cards are played for free, but cost you points at the end of the game.
Droid Cards (Jawa Market Deck)
Each Droid card shows Droid attack values, the cost to activate the card, and the number of Droid cards with these stats in the deck.
Droid cards are found in the Jawa Market deck, and therefore cost Credits. At the end of the game, however, no points will be deducted.
Confronting a Target
Each player manages their own confrontations in front of them. Gather your forces for a confrontation by placing attack cards (i.e. Bounty Hunters and Droids) to the right of a Target card, next to it. All the attack cards facing the same Target should be overlaid, leaving their attack values visible.
A Target's shield values are represented by 3 bars (green, blue and orange), each containing a number. The attack values of the cards facing the Target are represented by another 3 bars (green, blue and orange) and numbers. The sum of the numbers in each bar is the attack value.
Starting a Confrontation with a Target Card
- Place the Target card in front of you to prepare a new confrontation. You may prepare as many confrontations as you like.
- When you activate an attack card, place it facing any Target card to start a confrontation.
- When you add an attack card to an existing confrontation, overlay it onto the previous card, leaving its attack values visible.
Prepare several confrontations, so that you will have more options to place your attack cards!
Starting a Confrontation with an Attack Card
- Even if you don't have any Targets to capture, you may still play an attack card on its own to prepare a confrontation.
- As long as you have no Targets to capture, any subsequent attack cards you activate must be added to this confrontation.
- The next Target you play must be assigned to this confrontation!
Capturing a Target
To capture a Target, the combined attack values of the Droids and Bounty Hunters confronting that Target must equal or exceed the corresponding shield values.
When all three attack values on the cards facing a Target reach or exceed its shield values, that Target is captured. Turn the Target card on its side so that everyone can see at once how many Targets you have captured.
Whenever you capture a Target with a credit icon, immediately win an Imperial Credit.
Whenever you capture a Target with a contract icon, immediately draw and activate a Contract card.
Points earned for capturing Targets and points lost because of Bounty Hunters will be summed up at the end of the game.
Crate Cards (Jawa Market Deck)
Each Crate card shows:
- Points scored at the end of the game.
- The cost to activate the card (first cost, then second cost).
- The number of Crate cards in the deck.
Crate cards contain 1, 2 or 3 crate icons.
At the end of the game, players with the most crate icons score an additional 5 points!
Example: Ginny has 2 activated Crate cards worth 4 crate icons total, Thomas has 1 worth 2 crate icons, and Mia has 2 worth 4 crate icons total. Ginny and Mia have the most (4) and therefore score 5 points each.
Note: To activate a Crate card and score the corresponding points at the end of the game, you must pay the cost of the card. You can reserve a card, then pay its cost during a subsequent turn.
There are 15 Crate cards in all. 6 contain only 1 crate icon, 6 contain 2 crate icons, and 3 contain 3 crate icons.
Contract Cards (Contract Deck)
Contract cards award points at the end of the game if their conditions are met.
For an introductory game without Contracts, see Introductory Game.
There are three types of Contracts:
1. Contract with two different Targets:
- For each of the first named Target captured, score 1 point.
- For each of the second named Target captured, score 1 point.
- For each unique duo of the first Target and the second Target captured, score 3 additional points.
Example: Ginny has captured 2 of the first Target and 1 of the second. She therefore scores 3 points, plus 3 points for capturing the designated duo of Targets once. This Contract is worth 6 points (1+1+1+3).
2. Contract with the same Target twice:
- For each of the named Target captured, score 1 point.
- For each duo of the named Target captured, score 2 additional points.
Example: Mia has captured 2 of the named Target. She therefore scores 2 points, plus 2 points for capturing the designated duo of Targets once. This Contract is worth 4 points (1+1+2).
3. Contract with a Target and a Crate:
- For each of the named Target captured, score 1 point.
- For each unique duo of the named Target captured and a crate icon on an activated card, score 2 points. Note: the crate icon must be on an activated card.
Example: Thomas has captured 2 of the named Target and has 2 crate icons on his activated cards. He therefore scores 2 points, plus two times 2 points for capturing two duos of the Target and a crate icon. This Contract is worth 6 points (1+1+2+2).
You can use the same Target or Crate to complete multiple contracts, regardless of their type.
End of the Game
The first player to capture 4 Targets wins the following bonuses:
- Take 1 Imperial Credit from the reserve.
- Draw 1 Contract card and activate it immediately.
If two or more players capture their 4th Target during the same turn, they all receive the bonuses.
It triggers the end of the game. Finish the current turn, then play two more full turns.
It is possible to capture more than 4 Targets during the game.
Then the game is over. Time to calculate your score!
Scoring
The Guild Master notes each player's first name in the top row on the score pad, and then records their respective scores as follows:
- Each player adds up the points awarded for the Targets they captured. Uncaptured Targets score no points.
- Each player adds up the points granted by their activated Crate cards. Reserved cards score no points. Players then count the number of crate icons on their activated cards. The player(s) with the most crate icons receive(s) 5 bonus points.
- Players add up the points awarded by their Contracts.
- Each player counts the total number of points deducted by Bounty Hunters who helped capture their Targets. Ignore any Bounty Hunters whose Targets were not captured when the game ended, as they did not complete their mission.
- The Guild Master adds up the first three criteria (Targets, Crates and Contracts), deducts the Bounty Hunters points, and records each player's final score. The player with the highest score wins the game!
Note: In the event of a tie, the winner is the player with the most Imperial Credits at the end of the game. If the tie persists, tied players win the game together.
Example of Final Score
Here are all the cards that Anna played during the game:
- Targets: All these Targets were captured. Anna scores 9+16+9+12 = 46 points.
- Bounty Hunters: These Bounty Hunters helped to capture those Targets. Deduct -1-1-3-0-3-2-2 = -12 points. Some Bounty Hunters didn't capture their Target — no points are deducted for those. One Target was not captured; it scores no points and doesn't count towards Contracts.
- Crates: One Crate card has been activated and therefore scores 4 points for Anna. It contains 3 crate icons. Since Mia has 4 crate icons, Anna does not win the 5-point majority bonus. Another Crate card was not paid for and has therefore not been activated; it scores no points and does not count towards the total.
- Contracts:
- The 1st contract earns Anna 2 points, as she had 2 of one Target and none of the other.
- The 2nd contract scores 2 points for her Target captures and 2 extra points because she can make a Target-and-Crate duo.
- The 3rd is worth 2 points for one Target, 1 point for another, and 3 points because she can form a duo of those two Targets.
- Anna scores 2+2+2+2+1+3 = 12 points.
Anna's final score: Targets 46, Crates 4, Contracts 12, Bounty Hunters -12. Anna scores a total of 50 points.
Introductory Game
We have devised an introductory mode, played without Contract cards, to help you become familiar with the game. Adjust the setup and gameplay sequence as follows:
- Remove the 8 cards with the contract icon from the Target deck.
- When setting up the play area, use only the Target, Bounty Hunter and Jawa Market cards and their three related Zone cards. Leave the Contract cards in the box.
- Players form their starting hand by drawing 1 Target card, 2 Bounty Hunter cards and 1 Jawa Market card from their respective decks.
- At the end of the game, the first player(s) to capture 4 Targets receive(s) only the Imperial Credit bonus. The rest of the game is played in the normal way.
- When scoring, ignore the Contracts section of the score pad.
This introductory mode will help you learn how to play. Once you are familiar with the gameplay, move on to the normal rules for the full Star Wars: Bounty Hunters experience!
There are many ways to win a game of Star Wars: Bounty Hunters. Have fun trying out new strategies!
Target Characters
The Target deck features the following characters:
- Qi'ra
- Padmé Amidala
- Zeb Orrelios
- Omega
- Chewbacca
- Han Solo
- Kanan Jarrus
- Grogu
- Greedo
- Dengar
- Bossk
- Zuckuss
- Hondo Ohnaka
- Black Krrsantan
- Fennec Shand
- Cad Bane
- The Mandalorian
- IG-11
- Boba Fett
- Aurra Sing
The Jawa Market deck's Droid cards are split between Astromech droids and Protocol droids.