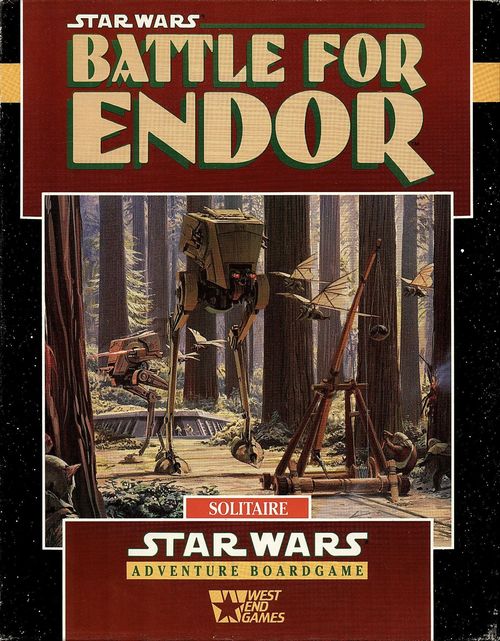
Star Wars: Battle for Endor
Star Wars: Battle for Endor Rulebook
Table of Contents
Table of Contents
Contents
- The Battle for Endor
- A Look at the Game Parts
- Setting Up the Game
- Turn Sequence
- Using Action Cards
- Moving Your Units
- Firing at the Enemy
- Imperial Actions
- Using Event Cards
- Heroes
- Winning the Game
1. The Battle for Endor
STAR WARS: The Battle for Endor recreates the dramatic battle between the Imperial, Rebel, and Ewok armies during the final climactic scenes from Return of the Jedi. You command the strike team of Rebel Troopers, the Ewok hordes, and the Heroes of the movie, while the game system itself controls the actions of the Imperial forces you face: AT-ST Scout Walkers, speeder bikes, security troops, and a vast army of stormtroopers.
You must use your Ewok forces to distract the Imperials and your Rebel Troopers to cover the entrance to the base while your Heroes — Han Solo, Princess Leia, Chewbacca, and the Droids C-3PO and R2-D2 — attempt to breach the security systems of the Imperial Bunker Complex. Once inside, you must disable the Shield Generator that protects the Death Star in orbit above the forest moon.
But hurry! The longer you take to destroy the Shield Generator, the more losses will be inflicted upon the Rebel fleet. Can you disable the Death Star's defenses before the Rebel fleet is destroyed?
How the Game is Played
Each side in the battle has a number of cardboard pieces, called units, representing the troops, vehicles, and leaders which took part in the Battle for Endor. Units maneuver across a map of the area around the bunker on the forest moon of Endor.
The Imperial forces consist of several All Terrain-Scout Transports, or AT-STs. These quick, two-legged vehicles wield powerful blasters and are practically impervious to infantry weapons. The Imperials also have many troops mounted on speeder bikes, lightning-fast repulsorlift vehicles armed with rapid-fire light blasters. Although not quite so devastating in firepower as AT-STs, speeder bikes are agile and harder to escape from. In addition to these armed vehicles, the Imperials have many squads of security troops and stormtroopers.
You command the Rebel strike force assigned to infiltrate the Imperial Bunker Complex, consisting of Rebel Troopers and units that represent each of the major characters from the movie who fought in the battle: Han Solo, Princess Leia, Chewbacca, and R2-D2 and C-3PO. As well, you command the Ewok forces coming to the Rebels' rescue. Ewok Leaders are the center of this army, able to organize their primitive troops to spring traps and coordinate their attacks on the Imperial forces. The bulk of the rescuers consist of Ewok units: large groups of forest denizens armed with rocks, clubs, bows, arrows and spears. As well, there are a number of Ewok Catapult units that represent a few heavy, stationary, rock-throwing catapults manned by Ewok crews.
Battle for Endor is played in a series of turns. During a turn, you will have opportunities to perform actions (that is, move and fire your units). You will also perform actions for the Imperial troops on the board. The order in which units move and fire changes from turn to turn because it is determined by drawing cards from the Action Deck. Deciding on how to move the Imperial forces fairly and impartially is determined by referring to the Imperial Tactics Charts and the rules in Section 8.
Combat is fast and furious. Each unit has a fire strength, showing how powerful its weapons are, and an armor strength, reflecting how well it stands up to enemy fire. When one unit fires at another, roll a number of fire dice equal to the firing unit's fire strength; if you roll a number of "relevant symbols" (see 2.3, The Dice) equal to or greater than the target's armor strength, the target has been hit (wounded or destroyed).
Throughout this game, you are racing against time. Cards drawn from the Event Deck determine how much of the Rebel fleet is destroyed before you eliminate the shield protecting the second Death Star, and two Event Cards are drawn each turn. Thus, as the game progresses and more Rebel Cruisers are eliminated, you are under increasing pressure to destroy the Shield Generator before the fifth Rebel Cruiser is destroyed.
In addition to determining when Rebel Cruisers are destroyed by the Imperial fleet and the Death Star, draws from the Event Deck also detail when Rebel and Imperial reinforcements arrive and when other unusual events — such as changing Imperial tactics and hidden Ewok traps — come into play. Thus, important aspects of the game vary each time you play, making each game a different challenge!
How to Use This Rules Booklet
Battle for Endor is not a complicated game, but the Rules of Play must be presented in a format that allows you to learn the game when first read and to find answers to questions during play. For this reason, many rules contain parenthesized numbers that refer to other parts of the book for clarification. When reading the rules for the first time, ignore the references as much as possible. When a question arises during play, however, you may find the references very useful.
2. A Look at the Game Parts
A complete copy of Battle for Endor contains:
- One map board
- One sheet of 72 counters and markers
- 64 plastic stands
- Eight dice (six fire dice and two normal)
- 40 cards
2.1 The Game Board
Most of the game board contains the terrain over which the dramatic Battle for Endor was fought. The game board also includes a box which represents the underground shield bunker complex, and a number of displays for use during play.
Macrohexes and Hexes. The map shows the area around a small rear entrance to the Imperial Bunker Complex on the forest moon of Endor. It is divided into macrohexes, which you use to determine the range between firing and target units in fire (7.1). Each macrohex is further divided into seven hexes, which you use in movement of your units (6).
Terrain on the Map. Endor is a forested world, covered in lush vegetation, giant trees, and rolling hills. The map of the battlefield displays the prevalent types of terrain that play an important role in the battle, plus some special locations. (Refer to the Terrain Key on the map while reading the following.) There are four types of terrain on the map: open forest (also called clear), hills, woods, and the Bunker Entrance.
- Open Forest/Clear terrain: While all of the terrain on the Forest Moon is covered with trees, some portions have fewer trees than others. The clear terrain on the map represents clearings between trees, grassy swards, and paths through the forest. It is easy for all units to move through, but since there is no cover, units are easier to hit.
- Hills terrain: Hills represent rough, steep, and rocky terrain where the Ewoks can ambush Imperial troops, and where AT-STs have trouble maneuvering. All units except AT-STs and speeder bikes are harder to hit in Hills, and AT-STs can never enter Hills. When a non-AT-ST/speeder bike unit occupies a Hills hex, the unit is considered in cover for purposes of fire (7.1).
- Woods terrain: The woods of Endor consist of tall, ancient trees and dense undergrowth. As in Hills, all units except AT-STs and speeder bikes gain a benefit for the cover of Woods (7.1). Because of the dense tangle, speeder bikes cannot enter Woods hexes.
- Bunker Entrance: This single hex leads to the vast underground Imperial Bunker Complex (see below). Imperial AT-ST and speeder bike units cannot move into or through this hex, but during the later part of the game, may convert into stormtroopers and Security units to enter the Bunker Entrance (8.3). All units occupying the Bunker Entrance are considered in cover (7.1).
Reinforcement Sectors. The Imperial forces on Endor are scattered throughout the forest on patrol. When the Ewok attack begins, a number of Imperial units close in on the Bunker Entrance as reinforcements. These reinforcements enter in one of the three Imperial Reinforcement Zones, as stated on the Event Cards and the map.
The Imperial Bunker Complex. The Imperial Bunker Complex has a little-used rear entrance that leads to a vast underground power facility that serves the Shield Generator protecting the Death Star. In addition to the forces on the surface of Endor, a number of Imperial units are held in reserve within the Imperial Bunker Complex to protect the Shield Generator.
The Fire/Armor Strength Charts. These list the fire and armor strengths of all units in the game.
Hero/Ewok Leader Displays. The major heroes and Ewok leaders of the movie have displays on the map that show their various abilities and their relative health (7.3). Markers are placed on the Displays to show their state of health.
The Blast Doors. This short track shows how far the Rebels have progressed in their efforts to breach the entrance to the Imperial Bunker Complex (10.1).
The Card Deck Spaces. These boxes are used as spaces to put the Action Deck and Event Deck, and also hold the Action and Event discard piles.
The Imperial Priorities Lists. As you play the game, these lists tell you which type of units the Imperials will pursue or fire at in order of priority (8).
2.2 Playing Pieces
In Battle for Endor, you move playing pieces (units) representing Rebel forces under your control as well as Imperial forces. Rebel units (Heroes, Troopers, Ewoks, Ewok Leaders, and Catapults) have a green background; Imperial units (AT-STs, stormtroopers, speeder bikes, and security troops) have a brown background. Each piece fits into a plastic stand so that it will stand upright.
In addition, the smaller pieces (markers) are placed on the Hero displays, and a number of other displays on the map.
- First, punch out the pieces from their boards.
- Put each piece in a plastic stand.
2.3 Fire and Placement Dice
There are two kinds of dice in Battle for Endor: six fire dice and two placement dice.
Fire Dice. The six odd-looking dice are called fire dice. Two faces of each fire die display a picture of Darth Vader's helmet, called Vader symbols, and two others contain a picture of a Jedi lightsaber, called Saber symbols. The other two faces of each fire die are blank.
When an Imperial unit fires at a Rebel unit, roll fire dice. If any Vader symbols appear on the dice rolled, the Rebel unit may have been hit. When a Rebel unit fires at an Imperial unit, roll the fire dice. If the roll results in a number of Saber symbols, you have possibly hit the Imperial target.
- Vader symbols are always irrelevant when rolling to hit an Imperial target, and Saber symbols are always irrelevant when rolling to hit a Rebel target (7.1).
Placement Dice. The standard six-sided dice are used when determining placement of Imperial units at the beginning of every game (3), and Imperial reinforcements during the game (9).
2.4 Cards
There are two types of cards in Battle for Endor: Action Cards and Event Cards.
- Action Cards determine when units move and fire (5, 6, and 7).
- Event Cards describe important occurrences during the battle (9).
An Action Card shows the Imperial or Rebel side, the unit type and action type (for example, "Imperial Action: AT-STs Move"), and the details of the action and its restrictions (for example, "5 MPs; May not move into hills"). An Event Card shows the event name and its effects and restrictions (for example, "Chewbacca Boards AT-ST!" — "Keep until played; discard after use").
3. Setting Up the Game
To begin play, do the following:
A. Bring out the Board. Lay the board in the middle of a table. Face the board so that you can read all of the printed Displays.
B. Set Up the Card Decks. Remove the blank cards and sort the various cards into two decks: the Action Deck, and the Event Deck. Place the Action and Event decks face-down on their respective areas of the Displays.
C. Set Up the Troops. You are now ready to place the Rebel and Imperial units on the map. The units are placed in three groupings: first, the Rebel troopers and most of the Heroes are placed in the center of the board. Surrounding the captives is a ring of Imperial troops. In an even larger circle around the Imperials lie the Ewoks.
3.1 Rebel Set-up
You begin with your Rebel troops standing just outside of the Imperial Bunker. Place the four Rebel Trooper units, plus Han Solo, Princess Leia, and Chewbacca in any hexes of the macrohex with the Bunker Entrance, labelled "Rebel Set-up Area." Place only one unit per hex.
3.2 Imperial Forces Set-up
Next, set up the Imperial forces. Place the Imperial forces in the Imperial Bunker and the Imperial Forces Set-up Area using the following guidelines:
- Bunker Troops: Place two (2) Imperial Security units in the Imperial Bunker holding box.
- Place AT-STs: Two (2) AT-STs are placed first in hexes in the Imperial Forces Set-up Area surrounding the Rebel Set-up Area. For each AT-ST, roll a placement die to determine which macrohex the unit will set up in. The macrohexes of the Imperial Forces set-up area are labeled "1" through "6" and correspond to the roll of the placement die. Once you have determined in which macrohex you must set up the AT-ST, place it in the hex farthest from any Rebel units. If two hexes are equidistant from Rebel units, you have the choice of which hex to place the Imperial unit in.
- Place speeder bikes: Four (4) speeder bikes are placed in the Imperial Forces Set-up Area after all AT-STs are placed, but before stormtroopers or security troops. Use the same method as for placement of AT-STs, but remember that speeder bikes cannot be placed in or enter Woods hexes.
- Place stormtroopers: Set up eight (8) stormtrooper units in the Imperial Forces Set-up Area. Use the same method as above to place Imperial stormtroopers. Once you have rolled the Placement Die to determine which macrohex to place the stormtrooper unit in, you must place it in the hex farthest from a Rebel unit. If two or more hexes in the macrohex are equidistant from Rebel units, you may choose which hex to place the unit in, but set stormtroopers in Woods hexes before placing them in Clear hexes.
- Place security troops: Place four (4) Imperial Security troops in the Imperial Forces Set-up Area after all other Imperial units have been placed. Use the same method as for placement of stormtrooper units.
- Setting up a More Challenging Game: Once you have thrashed the Imperials, add two more stormtroopers to the Imperial set-up. Once you have mastered the stormtroopers, add two more AT-STs to the Imperial forces.
If you want even more challenge, try to blow up the shield generator before the fourth Cruiser Destroyed card comes up in the event deck.
3.3 Ewok Set-up
Once you have placed and studied the Imperial units on the board, you must decide how to set up the Ewok army.
- Place Ewok Units and Ewok Leaders: Surrounding the Imperial Forces set-up area is the Ewok Set-up Area. In this area of macrohexes, place three (3) Ewok Leader units, fifteen (15) Ewok units, and the R2-D2 & C-3PO unit. You may set up these units in any hexes in the set-up area, one unit per hex.
- Place Ewok Catapults: You may deploy three (3) Ewok Catapult units in any hexes of the Deep Woods Set-up Area. It is usually a good idea to place the Ewok Catapults in Woods or Hills hexes, where they may benefit from cover. Note that once you place the Ewok catapults they cannot be moved during the game.
4. Turn Sequence
The game is played in a series of turns. Each turn is divided into a number of Action Rounds.
You initiate each Action Round by drawing the top card from the Action Deck. The card indicates what units may perform actions and what actions the units may perform during the round. Following is an outline of a turn:
Turn Outline
- Draw an Action Card.
- If it is a Draw Event card, draw an Event Card (9).
- If it is not, then move, fire or breach with any or all units of the type indicated on the card (5, 6, 7, and 10).
- After the actions indicated on the card have been performed, place the card in the discard pile and perform another Action Round.
- If no Action Cards remain to be drawn, the turn is over; shuffle the Action Deck back together and begin another turn.
Play continues in this manner until the Rebel forces destroy the Imperial Shield Generator or five Rebel Cruisers are destroyed by the Death Star (11).
5. Using Action Cards
At the beginning of each Action Round, draw the top Action Card. The Action Card drawn determines what happens during the current Action Round. After the last Action Card is drawn and all applicable units perform actions, the turn is over. Shuffle the Action Cards together face-down and begin the next turn.
5.1 Draw Event Cards
If the Action Card revealed says Draw Event Card, turn over the top card in the event deck. Section 9 explains how to resolve events.
5.2 Action Cards
If the card revealed is not a Draw Event Card, all of one listed type of unit may perform the action indicated on the card. Note that all Imperial units of a type must perform the indicated action on the card, but you are not required to do anything with your Rebel units just because an Action Card allows it.
- If only one action is listed on the card, each unit of the listed type may perform that action.
- If more than one action is listed, each of the units may do any one of the actions. Note that only Rebel Heroes have a choice of which action they will perform.
Example: At the beginning of an Action Round, an AT-STs Move card is drawn. You move all of the Imperial AT-ST units following the procedure described in section 8. After all AT-STs move, you draw the next action card: Heroes Move, Fire, or Breach. You must choose (for each Hero) if your Heroes will move, fire, or use a Hero's ability to breach or destroy the Imperial Bunker Complex (10).
6. Moving Your Units
All units in the game may move when the appropriate Action Card is drawn. Units are moved from hex to hex, using a system based upon Movement Points (MPs) to determine how far a unit may move.
Each unit gets 5 Movement Points (MPs) when an Action Card permitting it to move is drawn. It costs a unit 1 MP to move one hex, so a unit may move up to 5 hexes during an Action Round. Units may move in any direction or combination of directions. Terrain has no effect upon MP cost to enter a hex, although some unit types may not enter certain terrain.
General Rules of Movement
You move units one at a time, completing one unit's move before beginning another's. During their move, all units may spend up to 5 MPs. Each unit may spend some, none, or all of its MPs to move during an Action Round. Any MPs not spent during an Action Round are lost; they may not be saved.
Movement Restrictions
You may move units in any direction or combinations of directions. You may move Rebel units through Imperial units or other Rebel units without restriction (or vice versa), but you may never end a unit's move in a hex with another unit.
- Movement Costs: Each hex costs 1 MP to enter.
- Exiting the Map: No unit may ever leave the map (unless entering the Imperial Bunker).
- Clear: All units may enter Clear.
- Woods: All units except speeder bikes may enter Woods.
- Hills: All units except AT-STs may enter Hills.
- Imperial Bunker Entrance: All units may enter the Bunker Entrance hex.
- Imperial Bunker Complex Box: It costs units 2 MPs to enter the Bunker Complex Box. Note that the Bunker Complex Box can only be entered by units in the Imperial Bunker Entrance hex. Speeder bikes and AT-STs cannot enter the Imperial Bunker Complex, but they can be converted into other units which may enter (8.3). A unit cannot enter the Imperial Bunker Complex if the Bunker Entrance hex is occupied by an enemy unit.
7. Firing at the Enemy
When an Action Card is drawn which permits units to fire, all units of the listed type may do so. Each unit fires individually, and any result is applied to the target before another unit may fire. When more than one unit can fire, you may decide the order to resolve fire.
- Rebel Heroes and Ewok units do not have to fire individually; Hero and Ewok units can combine their fire with similar units (7.2). Ewok units can only combine fire if coordinated by Ewok Leaders.
- Each unit may fire only once during a round, but a unit may be the target of any number of fires.
7.1 Resolving Fire
Roll fire dice to determine if the firing unit hits its target. The number of fire dice you roll is equal to the firing unit's fire strength, modified by certain circumstances. When you roll the fire dice, you are looking for a number of relevant symbols (Sabers for Rebel units and Vaders for Imperial) equal to or greater than the target's armor strength.
- All fire and armor strengths are listed on the Fire/Armor Strength Charts.
Example: An Imperial unit is firing. The firing unit's fire strength is 3 and the Rebel target's armor strength is 1. You roll 3 fire dice; if you get one or more Vader symbols, the target is hit.
Fire Strength Modifiers
Each time a unit fires, its fire strength is modified according to the range to the target and the terrain the target occupies.
- Range: Range is determined by counting the number of macrohexes between the firer and target (including the target's macrohex but not the firer's). The fire strength is reduced by a number equal to the range. (For example, an AT-ST (fire strength of 4) firing at a target 2 macrohexes away would have its fire strength reduced to 2: that is, 4 - 2 = 2.)
- Terrain: Woods and Hills hexes, as well as the Imperial Bunker Entrance, are considered to provide cover. If a unit fires at a target that occupies a cover hex, reduce the firing unit's fire strength by 1. Fire at an AT-ST or speeder bike unit in cover is not affected; AT-STs and speeder bikes do not gain benefit from cover.
- Speeder bikes: While speeder bikes do not benefit from cover, their speed and agility do make them difficult to hit. Reduce the firing unit's fire strength by 1 when shooting at speeder bikes, regardless of the terrain they occupy.
Impossible Shots
If the target's armor strength is greater than the firer's modified fire strength, the fire cannot possibly hit the target. (For example, a Rebel Trooper firing at an AT-ST two macrohexes away could not possibly hit: the Trooper's fire strength would be 1 and the AT-ST's armor strength is 2 — it is impossible to roll two Sabers on one fire die.)
Rolling the Fire Dice
After determining the fire strength of a shot, roll a number of fire dice equal to the firing unit's modified fire strength. If you roll a number of relevant symbols (Sabers for an attacking Rebel unit, or Vaders for a firing Imperial unit) equal to or greater than the defending unit's armor strength, the fire hits the target.
- For any unit other than a Hero or Ewok leader unit, a single hit destroys the unit; remove it from the map.
Example: For an Ewok Catapult firing at a stormtrooper unit in a Woods hex in the same macrohex you roll two dice. The dice turn up two Sabers. Since the stormtrooper's armor strength is 1 and you rolled at least one Saber, the fire hits.
7.2 Combined Fire
Ewok Leaders can coordinate Ewok units in combat; this is called "combined fire." As well, Heroes can combine fire with other Hero units. Note that Ewok units and Hero units cannot combine fire unless you play the "Chewbacca Boards AT-ST!" Event Card (9).
- Ewok Leaders in the same macrohex as one or more Ewok units may combine the Ewok units' attack. Any and all Ewok units in the macrohex can combine their attack into a single strength for one attack. The fire strength of the combined attack equals one die for each Ewok unit (including the Ewok leader combining the attack) that participates in the attack.
- If there is more than one Ewok Leader in a macrohex, you may make additional combined attack attempts, so long as no single Ewok or Ewok Leader unit is involved in more than one combined fire, and each combined fire attack involves an Ewok Leader and at least one other Ewok unit.
- Ewoks may combine their attacks on Imperial units in the same macrohex as the attackers, or a macrohex adjacent to the attackers. No Ewok combined attack may be made at a range greater than 1.
- Hero units in the same macrohex may combine fire. Heroes' combined fire strength equals one die for every Hero unit in the macrohex participating in the attack, and may be made at any range. Remember that R2-D2 & C-3PO have no fire strength and cannot participate in combined fire.
- Units that are not in the same macrohex cannot combine fire.
- Units that combine fire cannot fire by themselves on the same action round.
Fire Diagram 1. An Ewok Fire card is drawn. The Rebel player elects to combine the fire of the three Ewoks and the Ewok leader pictured here, for a total fire strength of four. If they fire at the AT-ST in their macrohex, they will need at least two saber symbols on the four fire dice. If they fire at the stormtrooper, they will lose one die for range (one macrohex away) and one die for the cover, for a total fire strength of two to get one saber. If they fire at the speeder bike, they lose one die for range, and one die for the special speeder bike defense, getting two dice to get two sabers. They cannot fire at the security trooper, since Ewok combined fire cannot take place at more than one macrohex distance.
7.3 Wounding Heroes and Ewok Leaders
For most units, a single hit will destroy them. Heroes and Ewok leaders, because of their unique courage and tenacity, are not automatically removed from play; instead, both types of units take two hits before they are removed from play. The first hit wounds the Hero or leader; the second hit results in the Hero or leader being captured. If a Hero unit (Han Solo, Princess Leia, Chewbacca, or the Droids R2-D2 & C-3PO) is hit, place a "Hit" marker on the corresponding space on the Hero Display. If an Ewok leader is hit, place a "Hit" marker on the corresponding Ewok Display.
A Hero or Ewok leader with a single hit suffers no ill effect, but if hit a second time the unit is captured; remove the piece from the map and place the counter on the appropriate Captured box of the Hero or Ewok Display.
8. Imperial Actions
When an Imperial Action Card is drawn, these rules tell you how to move Imperial units on the board. In general, Imperial units fire at or move toward the closest Rebel units. But in cases where there are a number of Rebel units in their vicinity, Imperial units will move and fire at targets in order of "priority." In general, Imperial units will fire at or move toward Rebel Units with the highest priority before considering lower priority units.
At some points during the game, "Imperials Change Tactics!" Event Cards may change the Imperial priorities. When you draw one of these cards, move the Imperial Tactics marker from its present Imperial Tactics box one box to the right.
Example: At the beginning of a game, the Imperial priority is Ewoks, Ewok Leaders, Catapults, Rebel Troopers, and Heroes. That means that Imperial units will fire at Ewok units rather than fire at Rebel Troopers. Later in the game, under the next Imperial tactic, Imperial units would rather fire at Rebel Trooper units than at Ewoks.
(Transcription note: the example above is as printed in the rulebook; the map's Tactic A list, given below, orders Catapults before Ewok Leaders.)
Imperial Tactics (printed on the map)
A. Hunt Ewoks: 1. Ewoks; 2. Catapults; 3. Ewok Leaders; 4. Rebel Troopers; 5. Heroes.
B. Hunt Rebels: 1. Rebel Troopers; 2. Ewoks; 3. Heroes; 4. Catapults; 5. Ewok Leaders.
C. Desperate Struggle: 1. Rebel Troopers; 2. Ewoks; 3. Ewok Leaders; 4. Heroes; 5. Catapults.
D. Breach (when marker is on "3" on Breach/Blast Door Track): 1. "Bunker Entrance"; 2. Rebel Troopers; 3. Ewoks; 4. Heroes; 5. Ewok Leaders.
Imperial Movement Rules:
- Move into macrohex of nearest target (in movement points, then priority).
- Seek cover.
- Reduce range to nearest target (in movement points, then priority) — such moves end in cover if possible.
Imperial Fire Rules:
- Closest range, not in cover (in macrohexes, then priority).
- Closest range, in cover (in macrohexes, then priority).
- Next macrohex, not in cover (ties by priority).
- Next macrohex, in cover (ties by priority).
Note: During tactic "D," if an Imperial unit is in a macrohex of the Ewok, Imperial, or Rebel set-up areas and that macrohex is not occupied by a Rebel unit, the Imperial unit will ignore other Rebel units and attempt to move in a direct path to the Bunker Entrance hex. Imperial units will treat the unit stacked in the bunker entrance as having a higher priority than other units. Catapults are not on the priority list. Imperial units will ignore catapult units for all purposes unless there are no other targets to fire at.
Fire/Armor Strength Chart (printed on the map)
| Unit Type | Fire | Armor |
|---|---|---|
| AT-ST* | 4 | 2 |
| Stormtrooper* | 3 | 1 |
| Security Trooper* | 2 | 1 |
| Speeder Bike | 4 | 1*** |
| Catapult* | 3 | 1 |
| Ewok* | 1** | 1 |
| Ewok Leader* | 1** | 1 |
| Rebel Trooper* | 3 | 1 |
| Han Solo* | 1** |
* Receive defensive bonus when in Hills or Woods (AT-ST receives no benefit in Woods). ** Heroes can combine their fire strengths with other heroes. Ewoks can combine their fire with other Ewoks and Ewok Leaders. *** Receives automatic "range modifier" (-1 die) when fired upon.
Hero Boxes (printed on the map)
Each Hero Box: 1st Hit: Wounded; 2nd Hit: Captured; place counter in box. Breach values: Princess Leia 1D; Han Solo 2D; Chewbacca 2D; R2-D2 & C-3PO 4D. The Ewok Leaders Wicket, Logray and Chief Chirpa have boxes with the same hit rules and no Breach value.
8.1 Imperial Movement
When you draw an Imperial Action card that specifies a certain type of Imperial unit move, you must move all units of that type. To help you keep track of which units you have moved, move Imperial units in order of the identification numbers on their counters (i.e., when moving AT-STs, move AT-ST 1 first, number 2 next, and so on, until you have moved all AT-STs).
Imperial units will generally move toward the closest Rebel unit (in terms of hexes). If there are two or more Rebel units the same distance from the Imperial unit, the Imperial unit will move toward the unit with the higher priority. If the units are of the same type, you have the choice of which to move the Imperial unit toward.
- Remember, AT-STs cannot enter Hill hexes; speeder bikes cannot enter Woods.
- The distance to a unit is equal to the number of hexes that the Imperial unit would have to traverse in order to move adjacent to the Rebel unit. Count the path of hexes to a unit through terrain that the Imperial unit can enter.
- If the Imperial unit has moved into a macrohex with a Rebel unit and has additional movement points left, it will attempt to move into a cover hex, if it is able to move into and benefit from such terrain.
- If an Imperial unit cannot enter the same macrohex as a Rebel unit (due to overcrowding or insufficient movement points), it will move to cover in the macrohex closest to the Rebel unit, if it is allowed to move into and benefit from such terrain.
8.2 Firing at Rebel Units
When an Imperial Action Card indicates that Imperial units can fire, each unit of that type will attempt to fire at a Rebel unit. Follow these guidelines when determining at which Rebel unit an Imperial unit will fire:
- Fire at Closest Units: An Imperial unit will fire at a Rebel unit in the same macrohex before attempting to fire at units in adjacent macrohexes, and will fire at the closest Rebel unit (in terms of macrohexes distance) if there are none in the Imperial unit's macrohex. If there is only one unit at this closest range, it will be the subject of the Imperial unit's fire. If there are two or more units at the same distance from the firing Imperial unit, go to the next step.
- Fire at Units in Priority Order: Refer to the current Imperial Tactics List. Of the possible targets, the Imperial unit will fire at the unit that is of highest priority. If there are no units of the highest priority available to be fired at, then the target will be of the next highest priority. If there are two or more units at the same range from the firing unit that are of equal priority, go to step 3.
- Fire at Units Not in Cover: If two units of equal priority are at the same distance from the firing Imperial unit, the Imperial unit will fire at the unit that is not in cover before firing at a unit in cover. If there is only one unit at closest range that is not in cover, it will be the subject of the Imperial unit's fire. If there is more than one unit of equal priority not in cover available to be fired upon, or if all are in cover, you may choose which Rebel unit is targeted by the Imperial unit.
- Impossible Shots and Disregarding Priority: If the unit targeted according to this procedure is an impossible shot, and there is another unit of lower priority or greater distance that the Imperial unit would have a possible shot at, the Imperial unit fires at that unit instead.
8.3 Breach Tactics
If the Bunker Entrance has been "breached" (10.1), the Imperial Bunker Complex can be entered by Rebel units. The Imperials will respond immediately by dramatically changing their tactics. Even if the Bunker has not been breached, the Imperials may revert to "Breach" tactics by drawing the third "Imperials Change Tactics" Event Card (9).
Note that under the last column of the Imperial Priorities List, "Bunker Entrance" is listed as having the highest priority. Using "Breach" tactics, Imperial units will move toward the Bunker Entrance, and fire at units in the Bunker Entrance hex, as if it were a Rebel unit of the highest priority. An Imperial unit in the Bunker Entrance hex will move into the Imperial Bunker Complex if it has sufficient movement points remaining; if not, it will move into the Bunker Complex as soon as its next movement action is drawn.
Using "Breach" tactics, Imperial units will ignore Catapult units totally. Imperial units will not fire at Catapult units nor move toward them. In addition, Imperial units change their normal movement and fire behavior as detailed below.
Breach Tactics: Movement
When Tactic D, "Breach," is indicated, Imperial units near the Bunker Entrance will (in general) attempt to return to the Imperial Bunker Complex. Any Imperial unit in the Rebel, Imperial or Ewok Set-up Areas will move toward the Bunker Entrance hex unless it shares its macrohex with one or more Rebel units. Imperial units move toward the Bunker Entrance in the most direct manner, ignoring the presence of Rebel units (except for stacking at the end of their move, etc.). They will not move into cover if it will take them out of the direct path to the Bunker Entrance.
Imperial units that occupy a macrohex with Rebel units, and any Imperial units in the Deep Woods Set-up Area will follow the normal rules of Imperial movement priority and will move toward the closest Rebel unit with the highest priority. When using "Breach" tactics Imperial units totally ignore Catapult units when determining movement.
- If the Blast Doors have been Breached, security trooper and stormtrooper units that move onto the Bunker Entrance hex immediately move into the Imperial Bunker Complex (if they have movement points remaining) at the cost of two movement points.
- If the Blast Doors have been breached, AT-ST and speeder bike troops will dismount from their vehicles and convert into other units upon reaching the Bunker Entrance. A speeder bike unit converts to one stormtrooper unit; an AT-ST converts to a security troops unit. Replace converted units with destroyed units; if there are not enough destroyed units of a type to replace the Imperial units, then that unit does not convert, and must remain outside the Imperial Bunker Complex in the Bunker Entrance hex. Converted units immediately move into the Bunker Complex at a cost of two movement points. Thereafter, converted units perform as normal units of their type. For example, AT-STs converted to security troops take actions with security troops Action Cards; AT-ST cards no longer have any effect on the converted units.
- If the Blast Door has not been breached yet, AT-ST and speeder bike units will not convert.
Breach Tactics: Fire
Using "Breach" tactics, Imperial units will fire using the Breach tactics priority. Imperial units will fire at Catapults only if there is no other shot available. Imperial units will attempt to fire at any Rebel unit in the Bunker Entrance hex before they fire at other units in cover at a similar range.
9. Using Event Cards
Two Action Cards say "Draw Event Card." When you draw one of these Action Cards, pick up and read the top Event Card, and follow its directions. Place used Event Cards aside; the Event Deck is never reshuffled.
There are four kinds of Events: Reinforcements/Regroupings, Rebel Cruiser Destroyed!, Imperials Change Tactics!, and "special effects."
9.1 Imperial Reinforcements and Rebel Regroupings
When an Imperial Reinforcement or Rebel Regrouping Event is drawn, immediately place the listed units according to the directions on the card.
- Roll a placement die to determine in which Reinforcement Zone the Imperial reinforcements arrive. Note that one Imperial security unit arrives in the Imperial Bunker Complex, as indicated on the Event Card, and no die need be rolled for its placement.
- Rebel regroupings can only be drawn from previously eliminated units. If there are not enough Rebel units lost of the regrouping type, then place as many as are available. Regrouped Rebel units may be placed in the appropriate macrohex or the Imperial Bunker Complex as indicated on the Event Card. If there are not enough empty hexes in an eligible macrohex to place regrouping Rebel units, the regrouping units are lost and are not placed on the board.
Once on the map, reinforcements and regrouped units may move or fire whenever the appropriate Action Card is drawn.
Note: For an extra challenge, experienced players may remove the "Rebel Troopers Regroup!" card from the Event Deck prior to play.
9.2 Rebel Cruiser Destroyed!
These cards indicate that the Death Star or the Imperial Fleet has destroyed another Rebel Cruiser. If the fifth "Rebel Cruiser Destroyed!" appears before the Shield Generator is destroyed, you have lost the game. If you have destroyed the Shield Generator before the fifth "Rebel Cruiser Destroyed!" card is drawn, then you have won the game.
Note: For an extra challenge, play only until the fourth Cruiser is destroyed.
9.3 Imperials Change Tactics!
Move the marker on the Imperial Tactics Display one space to the right. For instance, if the marker was on Tactic B when an "Imperials Change Tactics" Event Card is drawn, move the marker to Tactic C.
9.4 Special Events
These cards detail unusual occurrences in the battle — Ewok traps sprung upon unsuspecting Imperial forces, Chewbacca's attempt to take control of an AT-ST, and a secret code to help the Rebels enter the Imperial Bunker Complex. Each card explains how it is used in the game, but here are a number of additional clarifications:
Ewok Traps!
This event allows an instantaneous 6 fire-dice attack on one Imperial unit. If firing at a stormtrooper or security unit in cover, subtract a die from the attack. There is no range modifier for the attack.
Chewbacca Boards AT-ST!
Keep this card until you use it. During any Action Round where Heroes may fire, Chewbacca may instead attempt to take control of an AT-ST unit. If Chewbacca is in the same macrohex with one or more Ewoks when the "Heroes May Move, Fire or Breach" Action Card is drawn, you may play this card as Chewbacca's action. Roll one fire die, plus one die for every Ewok unit in the macrohex. If the AT-ST is not in the same macrohex with Chewbacca, remember to deduct 1 die for every macrohex distance.
For example, if Chewbacca, four Ewok units, and an AT-ST were all in the same macrohex, you would roll five dice, but if the AT-ST were two macrohexes away, you would roll three fire dice.
- If you roll two Sabers on any of the dice, Chewbacca has successfully captured the AT-ST. Place the AT-ST on Chewbacca's Hero Display. As soon as Chewbacca captures the AT-ST counter, he is treated as an AT-ST for purposes of fire dice (4) and armor strength (2) when firing and being fired upon. He may not enter Hills, or gain benefit from cover. In addition, his Breach ability is increased to 3 dice.
- Chewbacca is still treated as a Hero for purposes of Action Cards. If "AT-STs Move" or "AT-STs Fire" cards are drawn, he cannot take these actions; you must wait for a "Hero" Action Card to perform actions with Chewbacca. As well, he still needs Sabers to hit Imperial units (not Darth Vader helmets).
- Chewbacca cannot enter the Imperial Bunker Complex with the AT-ST; you must discard it instead. You may, at any time, remove the AT-ST unit from his card. It is considered destroyed. Chewbacca will perform his actions normally thereafter, reverting to his regular fire (1) and armor (1) strengths.
- The AT-ST will remain on Chewbacca's display until he is hit, or you wish to discard the AT-ST. If Chewbacca is hit while in possession of the AT-ST, the hit has no effect, but eliminates the AT-ST; remove it from the Hero Display. Subsequent hits would have their normal effect.
Security Code!
When you draw this card, keep it off to one side of the board until you use it. During any Hero's breach attempt to open the Blast Doors, add 2 dice to the Hero's Breach ability. Discard this card to the Event Discard pile after you use it. Note that this card cannot be used to aid breach rolls to destroy the Imperial Bunker Complex, just rolls to open the Blast Doors.
Note: Experienced players should remove the "Security Code!" card from the Event Deck before the game for an extra challenge.
10. Heroes
The most important individuals in the Battle for Endor are the heroes of the Rebellion: Han Solo, Princess Leia, Chewbacca, and R2-D2 and C-3PO. These characters lead the Rebel and Ewok forces in battle to destroy the Imperial Shield Generator facility. Note that the two Droids R2-D2 and C-3PO always stay together, and are thus represented by one counter. Each of these characters has the special ability to Breach. This ability represents the Heroes' skills at breaking through the security system of the Bunker Entrance.
10.1 Breaching the Imperial Base
When the "Heroes May Move, Fire or Breach" Action Card is drawn you may use the Breach ability of a Hero unit to break into and destroy the Imperial Bunker Complex.
To break into the Bunker, the Hero unit must occupy the Bunker Entrance hex. Roll a number of fire dice equal to the Breach ability of the Hero unit, as indicated on the Hero Display. If you roll one or more Saber symbols, move the Breach marker a space to the right on the Blast Doors Track. If you roll no Saber symbols and one or more Vader symbols, move the Breach marker a space to the left on the Blast Doors Track. (There is no effect for rolling Vader symbols if the Breach marker is on "0".)
In any turn when the Breach marker is on the "3" of the Blast Door Track, the Rebels have managed to open the entrance, and subsequently units may move into the Imperial Bunker Complex.
10.2 Destroying the Imperial Bunker
To destroy the Imperial Bunker Complex, a Hero must occupy the complex when the "Heroes May Move, Fire, or Breach" Action Card is drawn, and the complex must be unoccupied by Imperial units. When a Hero attempts to destroy the complex, roll a number of fire dice equal to the Hero's Breach ability. If you roll a Saber on any die, you have destroyed the Imperial Bunker Complex. Note that since any number of units may occupy the Imperial Bunker, you can attempt to roll dice for each Hero in the Bunker that did not perform any other actions during the current action round. For example, if Han and Leia were in the Bunker Box, you could roll two dice for Han and another die for Leia. If a Saber symbol resulted on any of the dice, you have destroyed the Bunker.
11. Winning the Game
If you manage to destroy the Imperial Bunker Complex before the fifth "Rebel Cruiser Destroyed!" Event Card is drawn from the Event Deck, you have won the game. If five "Rebel Cruiser Destroyed!" cards are drawn before you have destroyed the Bunker, you have lost.
Card Notes (printed on the card sheets)
Action Cards (21 in the deck as printed; each shows its action and restrictions):
- Rebel: Catapults Fire (Fire Strength 3) x2; Heroes Move, Fire or Breach (5 MPs; Fire Strength 1; may combine fire; may roll breach dice); Heroes Move (5 MPs); Heroes Fire (Fire Strength 1; may combine fire); Rebel Troopers Move (5 MPs); Rebel Troopers Fire (Fire Strength 3); Ewoks and Ewok Leaders Move (5 MPs); Ewoks and Ewok Leaders Attack (Fire Strength 1; Leaders may combine attacks).
- Imperial: Security Troops Fire (Fire Strength 2); Security Troops Move (5 MPs); Speeder Bikes Move x3 (5 MPs; may not move into woods); Speeder Bikes Fire (Fire Strength 4); AT-STs Move x2 (5 MPs; may not move into hills); AT-STs Fire (Fire Strength 4); Stormtroopers Fire (Fire Strength 3); Stormtroopers Move (5 MPs).
- Event Action: Draw Event x2.
Event Cards:
- Rebel Troopers Regroup! — Return two destroyed Rebel Troopers to any macrohex with hero units.
- Cruiser Destroyed! (x5) — If this is the fifth cruiser to be destroyed the Rebels have lost the Battle!
- Chewbacca Boards AT-ST! — Instead of firing, Chewbacca may try to capture an AT-ST. Roll 1 fire die, plus 1 fire die for every Ewok or Ewok leader in the macrohex. Keep until played; discard after use.
- Security Code! — Add 2 dice to your next breach attempt. Discard after use.
- Imperial Reinforcements! (roll placement die: 1-2: Zone 1; 3-4: Zone 2; 5-6: Zone 3) — 4 Stormtroopers; 2 Speeder Bikes; 2 AT-STs. A further Imperial Reinforcements! card: in the Bunker Box, 1 Security Trooper.
- Ewoks Spring Trap! — Immediately roll 6 dice to attack any Imperial unit.
- Ewoks Regroup! — Return four scattered Ewoks to macrohexes with Ewok leaders.
- Ewok Leader Escapes! — Return one captured Ewok leader to any macrohex with an Ewok counter.
- Imperials Change Tactics! (x3) — Advance tactics marker to next box.