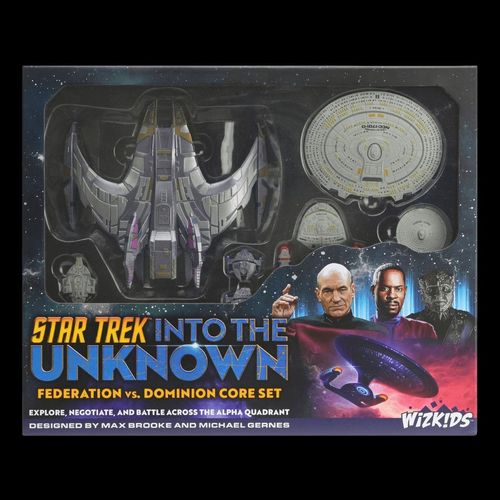
Star Trek: Into The Unknown – Federation vs. Dominion Core Set
Star Trek: Into The Unknown – Federation vs. Dominion Core Set Rulebook
Table of Contents
Table of Contents
- The First Duty
- Missions and Game Modes
- Task Force Creation
- Sway
- Game Setup
- Officers
- Objects
- Ship Movement
- Projectile Units
- Team Units
- Auxiliary Units
- Inspire
- Transporting Personnel
- Directives
- Hazard Units
- Hail Phase
- Lost and Captured Officers
- Coerce
- Conditions
- Repair
- Advanced Concepts
- Sector Setups
- Definitions and Keywords
The First Duty
There are several foundational concepts you need to know to play Star Trek: Into the Unknown. They're covered in this section.
Conduct Befitting an Officer
First and foremost, Star Trek: Into the Unknown should be played with a gracious and open-minded attitude toward your opponent and yourself. Even when playing competitively, players should bear in mind that the game is a shared narrative experience, and it should be fun, enriching, and inclusive for all players. A few key ideas include:
Respect for One's Opponents
Remember that your opponent is also a person who is trying to have fun with the game. Each of you has a partial responsibility for the other's experience. Try to have empathy and understanding. Before you even begin playing, consider asking your opponent what they're looking for in this game, and communicate what you want out of the experience.
Respect for Oneself
Keep in mind Picard's words of wisdom: "It is possible to commit no mistakes, and still lose. That is not a weakness. That is life." When things don't turn out in your favor, strive to learn from the experience rather than dwelling on frustrations aimed at anyone, including yourself.
Find the Fun in Uncertainty of Outcomes
This is a game of storytelling between all players. Just like in an episode of Star Trek, the dramatic twists and turns can be part of the fun—if you let them. Even when things don't fall in your favor, the story you've woven with your opponent can be something special you share for years to come.
Resolve Conflicts Respectfully
In an expanding game, sometimes there can be conflicts between rules. To resolve these, first refer to the rules in the order described below. If this does not provide a clear answer, then discuss with your opponent. If you still cannot find a resolution, then roll a die or flip a coin to determine which player's interpretation to use.
Fundamental Concepts
To understand the rules of the game, there are several fundamental concepts that players need to grasp.
Specific Supersedes General
When two effects conflict, rules from a game component or other element at the table generally supersede the rules in a rulebook. The overall hierarchy of precedence is as follows, from highest to lowest:
- Official rules clarifications documents
- Game components (ship displays, cards, etc) and mission rules
- Campaign Guide
- Rulebooks
Example: The first mission in the Campaign Guide has an overture mission action that removes a solid objective token on a successful test and says "If the control marker is not your color, this is a hostile act..." While this mission's overture is in effect, that test outcome is treated as a hostile act even though it is not listed in the rulebook.
Cannot Supersedes Can
When two effects at the same level of specificity conflict (e.g. two components), effects that restrict take precedence over effects that expand rules capacity. In other words, within the same level of specificity, "cannot" supersedes "can," "may," and other words that grant exceptional capabilities.
Example: The complication card Infection says "Peril (peril token) cannot be spent" and the damage card Exploding Panels says "An opponent may spend 1 of this ship's peril to move this card to another bridge station…" While the Infection complication card is in effect, an opponent cannot exercise the option expressed in the quoted text from Exploding Panels.
Missions and Game Modes
As described in the introductory rules section, Star Trek: Into the Unknown is structured around its missions and the game's various modes also revolve around them.
Mission Types
There are two types of missions, each described below.
Story Missions
Story missions are bespoke experiences, designed from the ground up as a complete experience. Each story mission has a preset overture and situation and two or more complications specific to its narrative. The introductory mission in this book is a story mission. Each product typically has associated story missions. Alongside the core set, there is a Campaign Guide that includes rules for campaign play and several story missions (see the Campaign Guide page 32).
Reading the Mission
When playing a story mission, read the overture and situation, and resolve any instructions in the order they are listed. If a player has a complication listed for their faction, they may read that complication before setup (but cannot read any other players' complications), and should not reveal anything about that complication to other players.
Incident Missions
Incident missions are used when players want to create new, emergent narratives. Each incident mission is created by using mission cards. See page 94 for more on mission cards.
Game Modes
Star Trek: Into the Unknown is played in modes. Each mode uses the mission types differently, as described below.
Campaign Mode
This is the standard mode and is recommended for players to experience the full depth of the game. A campaign unfolds like a beloved Star Trek season as players play a series of connected missions, creating their task forces from only the officers and units available on each player's roster (see Task Force Creation, page 46).
After each mission, the players determine its impact on the overall campaign and update their rosters. Core officers can become incapacitated, new officers can be added to the roster, and players can gain rewards to help their task force in future missions.
Campaigns can include both story missions and incident missions, but it is the story missions and their specific order that shape the campaign's narrative structure. Incident missions can be used in campaigns to transition between the story missions of different products or as opportunities for surprising developments to occur.
Campaign rules are described in depth in this core set's accompanying Campaign Guide.
Match Mode
Players can also enjoy the game as a standalone experience that can be concluded in a single, win-or-lose match. In a match game, players build their task forces from the officers and units available in their collection, following only the restrictions of their mission.
Match mode is best played as an incident mission.
Elements of a Mission
Missions are made up of the parts described in the introductory section and below. These elements exist in both story missions and incident missions.
- Overture: This dictates the rules and scoring for the first portion of the game.
- Situation: This is a set of entangling factors that affect the entire game.
- Complication: This is a mid-game twist that affects the game's outcome, changing rules and scoring conditions.
Mission Actions
Most missions include mission actions as part of their overture, complication, or situation. Mission actions can be taken by units that meet their requirements. A mission action that does not specify unit types can be taken by any type of player unit and is treated as part of that unit's display or card.
Example mission action: "THREAT ANALYSIS (station icon: instruments): Ship only. Must be at Sensors range of a solid objective token with a control marker."
- For example, if a station icon is shown on a mission action, that action must be taken at that station by units with stations, such as ships or auxiliary units (see page 70). That action is unavailable if that station is offline.
- If a mission action has multiple station icons, it can be taken at either station shown and is unavailable at a station that is offline.
- Units that do not have stations can take a mission action if they meet its requirements. Such units include projectiles and teams (see page 62).
Mission Equipment
Equipment cards can be attached to ships to add special abilities, and are described in full on page 91.
Complication Setup
After the complication begins, some features change, including objective tokens.
The complication brings its own objectives. Before placing any of the complication's objectives, follow these steps in this order (unless the mission describes otherwise):
- Remove all ping objective tokens from the sector.
- Remove all control markers from each solid objective token in play.
- If a solid objective token with personnel is removed due to the complication's setup instructions, each personnel must be attached to the closest friendly space unit with capacity. If there is no space unit to attach that personnel to, that team is destroyed or that officer is lost.
Then, place any objectives as described in the complication.
Mission Effects
Missions sometimes have effects which must be resolved in a particular order, or by a particular player. A mission effect that is part of the overture is no longer available after the complication begins.
Player Order
When an effect refers to player order, player order is determined as follows:
- The first player in player order is the priority player, who is the one with the priority token.
- In a two-player game, the opponent is the next player in player order.
If an effect says "players alternate" undertaking an activity, begin with the priority player and continue in player order, repeating as many times as needed.
Leading Player
Some missions and hazard units refer to the leading player. The leading player is the player with the most victory points, which is equal to their scored victory points (positive VP) minus their scored negative victory points (negative VP). If the players are tied, the one who is highest in player order is the leading player.
Trailing Player
Some missions and hazard units refer to the trailing player. The trailing player is the player with the lowest score, which is equal to their scored positive VP minus their scored negative VP. If the players are tied, the one who is lowest in player order is the trailing player.
End of Game
Each mission's complication lists one or more end of game triggers. After one of these events occurs, the game ends at the end of that round as described in the mission.
When the game ends, the players follow any end of game scoring instructions. Then, each player counts their scored victory points and subtracts their scored negative victory points to determine their final score. Players compare their scores to determine the winner, following any other mission instructions.
Example end of game (from the introductory mission): The game ends at the end of the round when any of the following happen:
- Each solid objective token has a control marker or has been removed from the sector.
- Either player's ship has been disabled or destroyed.
- The end of round 6.
Each player totals their victory points and subtracts their negative victory points. The player with the highest total wins. A tie goes to the Federation player.
Winning and Losing
After the game ends, the player with the greatest score wins and each opponent loses. If players' scores are tied, the tied player whose complication was triggered is the winner.
In some missions, it is possible for each player to lose. This is called a mutual loss.
Banked Victory Points
Some game effects can temporarily store victory points (positive VP) or negative victory points (negative VP) by banking them onto officers, units, or other game components rather than scoring them. When a victory point is banked, place its token next to the officer, unit card or display, or other game component onto which it was banked. The individual effect that banked the victory points indicates the conditions under which they can be scored, typically at the end of the game.
Note that victory points that have been banked on a player's officer or unit do not count as having been scored by that player. Thus, they are not counted in the determination of the leading/trailing player.
Task Force Creation
Before starting a game in either mode, players build their task forces. A task force consists of several elements, including core officers, a transfer pool, a unit pool, and an equipment pool. For campaign play, these elements must be drawn from a player's roster (see Campaign Guide page 5), while for match play, these are drawn from a player's collection. To create a task force follow these steps:
1. Determine Task Force Eligibility & Core Points
Depending on the mode and specifics of the game a player intends to play, there may be certain restrictions on their task force. These include:
- In Campaign Mode, a task force must be drawn from a player's roster.
- In both Campaign and Match Mode, the number of core points allocated to the task force can vary. Determine the core points budget for your task force by checking the mission you intend to play (for Campaign Mode, see page 43) or conferring with your opponent or the tournament organizer (for Match Play, see page 43).
2. Choose Faction
The players each choose a faction to play.
A player's chosen faction also determines the line officer they use (see Line Officers, page 56).
Campaign Mode
In Campaign Mode, each faction has a specified player throughout the campaign. Thus, a player must choose a faction that they control in that campaign.
- Each story mission that is part of a campaign specifies which factions participate.
- For incident missions played during a campaign, the campaign structure dictates which factions can participate (see Mission Planning in the Campaign Guide, page 3).
Match Mode
In Match Mode, a player can select any faction for which their collection includes the appropriate officers and ships.
In Match Mode, both players can select the same faction, if desired.
3. Choose Directives
Each player must select 1 of their faction's directive cards for each of the 3 directive categories: diplomacy, exploration, and combat. See Directives on page 80 for more details.
4. Choose Core Officers
Each player has a number of core points to spend on officer cards (see Officers, page 56).
The number of core points is based on the chosen game mode and size of game (see Game Modes, page 43).
Officer Selection
Each player must select 5 core officers. Each officer chosen must be aligned with that player's faction.
- Some officers align with multiple factions. If an officer has multiple factions' alignments, the player's faction must be included among them for the officer to be selected.
For the task force to be valid, each core officer must occupy one of the following roles. To fill a role, an officer must have the matching role icon. Each role can be filled by only one officer.
- Command Liaison (command role icon)
- Chief of Operations (operations role icon)
- Head of Science (science role icon)
- Specialist 1 (no required icons)
- Specialist 2 (no required icons)
Points not spent during this step become flex points during step 5 of Game Setup (see page 51).
Campaign Mode
In Campaign Mode, officers who are unavailable cannot be selected (see Available Officers in Campaign Guide, page 6).
5. Create Transfer Pool
Each player creates a transfer pool. This is a set of officers who might become available as transfer officers for games played with the task force. If each game is an episode, think of them as special guest stars or recurring secondary characters.
Campaign Mode
In Campaign Mode, you have a transfer pool only if specified by the mission.
Match Mode
In Match Mode, your transfer pool consists of any 6 officers from your collection.
Note that you can choose an officer who is NOT part of your faction this way so long as you have at least 1 sway with one or more of their factions (see Sway, below). You must still use sway to choose these officers as Transfer Officers (see Step 5: Spend Flex Points, page 53).
6. Determine Unit Pool
Each player determines which units could be available to them during the game.
Campaign Mode
In Campaign Mode, your unit pool consists of all units on your roster.
Match Mode
In Match Mode, your unit pool consists of all units in your collection from your faction, plus any units from other factions you could access with sway (see the following page).
7. Determine Equipment Pool
Each player determines which equipment cards could be available to them during the game.
Campaign Mode
In Campaign Mode, your equipment pool consists of all equipment in your roster.
Match Mode
In Match Mode, your equipment pool consists of all equipment your faction could take, plus any equipment that could be used by ships you could access with sway (see the following page).
Sway
Some officers have connections to other factions they can call on for support when creating a task force of a different faction. Sway is represented by faction icons found in the sway area of an officer card's committed side. Many officers do not have sway with another faction.
Using Sway
Sway is currently used only in match mode (see Additional Rules, page 43). If future campaign arcs refer to sway, they will describe how it is used.
Sway is used during both Task Force Creation and Game Setup (see Additional Rules, pages 46-53). These rules for sway supersede any conflicts with the rules in those sections.
Task Force Creation (Sway)
During Task Force Creation, each player determines their sway. This can open up additional choices for each player's transfer officer, unit, and equipment pools. Note that players must wait until Game Setup to use their sway to actually add specific items to their fleets from their pools (see below).
Determining Sway (Step 4: Choose Core Officers)
After Step 4: Choose Core Officers, each player determines their task force's sway with each other faction. To determine a task force's sway with a given faction, a player adds up the total number of sway icons for that faction on their core officers. That is their task force's sway with that faction. A task force can have sway with multiple factions, but it cannot have sway with its own faction (even if it has sway icons for it).
Using Sway with Transfer, Unit, and Equipment Pools (Steps 5-7)
After determining sway, each player follows the existing rules for sway in each of these steps as summarized below.
Step 5: Create Transfer Pool—You can choose an officer who is NOT aligned with your faction if you have at least 1 sway with one of that officer's factions.
Step 6: Determine Unit Pool—Your unit pool also includes any ship units from other factions for which you have at least 2 sway.
Step 7: Determine Equipment Pool—Your pool also includes any equipment aligned with other factions for which you have at least 2 sway. Note that during Game Setup, equipment aligned only with other factions cannot be equipped to ships that don't match that faction.
Game Setup (Sway)
During Game Setup, Sway can be used in several ways as described in Table @: Sway Table. Sway is not spent, but instead corresponds to a set of one or more options available for that sway value, and the player must either select from the options at that sway value or decline to use their sway. Note that the options available for a total sway amount can affect different steps of Game Setup. Additionally:
- If a task force has sway with multiple other factions, it can resolve one set of options from this table for each faction with which it has sway.
- Sway is not used to select any transfer officer who is aligned with the task force's chosen faction (even if the officer has multiple factions).
- To select a transfer officer in their pool from another faction using sway, a player must still spend flex points as normal.
- When a transfer officer from another faction is selected using sway, they do not become the commodore even if their rank is higher than the highest ranking in-faction officer. The highest ranking in-faction officer still becomes the commodore.
- Selecting a transfer officer who has sway with one or more factions does not increase the task force's sway with those factions (as sway is determined during Task Force Creation, prior to Game Setup).
- To select a ship using sway, it must be a ship of a category allowed to the player by the mission.
- To select a ship using sway, a player forgoes selecting a ship from their task force's faction of the relevant category. Sway does not give the player an "extra" ship.
- To select a ship using sway, a player must still resolve flex cost as normal for that ship.
- When spending flex points to add equipment to a ship, a player can select only equipment for that ship that matches that ship's faction.
Sway Table
| Total Sway with Faction | Options |
|---|---|
| 0 | None. |
| 1 | Select up to 1 transfer officer from this faction during Step 5: Spend Flex Points (this officer must be in your transfer pool). |
| 2 | Select up to 1 scout, support, or specialist ship from this faction during Step 3: Select Units. OR Select up to 1 transfer officer from this faction during Step 5: Spend Flex Points (this officer must be in your transfer pool). |
| 3 | Select up to 1 capital ship from this faction during Step 3: Select Units. OR Select up to 1 scout, support, or specialist ship from this faction during Step 3: Select Units. AND Select up to 2 transfer officers from this faction during Step 5: Spend Flex Points (these officers must be in your transfer pool). |
| 4 | Select up to 1 ship unit from this faction during Step 3: Select Units. AND Select up to 2 transfer officers from this faction during Step 5: Spend Flex Points (these officers must be in your transfer pool). |
| 5+ | Select up to 2 ship units from this faction during Step 3: Select Units. AND Select up to 2 transfer officers from this faction during Step 5: Spend Flex Points (these officers must be in your transfer pool). |
Task Force Creation Example (Campaign Mission 2: Allies of Inconvenience)
The Federation and Dominion players are ready to play the second mission of the Campaign Guide, on page 18. The players start with the mission's "Task Forces" section, which requires them to create their own task forces, including choosing their own officers (unlike the first mission, which assigned specific officers).
- The players first determine eligibility and core points. The mission says that the officers on a player's roster are eligible, and each player has 40 core points to spend.
- Because this is a campaign, the players have already chosen their factions. The mission is written for Federation and Dominion, so the players must play as those factions.
- This mission instructs the players to use all of their directives for the first time, introducing diplomacy and exploration. Each player has only 1 directive card available from each category, so they must use those cards.
- The players proceed to choose their core officers and must choose 1 officer available on their roster to fill each required role.
- Note: To better show how core officers are chosen, the player rosters after mission 1 in this example reflect different choices than those in the Mission Results Example on pages 8-11 of the Campaign Guide.
- Federation roster officers: Benjamin Sisko, Worf, Scholarly Doctor, Redoubtable Engineer, Daring First Officer, Vigilant Security Chief (incapacitated).
- The Federation player added two famed officers from strategic acquisitions after mission 1. So, they choose Benjamin Sisko (11) for the command liaison and Worf (11) for the chief of operations. They then choose the Scholarly Doctor (6) for head of science and the Redoubtable Engineer (6) for specialist 1. The Vigilant Security Chief is still incapacitated after mission 1, so they instead choose the Daring First Officer (6) for specialist 2. These officers total 40 core points, so the Federation player has spent all of their points. If they had any points remaining, they would become flex points during setup.
- The Dominion player added one famed officer after mission 1. They choose the Founder (9) for the command liaison, Omet'iklan (11) for the chief of operations, and the Karemma Researcher (7) for head of science. They then choose the Vorta Diplomat (6) for specialist 1 and the Jem'Hadar Second (7) for specialist 2. These officers also total 40 core points, so the Dominion player has spent all of their points.
- Transfer officers are only available in specific campaign missions. This mission instructs the players to ignore the transfer pool, so they skip this step.
- The mission also instructs the players to ignore their unit pool, so they skip this step as well. If this were a later mission, each player's pool would consist of the units on their roster. Instead, this mission's "Overture - Select Fleets" section assigns specific units to each player.
Mission excerpt used by the example (Campaign Mission 2, "Task Forces"): Follow the task force creation rules with the restrictions below. Eligibility and Core Points: Officers from your roster are eligible. You have 40 core points. Factions: Federation and Dominion. Directives: Use your combat, diplomacy, and exploration directive cards. Core Officers: Choose from your available officers. Transfer Pool, Unit Pool, and Equipment Pool: Ignore these for this mission.
Mission excerpt used by the example (Campaign Mission 2, "Overture"): Follow the complete game setup rules in the Additional Rules, pages 50-53, with the exceptions below.
- Select Fleets: Use your faction's units listed below. If a ship's status is disabled or destroyed, increase its dial until it no longer has that status. Subtract the strategy points (SP) that would be required to repair or heal that ship (to a minimum of '0') and update your roster.
- Federation: Defiant-class Escort, Constellation-class Starship
- Dominion: Jem'Hadar Fighter, Jem'Hadar Fighter, Diplomatic Team (alpha, placed at the leftmost objective token in system 2). Note that this team does not reduce either of your ships' crew dials and officers cannot be assigned to it during setup (see Teams at right).
- Spend Flex Points: Ignore this step.
- Determine Priority: The Federation player has priority.
- Place Influence: See the track on the following page.
- Sector Setup: Set up two systems as shown in the diagram.
- Directives Setup: Each player sets their combat, diplomacy, and exploration directive cards to their CALM sides.
- Objective Setup: The players place 6 solid objective tokens as shown in the diagram, 3 in system 1 and 3 in system 2. Each token represents an archeological site (Capacity 3). Any of the sites might reveal the location of the gateway, but there is no way to be sure without sending down a team to investigate.
Game Setup
The players take the following steps to set up the game:
1. Choose Game Mode
The players choose one of the following game modes:
Campaign Mode
The players choose this mode if they are beginning or continuing a campaign.
Match Mode
The players choose this mode when playing stand-alone games or at an event.
2. Select Mission
The players select the story mission (or incident cards) to be played as described below.
Campaign Mode
The players choose a story mission from a campaign booklet or create an incident mission as allowed within the campaign structure.
- The mission chosen must be one their faction can play.
- Story missions released in a product are numbered to form a linked campaign. Story missions from other products within the same cycle can be combined to form a longer campaign.
- Each mission in a campaign is played in order, then that game's achievements are logged so that they affect future games.
Match Mode
The players create an incident mission using mission cards (see Campaign Guide, page 32-35) or use a story mission provided by the event or tournament organizer.
3. Select Fleets
Each player builds their fleet by choosing ships and other units of the categories or types available for the mission.
- Each mission's overture defines the categories of ships and types of other units that can be selected.
- Some story missions list specific units that players must include in their fleets.
- If a unit is optional and has a core point cost, the player must spend remaining core points equal to that unit's cost or they cannot select that unit.
- If a unit is optional and has a core points bonus, the player gains that many additional core points, which become flex points in step 5 if unspent (see page 53).
(Illustrations: a Defiant-class Escort scout ship card shows a core point cost of 3; a Constellation-class Starship support ship card shows a core point bonus of +3.)
4. Assign Officers
Each player assigns their core officers to stations aboard their ships. A player's command liaison must be assigned to the captain's chair station of a ship.
Players assign one copy of their faction's line officer to a station on each ship in their task force (see Line Officers, 56).
At least one officer must be assigned to the Bridge section of each ship.
5. Spend Flex Points
Depending on the mode and scenario, each player can have a number of flex points to spend on additional cards (see Officers, page 56). Each player's flex points are equal to that player's unspent core points plus any flex points specified by the scenario. Players spend flex points in the following order:
Mission excerpt used here: Spend Flex Points: Each player may spend their leftover core points plus any additional flex points from campaign rewards on transfer officers or equipment (see sidebar). Note that this mission's situation includes mission equipment (see below).
5.1 Select Transfer Officers
- In campaign mode, if transfer officers are available they are specified by the mission. In match mode, each player shuffles their transfer pool, then draws two officer cards from it that are available for this game.
- Each player may select up to two of these officers by spending flex points. Each transfer officer costs a number of flex points equal to the total of all of their skill category levels.
Transfer Officers Example: For example, an officer with 1 social, 1 security, and 3 technical would cost 5 flex points.
- For each transfer officer selected this way, the player selects one of their line officers and replaces it with that transfer officer.
5.2 Select Equipment
Each player selects a number of equipment cards from their equipment pool by spending flex points equal to each equipment card's cost.
- Title cards selected must each match the ship class of 1 unit in that player's fleet.
- Equipment cards selected must each be compatible with a unit in that player's fleet.
- a. Each ship can have a maximum of 1 of each subtype of equipment.
- b. Each ship can have a maximum of 1 refit equipment.
- c. Attach the equipment to that unit by placing it at the section matching the card's icon.
5.4 Select Auxiliary Units
If the mission specifies, each player selects a number of available auxiliary units up to their limit (see Auxiliary Units, page 70).
- Units selected must be aligned with that player's fleet.
- If a unit is optional and has a flex point cost, the player must spend flex points equal to that unit's cost. Some story missions assign auxiliary units at no cost.
- If an auxiliary unit is assigned to a fleet by the mission, that player may replace it with another auxiliary unit of the same type by spending the FP cost the upgraded auxiliary unit. For example, a Type-6 Shuttlecraft assigned by the mission can be replaced with a Danube-class Runabout.
Additionally
- Some story missions skip this step.
- Transfer officers selected must be aligned with the player's faction or the player's core officers must meet the sway threshold to recruit one or more officers this way (see Sway, page 48).
- Title and equipment cards selected must be aligned with that player's faction or have no faction alignment.
- Mission equipment can be provided at no cost by the mission.
(Note: the source numbers the Spend Flex Points sub-steps 5.1, 5.2, and 5.4; there is no step 5.3 printed in the document.)
6. Fleet Inspection
Each player must set their fleets in order by doing the following:
6.1 Commodore and Flagship Selection
Each player must choose an officer as their commodore.
- The commodore must have the command role icon and must be the highest-ranking eligible officer. Place the commodore token next to the commodore's card.
- If two or more officers with the command role icon are tied for rank, the player chooses which one is the commodore.
- If the commodore is not on the bridge of their ship, their player must move the commodore's card to the bridge. Then, if the commodore is not in the captain's chair, move them to that station and relocate any other officer there to another station of the player's choice on that ship.
- The ship which the commodore is on is the flagship.
6.2 Other Ships
For other ships, each player must place the highest-ranking officer on the ship in the captain's chair and relocate any other officer there to another station of their choice.
7. Determine Priority
The players determine priority and give the priority token to the first round's priority player.
Story Mission
The mission specifies which player receives the priority token.
Incident Mission
The players each roll 3 intuition dice, then the player with the most success results receives the priority token.
- If two or more players' rolls are tied, they reroll until one player has a higher roll.
8. Place Influence Marker
The players place the influence marker on the influence track.
Story Mission
The influence marker begins at a preset position on the influence track.
Incident Mission
The last player in player order places the influence marker on one of the outer positions of their complication card.
9. Set Up the Sector
The players set up the play area, which is referred to as the sector and has a standard size of 3' x 3'. Then, players follow the instructions for the chosen game mode.
Story Mission
Players follow any instructions in the story mission. Many include a setup diagram.
Incident Mission
Players use the overture and situation cards to set up the mission.
Start by following the overture card's instructions in the following order:
9.1 Sector Setup
Players place the systems as indicated on the overture card (see the list of Sector Setups, page 96).
9.2 Directive Setup
The players turn each of their directive cards to match the color shown on the overture.
- If a directive category has divided colors, the priority player turns their directive to match that color. Then, each opponent turns their directive to match the other color.
9.3 Objective Setup
Starting with the priority player, players take turns setting up objectives as described in the mission until all objectives are placed.
9.4 Situation Setup
Next, follow the situation card's instructions in the following order:
- Anomaly and Feature Setup: Starting with the priority player, players take turns to place each anomaly or feature in the listed order.
- Neutral Unit Setup: Starting with the priority player, players take turns placing neutral units as described on the situation card.
10. Deploy Fleets
Starting with the priority player, players take turns deploying their units until both players' fleets are deployed. Units must be deployed by type in the order below, following any additional instructions in the story scenario or overture card.
10.1 Starships
Each player takes their turn to deploy 1 starship at a time until both players' ships are all deployed.
Ships must be deployed following the rules below and any additional restrictions of the mission:
- Ships must be deployed completely within a player's setup area or according to the mission's diagram. Ships can be deployed either in a system or deep space (see Systems, page 14 in the Learn to Play Book).
- If a ship is partially deployed in a system it must declare whether it is in that system and gain that system's marker if it is.
- Ships are not required to be deployed in the same system unless the mission requires it.
When a ship is deployed, the player must assign it an ID number token matching their color and set its dials as indicated below:
- Alert Dial: choose any green All Clear status.
- Hull Dial: maximum value (marked with a star).
- Crew Dial: start position (marked with a star).
- Reserve Dial: maximum value (marked with a star).
Note that in campaign mode, a ship's hull and crew dials must be set to their roster values (see Setup in the Campaign Guide, page 3).
10.2 Other Units
If players have auxiliary, projectile, or team units to deploy, each player takes their turn to deploy 1 unit at a time until both players' units are all deployed.
- Auxiliary and projectile units must be deployed completely within a player's setup area or according to the mission's diagram.
- Auxiliary units can be deployed only if individually purchased with flex points or specified by the mission.
- Projectile and team units can be deployed only if specified by the mission.
- Units must be deployed following the rules below and any additional restrictions of the mission:
- a. Auxiliary and projectile units can be deployed either in a system or deep space (see Systems, page 14 in the Learn to Play Book).
- b. Team units can be deployed attached to a friendly ship or auxiliary unit.
- c. If a unit is partially deployed in a system it must declare whether it is in that system and gain that system's marker if it is.
- d. Units are not required to be deployed in the same system unless the mission requires it.
Officers
Line Officers
Each faction has a line officer card with multiple copies, denoted with a * in its points cost box. Line officers cannot be added to one's core officers, and are instead assigned automatically to ships during Setup (See Game Setup—Assign Officers, page 52).
Commodore
The commodore is the officer leading a fleet. Each player chooses their commodore during the Fleet Inspection step of setup and marks that officer with their commodore token.
A commodore can be committed to give a special priority order to units in the fleet, following the rules below.
- While a commodore is at their flagship's captain's chair station, they can be committed to give a priority order to a friendly ship, auxiliary, or team unit at Comms range of their ship (but not to a projectile unit).
- When giving this order, if there is no committed officer at the required station, the commodore is treated as if they are at that station and can lead a test or attack made as part of the action taken.
- A commodore keeps their token for the remainder of the game, even if they become incapacitated or otherwise go out of action.
Objects
All units and tokens that sit on the play area surface and represent an interactable component in the sector are objects. Objects do not include reference markers, such as system centers or boundaries, endurance markers, banked victory points or negative victory points, or status markers for conditions and sensor locks.
Features
Features are non-unit objects placed in the sector. They include anomaly tokens, phenomena tokens, and objective tokens (of both types). Anomalies, solid objective tokens, and ping objective tokens are each introduced in the learning mission.
Phenomena are described below.
Expose an Anomaly
As described in the learning mission, an anomaly token is exposed and its number side is revealed when a space unit (such as a ship, auxiliary unit, or projectile) crosses it during a warp maneuver or begins the Hazard Phase at 2" of it. When a unit exposes an anomaly, it resolves the following steps in order:
- Flip Anomaly Token: Flip the anomaly to its numbered side.
- Resolve Expose Effects: If any effects occur after the anomaly is exposed, these are resolved immediately. Note that these effects can affect the unit that exposed the anomaly or affect units in a proximity.
- Replace or Remove Anomaly: If the anomaly is replaced with a phenomena or any other object, replace it with the appropriate object. Otherwise, remove the anomaly if instructed.
Phenomena
In many missions, an exposed anomaly is replaced by a specific phenomena token listed for that number in the table. These tokens are shown below and can have keyword types or effects as described by the mission, but otherwise have no inherent rules. The phenomena tokens are: comet, cloud, stellar, rift, wormhole, and wreck.
Feature Keywords
Features typically have keywords assigned by the mission. A full list of these keywords is found in the Keywords section, beginning on page 99.
Ship Movement
As described in the introductory mission, ships move by taking actions to perform maneuvers.
Basic Maneuvers
The basic maneuvers below were introduced in the learning mission.
Engage Warp
This allows a ship to use its warp drive stat to move rapidly forward and enter or leave systems, but with no turning ability (see the Learn to Play Book page 18).
(Illustration caption: A warp of 15", performed in two segments with a 12" ruler.)
Engage Impulse
This allows a ship to move as well as turn using the following modes (see the Learn to Play Book page 20).
Forward Impulse
The ship can move forward up to its engine power stat and turn up to its impulse turn value.
(Illustration caption: The Jem'Hadar Fighter turns one notch to the left and moves 5", which is under its current impulse turn value of 2, and under its engine power of 7.)
Come About
The ship can be rotated any amount at its current position as long as this does not cause its base to collide with other ships or be placed outside the sector.
Advanced Maneuvers
Two additional engage impulse maneuver modes are also available and are described in full below.
Lateral Impulse
A lateral impulse maneuver allows the ship to move sideways. It is resolved by following the forward impulse procedure described in the Learn to Play (see pages 20) with the following exceptions:
- The unit is moved in the direction of port (left) or starboard (right) side (instead of its fore end). The turning tool is fitted into the slot at the fore or aft end of the ship.
- a. If moving left, the stem of the tool is turned to the right.
- b. If moving right, the stem of the tool is turned to the left.
- c. The tracking marker is placed in the slot on the opposite side of the base from the direction of movement.
- While resolving the maneuver, the unit treats its engine power stat as half the value shown on its alert dial (rounded up), and treats its impulse turn value as half the value shown on its alert dial (rounded up).
A comprehensive step-by-step explanation is provided in the Living Rules Document.
Lateral Impulse Example (Beyond the Halls of the Prophets: Example Dominion turn)
The Dominion player wants to get a better position with their Jem'Hadar Fighter to threaten the Defiant-class Escort, which is in the same system. To do so, the Dominion player engages a lateral impulse maneuver.
- The Dominion player sets the turning tool in the fore slot on their Jem'Hadar Fighter. Because the ship is at an alert status of yellow 1, it has engine power of 7 and impulse turn of 2, which it halves (rounding up) to engine power 4 and impulse turn 1 for this lateral impulse. The Dominion player decides to move the ship 4" to its port side.
- The Dominion player wants to optimize their angle of attack, so they choose not to adjust heading at step 2 of the impulse movement procedure. This puts the Jem'Hadar Fighter in a good position to attack either the fore or aft end of the Defiant-class.
Reverse Impulse
A reverse impulse maneuver allows the ship to move backwards. This is resolved by following the forward impulse procedure described in the Learn to Play Guide (see pages 20) with the following exceptions:
- The unit is moved in the direction of its aft end (instead of its fore end).
- a. The turning tool is turned toward the fore end instead of the aft end.
- b. The tracking marker is placed at the fore slot.
- While resolving the maneuver, the unit treats its engine power stat as half the value shown on its alert dial (rounded up), and treats its impulse turn value as half the value shown on its alert dial (rounded up).
A comprehensive step-by-step explanation is provided in the Living Rules Document.
Reverse Impulse Example (Beyond the Halls of the Prophets: Example Federation turn)
With the Jem'Hadar Fighter sliding into position to strike at the Defiant-class, the Federation player decides to limit their foe's options by performing a reverse impulse maneuver.
- The Defiant-class is at green 2, giving it engine power 8 and impulse turn 3. For a reverse maneuver, these are treated as half, rounded up (engine power 4 and impulse turn 2).
- To stay near the objective they want to interact with, the Federation player sets the turning tool on the port (left) side of the Defiant-class and rotates it to its 2 notch. Then they reverse the ship 4". This causes it to present its better-shielded front to the Jem'Hadar Fighter.
Ram
Some abilities allow a unit to ram an opposing unit by following this procedure. This is a hostile act.
- Declare Target: Choose an opposing unit to ram. If the target is a ship, choose which end of the ship to target (fore or aft). The chosen target must be in the ramming unit's arc and range specified for the ability.
- Determine Difficulty: The difficulty is equal to the target's evasion stat.
- Make Ram test: Test the difficulty (as determined by the ability that allows a ram) using the stat and skill specified by the ability.
Success: The target unit sustains hull damage based on the ramming unit's size (see below). Then, the ramming unit sustains hull damage based on the target unit's size. Breakthrough success (bs): Increase the damage the target unit sustains by 1.
Ram Damage
When a ram test succeeds, the target unit sustains an amount of damage equal to the ramming unit's size below. When a ram test succeeds, the ramming unit sustains damage equal to the target unit's size below. This damage is treated as having the Breach 2 keyword (see "Weapon Keywords" on page 99).
- Large ship: 4
- Medium ship or vessel auxiliary unit: 3
- Small ship or vessel: 2
- Shuttlecraft: 1
Projectile Units
As introduced in the learning mission, projectile units can be launched into the sector by ships. Projectiles are space units (like ships and auxiliary units) with their own type of unit card and follow the rules described in the Learn to Play Guide on pages 28-32.
- They have a limited Endurance to remain in the sector and must use endurance markers to track it.
- They can be given a standby order only during the projectiles part of the Standby Phase.
Each subtype of projectile has its own keyword rules and is described below.
Torpedoes
(Example card: Photon Torpedo. Navigation 1. Sensors 4". Endurance 0-2. Detonation 1 (Detonates if at 1" of opposing unit before or after move, using attack shown). Guided (If unit is at Sensors range of locked opposing unit, can move along fore sides). Inertia (Must activate to move during Standby Phase if it has 1 or more endurance markers). Warhead: 3 attack dice. Blast 1 (Targets each unit at 1"; if locked opposing units are at 1", it attacks only those units). Breach 1 (can reduce hull damage 1 beyond the next color).)
Torpedoes are introduced in the learning mission and are the most common subtype of projectile, used by most factions of the galaxy (see Learn to Play Guide page 28). They are launched as an attack, using a unit's torpedo weapon profile. A torpedo has the Inertia and Detonation keyword rules, which dictate its movement and determine when it attacks opposing units.
Probes
(Example card: Class 1 Probe. Biology 1, Navigation 1. Comms 2". Sensors 4". Endurance 3. Relay [science] (If there is a friendly unit with combined Comms range to this unit, this unit can use the friendly unit's science value instead of its own).)
Probes are used to make tests and maintain a faction's presence without exposing more valuable craft. They are widely available among factions as equipment, but many Federation ships carry them as standard gear.
Probes are launched as an action. To do so, the launcher status button must show the probe ready status. A probe has the Relay [science] keyword rule that allows it to use a friendly unit's science stat to make tests.
Pods
(Example card: Escape Pod. Navigation 1. Comms 2". Endurance 2. Capacity 1 (This unit can accommodate unlimited officers and up to 1 team per player). EMERGENCY LANDING: Remove this unit to place all its attached personnel on a feature or friendly space unit at 2". Then you may attach 1 or more officers to friendly units at that location.)
Pods are used to carry personnel short distances across the sector. Similar to probes, they are available as equipment for ships.
Escape pods are the most common example and are launched as an evacuate action; this procedure is described later with equipment (see Equipment on page 92). An escape pod has the EMERGENCY LANDING action, which allows it to attach its personnel to a nearby feature or friendly space unit.
Projectile Movement and Actions
Projectiles have more limited actions compared to ships and auxiliary units. All projectiles that have an engine power stat can take the action below, following their own procedure on pages 28-29 in the Learn to Play Guide.
IMPULSE: Engage impulse (move up to engine power and check endurance after).
Each subtype of projectile can take only other actions allowed by abilities on its unit card or specified by the mission.
Attacks
Projectiles with a weapons profile—such as torpedoes—can attack as instructed by their keyword abilities or mission actions available to them. When a projectile attacks, it follows the attack procedure (see Learn to Play Guide page 24). Projectiles do not have a weapons power stat or reserve power and can use only the dice in their weapon profile.
Damage
Projectiles have a numeric hull value similar to an officer or team's health value. For each point of hull damage sustained, place a trauma token on the projectile's hull value. If it has tokens equal to its hull, it is destroyed and removed from the sector. Note that projectiles with a hull value of "1" do not have individual unit cards but share a single unit reference card for their type.
Officers attached to a projectile unit that is destroyed are lost, just as they would be if they were attached to another space unit.
Projectiles and Officers
Projectiles do not have a capacity for officers (or teams) unless they have the Capacity keyword rule specifying the number of personnel that can be attached. If a projectile has capacity, it has one section but no stations.
Projectile Unit Limits
A player cannot have more torpedo and probe projectiles in the sector than their fleet's total number of torpedo tubes at the end of that round. Pod projectiles are not counted toward this limit. If a player exceeds this number at the end of a round, that player must remove torpedo or probe projectiles from the sector until they no longer exceed their fleet's number of tubes. Any personnel attached to those projectiles are lost. Any banked victory points or negative victory points on that projectile are lost.
Team Units
Not all of the game's action happens aboard starships. As in many Star Trek stories, small teams of crewmates are often crucial to completing mission goals. Team units are ground units and unlike space units must be attached to a unit or at a location.
Each team has its own stats and keyword abilities, which are described on the unit card for its type, similar to projectiles.
Teams can be given orders during both the Priority Phase and Standby Phase following the rules for units. An officer is eligible to give a priority order to a team if they are ready and attached to that team (see below).
Team Card Anatomy (front and back)
- Name: The team's name.
- Type and Letter Identifier: The team unit icon and letter identifier for the team's unit token and both sides of this team card (front and back). This is a greek letter: alpha, beta, or gamma. Each team can be formed in one of its two versions as allowed by the player's exploration directive.
- Crew Stats: The unit's command stat, ops stat, and science stat. Unlike ships, these do not change with damage.
- Health: The team is destroyed when it has trauma tokens equal to this value (see Learn to Play Guide, page 33).
- Faction Alignment: The team can be formed by fleets of this faction icon.
- Fixed Stats: Teams have only evasion.
- Alert Stats: This bar displays the team's stats. Unlike ships, these do not change with damage.
- a. Weapons Power is how much power is available for attacks.
- b. Instruments Power determines the unit's dice rerolls during tests.
- Skills List: Each skill category icon is shown with a list of each skill and its level the team has of that category. These are used when the team makes a test.
- Abilities: Each box describes the projectile's abilities.
- a. Standard Actions: The standard actions available to the team; each of these actions is described below.
(Example cards: Survey Team alpha, front: Diplomacy 1, Fieldcraft 1, Biology 1; ASSAULT, RELOCATE; Sensors 2", Comms 4"; TRANSMIT FINDINGS: Remove 1 or more tokens from this unit to add that many tokens to a unit at Comms range; HAND PHASERS 1-2 attack dice, Location, 1 per spent. Security Team alpha, back: Discipline 1, Fieldcraft 1, Skirmish 1; ASSAULT, RAID, RELOCATE; Sensors 2", Comms 2"; SECURITY SWEEP: Choose a unit at the same location with 2 or more tokens. Remove 1 token from that unit; PHASER RIFLES x2, 1-3 attack dice, Location, 1 per spent.)
Teams and Locations
When a team unit is formed it must be placed at a location with a capacity value for teams, which is the number of units that location can accommodate.
- If a location has capacity, it can accommodate ground units (such as teams) and officers. A location can accommodate a number of ground units per player equal to its capacity number. If a location has capacity, there is no limit to the number of officers at that location.
- Each ship section and auxiliary unit section has a default capacity of 1.
- Other units and features must have the Capacity keyword rule to have a capacity value.
Teams can use actions and some other abilities to relocate to other locations with open capacity. When a team relocates, remove its token from its current location and place it at the location to which it is relocating.
Occupying Locations
While a team unit is at a location, that location is occupied.
Contested Locations
While a section of a unit or feature is occupied by two or more team units that oppose each other, it is contested.
While a section of a space unit is occupied by an opposing team unit and is uncontested, that section's stations are each treated as offline.
Teams and Officers
Teams have one section with no stations. Teams have an unlimited capacity for officers, but no capacity for other units. Officers can be attached to a team when it is formed (see next page) or relocate and be attached to or removed from a team that is in the same space unit or feature. The transport procedure also allows officers to be attached to or removed from teams (see "Transporting Personnel" on page 79).
Officers attached to a team can sustain damage that would otherwise be inflicted on the team (see The Needs of the Many, page 69).
Team Unit Limits
Each player can have up to 3 team units in the sector at a time. This is limited by their faction's 3 team tokens. Each double-sided team token is labeled with a greek letter: alpha, beta, and gamma.
Forming Teams
Ships can create teams from their crew. To do so, a ship must take the form a team action by following the below procedure. The type of teams a player can form are based on their faction's exploration directive. After a team has been formed and it remains in the sector, even if the directive is set to a side that allows different teams.
- Reduce Crew Dial: Reduce the ship's crew dial by 1 step. If the dial cannot be reduced, no team can be formed and the procedure ends.
- Select Team Unit: Select an available team unit token of your task force's faction and flip it to a side listed by its letter on your exploration directive. Take the team unit card matching that token's letter and place it at your side of the play area.
- a. If a token is already in the play area it is unavailable and cannot be formed.
- Place Team Unit: Place the unit's token in the same section as the action being taken (unless otherwise specified). The team is formed.
- a. The unit cannot exceed the capacity limit for that section.
- (Optional) Attach Officers: Any number of friendly officers attached to the ship forming the team can be relocated from other sections of that unit and attached to the formed team.
- (Optional) Relocate Unit: The team can relocate to any section of the unit it is attached to with open capacity for teams.
Disbanding Teams
A team can take an action to disband and merge back into a ship's crew. To do so, a team must be attached to a friendly ship and follow the procedure below.
- Increase Crew Dial: Increase the ship's crew dial by 1 step. If the dial is at its start position or above, inspire that ship. If the dial cannot be increased, the team cannot be disbanded and the procedure ends.
- Remove Team Unit: Remove the team unit token and place it and its unit card near your side of the play area so they are available.
- Attach Officers and Tokens: Each officer previously attached to the disbanded team must be relocated to sections of that unit as chosen and may be assigned to open stations within those sections. Any tokens (such as peril, advantage, positive VP, or negative VP tokens) previously assigned to the disbanded unit are assigned to the ship.
Team Actions
Teams have limited actions. All teams are potentially part of a ship's crew and can take the action below, following the disband procedure above.
DISBAND: If this team is attached to a friendly unit with a crew dial, disband this team.
Other than this action, each subtype of team can take only the actions on its unit card, on other cards at its location—such as repair actions on damage cards—or those specified by the mission, similar to projectiles.
Standard Actions
Teams can have one or more of the standard actions listed in the 'Action' section of their unit card and described below.
- ASSAULT: This unit may relocate; if it does add 1 peril token. Then, it performs 1 or more attacks (+ Skirmish to first attack, instead of Ordnance).
- RAID: If this unit is at an uncontested section of an opposing space unit (one with no opposing units), test (difficulty [X]) ops + Fieldcraft. X is equal to the space unit's ops stat.
- Success: Add 1 peril token to the space unit per success result. Breakthrough success: If the space unit has a crew dial, it sustains 1 health damage unless that unit's controller chooses a friendly officer at that location to sustain 1 health damage.
- Failure: Add 1 peril token to the testing unit.
- RELOCATE: Relocate this unit to another location in this space unit or feature that has Capacity.
Attacks
Team units with a weapons profile can take the ASSAULT action and follow the attack procedure, similar to ships and auxiliary units (see Learn to Play Guide, page 24). Teams use the Skirmish skill during attacks instead of Ordnance. They do not have a reserve and can use only their weapons power stat while performing attacks. After a team resolves one or more attacks, place a weapons power token on it.
Team Weapons
Team weapon profiles are similar to those for ships and auxiliary units but have some significant differences. Team weapons do not have firing arcs. They can target only other teams and their range is restricted to the team's current location. Team weapons can have the following keyword ability:
- Lethal X: During the post effects step, you may resolve the following effect: Analysis result: If the attack hit and the defender sustained damage, for each analysis result spent, up to X, the defender must sustain 1 additional health damage.
Team Action Example (Story Mission 2, example Dominion turn)
The Dominion player has a Diplomatic Envoy team on a solid objective token in system 1. As the team has no officers attached, during the Standby Phase, this team can be given one standby order.
- The Dominion player wants to use this team to SEARCH FOR THE GATEWAY (the mission action). During the Standby Phase, they give this order, activating the unit. It makes the listed test, and resolves its success or failure outcome in the same manner as any other unit.
Mission action shown in the example: During the overture, each fleet must send teams to search the archeological sites. However, ambushers may lie in wait at any site. SEARCH FOR THE GATEWAY: A team unit at a solid objective token without a control marker, can test (difficulty [X]3) ops stat + Mechanics (reroll instruments power). Success: Score 1 victory point and place your color of control marker on the token. Breakthrough success: Score 1 additional victory point if there are no opposing teams at the token. Failure: The renegade Jem'Hadar mount a counterassault! The unit sustains 1 damage, then add 1 peril token to the unit. Analysis result: If the unit sustained damage, reduce that damage by 1 per analysis result spent. Analysis result: Move the influence marker 1 space.
(Example card: Diplomatic Envoy alpha. Discipline 1, Diplomacy 1. ASSAULT, RELOCATE; Sensors 2", Comms 4". COERCE: Test command + Diplomacy (reroll instruments power) to coerce a unit at Comms range. Difficulty equals highest health in the unit (minimum 1). PLASMA RIFLES 1-2 attack dice, Location, 1 per spent. Lethal 1.)
- In addition to any mission actions or actions printed on its card, each team has several standard actions it can take, listed on its unit card. Each of these standard actions has an effect specified in this rulebook (see Team Actions, page 67).
Damage (Teams)
Teams have a numeric health value similar to an officer. For each point of damage sustained, place a trauma token on the team's health value. Then, if it has tokens equal to its health, it is destroyed and removed from its location.
When a team is destroyed, each officer previously attached to that team is attached to the team's former location. Depending on their location, these officers can become vulnerable or captured (see Capturing Officers on page 88).
The Needs of the Many
When a team sustains damage, it can choose to sustain damage to an attached officer before sustaining damage to the team itself. To do so, that team's player can choose an attached officer. The chosen officer must sustain as much damage as possible, one point at a time, by placing trauma tokens equal to the damage on that officer's health value. Once an officer has sustained damage equal to their health value, they are incapacitated. Then, if there is still damage remaining, the player must either choose for the remaining damage to be sustained by the team or choose an additional officer and repeat the process.
Auxiliary Units
Although ships are the primary units of the game, simpler auxiliary units also appear and can have a great impact, such as shuttlecraft or secondary vessels. Auxiliary units are space units (like ships and projectiles). They can be given orders during both the Priority Phase and Standby Phase following the same rules as ships.
Auxiliary units also have sections and stations and follow the same rules as ships for them with the following exceptions:
- An auxiliary unit's sections do not belong to a specific end of the unit.
- Unassigned officers in the red section are placed near the helm station.
Each subtype of auxiliary unit is described below.
Shuttles
Shuttles can operate independently in the sector, but can be launched from ships. Each shuttle has its own unit card and is represented in the play area with a template that is similar to but smaller than a ship's base and divided into the same arcs.
Vessels
Vessels are larger auxiliary units with more abilities than shuttles. They are often secondary units that can separate from ships (such as the Saucer Section of a Galaxy-class Starship). Vessels have a large unit card and are typically represented in the play area by a mini on a ship base.
Auxiliary Unit Limits
A player cannot have more than 3 friendly shuttles in the sector at a time; if they exceed this number, that player chooses a shuttle and removes it from the sector. Any personnel attached to that shuttle are lost. Any banked victory points or negative victory points on that shuttle are lost.
A player's vessels are limited by the number of ships they have that are capable of separating or that are provided by the mission. There is no limit to the number of friendly vessels a player can have in the sector at a time.
Auxiliary Unit Display Cards
(The source shows annotated Shuttle display card and Vessel display card fronts and backs; numbered callouts 9, 10, and 11 appear on the front diagrams but are not explained in the source text.)
Front: This is the side that shows the auxiliary unit's stations and stats, similar to a ship display.
- Fixed Stats: These stats are similar to those for ships. Evasion is the number of success results an attacker needs to hit the unit. Warp drive determines the maximum distance the unit can move when it engages warp (see Learn to Play Guide, page 18).
- Crew Stats: These are the unit's command stat, ops stat, and science stat. These stats are used when the unit attempts tests (see Learn to Play Guide, page 22). Unlike a ship, an auxiliary unit's crew stats do not change.
- Alert Stats: Displays the unit's alert stats as a group. Unlike a ship, an auxiliary unit's alert stats do not change.
- a. Engine Power and Impulse Turn are how far the unit can move when it engages impulse or warp and how much it can turn at impulse.
- b. Weapons Power is how much power is available for attacks.
- c. Instruments Power is the dice the unit rerolls during many tests.
- Hull Track: Displays the unit's hull and current damage status as positions on a track. Hull is reduced by steps as the unit sustains damage and is marked by sliding a damage status marker along the track so that it points to the current position. Some positions show icons that denote specific effects (see Learn to Play Guide, page 32)
- Unit Image: This is an image of the unit and matches that on its card back and unit template or mini.
- Fore and Aft shields: The number of icons at each end is how much damage the unit can cancel from attacks or other effects against that end during a round.
Back (Shuttle): This side is used when building fleets.
- Class: A shuttle's class includes the class's name and the auxiliary unit type icon.
- Faction Alignment: The shuttle can be included in fleets of the faction icon here.
- Flex Cost: This is the cost in flex points to add the unit to a player's fleet during setup. If the unit has no points cost, it cannot be added during setup and must be launched by another unit during the game.
- Unit Image: This is an image of the unit and matches that on its card front and its unit template.
- Unit Identifier (Shuttle only): This letter identifies the specific shuttlecraft and matches its template. Note that vessels use number ID tokens like ships.
Back (Vessel): This side is used when separating a secondary unit during play.
- Class: A vessel's class includes the class's name, base size, and the auxiliary unit type icon.
- Faction Alignment: The vessel can be included in fleets of the faction icon here.
- Reminder Text: This text summarizes important rules the vessel must follow. For example, the Galaxy-class Saucer describes the separation procedure (see page 75).
- Unit Image: This is an image of the unit and matches that on its card front.
Movement (Auxiliary Units)
Auxiliary units follow the same rules as ships for movement and have the same maneuvers available to them. Auxiliary units also follow some additional movement-related procedures.
Launching Auxiliary Units
Some ships can launch an auxiliary unit by following this procedure. The launching player places that unit's card in their side of the play area.
- Place Turning Tool: Place the turning tool with its circular head fitted into any of the 3 turning slots at that station's end of the ship—fore (or aft), starboard, or port. Align the tool's central notch to the center dot of the slot.
- (Optional) Adjust Heading: Rotate the turning tool up to 3 notches to either side. Note that it is not necessary to stop on specific notches.
- Place Auxiliary Unit: Place the unit in the play area, with either of its base (or template) side's aft straight edges along the turning tool's stem.
- The unit's position can be adjusted along the tool, but it must be placed so the point where the straight edge ends (becoming that side's turning slot) is no farther than the tool's notched end.
- The unit cannot overlap or be overlapped by another unit or feature.
- Remove Tool: Remove the turning tool. The unit is launched.
- (Optional; Shuttle only) Attach Personnel: Friendly mobile personnel (officers and teams) attached to the launching ship can be attached to the launched unit (up to its capacity) and located in a section or station of the launching player's choice.
- If the launched unit is being separated from its primary unit, ignore this step and resolve the procedure to separate (see page 75).
Launch Auxiliary Unit Example
The Federation player gives a standby order to their Defiant-class Escort to take its DEPLOY action and launch a Type 6 Shuttle.
- The player committed no officer, so they reduce the Defiant-class' reserve dial by 2. Then they take their Type 6 Shuttle 'A' unit card and place it at their side of the play area.
- The player places the turning tool against the Defiant's aft turning slot, with its central notch aligned. The player can choose this slot because the action that launches the shuttle is in the Defiant's cargo bay station, which is in the ship's aft end.
- The player adjusts the tool's heading by rotating it to the left, less than the 3 notches allowed.
- The player places their Type 6 Shuttle 'A' template with its straight edge against the tool's edge and positioned as far toward the tool's notched end as they can.
- The player removes the turning tool.
- The player takes their previously-formed Survey Team unit from their cargo bay and places the unit token on the Type 6 Shuttle's card, in its bridge (red) section. They also place the team's unit card—with their Daring First Officer card attached—next to the shuttle's unit card to show the team is attached to that shuttle. The unit is launched and the action ends.
Separating Units
Some ships can separate into multiple units, such as the Galaxy-class Starship, which separates its Saucer Section vessel from its Star Drive. While separated, the primary ship unit continues to use its display but attaches a card that modifies its abilities. The secondary unit that is launched uses its auxiliary unit card. The units remain separated until the auxiliary unit docks with the ship unit (see Docking Units, page 76).
(The source illustrates the Galaxy-class Star Drive and Saucer display cards, front and back, and the Star Drive card attached to a ship display; the card text is only shown in miniature and is not transcribed.)
To separate, follow the steps below:
- Launch Auxiliary Unit: Launch the unit referred to by the separation ability, following the launch procedure above. The launching player places that unit's card in their side of the play area.
- If the separation ability does not specify an arc, the auxiliary unit can be launched from any of the 3 turning slots at that station's end of the ship—fore (or aft), starboard, or port.
- Attach Display Card: Slide the end of the card with the station icon faceup under the ship display at the matching station, leaving its text end exposed. Then, adjust any dials as instructed by the display card's text.
- Attach Personnel and Equipment: Each officer and team attached to the ship before separation must declare which unit they are attached to.
- Friendly officers and teams can be attached to either unit, but must be located in the section or station of either unit that matches their current location, if able. If there is no matching location available, that officer or team is placed in the bridge.
- Opposing officers and teams must remain attached to the ship unit and cannot be attached to the launched auxiliary unit.
- Mission Equipment stays with the primary unit.
Docking Units
An auxiliary unit can dock with a ship at 2" after that auxiliary unit performs an engage impulse maneuver. When an auxiliary unit docks with a ship, that auxiliary unit is removed from the sector and its mobile personnel and tokens become attached to that ship. Depending on the unit's subtype, the ship's crew dial is also increased.
To dock a unit, follow the steps below:
- Declare Dock: The docking unit must declare the ship it will dock with. To be eligible, the ship must have a cargo bay station with a launch ability and must be at 2" of the docking unit.
- If the docking unit is opposed to the ship, the player who controls that ship may choose to prevent the dock. If they do, end the procedure.
- A secondary unit can dock only with its primary unit.
- Remove Auxiliary Unit: The docking unit's player removes it from the sector. That unit's card remains at their side of the play area.
- If the docking unit is separated from its primary unit, reattach the minis.
- Attach Personnel and Tokens: Each officer and team previously attached to the docking unit must be attached to the ship. The ship's player chooses which section or station each officer or team is attached to. All advantage, peril, victory point, and negative victory point tokens previously assigned to the docking unit are assigned to the ship.
- Sensor lock and condition tokens previously assigned to the docking unit are discarded.
- If the docking unit was previously separated from its primary unit, increase that ship's crew dial by 2 (up to its maximum) and remove the separation display card from the ship.
Docking Auxiliary Unit Example
The Federation player decides to dock their previously-separated Galaxy-class Saucer vessel to its primary Galaxy-class Star Drive unit. The player gives a standby order to the Saucer to take its IMPULSE action.
-
The Galaxy-class Star Drive previously moved to nearly 2" of the Saucer. So, the player performs a come about impulse maneuver with the Saucer, rotating it so its fore end is at 2" of the Star Drive's aft end. Then, the player can declare that the Saucer will dock.
-
The player removes the Saucer unit from the sector. They dismount the Saucer mini and reattach it to the Star Drive mini.
-
The player chooses to attach their Redoubtable Engineer and Reliable Commander officers who were on the Saucer to the Galaxy-class Starship's bridge section. They also remove the Galaxy-class Star Drive card from the ship's display. The docking procedure ends.
Attaching the Saucer Section
The Galaxy-class ship has a detachable saucer section. Gently slide the saucer section over the rear star drive section until it fits securely before attaching it to the pegs. Attaching the Galaxy-class ship to the base will require a third peg under the detachable saucer. To assemble the Galaxy-class Ship, insert two t-shaped pegs into a large base. Then inset the pegs into the holes in the bottom of the ship.
Attacks (Auxiliary Units)
Auxiliary units can perform the FIRE WEAPONS action and follow the attack procedure (see Learn to Play Guide page 24). Auxiliary units do not have a reserve and can use only their weapons power stat while performing attacks.
Damage (Auxiliary Units)
An auxiliary unit's hull is reduced by steps as the unit sustains damage, similar to a ship. For each point of uncancelled hull damage remaining, mark the unit's hull track by sliding a damage status marker along the track so that it points to the current position. Note that the marker is placed so the first position on the track is not exposed until the unit sustains damage.
Each step has a damage status and can also have an associated damage icon to the right of it. When the unit's hull is reduced to a step with a different status icon, the track stops and cannot be marked further, even if there is damage remaining to be sustained. However, as the unit slides to the next step, the unit's player must check whether there is a status icon to the right of that step, and if there is, slide the marker to expose that icon.
Each damage icon to the right of the last exposed damage status represents another step with that status. For example, a Galaxy-class Saucer track's rightmost severe damage status step has both a disabled status icon and a destroyed status icon to the right of it. This means that the unit has 2 severe damage steps, each with 1 of these icons. When the destroyed icon is exposed, the unit is destroyed and removed from the play area.
Officers attached to an auxiliary unit that is destroyed are lost, as they would be if on other space units.
(Illustrations show the damage status marker for: No Damage; Light Damage; Severe Damage (Disabled); Severe Damage (Destroyed).)
Shields (Auxiliary Units)
When an auxiliary unit sustains damage (whether hull or health), the unit must use its shields to cancel some or all of that damage before it is tracked on its hull, similar to a ship. Each end of the unit has its own number of shield icons. The unit can cancel a number of damage during a round up to its icons:
- For each point of damage canceled, the player places a trauma token over the shield icons used. Covered icons are unavailable for the remainder of the round.
- If the damage is inflicted by an attack, the shield value for the targeted end must be used. If the damage is from another effect and does not specify which end is affected, the player uses any of the unit's remaining icons.
- Each auxiliary unit removes its trauma tokens from its shield icons during the Ready Phase's Resolve Ready Abilities step.
Inspire
As introduced in the learning mission, some effects inspire units. A unit resolves this effect based on whether its crew stats are at their maximum step.
- If a unit has a crew dial below its maximum step but at or above its starting step, increase its crew dial by a step each time it is inspired.
- If a unit has no crew dial, its dial is at its maximum step, or its dial is below its starting step, add 1 advantage token to the unit each time it is inspired.
Transporting Personnel
Transporters are one of the defining technologies in the galaxy. They are used to relocate officers and teams across long distances to explore new locations or travel between friendly or opposing units. Most ships and auxiliary units can take an action or resolve an ability to transport personnel following the procedure below.
- Choose Officer/Team: Choose one mobile personnel (an officer or team) within the range specified by the transport ability.
- A team with one or more officers attached is treated as one personnel.
- An officer that is transported can be attached to and/or removed from a team at either their starting or final position or both.
- An officer who is committed and at a station cannot be chosen for transport.
- When a personnel is transported "within" a specified range, this means that:
- Their starting position must be at the specified range of the unit transporting them.
- Their final position must be at the specified range of the unit transporting them.
- Choose Destination: Choose a location with open capacity for the personnel being transported that is within the range specified by the transport ability.
- 2.1 Interference: If the location is shielded (the unit has a shield stat and at least 1 science or at least 1 unused shield icon), the player who controls that location may attempt to prevent the transport procedure. If they do, the transporting unit must test (difficulty [X]) science + Mechanics. X is 2 + the total shield value of the chosen location.
- Success: Proceed to step 3.
- Failure: End the procedure. The personnel are not transported.
- 2.1 Interference: If the location is shielded (the unit has a shield stat and at least 1 science or at least 1 unused shield icon), the player who controls that location may attempt to prevent the transport procedure. If they do, the transporting unit must test (difficulty [X]) science + Mechanics. X is 2 + the total shield value of the chosen location.
- Relocate Personnel: Place the personnel at the new location, then resolve any effects of relocating to that location.
Transporting Personnel Example
The Federation player decides to transport a team they have already formed down to the surface of the solid objective token so it can take the SEARCH FOR THE GATEWAY mission action there.
(Mission action shown: SEARCH FOR THE GATEWAY: A team unit at a solid objective token without a control marker, can test (difficulty [X]3) ops stat + Mechanics (reroll instruments power).)
- Using a standby order at the Defiant-class's engineering station (cargo bay), the Federation player begins the transport personnel procedure. They are able to select any personnel (such as the Survey Team in the Defiant's green cargo bay section has Benjamin Sisko has joined) at the Defiant's sensors range, then relocate it to another location with capacity for personnel at the Defiant's sensor range.
- If there was interference at the location (such as if it was shielded), this would require a test. However, there is no interference, so no test is required to transport the team safely. The Federation player places the Survey Team and its attached officer on the solid objective token.
Directives
As described in the introductory mission, each faction has its own directive cards. The introductory mission used only the combat directive card, but most story and incident missions also use the exploration directive card and diplomacy directive card. These additional directives enable other rules to come into play, including team units and hails (see page 82).
Hostile Acts
Hostile acts were introduced in the learning mission and represent moves that threaten an opponent's ships and leave them the option to respond with full military force (see Learn to Play Guide, page 12). Some directives—such as the combat directive—allow their player to set them to their opposite side when an opposing unit resolves a hostile act. Missions can also define additional hostile acts.
Aggressive Acts
These acts represent threatening moves that fall short of outright starship combat. Similar to hostile acts, some directive cards and missions provide an opponent the option to escalate tension in response to aggressive acts. When an opposing unit resolves one of the following procedures, it is an aggressive act. Missions can also define additional aggressive acts.
- Attack: The unit performs an attack targeting a friendly auxiliary, projectile, or team unit (but not a ship).
- Capture: The unit captures a friendly officer (see page 88).
- Hail: The unit refuses a hail (see page 84).
- Raid: The unit performs a RAID action against an opposing space unit (see page 67).
- Transport: The unit transports an opposing team unit to a location in a friendly unit (see page 79).
Hazard Units
Some missions include neutral units that activate during the Hazard Phase and are opposed to each player. Hazard units are space units. Each unit has its own unit card and is represented in the play area with a template that is similar to a medium-sized ship's base and divided into the same arcs.
Hazard units activate during step 3 of the Hazard Phase. Each unit must each be given the number of orders specified by its unit card back (typically 2).
Hazard units are similar to auxiliary units in that they have sections and stations and follow the same rules as ships with the following exception:
- Unassigned officers in the red section are placed near the helm station.
Each subtype of hazard unit is described below.
Constructs
Construct hazard units represent technological craft, whether they are crewed spaceships or massive, AI-controlled probes. Construct unit sections have the same capacity as sections of ship or auxiliary units for unlimited officers and up to 1 team unit per player. Some abilities and effects can also refer to this type of unit.
Creatures
Creature hazard units represent space-dwelling organisms, whether they have a conventional biology or are composed of an exotic crystalline structure. Creature unit sections do not have capacity for officers or units, unlike the sections of ship or auxiliary units. Some abilities and effects can also refer to this type of unit.
Hazard Unit Display Cards
(Example card: Hostile Raider, neutral unit. Actions: 1. FIRE WEAPONS: If a ship is in weapons range, perform attacks. 2. CLOSE IN: If another ship is in the same area, engage impulse. 3. SEEK FOES: Come about then engage warp. The nearest ship adds 2 peril.)
Front: This is the side that shows the hazard unit's stations and stats, similar to a ship display.
- Fixed Stats: These stats are similar to those for ships and include Evasion and Warp drive.
- Crew Stats: These are the unit's crew stats for tests—command, ops, and science. Unlike a ship, these crew stats do not change.
- Alert Stats: Displays the unit's alert stats as a group. Unlike a ship, these alert stats do not change.
- a. Engine Power Stat and Impulse Turn Value are how far the unit can move when it engages impulse or warp and how much it can turn at impulse.
- b. Weapons Power Stat is how much power is available for attacks.
- c. Instruments Power Stat is the dice the unit rerolls during many tests.
- Hull Track: Displays the unit's hull and current damage status as positions on a track, and are tracked similar to auxiliary units. Some positions show icons that denote specific effects (see Learn to Play Guide, page 32).
- Fore and Aft Shields Stats: The number of icons at each end is how much damage the unit can cancel from attacks or other effects against that end during a round.
- Sections: These colored areas represent the unit's major parts, similar to a ship.
- Unit Identifier: This letter and number identifies the specific unit and matches its template.
(The source's front-card diagram also shows callouts 8, 9, and 10 that are not explained in the source text.)
Back: This side shows the hazard unit's class and activation info.
(Example back text: HAZARD: The trailing player resolves two of the unit's actions in the order shown. They must resolve the first two actions possible. When choosing a unit to attack, the Hostile Raider must target the ship in weapons range with the most peril, if able.)
- Class: A hazard unit's class includes the unit's name and type.
- Subtype Icon: This is the unit's subtype, either construct or creature.
- Activation Text: This text summarizes important rules the unit must follow and includes the number of orders it is given when it activates. For example, the Hostile Raider takes 2 actions and must attack the ship at range with the most peril first.
- Unit Image: This is an image of the unit.
Hazard Unit Activation
Each of a hazard unit's actions are numbered. When a hazard unit takes its turn it must take its specified number of actions in ascending order. If the unit cannot take an action, it takes the next highest-numbered action instead. Unless otherwise specified, a hazard unit unit can take each of its actions once during its turn.
The trailing player resolves each action for the unit, following the requirements and text for that action and making any decisions for the unit within those limits. If there are multiple hazard units in the sector, the trailing player chooses the order they activate in.
Movement
Hazard units follow the same rules as ships for movement but can perform only the maneuver procedures specified by their actions.
Attacks (Hazard Units)
Hazard units can each take an action to perform one or more attacks and follow the attack procedure for each (see Learn to Play Guide, page 24). A hazard unit targets a player unit as its action specifies and performs as many attacks against that unit as it can. Hazard units do not have a reserve and can use only their weapons power stat while performing attacks.
Damage (Hazard Units)
A hazard unit sustains damage and marks its hull track following the same rules as auxiliary units (see page 77). Officers attached to a hazard unit that is destroyed are lost, as they would be if on other space units.
Shields (Hazard Units)
A hazard unit that sustains damage must use its shield icons to cancel that damage, following the same rules as auxiliary units (see page 77). The trailing player removes trauma tokens from that unit's shield icons during the Ready Phase's Resolve Ready Abilities step.
Hazard Phase Example
In an incident mission, an Inscrutable Entity is one possible hazard unit.
- Since the Dominion player is trailing (they have the lowest total victory points), they direct the Inscrutable Entity's actions. The inscrutable entity must perform two of its listed actions in the numbered order. For each action, the Dominion player makes any choices that the action entails.
- The first action on the Inscrutable Entity's list is DEVOUR (if a ship is in weapons range, perform attacks), but no ship is at weapons range (4"). Because this action can't be taken, the Dominion player proceeds down the entity's action list.
- The next action in ascending order on the list is CLOSE IN (if another ship is in the same area, engage impulse). There is another ship in the same area (System 1), so the entity engages impulse. The Dominion player chooses to have it use forward impulse, angling toward the Defiant-class. This completes its first action.
- With its first action complete, the Inscrutable Entity begins its second action. Again, it begins at the first action on its list: DEVOUR. This time, the Defiant-class is in range for the attack (4"). The dice are rolled by the Dominion player and the attack is resolved in full as described in the Learn to Play Guide page "Attacks" on page 24. This completes the second action, and ends the hazard unit's activation.
Hail Phase
Opposing captains must sometimes settle their conflicts with shrewd negotiation instead of destructive combat. This happens during the Hail Phase, when fleets can open hails to communicate, collaborate, or apply diplomatic pressure in service of their goals.
During the Hail Phase, the players resolve the following steps in order.
- Open Hail: Starting with the player with priority and continuing in player order, players have the opportunity to open a hail (see below). If a player cannot or does not wish to open a hail, the opportunity passes to the next player in order. If no player opens a hail, the phase ends.
- Resolve Hail: Players participate in that hail and use their trust tokens to resolve it (see page 85).
- Refresh Trust Tokens: If any players have 1 or fewer available trust tokens, each player refreshes all of their trust tokens by flipping them faceup (see below).
Only one hail can be resolved during each Hail Phase. Each of that hail's steps (opening, answering, and resolving) is a part of the same hail. It is possible that no player chooses to open a hail, in which case no hail occurs in that phase. Depending on the players' choices, this phase can end after any step.
Trust Tokens
Hails use trust tokens, which have a player color on one side and a number on the other. Each player has a pool of trust tokens. Each player has one refusal trust token with an asterisk () next to its number. This token can be used to refuse a hail (see Resolving a Hail, page 85). The tokens are numbered 1, 2, 3, and 4 for each player.
Managing Trust Tokens
Each player keeps their trust tokens in the play area next to their own diplomacy directive. Each available trust token is kept faceup to signify that it has not yet been used.
After a trust token is used in a hail, flip it facedown next to the diplomacy directive card to show that it is spent. Spent trust tokens cannot be selected during a hail. Which trust tokens are available and spent is public information to all players.
Refreshing Trust Tokens
At the end of any Hail Phase in which one or more players have 1 or fewer available trust tokens, each player refreshes all of their trust tokens by flipping them faceup. These trust tokens become available again.
Opening a Hail
To open a hail, a player must be able to open hails, and must have at least one hail available through their diplomacy directive, the mission, or another component. If they meet these criteria, a player follows these steps:
- The hailing player chooses a unit to conduct the hail.
- The hailing player may choose a readied officer attached to the hailing unit to lead the hail. If the unit has a bridge section, the officer must be in that section.
- The hailing player chooses a hail available to them. These include faction hails and mission hails.
- The hailing player chooses which opposing units receive the hail. That unit answers the hail in a manner determined during Resolving a Hail (see below).
- An opposing unit must be at Comms range of the hailing unit to receive a hail.
- The hailing player can choose a maximum of 1 unit per opposing player.
- The hailing player must choose at least one opposing unit this way. If they don't, this process ends and the next player in order may open a hail.
- For each opposing player, the hailing player can choose up to one of that player's units to receive the hail.
- If an answering unit is attached to a unit friendly to itself (such as a team unit attached to a ship), that unit's player may choose to have the unit it is attached to become the answering unit instead.
- Each player whose unit answered the hail may choose an officer attached to that unit to lead the hail. If the unit has a bridge section, the officer must be in that section.
Resolving a Hail
Once a hail has been opened and answered, players follow these steps:
- Each participating player secretly selects one of their remaining trust tokens. A higher number reflects a high degree of trust and commitment to working together, while a low number reflects defensiveness, suspicion, and protection of one's own interests.
- All players simultaneously reveal their trust tokens.
- 2.1 In player order, players may resolve abilities that occur after the trust tokens are revealed.
- If a player whose unit is answering the hail reveals their refusal token (with an '*'), they refuse the hail. This opts them out of further participation in the hail.
- If a player who opened the hail reveals their refusal token, it is treated as the number printed on it (usually "1"), instead.
- If all answering players refuse the hail, the hail ends immediately. Skip directly to step 6.
- Players determine which player was most persuasive in the hail. The player who revealed the highest number on their trust token is persuasive. All other players are accommodating.
- 4.1 If two or more players revealed the same number, the tied player whose unit has the higher Diplomacy skill is persuasive.
- If a leading officer was chosen, the unit can use that officer's Diplomacy skill instead of its own.
- 4.2 If the Diplomacy skill of units is tied, the tied player who is highest in player order is persuasive.
- 4.1 If two or more players revealed the same number, the tied player whose unit has the higher Diplomacy skill is persuasive.
- The persuasive player makes the listed hail test, resolving all of its effects as they choose. They make the test using a number of intuition dice equal to the value of the trust used in the hail and expertise dice equal to the leading officer's ranks in the listed skill (if any).
Faction Hails
Each faction has access to one or more hails via its diplomacy directive.
Mission Hails
The below hail is used by one or more missions.
Joint Solution
Participants: 2 or more players
One or more of the gathered forces offers an olive branch to solve a shared problem. If the fleets can't find a solution together, they will share the tremendous consequences.
The test for a Joint Solution is listed in the missions in which it appears. The results of the test are always as follows:
Success: The Joint Solution is successful. See your mission for the result of this outcome. Failing to resolve a Joint Solution often causes a Mutual Loss (see Winning and Losing, page 45).
Breakthrough success (two): Score 2 victory points.
Analysis result: Add 1 advantage token to each participating unit.
Hail Phase Example
-
The Dominion player has priority, and so they have the opportunity to first open a hail. The Jem'Hadar Fighter has Comms range to a Federation Survey Team on a nearby solid objective, so they could open a hail. However, the Dominion player declines to do so.
-
Now, the Federation player has the chance to open a hail. Their Survey Team doesn't have Comms range to the Jem'Hadar fighter, but it does have Comms range to a Dominion Diplomatic Envoy team at the same location. The Federation player decides to open a hail. They may choose an officer attached to their team unit to lead the hail. However, that team has no officer, so they cannot choose a leader. There is no mission hail at this stage of the mission, so the Federation player chooses their faction hail from their diplomacy directive: Shared Findings.
(Hail shown: Shared Findings—The persuasive unit tests (difficulty 3) Trust + Highest skill of its leading officer.)
-
The Dominion player automatically answers and must participate in resolving the hail. They may choose an officer attached to their team unit to lead the hail. However, that team has no officer, so they cannot choose a leader.
-
To resolve the hail, each player selects one of their four trust tokens secretly. If the Dominion Player wished to refuse the hail, they could answer with their refusal ("1*") trust token. Then, their diplomacy directive's hostility section would instruct them to set the directive to its hostile side. Not wanting to escalate hostilities, they instead choose the "2" trust token, indicating a low level of trust. The Federation player selects the "3" trust token, indicating a moderate level of trust. Both players place these tokens facedown in front of them.
(Hostility text shown on the directive: After you refuse a hail, set this directive to HOSTILE.)
-
Both players simultaneously reveal their tokens. Because the Federation player's token had a higher value, they are persuasive and the Dominion player is accommodating.
-
The Federation player makes the hail test. This is a (difficulty [X]3) trust + highest social category skill test. The trust is 2 (the lower value put in), so the team rolls 2 intuition dice. The team has no leading officer attached, but it has Diplomacy 1, so it adds 1 expertise die as that is its highest social skill.
Lost and Captured Officers
In the chaos of a mission, officers can be lost or captured.
Lost Officers
Officers attached to a space unit that is destroyed are lost in action and cannot be used for the remainder of the game. Officers attached to a team unit that is destroyed are not lost and remain at their current location (see Team Damage, page 67).
Capturing Officers
Officers can be captured and some missions and faction directives reward this. To capture an opposing officer, a team can follow the procedure below during its activation.
- Resolve Action: Activate the team to take any action available to the team and resolve that action.
- Check Vulnerable Officers: An opposing officer at the team's location and not attached to a team friendly to themself is vulnerable if either of the following are true.
- There are no team units friendly to that officer there.
- The location is in a unit opposed to that officer or is a neutral feature.
- Capture Officers: The team may capture each vulnerable officer at its location.
Captured Officers
A captured officer is attached to the unit that captured them and must be flipped to their committed side. While an officer is captured, they cannot be readied and follow these rules:
- They must be attached to an opposing unit at all times. If a captured officer is no longer attached to an opposing unit, they are no longer captured and are placed at their current location (if able). A captured officer attached to a space unit that is destroyed is lost.
- A captured officer can be relocated by the capturing player during the Ready Phase as if they were one of that player's officers.
Team Combat and Capturing Example
The Dominion player gives a standby order to their Diplomatic Envoy Team unit alpha to take its ASSAULT action and attack the Federation Survey Team on the same solid objective, which has a Daring First Officer attached.
- The Diplomatic Team resolves its ASSAULT action. It is already in the same location as the Survey Team, so it does not move and adds no peril before it attacks. The Diplomatic Team rolls two success results and 1 analysis result with its Plasma Rifles' 2 dice. Using the Lethal 1 keyword, this means that the Survey Team sustains 3 damage.
- Although the Daring First Officer is not incapacitated, they are now vulnerable both because there are no friendly remaining team units at the location and it is a neutral feature. Without a team, the daring first officer card is placed near their team's former location.
- The Dominion player chooses to capture the Daring First Officer. They flip that card to its committed side and attach it to the Diplomatic Envoy Team. The Daring First Officer is captured by the Jem'Hadar Team.
Coerce
Some units can coerce opposing units to inflict harm upon their morale. When a unit takes an action or resolves an ability that coerces another, the coerced unit does the first of the following it is able to do:
- If the unit has no crew dial, it removes 1 advantage token. If it cannot, it adds 1 peril token.
- If the unit has a crew dial at an inspired state, it reduces its crew dial by 1.
- If the unit has a crew dial at any other state, it removes 1 advantage token. If it cannot, it adds 1 peril token.
(Example: the Diplomatic Envoy team's COERCE action: Test command + Diplomacy (reroll instruments power) to coerce a unit at Comms range. Difficulty equals highest health in the unit (minimum 1).)
Conditions
Some abilities can apply condition tokens to units. While a unit has that token, it follows the rules described below. When the token is removed from that unit, the condition ends.
Hidden
This token means the unit is holographically camouflaged or otherwise obscured from other units. While a unit is hidden, add +2 to the difficulty of attacks and tests against that unit.
A hidden unit must remove its token after it performs an attack or makes a test.
Jammed
This token means the unit's Comms and Sensors have been jammed, either by phenomena or electronic warfare. When a unit adds this token, it must remove each of its sensor locks from other units. While it is jammed, its Comms and Sensors range are each reduced to 2" and cannot be increased. The unit gains the following action:
TUNE INSTRUMENTS (instruments station): 2 technical icons to remove all jammed tokens from this unit.
Repair
As introduced in the learning mission, space units can be repaired (including ships, auxiliary units, and projectiles). When an effect repairs a unit, the affected unit does the following based on what is being repaired.
- If a damage card is repaired, discard that card as described in the learning mission (see Learn to Play Guide page 33).
- If a space unit's hull is repaired, increase its hull by the number described, to a maximum of its starting value. As appropriate for the unit's type, increase its hull dial, slide its damage status tracker, or remove trauma tokens.
Advanced Concepts
The following concepts are needed as you progress to the later missions of the Into the Unknown campaign or begin playing incident missions.
Equipment
Equipment cards can be attached to ships to enhance their abilities. Players can purchase equipment by spending flex points during game setup. Some missions also provide players with specific mission equipment cards.
Each equipment card must be attached to the station slot matching its icon and is then treated as part of that station. An officer assigned to that station is placed next to the equipment card. Equipment is represented by double-sided cards made up of the following parts:
(Example card: Title "U.S.S. Defiant". Front text: REACTION: After this ship is declared as the target of an attack, commit a readied officer at this station to increase its evasion by 1 until the end of that action. Back: "Defiant-class Escort only." Points value 3.)
Front: This is the side that shows the ability the equipment adds to the ship.
- Subtype: Matches back side.
- Name: The equipment's name.
- Station Icon: The equipment card's abilities become part of this station's box when attached.
- Abilities: The equipment's ability, such as the action it grants or any additional effects are described here.
Back: This side shows the requirements to attach the card during game setup. The card is also flipped to this side if its station is offline.
- Subtype: The category of this equipment. A ship can have up to one card of each subtype attached. Some subtypes have restrictions on which ships they can be attached to, such as titles.
- Name: Matches front side.
- Station Icon: The equipment must be attached to this icon's station slot, including when the station is offline.
- Faction Alignment: The equipment can be included in fleets of each faction icon here. If no icons are shown, it can be included in any fleet.
- Ship Requirement: This describes any requirements a ship must have for the card to be attached to it. For example, a title can only be attached to a ship matching this class.
- Points Value: The card's flex point cost when selecting a fleet.
- Image: This is an image of the equipment or the famous ship that it represents.
- Refit Icon: This refit icon represents a significant modification to the ship; no more than one card with this icon can be attached to each ship. Note that this icon does not appear on the pictured equipment card.
Evacuation
Some space units can take an action to evacuate, such as a ship with Escape Pod equipment. When the unit evacuates, it can launch an escape pod projectile unit with some of its key officers attached. Even if the unit is destroyed afterward, its personnel can potentially be recovered. To evacuate, follow the procedure:
- (Optional) Form a Team: The launching unit may form up to 1 available team, following the procedure on page 66 and reducing its crew dial as normal.
- Attach Personnel: Each officer and team attached to the launching unit must declare which unit they are attached to.
- Friendly officers or captured opposing officers can be attached to either unit.
- Up to 1 friendly team can be attached to the escape pod.
- Place officer cards that are attached to the escape pod (but not its team) near their former ship display.
- Banked victory point and negative victory point tokens on the launching unit must be attached to the escape pod.
- Equipment stays with the ship.
- Launch Escape Pod Unit: Launch an escape pod unit, following the projectile launch procedure (see Learn to Play Guide, page 29). The launching player transfers that ship's ID token to the escape pod token to distinguish it from other escape pod units.
- The pod can be launched from any of the unit's turning slots—fore (or aft), starboard, or port.
- The launcher's value is treated as impulse turn 2, regardless of the unit's torpedo launcher values. It is not necessary for the probe ready button to be shown.
Reinforcements
Some mission complications add reinforcement units to players' fleets. Story missions can describe the specific units added to each player or show unit type icons for players to choose specific units from. Incident missions add the same number of ships for each player, but allow players to choose their specific units from the class icons shown.
If a complication adds reinforcements, players first set up the sector as instructed by the complication. Then, they follow the steps below.
- Select Units: Each player references the complication based on the type of mission.
- Add Units: If the mission adds units, each player takes the listed units or chooses units from the icons shown. This can exceed their fleet's starting number of units.
- Replace Units: If the mission replaces units, each player takes the listed units or chooses their units from those matching the icons shown, starting with the priority player and taking turns to choose 1 unit at a time. This cannot exceed their fleet's starting number of units and each chosen unit must match a unit the fleet started the game with that has been destroyed. In incident missions, unless it is specified that the unit is added, it can only replace a unit.
- Assign Officers: Each player assigns one copy of their faction's line officer to any station they choose within the bridge section of each of their reinforcement ships.
- Deploy Units: Starting with the priority player, players take turns deploying their units until both players' reinforcement units are deployed. Units must be deployed by type in the order below, following any additional instructions in the story mission or incident mission's sector setup.
- 3.1 Starships: Each player takes their turn to deploy 1 starship at a time until both players' ships are all deployed.
- Ships must be deployed following standard setup rules (see page 55) and any additional restrictions of the mission.
- When a ship is deployed, the player must assign it an ID number token matching their color and set its dials as indicated below:
- Alert Dial: choose any status.
- Hull Dial: maximum value (marked with a star).
- 3.1 Starships: Each player takes their turn to deploy 1 starship at a time until both players' ships are all deployed.
Reinforcements Example (Campaign Mission 3)
At the end of round 3, the influence track is on a BLUE space, so the Federation complication, 'The Standoff', is triggered. The players follow the complication's instructions to set up the sector. Then, they check the complication's reinforcements section.
(Complication text shown, Reinforcements: Some missions include reinforcements for one or both sides. In story missions, these are set by the specific mission. In incident missions, these are described by the complication card used. Reinforcements can add or replace ships. This mission specifies that a Constellation-class Starship is added for the Federation and Jem'Hadar Battle Cruiser is added for the Dominion, so each player places that ship in addition to their current forces. But in incident missions, unless it is specified that the ship is added, it can only replace a vessel of the same category that has been destroyed. See page 90 of the Additional Rules book for more on Reinforcements, and page 91 for an example. Note that in a campaign mission, if a reinforcement is a ship on the player's roster, that ship is placed with its current hull and crew statuses.)
-
This complication adds reinforcements to both players' fleets. In this case, the reinforcement unit is specifically listed as a Constellation-class Starship for the Federation player, and a Jem'Hadar Battle Cruiser for the Dominion player, so each player must use their listed ship. In this case, the reinforcement unit is specifically listed as a Constellation-class Starship, so the player must use that ship. If the complication instead showed ship category icons—such as a capital or support ship—the player could choose a ship of that category. If the reinforcement was a replacement (instead of added), the chosen ship would also have to match a destroyed ship that started the mission in the player's fleet.
-
The Federation player assigns a copy of their Reliable Commander line officer card, choosing the Constellation-class' captain's chair station. The Dominion player assigns a copy of their Vorta Supervisor line officer card, choosing the Jem'Hadar Battle Cruiser's helm station.
-
The Federation player has priority, so they deploy the Constellation-class first. The complication's setup diagram shows a shaded setup area for each player, so they must deploy the ship in their own area. The player sets the ship's alert dial to its 1-pip yellow position. They set its hull, crew, and reserve dials each to its start position or maximum value.
Then, the Dominion player deploys the Jem'Hadar Battle Cruiser in their own setup area. They set its alert dial to its 2-pip green position and set each of its other dials to the start position. The reinforcements are all placed, so the players can proceed to playing the mission.
Mission Cards
These cards are used to assemble the three parts of an incident mission. Incident missions can be used to play a one-off match or to add an incident mission to your campaign. This section summarizes the use of mission cards.
Learn as You Go
The use of mission cards is explained in detail in campaign Mission 4: At the Knife's Edge (see Campaign Guide, page 31-35).
Note also that a comprehensive, step-by-step breakdown of the Mission Card rules for event play can be found in the Living Rules Document. The rules here are intended to help you get going quickly, and thus summarize some steps for ease of comprehension.
Creating Your Task Force
To create a task force, use the Task Force Creation rules found on page 46. Remember to decide with your opponent how many points your game will use before creating your task force. The standard amount for an incident mission is 50 core points.
Creating an Incident Mission
Each incident mission uses three types of cards: an overture card, a situation card, and 2 complication cards that create the influence track, 1 of which will be resolved during the game. To create an incident mission, follow the steps below:
- Select Overture: Talk to your opponent and mutually agree upon an overture card. You can always randomize by shuffling all of your overture cards. Put it faceup in view of both players.
- Select Situation: Do the same for a situation card.
- Determine Priority: Randomly determine which player starts with priority.
- Create Influence Track: Take all complication cards that share at least one category (found in the top right corner of the card) with the overture or situation card. Shuffle these cards together to form the complication deck. Then, each player draws two cards from this deck, looks at both, chooses one, and places it facedown to form their half of the influence track (see diagram).
- Place Influence Marker: The player without priority places the influence marker on either outer position of their complication card (see diagram).
(Diagram: incident mission setup shows the overture and situation cards beside the play area, with Player A's and Player B's board edges, and the influence track formed by Player A's complication and Player B's complication cards.)
Playing an Incident Mission
After the incident mission has been created, follow the setup instructions on the overture card, then follow the setup instructions on the situation card and the general rules for game setup on page 52. For each of these missions, each player uses all three ships provided in the core set. The Living Rules Document contains more advanced options for players with larger collections. Additionally, see Sector Setups on page 96 for more about how to set up a sector in a solitary, helix, or trinary setup.
Each overture lists a mission action, describes scoring victory points, and explains how the overture ends. Each situation adds further rules to the mission.
(The source illustrates example overture and situation cards, and an example overture and situation with mission actions; the card text is shown only in miniature and is not transcribed.)
When the conditions for the end of the overture are met, begin the complication that has the influence marker on it. Flip the card faceup, read it, and place it in view of both players. For the remainder of the game, it replaces the overture card (but not the situation card). Resolve any setup instructions it contains, then use its rules as you did with the overture card.
The complication card instructs you how the game ends.
(Example complication shown, Contested Territory, end of game: End of round when one player controls all [objectives], or end of round 6. Each player scores an additional victory point x2 for each objective with a friendly unit that they occupy.)
At the end of the game, the player with the most victory points wins.
Sector Setups
Each mission indicates how the systems are arranged within the sector for that mission. For mission cards, this is provided on the overture card. To set up a sector, follow the steps below:
- Define Sector: Measure a 36" by 36" area and place the sector corner markers at the corners of the sector.
- Place System Center Marker(s): As described in the standard setups below, place the system center markers at the positions indicated.
- Place System Edge Markers: Place the system edge markers to denote the edges of the systems.
- Determine Setup Areas: Each player determines their setup area for the sector setup.
Solitary
A solitary sector is 36" by 36" and has one system (13" radius).
- System 1's center is placed at the center of the sector (18" by 18" from each corner).
- Player 1's setup area is a 6" x 12" box along their board edge, starting at the northwest corner.
- Player 2's setup area is a 6" x 12" box along their board edge, starting at the southeast corner.
Helix
A helix sector is 36" by 36" and has two systems (13" radius).
- System 1's center is placed on the east edge of the sector, 13" from the northeast corner.
- System 2's center is placed on the west edge of the sector, 13" from the southwest corner.
- Player 1's setup area is a 6" x 12" box along their board edge, starting at the northwest corner.
- Player 2's setup area is a 6" x 12" box along their board edge, starting at the southeast corner.
Trinary
A trinary sector is 36" by 36" and has three systems (13" radius).
- System 1's center is placed at the northwest corner of the sector, touching both edges and fully inside the sector.
- System 2's center is placed at the southwest corner of the sector, touching both edges and fully inside the sector.
- System 3's center is placed 4" from the west edge of the sector and 18" from the north edge.
- Player 1's setup area is a 6" x 12" box along their board edge, situated 9" from the northeast corner.
- Player 2's setup area is a 6" x 12" box along their board edge, situated 9" from the southeast corner.
(Note: the source states System 3 is placed "4" from the west edge"; the accompanying diagram shows it near the east edge. It is transcribed here as printed.)
Definitions and Keywords
Definitions
Below are the most crucial definitions required as you learn the game. This section is greatly expanded in the Living Rules Document, which covers topics like effect timing, procedures, and combined range in detail.
Rerolling Dice
A die can be rerolled multiple times from effects unless another effect prevents rerolling that die. For example, breakthrough success results cannot be rerolled by an opponent.
Dice Effects
Tests, weapon keywords, and other abilities can include effects that are resolved by spending dice results during tests or attacks. A die effect is shown as a subheader with the required die icon, such as an analysis result, displayed as 'analysis:' with the icon followed by a colon. Die effects are typically resolved during the Post Outcome Effects step of a test or attack. Some effects can be resolved during the Determine Outcome step, and will say so if they are. Die effects also follow these rules.
-
Each effect shows the number of icons that must be spent to resolve it.
-
When an icon is spent, that die is removed from the pool.
If an effect spends an icon to change a die's result, that die is placed back in the pool.
-
An effect can be resolved once during its timing.
An effect with the icon followed by a '+' is repeatable. Each time the number of required icons is spent, the effect is resolved. The scaling of the repeatable effect is always defined by its text.
-
A breakthrough success effect is a kicker and can be resolved only if the test succeeded or attack hit. Other effects can be kickers if defined in their text.
Keywords
Many components have named keyword rules assigned to them. Some keywords have a level value, represented by 'X'. Some of these keywords are introduced in earlier sections. Where space permits, components include keyword reminder text, but the complete list and rules are below.
Officer Keywords
Officers can have the keyword rules on their card that are described below. Note that although an officer's keywords appear only on their ready side, if a keyword does not require the officer to lead a test or attack, it is available while they are committed. Keywords represent personality traits, special training, or special abilities not covered by skills.
AUGMENTED X
While this officer leads a test, you may replace up to X intuition dice with that many expertise dice.
CHANGELING X
After this officer leads a test, add X peril to each opposing unit at this officer's location.
GLIB X
After this officer leads a hail, if you were accommodating, add X peril to a unit of your choice at Comms range.
HANDY X
While this officer leads a repair test, you may reroll up to X dice.
INSPIRING [ONE OR MORE STAT ICONS]:
While this officer leads a test with the specified stat, you can spend two analysis results to inspire their unit. Inspire is described in detail on page 78.
MEDIC X
During your turn in the Ready Phase, you may test (difficulty [2]) science stat + Biology.
Success: Remove up to X trauma from personnel at this location. You can choose more than one personnel (officers and/or team units), in which case you decide how to split the total of X trauma removed this way.
PERCEPTIVE X
While this officer leads a test, treat their unit's instruments power stat as increased by X.
QAPLA' [ONE OR MORE SKILL RANKS, ABILITIES, OR OTHER GAME TEXT]
After this officer leads an action that scores 1 or more victory points, you may bank up to 1 of the victory point tokens on their card. While this officer has 1 or more victory points banked on their card, they gain the bracketed abilities, skills, or other game text in brackets. At the end of the game, unless this officer is captured, score all victory points banked on them.
RELENTLESS X
While this officer leads an attack or a test for which the relevant skill comes from the security skill category, you can reroll up to X dice. For each die rerolled this way that results in breakthrough success, this officer's unit sustains 1 health damage during the Post Effects step.
Projectile Unit Keywords
Projectile units can have keywords on their unit cards that include the following:
DETONATION X
This unit detonates if it is at X" of an opposing unit before or after it moves. Then it uses its weapon profile to perform an attack against each unit at X" (both friendly and opposing).
GUIDED
If this unit begins its move at Sensors range of a locked opposing unit, it can move along one of its fore sides (instead of its lateral sides). A unit with this keyword shows these sides with striped lines on its unit card.
INERTIA
This unit must activate to engage impulse and move during the Standby Phase if it has 1 or more endurance markers remaining. The unit must move a distance equal to its full engine power stat, if able.
RELAY [X]
While there is a friendly unit with combined Comms range to this unit (adding both units' Comms ranges), this unit can use the friendly unit's X stat value instead of its own.
Weapon Keywords
Some weapons have keyword abilities, which can be resolved when attacking with that weapon. These include the following:
BLAST X
When this unit detonates, it attacks each unit at X" with this weapon profile. If there are one or more opposing units with a friendly lock token at X", only those units are attacked.
BREACH X
If the target has hull, during the resolve damage step, the defender does not stop reducing their hull value after their dial or track changes to the next hull status; its hull can be reduced up to X additional steps.
LETHAL X
During the post effects step, you may resolve the following effect:
Analysis result+: If the attack hit and the defender sustained damage, for each analysis result spent, up to X, the defender must sustain 1 additional health damage.
- If the defender has a crew dial, its hull must have been reduced by the damage sustained.
PIERCE X
If the target has shields, during the determine outcome step, you may resolve the following effect:
Analysis result+: For each analysis result spent, the defender's shield value is reduced by 1 until the end of the action. This effect is cumulative up to X, including across additional attacks during the same action.
PULSE X
During the modify dice step, you may reroll a number of dice up to X.
Feature Keywords
Features typically have keywords assigned by the mission. These keywords can be applied to both objectives and phenomena. They include the following:
ABUNDANT X
Each unit with no advantage token at 2" gains the following action:
GATHER RESOURCES (cargo bay station): Test (difficulty [X]3) science stat + Commerce or Fieldcraft (reroll instruments power).
Success: The unit adds 1 advantage token, plus 1 advantage token per point by which it exceeded the difficulty, to a maximum of X advantage tokens.
CAPACITY X
This feature has one section, which can accommodate an unlimited number of officers and up to X ground units (per player). Units inside of the feature cannot be attacked by units outside of the feature.
MASSIVE X
After a space unit performs a maneuver, if it is at 2" of this feature, it must make the following test: test (difficulty [X]) command stat + Navigation (reroll impulse turn value).
Success: Add 2 peril.
Breakthrough success+: Remove 1 peril added this way per breakthrough success result.
Failure: Add 1 peril, plus 1 peril per point by which the test failed. Then an opponent may rotate the space unit up to 1 notch.
OBSCURING X
Each unit at 2" of this feature increases its evasion stat by X and treats its Comms and Sensors range as 2".
TREACHEROUS X
While a space unit performs a warp maneuver that crosses this feature, it must immediately resolve the following: test (difficulty [X]) ops stat + Navigation (reroll instruments power).
Success: Complete the maneuver. Add 2 peril.
Breakthrough success+: Remove 1 peril added this way per breakthrough success.
Failure: Add 1 peril, plus 1 peril per point by which the test failed. Then an opponent places the space unit touching the feature. Finally, the unit sustains 3 damage to its fore end.
UNSTABLE X
During the Hazard Phase, each unit at 2" of this feature must make the following test: test (difficulty [X]) ops stat + Mechanics (reroll impulse turn).
Success: Add 2 peril.
Breakthrough success+: Remove 1 peril gained this way per breakthrough success.
Failure: Add 1 peril, plus 1 peril per point by which the test failed. Then if the ship has 3 or more peril, any opponent may remove 3 peril from the ship to have it sustain 1 crew loss.