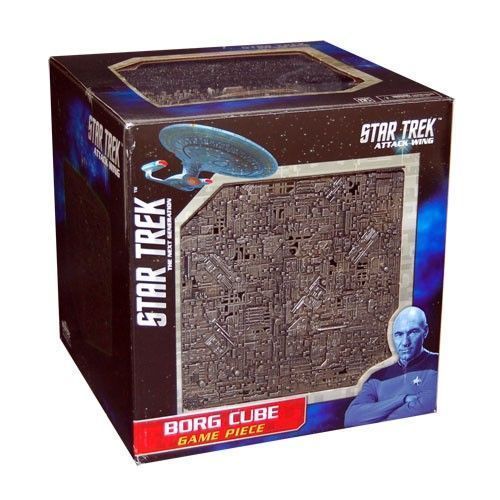
Star Trek: Attack Wing – Cube 112 Expansion Pack
Star Trek: Attack Wing – Cube 112 Expansion Pack Rulebook
Table of Contents
Table of Contents
The Battle of Wolf 359: Mission Overview
Number of Players: 2
Special Components: Mission Tokens (variable number).
The Battle of Wolf 359: Set Up
Borg Player: 150 Squadron Points, including one (and only one) Borg Cube with Locutus assigned as its Captain. The Borg ship may be equipped with any number of Borg Upgrades, even if these Upgrades exceed the ship's restrictions.
Federation Player: 150 Squadron Points, including at least 3 Federation ships. The Federation player cannot assign Jean-Luc Picard as one of his Captains.
The Federation player sets up along any edge of the play area, within 4" of the edge. The Borg Cube then sets up directly in the center of the play area. Place 2 Mission Tokens on each of the Federation Player's Ship Cards.
The Battle of Wolf 359: Special Rules
Assimilated Information: Whenever the Borg Cube is damaged by or damages a Federation ship, if there are still any Mission Tokens on that Federation Ship Card, remove 1 Mission Token from it and place it on the Borg player's Ship Card. This represents Locutus's assimilated knowledge of the Federation. Each round, the Borg Player may discard any number of these Mission Tokens (1-at-a-time) from his Ship Card to achieve the following effects:
During the Planning Phase:
-
Repair up to 3 Damage of your choice to your Hull or Shields. (once per round)
-
Add up to 4 Drone Tokens to your Captain Card. You cannot exceed your Captain's starting number of Drone Tokens. (once per round)
During the Combat Phase (when you are defending):
-
During the Roll Attack dice step, force the attacking ship to roll -3 attack dice for all of its attacks that round. (once per round per attacking ship)
-
During the Compare Results step, cancel up to 3 Hit or Critical results. (once per round)
During the Combat Phase (when you are attacking):
-
During the Roll Defense Dice step, force the defending ship to roll -3 defense dice against all of your attacks that round (once per round per defending ship).
-
During the Compare Results step, convert all of your Hit results into Critical results (once per round).
During the End Phase:
- Target a ship at Range 1-2 and disable up 2 Upgrades on that ship. (once per round) [Printed as "disable up 2 Upgrades"; the intended wording is evidently "up to 2".]
Objectives:
Federation Player: Destroy the Borg Cube.
Borg Player: Destroy all of the Federation ships.
Transcriber note: the printed cards show the attack-result symbols as glyphs; they are rendered here as "Hit" (the four-point star) and "Critical" (the ring symbol).
Additional Rules 1
Borg Upgrades [Borg icon]
Ships with the [Borg icon] icon in their Upgrade Bar can be equipped with Borg Upgrades. For each [Borg icon] icon shown in the Upgrade Bar, the ship can equip one Borg Upgrade Card with the matching icon.
Drone Tokens
Each Drone Token has a Drone number listed on the face, as well as a Captain Skill Number listed on the back. The Drone Tokens are placed in a stack on top of the Captain Card in descending order (from highest to lowest) of their Drone numbers. NOTE: The Drone number listed on the token at the top of the stack is always considered the ship's current Captain Skill. At the start of the game, place the Drone Token that has the starting Captain Skill beside the ship (this will be the reverse side of the Drone Token that reads "START" on the face).
When a Drone Token is used, remove one Token from the top of the stack and flip it over. Then remove the Drone Token that is beside the ship from play and replace it with the token that you just removed from the stack. NOTE: The Captain Skill that is listed on the Token beside the ship should always be equal to the number of Drone Tokens left on the Captain Card.
Additional Rules 2
Regenerate [Regenerate icon]
Ships with the [Regenerate icon] icon in their Action Bar may perform the REGENERATE Action. A ship that performs the [Regenerate icon] Action immediately repairs 1 damage of its choice to its Hull (critical or normal). A ship cannot attack during the round that it performs the [Regenerate icon] Action.
Oversized Plastic Base and Ship Token
The oversized Borg Cube rests on 3 plastic pegs that clip onto the plastic base. With regards to the Oversized Borg Cube's special movement rules below, the side of the Borg Cube that has one peg/clip in the center of it is considered to be the "front" of the Cube. NOTE: All of the Borg Cube's movement is based from the "front" of the Cube.
The oversized Ship Token is then placed beneath the plastic base so that the front plastic peg/clip sits between the ship's Ability Values and the Action Icons (see diagram 1).
The Borg Cube's Captain ID Tokens are placed on top of the Borg Cube's Base.
Additional Rules 3
The Oversized Borg Cube does not follow the normal movement rules. When moving the Oversized Borg Cube, use the following instructions:
Spin Maneuver (Oversized Borg Cube)
-
The Spin Maneuver [left arrow] or [right arrow] uses the same movement template as a Straight Maneuver [up arrow]. The only difference between these maneuvers is that before executing a SPIN Maneuver, the player rotates his ship 90°. In order to do this, place the 90° Maneuver Template so that it sits flush with the edge of the ship's base in the direction of the Spin Maneuver (right or left) AND so that the side of the Template that is furthest from the front clip touches the corner of the clip (on that side of the Cube) that is closest to the front clip (see diagram 2).
-
While holding the 90° Maneuver Template firmly in place, rotate the ship 90° (either right or left depending on the maneuver) until the corner of the front clip touches the side of the Template that is closest to the front clip (see diagram 3).
Additional Rules 4
-
After rotating the ship (see Spin Maneuver above), remove the 90° Maneuver Template and place the chosen [up arrow] Maneuver Template between the guides on the front clip. Insert the template fully into the guides so that it is flush against the clip (see diagram 4).
-
Place a 2nd [up arrow] Maneuver Template at the end of the chosen [up arrow] Maneuver Template so that it sits flush against it. Then, while holding the 2nd [up arrow] Maneuver Template firmly in place, remove the chosen Maneuver Template (see diagram 5).
-
While still holding the 2nd [up arrow] Maneuver Template firmly in place, slide the Oversized Borg Cube across the play area until the end of the template fits fully into the guides so that it is flush against the clip (see diagram 6).
Additional Rules 5
- Remove the 2nd [up arrow] Maneuver Template (see diagram 7).
NOTE: When performing a 180° Spin Maneuver [down arrow], repeat steps 2 and 3 a 2nd time before continuing to step 4.
Overlapping the Borg Cube's Base
If a ship executes a maneuver that would cause its base to overlap the Borg Cube's base (even partially), the ship stays where it lands (on top of the Borg Cube's base) and that ship loses its "Perform Action" step.
If a ship executes a maneuver that would cause its base to overlap one of the Borg Cube's pegs, the active ship would move backward along the top of the template until it no longer overlaps the peg and that ship loses its "Perform Action" step.
A ship that is on the Borg Cube's base is considered to be at Range 1 and may be attacked by the Borg Cube. The overlapping ship may attack the Borg Cube if any of the Borg Cube's base is within the attacking ship's forward firing arc, 360° firing arc, or rear firing arc (if using an attack that may be fired from the rear firing arc).
Additional Rules 6
Marking a Ship's Position
If a ship is in the way of the Borg Cube's base during the Borg Cube's Maneuver OR if a ship is overlapping the Borg Cube's base when it time [sic: "when it is time"] for the Borg Cube to move, that ship's position must be "Marked". Marking is holding a ship's place while an oversized ship finishes its move and may only be performed by an inactive ship (i.e. it does not count as an activation for that ship). NOTE: The Borg Cube does not lose its "Perform Action" step when "Marking" a ship with a Hull of 9 or less. Follow these steps to "Mark" a ship:
-
The ship to be Marked takes a straight Maneuver Template and performs that Maneuver (either using its forward or rear guides) so that the ship is no longer in the way of OR overlapping the Borg Cube's base. Lean that Maneuver Template on top of the ship's base as a reminder that its position is being Marked.
-
After the Borg Cube completes its entire maneuver, the Marked ship returns to its original position. Using the Maneuver Template that is leaning on its base, that ship performs that maneuver in the opposite direction it did previously (using the opposite guides).
-
If returning to its original position would cause the Marked ship's base to overlap the Borg Cube's base (even partially), the ship stays where it lands.
-
If returning to its original position would cause the Marked ship's base to overlap one of the Borg Cube's pegs, the Marked ship would move backward along the top of the template until it no longer overlaps the peg.