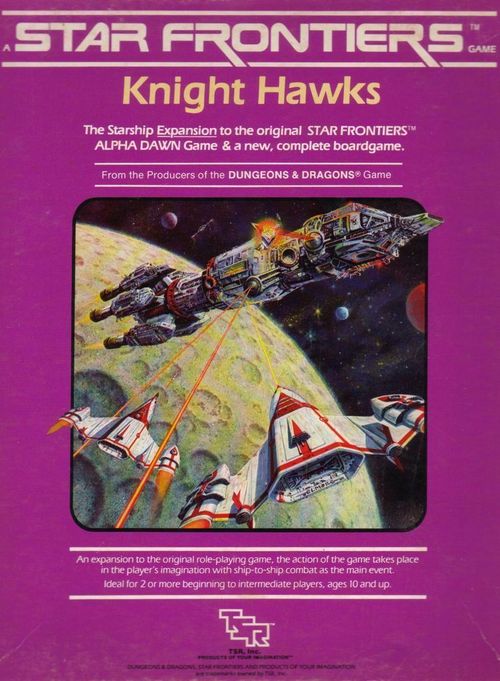
Star Frontiers: Knight Hawks
Star Frontiers: Knight Hawks Rulebook
Table of Contents
Table of Contents
PART I: BASIC AND ADVANCED BOARDGAME RULES
Introduction to Star Frontiers Knight Hawks
STAR FRONTIERS Knight Hawks Space Battle game mixes the role-playing rules of STAR FRONTIERS Science Fiction Game with rules for spaceships. This booklet contains rules for a fast-moving boardgame of spaceship combat. The game can be played on its own, and requires no knowledge of STAR FRONTIERS game. The second book in this set contains rules that tie this game into the STAR FRONTIERS role-playing game. It covers spaceship design and construction, boarding combat and new spaceship-related skills for STAR FRONTIERS characters. It is ideally suited for players that want to expand their STAR FRONTIERS adventures into the dark reaches of space.
How to Use this Book
This boardgame is divided into two sections: the Basic Game and the Advanced Game. The Basic Game introduces simple rules on ship movement and combat. The Advanced Game expands the basic system, adding detail and complexity. Players should try the Basic Game first, moving on to the Advanced Game after playing the Basic Game scenarios.
Components
To play this game, players need the map, dice and cardboard playing pieces (counters) included with this set. Paper and pencils also are needed to keep notes about the different ships. Sample ship roster forms are included with the game. Players may photocopy these or make copies on scratch paper.
The map shows an empty area of space. A hexagonal grid is printed on it. This grid divides the map into spaces, called hexes, to regulate ship movement and indicate positions.
Most of the counters represent individual spaceships or space stations. Some are used to record other information that is needed during the game. Many of the counters are not used in the Basic Game.
How To Use The Dice
Two dice are included in Knight Hawks games. These dice have 10 sides, numbered from 0 to 9. They are called ten-sided dice (abbreviated d10).
If the rules tell you to roll one ten-sided die (abbreviated 1d10), roll one die to get a number from 1 to 10. A zero is read as a 10.
If the rules tell you to roll two ten-sided dice (abbreviated 2d10), roll both dice and add the results to get a number from 2 to 20. A zero is read as a 10. For example, if the rolls were 0 and 4, the result would be (10 + 4 =) 14. More dice can be rolled to give results of 3-30 (3d10), 4-40 (4d10), etc. If the number of dice is followed by a plus sign and a number, then the number is added to the dice roll. For example, 1d10 +2 means roll one die and add 2 to the result.
If the rules tell you to roll percentile dice (abbreviated d100), roll both dice. Instead of adding the results, read the dark-colored die as the first (tens) digit and the light-colored die as the second (ones) digit. A zero is read as a zero. The following table shows several examples of percentile dice rolls.
| dark die | light die | result |
|---|---|---|
| 5 | 3 | 53 |
| 6 | 0 | 60 |
| 0 | 6 | 6 |
| 0 | 0 | 100 |
The crayon included with this game can be used to color in the numbers on the dice and make them easier to read. Simply rub the crayon over the sides of the die and wipe away the excess wax with a tissue or paper towel.
Game Scale
One turn in this game represents 10 minutes of time. Each hex is 10,000 kilometers across. Each unit is a single ship or space station.
Basic Game
The Basic Game can be played by two or more players. The players must be divided into two teams: the United Planetary Federation and the Sathar, an evil race of worm-like aliens. Each player controls one or more starships in a space battle. Two sample battle set-ups, called scenarios, are given at the end of the Basic Game. Players can make up an endless variety of scenarios on their own.
Sequence of Play
The game is played in a series of game turns. Each game turn is divided in half. The first half is Side A's turn and the second half is Side B's turn. During Side A's turn, Side A is the moving side and Side B is the non-moving side. During Side B's turn, Side B is the moving side and Side A is the non-moving side. During each side's turn, players do the following things in order:
- Player A's Turn
- a. Movement
- Player A announces which of his ships are using masking screens. A masking screen counter is placed on top of each of these ship counters.
- Ships and space stations in orbit are moved one hex, following the direction of their orbit.
- Player A moves each of his ships, making sure that no ship moves a longer or shorter distance than its speed from the previous turn will allow. The player writes down each ship's new speed after it moves.
- b. Combat
- The non-moving player (player B, in this case) announces which of his ships will shoot at moving ships, and which weapons they will use. The non-moving player then resolves all of these attacks and their effects are applied immediately.
- The moving player (player A, in this case) announces which of his ships will shoot at the non-moving player's ships, and which weapons they will use. He then resolves all of these attacks, and their results are applied.
- a. Movement
- Side B's Turn - The steps described above are repeated, but Side B becomes the moving side and Side A becomes the non-moving side.
Movement
Speed
Every ship has a speed when the game starts. This speed is the number of hexes the ship will move on the space map during its turn. Players should write down each of their ships' speeds so they remember them during the turn. Also, a ship's speed this turn will affect its speed next turn.
Acceleration and Deceleration
Each ship has an Acceleration / Deceleration Factor (ADF). This is a number that tells the player how many hexes the ship can add to or subtract from its speed in one turn. Ships accelerate or decelerate just before they move. A ship cannot accelerate and decelerate on the same turn.
EXAMPLE: A ship that moved five hexes last turn has a speed of 5 at the beginning of this turn. If its ADF is 2, it can add one or two hexes to its previous speed, or subtract one or two hexes from its previous speed. This turn, the ship can move 3, 4, 5, 6 or 7 hexes. The player decides he wants the ship to move 6 hexes this turn. He moves the ship 6 hexes, then writes down "6" as the ship's speed so he will remember it next turn.
STOPPING. A ship can stop moving (decelerate to a speed of 0) only if its speed during the previous turn was equal to or less than its ADF. A ship that had a speed of 0 during the last turn can remain at 0, or accelerate to any speed up to its ADF. A ship does not move at all on the turn it stops.
TOP SPEED. Ships do not have a top speed. They can accelerate to any speed, but players may find that ships traveling very fast will be forced to leave the map.
Turning
Each ship has a Maneuver Rating (MR). This number tells the player how many times the ship can turn during its move.
The bow (front) of a ship always must point at one of the six sides of the hex the ship is in. When a ship moves, it must move into the hex it is facing.
A ship can turn after it enters a hex. A ship turns by rotating so that its bow faces the first hexside to its right or left. During its move, a ship can make a number of turns equal to its MR. A ship can turn only one hexside in any hex, however. If the number of hexes a ship moves is less than its MR, it still can turn only once per hex.
EXAMPLE: The frigate in the illustration has a speed of 7 and an MR of 3. The player controlling the ship decides she wants it to perform a wide turn. She moves the ship forward three hexes and turns it one hex side to the left. She then moves it two more hexes and turns to the left again. So far, the ship has moved five hexes and turned twice. She moves the ship one hex forward, turns it left again, and finishes the move by moving the ship one more hex forward. The ship has now moved seven hexes and turned three times.
If a ship has a speed of zero through the entire turn, it can rotate during its movement phase so it faces any hexside.
Stacking Counters
Any number of ships can be in one hex at the same time. Ships can shoot at other ships in the same hex without penalty.
Planets
A hex that contains a planet counter is blocked. No ship can move into or through that hex. The planet also blocks shots if the shortest path from the attacker to the target must be traced through the planet's hex.
Orbiting Planets
Any ship that starts its move in a hex next to a planet can orbit that planet. The player simply announces during his movement phase that the ship is orbiting the planet.
A ship that is orbiting a planet has a speed of zero. However, the ship automatically moves one hex around the planet each turn. The direction of the orbit (clockwise or counterclockwise) is up to the player who controls the ship. Once it is established, the direction cannot be changed unless the ship leaves orbit and returns to start a new orbit in the opposite direction. The ship in the illustration is orbiting clockwise. The numbers show how many turns it will take the ship to move from its starting hex to the various hexes around the planet. It will return to its starting hex in six turns.
Because a ship in orbit has a speed of zero, it can rotate to face any hexside during its movement. The ship can rotate this way even if it leaves orbit during the turn. If the ship leaves orbit, it still has its full MR to use during its move.
Moving Off The Map
Ships that leave the map are considered lost and are taken out of the game. If a ship travels off the map because it cannot turn before reaching the edge, then it cannot return to the map on a later turn.
Combat
A ship can fire its weapons during the opposing player's movement phase and during its own combat phase. Weapons cannot be fired at any other time during the turn.
Range
Before firing any weapons, the player that is attacking must count the range from the attacking ship to its target. To find the range, count the number of hexes in the shortest path between the attacking ship and the target ship. Count the hex the target ship is in, but not the hex the attacking ship is in. Weapons cannot be fired at targets beyond a certain range, and some weapons become less effective at long ranges; see Weapon Systems for more information.
EXAMPLE: The range from Ship A to Ship B in the illustration is five hexes.
Fields of Fire
Laser batteries, torpedos and rocket batteries can be fired in any direction. Laser cannons and assault rockets can only be fired straight ahead of the firing ship. Laser cannons and assault rockets are called Forward Firing Weapons. Forward firing weapons can be fired at any target inside the three-hex-wide area outlined in the diagram. (The weapons are not limited to the range shown in the diagram. The field of fire extends to the limit of the weapon's range. Targets in the central row of hexes are easier to hit; see Head-On Shots.)
If a moving ship enters a hex containing an enemy ship, the moving ship may always use its FF weapons against that enemy ship. The enemy ship, however, may only use an FF weapon for defensive fire if the last hex the moving ship was in before entering the enemy's hex was in the enemy ship's forward field of fire.
Aiming Weapons
A player must announce which weapons he is using and which targets he will use them against before the dice are rolled to resolve any attacks. If a target is destroyed by the first few shots, any other weapons the player had aimed at that target must be fired, even though there is nothing for them to hit. The attacker cannot shift these weapons to a new target once they are aimed. If these wasted shots include torpedo or rocket fire, these weapons are fired and must be crossed off the attacking ship's record sheet.
EXAMPLE: A player announces he will fire five weapons - two lasers, two torpedos and a rocket battery - at an enemy. The lasers and one torpedo are enough to destroy the target. The second torpedo and the rocket battery are wasted shots, because their target is already destroyed.
Combat Procedure
When a player wants to shoot at an enemy ship, he must use the Combat Table. Find the row on the Combat Table that lists the weapon being fired, and the column that lists the defensive system being used by the target ship. The number that is printed at the intersection of the weapon's row and the defense's column is the attacker's percentage chance to hit the target. If the attacker rolls this number or less on d100, the target ship has been hit. If the target ship has more than one defensive system operating, the defense that is most effective against the attacking weapon is used.
EXAMPLE: A laser battery is being fired at a ship that has a reflective hull. According to the Combat Table, the laser battery has a 50% chance to hit its target. The attacking player rolls d100 and the result is 26. This number is less than or equal to 50, so the laser hits the ship. If the ship had a masking screen, the laser battery would have had only a 10% chance to hit, and a roll of 26 would have missed.
Attack Modifiers
A ship's percentage chance to hit its target can be modified by several factors. These are explained below.
Head-On Shots. If a forward-firing weapon is used against a target in the center row of the three-hex firing area, the attacker can add 10% to his chance to hit. This central row is shown in the Forward Field of Fire diagram.
If a ship with a forward-firing weapon enters the same hex its target is in, the attacking ship automatically gets the head-on bonus.
Range Diffusion. Laser cannons and laser batteries become less effective at longer ranges. The attacker's chance to hit his target with a laser weapon is reduced by 5% x the range to the target.
EXAMPLE: A ship is firing its laser cannon at an enemy ship that is four hexes away. The target ship has a reflective hull, so the attacker's base chance to hit is 60%. The attacker is making a head-on shot, increasing the chance to 70%. This is reduced by (4 x 5% =) 20% because of the range. The attacker will hit the enemy ship on a d100 roll of (70-20=) 50 or less.
Evasive Maneuvers. Fighters and assault scouts have a special defensive ability. Because they are small and maneuverable, these types of ships can try to dodge torpedos that have been launched at them. The player controlling the ship under attack must declare that he is taking evasive action. The MR of the evading ship is then multiplied by 5% and the result is subtracted from the torpedo's percentage chance to hit.
If the evading ship is not destroyed by the torpedo, it must turn in every hex it enters during its next move, until its MR is used up. The ship must move a number of hexes equal to or greater than its MR on its next turn; it cannot evade by staying in its hex and rotating. An evading ship can zig-zag or move in a circle.
Rate of Fire
Laser cannons, laser batteries and rocket batteries can be fired during both the controlling player's combat phase and during his opponent's combat phase. Torpedos and assault rockets can be fired only during the controlling player's combat phase. A ship with more than one torpedo, assault rocket or rocket battery can fire each only once per turn. For example, a ship with four torpedos and two rocket batteries can fire only one torpedo and one rocket battery per turn.
Automatic Hits and Misses
If a target is within a weapon's maximum range, a d100 roll of 5 or less always will hit the target, even if the attack's chance to hit was modified to 0 by range, evasion or other factors.
Similarly, a d100 roll of 96 or more will always miss, even if the attack's chance to hit was modified above 100%.
Defensive Attacks
The non-moving player can shoot at his opponent's ships at the start of his opponent's combat phase. Moving ships can be shot at in any hex they moved through during their move. No shots are resolved until after all ships have finished moving. At that time, the non-moving player can shoot at any of his opponent's ships as if they were in any hex they moved through during the turn. The non-moving player can place upside-down counters in hexes his opponent's ships move through, so he will remember where the opposing ships traveled.
Laser cannons, laser batteries and rocket batteries can be fired defensively at the start of the moving player's combat phase. Torpedos and assault rockets cannot be launched at this time; they can be used only during the player's own combat phase.
Ship Damage
If a weapon hits its target, the player who made the attack must roll dice to determine how many points of damage the attack caused. The number of dice rolled depends on the weapon used; this information is listed on the Combat Table.
Each ship has a number of Hull Points. When a ship is hit, the number of points of damage caused by the attack is subtracted from the ship's hull points. When all of the ship's hull points are gone, the ship is destroyed and immediately removed from the map.
EXAMPLE: An assault scout has 15 hull points. In one turn it is hit by a rocket battery (2d10 points of damage). The attacking player rolls 2d10 and gets a total of 11 points of damage. The defending player subtracts 11 from his ship's 15 hull points, leaving it with 4 hull points. On the next turn, the ship is hit by a laser battery (1d10 points of damage). This attack causes 6 points of damage. This damage reduces the ship's hull points to 0 or less, so the ship is destroyed and the player removes it from the map.
Weapon Systems
The following weapons are used in the Basic Game. The abbreviations listed after the weapon name are explained at the end of the weapon list.
Laser Cannon - FF / RD / Range: 10 / Damage: 2d10 A laser cannon is a large weapon that is mounted on the bow of a spaceship. It fires an intense, concentrated beam of light.
Laser Battery - RD / Range: 9 / Damage: 1d10 A laser battery is a cluster of very small laser cannons mounted in a rotating turret. It can fire in any direction, but is not as powerful as a laser cannon.
Torpedo - MPO / LTD / Range: 4 / Damage: 4d10 A torpedo is a self-guided nuclear bomb that homes in on its target after it is launched. Torpedos are propelled by prolonged fission reactions which enable them to travel at tremendous speeds. A ship can carry only a limited number of torpedos, and these must be marked off the ship's record sheet as they are used.
Assault Rockets - MPO / FF / LTD / Range: 4 / Damage: 2d10+4 Assault rockets usually are carried by fighters and other small ships. They can be launched at a target during the owning player's combat phase. Assault rockets are powered by a brief fusion reaction which causes them to fly even faster than torpedos. Unlike torpedos, however, assault rockets are not guided missiles. They rely on their tremendous speed to hit their target before it can dodge away. A ship can carry only a limited supply, so assault rockets must be marked off the ship's record sheet as they are fired.
Rocket Battery - LTD / Range: 3 / Damage: 2d10 A rocket battery is a cluster of small rocket launchers. These rockets are much smaller than assault rockets, but they cause nearly as much damage as an assault rocket because many rockets are fired together. Like torpedos and assault rockets, rocket batteries must be marked off the ship's record sheet as they are fired.
Interceptor Missiles (ICM). Interceptor missiles are small missiles that can be fired at incoming torpedos, assault rockets and rocket battery barrages. Before the torpedo or rocket attack is resolved, the player controlling the target ship can declare that it is launching ICMs. The player must declare how many ICMs the ship is using. The attack's chance to hit is determined as if the attack was hitting a reflective hull or a masking screen, whichever the ship is using. The number of ICMs launched by the target ship is multiplied by the modifier on the Combat Table, and the result is subtracted from the attack's chance to hit.
EXAMPLE: A torpedo is launched at a ship with a reflective hull. The player that controls the target ship announces that it will fire two of its ICMs in defense. The torpedo normally has a 70% chance to hit, but each of the ICMs lowers this by 10%. The torpedo's final chance to hit is (70 - 20 =) 50%.
A ship carries a limited number of ICMs. Whenever one is used, it must be checked off the ship's record sheet. ICMs can defend only the ship that launched them.
Explanation of Terms
FF - Forward-firing weapon.
MPO - Moving Player Only. MPO weapons can be fired only during the attacking player's combat phase.
RD - Range Diffusion. The accuracy of RD weapons is reduced by 5% x the range to the target.
LTD - Limited Supply. A ship can carry only a limited supply of these weapons. They must be marked off the ship's record sheet as they are fired.
Range: # - The weapon can be used only against targets within the listed range of hexes.
Damage: #d10 - This is the number of 10-sided dice that are rolled to determine how many points of damage are caused by a successful attack.
Defensive Systems
The following types of spaceship defenses are available in the Basic Game. If a ship has more than one defensive system, an attack's chance to hit is calculated against the most effective defense.
Reflective Hull. This is mirror-like paint that is sprayed onto a ship's hull. It will often cause a laser beam to bounce off the ship without causing any damage. A reflective hull is the most common defense on spaceships.
Masking Screen. A masking screen is created when a ship releases a cloud of water vapor into space. The vapor crystalizes and forms a protective cloud surrounding the ship.
Besides making the ship more difficult to hit, a masking screen absorbs energy from a laser. If a ship is hit by a laser while inside a masking screen, the amount of damage that is rolled is divided in half (fractions are rounded up). The result is the number of damage points inflicted on the target ship.
A masking screen has exactly the same effect on a laser fired out of the screen as it does on a laser fired into the screen. If a ship surrounded by a masking screen fires its lasers, resolve the attack as if the defending ship is masked.
To indicate that a ship is using a masking screen, place a screen counter on top of the ship counter. This screen counter stays on top of the ship as long as the ship travels in a straight line at its current speed. If a ship or space station in orbit around a planet creates a masking screen, the screen will last through one complete orbit. The hex the ship or station was in when the screen was created should be marked with an upside-down counter, so players will know when one orbit is finished.
A ship can carry only a limited number of masking screens. These must be marked off the ship's record sheet as they are used. When all of them are used, the ship cannot create any more masking screens.
Combat Table (Basic Game)
| Weapons | Reflective Hull | Masking Screen | ICM | Damage |
|---|---|---|---|---|
| Laser Cannon | 60% | 20%* | - | 2d10 |
| Laser Battery | 50% | 10%* | - | 1d10 |
| Torpedo | 70% | 70% | -10%/ICM | 4d10 |
| Assault Rocket | 60% | 60% | -5%/ICM | 2d10 +4 |
| Rocket Battery | 40% | 40% | -3%/ICM | 2d10 |
* The target ship takes only one-half damage (round fractions down) if it is hit.
Weapon Restrictions Table
| Weapon | Restrictions | Range |
|---|---|---|
| Laser Cannon | FF, RD | 10 |
| Laser Battery | RD | 9 |
| Torpedo | MPO, LTD | 4 |
| Assault Rocket | MPO, LTD FF | 4 |
| Rocket Battery | LTD | 3 |
Spaceships
All of the spaceships used in the Basic Game are warships. Space stations that serve as bases for these military vessels also are used. All of the various types of ships and stations used in the Basic Game are described below.
Besides a short report about the ship, each description includes the number of hull points the vessel has, the types of weapons it can carry, how many limited supply weapons (torpedos and rockets) it carries, the defensive systems built into the ship and movement information.
Not all ships of the same type are identical. All ships of one type will have the same ADF, MR and hull points. The weapon and defense information, however, lists the maximum amount of equipment a ship can carry. Many ships do not carry their maximum armament.
UPF: Enemy Silhouette Recognition Card - Know Your Enemy! (silhouettes of Destroyer, Frigate, Heavy Cruiser and Assault Carrier)
Fighters. Fighters are small, single-seat spaceships. They must be based on an assault carrier or a space station. Fighters are fast and maneuverable, but because they are small the only weapons they can carry are three assault rockets. Their size also makes them easy to destroy.
A fighter that has fired all of its assault rockets can dock at a station or assault carrier to rearm. In order to dock, the fighter must stop (have a speed of 0) in the same hex as the station or assault carrier.
To be rearmed, a fighter must spend one complete game turn on board its station or carrier. If the fighter's base is attacked, the fighter cannot be rearmed that turn. A fighter that is docked cannot be attacked.
- Hull Points: 8
- ADF: 5
- MR: 5
- Weapons: 3 assault rockets
- Defenses: reflective hull
Assault Scout. Assault scouts are larger than fighters, and carry five crew members. They are as fast as fighters, and are big enough to operate without a base station or carrier. They are lightly armed and easily damaged, however.
Like fighters, assault scouts can rearm at a space station. They cannot be attacked while docked at the station. Assault scouts cannot be rearmed at assault carriers.
- Hull Points: 15
- ADF: 5
- MR: 4
- Weapons: 4 assault rockets, laser battery
- Defenses: reflective hull
Frigate. Frigates are small warships, carrying about 25 crew members. They are commonly used as patrol ships by the UPF, as they are large enough to handle most pirate ships and other criminal vessels.
- Hull Points: 40
- MR: 3
- ADF: 3
- Weapons: laser cannon, laser battery, 2 torpedos, 4 rocket batteries
- Defenses: reflective hull, 1 masking screen, 4 ICMs
Destroyer. Destroyers are slightly larger than frigates, and also a little slower. They carry 40 to 50 crew members. Their main function is to escort larger ships.
- Hull Points: 50
- ADF: 3
- MR: 2
- Weapons: laser cannon, laser battery, 2 torpedos, 6 rocket batteries
- Defenses: reflective hull, 2 masking screens, 4 ICMs
Heavy Cruiser. These large ships were the first space battleships. Advances in technology have caused them to be downgraded to cruisers, and they tend to be slow and somewhat clumsy compared to most modern warships.
- Hull Points: 80
- ADF: 1
- MR: 1
- Weapons: laser cannon, 3 laser batteries, 4 torpedos, 8 rocket batteries
- Defenses: reflective hull, masking screen, 8 ICMs
Battleship. These galactic dreadnoughts are the mightiest vessels to travel between the stars. The UPF has only a few of them, and they usually stay near the largest space stations. Battleships have never fought in ship-to-ship battles, so their effectiveness is a matter of theory.
- Hull Points: 120
- ADF: 2
- MR: 2
- Weapons: 2 laser cannons, 4 laser batteries, 8 torpedos, 10 rocket batteries
- Defenses: reflective hull, 4 masking screens, 20 ICMs
Assault Carrier. This type of ship is a relatively new development. Assault carriers carry groups of four to 10 fighters through the Void, launching the fighters where they are needed and taking them back on board to refuel and rearm.
- Hull Points: 75
- ADF: 2
- MR: 1
- Weapons: 2 laser batteries, 6 rocket batteries
- Defenses: reflective hull, masking screen, 8 ICMs
Space Station. These are large outposts that orbit planets. A space station has no engines to move itself; it simply serves as a base of operations for other ships.
- Hull Points: 20 to 200
- ADF: 0
- MR: 0
- Weapons: 1 to 3 laser batteries, 2 to 12 rocket batteries
- Defenses: reflective hull, 1 to 4 masking screens, 2 to 8 ICMs
Any ship can dock at a space station by entering the station's hex and stopping there. At the end of the movement phase, the ship's counter is placed under the station's counter to show that it has docked. As long as the ship remains there, it is linked to the station, and people and supplies can move back and forth freely. The ship can leave the station during its movement phase, and pays no penalty for doing so. When the station moves, the ship that is leaving does not move with the station. It can move normally during its movement phase.
An attacker must declare whether his ship is firing at the space station or at a ship that is docked with the station. Any docked ship except fighters and assault scouts can be attacked by enemy ships. If a station is destroyed while ships are docked at it, each docked ship takes points of damage equal to one-half of the station's original hull points. If a ship is destroyed while docked, the station takes points of damage equal to one-half of the ship's original hull points.
A docked ship can use its battery weapons to help defend the station. A docked ship cannot fire any forward-firing weapons, torpedos or ICMs.
Basic Game Scenarios
After reading the Basic Game rules, play one of the following scenarios. Beginning players should try Scenario 1 first, playing it several times to become familiar with ship movement and the various weapons and defenses. After players feel comfortable with the rules, move on to Scenario 2. This battle involves several ships on each side.
Regardless of which scenario is played, players must become familiar with the ships they control and the weapons and defenses of each. Before starting to play, carefully read the ship descriptions in the scenario. Double-check the rules if you have any questions about weapons or defenses. It is important to understand the capabilities and limitations of each vessel under your control.
Ships designated UPFS are United Planetary Federation Ships. Those designated SAV are Sathar Attack Vessels.
Scenario 1: Surprise Attack!
A pair of UPF Ships - the frigate Z'Gata and the assault scout Stiletto - have been dispatched to guard the small space station Doliin Bay, in orbit around the planet Ken'zah Kit. In the second week of this routine duty, the Doliin Bay's powerful sensors detect a pair of ships entering the system from the Void. As they streak closer, the computer sketches the sleek outlines of a Sathar heavy cruiser and its destroyer escort. The UPF crews, facing a far stronger enemy, realize they must flee, but they cannot leave the Doliin Bay garrison defenseless against the invaders!
Unknown to the UPF defenders, the attacking ships represent only one prong of a huge attack against colonized planets along the edge of the Frontier. The attackers' mission is simple: destroy any UPF starships encountered and wipe out any colonies in the area.
In this scenario, the Sathar player is Player A, and moves first. The UPF player is Player B and moves second.
UPF Ships
- UPFS Z'Gata (frigate)
- 40 Hull Points
- Weapons: laser cannon, laser battery, 2 torpedos
- Defenses: reflective hull, 4 ICMs
- MR: 3
- ADF: 3
- UPFS Stiletto (assault scout)
- 15 Hull Points
- Weapons: 4 assault rockets, laser battery
- Defenses: reflective hull
- ADF: 5
- MR: 4
- UPFB Doliin Bay (space station)
- 25 Hull Points
- Weapons: laser battery
- Defenses: reflective hull, 6 ICMs
- MR: 0
- ADF: 0
Sathar Ships
- SAV Venomous (destroyer)
- 50 Hull Points
- Weapons: laser cannon, laser battery, 2 torpedos
- Defenses: reflective hull, 2 masking screens
- MR: 2
- ADF: 3
- SAV Perdition (heavy cruiser)
- 80 Hull Points
- Weapons: 2 laser batteries, 4 rocket batteries, 2 torpedos
- Defenses: reflective hull, 2 ICMs
- MR: 1
- ADF: 1
Setting Up. Both UPF ships are docked at the station, which is in orbit around the planet Ken'zah Kit. The planet can be placed anywhere on the map by the UPF player; somewhere near the middle is best.
After the planet, space station and UPF ships are placed on the map, the Sathar ships can be placed in any hex touching one of the short ends of the map. These ships need not be in the same hex, but they must be on the same side of the map. They can start at any speed the Sathar player wants, but both ships must have the same speed.
Evacuating Doliin Bay. The Z'Gata must spend three complete game turns docked at Doliin Bay in order for the station's crew to get aboard. These three turns need not be consecutive; the ship can leave the station after one turn and return later for two more turns to rescue the station crew.
After Doliin Bay has been evacuated, the station's weapons cannot be used.
Victory Conditions. If the UPF player evacuates Doliin Bay and flies the Z'Gata off the map, the UPF has won this battle. Any other result is a Sathar victory.
Scenario 2: The Battle of Fortress Kdikit
News of the Sathar invasion has reached all the planets of the Frontier. The story always is the same; defeat and retreat. Soon, the major UPF planets will be in danger.
Task Force Cassidine has been dispatched to the planet Kdikit with one goal: Stop the Sathar onslaught. Circling the planet is Fortress Kdikit, a huge and well-defended space station. Along with the ships that have been sent to reinforce it, the UPF hopes Fortress Kdikit will be the bastion that breaks the Sathar assault.
The Sathar player is Player A in this scenario, and the UPF player is Player B.
UPF Ships
-
UPFS Admiral Clinton (battleship) - Hull Points 120
- Weapons: 4 laser batteries, 10 rocket batteries, 8 torpedos
- Defenses: reflective hull, 4 masking screens, 9 ICMs
- ADF: 2, MR: 2
-
UPFB Fortress Kdikit (space station) - Hull Points 100
- Weapons: 3 laser batteries, 12 rocket batteries
- Defenses: reflective hull, 2 masking screens, 8 ICMs
- ADF: 0, MR: 0
The following two fighters are based at Fortress Kdikit.
a&b. UPFS Fighters - Hull Points 8 each
- Weapon: 3 assault rockets each
- Defense: reflective hull
- ADF: 5, MR: 5
-
UPFS Allison May (destroyer) - Hull Points 50
- Weapons: laser cannon, laser battery, 4 rocket batteries
- Defenses: reflective hull, 1 masking screen, 2 ICMs
- ADF: 3, MR: 2
-
UPFS Driadia (frigate) - Hull Points 40
- Weapons: laser cannon, laser battery, 2 torpedos
- Defenses: reflective hull, 2 ICMs
- ADF: 3, MR: 3
Sathar Ships
-
SAV Infamous (assault carrier) - Hull Points 75
- Weapons: 2 laser batteries, 6 rocket batteries
- Defenses: reflective hull, 4 ICMs
- ADF: 2, MR: 1
The following five fighters are based on the Infamous:
a-e. Sathar Attack Fighters - Hull Points 8 each
- Weapons: 3 assault rockets each
- Defenses: reflective hull
- ADF: 5, MR: 5
-
SAV Star Scourge (heavy cruiser) - Hull Points 80
- Weapons: laser cannon, 2 laser batteries, 4 torpedos, 4 rocket batteries
- Defenses: reflective hull, 6 ICMs
- ADF: 1, MR: 1
-
SAV Vicious (destroyer) - Hull Points 50
- Weapons: laser cannon, laser battery, 2 torpedos
- Defenses: reflective hull, 2 masking screens
- ADF: 3, MR: 2
-
SAV Pestilence (destroyer) - Hull Points 50
- Weapons: laser cannon, 4 rocket batteries, 2 torpedos
- Defenses: reflective hull, 2 masking screens
- ADF: 3, MR: 2
Setting Up. The UPF player sets up his ships first. The planet Kdikit should be placed at least 15 hexes from any map edge. Fortress Kdikit (with its fighters docked) is placed in orbit around the planet. The other ships can be placed on the map wherever the UPF player wants them. All of the ships should be given a speed from the previous turn (the turn before the game starts). This can be any speed the UPF player wants, and need not be the same for all UPF ships.
All of the Sathar ships must be placed along one map edge. The Sathar player chooses which side of the map his ships start on. The fighters must be on board the assault carrier when it is placed on the map, but they can be launched on the first or any following turn. All Sathar ships must be traveling at the same speed at the beginning of the game.
Victory Conditions. The victory conditions for this scenario are very simple. This is the UPF's last desperate chance to stop the Sathar fleet before it reaches major planets, so the UPF will fight to the last ship. Sathar, of course, do not know the meaning of retreat. Whichever fleet survives the battle is the victor. The space station is considered part of the UPF fleet. If one player destroys all of his opponent's ships but has only fighters remaining, the game is a draw.
Advanced Game
Introduction
The Advanced Game expands the Basic Game rules, adding new types of ships, new movement rules, more weapons and defenses and more detailed damage and repair rules. All of the rules from the Basic Game are used in the Advanced Game, but Advanced Game players have more decisions to make and more options to choose from.
Sequence of Play
The turn sequence for the Advanced Game is outlined below.
- Side A's Turn
- Movement Phase
- activate screens
- activate and move seekers
- move ships in orbit
- move other ships
- Combat Phase
- roll for fire damage
- defensive fire
- offensive fire
- Movement Phase
- Side B's Turn
- Movement Phase
- Combat Phase
- Repair Turn (after every 3 turns)
The only changes are the addition of a Seeker Activation step, a dice roll for damage from fires burning on ships, and a Repair Turn following every three game turns. Seekers are explained under New Weapons; fires are explained under Damage; and Repair Turns are explained under Repairing Damaged Ships.
Advanced Game Movement
Three major changes are made to the movement rules in the Advanced Game. First, gravity has a greater effect on ships near planets. Second, ships can move off the map edge without being removed from the game. Third, ships that are damaged in battle can have their MR or ADF reduced (this is explained further under Effects of Damage).
Gravity
A ship that is traveling straight toward a planet may get caught in the planet's gravity well. A planet's gravity extends into the six hexes surrounding the planet. Any ship that enters one of these hexes by crossing the hexside directly opposite the planet's surface will be unable to pull away from the planet's gravity. The ship will crash into the planet and be totally destroyed. This is illustrated in the diagram on this page.
Diagram caption: Ship A entered the planet's gravity well while headed straight toward the planet. Even if it turns in hex 2, it cannot escape the planet's gravity and will crash into the planet. Ship B is moving through the planet's gravity well. The planet's gravity changes the ship's course by turning it one hexside to the left. If the ship does not counter this by turning to the right, it will continue moving along its new course.
Moving Through Gravity Wells. A ship that moves through one of the six hexes surrounding a planet will have its facing changed by the planet's gravity. The ship's facing will be changed 60 degrees (one hexside) as the ship passes the planet. This effect is illustrated in the Gravity Diagram.
If a ship uses its MR to make a facing change away from the planet as it flies through the surrounding hexes, it can continue past on a straight course. The maneuver cancels the effect of the planet's gravity.
Moving Off The Map
At the end of the Campaign Book is a perforated page printed with a hexagon pattern. If a player wants to move a ship off the edge of the map, this perforated page can be placed next to the map so the hex patterns match. Ships can move and maneuver on the page the same as on the map.
This page can be photocopied, so the map can be extended as much as the players want. If a ship keeps moving away from the map, additional pages can be added next to the first. When only a few ships are in play, a ship leaving the map from one side can move onto the opposite side of the map. Players must remember that the ship moved off the far side of the map, and treat the ship as if it was on a separate map. Also, if a ship is about to move off the map, all counters on the map can be shifted the same number of hexes toward the other side of the map. This will give the ships more room to maneuver, without changing their relative positions.
Advanced Game Combat
The most important change in combat in the Advanced Game is the use of the Damage Table. In the Basic Game, all damage was marked off the ship's hull. The Damage Table spreads damage around, so hits can destroy a ship's weapons, engines or other components. This makes it possible for a ship to be severely damaged with only a few shots, and to be removed from the fight without being destroyed.
Besides the Damage Table, the Advanced Game adds many new types of weapons and defenses for starships, giving players more choices to make during battles. More information is given about the weapons from the Basic Game, so they can be used with the new rules.
New Statistics for Basic Game Weapons
All of the weapons used in the Basic Game can be used in the Advanced Game. The abbreviations that are used are:
- FF - Forward Firing
- RD - Range Diffusion
- MPO - Moving Player Only
- LTD - Limited Supply
- RA - Range
- DTM - Damage Table Modifier
- HOR - Hull Damage Rating
Laser Cannon - FF / RD / RA 10 / DTM 0 / HOR 2d10 Laser Battery - RD / RA 9 / DTM 0 / HOR 1d10 Torpedo - MPO / LTD / RA 4 / DTM -20 / HOR 4d10 Assault Rocket - FF / MPO / LTD / RA 4 / DTM -10 / HOR 2d10+4 Rocket Battery - LTD / RA 3 / DTM -10 / HOR 2d10
ICMs in the Advanced Game
In the Basic Game, interceptor missiles could defend only the ship that launched them. In the Advanced Game, ICMs can defend any ship in the same hex as the ship that launched them. For example, an ore carrier in a hex with two destroyers may be attacked with torpedos or assault rockets. The two destroyers could launch ICMs against the missiles that were aimed at the ore carrier.
New Advanced Game Weapons
Electron Beam Battery - RD / RA 12 / DTM +10 / HOR 1d10 An electron beam battery fires an electrical beam of negatively charged particles (electrons). It can fire in all directions.
Proton Beam Battery - RD / RA 12 / DTM +10 / HOR 1d10 This weapon fires an electrical beam of positively charged particles (protons). Like all batteries, it can fire in every direction.
Disruptor Beam Cannon - RD / FF / RA 9 / DTM +20 / HOR 3d10 This powerful weapon must be mounted on the bow of a large spacecraft. It fires an intense beam, alternating protons and electrons. Disruptor beams can do heavy damage to a ship's electrical system.
Seeker missiles - LTD / RA - / DTM -20 / HOR 5d10 Seeker missiles are placed the same way mines are; the defending player can put them in a hex before the scenario begins, or a ship that carries seekers can drop them at any time. Once a seeker missile is placed, it will not move until it is activated. The player that placed a seeker can activate it at the beginning of his movement phase on any turn.
Immediately after it is activated, the seeker will move two hexes toward the closest ship. If the closest ship is more than two hexes away, the turn is over for the seeker. On the next turn, the seeker will move four hexes toward the closest ship. It will continue accelerating at the rate of two hexes per turn (six on the third turn, eight on the fourth, etc.), and can make an unlimited number of facing changes to keep itself aimed at the nearest ship. A seeker can change facing up to three times before it moves each turn.
Note that the seeker may change targets many times, because a different ship may be closest to it at the beginning of each turn. The seeker cannot tell the difference between friendly and enemy ships, and will always fly toward the closest ship. If two or more ships are an equal distance from the seeker, players should roll a die to determine which ship the missile will aim at.
A seeker detonates as soon as it enters a hex containing a ship, or a ship enters the hex containing the activated seeker. If the hex contains more than one ship, the seeker will attack the largest. If the two largest ships are the same size, players should roll a die to determine which ship the missile attacks. When the seeker explodes, the player that placed it rolls one attack on the Damage Table.
On the turn that a seeker moves 12 hexes, it will automatically detonate. If there is no ship within range at that time, the explosion will do no damage. Seekers will not be attracted to planets, moons, asteroids or space stations.
Mines - LTD / RA 0 / DTM -20 / HOR 3d10+5 The defending player can place mines in a hex before the game starts, or either player can drop them from a mine layer during the course of play. When a hex is mined, the player that placed the mines must record the number of that hex on a sheet of paper. When an enemy ship enters that hex, the mines detonate automatically at the end of all movement for that turn. If several enemy ships enter or pass through a mined hex on the same turn, all of them will be attacked by the mines (a mine pattern involves several hundred individual explosive devices). After the mines in a hex have exploded, the hex is no longer mined.
New Advanced Game Defenses
None. This is a category used to describe the many ships (usually civilian) that do not have even a reflective hull as a means of defense.
Proton Screen. This screen is a field of charged particles which surrounds a ship. It is effective in blocking proton and disruptor beams, but actually attracts electron beams!
Electron Screen. This screen is the opposite of a proton screen. It blocks electron and disruptor beams, but attracts proton beams.
Stasis Screen. A stasis screen is moderately effective against all electrical beam weapons. It is not as good as a proton or electron screen against their respective weapon types, but it does not attract any beams. However, the electrical pulse of a stasis screen allows missiles and rockets to home in with increased accuracy.
NOTE: When using electron, proton or stasis screens, exceptions will occasionally arise to the rule that states "A weapon's chance to hit is determined against the most effective defense in use." Since some defenses actually attract a weapon type, the percentage chance to hit is calculated against the defense that is attracting it, not the defense that is most effective against it.
When a player activates a screen, he simply circles in pencil the notation for that screen on his ship roster. When the screen is deactivated, the circle is erased. No more than one screen can be activated on a ship at one time.
Combat Table (Advanced Game)
Each entry on the Advanced Game Combat Table has two percentages; the first is used in the Advanced Game, and the second (shaded) number is used with characters who have gunnery skills (see Skills in the Campaign Book). Use only the first entries for now.
The Advanced Game Combat Table is used the same as the Basic Game Combat Table. All weapons and defenses used in the game are included on the Advanced Game Combat Table.
Each cell shows: Advanced Game chance / chance with gunnery skills.
| Weapon | None | Reflective Hull | Proton Screen | Electron Screen | Stasis Screen | Masking Screen | ICM | Hull Damage |
|---|---|---|---|---|---|---|---|---|
| Laser Cannon | 75% / 60% | 60% / 45% | 75% / 60% | 75% / 60% | 75% / 60% | 25%* / 10%* | - | 2d10 |
| Laser Battery | 65% / 55% | 50% / 40% | 65% / 55% | 65% / 55% | 65% / 55% | 20%* / 10%* | - | 1d10 |
| Proton Beam Battery | 60% / 50% | 60% / 50% |
* Weapon causes half damage (rounded up) on Hull hits.
Damage
When a ship is hit, the attacking player must determine what damage was caused. The Damage Table lists all the possible types of ship damage. The attacking player rolls d100. The result of this roll is modified by the weapon's DTM, and the modified result is found on the Damage Table. Modifiers for the various weapons are listed under Damage Table Modifiers. The number listed is added to or subtracted from the die roll.
EXAMPLE: A destroyer is hit by a proton beam battery. The modifier for a proton beam battery is +10. The attacking player rolls d100 and gets a result of 73. The weapon modifier is added, giving a modified result of 83 - "Defensive Control hit." (As printed; the Damage Table lists 81-84 as a Defense hit.)
Damage Table Modifiers
| Weapon | Modifier |
|---|---|
| Laser Cannon | 0 |
| Laser Battery | 0 |
| Proton Beam Battery | +10 |
| Electron Beam Battery | +10 |
| Disruptor Beam Cannon | +20 |
| Assault Rocket | -10 |
| Rocket Battery | -10 |
| Torpedo | -20 |
| Mine | -20 |
| Seeker Missile | -20 |
Advanced Game Damage Table
| Modified Die Roll | Type of Damage |
|---|---|
| -20 to 10 | Hull hit: double normal damage |
| 11 to 45 | Hull hit: roll normal damage for weapon |
| 46 to 49 | Drive hit: lose 1 ADF point |
| 50 to 52 | Drive hit: lose 1/2 total ADF (round up) |
| 53 | Drive hit: lose entire ADF |
| 54 to 58 | Steering hit: lose 1 MR point |
| 59 to 60 | Steering hit: lose entire MR |
| 61 to 62 | Weapon hit: LC; LB; PB; EB; AR; RB |
| 63 to 64 | Weapon hit: PB; EB; LB; RB; T; AR |
| 65 to 66 | Weapon hit: DC; LC; AR; T; LB |
| 67 to 68 | Weapon hit: T; AR; EB; PB; LB; RB |
Explanation of Results
Hull Hits. Hull hits affect the ship's hull points. The player that scored the hull hit rolls the correct number of dice (indicated by the weapon's HDR) and the result is subtracted from the target ship's hull points. If the result indicates "Double Damage," the attacker should roll the dice and multiply the result by 2.
When more than half of the ship's hull points are gone, the ship is severely damaged and there is a chance it will break apart. Whenever a severely damaged ship accelerates, decelerates or turns, the player controlling the ship must complete the following steps to determine if the ship breaks apart:
- Subtract one-half (rounded down) of the ship's original hull points from the number of points of damage the ship has taken.
- Multiply the result from step 1 by the number of ADF and MR points the ship is using this game-turn.
- Roll d100. If the number rolled is equal to or less than the result from step 2, the ship breaks apart performing the maneuver. If the number rolled is greater than the result from step 2, the ship completed the maneuver safely.
A ship that is torn apart is completely destroyed.
EXAMPLE: A destroyer with 50 hull points has taken 32 points of damage. The player that controls the destroyer wants to get it away from the battle as quickly as possible, so he decides to accelerate and turn one hex side. The destroyer's ADF is 3, and 1 MR point is used to make the turn. Subtracting one-half of the destroyer's original hull points from the ship's damage gives (32-25=) 7. The ship is using (3+1=) 4 ADF and MR points this turn. The chance the ship will break apart is (7x4=) 28%. The player rolls d100 and gets a 29 - the destroyer makes its move successfully! If the player had rolled 28 or less, the ship would have been destroyed.
All weapons cause the same damage when they hit anything other than the hull. The attacker does not roll dice to reduce the ship's hull points unless the result on the Damage Table was a Hull Hit. The number of dice rolled is determined by the weapon that was used.
Drive Hit. A drive hit can cause a ship to lose 1 ADF, one-half of its original ADF or all of its ADF. If a ship with 3 ADF loses 1, its ADF is reduced to 2. If it loses one-half of its ADF, its ADF is reduced to 1 (one-half of 3, rounded down). If the ship loses its entire ADF, its ADF is reduced to 0. If a ship has taken some drive damage, and receives a "1/2 ADF" hit, it loses a number of ADF points equal to one-half of its original ADF.
Losing ADFs does not affect the ship's current speed. A ship that loses its entire ADF can turn, but it cannot accelerate or decelerate. The ship may recover ADF during the Repair Turn.
Steering Hit. Steering hits reduce a ship's MR. The hit will either lower the ship's MR by 1, or reduce the ship's MR to 0. A ship with an MR of 0 cannot turn or change its facing, even if it stops and remains in a single hex. Damage to a ship's MR can be repaired.
DRIFTING. A ship that loses all of both its ADF and MR will drift. A drifting ship travels at the same speed and in the same direction it had before it started drifting. It cannot turn, accelerate or decelerate until repairs are made.
Weapon System Hit. If a weapon system is hit, the system that is destroyed is the system that is listed first at that Damage Table result. If the damaged ship does not have that type of system, then the system listed second will be destroyed, and so on. If the ship has none of the listed systems, then treat this result as a hull hit. If an LTD system with no ammunition left is hit, the system is still destroyed.
EXAMPLE: A destroyer is damaged in combat. The attacker rolls d100 and gets a 66 - Weapon hit: DC, LC, AR, T, LB. The destroyer does not have a disruptor cannon. The next system listed is a laser cannon. The destroyer does have a laser cannon, so the laser cannon is destroyed.
Power Short Circuit. All active defenses on the damaged ship stop working. This includes ICMs and electron, stasis and proton screens, but not reflective hulls and masking screens that have already been launched. No new masking screens can be released, however. Repairing a power short circuit will remove all effects of the hit.
Defense Hit. Defense hits are handled the same as weapon system hits, except defensive systems are destroyed instead of weapons.
Combat Control System Hit. The ship's automatic targeting devices are damaged. The player must subtract 10% from this ship's chance to hit with any weapon.
Navigation Hit. The ship's navigation and steering equipment is damaged. The player controlling the ship must roll 1d10 before the ship moves. If the result is 1-5, the ship must turn to the left in each hex it enters until its MR is used up. If the result is 6-10, the ship must turn to the right. The ship remains out of control until the damage is repaired. If the ship's hull is severely damaged, these turns affect the ship's chance of breaking apart. A stopped ship can ignore a navigation hit.
Electrical Fire. Electrical equipment in the ship is burning. Place a "fire" counter on top of the ship's counter. The player must make another damage roll for this ship with a +20 modifier at the start of his opponent's combat step every turn, until the fire is put out. If a fire causes hull damage, it will cause 1d10 points of damage.
Damage Control Hit. The ship's DCR is cut in half (round fractions up). This can be repaired, the same as normal damage.
Most damage is cumulative. For example, if a ship takes three drive hits and each calls for the ship to lose 1 ADF point, the ship loses 3 ADF points altogether. If the ship had only 1 or 2 ADF points to begin with, then its ADF is brought to 0 and all further drive hits are treated as hull hits. Damage will remain in effect until it is repaired (see Repair).
Combat control system and damage control hits are not cumulative. After one of these systems has been hit, any more hits on that system are considered hull hits. Also, a ship can have only one fire at a time, so a result that would cause a second fire is treated as hull damage.
If the damage table indicates a hit on a system that a ship does not have (a weapon hit on a civilian ore carrier, for example), the hit is considered as a hull hit. Likewise, if a hit is scored on a ship's system that has already been destroyed by damage (a drive hit on a ship with no ADF left, for example), that hit is treated as a hull hit.
Recording Damage
The player that controls a damaged ship must mark the damage on his ship roster. If a weapon or defense system is damaged, then that system is crossed off the roster in pencil. If a torpedo, assault rocket or other LTD weapon is damaged, the entire system is shut down, not just one torpedo or rocket. When a ship's movement ability is damaged, the original ADF or MR is crossed out and the modified number written in pencil. Electrical fires, navigation, combat control and damage control hits are recorded in the box labelled "Damaged Systems" on the Advanced Game ship roster.
Defensive Fire
As in the basic game, the non-moving player gets defensive fire at the moving player's ships as they move. The moving player finishes moving, and then the non-moving player can shoot at the moving player's ships in any hexes they traveled through. Any damage that is caused does not take effect until the ships have finished moving, however. For example, a ship that lost its entire MR at the beginning of its move could still maneuver during that turn.
Repairs
Each ship in the Advanced Game has a Damage Control Rating (DCR). These range from 30 to 200. The DCR is a measure of the crew's ability to repair damage to the ship.
A special repair turn takes place after every three turns of play. This is noted on the time record track. A repair turn is not a separate measure of time, but represents the efforts of the ship's crew to repair damage over the last thirty minutes (three turns). Both sides try to make repairs at the same time. After all repair attempts have been made, the battle picks up exactly where it left off before the repair turn.
All of a ship's DCR points can be allocated during each repair turn. The number of points assigned to a specific repair equals the percentage chance that that repair will succeed. After all DCR points are allocated, the player who controls the ship rolls d100 for each repair attempt. If the roll is equal to or less than the number of DCR points allotted for that repair, the damage is erased from the ship's roster. If the roll is higher than the number of DCR points allotted for that repair, the system is still damaged.
The DCR of a ship can be used to repair as many damaged systems as a player wants to repair. However, the more systems a player tries to repair, the less likely each attempt is to succeed.
Drive and Steering Repairs. When drive or steering damage is repaired, only 1 ADF or MR point is restored per repair, even if the entire drive or steering system was destroyed with one hit. However, players can allocate more than one block of DCR points to drive or steering repairs. For example, 90 DCR points could be split into three blocks of 30 points each and applied toward three Maneuver hits. If all three rolls at 30% are successful, three MR points will be repaired.
Fires. Successfully repairing a fire extinguishes the fire, but does not repair any damage that was caused by the fire. Extinguishing a disastrous fire does not repair the ship's DCR, movement or combat control systems.
Hull Repairs. Players can repair hull damage by following the usual repair procedure for allotting DCR points and rolling for success. If the repair is successful, the player rolls 1d10. The result is the number of hull points that are restored to the damaged ship.
Automatic Failure. A damage repair roll of 90 to 00 always is unsuccessful. If the roll is 99 or 00, the damage is too severe to be repaired in space, and requires the facilities of a station airdock. Once a 99 or 00 has been rolled for any system, no further attempts can be made to repair that system.
EXAMPLE: A battleship with a DCR of 200 has been severely pounded during the last three turns. It has lost its entire ADF (2), its torpedo system, a laser battery, its combat control system, and has an electrical fire. The player decides that the fire must be put out and that he wants to launch torpedos and repair his drives, so he puts 50 DCR points on the fire, 50 on the torpedos and 50 on each of the ADF points lost.
The fire repair roll is 89, which is higher than 50, so the fire continues to burn. The torpedo repair roll is 24, so torpedos can be launched again. The ADF repair rolls are 62 (unsuccessful) and 30 (successful), so the ship regains 1 ADF.
Advanced Game Spaceships
New Types of Ships
Minelayer. A minelayer is a large, lightly armed ship. Its purpose is to place defensive mines and seeker missiles throughout a section of space. In order to place mines or seekers, the minelayer simply passes through the hex where the mines or seeker will be placed. The player controlling the minelayer writes down the hex number on a sheet of paper.
Mines are activated when an enemy ship enters the hex. A seeker can be activated at the start of its movement step on any turn. Only one group of mines can be in a hex at a time. Another pattern of mines can be placed in a hex after the first group detonates. There is no limit to the number of seekers that can be placed in a hex.
Light Cruiser. A light cruiser is a fast, heavily armed ship. Light cruisers maneuver almost as well as destroyers, but carry almost as many weapons as a heavy cruiser.
Civilian. Civilian craft serve a wide range of purposes and vary in size and performance as much as military ships. Some standard designs include mining and ore transport ships, passenger liners, scientific research and exploration ships. In the Advanced Game, they are used only as objectives to be protected or attacked by warships.
Advanced Game Ship Statistics
Each type of ship that can be used in the Advanced Game is listed in this section. All of the information on weapons, defenses, movement and damage control that is needed for play is included. Players should read this section carefully, since the specifications used in the Advanced Game are different from those in the Basic Game.
The format used for each ship will be:
Ship Type; Hull Points; ADF; MR; Damage Control Rating Weapons: Defenses:
The following abbreviations are used for weapons:
- AR = Assault Rockets
- DC = Disruptor Beam Cannon
- EB = Electron Beam Battery
- LB = Laser Beam Battery
- LC = Laser Beam Cannon
- M = Mines
- PB = Proton Beam Battery
- RB = Rocket Battery
- S = Seeker Missiles
- T = Torpedos
Defenses use the following abbreviations:
- RH = Reflective Hull
- ES = Electron Screen
- PS = Proton Screen
- SS = Stasis Screen
- MS = Masking Screen
- ICM = Interceptor Missiles
| Ship | HP | ADF | MR | DCR | Weapons | Defenses |
|---|---|---|---|---|---|---|
| Fighter | 8 | 5 | 5 | 30 | AR (x3) | RH |
| Assault Scout | 15 | 5 | 4 | 50 | AR (x4), LB | RH |
| Frigate | 40 | 4 | 3 | 70 | LC, RB (x4), LB, T (x2) | RH, MS (x2), ICM (x4) |
| Destroyer | 50 | 3 |
(Statistics for stations vary with the size and type of station.)
Advanced Game Scenarios
The two scenarios described in this section are intended to give players the "flavor" of Knight Hawks games. Players are encouraged to create their own scenarios after playing these a few times. Both of these scenarios pit the UPF against the Sathar. Other conflicts (involving pirates, rebels, dictators or other interstellar ruffians) certainly are possible, and players are encouraged to experiment with new forces and situations.
Advanced Scenario 1: Close Escort
While escorting a heavily laden ore carrier, a UPF light cruiser and a pair of assault scouts encounter a Sathar light cruiser and destroyer near a major fortified space station.
UPF Ships
| Ship | HP | ADF | MR | DCR | Weapons | Defenses |
|---|---|---|---|---|---|---|
| UPFS Courageous (Light Cruiser) | 70 | 3 | 2 | 100 | DC, LB, EB, PB, RB (x6), T (x4) | RH, ES, SS, ICM (x8) |
| UPFS Scimitar (Assault Scout) | 15 | 5 | 4 | 50 | AR (x4), LB | RH |
| UPFS Dagger (Assault Scout) | 15 | 5 | 4 | 50 | AR (x4), LB | RH |
| UPFS Megasaurus (Freighter) | 75 |
Sathar Ships
| Ship | HP | ADF | MR | DCR | Weapons | Defenses |
|---|---|---|---|---|---|---|
| SAV Faminewind (Light Cruiser) | 70 | 3 | 2 | 100 | DC, LB, EB, PB, RB (x6), T (x4) | RH, ES, SS, ICM (x8) |
| SAV Nemesis (Destroyer) | 50 | 3 | 3 | 75 | LC, RB (x4), LB (x2), EB | RH, MS (x2), ICM (x5) |
Setting Up. The two forces enter the map from opposite, short map edges. The Sathar player can establish whatever speed he wants for each of his ships on the previous turn. Because of the slow freighter, the UPF ships must begin with a speed of 5. After the ships are placed, each player rolls a die. The player rolling the higher number is side A, and moves first.
Special Rule. The Megasaurus must travel in a straight line at a speed of 5 hexes per turn until it has crossed the map. If it has not been destroyed by this time, it will leave the map and is assumed to have reached the safety of the fortified station as the warships resolve the battle.
Victory Conditions. The player who destroys all of his opponent's ships is the victor. If the Megasaurus escapes and all of the other UPF ships are destroyed, however, the game is a draw.
Advanced Scenario 2: The Stand
The Sathar fleet approaches the fortified station at Ken'zah Kit. No reinforcements are available; the few UPF ships already at the station must fight.
UPF Ships
| Ship | HP | ADF | MR | DCR | Weapons | Defenses |
|---|---|---|---|---|---|---|
| UPFB Ken'Zah Station (Space Station) | 140 | - | - | 100 | LB (x2), RB (x8) | RH, MS (x2), ICM (x10) |
| UPFS Z'Rak't Zoz (Minelayer) | 50 | 1 | 2 | 75 | M (x20), S (x4), LB (x2) | RH, ICM (x4) |
| UPFS Shimmer (Frigate) | 40 | 4 | 3 | 70 | LC, RB (x4), LB, T (x2) | RH, MS (x2), ICM (x4) |
| UPFS Zz'Nakk'T (Frigate) |
The following 5 fighters are based at Ken'zah Station:
| Ship | HP | ADF | MR | DCR | Weapons | Defenses |
|---|---|---|---|---|---|---|
| Fighters A-E | 8 | 5 | 5 | 30 | AR (x3) | RH |
Sathar Ships
| Ship | HP | ADF | MR | DCR | Weapons | Defenses |
|---|---|---|---|---|---|---|
| SAV Maelstrom (Assault Carrier) | 75 | 2 | 1 | 150 | LB, PB, RB (x8) | RH, MS (x4), ICM (x10) |
| SAV Bludgeon (Destroyer) | 50 | 3 | 3 | 75 | LC, RB (x4), LB, T (x2), EB | RH, MS (x2), ICM (x5) |
| SAV Viper (Destroyer) | 50 | 3 | 3 | 75 | LC, RB (x4), LB, T (x2), EB | RH, MS (x2), ICM (x5) |
| SAV Deathstroke (Light Cruiser) |
The following 6 fighters are based aboard the Maelstrom:
| Ship | HP | ADF | MR | DCR | Weapons | Defenses |
|---|---|---|---|---|---|---|
| Fighters A-F | 8 | 5 | 5 | 30 | AR (x3) | RH |
Setting Up. The planet Ken'zah Kit is placed in the middle of the map with the station in orbit around it.
The Sathar will enter the map from one of the narrow edges, and the Sathar player must announce which edge it will be before the UPF player places his ships. The UPF player then places his ships anywhere on the map, traveling at any speed desired. The UPF player may also place mines and seeker missiles anywhere on the map, noting the numbers of the hexes on a piece of paper. The Sathar player then places his ships on the map edge. The Sathar are the attackers in this scenario, and have the first move.
Victory Conditions. The player who destroys all of his opponent's ships is the victor. The station is considered a ship for this purpose. If all of the ships on one side have been destroyed and the other side has only fighters remaining, however, the game is a draw.
Ship Rosters
A form containing four ship rosters is printed on the inside back cover of the Knight Hawks Campaign Book. This form can be photocopied for personal use during Knight Hawks games.
The sample on the form shows how it should be filled out for a typical light cruiser. The area of boxes can be used to mark off LTD weapons. The light cruiser on the sample form carries six rocket batteries (RB), four torpedos (T), and eight interceptor missiles (ICM). Unused boxes are darkened or crossed off to show that they are not available.
The Damaged Systems box is needed only if players are using the Advanced Game Damage Table.
Playing Knight Hawks with Miniatures
Players interested in expanding their Knight Hawks games can use miniature metal spaceships instead of the cardboard counters included with the game.
If the miniatures are small enough, they can be used directly on the space map. Playing with miniatures is most fun, however, when they are used without a map. To do this, simply convert all measurements to inches by letting one inch equal 10,000 km (the size of one hex).
For example, a ship that is moving with a speed of 5 travels five inches. If it has an ADF of 3, it can increase or decrease its movement by three inches per turn.
A ship can turn up to 60 degrees when it uses one MR point (this can be measured with a protractor or a cardboard template). A ship can turn less than 60 degrees, but this still uses one whole MR point. For extra realism, players can allow a ship to make several turns that add up to 60 degrees for one MR point.
Planets and moons can be cut out of cardboard and colored however the players like. These planets can be cut to reflect their real size, unlike the counters in the game. For example, the Earth would be 1.3 inches in diameter. The moon would be .3 inches in diameter, 38 inches away from the Earth.
PART II: CAMPAIGN BOOK (EXPANSION RULES)
Introduction (Campaign Book)
Although the boardgame can be played by two players or two teams, a referee is needed to get full enjoyment from the rules in this book. The referee arranges encounters and plays NPCs - the same things he does in a STAR FRONTIERS campaign. The Referee's Background section included in this book is to aid the referee in adding spaceships to his campaign.
The addition of spaceships will open many new opportunities for adventures in a science fiction role-playing campaign. Spaceship adventures are easy to create, whether the characters are using a ship that was loaned to them or one that was custom-built to their specifications.
Interstellar Travel
Spaceships were developed that could accelerate to a speed of about 12 million km per hour (1% of the speed of light). At this speed a ship will disappear from the space known as the universe and enter a region called "the Void." Time is very distorted in the Void, and space does not seem to exist at all. If a ship decelerates slightly while in the Void, it will emerge into the "real" universe at some point far distant from where it left the universe. By carefully coordinating the ship's direction with the length of time the ship spends in the Void (usually 3 to 15 seconds), a navigator can "jump" his ship into the vicinity of another star.
Although this process of jumping through the Void allows ships to cover immense distances in very short times, jumping still takes several days. Most of this time is spent accelerating to jump speed and then decelerating at the other end.
What Is the Star Frontiers Knight Hawks Game?
Knight Hawks game is a set of rules that allows players of the STAR FRONTIERS role-playing game to design, build and use spaceships in their campaigns. The Knight Hawks boardgame introduces the movement and combat rules for spaceships. Players do not need to have played STAR FRONTIERS game to play the boardgame. The Knight Hawks Campaign Book (this book) introduces rules for using STAR FRONTIERS characters with spaceships. Players can use their own Vrusk, Yazirian, Dralasite or Human characters in Knight Hawks games. These characters can learn several new skills that are related to spaceships, including spaceship piloting, navigation, engineering and gunnery.
Spaceship Design
Characters may want to design their own spaceships at some point during a STAR FRONTIERS campaign. The high cost of building a starship will prevent most characters from owning one, however. Most starships in the campaign probably will be chartered, or vessels that are loaned to the characters by their employer for a specific mission.
Even if characters do not have enough cash or credit to design or purchase a spaceship, the referee can use this section himself to design ships that fit a specific need in the campaign.
Even if characters do not design their own spaceship, this section will be useful if they need to modify a ship for a special purpose. This section explains how characters can design and build spaceships, and how they can modify existing ships. The following section, Spaceship Equipment, describes specific systems that can be installed on spaceships.
Spaceship Types
Shuttles
Shuttles are small ships that can land on the surface of a planet and take off again. They can fly into orbit around planets, but their range is too short for interplanetary or interstellar travel. They are propelled with chemical drives (rockets). Shuttles are the least expensive spaceships to build.
Shuttles are used to transport passengers and supplies from starships or space stations to a planet's surface, and from planets to ships in orbit. Unlike other types of spaceships, a shuttle can be flown by any technician that has reached the 6th level of ability.
System Ships
System ships are driven by chemical propulsion. They can be built in a wide variety of sizes, and most have much longer ranges than shuttles. These vessels are called system ships because they can travel among the planets, asteroids and space stations of a given star system. The limitations of rocket engines, however, prevent them from attaining the speeds necessary for interstellar travel.
System ships can be used for many jobs. They are used to transport minerals from mining centers on asteroids or uninhabited planets to large processing centers. Some exploration and agriculture ships are system ships. In star systems where several planets are inhabited, they may carry passengers between those planets. Any character with 1st level spaceship piloting skill can operate a system ship.
Starships
Starships are used for any job that requires transport from one star system to another. Most military ships, many freight haulers, passenger, research and exploration vessels, and some agricultural ships are starships.
Starships are the fastest and most expensive spaceships. Starships are driven by either atomic fission engines or ion engines. They tend to be large, although the recent introduction of the assault scout has created an exception to this rule.
A character must have reached at least the 2nd level of spaceship piloting skill to operate a small starship. Higher levels of ability are required to operate larger starships. See the section on Spaceship Skills for more details.
Space Station Types
Space stations are different from space ships, as they have no means of propulsion. Instead, they are constructed in orbit around a planet, and stay there through their entire service. Space stations vary widely in size and cost. Most spin so that centrifugal force will simulate gravity around the station's outer rim. It is not uncommon for a station to have a population of several thousand more or less permanent residents.
Commerce Centers
Space stations are used as docking centers for all other types of spaceships. Starships and large system ships cannot land on planets, so they transfer cargo and passengers while docked at space stations. Shuttles are used to transport goods and passengers between the station and the planet's surface. Larger stations carry large quantities of supplies that are loaded onto ships as they are needed.
The docking bay of a space station is located at the "hub" of the circle. There is no centrifugal force, and hence no gravity, in the docking bay, so ships can gently connect to the ports leading to the interior of the station. The "spokes" of the circle usually contain elevator shafts which ferry individuals and goods to the station rim. As the elevators travel toward the rim, the feeling of gravity inside the elevator increases until, at the rim, it is the equivalent of about 1 g.
The rim of a commerce station contains all of the stores, restaurants, taverns, nightclubs, theatres and other businesses common in a bustling city. The rim is divided into several decks. The upper decks - those closest to the hub - contain living quarters similar to apartments and hotel rooms, where characters can stay during a visit to the station. Above the lodging decks are the administrative offices of the station. Larger stations store many supplies that are loaded onto spaceships as they are purchased. The supply storage area usually is near the hub, where large, massive objects and crates can be moved easily through the low gravity.
Military Bases
Military stations are organized about the same as other stations, with a docking bay in the center and recreational facilities along the rims. The docking bays are often very large, however, and missile launchers and weapon batteries are mounted along the rim for defense.
Specialized Stations
Some space stations are designed solely to be centers for spaceship construction, as research laboratories or as areas for food production. More details on these special purposes are given later in these rules, in the section on Optional Spaceship Equipment.
Spaceship Hulls
Spaceship hulls are rated by size from 1 to 20. A fighter has a type 1 hull, whereas a battleship has a type 20 hull. The hull is the framework for every spaceship, and each hull size includes a specific number of hatches, decks and engine mounts. The Spaceship Equipment section lists each hull size with specifications for engines, entry and exit, and living quarters.
Note that two hulls of the same hull size can be built in very different shapes. The term "hull size" is simply a measure of how much material is needed to make the hull. A shuttle of hull size 3 might be a saucer-shaped vessel with chemical drives firing out one of the flat sides of the disk; whereas an assault scout of the same hull size is a long, sleek ship equipped with two atomic engines.
Space station hulls are shaped and rated differently. There are only 6 types of space station hulls, with 1 the smallest and 6 the largest. As with ships, however, a space station design must begin with the selection of a hull.
Scale illustrations of many different spaceships and stations are included in this book for comparison.
Spaceship Designs
Standard spaceships are designed to perform a specific job. Many different warships were described in the boardgame. Each of these ships has a defined function within the UPF or Sathar Spacefleet. Civilian ships also are designed with an emphasis on the ship's purpose.
This section lists the most common ship purposes, and briefly defines each. If, at some point in the campaign, a player wants to design a ship for a role that is not listed here, the referee should be able to use these descriptions as models when designing the unique ship.
Because the size of a ship often depends on the ship's purpose, this section also includes a list of the common hull sizes used for each type of ship. The prices of the different hull types are in the Spaceship Equipment section.
Warships
Fighters. HULL SIZE = 1. Fighters are fast and maneuverable ships, designed to attack larger ships with assault rockets. A fighter has one crew member (the pilot) and carries enough life support for approximately 20 hours.
Assault Scout. HULL SIZE = 3. Assault scouts can be used to attack larger ships much as fighters can, but their larger size and crew of 4 to 6 give them much more versatility. They can make interstellar trips, although they require an overhaul after each jump. They serve as scouts and rescue ships as well as combat vessels.
Frigate. HULL SIZE = 5. The frigate is the smallest of the "full size" spacefleet vessels. Carrying 25 to 30 crew members, frigates can make high speed patrols, and up to three jumps before needing an overhaul. Frigates are the mainstay of the UPF fleet.
Destroyers. HULL SIZE = 6. Destroyers carry 40 to 50 crew members. They are very similar to frigates, being only slightly larger and a bit less maneuverable. A destroyer carries more fuel than a frigate, but still needs an engine overhaul after every three jumps. The UPF has only a few destroyers. The Sathar have made them their most common warships.
Minelayer. HULL SIZE = 7. Minelayers carry 30 to 40 crew members. Although larger than a destroyer, a mine layer has a smaller area devoted to living quarters for the crew, since most of the ship is used to store mines and seeker missiles. Its ion engines are slow, but very reliable, so a minelayer can make many jumps before it needs an overhaul.
Assault Transport. HULL SIZE = 8-10. Assault transports can be built with a size 8, 9 or 10 hull. They carry very few weapons, relying heavily on other ships for protection. A transport can carry from 600 to 1,000 troopers, however. The ship's cargo hold carries one shuttle for every 100 soldiers. An assault transport's ion engines are slow, but these ships can make more than a dozen jumps between overhauls.
Light Cruiser. HULL SIZE = 12-14. Light cruisers carry 70 to 100 crew members and can be built with a size 12, 13 or 14 hull. These ships tend to be fast and well-armed, but cannot absorb as much damage as a heavy cruiser or battleship. A light cruiser can make three jumps before requiring an engine overhaul.
Assault Carrier. HULL SIZE = 14-17. Assault carriers serve as mobile bases for fighter squadrons. A carrier transports fighters to the scene of a battle, launches them, and recovers and re-arms fighters that survive the battle. Because of the large amount of maintenance required by fighters, an assault carrier carries 300 to 400 crew members. Most carriers have a complement of 5 to 8 fighters, but some of the largest can carry 12 or more. Although they are not fast or maneuverable, an assault carrier can make 3 to 12 jumps before needing an engine overhaul, depending on the size of its engines.
Heavy Cruiser. HULL SIZE = 16-18. Heavy cruisers are the original battleships of the spacefleet. All heavy cruisers, both Sathar and UPF, are old ships. They are among the slowest and least maneuverable starships. The Sathar have many heavy cruisers in active service, but the UPF has been phasing them out in favor of modern battleships. A heavy cruiser can make a dozen interstellar jumps before the engine must be overhauled.
Battleship. HULL SIZE = 20. Several battleships have recently been built by the UPF. These are the mightiest warships in the frontier, and carry about 400 crew members. A battleship has excellent maneuverability and acceleration, and can absorb considerable damage. In addition, the new and durable engines mounted on these ships allow 12 jumps between overhauls. The biggest disadvantage of the battleship is its extreme cost; only three have been commissioned at the current time.
Scientific Research Ships
System Ships. HULL SIZE = 3-6. System research ships are basically self-propelled laboratories that are based at space stations or (rarely) at a spaceport on a planet. They are used to explore, map and analyze the planets, asteroids, moons and star(s) of a given star system. Detection of gravitational patterns, star mapping, and atmosphere and ecological analysis of potentially habitable planets are among the primary functions of a system research ship. The rocket engines of a system ship are not capable of interstellar travel, but a large research ship can spend up to a year in space before returning to base.
Starships. HULL SIZE = 3-7. Starship research vessels have atomic engines and are capable of interstellar jumps. These ships often are used to examine recently discovered systems, deep space phenomena (gas clouds and such) or mineral content in distant and uninhabitable planets and asteroids. Performance is not a priority on these ships, so acceleration and maneuverability tend to be poor. However, starship research vessels often are capable of making three jumps before the engine needs an overhaul.
Transport Ships
Spaceliners. HULL SIZE = 6-15. Spaceliners (passenger transports) are built in a wide variety of sizes. Modern spaceliners are fast, quiet ships, capable of providing the wealthy passenger with any conceivable luxury. Many of the older liners are smaller, somewhat decrepit vessels that promise only the fundamental requirements of life support. The number of passengers carried by a spaceliner is about 25 times the ship's hull size. For example, a space liner with a hull size of 10 can carry 250 passengers. Engine durability varies as much as size on space liners. Some will require an overhaul after three jumps, while others will be able to make 8 or 10 interstellar trips without maintenance.
Freighters. HULL SIZE = 5-20. Freighters (freight transports) are built in a greater variety of styles than spaceliners. The largest are as big as a battleship, but are much slower and less maneuverable. Some small freighters are fast enough to outrun pirate vessels or spacefleet frigates. Most of the room in a freighter is taken up by cargo, so the crew generally will approximately equal the ship's hull size. As with spaceliners, differences in engine performance allow some freighters to make many jumps without adjustment, while others must be overhauled after each trip.
Agriculture Ships and Stations
Agriculture Starships. HULL SIZE = 8-16. Agriculture starships are very expensive to build and move, because of the large amount of mass (in the form of water) that they must carry. Sometimes, however, the only way a new colony in some remote star system can be provided with food is by sending an Ag starship to that system. In this case, the smallest type of Ag ship that can supply the colony's needs will be sent. As a colony grows, it is expected to begin developing its own food sources.
Agriculture System Ships. HULL SIZE = 10-20. Agriculture system ships are huge vessels designed to serve as a base for food production. Food usually is grown hydroponically (in nutrient solutions) to produce as much food as possible in a short time. Ag ships use solar energy from the system's star, but also have auxiliary power sources to provide the light and heat needed by the growing plants. Agriculture ships often are the only source of food in systems where edible plants cannot be grown on the planets. An Ag ship can support a number of people equal to its hull size x 200, providing all of the food for that group of individuals. Because most of the work on an Ag ship is done by robots, an Ag ship needs only four crew members, plus one additional crew member for each 5 hull size points.
Agriculture Space Stations. STATION HULL SIZES = 4-6. An Ag space station has the same function as an Ag ship, but it has no engines. Most are in permanent orbits around planets, but some are placed nearer to a star to collect enough solar energy so they do not need auxiliary power sources. An agriculture space station can produce enough food to feed a population equal to its hull size x 2,000.
Mining Ships
HULL SIZE = 8-20. Mining ships are used to remove valuable ores, minerals, metals and other resources from asteroids and planets. The ship's processing facilities remove valuable materials from the rock or dirt being mined and jettison the tailings. When a planet is mined, the mining ship sends several shuttles (carried in the miner's cargo hold) down to the surface, where the digging and processing takes place. Only the valuable materials are brought back to the ship. The processed materials are loaded into the shuttle hangars and the shuttles are left behind when the miner returns to its base. When an asteroid is mined, the processing takes place in the mining ship. Digger shuttles are used to bore into the asteroid and carry the raw ore back to the mining ship.
Exploration Ships
HULL SIZE = 3. Exploration ships are civilian versions of assault scouts. They have the same performance capabilities, but are usually unarmed. Instead of weapons, they carry sophisticated computers and mapping devices for exploring the unknown reaches of the galaxy. An exploration ship can carry up to 10 crew members. As traveling in unmapped regions is a very risky business (10 to 20% of all exploratory missions are never heard from again!), exploration ship crews are kept as small as possible. A wide variety of miscellaneous equipment can be carried by an exploration ship. Occasionally, a large research starship will be outfitted and manned for an exploratory mission. This generally occurs when a standard exploration ship would be too small for the expedition's needs.
Space Station Designs
Space station hulls are ring-shaped, with a dock for spaceships at the center of the ring. Stations vary from 200 to 1,200 meters in diameter. The various hull sizes are rated from 1 to 6 (the scale used to rate space stations is different from that for starships). A station's diameter equals its hull size x 200 meters.
Space stations usually serve as bases for spaceship operations and as links for space-planetary communications and travel. At major starship airdocks and military bases, as many as six or eight Type 6 stations may be linked in a line, but these orbiting giants are rare. The types of ships that can be docked at various stations are listed below.
| Station Type | Ship Types |
|---|---|
| 1 | 1-6 |
| 2 | 1-10 |
| 3 | 1-14 |
| 4 | 1-18 |
| 5 | any |
| 6 | any |
Not all space stations fit the descriptions above. Such stations are designed and built to serve a specific purpose, and are not equipped to serve as bases for spaceships. Space stations can be used for agriculture, scientific research and planetary defense. Stations designed for planetary defense are designated "fortresses," and can serve as bases for military ships. A fortress may even have a small complement of fighters that can be launched and re-armed there.
Civilian Ships: Calculating DCR and Hull Points
A referee will often need to know the number of hull points and the DCR of civilian ships involved in combat. If the information is not given in the boardgame rules, the following equations can be used.
To find a ship's Damage Control Rating, multiply the ship's hull size by 3 and add 20. To find the number of hull points the ship has, multiply its hull size by 5. These two formulas are summarized below:
- DCR = (hull size x 3) + 20
- Hull Points = hull size x 5
EXAMPLE: A freighter of hull size 8 has a DCR of (3 x 8) + 20 = 32 + 20 = 52. It has (8 x 5 =) 40 hull points.
A ship's damage control rating represents both the crew's repair work and computer guided repairs that can be made in the electrical circuitry of a ship.
Equipping Spaceships
Required Spaceship Systems
All spaceships must be designed to include the following seven systems. A full explanation of the different costs, size and maintenance requirements for each system can be found in the Spaceship Equipment section.
Hull. The hull provides the framework that holds the ship together. Hulls are not always solid, with air pressure throughout the interior; often, much of a ship's hull resembles a cage that simply keeps cargo inside.
Propulsion. Spaceships have from one to eight engines. Three types are available: rocket, atomic or ion drives. Rocket engines are often located at the stern (back) of the hull, while atomic and ion engines are mounted on struts and kept at a distance from the hull.
Life Support. Life support systems are necessary to keep a ship's crew and passengers alive in space. The cost of life support depends on the number of creatures that must be kept alive. Life support includes air, water, food and waste utilization.
Computer. A computer is required on a spaceship to operate the engines properly, run the life support system, make navigation calculations and operate weapons or other special systems. The cost of a computer will vary with the size of the ship and the number and complexity of programs involved.
Navigation. A series of complicated instruments are required by navigators in order to take the readings necessary for interstellar jumps. The cost of these instruments does not vary much from ship to ship.
Communication and Detection. These systems allow a ship to send messages either at the speed of light via radio waves or at an accelerated rate with a subspace radio, and to scan the space around the ship for other ships, asteroids and assorted space objects. Communication and detection systems vary in cost depending on the complexity and range of the system purchased.
Emergency. Emergency equipment is designed to keep a ship's crew and passengers alive if the life support, hull or other major system should fail. Included in this category are backup life support systems, spacesuits, lifeboats and rescue pods.
Optional Spaceship Systems
In addition to the required systems, characters can have some or all of the following systems installed on a ship. The actual costs and space requirements of optional systems are listed in the Spaceship Equipment section.
Weapons. All of the weapons described in Knight Hawks game can be used in the role-playing game. Restrictions on the types of weapons that can be carried by each type of ship still apply (a fighter cannot be armed with torpedo, for example).
Defenses. All defenses used in the boardgame can be purchased and installed on the appropriate ship types.
Special Systems. This category includes the equipment and materials needed for agriculture, mining, exploring, research, or passenger or freight transport. The costs and space requirements of special systems vary widely. Check the Spaceship Equipment section for details.
Spaceship Construction
A huge amount of raw material and many skilled personnel are needed to build a spaceship. Airdock facilities are also needed, to hold the ship during construction. The necessary combination of material, personnel and facilities can be found in only a few places throughout the Frontier.
Designing a Ship
There is no such thing as a "standard" or "typical" spaceship design. Besides the fact that each of the four races has its own design peculiarities and customs, most spaceship owners prefer to have ships designed that fill their specific needs. High technology in the Frontier allows spaceship designs and construction to be extremely fluid.
When players are trying to design spaceships for their own use, the referee should concentrate on maximum flexibility. Although each hull's general length and diameter are given on the Hull Table, there is no need to account for each cubic meter of the ship's interior. Extra space onboard a ship will generally be used for mundane storage: spare parts, spacesuits, small cargos, or ground equipment. Also, because starships larger than hull size 3 are not streamlined to land on planets, large pieces of equipment that will not fit inside the ship can simply be mounted on brackets outside the ship. Very general information on the space needed for some systems is given in the description of those systems in the Spaceship Equipment section. A few more guidelines are given here. Referees who want more information must generate specifics themselves.
Bridge. A ship's bridge (command center) typically fills one entire deck. This usually is the topmost deck in the ship, making it easy to restrict access to that deck.
Engineering Section. The bottommost deck in most ships usually is the engineering section. Repair shops, engine monitors and spare parts can be found in this area.
Ship's Vehicles. Very few ship's vehicles are kept inside the ship's hull. Workpods, lifeboats and shuttles usually are mounted outside the ship, with a hatch between the ship and the boat. (These hatches are in addition to the ship's entrance airlocks.) Launches and fighters generally are kept inside the ship, in small landing bays.
Construction Times
The time needed to actually build a spaceship equals the hull size of the ship x 30 days. For example, an assault scout (hull size 3) can be built in 90 days.
Spaceship Construction Centers
Spaceships can be built only at spaceship construction centers. Every construction center is rated as a Class I, Class II or Class III center. All centers consist of at least one Type 6 space station hull in orbit around an inhabited planet in the Frontier.
The docking bays of these Spaceship Construction Centers (SCCs) are large, open areas. Often, specific docks in the bay may be enclosed to contain air pressure, so workers do not need to wear spacesuits; these are called airdocks. Spacers generally refer to an airdock as "the shop."
Class I Centers can construct any type of military or civilian ship. Up to 140 hull points of ships can be under construction at any one time.
To determine whether airdock space is available for ship construction, roll d100 and add 80 to the number rolled. If the total is less than 140, it is the number of ship hull points currently under construction at that center. If the number is over 140, any points above 140 represent ship hull points waiting for airdock space. If not enough airdock space is available for the characters' ship, the characters must wait for space to open up. The number rolled will decrease by 1 every day, until there is enough room in the airdock for the characters' ship.
EXAMPLE: Several characters have a 5-hull point freighter that needs extensive repairs. A player rolls d100 and gets 72. Adding 80 gives a total of 152. This means the airdock is full, and there are (152 - 140 =) 12 ship hull points waiting for space ahead of the players. In 12 days, all these ships will be moved inside and the players' ship will be first in the waiting line. In another five days, enough space will be opened up inside for the players to move their ship into the airdock.
Class II Centers can house any civilian ship of 14 hull points or less, and military vessels of 6 hull points or less. Up to 50 hull points of ships can be under construction at one time.
To determine the amount of current work and backlog at a type II center, roll d100. The result is the number of hull points being worked on (up to 50) and the number of days a ship must wait before construction space is freed (any number over 50).
Class III Centers are used only for the construction of system ships, since installing and adjusting atomic engines requires equipment that is not available at these smaller centers. Any size civilian system ship can be built at a Class III center, but these centers will never be used for the construction of military vessels. Up to 20 hull points of ships may be under construction at one time.
A player constructing a ship at a Class III center rolls 3d10 to determine the amount of work and backlog at the station, using any number over 20 as the number of days wait before construction can begin.
Locations of Spaceship Construction Centers
The Construction Center Table shows the location of all of the Class I, II and III centers in the Frontier.
Construction Center Table
| System (Planet) | Center Class | # of Type VI Hulls |
|---|---|---|
| Araks (Hentz) | Class II | 3 |
| Cassidine (Rupert's Hole) | Class III | 1 |
| Cassidine (Triad) | Class I | 6 |
| Dramune (Outer Reach) | Class III | 1 |
| Fromeltar (Terledrom) | Class II | 4 |
| Prenglar (Gran Quivera) | Class I | 8 |
| Theseus (Minotaur) | Class II | 3 |
| Truane's Star (Pale) | Class III | 1 |
Spaceship Maintenance and Repairs
Like all types of machinery, a spaceship requires maintenance in order to operate with top efficiency. If the ship does not receive this maintenance, the chance of a serious breakdown during a voyage increases dramatically.
Annual Maintenance
All spaceships, whether starships, system ships or shuttles, should undergo routine maintenance once every year. Any spaceship construction center can perform routine maintenance on any ship, even if the ship could not have been built at that center.
These routine checks, replacements and tuneups take a number of days equal to 1d10 plus the hull size of the ship. The cost is assessed to the shipowner at a rate of 1,000 Cr per day of work. If the ship is operating under a company charter, the company and the owner split the cost in half.
If a ship has gone more than a year without maintenance, add another d10 to the number of days needed to complete the work. If two years have passed, 2d10 should be added, and so on. In other words, for each year that the ship is not maintained, another 1 to 10 days of work are required when it finally does get into the shop.
Spaceship Breakdowns
The breakdown of a crucial spaceship system is a matter of grave concern to all spacers. While routine maintenance lowers the chance of a breakdown, it does not eliminate that chance entirely. Factors such as the age of the ship and the length of time since its last annual maintenance affect the likelihood of a system failure or breakdown.
The chance that a new ship will break down on any given voyage is only 1%. For each five years that the ship has been in service, add another 1%. For example, a ship that is 25 to 29 years old has a 6% chance of breaking down on a voyage. Unless the referee has a specific reason for declaring a ship to be a certain age, consider most spaceships to be 2d10 years old.
If a ship misses its yearly maintenance, add 5% to its breakdown chance. If more than two years have passed since the ship was in the shop, add 10%, and so on.
There will be times when the dice indicate a breakdown should occur, but serious problems would be caused in the campaign if the players had to stop the action to make repairs. As usual, this rule is simply a guideline that the referee should disregard whenever it is inconvenient. On the other hand, a breakdown is an excellent tool for the referee when he wants to strand the characters so they can have a planned adventure.
The referee should roll for a breakdown at some time during each voyage. If there is a breakdown, the Spaceship Breakdown Table should be consulted.
The Spaceship Breakdown Table lists many types of breakdowns that can be suffered by a spaceship. Once the referee determines that a ship will break down, he should roll 2d10 and find the result on this table. Or, the referee can simply choose a breakdown that suits his purpose, or invent a new one that is not on the table.
Spaceship Breakdown Table
| Dice Roll (2d10) | Breakdown | Repair Time (days) |
|---|---|---|
| 2 | Reactor meltdown; atomic engines will explode in 1d10 minutes, must be jettisoned. | no repair possible |
| 3 | Life support failure; characters must wear spacesuits until repaired | 1d10 |
| 4 | Radar failure | 1d10 |
| 5 | Drive program falters, all engines shut down. | 1d10/engine |
| 6-7 | One engine hyper-ignites; replace fuel pellet. | standard |
| 8 | Astrogation program fails, no jumps possible until repaired | 2d10 |
| 9-10 | Computer burnout, cannot use drives or life support until repaired | 2d10 |
| 11-12 |
* Any failed repair roll (not just 99 or 00) means that the damage must be repaired at an SCC.
When the repair time is listed as a number of d10, the result of the dice roll is the number of days needed to make the repairs. If an engineer is aboard, his skill level can be subtracted from the roll. If the result is zero or less, the repairs will take one day anyway. Only one engineer can subtract his skill level, even if more than one is aboard the ship.
If the repair time is "standard," the procedure for repairing the problem is explained somewhere else in these rules. The players should use the usual procedure for repairing that breakdown.
When the repair time listed is "DCR," the damage is repaired using the ship's DCR (including engineer bonuses), as if the ship was in combat. If a meteor collides with the ship, any unsuccessful DCR roll means that the ship must be repaired in a shop. Any further attempts to repair the ship in space will fail automatically.
Battle Repairs
When a ship survives a battle, crew members will try to repair battle damage as quickly as possible. Most ship systems can be repaired in space, but severe hull damage may be impossible to repair without airdock facilities.
Hull damage is repaired using the ship's DCR, the same as during combat. Each successful roll repairs 1d10 points of hull damage. If any hull damage repair roll is unsuccessful, however, then the damage cannot be repaired in space. The ship must be taken to an airdock and patched. While in the shop, 1d10 points of hull damage will be repaired per day, at a cost of 1,000 Credits per day.
Other systems also can be repaired using the ship's DCR. The entire DCR can be applied to each repair. One roll is allowed every 30 minutes. Eventually, every system will be repaired. However, if any roll results in a 99 or 100, that system cannot be repaired with parts on the ship. The ship must be taken to an airdock, where the damaged system can be repaired in one day for the standard charge of 1,000 Credits per day.
Spaceship Equipment
The most important part of spaceship design is choosing what equipment to install in the ship. The choice of equipment determines how well the ship performs in combat, and what jobs it can do in civilian service.
Many different types of equipment are described in this section. Some of them are required, but many others are optional. The description of each item includes its cost and a report on what the item can do and how it is used.
Note that "required" systems are simply those that usually are installed in spaceships. If a player designing a ship wants no astrogation or life support equipment, he is free to leave them out. The referee may have to tell the player some bad news when the ship enters space, however!
Besides helping players design ships, this section is useful to players who want to learn more about equipment that is already on a ship. The ship rosters from the boardgame and those included in this book list all of the equipment installed on the different ships. Some quick checks through this section will explain exactly what the ships on the rosters can do.
Hulls
Hulls are rated by size (from 1 to 20). Each hull size has a set number of hatches and engine mounts. The length and diameter of a given hull can be increased or decreased as much as 25%, however, since two hulls of the same size can be of very different shapes.
Hatches always include an airlock inside the opening in the hull. The airlock provides an enclosed area that can be filled with air, allowing "spacewalkers" to take off spacesuits and then enter the ship. Hatches are located once every two or three decks, but there never is a hatch on the deck closest to the bow.
Engine mounts on a hull will take any type of engine. Chemical drives can be mounted in the tail. Ion and atomic drives must be mounted on struts. Note that a ship does not need to use all of its engine mounts; the engine mount number is simply the maximum number of drives the ship can carry.
Entries in the ADF/MR column show the ADF and MR that a ship of that size will have if it is outfitted with the maximum number of atomic engines its hull can carry. This is explained in more detail under Spaceship Drives.
Hull Specification Chart
Lengths and diameters are given in meters.
| Type | Leng/Diam | Hatches | Engines | ADF/MR |
|---|---|---|---|---|
| 1 | 10/2 | 1 | 1 | 5 |
| 2 | 30/5 | 1 | 1 | 4 |
| 3 | 50/8 | 1 | 2 | 4 |
| 4 | 75/12 | 2 | 1 | 4 |
| 5 | 100/15 | 2 | 3 | 3 |
| 6 |
Hull Availability and Cost
Availability
Class I Centers. All types of spaceship hulls are available at Class I spaceship construction centers.
Class II Centers. Military hulls of type 6 or smaller, and hulls for civilian purposes of type 14 or less may be available at Class II spaceship construction centers. There is a 75% chance that a specific type of hull will be available.
EXAMPLE: A character at a Class II construction center wants a size 7 civilian hull. The player rolls d100 and gets 60. This is equal to or less than 75, so the hull is available.
Class III Centers. Class III construction centers can build only civilian system ships. Only 20 hull points of ships can be under construction at any one time. There is a 35% chance that a system ship hull of a specific size will be available at that Class III center.
Cost
The cost of a spaceship hull depends on the hull size and the type of center where the hull is purchased.
At a Class I center, the size of the hull being purchased is multiplied by 50,000 Credits. At a Class II center, the size of the hull is multiplied by 60,000 Credits. At a Class III center, the size of the hull is multiplied by 75,000 Credits. The price is higher at small centers because hulls are harder to build without major facilities. Hull prices are summarized on the Hull Cost Table.
Hull Cost Table
| Construction Center | Cost Multiplier |
|---|---|
| Class I | 50,000 Cr |
| Class II | 60,000 Cr |
| Class III | 75,000 Cr |
EXAMPLE: An assault scout hull (hull size = 3) costs 150,000 Cr at a Class I construction center. The same hull costs 180,000 Cr at a Class II construction center, or 225,000 Cr at a Class III construction center. (The hull can be used only to construct a system ship at a Class III center.) The price for the hull is the same whether it is used for a system ship or a starship.
Spaceship Drives
Three types of spaceship drives (also called engines or propulsion) are available: chemical fuel engines, ion engines and atomic engines. Each of these types has certain limitations and requirements which are discussed in detail here.
In addition to a drive, each ship must have a Drive Program for the on-board computer. Information on Drive Programs is included at the end of this section.
Sizes. Engines of all three types come in three sizes, ranked from size A to size C. Size A is the smallest, and size C the largest. A hull must be equipped with the engine size appropriate for that hull size, as shown on the Hull Size/Engine Size Chart.
All engines are equipped with maneuver jet nozzles. These are used to take the ship through delicate maneuvers, such as docking with a station.
Engine Size Chart
| Hull Size | Engine Size |
|---|---|
| 1 to 4 | A |
| 5 to 14 | B |
| 15 to 20 | C |
Chemical Drives
Chemical drives are the cheapest and simplest spaceship engines. They work by igniting a chemical fuel, and propel the ship with the force of the exhaust. Liquid or solid oxygen must be carried by the rocket. Chemically driven ships must carry a lot of fuel, and cannot accelerate long enough to achieve interstellar speeds.
Any hull that is outfitted with chemical engines must have the full complement of engines for that hull. For example, a ship with a hull size of 13 needs four chemical engines. These engines are mounted at the tail of the ship, instead of away from the ship on struts.
All ships with chemical engines have an ADF of 1.
The Chemical Drive Price Table lists the prices of the three types of chemical engines. Because these engines are simple and easy to build, the cost is the same at all construction centers.
Chemical Drive Price Table
| Engine Size | Price |
|---|---|
| A | 50,000 Cr |
| B | 100,000 Cr |
| C | 200,000 Cr |
Chemical Drive Fuel. Ships using chemical drives burn a load of fuel on every voyage, as a general rule. The cost of one load of fuel is 250 Cr x the hull size of the ship for each engine. This is doubled for shuttles when they are taking off from a planet, because of the extra thrust required to escape the gravity well.
If a chemical drive system ship is being used on a long voyage and the crew wishes to conserve fuel, the referee may allow the players the option of traveling very slowly (a mere 10,000 km per hour or so). They may then be allowed to make a return trip with the same load of fuel that they started with.
Ion Drives
Ion engines operate on the same principle as particle beam weapons, such as a proton or electron beam battery. Charged particles are released from the rear of the engines at tremendous velocity. Even though the particles are extremely small, there are enough of them to provide a ship with a steady and long-lasting thrust. Ion drive engines require very little fuel.
Ion engines must be mounted on struts, away from the hull of the spaceship. Any ship equipped with ion drives must have the full complement of engines for that hull size in order to accelerate and decelerate normally. The ADF of a ship with ion drive always is 1.
Prices for ion engines are listed on the Ion Drive Price Table. Note that ion engines are not available at class III construction centers, and that they are more expensive at class II centers.
Ion Drive Price Table
| Engine Size | Class I Center | Class II Center |
|---|---|---|
| A | 100,000 Cr | 150,000 Cr |
| B | 150,000 Cr | 200,000 Cr |
| C | 200,000 Cr | not available |
Ion Drive Fuel. Ion engines work by ionizing (electrically charging) particles of fuel. This fuel can be just about anything, but the standard substance is hydrogen. If characters are stranded in an asteroid belt with an ion-driven ship, however, they could crush up the rock of the asteroids to use for fuel, or basically use any kind of junk that they can find. All fuels other than hydrogen will provide the ship with an ADF of only 1/2.
Hydrogen can be purchased at all SCCs for a cost of 10 Cr per engine per ADF point used. For example, a ship with two ion engines embarks on a voyage with 8 units (8 x 10 = 80 Cr worth) of hydrogen. The ship accelerates to a speed of two hexes per turn, which uses two ADF points. Since both engines burned the fuel, however, this means that four units of fuel have been used. The ship now has just enough fuel to use two ADF points per engine to decelerate at its destination.
A ship with ion drives can carry a tremendous amount of fuel, if necessary. Up to 10,000 units can be stored in each engine. This can be increased if the crew makes a few modifications to the ship's storage areas.
Atomic Drives
The most powerful type of engine that can be installed on a spaceship is an atomic fission engine. Atomic engines propel the ship by splitting atoms and using the tremendous amount of energy released as thrust. Atomic drives use either uranium or plutonium as fuel. An engine will burn a 10 cm diameter chunk of fuel in the course of an interstellar jump.
Atomic engines are mounted on struts that keep them away from the ship's hull. This is because these drives are a source of dangerous radioactivity, and must be isolated from the crew and living quarters of a ship. A fighter is the only ship that has an atomic drive mounted in the spaceship's tail. Fighter pilots must wear special suits that resist radioactivity.
The struts that atomic drives are mounted on are equipped with explosive charges. These charges enable the pilot or engineer to jettison the engines if this should become necessary. This obviously will be done only in extreme emergencies, such as an engine meltdown or overload (see Close Combat for more details).
ADF. If a ship has a full complement of atomic engines, both its ADF and MR will be the number indicated on the Hull Specification Chart. For each engine less than the maximum, however, either the ship's ADF or MR (player's choice, at time of construction) must be lowered by 1. The ship's MR cannot be more than one higher than the ADF. Also, the ship's ADF and MR never will be less than 1, even if the ship has only one engine.
EXAMPLE: Hargut Lance, a hull size 6 ship, can carry three atomic engines. With all three engines, its ADF is 3 and its MR is 3. If one engine is removed, either its ADF or its MR must be reduced to 2. The owner, Snar Latm, reduces the MR. If a second engine is removed, the ship's ADF must be reduced to 2, or its MR reduced to 1.
Cost. Atomic engines are very expensive, as shown on the Atomic Drive Price Table.
Atomic Drive Price Table
| Engine Size | Class I Center | Class II Center |
|---|---|---|
| A | 200,000 Cr | 250,000 Cr |
| B | 400,000 Cr | 500,000 Cr |
| C | 750,000 Cr | not available |
In addition to the initial cost, atomic engines are more expensive to maintain than either of the other types.
Atomic Fuel. A pellet of atomic fuel is a 10 cm diameter piece of radioactive material, either plutonium or uranium. One pellet costs 10,000 Cr. They can be purchased only at Class I or Class II ship construction centers. A pellet is burned out in a single interstellar jump. A ship that does not decelerate appreciably after a jump will still have power for 1d5 x 20 days.
An atomic engine can automatically replace the fuel pellet after a jump, if the engine has been loaded with an additional pellet. Depending on the size of the engine, from 3 to 10 pellets can be loaded into it before a voyage begins. (For the exact figure, see the Atomic Drive Information Table.) Additional pellets can be loaded only by a Spaceship Engineer (see Spaceship Skills). Refueling an engine takes 2d10 hours, minus the engineer's skill level. Because most of this time is spent removing access panels and shielding, the time is the same no matter how many fuel pellets are loaded.
Overhauls. Besides refueling, atomic engines must be overhauled regularly by an engineer. To determine how much time the overhaul takes, roll a number of d10s equal to the engineer's skill level. Subtract the result of this roll from 60 hours. The difference is the number of hours needed to overhaul the engine.
EXAMPLE: A level 3 starship engineer needs to overhaul a starship's engine. The player rolls 3d10 and gets 15. Subtracting 15 from 60 hours determines that overhauling the engine will take 45 hours.
The Atomic Drive Information Table lists the number of trips each type of atomic engine can make between overhauls.
Atomic Drive Information Chart
| Engine Size | Pellets Carried | Trips Between Overhauls |
|---|---|---|
| A | 3 | 1 |
| B | 6 | 3 |
| C | 10 | 12 |
Multiple Engines. If more than one atomic engine on a ship needs either refueling or overhauling, each must be worked on separately. For example, if only one engineer is aboard a twin-engine ship that needs both overhauling and refueling, that engineer must perform four operations consecutively. This could take several weeks.
Skipping Overhauls. If an atomic engine is not overhauled on schedule and the ship tries to make an interstellar jump, there is a 60% chance the engine will fuse itself into a worthless lump of iron. If a second jump is made, this risk increases to 80%. A third jump cannot be made, and an attempt will automatically ruin the engines. If there is an engineer on board, he has a chance to realize that the engines are about to become fused. This chance is equal to his Logic score plus 10% x his engineering skill level. A successful roll means the engineer can shut down the engines before they are ruined. However, no further acceleration will be possible until the engines are overhauled.
Drive Programs
The delicate balancing of fuel, temperature and thrust required by all types of spaceship engines is beyond the abilities of any single individual. Consequently, a Drive Program must be purchased and used in the ship's computer. This program will respond to a pilot's instructions ("more speed!" or "turn left") and make the necessary adjustments in the engine to cause the desired effect.
Drive Programs vary in cost and complexity, based on the type and size of the engines being operated. The Drive Program Table shows the program level required for each type and size of engine. The number in parentheses following each program level is the number of function points the ship's computer needs to operate that program. Program levels and function points are explained on page 46 of the STAR FRONTIERS Expanded Game rule book.
Drive Program Table
| Drive | Size A | Size B | Size C |
|---|---|---|---|
| Chemical | 1 (3) | 2 (6) | 3 (12) |
| Ion | 3 (12) | 4 (24) | 4 (24) |
| Atomic | 4 (32) | 5 (64) | 6 (128) |
Drive programs can be purchased at any construction center that carries the engines the program will operate. As with all computers, the cost of a program is 1,000 Credits x the number of function points it requires.
Life Support Systems
Life support systems on spaceships provide all the elements necessary to keep creatures on board those ships alive. These include food storage and preparation, and water, atmosphere and waste processing and disposal.
A life support (LS) system consists of the machinery that performs the various functions and a level 1 computer program to control the machinery. The complexity of a Life Support system varies with the number of creatures that must be supported, not with the size of the ship.
The Life Support System Rating Chart shows how many kilograms of LS equipment is needed to support various numbers of creatures (including animals!). The number in parentheses following each weight is the number of computer function points required by the system's level 1 program.
Life Support System Rating Chart
| Number Supported | Mass (kg) and Function points |
|---|---|
| 1-2 | 3 (1) |
| 3-6 | 5 (2) |
| 7-12 | 9 (2) |
| 13-20 | 15 (2) |
| 21-35 | 25 (3) |
| 36-60 | 50 (3) |
| 61-100 | 90 (3) |
| 101-200 | 180 (4) |
| 201-500 | 300 (4) |
| 501-1,000 | 600 (4) |
The cost of a Life Support system is divided between the computer program and the actual equipment. The program costs 1,000 Cr x the number of function points needed. The equipment costs 100 Cr x the weight of the system in kg. An LS system must be replenished with fresh food capsules and water every six months. Replenishment costs half as much as the original LS equipment - not including the computer program.
Capacity. A spaceship or space station cannot have more creatures living in it than its life support system will sustain. If for some reason (rescued castaways, stowaways, etc.) a ship has more creatures on board than its LS system can handle, a backup life support system will be engaged. If the ship has no backup, or if the backup's capacity is exceeded, each creature aboard the ship will lose one stamina point per hour, due to shortage of air.
Obviously, the ship must reach a source of air quickly or its occupants will begin to suffocate. If a creature reaches 0 stamina points, it dies. When enough creatures have died to bring the number of occupants down to the LS capacity, no more stamina points will be lost. At that point, surviving individuals will regain stamina points at the rate of 1 per hour.
Several things can be done to protect passengers in an overloaded ship. Characters that are placed in freeze fields require no life support while the field is operating. If spacesuits are available, persons can put them on and use the suit's life support instead of draining the ship's systems. Spacesuits are a short-term solution at best.
Backup Life Support Systems
Any ship that has a little extra space can carry up to three backup life support systems. There are two advantages to this.
First, a backup LS system makes it safe for a ship to carry more passengers than the main life support system can handle. It is not hard to imagine any number of situations where a backup Life Support system could save many lives.
Second, a ship with a backup life support system can keep functioning normally if its primary LS system malfunctions or is sabotaged. A disastrous fire, however, will knock out all LS systems because it impairs the computer's ability to control the ship. Losing LS during combat has no effect, because everyone will be wearing spacesuits. The system must be repaired as quickly as possible after the battle, however.
Computers
All of the rules in the STAR FRONTIERS Expanded Game rule book apply to computers on spaceships. All of the new programs introduced here can be used with any computer large enough to handle the program's function points, whether on a spaceship, station or planet.
As explained in the STAR FRONTIERS rules, each program is sold with the circuitry needed to make it work. In addition, a special spaceship Control Panel is needed. This panel links the drive, life support, astrogation and other essential programs into an easily controlled master panel for the pilot. A master control panel costs 100 Credits.
The computer control panel, containing at least the speech and warning programs, will be located on the bridge or in the cockpit of a spaceship. The rest of the computer apparatus can be installed near the control panel, if space is available, or tucked away in the ship wherever room can be found for it.
Other programs that can be added are listed below, with a brief description of their functions.
Alarm. This program will cause lights to flash, dials to flicker or even sirens to wail if a programmed system on the ship begins to malfunction. The program must contain at least one level for each of the ship's engines, with a maximum level of six. (Ships with seven or eight engines may use a 6th level program.)
Computer Lockout. A computer lockout program is designed to prevent unauthorized characters from operating a spaceship's controls. The lockout is a series of codewords which usually are committed to memory, although a written record of the codewords is sometimes left with a ship's first mate, in case the captain meets an unexpected and sudden demise. A lockout program must be of the same level as the ship's computer. A computer expert can get past the lockout by "Defeating Security" or "Bypassing Security."
Damage Control. This program coordinates the crew's and computer's efforts to repair damage that has been inflicted upon a ship. This program allows the ship to use its full DCR; ships without this program can use only half of their DCR. As with the alarm program, it requires one level for each of the ship's engines.
Astrogation Equipment
A starship astrogator needs special equipment in order to make the delicate course adjustments before an interstellar jump. System ships can get by with much simpler equipment, since they need only to navigate around one star. Navigators with skill level 3 or higher can purchase very sophisticated equipment that lets them plot a jump in less time with little risk.
Required astrogation equipment is listed and described below, followed by necessary computer programs. A ship needs only one set of astrogation equipment and the appropriate program.
Starships. Starships require all of the astrogation equipment of a system ship as well as a high powered telescope for long-range sighting. The package costs 15,000 Cr in its basic form, but high level astrogators can purchase a more sophisticated version for 50,000 Cr. Starship astrogation equipment can be purchased at any class I or II construction center.
System Ships. The telescopes, doppler scanners, electrocharts, acceleration meters and gauges needed to navigate a system ship cost a total of 5,000 Cr at any spaceship construction center.
Shuttles. Shuttles have the simplest astrogation requirements, involving only a gyroscope, radar, gravity detectors and some gauges. The complete package costs 1,000 Cr at any spaceship construction center.
Computer Programs
Computer programs for astrogation are listed on the Astrogation Program Table. The program needed by each type of ship is listed with its program level and the number of function points it uses.
Astrogation Program Table
| Ship Type | Program Level | Function Points |
|---|---|---|
| shuttle | 1 | 3 |
| system ship | 2 | 6 |
| starship | 4 | 24 |
Communication and Detection Equipment
Communication and detection equipment includes all devices that let a ship's crew send messages to nearby or distant star systems, converse with the crew of a station being approached, or determine the location of other objects such as ships, asteroids and planets in nearby space. Communication systems also include the intercoms used to communicate throughout a spaceship, and some means of jamming the communications and detection equipment of hostile creatures.
Radios
Videocom Radio. This communication device broadcasts a combined picture and voice message that travels at the speed of light. It is useful over relatively short distances in space, and when communicating between points on a planet or from an orbiting vessel or station to the planet.
A videocom message takes one second to travel 300,000 kilometers. If, for example, the points of communication are 30 million kilometers apart, a message sent from one point to the other would take 100 seconds to reach the receiver. Any reply would take another 100 seconds to cross the distance. This means that after sending a message, the sender must wait at least 200 seconds (3 minutes, 20 seconds) before receiving a reply.
A videocom radio costs 1,000 Cr. Additional viewing/speaking screens can be installed at a cost of 100 Cr apiece.
Subspace Radio. See the STAR FRONTIERS Expanded Game rule book, page 48, for an explanation of subspace radio. A subspace radio costs 20,000 Cr. However, subspace radios mounted on ships use the ship's power supply and do not need their own parabattery.
Intercom
An intercom is a device that allows individuals in different parts of a spaceship to converse with each other. An intercom control panel is located on the bridge of a ship, and speaker/microphones can be installed anywhere the designer wants them.
An intercom has four settings: monitor, selective monitor, speak and selective speak. The settings can be changed only at the control panel on the bridge. Each of these settings is explained below.
Monitor. An intercom set on monitor activates every microphone and speaker of the intercom system. This allows characters in each ship compartment to hear what is being said in every other ship compartment, and to speak to the entire ship from any compartment. (This assumes, of course, that each compartment has a speaker/mike.)
Selective Monitor. The operator of the intercom can choose selective monitoring, which allows him to choose any compartment or compartments on the ship and listen to them. Selective monitoring can be done between any speakers. For example, a character might set the speaker on the bridge to be monitored by the speaker in that character's compartment. He then could go to his stateroom and eavesdrop on the bridge.
Speak. The speak setting is the opposite of monitor, allowing an individual to speak into the microphone on the bridge and be heard in all compartments of the ship.
Selective Speak. This setting allows the operator to select any compartment or compartments on the ship and give a spoken message to those compartments only.
An intercom costs 50 Cr for the control panel and an additional 10 Cr for every speaker/mike installed in the ship. Note that the control panel includes a speaker/mike for the bridge.
Long Range Detectors
Long Range Detectors (LRD's) are used to detect objects that are beyond visual sighting range from a ship or station. There are two types of LRD's: Radar and Energy Sensors.
Radar. Radar sends out radio beams that travel at the speed of light. They bounce off solid objects and return to their source where the images of the solid objects are displayed on a screen. A radar unit can detect a spaceship at a range of 300,000 km. A radar unit costs 10,000 Cr.
Energy Sensors. Energy Sensors detect the radiating energy of chemical rockets, atomic rockets and any other source of extreme heat. This includes stars, nuclear explosions, volcanic activity and even large geysers, but not ion engines. Energy sensors can detect very strong sources of heat, such as stars, at ranges up to 100 light years. The radiating energy travels at the speed of light, so the information detected from a source 20 or 30 light years away will be 20 or 30 years old.
The energy produced by atomic engines can be detected with an energy sensor up to 500,000 kilometers away. The heat from a chemical engine will be detectable at ranges up to 200,000 km. An energy sensor unit costs 200,000 Cr.
Local Detectors
Local detectors are devices that can be used to locate and identify objects and creatures that are near the spaceship. Local detectors include portholes, cameras and skin sensors.
Portholes. A porthole is a plastiglass "window" to space. It can be placed in any compartment that is against the outer wall of the ship, at a cost of 50 Cr. Any number of portholes may be placed on a ship.
Cameras. Cameras on the hull of a ship can be used to scan the area around the ship in all directions. Cameras are monitored at screens on the bridge, and may also make taped copies of what they see. These tapes are especially useful to research and exploration teams.
A series of six cameras, six screens, the taping mechanism and a control panel costs 25,000 Cr. Half-size versions with three cameras and three screens are available for 15,000 Cr, but these have only a 50% chance of covering a specific area at a given time. Of course, the controls allow the cameras to be moved to any position in one combat turn.
Skin Sensors. Skin sensors are very small, pressure-sensitive gauges that can be placed all around the outer hull of a spaceship. When anything comes into contact with the hull, the sensors will give an alarm on the ship's bridge, and locate the contact very specifically on the hull.
Skin sensors for a spaceship cost 1,000 Cr x the ship's hull size. A level 1 computer program (one function point) is required to operate this system.
Jamming Equipment
Jamming equipment is used to interfere with the communication and detection systems of hostile or unknown ships. Both radio and radar jammers are available.
Radio Jamming
White Noise Broadcaster. A white noise broadcaster (WNB) is designed to blanket a particular area of space with radio waves that are so powerful they drown out other radio signals being sent through that area. A WNB will block both videocom and subspace radios.
The strength of a WNB diminishes with range as follows: if the ship with the WNB is in the same hex (within 10,000 kilometers, if the map is not being used) as the ship being interfered with, any radio messages can be blocked automatically simply by activating the WNB. For each hex (or 10,000 km) of range between the ships, the radio message has a 10% chance of getting through. Thus, a message sent from a ship that is four hexes (40,000 km) away from a ship with a WNB has a (4 x 10% =) 40% chance of getting through. If either of the ships move during the turn the message was blocked, a new dice roll must be made on the next turn.
A WNB costs 80,000 Cr. An extremely powerful version of the WNB is available for 400,000 Cr, but it can only be mounted on battleships or Type 5 or 6 stations. The larger WNB allows only a 1% chance that a message will get through per hex of range, instead of the normal 10%.
Radar Jamming
Window. Any ship with an ion engine can use the ion field generated by that engine to create a radar window. The ship simply releases the ions in all directions, rather than toward the stern. A radar window prevents an area of space from returning clear radar images. Instead, the entire area appears as an indistinct cloud on the radar sets of ships that are searching for screened vessels.
A ship with one ion engine can mask only the hex it is in. If the ship has more than one ion engine, each engine can screen a separate hex. The screened hexes must be adjacent to the hex the ship is in.
When a hex is screened, all of the ships in that hex are removed from the map, and a window counter is placed in that hex. The opposing player always knows which hexes are being screened, but does not know how many ships or what types of ships are in those hexes. Any number of ships can be hidden in a window hex.
A ship creating a radar window cannot use its ADF or MR while maintaining the field. As soon as it lets down the screen, the ships in the hexes that were screened become visible to the opponent.
Decoys. A decoy is a small rocket that is programmed to imitate the ship that launches it. Each decoy is only 2 meters long, but sets up a magnetic pattern that causes it to appear on radar as an exact duplicate of the launching ship.
Any ship of hull size 5 or larger can carry decoys. The number carried cannot exceed the ship's hull size divided by five. Thus, a ship of hull size 10 or 11 could carry two decoys.
Decoys are launched during the Moving Player's combat phase. Any number can be launched at one time. When they are launched, the decoy counters are placed on top of the ship counter that launched them. At this point, the launching player can choose any one counter in that stack, either the launching ship or one of the decoys, as the real ship. The player should record his choice on a piece of paper. During his following movement phases, the decoys will follow the movements of the ship that launched them.
Unless the opposing player has an energy sensor, he will not know which of these counters are decoys and which is the real ship. If any weapon hits a decoy, the decoy is destroyed and must be removed from the map.
A decoy costs 10,000 Cr x the hull size of the ship it will imitate. Each decoy can be used only once.
Energy Sensor Jamming
Neither window nor decoys will fool energy sensors! If a ship is equipped with an energy sensor, and being approached by a vessel that is screening itself from radar, the player with the sensors can wait as long as he wants before informing his opponent that he is equipped with energy sensors.
Once a player explains that his sensors are not fooled by the decoys or window, his opponent must remove the decoy counters or place his ships on the map if they had been concealed in a screen. However, ships with ion engines are invisible to energy sensors. This is why ships with energy sensors usually carry radar, also.
Emergency Equipment
Emergency equipment is installed on a ship with the hope that it will never be used. If it is needed however, it usually will be the means of saving someone's life, so most spaceship designers do not scrimp when it comes to outfitting a ship with emergency equipment.
Spacesuits. Spacesuits are the most fundamental lifesaving devices, but since they are personal rather than ship equipment, they are explained in the section on Personal Space Equipment.
Escape Pods. Escape pods are small, one-passenger lifeboats that can be launched from a ship toward any nearby planet, space station or ship. The pod must be given a target when it is launched. This target cannot be changed after launch, because the pod has no steering controls; it is completely automated. Pods also carry automatic S.O.S. beacons that broadcast continuously in all directions. These beacons can be turned on or off by the passenger.
An escape pod has an effective range of 20 million kilometers. A pod travels 1 million kilometers every 10 hours. Its life support equipment will support one person for 11 days (220 hours). After that time, the passenger will suffocate.
A ship can carry a number of pods equal to its hull size. Escape pods cannot be mounted in fighters, but fighters can be modified so the entire cockpit is ejected. Each escape pod costs 30,000 Cr.
Lifeboats. A lifeboat can carry up to 20 passengers for 30 hours, or 10 passengers for 60 hours. Unlike escape pods, a lifeboat can be steered toward any objective the pilot chooses. It will travel 60,000 km per hour with no acceleration, but it has unlimited maneuverability. If the lifeboat is not able to reach a planet, station or other ship within the time listed above, the passengers will die from lack of air. The lifeboat will continue to travel in a straight line from that point until something interrupts its course.
A lifeboat is essentially a one-way shuttle. One lifeboat can be carried by a ship for every 5 points of the ship's hull size. An assault scout (HS = 3) cannot carry a lifeboat, while a frigate (HS = 5) or destroyer (HS = 6) can carry a single lifeboat. A battleship (HS = 20) can carry up to four lifeboats.
The cost of a lifeboat is 100,000 Cr. They are available at all types of spaceship construction centers.
Optional Spaceship Equipment
Besides the equipment that is needed to keep a spaceship operating, a wide variety of systems can be built into a ship to enable it to perform special functions. These include weapons and defenses; mining, agriculture, freight hauling, exploration and scientific research equipment; and passenger accommodations.
Weapon Systems
All the weapons in this section are described in the Advanced Boardgame. This section describes how weapons can be purchased and installed, and how much they cost.
Important statistics for all the ship-mounted weapons are listed on the Weapons Installation Table. Information contained on the table is explained below.
Cost. This includes both the price of the weapon in credits and the cost of having the weapon installed on a ship. The price for LTD weapons is divided into the price for the weapon system and the price of the armaments fired or launched by those systems.
EXAMPLE: A torpedo launcher costs 40,000 Cr. This does not include any torpedos. Each torpedo costs an additional 20,000 Cr. A launcher and three torpedos costs 100,000 Cr. (As printed; the Weapons Installation Table below lists a torpedo launcher at 20,000 Cr and a torpedo at 8,000 Cr.)
MHS. This is the minimum hull size that can carry this weapon. A weapon cannot be installed on a ship that has a hull smaller than the size listed. Hulls that are twice as large as the minimum can carry two of that weapon. If a hull is three times bigger than the minimum, it can carry three of that weapon.
EXAMPLE: The minimum hull size for an electron battery is 6. An electron battery cannot be placed on any ship of sizes 1-5. One electron battery can be mounted on hulls of size 6-11, two can be mounted on hulls of size 12-17 and three can be mounted on hulls of size 18-20.
Availability. The Roman numerals in the last column indicate the classes of spaceship construction centers where the systems are available. Rockets, missiles, mines and torpedos can be bought wherever their launch systems are available.
Weapons Installation Table
| Weapon | Cost | MHS | Availability |
|---|---|---|---|
| Laser Cannon | 5,000 Cr | 5 | I, II |
| Laser Battery | 3,000 Cr | 3 | I, II |
| Proton Battery | 5,000 Cr | 10 | I |
| Electron Battery | 5,000 Cr | 6 | I |
| Disruptor Cannon | 10,000 Cr | 12 | I |
| Assault Rocket Launcher | 5,000 Cr | 1* | I, II |
| Assault Rocket |
* Assault rockets cannot be used by any ship that has an MR less than 4.
Included on the Weapons Installation Table are grapples. While not actually weapons, grapples are used much like weapons and their purpose (the capture of enemy ships) is basically offensive. For more information on the use of grapples, see Boarding Actions in the Close Combat section.
Weapon Programs
Ship-mounted weapons must be connected to computers, which constantly feed updated information about a target's position to the weapon. Characters manning the guns choose the targets and decide when the weapons should be fired, but computers do most of the aiming.
Each weapon must have its own program. For example, a ship with two laser batteries needs two laser battery programs; one program cannot control both weapons. All of these computer programs are reusable, except the seeker missile program. Each seeker missile must have its own program, as the program and its circuitry are destroyed when the missile explodes.
The Weapon Programs Table lists the levels and function points of the programs needed by various weapons. As usual, the cost of a program is its number of function points x 1,000 Credits.
Weapon Programs Table
| Weapon | Program Level | Function Points |
|---|---|---|
| Laser Cannon | 1 | 3 |
| Laser Battery | 1 | 4 |
| Proton Beam Battery | 2 | 8 |
| Electron Beam Battery | 2 | 6 |
| Disruptor Beam Cannon | 2 | 8 |
| Assault Rocket | 1 | 4 |
| Rocket Battery | 2 | 6 |
| Torpedo | 1 | 3 |
| Mines |
Defensive Systems
All the defenses used in the advanced boardgame are listed here, with information on cost and availability. The Defensive Systems Installation Table is very similar to the Weapons Installation Table. Cost is the cost in credits to buy the system and have it installed. MHS is the smallest size hull that can carry this defense. Availability lists the types of spaceship construction centers where the systems can be purchased.
The costs of some systems are marked with an asterisk. This means that the listed cost must be multiplied by the ship's hull size to determine the actual price for that defense on a specific ship. This is because in many cases a large ship requires more material than a smaller one to establish an equally effective defense.
The price of a masking screen is 10,000 Cr. This is the price of the masking screen launching system. The system must be loaded with water to be used. The number of charges that can be held on a military ship are listed on the ship rosters. Civilian ships can hold two charges at hull size 4, and one additional charge for each additional four steps in hull size. For example, a ship with a size 12 hull can carry four charges. The referee may allow characters with engineering skill to increase this capacity by modifying the ship. Water usually is available free, either from planetary oceans or ice asteroids.
(As printed, the Defensive Systems Installation Table lists the masking screen cost as 1,000 Cr, while the text above gives 10,000 Cr.)
Defensive Systems Installation Table
| Defense | Cost | MHS | Availability |
|---|---|---|---|
| Reflective Hull | 500 Cr* | 1 | I, II, III |
| Masking Screen | 1,000 Cr | 4 | I, II, III |
| Electron Screen | 2,000 Cr* | 10 | I |
| Proton Screen | 4,000 Cr* | 12 | I |
| Stasis Screen | 3,000 Cr* | 10 | I |
| ICM Launcher | 2,000 Cr | 5 | I, II |
| ICM |
Limits
There is a limit to the number of weapons and defenses that can be installed on a ship. Carrying many weapons and defenses will reduce the amount of space available inside the ship and decrease the ship's ADF and MR. When adding weapons and defenses to a ship, follow the steps below:
- Add together the Minimum Hull Sizes of all weapons and defenses on the ship.
- Divide the ship's hull size by 2. If this result is greater than the sum from step 1, the ship can carry the weapons and defenses with no reductions.
- If the sum from step 1 is equal to or greater than the result from step 2, then the ship's interior space and performance will be affected. Divide the sum from step 1 by one-half of the ship's hull size (found in step 2). Round fractions up.
- Subtract 1 from the result from step 3.
The final result, found in step 4, is the number of ADF and/or MR points that the ship loses, and the number of ship hull units that are filled by weapons, defenses, power units and targeting servos. These hull units are unavailable for other uses.
EXAMPLE: Ish Birdt is buying weapons and defenses for the SAS King's Road, a hull size 6 freighter. He wants to install a laser battery (MHS 3) and a rocket battery (MHS 5). The step by step calculations are as follows:
- Sum of MHS: 3 + 5 = 8
- One-half of Hull Size: 6 / 2 = 3
- Step 1 divided by step 2: 8 / 3 = 2 2/3 = 3
- Step 3 minus 1: 3 - 1 = 2
The final result is 2. This means the ship must lose 1 ADF and 1 MR point. This also reduces the ship's available interior space by two hull units. When determining how much cargo the ship can carry, Birdt must treat the ship as hull size 4.
Military Ships. The procedure above applies to civilian ships only. Most players will observe that military ships carry more weapons and defenses than civilian ships, with fewer penalties. This is possible due to small but significant technological refinements in military designs.
Governments and military shipbuilders place heavy guards on their top secret designs. These plans and techniques will not be available to players unless they are obtained illegally (and against incredible odds). If players do obtain military blueprints, they still must find a shipyard willing to work from them.
If players manage all this, and try to design a military ship that is not a standard model, the referee must use the warships from the boardgame and his own discretion to decide what is possible. Remember, however, that advanced techniques for miniaturization and high-stress construction can make almost anything possible.
Defensive Computer Programs
Many types of defenses require a computer program to coordinate their activation and effectiveness. These defenses will not function without their program. The Defensive Computer Program Table lists the program level and function point requirements for each type of defense. "NA" means no computer program is required by that type of defense.
Defensive Computer Program Table
| Defense | Program Level | Function Points |
|---|---|---|
| Reflective Hull | NA | NA |
| Masking Screen | NA | NA |
| Electron Screen | 2 | 6 |
| Proton Screen | 2 | 8 |
| Stasis Screen | 3 | 12 |
| Interceptor Missile | 3 | 12 |
Mining Equipment
Mining equipment is used to extract minerals and other valuable materials from planets, moons and asteroids. Two types of mining equipment are required before a mining operation can start: digging equipment and processing equipment.
Digging Equipment
Digging into the dirt and rock of an asteroid or planetoid and removing valuable materials is a straightforward, but difficult, task. To accomplish it, mining companies use either heavy duty robots with level two excavation programs, or manned digger shuttles.
Robots. Robots used in excavation are heavy duty robots equipped with tracks for movement and at least three limbs, one of which is a large shovel. A heavy duty robot can move 4 tons of earth or rock in an hour. A mining operation on a body with at least .1 g of gravity will use heavy duty robots for all of its excavation.
Digger Shuttles. A digger shuttle can be used on asteroids or small moons that have less than .1 g of gravity. A digger shuttle is essentially a size 2 hull equipped with an automatic digging apparatus on its nose. The digging equipment adds 8,000 Cr to the cost of the shuttle. It can scoop mined material into the shuttle's hold at the rate of 4 tons per hour. Up to 50 tons of material can be stored in the shuttle's hold before it must return to the mining ship or other processing center for unloading.
Processing
Processing is the act of removing a valuable mineral or element from ore that has been removed from a planet, asteroid or moon. Because of the high cost of space travel, mining operations almost always process their ore at the mine. This way, only the valuable minerals are transported on ships returning to civilization.
Two types of ore processing systems are available. One is based in a ship's hold, and the other is set up on a planet.
Ship-Based Processing. An Orbital Processing Lab (OPL) can be carried in the hold of a mining ship that has 10 or more hull points. If the ship has 14 or more hull points, it can carry an OPL and a digger shuttle.
The tailings (waste) from the refining process are jettisoned into space. Up to 5 tons of mineral for every hull point of the ship may be brought back to base. An OPL can be purchased at any spaceship construction center for 100,000 Cr.
Surface-Based Processing. A Mineral Refinery (MR) can be carried to a planet or large moon and set up on the surface. A mining ship with 12 hull points can carry the components of an MR in its hold, but has no way to transport the refinery to the planet's surface. A 16 hull point ship can carry the MR and a shuttle, and the shuttle can carry the components of the refinery to the planet in four trips. The refinery can be assembled in two days by 12 workers (robots or characters). If more or fewer than 12 workers are available, the referee should modify the time required for setup accordingly.
Shuttles are needed to haul minerals to the mining ship. One shuttle can match the output of an MR.
The refinery usually is left on the planet after the mining operation is done; even if it will not be used in the future, the payoff for valuable minerals (gold, silver, platinum, or titanium, to name a few) will be greater than the cost of carrying the MR back to base. A ship that hauled an MR can carry 10 tons of mineral for each of the ship's hull points. An MR can be purchased at any spaceship construction center for 200,000 Cr.
Mining Programs
A standard excavation program is needed for each robot or digger shuttle involved in a mining operation, and a processing program is needed to process the ore. Program levels and function points are shown on the Mining Program Table.
Mining Computer Program Table
| Program Task | Level | Function Points |
|---|---|---|
| Excavation | 2 | 4 |
| Processing (OPL) | 4 | 12 |
| Processing (MR) | 4 | 16 |
Agriculture Spaceship Equipment
The cost of outfitting an agriculture spaceship is determined by multiplying the base cost of the materials needed to grow and tend the crops by the ship's hull size. The hull, drives, life support and other required systems must be purchased normally.
The Agricultural Supplies Table lists each ingredient that is necessary to start an agriculture ship's crops. Each ingredient is followed by a price; that price must be multiplied by the ship's hull size to determine its actual cost.
Agriculture Supplies Table
| Item | Cost (x Hull Size) |
|---|---|
| Seeds | 500 Cr |
| Nutrient Solution | 1,000 Cr |
| Farming Robot | 3,000 Cr |
| Solar Collectors | 4,000 Cr |
Farming Robots. One farming robot is required for each hull point of the agriculture ship. These level 3 maintenance robots need some supervision. This can be provided by a level 4 or higher Robotics expert on board the ship, or by a robot brain which can be purchased for 17,000 Cr. If a robot brain is installed on an ag ship, crops can be grown and harvested on schedule without any supervision from living characters.
Growing Schedules. A crop will grow and be ready for harvest after one month. As explained under Spaceship Design, this crop will feed 200 creatures per hull point of the Ag ship for one month. If the owner of the ship puts 10% of his crop back into the "fields," however, he can start growing a new crop without buying additional seeds or nutrients.
Ag Stations. Agriculture space stations are basically the same as Ag ships, with one difference: the cost of each ingredient is multiplied by 10 x the station's hull size. For example, the nutrient solution needed to farm a 10 hull point ship costs (10 x 1,000 =) 10,000 Cr, while the solution for a Type 5 space station costs (5 x 10 x 1,000 =) 50,000 Cr.
Agriculture Programs
An agriculture program regulates the temperature, light and water in the hydroponics tanks of an Ag ship. The Ag program is simply a modified Life Support program of level 1, with 3 function points.
If a robot brain is used to supervise the farming robots, however, a level 6 robot management program is required. This program uses 64 function points, so it costs 64,000 Cr.
Freight Transport Equipment
Freight transport is one of the most basic functions of a spaceship, requiring very little specialized equipment. All that is needed is the space in or on the ship, and some mechanical arms for loading and unloading cargo.
Obviously, the space comes with the ship's hull, so the arms are the only additional expense. Each freight hauler will have one or two of these installed in the hold. The bigger the ship, the bigger the arms. The cost of an arm is 1,000 Cr x the ship's hull size. The decision whether to install one or two of them is up to the player designing the ship.
A standard cargo in boxes, crates, bales or any type of bundles can be unloaded by a mechanical arm at the rate of one hull point of cargo per hour. For example, a ship with a hull size of 16 could be unloaded by a single arm in 16 hours. Two arms can accomplish the task in half as much time.
An arm can be either manually operated by a technician, or furnished with a level 2, 4 function point cargo handling program that will accomplish the job automatically.
Passenger Accommodation Equipment
A successful passenger transporting business requires more than just the fundamentals of life support for the individuals being transported. As explained in the STAR FRONTIERS Expanded Rules (page 49), passengers may travel either First, Journey or Storage Class. Each class has different equipment requirements.
First Class Accommodations
First class passengers expect the best food and the roomiest cabins. For this reason, the amount of life support required by first class passengers is double the amount listed under Life Support Equipment.
A first class cabin must be at least 6 meters square; it can be larger at the ship designer's option. A company may charge higher prices for a larger cabin. Use the ticket prices listed in the STAR FRONTIERS rules as a general guide; they can be modified at the Referee's discretion. The section on Spaceship Deck Plans gives information on how many cabins can be installed on a single deck. Furnishings (beds, chairs, etc.) for each first class cabin cost 2,000 Cr.
Lifeboats or escape pods are required for all first class passengers. Furthermore, these escape devices must be placed on the same deck as the first class cabins. If more than one deck is used for first class, then each deck must have enough escape devices for all of the first class passengers on it.
The cargo space set aside for the luggage of first class passengers must cover at least half as much area as the first class cabins. The hold does not need to be on the same deck as the cabins.
Journey Class Accommodations
Journey class passengers are not paying for the luxurious treatment of first class, so their accommodations are much more "primitive." The amount of life support given to journey class travelers is the standard amount listed under Life Support Equipment.
A journey class cabin must be at least 4 meters square, although occasionally they are as big as 4 by 6 meters. Of course, a larger cabin can be more expensive. The furnishings required for each journey class cabin cost 1,000 Cr.
The only emergency equipment required for journey class passengers is a spacesuit for each passenger. A spaceliner can carry lifeboats or escape pods for these passengers as well, but this is purely the owning company's option. Ships that carry additional rescue equipment will mention this fact prominently in their advertising.
The hold space set aside for the luggage of journey class passengers must cover at least one-fourth as much area as the journey class cabins. As with all luggage holds, this need not be on the same deck as the cabins.
Storage Class
Passengers carried in Storage Class require no life support, since they are "frozen" before they are loaded onto the ship. This freezing can be done at any spaceliner terminal, which includes most space stations. The process is completely safe, and it involves no risk or loss of abilities to the frozen character.
Once frozen, storage class passengers are stacked in special berths. One meter of cargo space in the hold is sufficient luggage space for three storage class passengers.
Exploration Equipment
Very little specialized equipment is used on exploratory missions. Generally, an exploration ship will carry extra supplies of food, water and air, and enough fuel to keep it running for a long time.
The two specialized devices that usually are carried by exploratory missions allow the crew of an exploration ship to analyze planets from a safe distance. The atmoprobe reports on the gaseous makeup of a planet's atmosphere, and a landing drone will send back information about a planet's surface.
Atmoprobes
Atmoprobes are 3-meter-long missile-like objects. An exploration ship can carry one atmoprobe for each point of the ship's hull size. The probe can be launched from anywhere inside a star system and programmed to seek out a specific planet or other body. It will travel at 10 million km per hour until it reaches its target.
When the atmoprobe reaches its destination, it will go into orbit around the planet and gradually drop toward the surface. As it enters the atmosphere, it will send back messages to the ship that launched it. After a few dozen orbits (several hours), the probe will burn up in the atmosphere. If the planet has no atmosphere, the probe will crash into the surface.
An environmental specialist aboard the exploration ship has the same chance of analyzing the data from the atmoprobe as he would of analyzing a reading on his vaporscanner: 50% + 10% per skill level. Only a character with environmental skill can interpret the findings of an atmoprobe.
An atmoprobe costs 40,000 Cr. A level 2, 4 function point computer program also must be purchased for each atmoprobe. A guidance/analysis program (level 3, 9 function points) must be used on the ship launching the probes. The program on the ship can be used with any number of atmoprobes.
Landing Drones
Landing drones are more sophisticated than atmoprobes. A drone is about the size of an aircar. It is launched and travels just like an atmoprobe.
When a drone reaches its destination, it slowly descends through the atmosphere (if there is any) and makes a soft landing on the planet's surface. As it descends, it sends reports about the planet's atmosphere to the ship that launched it. When it lands it begins sending geological information as well.
An environmental specialist is needed to interpret the data from a landing drone. This is resolved as if the specialist was using a vaporscanner and a geoscanner. Because of the sophisticated lab equipment in a landing drone, however, the environmental specialist gets a bonus of +10 to each roll.
A drone costs 100,000 Cr, and must be purchased at a Class I or II spaceship construction center. It requires a level 3, 9 function point computer program in order to accomplish its mission. The same guidance/analysis program that directs atmoprobes from an exploration ship can be used to guide and control a landing drone.
A landing drone can be reused if the exploration ship travels to the planet the drone is on, lands on the planet, and remounts the drone. Remounting takes 20 hours, divided by the number of characters helping. Robots can help remount a drone, as long as at least one character is present for each robot.
Scientific Research Equipment
The equipment needed to outfit a scientific research ship will vary according to the type of research the ship is performing. In many cases, the Referee will need to invent this equipment and assign costs to it. The items listed below are fairly standard, and might be found on any ship that is designed for scientific purposes.
Laboratory
A laboratory for testing samples is very likely to be carried on a research ship. A ship's lab is able to analyze biological, atmospheric and geological samples, much like an environmental specialist's toolkit. Because the lab is much more sophisticated than a portable toolkit, an environmentalist has a better chance of making an accurate analysis. This chance is 90% + 1% per skill level.
A laboratory costs 100,000 Cr. It also requires a level 3, 9 function point computer program to assist in analyses.
Remote Probes
Probes are often used to examine areas that would be fatal to living creatures, such as the atmosphere of a star or the interior of a highly radioactive cloud. Probes used in research are more sophisticated than those used in exploration.
A probe will send data back to the launching ship, including information on gasses, temperature, radiation, nuclear activity, wave lengths of light, gravitational effects and other potentially interesting or dangerous phenomena. Details about the "other" category are left to the Referee's discretion.
Information relayed by a probe must be analyzed by an environmental specialist. The instruments in the probe allow the specialist to add 10% to his "Analyzing Samples" roll. Gas analysis is discussed in the STAR FRONTIERS rule book, page 16. Information from all of the other areas can be analyzed following the same procedure.
If an analysis roll misses by less than 20, the environmentalist realizes that the probe did not send back useful data. If the roll misses by 20 or more, the Referee should give the specialist information that is false. This might mean reporting that the temperature of a very hot world is tolerable, that a radioactive region is safe, or that an area with little gravity would crush a character that landed there. Note that each analysis (temperature, radiation, gas, etc.) is rolled for separately. Thus, a probe could give accurate information about several things, but be way off base in another category.
A remote probe costs 100,000 Cr. It requires a level 2, 4 function point computer program to coordinate the analysis and relaying of data. The standard program used in a laboratory can be used to process and categorize the information sent to the ship from the probe.
Modifying Spaceships
Spaceships can be modified several ways to improve their performance, but to improve one area the ship must sacrifice something from another area.
Weapons and Defenses
When players alter the weapons and defenses mounted on a civilian ship, use the standard procedure for determining the effects of the changes on the ship's movement and interior space.
If players or the referee alter military ships, use these guidelines:
- Adding a weapon reduces the ship's ADF or MR (player's choice) by 1. Minimum hull size restrictions must be obeyed. Every additional torpedo, assault rocket, seeker missile, mine field and rocket battery counts as an additional weapon. Three ICMs can be added with only a one-point penalty.
- Proton and electron beam batteries can be exchanged freely. A laser battery can be installed in place of an electron or proton beam battery, but a PB or EB cannot be installed in place of an LB. Any battery can be exchanged for a rocket battery with four shots. Two torpedos can be exchanged for one additional seeker missile.
Movement
Armed civilian ships can increase their ADF or MR by removing weapons or defenses. Military ships can gain one ADF or MR point by removing three weapon systems, three defenses (not including reflective hulls) or any combination totaling three. Any ship can gain one ADF or MR point by removing 20% of its hull points. This modification can be performed only once.
Hull Points
Fighters, assault scouts and civilian ships can add 5 hull points for each ADF or MR point that is removed. All other ships can add 10 hull points for each ADF or MR point sacrificed.
Spaceship Deck Plans
Deck plans are simply maps of the decks of a spaceship. They are useful as aids to the referee when he is describing the deck to the players, and they help in planning the layout of a ship. When a deck plan is drawn on a half-inch grid, it serves as a board for moving counters and resolving combat.
Remembering a few basics of ship design makes drawing deck plans much simpler. First, space aboard ships is limited, so there will not be many large, open areas. Systems will tend to be compact and tucked into whatever nooks and crannies are available.
Second, all decks will be arranged perpendicular to the ship's axis, so that the nose of the ship is "up." This provides a sense of gravity when the ship accelerates and decelerates. All doors, hatches, airlocks and rescue equipment should be plainly marked on the plan. Every area must be accessible somehow, either by door, hatch, airlock or access panel. Cargo bays need large, swing-away doors. All decks should be connected either by a central elevator or ladder wells.
Positioning Decks
The bridge deck of a ship usually is close to the bow (always is close to the bow in Spacefleet vessels). Crew quarters (cabins, galley, perhaps a small recroom) usually are directly beneath (or behind) the bridge deck. The maintenance and engineering area with its machine shops, engineer's quarters and supply storage is toward the stern of the ship.
The central area of the ship usually is taken up by special equipment: cargo decks on a freighter, passenger cabins on a spaceliner, laboratories on a research ship, or weapons on a military vessel.
Movement on a Spaceship Deck
If a deck is drawn on a half-inch grid, each square is 2 meters on a side.
Normal doors to cabins, galleys and other low-security areas open when a character presses a button on either side of the door. These doors can be locked from either side. A normal door has 30 structural points, in case someone tries to shoot or break it open. Normal doors slide sideways into the wall when they are open.
Security doors, hatches and airlocks normally open toward the interior of the ship (away from the outer hull), but some are built to open either way. If the pressure inside an airlock does not match the pressure outside, the airlock must be cycled. This takes five turns, whether pressurizing or depressurizing.
Elevator doors slide open like normal doors. An elevator travels one deck per turn, and the doors can be opened on the turn the elevator stops moving. Characters inside the elevator cannot leave until the next turn, however.
Sample Deck Plans
The decks of a UPF frigate are shown below, as an example. Other deck plans are printed on the inside cover of Warriors of White Light. Deck plans for several areas of a typical space station are printed on the reverse side of the boardgame map. This is not a complete station, but a few sections.
Key to the sample UPF frigate deck plans:
- Flying bridge: a. laser cannon mount; b. radar and ES scanners; c. small launch; d. helm; e. hatch and ladder to bridge; f. elevator shafts; g. torpedo pods; h. magazine and weapon locker
- Main gunnery deck: i. laser battery; j. masking screen mechanism; k. torpedo launch and guidance control
- Engineering deck: l. engine struts; m. machine shop; n. work pods; o. spacesuit locker; p. tool lockers
The Spaceship Skills
Characters in a Knight Hawks games can develop their skills in several areas related to spaceship operations. A character must have a good foundation in technological or military skills before advancing to the skills described in this section.
Using Skills
Spaceship skills are divided into four areas: Piloting, Astrogation, Spaceship Engineering and Gunnery. Gunnery is further divided into Energy Weapon and Rocket Weapon fields. Unlike the skills in STAR FRONTIERS game, spaceship skills are not classified by Primary Skill Areas. Characters from any PSA can learn Starship skills if they have the necessary basic skills.
Most spaceship subskills are used the same way computer, medical or other subskills are; the subskill has a success rate and a modifier based on the character's skill level. The player must roll d100, and if the result is lower than or equal to the success rate, the skill is used effectively.
Some spaceship subskills, however, are used only as modifiers and have no success rate. These modifiers are used as bonuses to dice rolls that have been explained in the boardgame rules. For example, pilots use their evasion subskill only to modify the chance they will be hit by enemy fire.
Qualifications for Spaceship Skills
The qualifications needed to obtain a 1st level spaceship skill are listed on the Skill Foundations Table. A character must have achieved the indicated levels in all required skills before he can learn one of the spaceship skills.
These requirements never increase; once a character has the minimum qualifications for a spaceship skill, he can learn higher-level spaceship skills without increasing his basic technological or military skill levels.
Like other skills, no spaceship skill can ever be increased above level 6.
Skill Foundation Table
| Spaceship Skill | Basic Skill Level Requirements |
|---|---|
| Piloting | Technician 6, Computer 2 |
| Astrogation | Computer 6 |
| Engineering | Technician 4, Robotics 2 |
| Gunnery: Rocket Weapons | Projectile Weapons 4, Gyrojet Weapons 2 |
| Gunnery: Energy Weapons | Beam Weapons 6 |
Acquiring Spaceship Skills
The Spaceship Skill Cost Table lists the number of experience points needed to earn each level of the different spaceship skills. Spaceship skills are a lot more expensive, in terms of experience points, than skills from the STAR FRONTIERS game. This reflects the high degree of training a character needs in order to understand and use complex spaceship systems.
Spaceship Skill Cost Table
| Level | Piloting | Astrogation | Engineering | Gunnery |
|---|---|---|---|---|
| Level 1 | 10 | 8 | 8 | 6 |
| Level 2 | 20 | 16 | 16 | 12 |
| Level 3 | 40 | 36 | 36 | 20 |
| Level 4 | 70 | 60 | 60 | 30 |
| Level 5 | 100 | 80 | 80 | 50 |
Piloting Skill
Piloting skill allows a character to fly a spaceship. Rising levels of piloting skill represent both an improvement in flying ability and the ability to handle larger craft. The Pilot Certification Table lists the types of ships that can be operated by pilots at various levels.
Pilot Certification Table
| Level | Ship Types |
|---|---|
| 1 | System ships of all sizes |
| 2 | Starships of hull size 3 or smaller |
| 3 | Starships of hull size 6 or smaller |
| 4 | Starships of hull size 12 or smaller |
| 5 | Starships of hull size 15 or smaller |
| 6 | All starships |
Evasion
Modifier: +3% x skill level
The pilot of a fighter or assault scout can increase the ship's inherent ability to avoid enemy fire. As explained in the boardgame rules, fighters and scouts can try to evade enemy torpedos by using their full maneuver rating to dodge. Besides the enemy's usual modifier for shooting at an evading target, there is an additional modifier of -3% x the evading pilot's skill level.
EXAMPLE: Jason Rhegra is a 2nd level fighter pilot. If he evades, the total modifier is -31%: -25% because the fighter has an MR of 5, and (-3% x 2 =) -6% because of Rhegra's pilot skill.
Increase Accuracy of Forward Firing Weapons
Modifier: +5% x skill level
The pilot of a ship that carries assault rockets, a laser cannon or a disruptor beam cannon can add 5% x his skill level to that weapon's chance to hit. This reflects the pilot's skill in lining up the weapon for an accurate shot.
Increase Maneuver Rating
Success Rate: 10% x skill level
On a given turn, a pilot has a chance to turn his ship more than its MR will allow. This chance is 10% per level of the pilot. If the skill check is successful, the pilot can make an additional 60 degree (one hexside) facing change during that movement. This subskill and the evasion bonus cannot be used during the same turn.
This subskill cannot be used by a pilot whose ship has no MR points (due to damage, etc.).
Astrogation Skill
Characters trained in astrogation can make the complicated calculations required to take a starship on a safe course through the Void. Astrogators also have a chance to pinpoint their location in the galaxy if, for some reason, an interstellar jump deposits them somewhere other than their intended destination.
Astrogators of all levels can perform all astrogation subskills.
Plot Interstellar Jumps
Success Rate: 100% on charted route with proper preparation
A ship that makes an interstellar jump must carry an astrogator, or the pilot will not be able to predict where the ship will exit the Void. The time needed to make course calculations increases for long jumps, because even small errors become very serious as the distance increases.
Normal plotting time for a jump is 10 hours for each light-year that will be jumped. For example, an astrogator plotting an 8 light-year jump must spend 80 hours performing calculations before the ship could accelerate to jump speed. This time must be spent actually making calculations; the referee should remember that astrogators need to sleep sometime. (If a player wants to work without sleeping, the referee can make a secret Stamina check - if the character fails, his calculations are wrong and the ship will drift off course.)
If a jump is made along one of the established travel routes marked on the Frontier Sector map, and the astrogator spends 10 hours per light-year making the proper course adjustments, there is no risk that the ship will leave the Void anywhere other than its planned destination.
Risk Jumping
If for some reason an astrogator does not spend the full 10 hours plotting each light-year of an interstellar jump, there is a chance the ship will drift off course. Jumping without sufficient preparation is called Risk Jumping, or "smoking the jump."
The chance that a ship will reach its destination without sufficient course preparation depends on both the astrogator's skill level and the amount of time he spends planning the ship's course. To determine the exact percentage chance that the jump will be successful, follow the procedure below:
- Divide the total number of hours the astrogator spent preparing the course by the number of light-years in the jump.
- Add the astrogator's skill level to the result from step 1.
- Multiply the sum from step 2 by 10%. The result is the chance that the jump will be successful and the ship will arrive at the target system.
The astrogator rolls d100, and if the result is equal to or less than the chance that the jump will succeed, then the ship arrives at its planned destination. Otherwise, the ship has exited the Void somewhere else (see Fix Location subskill).
Two restrictions apply to this process. First, if the astrogator spends fewer than 10 hours plotting each light-year, a roll of 96-100 always means the ship misses its mark, even if the astrogator's modified chance to succeed is above 100. Second, if the astrogator spends fewer than two hours plotting each light-year, the ship will misjump automatically.
If the astrogator is using high-quality astrogation equipment (described in the Equipment section), he can add 5% to his chance to lay the course properly. This applies only to the most expensive equipment available.
EXAMPLE: Solleran is a 3rd level astrogator. His ship is carrying a desperately needed serum from Prenglar to the outpost at Dixon's Star. He wants to get the medicine there as soon as possible, so he spends only 25 hours plotting the 5 light-year course. The chance that Solleran's ship will actually arrive at Dixon's Star is (25/5 + 3) x 10, or 80%.
Find Location
Success Rate: 30% + 10% x skill level
When a ship misjumps, either because the astrogator spent too little time plotting the jump or because the ship was following an uncharted route, the ship will emerge somewhere other than its intended destination (see Misjumps in the Ship Movement section). The astrogator then must try to figure out where the ship is.
The astrogator can determine his position easily if the ship enters a colonized system, because all of the inhabited systems are charted in detail. The astrogator will recognize a charted system after only 1d10 hours of calculation.
A very simple way for a ship to find out whether a system is colonized is to broadcast a normal radio message. If anyone answers, the characters know there are intelligent creatures around. Unless the ship is very near a planet, however, the radio message may take several hours to reach a possible colony, and the reply will take just as long to return. Of course, any intelligent creatures who answer the message will also know that the characters are insystem...
If the system is uncharted, the stars will appear in unfamiliar patterns and will be difficult to recognize. Unless the astrogator can determine the ship's position, the crew may never see home again.
Determining the ship's position in an uncharted system takes 2d10 x 10 hours of calculations. The referee rolls d100. If the result is equal to or less than the astrogator's success rate for this subskill, the astrogator will know exactly where the ship is when he finishes his calculations. Like course calculations, these 2d10 x 10 hours do not include time for sleep.
If the astrogator does not pass the skill check, the referee must consider how close the roll was. If the roll was reasonably close, the astrogator will realize that he cannot locate the ship. If the roll was very much higher than the astrogator's success rate (at least 30 or 40 points higher), the referee may decide to tell the astrogator where the ship is, but deliberately give him false information.
If the astrogator cannot fix the starship's position, the ship can jump to another star and try again. The referee should simply move the ship to another randomly chosen star, because it will misjump automatically. The astrogator has a -10% penalty on his location roll at the new system and, if the ship must jump blind again, an additional -10% for each new system it enters. (By making blind jumps, the ship's position becomes more and more confused.) The referee should feel free to expand the Frontier map if a ship jumps off the edge.
An astrogator using high-quality equipment gets an additional +5% bonus when trying to fix the ship's position.
If the astrogator fails this subskill check, the ship misjumps (see Misjumping in the Ship Movement section).
If a ship misjumps to a star system that has never been explored, the route to that system is not considered charted or explored. Even if the astrogator locates the ship's position, he must also successfully chart a new route out of the system in order to leave safely.
Chart New Routes
Success Rate: 50% + 10% x skill level - 5% x light-years
An astrogator has a chance to chart a new route to a system. New routes may be shortcuts between inhabited systems that are not directly connected (Prenglar and White Light, for example), or they may be routes to unexplored star systems.
If an astrogator guides a ship successfully on an uncharted route, that astrogator can regard that route as charted if he ever travels it again. However, the route is charted in only one direction. To completely chart the route, the astrogator must guide the ship back to its starting point along the same path.
Astrogators do not get a bonus for using high-quality navigation equipment when trying to chart a new route.
If the astrogator chooses to tell the UPF about the route, the information will be fed into the Federation's computer banks and within a week the route will be considered as marked on the UPF astrogation charts.
The UPF pays a standard bonus of 100,000 Cr for information on new travel routes. By custom, this money is divided equally among the crew of the ship, as they all shared the risks of the jump.
The Interstellar Distance Table. When an astrogator tries to chart a new route to a star, players need to know the distance between the origin and destination stars. The referee can use the Interstellar Distance Table to find this distance easily.
To use the table, count the number of squares that separate the stars vertically, and the number of squares separating them horizontally. Find these numbers on the table. The number at the intersection of those two entries is the actual distance between the two stars, in light-years.
EXAMPLE: The horizontal separation between Prenglar and Dixon's Star is 4 squares. The vertical separation is 3 squares. Checking the Interstellar Distance Table, the number at the intersection of the "3" column and the "4" row is 5, so the stars are 5 light-years apart.
Interstellar Distance Table
Rows are Vertical Separation; columns are Horizontal Separation.
| Vert \ Horiz | 0 | 1 | 2 | 3 | 4 | 5 | 6 | 7 | 8 | 9 | 10 | 11 | 12 | 13 | 14 | 15 |
|---|---|---|---|---|---|---|---|---|---|---|---|---|---|---|---|---|
| 0 | 0 | 1 | 2 | 3 | 4 | 5 | 6 | 7 | 8 | 9 | 10 | 11 | 12 | 13 |
Spaceship Engineering Skill
Spaceship engineers are trained in the construction, maintenance and repair of spaceships. A skillful engineer often can save a damaged ship from destruction. The Engineering subskills are: Ship Design, Damage Control and Stress Analysis.
Ship Design
Success Rate: 100%
A spaceship engineer must draw up plans and blueprints for a spaceship before a construction center can begin building it. If a character who is not an engineer wants a custom-built ship, an engineer must be hired to do the technical design. The referee must determine whether any NPC engineers are available for hire and how much they get paid; 500 Cr per point of hull size is standard, but this can vary with the number of engineers at the station and the amount of work available to them.
As an engineer reaches higher levels, he can design larger ships. The Ship Design Qualification Table lists the types of ships an engineer can design at various skill levels.
Ship Design Qualification Table
| Engineer's Level | Qualified to Design |
|---|---|
| 1 | Shuttles of all types |
| 2 | System ships of all types |
| 3 | Starships of hull size 3 or smaller |
| 4 | Starships of hull size 6 or smaller |
| 5 | Starships of hull size 15 or smaller |
| 6 | Starships of all sizes |
An engineer must spend 10 days x the hull size of the ship to complete the design. The entire design of a ship must be done before construction work can start.
Damage Control
Modifier: +10% x skill level (added to ship's DCR)
An engineer can greatly aid the crew of a ship in repairing damage caused by combat or accidents. The engineer effectively increases the ship's Damage Control Rating (DCR).
Unlike the ship's regular DCR, which can be divided among as many repairs as a player wants, the engineer can use his repair ability on only one repair per repair turn (he can oversee only one thing at a time). Otherwise, the engineer's damage control points are used the same way as the ship's inherent DCR.
The engineer's addition to the DCR equals 10 x his skill level. For example, a 3rd level engineer aboard an assault scout (DCR 30) increases the ship's Damage Control Rating to 60.
All or part of a ship's DCR can be combined with the engineer's damage control points to make a repair. Any part of the ship's DCR that is not combined with the engineer's ability can be used for other repairs.
In order to use his damage control ability, the engineer must be working on the repairs during all three turns (30 minutes) preceding the repair turn. For example, a character who serves as both a ship's pilot and engineer cannot be flying the ship and making repairs at the same time.
If a ship is carrying more than one engineer, each can be working on a separate repair at the same time.
Stress Analysis
Modifier: -5% x skill level (to ship breakup percentage)
Because of their keen understanding of the forces at work on the hull of a spaceship, engineers can advise a pilot on how to accelerate and maneuver a damaged ship without tearing the hull apart with excess stress.
Having an engineer on board a ship modifies the chance that the ship will break apart when damaged. The player controlling the ship multiplies the engineer's skill level by 5, and subtracts the result from the normal chance that the ship will break up. An engineer cannot use this subskill during a turn when he is making or overseeing repairs.
EXAMPLE: Doc Evanson is a 3rd level engineer. His assault scout has taken 13 hull hits in combat. This is 6 hits above the 50% mark for the 15-hull point ship. In order to get away, the pilot uses full acceleration (5) and makes one turn. The chance that the ship will break apart is (5 + 1) x 6% = 36%. Doc's advice reduces this by (3 x 5% =) 15%, so the actual chance the ship will break up is only 21%.
Gunnery Skill
A ship's weapons can be fired by the ship's computer if no characters with Gunnery skill are aboard, but ship gunners increase a spaceship's effectiveness in combat. The gunnery subskills are: Improve Accuracy and Selective Targeting.
When a character spends experience points for Gunnery skill, he must specify whether he is learning Energy Weapon or Rocket Weapon Gunnery. The weapons covered by these two skills are listed below:
| Energy Weapons | Rocket Weapons |
|---|---|
| Laser Cannons, Batteries | Torpedos |
| Proton Beam Batteries | Assault Rockets |
| Electron Beam Batteries | Rocket Batteries |
| Disruptor Beam Cannons |
Improve Accuracy
Modifier: +5% x skill level
This subskill gives a gunner a better chance to hit a target with ship-mounted weapons. A gunner can apply this subskill to only one weapon per turn. The bonus can be combined with the pilot's Forward Firing Weapons bonus, however.
When player-character gunners are onboard spaceships, use the lower percentages in the shaded columns of the Advanced Game Combat Table. The higher, unshaded percentages are adjusted to reflect the skills of NPC gunners onboard military ships.
Selective Targeting
Modifier: -30%
This subskill lets a gunnery expert shoot at a specific system on an enemy ship. External systems only (those visible from outside the ship) can be attacked, so Life Support systems, astrogation controls, damage control equipment, computers and electrical systems cannot be targeted selectively.
To use this subskill, the attacking ship and its target must be in the same hex. The gunner declares what system he is targeting, and rolls to hit with a -30% modifier, in addition to all other modifiers that apply. The gunner can use his Improve Accuracy subskill with Selective Targeting. If the shot hits, the damage is applied directly to the targeted system as described on the Advanced Game Damage Table.
If the shot misses, it is considered a clean miss and causes no damage.
If the system that is hit can receive several grades of damage on the Advanced Game Damage Table, a random die roll should be used to determine how badly the system is damaged. If the ship's hull is hit, there is a 50% chance it will suffer double damage.
EXAMPLE: A gunnery expert using selective targeting hits the drive of an enemy ship. According to the damage table, this can reduce the ship's ADF by 1, by half of its total, or completely to 0. In this case, the referee decides that the gunner must roll 1d10. A result of 1-3 means 1 ADF is lost, 4-6 means one-half of the ship's ADF is lost, and 7-9 means the entire ADF is lost. A 0 is ignored and re-rolled.
Personal Space Equipment
When characters venture into space, they will need specialized equipment. This section introduces equipment that is uniquely suited for use in space. Any of these items can be purchased at any spaceship construction center.
The prices and masses of all these items can be found on the Equipment List.
Spacesuits
A spacesuit insulates a character from the lifeless vacuum of space.
Standard Suit
A standard spacesuit includes a self-sealing, double-walled shell of flexible plastic, enough oxygen for 20 hours, a clear, high-impact plexiglass bubble helmet, a short-range (10 km) communicator, and an emergency patch to repair punctures.
Putting on Spacesuits. A character with a Dexterity of 45 can get into a spacesuit in five turns, if he really hurries. For every 5 points of Dexterity above 45, one turn can be subtracted from this time, although it always will take at least two turns to suit up. For every 5 points of Dexterity below 45, a character must add a turn to the amount of time required. Because of their many limbs, all Vrusk characters must add two turns to the amount of time they need to get into a spacesuit.
Automatic Puncture Sealing. Spacesuits are made of a self-sealing material that will automatically close a puncture that is 1 centimeter or less in diameter. If the puncture is larger than 1 cm across, there is a 25% chance for each additional cm that the suit will be unable to plug the hole. For example, there is a 50% chance a suit will not automatically seal a 3 cm hole. A suit can never automatically repair a hole that is 5 cm or more in diameter; such punctures require a patch.
The roll to determine if a hole seals itself is made as soon as the suit is punctured. If it is successful, the hole is patched immediately.
Emergency Patches. If the suit does not repair the puncture automatically, an emergency patch can be applied. An emergency patch is a 10 cm circle of adhesive spacesuit material. It can be applied in one turn. The character applying the patch must make a Dexterity check. If the hole is in the front or side of the suit, the referee may allow a +20 modifier on the Dexterity check. If the hole is in the back of the character's suit, the check must be made at -10.
If the check is successful, the patch is applied and bonds instantly. If the check is unsuccessful, air is still leaking around the patch. The character can attempt to reseal the patch, making another Dexterity check. If the second check is unsuccessful, the adhesive on the patch will no longer function and the character must find another means of patching the leak (or try another patch).
A character can apply a patch to someone else's suit, if necessary. Extra patches can be carried, as explained under Optional Spacesuit Equipment.
Effects of Leaks. If a leak is not repaired, the character will lose consciousness in a number of minutes equal to 10 minus the diameter in cm of the hole. After losing consciousness, the character must make a stamina check every five turns (30 seconds). A character who fails this Stamina check dies immediately.
The diameters of holes caused by various weapons are listed in the Close Combat section.
Spacesuit Options
Defensive Suits. A character can wear a skein or albedo suit under a spacesuit, and receive all of that suit's defensive benefits in combat. No defensive screens can be worn with a spacesuit, however, since the material of the suit interferes with the field patterns of all types of screens.
Armor. Spacesuit armor is a semi-rigid shell of metalized plastic which is worn over a spacesuit. Armor reduces a character's Dexterity and Reaction Speed by 10, and cuts that character's movement rate in half when he is walking, running, climbing, or moving under his own power in any other way. The speed of a character traveling through space with a rocket pack is not affected by armor.
Armor will protect a character to some degree from most weapons. The Weapons vs. Armor chart displays the effect of armor on various weapons.
Weapons vs. Armor
| Weapon Type | Effect of Armor |
|---|---|
| Axe, Knife, Club, etc. | Cannot penetrate armor |
| Gas Grenades | Cannot penetrate armor |
| Needlers | Cannot penetrate armor |
| Sonic Weapons | Cannot penetrate armor |
| Spear, Sword | 70% protection |
| Bullets | 65% protection |
| Laser Weapons | 50% protection |
| Fragmentation Grenade | 35% protection |
| Gyrojet Rockets | 35% protection |
| Electric Sword | 30% protection |
| Vibroknife | 25% protection |
When the suit has a percentage chance to protect the wearer, the character being hit must roll d100. If the number rolled is less than or equal to the suit's protection percentage, the weapon does not penetrate the armor. If the roll is unsuccessful, the weapon has punctured the armor, but causes only half of its normal damage to the character.
COMBINING ARMOR. If a character is wearing a defensive suit inside an armored spacesuit, the defensive suit will reduce the amount of damage that the character suffers. For example, a character wearing a skeinsuit underneath an armored spacesuit will take only one-fourth of the normal damage from a bullet or other ballistic or fragmentation weapon.
PUNCTURES. Spacesuit armor is designed to fit tightly over a suit, so any punctures in the armor will also puncture the suit. Emergency patches may be placed directly over the armor to repair these punctures.
Magnetic Shoes. These heavy boots allow a character to walk across a metal surface, such as the hull of a spaceship or space station, in a weightless environment. The walking rate with magnetic shoes is one-half of the character's normal rate. Magnetic shoes can be used without a spacesuit for walking in the zero-gravity sections inside ships and stations, where air pressure in the compartment makes a spacesuit unnecessary. If a character with a rocket pack is in danger of bouncing off his destination because of excessive speed, magnetic shoes will give him a +20 modifier on his Dexterity check to see if he can hang on.
Velcro Boots. These boots allow a character to walk through carpeted sections of a spaceship while weightless. Since it is standard procedure to carpet all inhabited sections of a ship, velcro boots are a very common accessory. The walking rate with velcro boots is one-half of the character's normal rate.
Rocket Pack. A rocket pack is a device that allows a character in a spacesuit to travel through space. A rocket pack has 20 bursts of fuel. Each burst provides enough thrust to travel 50 meters per turn, until something causes the character to change course or speed. Only one burst can be used per turn.
A character can accelerate by firing several bursts over several turns, adding 50 meters/turn to his speed with each burst.
Once a character starts moving, an equal amount of power is needed to stop moving! A character could use all 20 bursts to accelerate to 1,000 meters/turn (about 380 mph!), but he would keep traveling at that speed in a straight line until someone or something stopped him, since there is no fuel left in the pack to decelerate with.
A character using a rocket pack to move through space toward an object must make a Dexterity check to move directly toward that object. This check should be modified by the referee according to the distance traveled and the size of the target. For the purpose of comparison, a 1 km trip to a spaceship of hull size 5 should be a standard check. Shorter distances and larger targets should allow positive modifiers, while longer distances or smaller targets are more difficult to hit. Modifiers should not exceed plus or minus 20.
A character will quickly realize if he is on the wrong heading, and should be allowed to correct his trajectory. This requires another burst of fuel, and another Dexterity check must be made to make a proper adjustment. These adjustments may or may not increase the character's speed, at the discretion of the character using the rocket pack. Even if the burst does not accelerate the character, it must be counted as one of the pack's bursts. A character can keep making direction adjustments as long as the rocket pack has fuel.
If the character gets himself aimed at the target and has enough fuel remaining to stop when he gets there, he can come to a gentle stop at the destination by using the appropriate number of bursts to decelerate.
If a character is aimed correctly at a target but does not have enough fuel in the pack to slow down, he will take 1d10 points of damage for each 50 meters/turn of his speed when he hits the object. In addition, the character must make a Dexterity check to stop at the object, or he will bounce off the intended target and travel at one-half of his previous speed in a direction determined by the referee. This Dexterity check has a -5 modifier for each 50 meters/turn that the character is traveling upon impact.
Additional Life Support. This important optional package includes enough water, compressed food and oxygen to support a character for an additional 20 hours beyond a suit's normal capacity. Up to two packages of additional life support can be added to a suit, for a maximum time of 60 hours.
Anchors. Spacesuit anchors are self-adhesing disks attached to flexible, lightweight cables. An anchor will bond to any rock, metal, plastic, or even wooden structure that is reasonably free of grease and dust. An anchor comes with 100 meters of cable, but a character can carry up to 1,000 meters of cable if he purchases extra. An anchor is used to prevent the character from drifting off into space.
An anchor also comes with a special belt that the character wears on the outside of his suit. By pushing a button on the belt, the character can be reeled in at a comfortable 20 meters/turn.
Extra Patches. A packet of two of these potentially life-saving devices can be added to a suit. The packet is carried on the suit's sleeve. A character can carry up to two packets (four extra patches).
Space Vehicles
None of the vehicles in the STAR FRONTIERS game will work in the weightless vacuum of space, yet there will be times when a character needs something smaller than a shuttle for transportation and working in space. Two types of small vehicles are available.
Launches
A launch is a small "space car" that is powered by a rocket engine. It is very short-ranged, and is used primarily to travel from one ship to another nearby ship or station. Launches can be purchased in two sizes: four passenger and 10 passenger. Both sizes have the same acceleration and handling characteristics.
A launch travels like a rocket pack, but a launch can carry 40 bursts of fuel. Characters inside a launch do not need to wear suits, as the cabins are fully pressurized and carry enough oxygen to support a full load of passengers for 10 hours.
Launches are unarmed, but characters can fire small arms from a launch if the canopy is open. Of course, characters in a launch with an open canopy will die unless they are wearing spacesuits! The Vehicle Damage Table from the STAR FRONTIERS Expanded Game rule book is used if weapons are fired at a launch. All steering hits are treated as "No Effect." Any hit that damages the speed of the launch disables its rockets, so the launch will keep traveling in a straight line until repairs can be made or something stops its progress. Spins, rolls and fires are treated normally, except that the launch will not come to a stop after the maneuver.
Launches have no airlocks, so the only means of entering or leaving one is through the bubble canopy. In the launch dock of a ship or station, this bubble opens into the pressurized atmosphere of the ship. Once the launch is in space, however, a character cannot enter the launch without opening the bubble and exposing any passengers not in spacesuits to instant death.
If characters are hurriedly evacuating a ship, they can enter the launch at the rate of one character per turn (six seconds). The first character in can start the engines and begin releasing the docking restraints. The launch may take off five turns after the first character has entered it.
All Spacefleet ships of Assault Scout class or larger carry a small launch. Cruisers and larger ships will have several small launches and a large launch. Most space stations maintain a complement of launches of both sizes.
Workpods
A workpod is a sort of one-man, space-going toolbox that enables a character to make repairs or perform construction in space. The pod is a round object about 4 meters in diameter, with four mechanical arms attached to it. Six small jets give the pod an exceptionally delicate maneuvering capability.
In addition to the four arms, a workpod can extend a welder, riveter, and net under the control of the operator. The welder and riveter are used for working on ship and station hulls, while the net, which is on a 100 meter tether, is used to retrieve objects adrift in space.
If the operator of a pod wishes to retrieve something with the net, the referee must determine whether the object is in range. If it is, the pod operator must roll one-half of his Dexterity or less (as if shooting a weapon) to capture the object. If the net misses, 10 turns must be spent reeling it back in before the operator can try again.
A pod carries enough oxygen to support its operator for 20 hours. It may use up to 25 bursts of fuel traveling to the work site and back to its launcher. Each burst propels the pod at 20 meters/turn. The tiny jets used to control the pod as it moves around while working are not charged against this fuel supply, since these delicate maneuvers use very little fuel.
A character can enter a pod in one turn when not wearing a spacesuit. A suited character needs two turns to get inside. Once the operator is inside, the pod can be activated and launched from the ship in four turns.
A workpod is standard equipment on all Spacefleet vessels. The chance other types of ships will be equipped with a pod is listed on the Workpod Frequency Table. The percentage following each type of ship is the chance that that ship will carry a workpod. If a second percentage is given in parentheses, it is the chance that that ship will carry two workpods.
Workpod Frequency Table
| Ship Type | Likelihood of Pod Aboard |
|---|---|
| Agriculture Ship | 80% (25%) |
| Exploration Ship | 50% |
| Freighter | 80% (50%) |
| Militia Vessel | 60% |
| Mining Ship | 95% (80%) |
| Pirate Vessel | 40% (5%) |
| Scientific Research Ship | 95% (50%) |
| Space Station | 100%* |
| Spaceliner | 15% |
* Space stations have 1d10 workpods.
Tools
The tools included in the various toolkits from the STAR FRONTIERS Expanded Game rule book will all prove useful in spaceships. Some additional, specialized tools that are designed specifically for use in space are listed below.
Engineer's Toolkit
Engineers routinely carry a Techkit. In addition to the items in the techkit, however, the engineer will have three specialized tools.
WELLASER: Laser welder which can repair punctures and tears in sheet metal.
PLASTISEAL: Package of compressed plastic which, when activated, expands to a 2 meter x 2 meter sheet of airtight plastic, used for sealing holes in ships. Several sheets of plastiseal can be used together to patch a very large hole.
INSSUIT: Insulated suit to protect engineers while working on atomic engines. Also worn by fighter pilots to protect them from the nearby atomic drive.
Laser Powertorch
The Laser Powertorch (LPT) is designed to cut holes through the heavy metal hatches and hulls of enemy ships so troops can board. An LPT will cut a slash 1 meter long in a ship's hull in one turn; a hole 1 meter square could be made in four turns.
An LPT is powered by a special power backpack that holds 300 SEU. This backpack is so heavy it can be used only in a weightless environment. The torch uses 30 SEU per turn. When not cutting metal, an LPT can be used as a laser rifle which causes 20d10 of damage with a successful hit. There is no variable power setting.
A character using an LPT as a weapon can use his Beam Weapon skill as a modifier. Because the LPT is not designed to be a weapon, however, the character can add only +5 per skill level to his chance to hit, instead of the normal +10.
An LPT is designed for cutting a surface that is close to the tool, so it is not very effective as a long range weapon. The ranges for the LPT as a laser rifle are: PB = 0-10; S = 11-20; M = 21-40; L = 41-60; E = 61-100.
Spaceship Movement
This section deals with types of movement that are not covered by the movement rules in the boardgame. The following pages cover interstellar misjumps, taking off from and landing on planets, docking with space stations, the effects of ship and station movement on passengers, movement through asteroid belts, and ship-to-ship collisions.
Misjumping
When something goes wrong with the calculations before an interstellar jump, the ship will still exit the Void in the vicinity of some star system. However, it will not be the system the ship was trying to reach.
A misjump can carry a ship to any system inside a circle that has the target system at its center and a radius equal to the distance from the starting system to the target system.
EXAMPLE: When news reaches Triad (Cassidine) that a Sathar landing party has been spotted at Kdikit (Madderly's Star), Bla'leg Norris quickly gathers his crew and heads for Madderly's Star. Unfortunately, the navigator makes a mistake in his rushed calculations and the ship misjumps. The distance from Cassidine to Madderly's Star is 7 light-years, so the ship can emerge at any system within 7 light-years of Madderly's Star. This area is outlined in the illustration. It contains 10 systems where the ship could arrive.
When determining whether a system is within range of the target system, the referee can use the Interstellar Distance Table (see Chart New Routes subskill in the Spaceship Skills section).
If no other systems are within the range of the misjump, the referee should extend the range so it includes one or two other stars.
Once the referee knows which systems are within range of the misjump, he can pick the ship's destination either by assigning numbers to the stars and rolling a die, or by simply picking a system that suits his plans. Rolling the die and then placing the ship wherever the referee wants it is a good tactic.
A ship that misjumps will not necessarily emerge at a system with planets; the ship is just as likely to arrive at a binary or neutron star as at a planetary system.
Jump Limits
Theoretically, a ship can jump any distance across the Void. The limiting factor is the precision needed in the pre-jump calculations. When a ship jumps more than 15 light-years, there is a 10% chance per additional light-year that the ship will misjump. If the astrogator is risk-jumping, this probability is subtracted from his chance to guide the ship safely.
Takeoffs from Planets
As described in the Spaceship Design section, only a few types of ships can land on planetary surfaces. These types include all shuttles, system ships of hull size 5 or less, assault scouts, and other scout class starships. Scout class starships include military, exploration and research ships of hull size 3 with two atomic engines.
Pre-Flight Preparations
A pilot preparing to launch a ship from a planetary surface cannot simply turn on the engines and "fly away;" he must perform various pre-flight preparations. Larger ships require more checks before liftoff, and planets with strong gravity are more difficult to pull away from.
Countdown. To determine how long the pre-flight checks will take, the referee should roll 1d10 for each point of the ship's hull size. The result is the number of minutes that must be spent in pre-flight preparations. The preparations for launch can begin as soon as the pilot is on the bridge of the ship and strapped into his seat.
Gravity. As an optional addition, the referee can multiply the number of minutes required for pre-flight checks by the planet's gravity. For example, if the pilot of a hull size 3 ship must spend 16 minutes performing pre-flight checks on a planet with a gravity of 1 g, the same checks would take (16 x 1.5 =) 24 minutes on a planet with 1.5 gravity.
Emergency Takeoffs. Pre-flight checks include time for the pilot to analyze computer reports on all of the ship's systems, make adjustments to the ship's instruments for temperature and thrust variables, study reports from scanners on weather and other factors that might interfere with the liftoff, and time to allow the engines to gradually warm up to thrusting temperature. This procedure can be cut short in an emergency, but there are risks.
The shortest amount of time in which an atomic or chemical engine can be activated is one minute from the moment the pilot straps into his chair. Obviously, this is not enough time to warm up the engines properly or check the ship's systems thoroughly.
If a pilot is trying to shorten his pre-flight checks, the number of minutes required for preparation should still be calculated normally. The pilot then announces how many minutes he will actually spend preparing for takeoff. The number of actual minutes is subtracted from the number of required minutes, and the difference is the percent chance that a malfunction will occur during liftoff.
When a pilot has determined the chance for a malfunction, the referee must roll d100. If the result is equal to or less than the percent chance for a problem, the Launch Malfunction Table is consulted. The referee makes this check by rolling 1d10 and matching the result to the table.
Launch Malfunction Table
| Die Roll | Occurrence |
|---|---|
| 1-6 | Engines fail to start, begin procedure again |
| 7-9 | Engines start but begin to sputter; land immediately within 10 km of launch site |
| 0 | Engines work for 2d10 turns and suddenly fail; bail out before ship crashes!* |
* A ship that crashes is demolished. The referee must decide how much of the ship is salvageable. Under no circumstances can it be repaired and flown without heavy, hi-tech construction and repair equipment and lots of replacement parts.
EXAMPLE: Anegray and her crew are chased back to their assault scout by a horde of aliens armed with heavy cannons. To spare the ship, Anegray wants to lift off before the cannons can be moved into range. She rolls 3d10 (the assault scout is hull size 3) and the result is 19. Because she wants to lift off in one minute, she subtracts 1 from 19, giving an 18% chance of a malfunction during the launch. The referee rolls d100, and the result is 47 - Anegray manages to lift the Bold Adventuress off the planet before the aliens can attack.
Launch Speeds
The speed of a spaceship or shuttle as it is taking off is determined primarily by the type of engines it has.
Chemical Drives. A ship with chemical drives must continually accelerate through the atmosphere to reach the speed necessary to escape the planet's gravity. The ship will increase its speed by 200 meters per turn (six seconds) while it is lifting off. This is a fairly accurate abstraction of actual liftoff speeds.
The speeds a ship will have and the distance it will travel after various numbers of turns are shown on the Liftoff Table.
Liftoff Table
| Turn | Speed (meters/turn) | Altitude (meters) |
|---|---|---|
| 1 | 200 | 200 |
| 2 | 400 | 600 |
| 3 | 600 | 1,200 |
| 4 | 800 | 2,000 |
| 5 | 1,000 | 3,000 |
| 6 | 1,200 | 4,200 |
| 7 | 1,400 | 5,600 |
| 8 | 1,600 | 7,200 |
| 9 | 1,800 |
Once the ship gets beyond the reach of anything on the ground, these calculations are not necessary. For the referee's information, though, the ship will continue to accelerate until it reaches a speed of 60,000 meters/turn, after 30 minutes of acceleration. At this point, it can escape a planet with 1 g of gravity and soar into space.
Atomic and Ion Engines. Because of their virtually unlimited power, a ship with atomic engines can lift off at any speed the pilot wants. Ships with ion engines never land on planets.
Gravity. The referee can increase or decrease a ship's acceleration on planets with gravities greater or less than 1 g. The math involved in these problems is fairly complicated, but players can get a simple approximation by adding or subtracting a few meters per turn to the ship's acceleration and making their own Liftoff Tables.
Landing on Planets
Landing on a planet is much simpler than taking off, as the planet's gravity is working with the ship instead of against it. In general, as long as a ship has power or, in the case of some shuttles, is capable of gliding, the pilot can set it down on any part of the planet he wants.
Of course, if that nice green field turns out to be a mass of liquid ooze, or the apparently solid hill is only a thin shell of dirt that will collapse at the slightest pressure, the referee should feel free to describe whatever result seems appropriate.
Landing Sites
Most of the hazards of landing involve choosing a landing site. The referee must handle this case by case. The appearance of the planet should be described to the pilot (within the limits of the ship's sensing devices), and the pilot allowed to choose a point for touch-down. The referee then explains what happens as the ship lands and what the crew members see as they open the hatches.
Generally, most plains, grasslands, gravel flats, deserts and wide beaches should be safe to land on. Forests, areas of open water, extremely rough hills, or plains strewn with large boulders will prove too rough to land a ship on. All of these general cases are subject to the referee's modification, of course.
Other Hazards
The referee may also, at his discretion, declare a random chance of engine failure, landing gear collapse, or other system failure. This is especially useful if the referee wants to strand his players on a planet for a while in order to provide some challenging adventure or obstacle.
Docking at Space Stations
Docking at space stations is a much more common procedure for most spaceships than landing on planets. Docking is a safe and routine procedure, but may take some time.
The docking area of a space station is at the station's hub: the center of the "wheel." Docking at the rim would be very difficult because of the station's rotation. Also, there is no gravity at the station's center.
The docking bay in the center of the station is a large, open area with openings to space at either end. A ship intending to dock must approach the station slowly and position itself outside the docking bay. Then, the ship's pilot uses maneuver jets to make the ship rotate at exactly the same rate as the station. As an example, a hull size 5 station (1 km in diameter) rotates once every 40 seconds.
To find out how long it takes a pilot to position his ship and match the station's rotation, the player rolls 1d10 and adds the hull size of his ship to the result. The pilot's skill level is subtracted from this sum, and the final result is the number of minutes necessary to establish the docking rotation.
Once the rotation of ship and station are matched, it is a simple matter for the ship to ease forward into the docking bay and slowly settle to one wall. Airlocks will extend to the hatches of the ship, allowing crew members to enter the pressurized environment of the station.
Artificial Gravity and High-G Maneuvers
Accelerating, decelerating, launching and maneuvering a spaceship all have very significant effects on the passengers in the ship. This section is intended to give the referee some idea of what these effects are.
Takeoffs
Chemical Drives. All characters aboard a chemically driven ship that is taking off from a planet must be strapped into some kind of chair or acceleration couch, or risk taking damage from the tremendous forces of the ship's acceleration.
The seats in shuttles are designed to handle this stress, as are the duty station chairs occupied by pilots, navigators and other crew members. If a character is not properly strapped into a seat, he must make a Dexterity check as the ship begins its liftoff. If the check fails, the character is knocked to the floor and takes 2d10 points of damage.
While a ship or shuttle is accelerating through the atmosphere of a planet, characters cannot move around inside the ship. After the ship leaves the planet's atmosphere, interior conditions can be weightless or under normal gravity, depending on whether the ship is accelerating or coasting.
Atomic Drives. If a ship equipped with atomic engines makes a slow liftoff, the effect on passengers in that ship is similar to taking a slow elevator ride. If the ship is raised rapidly, the effect is the same as riding a shuttle or other chemically driven ship during liftoff.
Traveling Through Space
When a ship is in space, the only time that it will seem to have gravity is when it is accelerating or decelerating. When a ship is coasting without thrust - even if it is traveling at 20,000 km/hour - all of the characters and objects inside the ship will be in freefall.
A shuttle will coast in freefall as soon as it leaves a planet's atmosphere. As it approaches its destination, however, it will need to decelerate so it can dock. In order to decelerate, the shuttle will use maneuver jets to turn around so its tail points toward its destination, and then use its main engines to slow down. During this deceleration, passengers will be pressed against the decks of the ship, creating the feeling that gravity is holding them there.
The same thing happens on a starship making an interstellar voyage. The starship will be either accelerating or decelerating during most of the trip, so passengers will feel the effects of "gravity" during most of the voyage.
On a normal interstellar voyage, the starship pulls away from the space station and begins accelerating at 1 g toward its destination star. This is about the same acceleration a ship uses when it increases its speed on the boardgame map by one hex per turn. While the starship is accelerating, the tail of the ship will be "down" to anyone aboard the ship, and the nose will seem to be "up."
After several days of acceleration, the ship should be ready to make its jump through the Void. Before the ship enters the Void, lights will flash and announcements will be made throughout the ship warning all passengers to strap themselves into seats or anchor themselves somehow.
A few minutes before the jump, the ship will stop accelerating and everything on board will float weightlessly. When the final preparations for the jump are made, the navigator will accelerate slightly and the ship will enter the Void.
During the brief period the ship spends in the Void, characters will feel that their senses are very distorted; colors and sounds will be unfamiliar, and the sense of touch will seem to vanish completely. Then the navigator decelerates slightly, the ship leaves the Void, and everything inside it will again float weightlessly.
Several minutes will pass while the ship uses maneuver jets to turn so that its tail is pointed toward its destination. The ship will then use its main engines to decelerate, at the same time restoring a feeling of gravity to the passengers. Again, the tail of the ship will seem to be "down" and the nose "up." The ship will continue to decelerate for several days, until it nears the space station or planet that is its destination.
At this point, passengers and crew will again be instructed to strap themselves into their chairs. The ship will stop decelerating, causing objects inside to become weightless once more. Everything will remain weightless as the ship approaches the station, matches its rotation and enters the docking bay.
Combat Maneuvers
When a ship is in combat, characters must be tightly strapped to their seats or they will certainly be injured by the ship's rapid turns and changes in speed. All crew members of any ship will have a solidly anchored Battle Station. If passengers are aboard, they must be strapped to their beds or chairs in order to assure their safety.
If a character is not strapped to a chair or bed, and the ship that the character is in goes through violent maneuvers, the character will be slammed repeatedly against the decks and bulkheads of the ship. The referee should roll 1d10 for each ADF or MR point that the ship uses during a 10 minute space combat turn. The sum of the dice is the number of stamina points of damage suffered by that character. If the character makes a successful Reaction Speed check, however, the character manages to grab something and hold on for dear life, reducing the damage by half (round fractions down).
If a character passes this Reaction Speed check, he can try to move toward a safer place during that turn. The character can move at one-half his normal walking movement rate. Until the character is strapped in, however, the character should suffer damage every turn that the ship uses its MR or ADF.
Space Stations
Space stations spin rapidly so that centrifugal force will simulate gravity along their outer rims. This "gravity" is strongest at the rim of the station, and gradually drops to nothing at the center (hub) of the station.
A station's rim and hub are connected by elevators that run through the "spokes" of the wheel. These elevators are adjacent to the airlocks that open into the docking bay. As the elevator moves toward the rim of the station, the gravity gradually increases until it reaches about 1 g at the rim.
Stations usually have several levels of decks along their rims. The gravity is strongest on the deck farthest from the hub, but the change from deck to deck is barely noticeable. The gravity does not become significantly lower until characters approach the zero gravity region near the hub.
Asteroid Belts
Interstellar and intrasystem travel routes always bypass the hazardous areas of asteroid belts. The large amount of rock and rubble in these areas makes them very perilous for spaceships. Mining operations and outlaw hideouts are sometimes located among asteroids, however.
Marking Asteroids on the Map
Asteroid belts can be portrayed on the hex map used for the boardgame. Planetary counters and upside down counters are used to represent asteroids. Instead of placing these counters in a hex, however, place them at the junction of three hexes, as shown in the diagram.
Asteroid counters can be as frequent or sparse as the referee desires.
Each of the three hexes touching the counter has a high concentration of asteroids in it. These hexes are shaded in the diagram. Ships can travel through these hexes, but there is danger. Hexes that are not touched by asteroid counters are clear. They do contain asteroids, but these rocks are far enough apart that ships can easily fly between them.
Occasionally, a hex can be touched by two asteroid counters. The asteroids are packed so densely in these hexes that any ship trying to move into or through that hex will be destroyed by hundreds of hurtling chunks of cold rock.
The asteroid belt itself can cover the whole map, if the referee desires, or only half of the map, or even a band down the middle of the map. Clear channels may offer many routes through the belt or lead to dead-ends where ships will be forced to pick their way through the asteroids.
Traveling Through Asteroids
When a ship enters an asteroid area, follow the step-by-step procedure to determine whether it passes through safely.
A) Add the ship's MR to the pilot's skill level. Multiply this sum by 5, then add 50. B) Add the ship's hull size to its speed in hexes per turn. Multiply this sum by 3. C) Subtract the product of step B from the product of step A.
The result from step C is the ship's percent chance to pass through an asteroid hex with no damage. The player controlling the ship must roll d100 for each asteroid hex the ship passes through. If the ship moves through more than one asteroid hex, the dice must be rolled once for each. If the roll is equal to or less than the result from step C, then the ship gets through the hex safely. A higher roll means that the ship has collided with an asteroid.
If a ship's MR has been reduced to 0, then treat its MR, its speed, and the pilot's skill level as 0 when determining the ship's chance to avoid asteroids. In these cases, the ship's chance to pass the asteroids safely is simply 50 - (3 x HS). A ship always gets through safely with a roll of 01-05, no matter what its chance was.
If a ship collides with an asteroid, roll once on the Damage Table with a -20 modifier. If the result is "Hull Damage," roll 2d10 to determine how many hull points are lost. Double this figure if the result was Double Hull Damage.
Ramming Spaceships
Ramming is a suicide tactic that is used very rarely in space combat. The Sathar have been known to ram enemy ships as a last, desperate maneuver.
Procedure for Ramming
A ship that intends to ram another ship must end its movement in the same hex with the target vessel. In addition, the ramming ship must be traveling faster (in hexes/turn) than its intended victim.
If the above conditions are met, the attacker announces that he intends to ram his opponent. Both players roll 1d10 and add the ship's MR and pilot's skill level to the result. (If this rule is being used in the Advanced Boardgame without character skill levels, add each ship's MR twice.)
If the attacker's total is higher, the attacking ship has rammed its target. If the result is a tie, or the defender has the higher total, the target ship dodged away from the attacker.
Effects of Ramming
If a ramming attempt succeeds, the ramming ship is completely destroyed. The player that controlled the ramming ship should roll a number of 10-sided dice equal to the hull size of the ramming ship. The result of this roll is the number of points of hull damage caused to the ship that was rammed.
EXAMPLE: A Sathar frigate has rammed a UPF destroyer. The Sathar frigate is destroyed automatically in the collision. The frigate is hull size 5, so the destroyer takes 5d10 points of hull damage.
Close Combat
This section deals with close combat in space. All of the STAR FRONTIERS rules for ranged weapon and melee combat apply in space, unless exceptions are mentioned here. The specific topics covered include Boarding Actions, Combat in Spacesuits, Escaping from Destroyed Ships, Sabotaging Spaceships, and Self-Destruction of Spaceships.
Boarding Actions
Generally, the crew of an attacking ship does not want to completely destroy an enemy's ship. Instead, they will try to board the ship and accomplish some objective inside. Rescuing prisoners, stealing cargo or capturing the ship intact are a few reasons why boarding parties would be used.
Approaching the Enemy
The first step in boarding is approaching the enemy ship. Two very different techniques are used, depending on whether the ship to be boarded is drifting or maneuvering under power.
Approaching a Drifting Ship. A ship is drifting if it has no ADF and no MR points left. In this case, the pilot of the attacking ship can simply pull alongside the drifting ship and match its course.
To match a drifting ship's course, the pilot of the attacking ship must maneuver into the same hex as the drifting ship, and adjust his ship's facing and speed so they match those of the drifting ship.
Once the ship's courses are matched, the boarding ship must spend a few turns approaching the drifting ship (remember, a hex is 10,000 kilometers across!). The attacker can close to boarding range (about 20 meters) in a number of turns equal to:
2d10 - pilot's skill level - approaching ship's MR
At least one turn will always be needed, even if the result is zero or less.
EXAMPLE: Bla'leg Norris, a level 3 pilot, is approaching a drifting pirate vessel to board it. His frigate-class vessel has an MR of 3. The result of the 2d10 roll is 13, so the approach will take (13 - 3 - 3 =) 7 turns.
Approaching a Maneuverable Ship. Approaching a ship that can still maneuver or accelerate is much trickier than the process described above. Unless the crew of the boarding ship can use its weapons to destroy the enemy ship's engines, causing it to drift, the enemy ship must be grappled.
A ship of hull size 5 or larger can be equipped with grapples (see Spaceship Equipment section). Grapples are strong cables with powerful magnetic tips. They have a range of only 200 meters, however, so some delicate maneuvering is required before they can be used.
Grapples are MPO weapons, so they can be fired only by the moving player. The following conditions also must be met:
- The moving player's ship must end its movement in the same hex as the ship to be grappled.
- The two ships must have the same facing and speed.
- Conditions 1 and 2 must have been maintained for at least five consecutive turns.
- If conditions 1 through 3 have been met, both players roll 1d10 and add their pilot's skill level and the MR of their ship to the result.
- If the player attempting to grapple has the highest modified die roll, he can fire his grapples.
If the player attempting to evade the grapples has the high die roll, then the ships are not within grappling range. If the pursuer can stay with his target, however, he can make another attempt on the following turn - he does not need to wait another five turns before trying again.
Even if the grappling player got the high die roll in step 5, this simply means that the ships have been maneuvered to within grappling range. The pilot of the ship being attacked still has a chance to evade.
EVADING GRAPPLES. The pilot's chance to evade a grappling attack equals the pilot's skill level plus the ship's MR, multiplied by 10%. The MR used should be the ship's functional MR, including any reductions caused by damage - not the ship's original MR. If the chance is greater than 100, the pilot and ship are just too nimble to be grappled. If the result is less than 100, the evading pilot must roll d100. If the roll is equal to or less than the chance to evade, the pilot evaded the grapples.
HAULING IN GRAPPLES. Following a successful grappling attempt, the grappled ship can be "reeled in" at a rate of 10 meters per six-second turn, bringing the ship within boarding range in two minutes. As long as the two ships are attached by grapples, they will cancel out each other's drive and maneuver abilities. Thus, the grappled ships will drift as if neither had power.
Grappling a Drifting Ship. A ship that is already drifting can be grappled to assure that it does not make repairs and then accelerate or maneuver. In this case, steps 1, 2 and 3 of the grappling process are followed as usual. During step 4, only the moving player rolls 1d10 and adds the level of his pilot. If the result is 8 or greater, the grappling attempt is successful.
Entering an Enemy Ship
Getting inside a defended enemy ship is the most difficult part of a boarding action. The attackers must decide what section of the enemy ship will be boarded, and how the attempt will be made.
Boarders must wear spacesuits or be inside some type of vehicle or machine when they cross the 10 or 20 meters separating the two ships. Once they reach the enemy ship, there are two ways boarders can get inside: open the hatches or cut holes in the hull.
The referee should describe the ship's hull in detail to the boarders, so they can decide where to enter. The referee is the final judge of where the attackers' holes actually break into the ship. If the ship has skin sensors or outside cameras, the crew will know where the attack is coming from and can prepare to defend the ship.
Opening Hatches. Hatches on a hostile ship must be opened by force. Each hatch has 200 + d100 structural points. The hatch can be attacked with Kaboomite or hand weapons. When damage equal to the hatch's structural points has been caused, the hatch is shattered and an opening big enough to step through is made. If the hatch separating the airlock from the rest of the ship also is secured, it must be destroyed the same way.
Precautionary Decompression. Most starships require all passengers to don spacesuits before a fight, and then depressurize the interior of the ship. This prevents violent decompression due to battle damage or boarding attempts.
Decompression. If both of the airlock's hatches are destroyed, the deck connected to that hatch will depressurize. Anything on that deck that is not fastened down, including characters, will be swept into space with the rushing air. Characters using velcro or magnetic shoes, and characters who are strapped down, are safe.
Other characters must make a Dexterity check; those who pass manage to grab something solid. Those who fail are swept toward the airlock. A character can make another Dexterity check at the airlock. A successful check means the character catches himself at the hatch and, although he will be a tempting target for boarding enemies, he is not swept into space. If the character fails the second check, he is carried into space and will die in one turn unless wearing a spacesuit.
A character swept into space will drift directly away from the ship at the rate of 20 meters per turn (six seconds).
Air will continue rushing out through the shattered airlock for a number of turns equal to the ship's hull size. For example, one deck of a destroyer (hull size 6) will depressurize in six turns (36 seconds). At the end of that time, the deck will be a vacuum.
Any compartments behind closed hatches or pressure doors will hold their air as long as the hatch or door stays closed. Elevator shafts and ladders between decks have automatic seals that will prevent a leak on one deck from depressurizing other decks. Regular doors, however, are not airtight.
Exposure to Vacuum. Any character directly exposed to vacuum will die in one turn. Characters on a deck that is depressurizing will die one turn after the deck is fully decompressed, unless they can get through a pressure door or hatch that has air beyond it. Opening the door will take two turns. On the third turn, the character can move through the door and close it behind him if he passes a Dexterity check. The character can make one Dexterity check per turn, but must get through the door before the chamber beyond depressurizes.
Entering the Ship. Boarders cannot get through a hole that is depressurizing a ship. Any shots fired from outside the ship at characters inside have a -20% penalty. Characters wearing spacesuits who are anchored inside the ship can fire at targets outside the ship with no penalty.
Once the deck is depressurized, the normal rules for weightless movement and combat apply. The attackers must deal with any defenders in spacesuits on the deck being attacked.
Opening Holes in the Hull. Rather than enter through an airlock, boarders can make their own entrances with explosives or laser power torches. If explosives are used, consider a ship's hull to have 200 + 2d100 structural points.
Combat in Spacesuits
Combat in the cold vacuum of space is a risky business. The injuries caused by weapons are of secondary importance when compared to the threat of depressurization caused by bullet and laser holes in a character's spacesuit!
The description of spacesuits in the Personal Space Equipment section explains the procedure for patching suits. The Puncture Diameter Chart is a list of weapons and the diameter of the holes caused by them.
Puncture Diameter Chart
| Weapon | Diam. of Puncture (cm) | Auto-seal % |
|---|---|---|
| Electrostunner | 0 | |
| Pistol bullet | 1 | 100% |
| Needler weapon | 1 | 100% |
| Fragmentation grenade | 2 (= 1d10 holes) | 75% |
| Gyrojet pistol | 2 | 75% |
| Laser pistol | 2 | 75% |
| Laser rifle | 2 | 75% |
| Machine gun bullet | 2 | 75% |
| Rifle bullet |
Note that sonic weapons will not work in a vacuum. Bullets can be fired in space if the firing chamber of the gun is equipped with an oxygen supply, which is standard equipment on most modern automatic rifles and pistols.
Melee weapons can cause punctures of different sizes. The exact size is determined by rolling 1d5 or 1d10, and sometimes adding a modifier. These variables reflect the fact that melee weapons can be used to slash or stab.
If a character is hit by a burst from an automatic weapon, the suit will be punctured in several places. To determine how many punctures are made, the 10 bullets in the burst should be divided by the number of characters struck by the burst, with any remaining bullets ignored. For example, if three characters are hit by a burst, each will have three holes in his suit, and the tenth bullet is lost. If one character is struck by the burst, he must find a way to repair 10 holes in a hurry!
Damage. Besides putting a hole in the spacesuit, a weapon does its normal damage to the character inside the suit. A spacesuit does not reduce the amount of damage taken, although armor may.
Armor. Spacesuit armor protects its wearer from damage, but if a weapon penetrates the armor, it makes a hole in the armor the same size as the hole in the spacesuit.
Effects of Wounds. Characters who have taken damage equal to or greater than one-half of their Stamina have a -10% modifier on their Dexterity checks when trying to patch punctures in their spacesuits.
Weapon Ranges in Zero Gravity
In space, there is no atmosphere to slow down bullets or diffuse a laser beam, and no gravity to pull projectiles away from their targets. To account for this boosted efficiency, the ranges of all ranged, hand-held weapons can be doubled when the weapons are used in space.
EXAMPLE: The normal and doubled ranges for an automatic pistol are:
| Range | Point Blank | Short | Medium | Long | Extreme |
|---|---|---|---|---|---|
| normal | 0-5 | 6-15 | 16-30 | 31-60 | 61-150 |
| doubled | 0-10 | 11-30 | 31-60 | 61-120 | 121-300 |
Escaping from Destroyed Ships
While it is not an automatic death sentence, any character who is on a ship when it is destroyed obviously is in trouble. This section explains what characters can do to escape this unpleasant predicament.
A ship is considered destroyed when it has taken sufficient hull damage to reduce its hull points to "0." Even if every other system on the ship is knocked out, the ship will hold together if it has at least one hull point left.
Decompression. When a ship's last hull point is destroyed, it will depressurize completely in 2d10 six-second turns. Any characters not in spacesuits or other pressurized areas (lifeboats or workpods, for example) will die from exposure to vacuum at this time.
Engine Destruction
Atomic Drives. When a ship with atomic drive is reduced to zero hull points, a series of chain reactions begins in the engines. This chain reaction will end in 1d10 minutes with an all-consuming explosion that will utterly destroy the ship and all of its contents. The referee should roll 1d10 secretly when the ship's last hull point is destroyed. Characters will not know how long the engines can last before exploding, but the referee can give clues such as "The vibrations are getting more violent!" to enhance the characters' sense of panic.
Chemical and Ion Drives. Ships with chemical or ion drives will not explode automatically. However, if the referee wants the ship to explode, he can announce that fuel, ammunition, cargo or anything else on the ship was set off by damage to the ship. The referee should feel free to increase or decrease both the blast radius and the length of time between the hull's destruction and the explosion.
If any other ship is within 1 kilometer of an exploding ship, it will be damaged by the explosion. The damage is equal to one torpedo hit for each engine on the exploding ship. This damage should be rolled on the Damage Table, including the -20 modifier for torpedo hits.
Survival
A character's only chance to survive this explosion is to get far away from the ship. A character who leaps away from the ship will travel 2d10 meters per turn in a straight line away from the ship. Otherwise, the character can use a rocket pack to accelerate his escape, or try to reach a launch, rescue pod, workpod or lifeboat.
The referee must determine how many turns it will take the character to reach rescue equipment or a hatch. Things to consider are the deckplan of the ship, the number of hatches that must be opened, whether the character is wearing a spacesuit and how much wreckage is blocking the character's path.
Characters who escape the ship must calculate their chance to survive at the time of the explosion. A character has a 10% chance to survive for each 250 meters of space between the ship and him. Anyone 2.5 kilometers (2,500 meters) or more from the ship is completely safe.
Several modifiers apply to this survival roll. These are listed on the Castaway Survival Table.
Castaway Survival Table
| Character is in: | Modifier to Survival Roll |
|---|---|
| Spacesuit Armor | +10% |
| Launch | +20% |
| Escape Pod | +20% |
| Lifeboat | +25% |
| Work Pod | +30% |
All modifiers are cumulative, so a character wearing spacesuit armor inside an escape pod gets +30 to his survival chance.
EXAMPLE: Bagrat Denuffe is the pilot of an assault scout that is struck by an assault rocket that causes 16 points of damage. Unknown to Bagrat, the referee rolls a die and determines that the ship will explode in five minutes. Bagrat is wearing a spacesuit and armor already. With his reduced movement it takes him three and one-half minutes to reach the scout's workpod. Another 30 seconds are spent activating the pod's drives before Bagrat launches into space at maximum acceleration.
The referee knows that Bagrat has one minute (10 turns) left before the ship explodes. The pod accelerates 20 meters/turn each turn, so a quick calculation shows that Bagrat will be (20 + 40 + 60 + 80 + 100 + 120 + 140 + 160 + 180 + 200 =) 1,100 meters from the ship when it explodes. This gives him a base chance to survive of 40%, with an additional +40 modifier (10 for the armor and 30 for the work pod), for an 80% chance to survive. Unfortunately, Bagrat rolls a 97 and the pod, armor, spacesuit and poor Bagrat himself are all incinerated by the white-hot flash of the exploding assault scout.
Sabotaging Spaceships
Occasionally, it might be possible for a character or group of characters to sneak aboard a spaceship and damage it from inside. Getting inside is the first obstacle. Once inside, technicians, demolitions experts and computer experts all can damage the ship in various ways.
Gaining Access to Enemy Ships
Spaceship hatches are routinely protected by locks. The levels of these locks vary with the type of ship; this information is displayed on the Spaceship Security Table. The lock can be destroyed (see Boarding Actions) or a technician can use his Opening Locks subskill.
If a ship's computer has an Installation Security program, other security devices at the hatch must also be detected and deactivated. Otherwise, alarms will be set off in the ship's control panel.
Characters must decide what types and levels of locks they install on their own ships. The Spaceship Security Table lists the levels of locks and the types and levels of other security devices likely to be found on various types of NPCs' ships.
Spaceship Security Table
| Ship Type | Lock Level | Security System and Level |
|---|---|---|
| Spacefleet (1-14) | 5 | Heat Sensitive (5) |
| Spacefleet (15-20) | 6 | Heat Sensitive (5) |
| Militia | 4 | Sound Sensitive (3) |
| Pirate | 5 | Video (4) |
| Spaceliner (6-12) | 3 | Sound Sensitive (3) |
| Spaceliner (13-15) | 5 | Video (4) |
| Freighter | 4 | Sound Sensitive (3) |
| Shuttle | 2 | Mechanical (1) |
Numbers in parentheses following a ship type are a range of hull sizes that use that level of security device. Larger ships typically have more advanced security systems, and smaller ships have simpler security systems.
Once characters have gotten aboard, they must deal with any other security systems they run into, as well as any guards or crew members that might resent the intrusion. These obstacles are left to the referee's discretion.
Computer Sabotage
A computer expert can do all sorts of nasty things to a spaceship's computer programs. The appropriate computer subskills are listed here, with explanations of how they can be used for sabotage. Full descriptions of these subskills can be found in the STAR FRONTIERS Expanded Game rule book (p. 11-18).
OPERATE COMPUTER. Obviously, the specialist must be able to operate the computer before he can do anything to its programs.
BYPASS or DEFEAT SECURITY. If the computer has a Computer Security program, the specialist must get past it somehow. In the case of sabotage, a character will rarely have enough time to Defeat Security, and will be forced to risk Bypassing Security.
DISPLAY INFORMATION. Information on cargo, passengers, weapons, fuel supply, astrogation charts, schedules, crew members and deck plans is routinely stored in a ship's computer. The specialist must roll separately for each type of information he is seeking.
MANIPULATE PROGRAMS. This function allows the computer expert to alter or eliminate programs stored in the ship's computer. If the program for a specific ship system, such as the engines, is destroyed, the ship cannot use that system until a new program has been written or obtained otherwise. Purging a program takes 1d10 minutes.
The character also can try to alter a program that is in the computer. For example, a laser battery targeting program could be altered so it will track a few degrees behind its target. Altering a program takes 5d10 minutes.
Demolitions Sabotage
A Demolitions expert who manages to get aboard an enemy spaceship with a supply of Tornadium D-19 is an extremely potent destructive force.
Explosives can be used to destroy anything in the ship that the demolitions expert has access to. As usual, the amount of explosive needed to destroy an object depends on the object's structure points. The Structural Points of Spaceship Systems chart lists the number of structure points of the most sensitive systems. The referee can use these as a guide when deciding how many structure points should be given to systems that are not listed.
Structural Points of Spaceship Systems
| Ship System or Component | Structural Points |
|---|---|
| Hatch | 200 + 1d100 |
| Hull Sections* | 200 + 2d100 |
| Control Panel | 100 + 1d100 |
| Battery Weapon | 300 + 2d100 |
| Cannon | 500 + 2d100 |
| Engine (size A) | 2d10 x 100 |
| Engine (size B) | 5d10 x 100 |
| Engine (size C) | 5d10 x 200 |
* If a Hull Section is destroyed, a hole is placed in the ship's hull in a specific location. The area near the hole will depressurize as during a boarding action. Any parts of the ship sealed from the hole by an airlock or pressure door - including other decks - will not depressurize.
It is possible to destroy an entire ship with a large demolition charge, but this usually requires a prohibitive amount of kaboomite. The amount of Tornadium D-19 needed is 200 kg x the hull size of the ship. For example, a frigate of hull size 5 could be destroyed with 1,000 kg of TD-19. As with all demolition attempts, the demolitions expert must make a successful Set Charge roll.
Technical Sabotage
A technician can use his or her knowledge of machinery to disrupt the various electrical and mechanical systems on a spaceship. Sabotage is treated as a new Technician subskill. The referee may allow this function to be used on planet-based equipment as well as spaceships.
Sabotaging Equipment
Success Rate: 10% + 10 x skill level
A technician can try to sabotage any piece of equipment in a spaceship, if he can get to it. Only the specific item sabotaged will be affected, however; if a ship has three engines, each must be sabotaged separately in order to knock out the ship's drives.
A technician can try to sabotage a specific piece of equipment only once. If that attempt fails, the technician is unable to sabotage that particular item.
If the sabotage roll is successful, the technician has damaged the system enough to keep it from working. The equipment must be repaired using the vessel's DCR, the same as combat damage.
If the technician makes his sabotage roll with a margin of 40 or more, the damage done to the system is so extensive that it cannot be repaired in space. In this case, the damage is treated like combat damage with a DCR roll of 99 or 00; the ship must return to a spaceship construction center before that particular system can be repaired.
Starship Self-Destruction
This tactic is used most commonly by Sathar when one of their ships is in danger of being lost to boarders. The computer program described here is a standard part of all Sathar onboard computers. Other self-destruction programs written for any atomic-powered vessel work exactly the same way.
Only atomic-powered ships can self-destruct as described here. Ships with chemical or ion drives can be destroyed with demolition charges, by setting off torpedos inside the ship, or some other similar method, but the referee must judge these cases.
A ship will destroy itself if its computer is programmed to activate the atomic drives at full power, without releasing any thrust. The heat and pressure produced in the engine reaction chambers build to the point where the engine housings cannot hold together. The disintegration of the housing releases an explosion that has exactly the same effect as the explosion of a ship that has had its hull destroyed (see Escaping From Destroyed Ships).
A 6th level program is required to overload a ship's drives. This program contradicts the ship's normal drive program, so the drive program must be purged from the computer first. If the character writing the program is working on an unfamiliar ship, the normal procedures for bypassing or defeating security must be followed also.
Risks. The biggest risk in writing this program is the unpredictability of the engines. The engines begin to overload as soon as the program is activated, and once the overload begins, it cannot be reversed! The explosion will occur d100 minutes after the overload begins. Of course, the referee makes this roll secretly so the character who programmed the computer does not know whether he has one minute or 100 minutes to escape from the ship.
Because the program cannot be reversed, the only way to save a ship after its engines have begun to overload is to jettison the engines. Jettisoned engines drift away from the ship at the rate of 100 meters/minute. If the engines explode within 1,000 meters of the ship, each engine should be treated as a torpedo hit on all ships within range. The Damage Table is used to determine the exact damage. Once the engines are 1,000 meters or more from all ships, they can explode harmlessly.
Economic Activity in the Frontier
Characters may want to try making a personal fortune in the Frontier. This is not impossible, but it is not a sure thing either. Any business venture has a possibility of failing in the best of times. Space pirates, claim jumpers and other shady types are further threats to the honest businessman in the Frontier. Add to these obstacles the high cost of spaceships and equipment, and an investment can be seen for the risky speculation that it is.
Despite the risks, millionaires are created regularly in the Frontier. Space travel is at a premium, and the person who has a ship in the right place at the right time can often make a killing. This section details some of the ways characters can use ships to earn money, the dangers in their path and how they can get started.
Loans
Any world larger than an outpost will have banking facilities available. The Pan-Galactic Bank, Streel Bank, Greater Vrusk Mutual Prosperity Institution, and First Bank of Cassidine are the largest financial institutions in the Frontier, but there are many others.
All of these banks make loans, and all charge 4% interest compounded every 40 days. This is about 23% per year. This high interest rate is justified by the volatile economy in the Frontier and offset by the possibility of making a quick fortune.
A character cannot just walk into a bank, demand a loan and walk out with money. A bank will not lend money unless it has a reasonable guarantee that the loan will be repaid. Depending on the size of the loan and the borrower's reputation, the bank may ask for collateral equal to the value of the loan, a personal guarantee, a tracer implant or a combination of these.
Applying for a Loan with Collateral
A bank will lend money to any character who can leave collateral with the bank.
Any valuable item that the character owns can be used as collateral. Before the collateral will be accepted, the bank's appraisor must inspect the item or items and verify that their combined value is at least equal to the value of the loan. The referee must use some discretion when deciding what a bank will accept as collateral. Valuable jewelry, buildings or a percentage of ownership in a space station orbiting the planet the bank office is on are good collateral. A spaceship that the character intends to take to the far end of the galaxy is unacceptable.
EXAMPLE: Disan, a Yazirian, needs a loan for 50,000 Cr. As collateral, she offers the bank a gold and platinum statue recovered from alien ruins in the Dramune system, and the jewel-encrusted Twin Laurels for Manifest Gallantry given to her by the governor of Terledrom. The bank's appraisor places their value at 37,000 Cr and 16,000 Cr respectively. Together, they are worth 53,000 Cr, so the bank will accept them as collateral on a loan of up to 53,000 Cr.
Collateral (or the deed or stock certificate representing it) remains with the bank until the loan is completely repaid. When the loan is paid off, the collateral is returned.
If the character misses a loan payment, the bank will issue a warning. If the character misses two payments in a row, the bank will close the loan and seize the collateral. The character loses both his collateral and all the loan payments he has already made.
Someone who has lost his collateral can try to recover it by resuming payments on the loan. The bank will charge at least a 10% fine on each payment that was missed, if it is willing to reopen the account at all. The referee must decide whether the bank is willing to renegotiate the loan.
Applying for a Loan Without Collateral
A character who tries to get a bank loan without collateral must meet some minimum qualifications to be eligible for the loan. The character must have a good reputation (or, at the least, no criminal record). The character also must meet a bank loan officer and describe to him in detail how the loan will be invested, and how it will be repaid. After the character has presented his plan, the referee makes a simple die roll to determine whether the bank will extend the loan to the character.
Interviews. A bank loan officer will set up an interview with a character when the character applies for a loan. Loan interviews are good situations for role playing. The referee plays the role of the loan officer, and should thoroughly question the character applying for the loan. If the character gives dubious answers or is rude, the loan officer will be suspicious. (Bank loan offices are routinely monitored by computer, so any attempts to hypnotize the loan officer will be noticed and the loan officer will be notified.)
Securing the Loan. After the interview, the referee must determine whether the loan officer will recommend lending money to the character. The referee rolls d100. If the result is equal to or less than one-half of the character's Personality score, the bank will lend him money. Otherwise, the loan is refused and the character cannot try to borrow money from that bank until he has accomplished some new deed worthy of public notice and praise.
The referee can modify this die roll to match the situation. Modifiers should be based on whether the character's plan has a good chance to succeed, the current economic conditions in the Frontier and the character's attitude and treatment of the loan officer during the interview. These modifiers should not exceed plus or minus 10%.
Reapplication. Note that large population centers will have at least four major banks, and that having a loan turned down at one bank will have no effect on an application at another bank. The actual number of banks in any city, and any particular lending policies of those banks, are left to the Referee's discretion.
Character's Reputations
To receive a loan, a character must have no criminal record and be considered by the bank to be "a good risk." The character's reputation is very important in this regard. A bad reputation or a criminal record can prevent a character from getting a loan anywhere, while a character known for heroism may be able to get a loan on the strength of his reputation alone.
Fame. The most critical consideration for the referee is whether a character's deeds are widely known. The loan officer will automatically discover any permanent criminal record by checking police files. On the other hand, even a character who has committed many crimes will have no police record if no warrants were ever issued for his arrest and he has never been caught. Likewise, a character who performed heroic deeds in a remote corner of the Frontier cannot expect the loan officer to know about them. However, if the story was broadcast by the news media, the loan officer will have heard it.
Earning a Reputation. A character will earn a good reputation by performing acts that are seen to be in the public service, such as capturing pirates, killing Sathar, saving a child's life, or doing other "good deeds."
Loan Values
A character's reputation determines how large a loan the character can apply for. Several examples are outlined below. The referee should use these as guidelines only; they can be modified to fit circumstances in the game.
- A character who has been credited with at least two good deeds can apply for a loan of up to 10,000 Credits. If the character passes the required Personality check, the bank will lend him the money on his personal guarantee alone.
- A character who has been credited with at least five good deeds can apply for a loan of up to 100,000 Credits. The character must pass the required Personality check to receive the loan. The bank also will require that the character accept a tracer implant.
- A character who, in addition to five or more good deeds, has performed a truly spectacular task, such as saving a city or colony at great risk to himself, can apply for a loan of up to 500,000 Cr. The character must pass the Personality check, and the bank will require that he accept a tracer implant.
Vouchers. A character who has a long-standing position with a corporation can get a letter of recommendation from his employer when seeking a bank loan. In this case, the character uses his employer's reputation instead of his own when asking for a loan. The referee must use discretion when players try this. Most importantly, an employer will not write a letter of recommendation unless an employee has proven his loyalty over a period of several years.
Guarantees
Before lending money, banks require some sort of guarantee that they will be repaid. Two types of guarantees are used commonly in the Frontier: personal guarantees and tracer implants.
Personal Guarantees. Banks will settle for a personal guarantee on a loan of 10,000 Cr or less. This is simply a signed, sworn statement by the loan recipient that he will repay the loan according to the agreed-upon schedule, and understands the penalties for breaking the agreement.
A character who defaults on a personally guaranteed loan will be placed on a wanted list. The bank will offer a reward for his capture.
Tracer Implants. Banks require that any character who receives a loan of more than 10,000 Credits without offering collateral must accept a tracer implant.
A tracer implant is a tiny transmitter that is surgically embedded in the character's skeletal system. The tracer emits a radio signal that identifies the character and the bank which loaned him money. The tracer's signal is weak, but it can be picked up by tracer scanners from a range of several meters. Tracer scanners are common in any populated area of the Frontier. All banks and spaceports, and most stores, restaurants and other businesses, have tracer scanners at their entrances. They are standard equipment for police officers.
As long as a character keeps making payments on his loan, the tracer's signal will register as "OK" on scanners. If the character skips payments and does not respond to warnings, the bank will notify all its branches to issue warrants for that character's tracer. From that point on, if any scanner detects that tracer it will trip an alarm, either in the business manager's office or the police station. Because banks offer large rewards for the capture of loan defaulters, police and independent loan agents will close in on the character immediately.
No reputable hospital or medical clinic will remove an implant unless the operation is authorized by the bank.
Bounties. In order to further discourage people from not repaying their loans, banks offer rewards for the capture of loan defaulters. For small loans, the reward usually is equal to the value of the loan. For loans over 15,000 Credits, the rewards become proportionally smaller. For example, the reward for a character who defaulted on a 75,000 Credit loan may be only 25 or 30,000 Credits. These rewards are paid only if the defaulter is captured alive.
Multiple Loans
It is possible for characters to receive more than one loan. This can be done by getting loans from more than one bank, or by getting one loan on collateral and another on reputation. In fact, this may be the only way characters can finance very large purchases.
Duration and Interest of Loans
Characters can arrange to repay their loans on a schedule lasting from 1 to 20 years. Payments usually must be made once every 40 days. Interest is assessed at the rate of 4% every 40 days.
To figure out what the monthly payments are for a loan, use the Interest Table. This table shows the monthly payments that must be made on a 10,000 Cr loan, depending on how many years the loan lasts.
To use the table, find the "Monthly" entry that matches the number of years the loan lasts. Divide the amount of the loan by 10,000 Cr. Multiply this number by the monthly payment from the table. The result is the monthly payment for the loan.
To find out how much money the loan will have cost when it is completely paid off, multiply the number in the "Total" column by the amount of the loan divided by 10,000 Cr.
Interest Table
| Years | Monthly | Total |
|---|---|---|
| 1 | 1,232.9 | 12,329 |
| 2 | 735.8 | 14,716 |
| 3 | 578.3 | 17,349 |
| 4 | 505.2 | 20,208 |
| 5 | 465.5 | 23,275 |
| 6 | 442.0 | 26,520 |
| 7 | 427.5 | 29,925 |
| 8 | 418.1 | 33,448 |
| 9 | 412.1 |
EXAMPLE: Lemuel Fairbanks III needs 200,000 Cr to remodel his starship. He applies for a loan at the First Bank of Cassidine. He has no collateral, but his excellent reputation and well-known adventures defending the Frontier make him eligible for a loan of up to 500,000 Cr. He is extremely courteous during the interview, and his investment plan seems well thought out. The referee rolls d100, and the result is 32. One-half of Fairbanks' Personality is 40, so the bank will lend him the money.
Fairbanks agrees to pay off the loan over a period of three years. To find his monthly payments, the player divides the amount of the loan (200,000 Cr) by 10,000. The result is 20. This is multiplied by the monthly payment for a three-year loan. The result is (20 x 578.3 =) 11,566 Cr every 40 days. At the end of three years, Fairbanks will have paid (20 x 17,349 =) 346,980 Cr to the bank, and the loan will be completely paid off.
As the example shows, paying off a loan is expensive. Players should make every effort to guarantee they can repay a loan before actually taking the loan. Loans that are repaid over many years have lower monthly installments, but short-term loans are less expensive overall.
Alternate Means of Acquiring Starships
If players are unable or reluctant to get a bank loan for a starship, the referee should consider the possibilities listed below. These are ideas only, not rules. The referee must make his own rules based on common sense in these situations.
Government Subsidies
Some planetary governments will subsidize the purchase of a starship if the characters being subsidized have demonstrated that they can be trusted, and have agreed to use the ship in a way that benefits the subsidizing agency. Basically, the government loans money to the characters (at a low rate of interest) so they can purchase a starship that fits the government's specifications. The characters then must use the ship in government service until the loan is paid off. Examples of areas a government might subsidize are long passenger or freight lines to remote worlds, transport of dangerous materials or desperately needed high-overhead cargos, privateering, or a government courier service.
Crime Organizations
Characters who are unable to secure bank loans, either because of their unsavory reputations or because they lack collateral, may be able to get a loan from a large criminal organization. In return, the criminals may demand very high interest (60 to 100 percent per year is not unusual) and will hold the title to the ship until the loan is paid off. They may also demand that the characters use the ship to do "favors" for the organization, such as smuggling illegal cargos, helping fugitives escape the police, or using the characters' business as a legitimate front for criminal activity.
In some rare instances, criminals may allow characters to put themselves up as collateral for a loan. If the characters default on the loan, the criminals will track them down and either sell them as slaves or kill them and sell their body parts on the black market, using their brains to build cybernetic robots.
In all cases, characters looking for criminal backing must make their own contacts and arrangements. The referee must remember that only the largest criminal organizations have the resources to make these types of deals, and criminals do not become powerful in the Frontier without being ruthless and aggressive.
Corporate Lease
A corporate lease is similar to a charter (see Business Ventures), except the company owns the starship. The characters agree to take a smaller percentage of the profits in return for use of the ship. The characters usually have the option to buy the ship, applying their lease payments to the purchase.
Joint Ventures
Characters can raise cash to purchase a starship by selling stock in their business. Persons who buy the stock are buying a percentage of the profit earned by that ship, and gambling that their share of the profit will be more than the cost of their shares. Characters can sell whatever percentage of their profits that they wish, but should be sure to keep enough for themselves to assure they can stay in business. At the end of each fiscal period (200 or 400 days are common), the business must deliver dividends to its shareholders. Shareholders who feel they have been defrauded or ripped off will almost certainly complain to the authorities.
Used Ships
Corporations (and occasionally governments) sometimes sell old ships. These ships typically are sold for 40 to 80 percent of their new value. The disadvantage to buying a used ship is that characters must take it as it is, and must pay a starship construction center to make any modifications they want. Used ships may be damaged when they are sold (nonfunctioning drives, defective computer, etc.) and are more prone to breakdowns and malfunctions than new ships. The referee should feel free to let the life support or some other system break down right after characters take possession of the ship, just to let them know what they can expect in the future.
Payment
A corporation or research group may be willing to sign over a ship's title to characters who use the ship on an extremely dangerous and important mission. Such ships usually are very old, however, and subject to the same disadvantages as used ships. Players must negotiate such arrangements themselves.
Patron's Ships
Characters may be able to find a ship owner who has no crew. If the patron is willing, the characters can agree to serve as the ship's crew, using it in the patron's service. Characters may even agree to work free, letting the ship owner keep their wages as a down payment against eventual purchase of the ship.
Salvage
According to interstellar law, any ship that is found abandoned and adrift in open space is the property of whoever salvages it. This can lead to interesting adventures, especially if the previous owner decides to reclaim the ship or a lost cargo hidden in a secret hold.
Hijacking
While it is extremely risky, it is not unknown for pirates to hijack a commercial or military starship and divert it to their own use in a remote corner of the Frontier. Any characters trying this should meet a lot of resistance, both from the ship's crew during the hijacking and from port authorities and the Star Law Rangers after the hijacking.
Deus ex Machina
As a last resort, the referee can intervene in the players' behalf with some miraculous event ("Your rich great-aunt just died and left her mining ship to you. After all, it is a family heirloom.").
Business Ventures
Characters who have gone to the expense of designing and building a spaceship probably will want to use that ship to earn enough Credits to pay off their investment. This section explains three different businesses that characters can get into: passenger transport, freight transport and mining.
Each of these businesses requires a spaceship specially equipped for that job. Besides the costs of starting and operating the business, characters must consider the routine costs of spaceship maintenance.
Obtaining a Company Charter
Although many small businesses manage to survive in the Frontier, most trade is controlled by large, powerful corporations. The most significant of these are listed in the Referee's Background and Campaign Material section. The surest way for a small ship owner to guarantee a steady supply of customers is to get a charter from one of these companies.
A charter is a license from a company to do business in that company's name. The procedure for obtaining a charter is similar for all companies and most types of businesses.
Applications. The first step in obtaining a charter is to make an initial application. The character must go to the company's office, fill out an application form, and interview a low-level executive. After the interview, the referee should secretly roll d100; if the result is less than or equal to the character's Personality score, the interview was successful and the character will be contacted 1d10 days later for a final interview.
The final interview will be conducted by two or three high-level executives of the company. The owner of the ship and all crew members will be interviewed, one at a time. The spaceship will be inspected by a high-level company engineer.
After all interviews and inspections are completed (which may take several days), the player rolls d100. The referee can assign a positive or negative modifier up to plus or minus 10, based on the interviews and the condition of the ship. If the roll is equal to or less than one-half of the character's Leadership score, the charter is granted.
Operating Under a Charter. Characters who are granted a company charter also receive, free of charge:
- uniforms for all ship's crew members
- a corporate insignia painted on the ship's hull
- use of company docking facilities at space stations
- company credit to draw from in times of financial stress.
In return, the company expects the ship to perform the tasks that are assigned in the time allotted. Refusing to perform a task, repeated delays or thievery will be grounds for revoking the charter.
A ship operating under a company charter will have layovers of six to 10 days (1d5+5) at each station on its route. The cargos and destinations are selected by the company, but profits and ship maintenance and repairs are the responsibility of the characters. For details on profits and expenses, see the sections dealing with specific businesses.
Passenger Lines
Carrying passengers from planet to planet or star to star in the Frontier is a major business. A character who owns a spaceliner can try to sell passage to individuals on a regular route or charter the ship for special trips.
Offices
The first step in starting a passenger transport business is opening an office at each city or spaceport where the liner will take on passengers. Each office costs 500 Cr every 40 days (5,000 Cr per year). This includes a secretary/receptionist robot, videophone, small room, and use of a simple appointments and reservations computer. An office is needed at each embarkation point on the liner's route. For example, on a two-way route the business must have an office at each end.
Spaceliners operating under a company charter do not need offices, as the parent company will take care of bookings, routes and schedules.
Bookings
The number of passenger tickets that can be sold for a voyage depends on the number of cabins available. How these tickets are divided among First, Journey and Storage classes also is a question of ship design.
The Spaceliner Bookings Table lists the percentage of berths of each type that will be filled on any voyage. The percentage sold depends on the populations of the departure and destination points. As explained in the STAR FRONTIERS Expanded Game rule book (p. 49), planet populations are rated H, M, L or O (heavy, moderate, light or outpost).
To use the table, locate the type of population at the starting point of the trip (Start Pop.) and follow that line over to the population of the destination (Destination Pop.). The table entry at that point indicates a base number and a dice roll that is added to the base number. The appropriate number of dice are rolled and the result is added to the base number. This sum is the percentage of all berths on the spaceliner that have been booked for that particular voyage. The tickets sold should be divided as evenly as possible between all three passenger classes. Any tickets remaining after this division will be for the best available class.
Spaceliner Bookings Table
| Start Pop. \ Destination Pop. | H | M | L | O |
|---|---|---|---|---|
| H | 80 + 2D10 | 70 + 3D10 | 60 + 4D10 | 10 + 4D10 |
| M | 60 + 4D10 | 60 + 4D10 | 40 + 3D10 | 10 + 3D10 |
| L | 40 + 6D10 | 30 + 6D10 | 20 + 4D10 | 10 + 1D10 |
| O | 20 + 8D10 | 20 + 4D10 | 20 + 2D10 | 0 + 1D10 |
EXAMPLE: Lemuel Fairbanks III has set up a passenger service from Kdikit (Madderly's Star) to Gollywog (White Light) and back again, using his newly remodeled starship, Honorable. When Fairbanks travels from Kdikit to Gollywog, he is traveling from a Medium to a Heavy population, so he can sell 60 + 4d10 percent of the berths on his ship. The player rolls 4d10 and the result is 25, so Fairbanks has sold (60 + 25 =) 85% of the ship's passenger berths.
The Honorable has nine Storage Class berths, five Journey Class berths and six First Class berths, for a total of 20 berths. Eighty-five percent of 20 is (.85 x 20 =) 17 passengers. Dividing these as evenly as possible gives six Storage Class passengers, five Journey Class passengers (as many as the ship can carry) and six First Class passengers.
Independent Lines. Spaceliners operating with a company charter always receive the number of bookings indicated by the Bookings Table. The number of tickets sold by privately operated liners depends on the layover time the ship spends at the station, as follows:
- If 20 or more days are spent in layover, the ship will sell the number of tickets indicated on the chart.
- If fewer than 20 days are spent in layover, the number of tickets sold will be reduced by half. In this case, the number of tickets sold is rolled normally and divided by two. Fractions are rounded up.
Profits
The profitability of a spaceliner business is determined by subtracting business expenses from the money earned through ticket sales. While it is possible to make money in this area, characters should realize that it will take quite a few paying passengers to begin paying for the spaceship!
Risks
Operating a spaceliner is a fairly safe business, since pirates generally leave the liners alone. If a very important person (planetary or military leader, business tycoon, etc.) is aboard, however, the referee may wish to include an encounter with criminals, pirates, assassins or other undesirables during a voyage through space. Otherwise, the referee can roll d100 and check the Spaceliner Hazards Table each trip to find out whether any unfortunate incidents occur. The referee can modify the table if the ship is carrying VIPs or following a dangerous route.
Spaceliner Hazards Table
| Dice Roll (d100) | Hazard |
|---|---|
| 01-02 | Hijacking attempt by passengers |
| 03 | Pirates attack |
| 04-05 | Drive problems; repairs will take (2d10 - engineer's skill level) days |
| 06 | Renegade Sathar Frigate |
| 07-00 | Safe and pleasant voyage |
Freight Hauling Businesses
Just as people need to be transported from one place to another in the Frontier, many different goods also must be hauled from place to place. This is the job of the freight ship, and another area where characters can earn some credits (if all goes well...).
If a ship is operating under a company charter, all of its cargos will be arranged by the parent company. There is a six to 10 day layover between trips, as mentioned above. Independent haulers must "drum up" their own customers, however.
Commodities
The Cargo Chart lists the types of cargo that can be picked up both at industrial and resource centers. If the referee has not decided beforehand what cargos are available, he can choose one randomly by rolling d100.
Cargo Units. One unit of cargo is the amount of cargo that can be carried in one hull size point. For example, a freighter of hull size 8 can carry 8 units of cargo.
Cargo Chart: Cargo Acquired at Industrial Centers
| d100 | Type of Cargo | Price per unit at Source | Price per unit at Destination |
|---|---|---|---|
| 01-07 | Air Cars | 20,000 Cr | 45,000 Cr |
| 08-16 | Chemicals* | 20,000 Cr | 40,000 Cr |
| 17-23 | Computers* | 60,000 Cr | 120,000 Cr |
| 24-27 | Drones | 35,000 Cr | 90,000 Cr |
| 28-30 | Explorers | 40,000 Cr | 100,000 Cr |
| 31-38 | Farming Equipment | 20,000 Cr | 35,000 Cr |
Cargo Chart: Cargo Acquired at Resource Centers
| d100 | Type of Cargo | Price per unit at Source | Price per unit at Destination |
|---|---|---|---|
| 01-07 | Aluminum | 50,000 Cr | 70,000 Cr |
| 08-11 | Copper | 15,000 Cr | 25,000 Cr |
| 12-13 | Diamonds* | 400,000 Cr | 600,000 Cr |
| 14-15 | Emeralds* | 300,000 Cr | 450,000 Cr |
| 16-18 | Gold* | 200,000 Cr | 300,000 Cr |
| 19-28 | Iron | 20,000 Cr | 25,000 Cr |
* This cargo is "high risk" material; see Risks.
Locating Cargo
Freight haulers can set up offices, the same as passenger liners. When a hauler tries to locate a cargo at a planet or station where he has an office, a load will be offered 2d10 days after the ship arrives. Once a load is contracted, another 1d10 days must pass before the cargo can be loaded onto the ship.
A freight hauler may also find cargos at stations where he has no office. This is done by "beating the docks" (spending time visiting bars, cafes and business offices on a station). If the referee decides the economic conditions are so strong that goods are stacked up awaiting shipment, the hauler will find a cargo in 4d10 days. Another 1d10 days will pass before dock space is available for loading the cargo.
Hauling Under a Charter
The economics of freight hauling varies between private and company ships. Charter carriers charge the cost of the cargo to the parent corporation. After delivery, the cargo is sold for the amount listed on the Cargo Charts and profit (selling price minus purchasing price) is calculated. The parent corporation's account at the station where the cargo was sold is credited for 20% of the profit immediately, and the rest goes to the owner (or captain, if the owner is not present) of the ship. The owner must pay his crew and maintain his ship with his share of the profits.
Independent Haulers
A private ship must provide some kind of guarantee on cargo before it will be brought aboard. The best guarantee is a large bankroll, that allows the private shipowner to purchase the cargo outright at the point of departure. The shipper then is free to take the cargo wherever he can sell it for a profit.
If the shipowner does not have enough cash to buy the cargo outright, the cargo's owner may demand that cargo guards accompany the merchandise. One guard will be sent for every two units of cargo, but if the cargo is smaller than four units, two guards will be sent anyway. The ship owner must pay their wages. The guards will help the ship's crew repel pirates and fight other dangers, but their primary job is to make sure that the ship and cargo do not "disappear." Cargo guards always will be 5th or 6th level weapon specialists, with demolitions, martial arts and computer skills as well.
If a freighter is running a regular route, there is a chance its owner will be trusted with a cargo. This chance equals 10% x the number of years the ship has run the same route. The shipowner can try this roll once each time a cargo is offered.
When a private shipowner secures a cargo and sells it at the end of a run, all the profit goes directly to the owner, who can use it however he wants. Crew salaries, supplies, fuel and maintenance also must be paid for, of course.
Supply and Demand. The prices of cargo, both at the source and the destination, are subject to modification by the referee. Not all types of cargo should be available at all sources, and supply and demand can raise or lower prices depending on how much of a particular commodity is available on a planet.
Risks
Hauling freight is more dangerous than carrying passengers, because pirates can make a lot of profit by selling stolen cargos. Referees can use the Freighter Hazard Table to determine whether a freighter runs into trouble during a trip. The referee should apply a -10 modifier on the roll if a ship is carrying a high risk cargo.
The Hazard Table is intended as an aid to the referee. As with all tables in these rules, the referee should ignore or modify the table's results to fit the campaign.
Freighter Hazard Table
| Die Roll | Hazard Encountered |
|---|---|
| 01-02 | Attacked by pirates in frigate or two assault scouts |
| 03 | Crew mutinies unless captain passes Leadership check |
| 04-05 | Drive Trouble; engineer needs 1d10 days to repair |
| 06-08 | Searched and harassed by local militia at destination |
| 09-00 | Safe and uneventful voyage |
Mining Ventures
Although many planets consist of nothing but worthless rock and low grade iron ore, others are fairly bursting with valuable metals, gems and other resources. Mining ships are designed to transport a crew to a mineral-rich planet and serve as a base of operations while those resources are exploited.
Finding Mining Sites
Determining whether a planet has natural resources worth mining involves as much luck as science. A mining concern can find good prospects for operations in two ways: by prospecting and by following rumors.
Prospecting. Prospecting involves examining samples taken from various likely locations on a planet, looking for valuable minerals. These planets might be minor outposts, uninhabitable worlds or even part of a newly discovered system.
The referee should feel free to decide himself that a planet has no valuable, minable resources, or that it is chock full of recoverable ores. If characters are examining planets randomly, the referee can use the procedure outlined below.
PRESENCE OF MINERALS. The base chance that an unmined planet, planetoid or asteroid belt has valuable resources is 25%. The referee can increase this slightly if the planet is very close to its star, or decrease it if the planet is at the edge of the system. The referee should make this roll secretly.
NUMBER OF RESOURCES. If valuable resources are present, the referee should roll 1d10 to see how many resources can be mined.
| Die Roll | Minable Resources |
|---|---|
| 1-5 | 1 |
| 6-8 | 2 |
| 9-10 | 3 |
FINDING DEPOSITS. If valuable resources are present, players must find them using either a geoscanner or a landing drone. The following procedure is used when characters are searching for minerals:
- The referee rolls d100 to determine whether resources are present on the planet or asteroid.
- If resources are present, the referee rolls 1d10 to determine how many resources there are.
- The characters choose a spot on the surface where they will search for minerals.
- The referee rolls 1d10. If the world contains resources, a roll of 1 means that the location where the characters are searching has resource deposits. If the world has no resources, the characters will never find any, regardless of this roll.
- The characters conduct a check with a geoscanner or landing drone. If the check is successful and resources are present, characters have found the resources and can begin mining.
The characters can repeat such scans as often as they want, and in as many different places on the planet as they wish.
Some prospectors also earn their livings by locating mineral deposits and selling their locations to miners. Information bought from prospectors usually costs more, but reputable prospectors will not sell a mine's location more than once.
Rumors and "Gold Rushes." The second way to find a promising location for a mine is to follow the crowd - travel with large groups of miners to planets that are reported to be the sites of rich strikes.
Both the Cappellan Free Merchants and the Cassidine Development Corporation (see the Referee's Background and Campaign Material section for more about these companies) sell information on possible mine locations. This information will cost 1,000 to 10,000 Cr, depending on the value of the resources. CFM and CDC provide this service to promote competition with the larger corporations.
Characters who do not want to buy information may be able to get what they want free. Characters who visit taverns and restaurants on resource worlds, space stations or other likely spots may, at the referee's discretion, hear rumors that can lead them to mineral strikes.
Mining and Processing of Raw Materials
Once a character has found an encouraging location for a mining operation, he must arrange to dig the material up and process it. Mining equipment and specifications for its use are listed in the Optional Spaceship Equipment section.
Once a mining operation starts, the referee can use the Raw Material Chart to determine what materials are present and other information vital to the operation. The meanings of the various entries on the table are explained below.
DICE ROLL. The referee can use this column to randomly determine what materials are present on a world.
ORE/UNIT. This is the number of tons of ore that must be mined to yield one unit of concentrate. A unit of mined material is the same as a unit of cargo.
PROCESS TIME. Process time is the number of days needed to process ore into one unit of concentrate. A mining ship of hull size 10 needs 10 times the number of days listed to completely fill its hold with mined concentrate. This processing time should be doubled for mines using an OPL.
Raw Material Chart
| Dice Roll | Material | Ore/Unit | Process Time |
|---|---|---|---|
| 01-10 | Aluminum | 4,000 | 4d10 |
| 11-18 | Copper | 1,500 | 1d10 |
| 19 | Diamonds | 20,000 | 12d10 |
| 20 | Emeralds | 25,000 | 14d10 |
| 21 | Gold | 1,000 | 2d10 |
| 22-36 | Iron | 1,000 | 1d10 |
| 37-43 | Magnesium |
Playing Out. There is no guarantee that a mine will yield enough raw material to fill the hold of a mining ship. The chance that a mine will "play out" is up to the referee. This can be determined randomly by rolling 2d10. The result is the number of cargo units of concentrate that can be taken from the mine before it is exhausted.
Characters can search for new deposits on a planet if a mine plays out.
Ecological Considerations. Some of the more heavily populated resource-rich worlds in the Frontier have been mined to the point where the planet becomes an industrial wasteland. The lessons learned from these experiences have led some planetary governments to pass tough environmental protection laws. Specific laws are up to the referee, but they can be used to provide obstacles for an ambitious mining operation.
Transporting and Selling Ores
Once miners have filled their ship with concentrate (or collected as much as they can), the material must be transported to a resource center and sold. A resource center is any Frontier planet with an "R" code in its Population and Trade listing in the STAR FRONTIERS rule book (p. 50). A buyer will be located within 1d10 days at the space station orbiting a resource center. The buyer will pay the amount in the "Source" column of the Cargo Chart in the freighter section.
If characters take concentrate to an Industrial world, they have a 10% chance of finding a buyer in 10 days. These buyers also will pay the amount at Source, not Destination.
Risks
Because of the potential for fat, fast profits, mining operations are plump targets for pirates and unethical corporations. Unless the referee has planned encounters during a mining venture, he should roll d100 and check the Mining Hazards Table once for each week a mining crew spends at the mine site.
Mining Hazards Table
| Dice Roll | Hazard |
|---|---|
| 01-04 | Pirates - One frigate or two assault scouts are used to attack the operation in an attempt to steal the concentrate |
| 05-10 | Corporation Thugs - Either Streel Corp. or the PGC sends two assault scouts with armed landing parties to disrupt the operation |
| 11-19 | Processing Plant Breakdown - technician needs 2d10 days minus skill level to repair |
| 20-30 | Wildcatters - Independent miners set up an operation nearby; they will fight if their work is interfered with |
| 31-00 | No event this week |
Referee's Background and Campaign Material
Transcriber's note: this section of the Campaign Book is largely setting background (history of the UPF and the First Sathar War, descriptions of corporations, planets, pirates and suggested plots). Those narrative passages are omitted here; the passages that give game procedures, tables and rulings are transcribed below.
The referee in a STAR FRONTIERS campaign is the person who determines whether the campaign is a success or a failure. The referee must be prepared to make quick decisions, and must be familiar with the setting of the campaign. This section contains information on the Frontier intended to help the referee, as well as suggestions for conflicts, plots and adventures.
The United Planetary Federation
Gollwin Academy
Spacefleet officers receive their training at the Gollwin Academy, which is the fleet war college. The academy is a huge group of space stations orbiting Morgaine's World. It offers a two year program in the tactics and strategy of interstellar combat. Its graduates assume the rank of Junior Lieutenants on Spacefleet vessels.
The academy has a fine reputation for graduating skilled and effective leaders. Each graduate is qualified at the 1st level of a spaceship weapons skill and 2nd level of piloting, astrogation or spaceship engineering skill. The program of instruction is rigorous, and only highly qualified individuals can gain admission to the school.
If the referee wants player character officers in his campaign, characters should be allowed to apply to the Gollwin Academy. Of course, characters who are accepted will be inactive for two years of campaign time. In many cases this will be undesirable. If it works out, however, the following requirements must be met by aspiring Space Cadets.
Requirements. All cadets entering the academy must have scores of at least 50 in six of their eight abilities. The character's Leadership score must be higher than 50. No character who has been identified as having committed an illegal act will ever be admitted to the academy.
If the ability requirements are met, the character must be interviewed by the faculty before applying for entrance. The character must furnish his own transportation to the academy for this interview. If the character passes a Personality check, he is accepted into the academy and will begin classes immediately. If the interview is unsuccessful, the character may apply again one year later.
Academy Skills. Characters who go through the academy's course of instruction can choose astrogation, piloting or spaceship engineering as their area of expertise. After the player chooses a skill area, the character must make a Logic check. If this roll is successful, the character can study in his chosen field. If the roll is unsuccessful, the character must choose one of the other two areas and roll again. If the second roll fails, the character may try once more for the remaining skill area. If the third roll fails, the character has "washed out" of the academy and will never be admitted again.
Cadets who successfully enter a skill area at the academy will graduate after two years with 1st level spaceship weaponry skill (either rocket or energy weapons) and a 2nd level ability in the spaceship skill of their choice. If the character did not have the foundation skills necessary for a spaceship skill when he entered the academy (such as 6th level computer skill for astrogation), he will receive these as well.
Spacefleet Enlisted Personnel
The enlisted members of the fleet come from all walks of life. The fleet always is short of crew members, so the requirements for enlistment are not rigorous. No checking is done regarding a crew member's background or abilities; consequently, a great amount of galactic riffraff has found a home in the crew's quarters of Spacefleet vessels.
Careers in the Spacefleet
The Spacefleet Rank Table lists the ranks of Spacefleet officers, from lowest to highest. Following each rank is the number of experience points which must be spent to acquire that rank, and the daily pay received by characters of that rank.
Spacefleet Rank Table
| Rank | Exp. Pts. needed | Daily Pay (Cr) |
|---|---|---|
| Junior Lieutenant | graduate from Academy | 75 |
| Lieutenant | 50 | 100 |
| Fleet Lieutenant | 100 | 140 |
| Commander | 150 | 180 |
| Space Commander | 200 | 250 |
| Commodore | 250 | 300 |
| Rear Admiral | 350 | 350 |
| Admiral | 500 | 400 |
| Fleet Admiral |
Officers in the Spacefleet do not earn experience points for "passing time." They earn points for doing their jobs well; bonuses may be awarded at the referee's discretion. Unless a character performs a truly heroic act, promotions will come every one or two years in wartime, and much less frequently during times of peace.
Advancement. Junior Lieutenants may advance in rank by earning experience points. Experience points spent to increase an officer's rank may not be used to increase that character's skill level; however, officers are required to increase one of their spaceship skills (or add a new spaceship skill) at least once after each promotion.
For example, a character might graduate from the Academy with 1st level energy weapons skill and 2nd level skill in astrogation. In order to increase his rank from Jr. Lieutenant to Lieutenant, the character must earn enough experience points to "buy" the Lieutenant rank. Before he can be promoted again, he must earn enough additional experience points to advance to 2nd level energy weapons skill, 3rd level astrogation or 1st level piloting, engineering or rocket weapons.
Command. As mentioned earlier, Spacefleet enlisted personnel are not always the most pleasant and cooperative types. If a character is in charge of enlisted NPCs, his Leadership score becomes very important.
Enlisted NPCs will obey most orders automatically, if the officer expresses it frankly and fairly and it is a basically mundane order. If the order requires the NPC to risk his life, or is expressed arrogantly or insultingly, the NPC will obey the order only if the character passes a Leadership check. The officer should receive a +5 modifier for each level of his rank. A Fleet Lieutenant, for example, gets a bonus of 15 to his Leadership for this check. As usual, this rule can be modified or disregarded by the referee to suit the situation at hand.
The Sathar and the UPF
Suggestions for Controlling Sathar
The Sathar home worlds are unknown to the members of the United Races. In fact, the only information known about the worm-creatures is what has been observed in combat. This information is included here to aid the referee when he must operate Sathar ships in a space battle.
The Sathar have never surrendered to any members of the UPF. Once, in fact, a disabled Sathar destroyer was approached by a UPF frigate with intent to board. As the frigate pulled alongside the Sathar ship, the destroyer exploded with a force that completely destroyed both ships. It has since become standard procedure to bombard crippled Sathar ships from a distance, without attempting to board.
The Sathar attack with incredible ferocity, but this does not mean that they use no tactical maneuvering in space battles. In fact, the mysterious race is famed for devious cunning that makes them extremely unpredictable in combat. Feints, bluffs and diversions have all been used to great effect by the Sathar at one time or another.
The Sathar have even been known to retreat a few times, but only if they are hopelessly outnumbered or believe that they can inflict greater damage in a later encounter. Suicide tactics, including ramming enemy ships, also are used by Sathar if a battle is going against them.
Planets of the Frontier
The inhabited planets of the Frontier are listed and keyed in the STAR FRONTIERS rules (p. 50). The referee may add any new planets he wants to this list. The map of the Frontier Sector shows many unexplored and uninhabited systems where characters can make discoveries and have various adventures.
Because this book deals with spaceships, planets do not play a major role in these rules. Three areas, however, are worth discussing here, as they relate directly to players and their ships. These areas are planetary defenses, planetary militias and planetary governments.
Planetary Defenses
An old maxim of naval warfare states that a shore battery always has an advantage over an attacking ship, because the shore battery cannot be sunk. It follows that any weapon that can be placed aboard a ship becomes much more dangerous when built larger and placed on a planet.
All of the Frontier planets with a population rating of moderate or heavy, or those lightly populated planets with any industrial potential (listed with an "I" in the STAR FRONTIERS rules) have planetary defenses. These usually contain laser cannons and missiles, but they are much larger than those carried on ships.
Planet-based batteries can destroy a ship at the fringe of the planet's atmosphere. If the ship tries to bombard the planet, incoming torpedos and missiles will be neutralized easily by the planet's laser anti-missile defenses. Laser weapons fired from space cannot cause much damage on a planet's surface because the weapon's area of effect is so small.
If characters try to bring a ship into a position to attack the surface of a planet, the referee can resolve the combat normally. Assume that the planet has 2d10 laser batteries that can be brought to bear. Each of these batteries will inflict 10 times as much damage as a ship-mounted laser if hull damage is called for. If a system (such as drive or steering) is hit, the system is completely destroyed, and cannot be repaired. Planets also are able to launch an unlimited number of ICMs, so ship-launched torpedos and assault rockets have only a 5% chance to reach their targets.
If the referee wants to create a special case where bombarding a planet is possible, he should try to work within these restrictions. For example, sabotage could destroy many of the ground batteries. For obvious reasons, it is undesirable to let characters easily get into a position where they can threaten an entire world.
Because planetary defenses are designed for intense, short-range fire, they are unable to attack anything beyond a planet's atmosphere. When a transport brings troops to a planet, the landing shuttles are released beyond the planet's atmosphere. If a large force descends, it usually is possible for some of the shuttles to get past the planetary defense. However, in operations like this, the tremendous number of casualties among the landing troops usually is unacceptable to any race except the Sathar.
Planetary Militias
Most planets beyond the status of outpost maintain a small space militia. Supposedly, these militias aid the Spacefleet in dealing with pirates; often they are used by the planetary rulers or by influential corporations as enforcers. Militia ships are generally no larger than frigates, although major planets may have destroyer class ships. A planetary militia may contain one to 10 ships, depending on the population of the planet.
Planetary militias are always looking for recruits. It is very likely that an applicant with even a low-level spaceship skill will be offered a commission in one of these forces. Any character can get a job as a crewmember on a militia ship. Generally, only high level characters with piloting or weapons skill will be given command of a ship. The adventure module The Warriors of White Light (included with the Knight Hawks game) offers a detailed setting for player characters in a planetary militia.
Awarding Experience Points
Experience points in the Knight Hawks game serve the same function that they do in STAR FRONTIERS games - they reward players for their accomplishments and enable characters to acquire more advanced abilities and skills.
Points should be awarded for spaceship adventures the same as for planetary adventures. Each player should be awarded 1 to 3 points for each goal accomplished, based on how actively and intelligently he played.
Characters should be able to achieve one to three goals in an evening of play. The referee may, at his option, award bonus points to characters who gallantly risked their lives or made some exceptionally clever deductions. A character should not receive more than 10 experience points for a single evening, however.
The adventure module, The Warriors of White Light, has specific suggestions for the referee on experience point awards. Referees should use the module as an example of the types of accomplishments that qualify as goals, and what actions deserve bonus points.
Campaign Suggestions
The following suggestions are for referees who want to use large groups of ships in a STAR FRONTIERS adventure. Mass battles can easily distract players from role-playing. The ideal situation gives players a feeling that their characters can make a meaningful contribution to events that are much larger than themselves.
Playing Large Battles as Boardgames
The simpler boardgame rules can be used when player characters are not taking part in the battle. Everyone present, including the referee, should be divided into teams. One team controls each fleet, using the rules from either the Basic or Advanced Boardgame.
If this battle will have an effect on player characters at some later time, players controlling the opposing force (the Sathar, for example) might be tempted to let their side lose, giving the characters a better chance to survive when the campaign shifts back to role-playing. To prevent this, the referee should be the top commander of the "enemy" team. He can intervene if he suspects his cohorts are not trying their best to win.
Combining Large Battles with Role-Playing
If player characters are aboard a ship in a large fleet action, it is unreasonable to expect the referee to handle all of the NPCs. In this situation, the referee should control the enemy fleet. The enemy might be the Sathar, or pirates, or even the Spacefleet, if characters are involved in something illegal. The referee should control these opponents with the same neutral style that he normally uses for NPCs.
The players, of course, should be allowed to run their own characters. If a player character is second-in-command on a militia or Spacefleet vessel, that character must still follow the orders of his superior officer. The referee should try to describe the battle to the player as the character would see it.
The ships of the friendly fleet should be divided as equally as possible among the players. For example, a UPF Task Force divided among five players might have one player running the battleship, another running the assault carrier and its fighters, a third running a light cruiser and a destroyer, the fourth operating a squadron of four frigates, and the last player controlling six or eight assault scouts.
As the players' ships meet the enemy fleet, each player commands the ships under his control, and the referee commands all of the enemy ships. The referee also must observe the battle objectively, to ensure that the players do not abuse their command by giving an unfair advantage to the ships their characters are on.
For example, if an assault scout carrying a player character gets cut off from the rest of the fleet because of a reckless maneuver, it is unrealistic to let the entire fleet rush immediately to rescue one small ship. If players try to do this, the referee must point out the illogic of the act from an overall tactical point of view. Perhaps one frigate might be sent to aid the assault scout, if the frigates in the battle are not under heavy attack. The referee may even rule that no ships can be spared to help the character's assault scout.
The Warriors of White Light includes several scenarios that illustrate this situation. The referee plays a group of pirate ships in one and Sathar in another, while the players are responsible for all of the militia ships. As low-level officers in the militia, the player characters do not have the authority to command the entire naval militia of Gollywog!
NPCs and the Spaceship Skills
Player characters involved in ship-to-ship combat receive bonuses from their spaceship skills. It follows that the NPC crews of most ships will have some spaceship skills as well. A referee can offset this advantage in one of three ways.
Use the Boardgame Tables. The easiest way to resolve the problem of skills is to use either the Basic or Advanced Boardgame rules and no skill modifiers. Average skill levels were taken into account when these tables were designed. This assumes that everyone in the battle has average skill levels.
Use Average NPC Skills. Characters are likely to possess a wide variety of skills, and different crews will have different average skill levels. Rather than have the referee determine a skill level for each NPC aboard each ship, averages are listed for various jobs on different types of ships.
The referee can determine average modifiers for different types of ships by checking the Average NPC Skill Levels table. Tables are prepared for Sathar, UPF, pirate, militia and civilian ships. The average level of each significant skilled NPC aboard that type of ship is listed. The most important bonuses received by NPCs during spaceship combat also are listed.
Skill Bonuses
- Pilot: Evasion = -3% x skill level; Improve FF Accuracy = +5% x skill level; Increase MR = 10% x skill level per turn
- Gunner: Increase Accuracy = 5% x skill level
- Engineer: Damage Control = DCR + 10 x skill level; Stress Analysis = -5% x skill level
Average NPC Skill Levels
| Ships | Pilot | Gunner | Engineer |
|---|---|---|---|
| UPF Spacefleet | 4 | 3 | 4 |
| Sathar Attack Vessels | 2 | 1 | 1 |
| Pirate and Planetary Militia Ships | 3 | 2 | 2 |
| Civilian Ships | 4 | 0 | 3 |
Ships often carry several gunners. The number of gunners aboard a ship will equal one-half of the ship's weapons, rounded up. A ship with one or two weapons will have one gunner, for example, while a ship with five or six weapons will have three.
Use Unique NPCs. This is suggested only when the characters' ship is fighting one or two enemy ships, because the referee must do a lot of preparatory work.
In a small engagement, the referee can determine a skill level for each skilled individual on each of the ships involved. This includes NPCs on board the characters' ship, as well as those on enemy ships.
Although this system requires extra preparation, it is recommended for detailed combats involving only a few ships because it gives an extra flavor of realism to the encounter. It also provides actual people for the characters to deal with, instead of uninteresting "enemy ships." This is especially valuable when characters are battling a high level NPC whose skills are a major obstacle, such as an old and wily pirate captain.
Most referees will find occasions to use all three of these systems. Use whichever system is best for the current situation. The most important goal is keeping the action moving and the players provided with challenges!
Wages for Characters with Spaceship Skills
The Spacer Wages table shows suggested daily wages for characters working on commercial spaceships. Pay can vary up or down considerably, depending on economic conditions in the area.
Spacer Wages
Credits per day, by skill level:
| Skill | 1 | 2 | 3 | 4 | 5 | 6 |
|---|---|---|---|---|---|---|
| Piloting | 150 | 175 | 200 | 225 | 250 | 300 |
| Astrogation | 120 | 140 | 160 | 180 | 210 | 240 |
| Engineering | 120 | 140 | 160 | 180 | 210 | 240 |
| Rocket Weapons | 100 | 120 |
The Second Sathar War
This section provides the referee with rules for a strategic-level boardgame about the second Sathar attack on the Frontier. Although the game can be played separately as a wargame, it is ideally suited to be worked into a campaign. The players and referee can alternate between role-playing and boardgaming at their gaming sessions. Fewer players are required for the boardgame.
Materials Needed to Play
The materials needed to simulate the entire Second Sathar War include the same map used for the boardgame, most of the counters included with this boxed set, the Frontier Deployment Map (the outside cover of the module included with this game), paper or ship roster forms, pencils and 10-sided dice.
Determining Sides
Any number of people can play this boardgame, but two to six players is best. The referee should control the Sathar ships if only two or three people are playing. If more than three people are involved, the referee should let one or two control part of the Sathar fleet. The other players command the ships of the UPF Spacefleet and the various planetary militias.
The ships on each side should be divided among the players as evenly as possible. For example, if there are three UPF players, each could take a single task force and the militias of three planets. Roll dice to settle any disagreements about how the forces should be divided.
Orders of Battle: The Opposing Ships
All of the ships available at the start of the Second Sathar War are listed by type below. Both sides have a limited ability to repair damaged ships and replace lost ships during the war (see Replacements).
Rosters for the various ships should be filled out before ships go into battle. Each ship should be outfitted with the weapons, defenses, DCR and movement capabilities recommended in the Basic or Advanced Game rules.
If the Basic Rules are used, all weapons and ships introduced in the Advanced Game are still used, as is the Advanced Game Combat Table. Ships may move off-map as described under the Advanced Game rules. The Advanced Game Damage Table and the repair rule are ignored, however.
Sathar Order of Battle
- 25 Fighters
- 8 Frigates
- 15 Destroyers
- 7 Light Cruisers
- 8 Heavy Cruisers
- 4 Assault Carriers
The fighters must be carried by assault carriers at the start of the campaign. Each assault carrier has a capacity of eight fighters. The fighters can be divided among the carriers however the Sathar player desires, within the limits of the carrier's capacities.
UPF Spacefleet Order of Battle
| Task Force Cassidine (A) | Task Force Prenglar (B) | Strike Force NOVA (C) | Non-Attached Ships |
|---|---|---|---|
| 6 Fighters | 1 Minelayer | 6 Fighters | 4 Fighters |
| 3 Assault Scouts | 5 Assault Scouts | 3 Assault Scouts | 3 Assault Scouts |
| 2 Frigates | 3 Frigates | 2 Frigates | 1 Minelayer |
| 1 Light Cruiser | 2 Destroyers | 1 Destroyer | 2 Destroyers |
| 1 Heavy Cruiser | 3 Light Cruisers | 2 Light Cruisers | 2 Light Cruisers |
| 1 Battleship | 1 Battleship | 1 Battleship |
The fighters in each task force can be placed aboard that force's carrier, or they can be based at the station where the fleet is based. The non-attached fighters can be placed with any of the task forces, or based at any station in the Frontier.
Ships may be freely detached or added to the various UPF forces after the game begins. Task forces may even be disbanded if the UPF player wishes.
Planetary Militia Order of Battle
The colors listed beneath each planet name are the colors of that planet's militia ship counters.
| Planet (System) | Counter colors | Ships |
|---|---|---|
| Gollywog (White Light) | black on light green | 3 Assault Scouts, 1 Frigate |
| Hargut (Gruna Garu) | black on dark green | 2 Assault Scouts |
| Hentz (Araks) | white on dark blue | 3 Assault Scouts, 1 Frigate |
| Inner Reach (Dramune) | black on orange | 3 Assault Scouts, 1 Frigate, 1 Destroyer |
| Ken'zah Kit (K'aken Kar) | white on purple | 2 Assault Scouts |
| Minotaur (Theseus) | black on yellow | 4 Assault Scouts, 1 Frigate, 1 Destroyer |
| Outer Reach (Dramune) | white on orange | 2 Assault Scouts, 2 Frigates |
| Pale (Truane's Star) |
Militia ships begin the game based at a station orbiting the appropriate planet.
UPF Spacefleet Fortresses
- Fortress Kdikit (Madderly's Star)
- Fortress Redoubt (Gollywog, White Light)
- Fortress Gollwin (Morgaine's World, Prenglar)
- Fortress Pale (Truane's Star)
Each fortress is in orbit around the indicated planet. All fortresses have the following statistics:
- HP 300 / ADF 0 / MR 0 / DCR 200
- Weapons: LB (x3), EB, PB, RB (x12)
- Defenses: RH, MS (x3), ES, PS, ICM (x20)
Fortified and Armed Space Stations
Fortified Stations: Minotaur (Theseus); Ken'zah Kit (K'aken Kar); Hentz (Araks); Gran Quivera (Prenglar).
Armed Stations: Kawdl-Kit (K'tsa-Kar); Zikit (Kizk'-Kar); Groth (Fromeltar); Terledrom (Fromeltar); New Pale (Truane's Star); Inner Reach (Dramune); Outer Reach (Dramune); Rupert's Hole (Cassidine); Triad (Cassidine); Hargut (Gruna Garu); Lossend (Timeon).
Each station is in orbit around the indicated planet. All fortified and armed space stations have the following statistics:
- Fortified Stations: HP 140 / ADF 0 / MR 0 / DCR 100; Weapons: LB (x2), RB (x8); Defenses: RH, MS (x2), ICM (x10)
- Armed Stations: HP 80 / ADF 0 / MR 0 / DCR 75; Weapons: LB, RB (x6); Defenses: RH, MS (x2), ICM (x6)
The Frontier Deployment Map
The Frontier Deployment Map (FDM) is an abstracted representation of the Frontier. It is used to keep track of fleet and ship locations on a daily basis. Combat never takes place on the Deployment Map.
Star Systems. The large yellow starbursts labeled with system names represent the inhabited star systems of the Frontier. Each star system has one or two planets pictured inside. Each planet is labelled by name.
Transit Boxes. The paths of light blue boxes between systems mark the known travel routes in the Frontier. The boxes are "transit boxes." Each transit box marks one day of acceleration or deceleration along that route. Thus, transit boxes measure speed, not distance. Ships move from system starbursts to transit boxes, and along transit boxes to other star systems. A ship normally moves only one transit box per turn.
If a player decides that a ship should stay where it is and not jump to another system, it must decelerate back toward the star at the rate of one transit box per day. A ship in a transit box can stop accelerating and coast, maintaining its speed, for any number of turns. The ship can resume moving along the transit box track in either direction on any turn.
Sathar Start Circles. The dark red circles are Sathar Start Circles. These are possible locations from which the Sathar can launch their attacks on the Frontier. The light red boxes connecting the Start Circles to star systems are the paths that the Sathar must follow in order to attack the star systems. Each of the light red boxes is a transit box, representing one day's travel.
The start circles represent the positions of Sathar ships as they emerge from the Void. The start circle leading to Prenglar, for example, is actually inside the Prenglar system, but the ships inside the circle are moving at tremendous speed toward the star. The boxes leading to Prenglar represent the number of days the Sathar ships need to slow down enough to attack the stations and ships based there.
Combat. If Sathar and UPF ships occupy the same star system on the FDM, the counters may be moved to the boardgame map for combat.
Setting Up the Game
Before placing counters on the FDM, each player should make a Fleet Deployment Sheet on a blank piece of paper. This sheet should be divided into squares large enough to hold several dozen counters each. The UPF Fleet Deployment Sheet should have boxes for Task Force Prenglar, Task Force Cassidine and Strike Force NOVA. The Sathar sheet should have boxes for Sathar Attack Fleets #1 and #2, and any other fleets the Sathar player forms.
The composition of the two Sathar attack fleets is up to the Sathar player. Each fleet may contain however many ships the Sathar player wants to put in it. The Sathar player may decide not to organize his ships into fleets at all.
The contents of the fleets, or any other stacks on the FDM, may be examined freely by all players. (Both armies have well-developed intelligence networks throughout the Frontier.)
Ships that belong to the various forces are placed in the appropriate box on the Fleet Deployment Sheet, and the counter representing the fleet is placed on the FDM. This eliminates large, clumsy stacks of counters on the FDM.
UPF Set-Up
The UPF player(s) sets up all UPF task forces, militias, stations, fortresses and non-attached ships before any Sathar ships are placed on the map. Strike Force NOVA and any non-attached ships assigned to it are placed off the map until later.
Stations and fortresses must be in orbit around their planets, as listed on the Order of Battle. Planetary militia ships are docked at the stations orbiting their planets. Task Force Prenglar and Task Force Cassidine are placed in orbit around Morgaine's World and Triad, respectively.
Non-attached ships can be placed in any systems where the UPF player wants them. They can be split into as many small groups or individual ships as desired. Any number of non-attached ships can be added to one or more of the task forces.
Sathar Set-Up
After the UPF ships are deployed, the Sathar player must place at least 20 of his ships (not counting fighters) on the FDM. These ships must be divided among two or more of the Sathar Start Circles. The Sathar ships can be distributed among as many start circles as the Sathar player wants, but no more than half of the ships placed can be in one start circle. Sathar ships that are not placed on the map at this time can be placed in a start circle at the beginning of the Sathar move on any later turn. On any turn, however, no more than half of the Sathar ships placed on the map may start in one start circle. (Sathar always try to attack from several directions at once, to confuse the enemy.) These ships can move as soon as they are placed on the map.
Strike Force NOVA
After the Sathar player has made his initial placement, the UPF player can decide whether to place Strike Force NOVA on the map. This formidable group of ships patrols the Frontier regularly, so the Sathar have little idea where it is located as they begin their attack. The strike force is placed randomly, however, so the UPF player also has very little idea where it is.
The UPF player can place Strike Force NOVA on the map immediately, or keep it off the map until later in the game. If SFN is kept off the map, it can be placed on the map at the start of any UPF turn. Like Sathar reinforcements, SFN can move normally during the turn it is placed on the map.
Whenever Strike Force NOVA is placed on the map, the UPF player must roll 1d10 and check the Strike Force NOVA Placement table. The strike force is immediately placed on the map wherever the dice roll indicates.
Strike Force NOVA Placement
| Die Roll | Initial Location of SFN |
|---|---|
| 1-3 | Gran Quivera (Prenglar) |
| 4 | Pale (Truane's Star) |
| 5 | Inner Reach (Dramune) |
| 6 | Terledrom (Fromeltar) |
| 7 | Zik-Kit (Kizk'-Kar) |
| 8 | Kenzah-kit (K'aken Kar) |
| 9 | Gollywog (White Light) |
| 0 | Kawdl-Kit (K'tsa-Kar) |
Strategic Turn Sequence
After the opposing forces are set up on the Frontier Deployment Map, players follow the Strategic Turn Sequence, below:
- Sathar reinforcements are placed on the map. Sathar ships are moved.
- UPF reinforcements are placed on the map. UPF ships are moved.
- Sathar player declares any attacks. Sathar attacks are resolved using Basic or Advanced rules.
- UPF player declares any attacks. UPF attacks are resolved using Basic or Advanced rules.
- The Time Record is advanced to the next turn. The turn sequence is repeated.
The Time Record Track
The Time Record Track is printed on the Frontier Deployment Map. It is used to record the passage of time during the Second Sathar War. Each box on the track represents either 1 or 10 days. At the end of each turn, the "Day" counter is moved to the next square on the track. When day 10 is reached, the marker is moved back to day 1 and the "Tenday" marker is placed over the 10 in the Tenday column. This indicates that it actually is day 11 of the war.
Strategic Movement
As mentioned earlier, the FDM is designed to regulate movement of ships and fleets as they travel from star to star in the Frontier. All ships begin the game in a star system or Sathar Start Circle.
Using the Transit Boxes
A fleet, task force or individual ship can leave a star system by moving into an adjacent transit box. On each following day, it advances into the next transit box. When the ship(s) enter a dark blue box marked with an arrow pointing in the same direction that the ships are traveling, those ships have jumped into the next system and are decelerating toward that star. Dark blue transit boxes with arrows pointing in the opposite direction of a ship's travel are treated as normal transit boxes.
Sathar and UPF ships can occupy the same transit box without having any sort of encounter. This is because the transit boxes represent speed, and not a specific location in space. Ships that occupy the same transit box are traveling at the same speed - they may be millions of kilometers away from each other.
A battle may occur when ships of both sides occupy the same system space. If Sathar ships enter a system space during Sathar movement, UPF ships in that space can avoid combat by moving to a transit box during the UPF move, since combat is declared after each side has moved.
Accelerated Movement (Risk Jumping)
At some point in the war, both sides are likely to find themselves in an urgent situation where they need to move their ships more than one transit box per day. This can be done by risk-jumping.
Players using accelerated jump movement must accept the risk of those ships making a mistake in their jump calculations and becoming lost. The chance that a ship will become lost depends on the ship's acceleration and the skill of its astrogator. These percentages are summarized on the Mis-jump Probability Table.
Ships with an ADF of 2 or more can move two transit boxes per day. Ships with an ADF of 3 or more can move three transit boxes per day. No ship can move more than three transit boxes per day, because such extreme, prolonged acceleration would disable the crew.
Ships that are risk-jumping should be placed underneath the appropriate counter (RJ 2 or RJ 3). This indicates whether the ships are moving two or three transit boxes per day.
A ship using accelerated movement must travel at the increased rate from the time it enters the first transit box until it reaches the jump point. The ship must stop moving for the turn when it enters its Jump Box (dark blue box containing arrow), even if the ship has moved only one or two boxes this turn. After the ship makes the jump, it can decelerate at the increased rate or at a lower rate. Ships decelerating more than one transit box per turn must stop as soon as they enter the system's starburst symbol.
Misjump Probability Table
Safe jump probability, by transit boxes crossed per day:
| Ship Type | 2 | 3 |
|---|---|---|
| UPF Battleship | 95% | 90% |
| UPF Ship (except battleship) | 90% | 70% |
| Sathar Warship | 90% | 70% |
| Frontier Militia | 70% | 50% |
The player controlling the jumping ship must roll a number equal to or less than the safe jump probability found on the table in order to make the jump successfully. This roll is made once, when the ship enters the jump box.
(These percentages assume that all UPF battleships have a 6th level astrogator aboard. All other Spacefleet ships carry 4th level astrogators, as do all Sathar ships. Planetary militia ships are assumed to have 2nd level astrogators. If characters bring their own ships into the war, assume that moving two transit boxes per day allows 50% of the normal calculation time, and moving three transit boxes per day allows 30% of the normal time.)
Interlocked Computers. Ships that are traveling together can interlock their computers and share one astrogator's jump calculations. If this is done, d100 are rolled once for the entire group of ships, instead of once for each individual ship, to determine whether the ships reach their destination.
EXAMPLE: One UPF battleship, three destroyers and two militia ships at Fromeltar are moving two transit boxes per day toward Dramune. The UPF player decides to link them together and make only one roll. All of the ships get the benefit of the battleship's 6th level astrogator. If the player rolls 95 or less on d100, the entire group reaches its destination safely.
Ships in a stack can be grouped however the commanding player wants. The six ships in the example can jump together, or as two groups of three ships, three groups of two ships, or any other possible combination, including six individual ships. Each group is rolled for individually. The failure or success of one group has no effect on the other groups.
Effects of a Misjump. Any ships that misjump during the course of this strategic game are lost for the duration of the war. They may reappear later in a campaign, if the referee wishes, but should not be brought back into the war.
Risk-Jump Limits. Sathar ships in the Sathar Start Circle or the red transit boxes connected to the start circles cannot decelerate more than one transit box per turn.
A ship with unrepaired hull damage may never move more than one transit box per turn.
Militia Ships
Militia ships are somewhat limited in their movement, since the primary objective of the militia is to defend its home planet. Militia ships can travel to a star system that is adjacent to their home system, if the home system is not threatened by an imminent Sathar attack. A system is "imminently threatened" if Sathar ships have emerged from the Void inside that system. If militia ships are in an adjacent system when Sathar ships emerge inside their home system, those ships must return home as quickly as possible.
A militia ship can move more than one system away from its home world only if all of the space stations in that home system have been destroyed. When this happens, the militia ships are "deputized" by the Spacefleet and can move as Spacefleet ships.
Day One
The Sathar Approach. The Sathar player always moves first. Ships in start circles must be moved into the red transit box adjacent to that start circle on the first day. They are limited to moving one box per day until they have entered a star system space. Once a Sathar ship has entered a star system space, it can use normal or accelerated movement for the rest of the game.
UPF Reaction. After all Sathar ships have been moved on the first turn, UPF ships can move. If Strike Force NOVA is not on the map, it may be placed before any UPF ships are moved. If it is not placed at this time, it cannot be placed until the UPF move on day 2.
Special Combat Rules
The Second Sathar War will be resolved, for better or worse, by spaceships. Planetary defenses will play very little role in the war, because the Sathar strategy is to destroy the Spacefleet and isolate the planets from each other. Once the planets are isolated, they can be conquered and sacked one by one. This game deals only with the spaceship battles of SW II.
Declaring Combat
If Sathar and UPF ships occupy the same starburst at the end of a day, those ships can fight each other. The Sathar player has the first option to attack, and must announce all systems where he is attacking. If there are two planets in a system that is being attacked, one of the planets must be announced as the target. Only one planet can be attacked by a specific ship or fleet per day.
These attacks are then resolved in any order the Sathar player wishes. Following these battles, the UPF player must declare any systems where UPF ships will attack Sathar ships. The UPF player may not attack Sathar ships that have already attacked UPF or militia ships.
Whichever player declared the attack is the attacker, and moves first in that combat.
Combat is resolved using either the Basic or Advanced Boardgame rules. If the battle is taking place near a planet (this is the defender's option), the planet is placed in the middle of the game map. The defender's ships are placed anywhere on the map, traveling at any speed the defender desires. The attacker's ships must enter the map from one of the narrow edges, traveling at whatever speed the attacker desires.
If the defender's ships include a minelayer, the defender may place all of its mines and seeker missiles before the battle begins. The locations of mines and seekers must be recorded on paper, to be revealed to the attacker when a ship enters one of those hexes.
If either side's ships are based at two planets in a single star system, all of the ships may gather for the battle. Ships are not required to do this.
Which Rules to Use?
Depending on the number of ships in the battle, the following rules are recommended. If a majority of the players agree to use rules other than those suggested, feel free to ignore this chart. Players are free to use one set of rules in one battle, and another set in a different battle; use whichever set of rules provides the best compromise between detail and playability for the battle being fought.
| Ships in Battle | Suggested Rules |
|---|---|
| 2 to 4 | Advanced Rules; average NPC Skills |
| 5 to 14 | Advanced Rules; no skill modifiers |
| More than 14 | Basic Rules |
Breaking Off Combat
If a battle is going badly for one side, that player can try to escape the battle with whatever ships he has remaining. To do this, simply maneuver the ships away from the enemy on the boardgame map. The fleeing ships must outrun any enemy ships that pursue them, crossing the map as many times as necessary. When the fleeing ships are beyond the range of the pursuers' weapons, they have escaped and are placed in a transit box adjacent to the star system. The victorious ships are placed in the system box where the battle was fought. The ships resume normal movement on the following turn.
Militia ships in their home system must make at least one attack (fire one weapon at one enemy ship) before breaking off combat. UPF Spacefleet ships never are required to attack.
Fighters can break off combat, but they cannot enter a transit box unless they are being carried aboard an assault carrier. Fighters not aboard a carrier or station when the "Day" marker is advanced are destroyed automatically.
Supply
After a battle, ships that are "in supply" can rearm by replacing all expended weapons and defenses such as torpedos, assault rockets, masking screens and ICMs. Supply has no other function in the game.
A UPF ship is in supply if a path can be traced from the ship to a UPF Fortress without passing through a star system occupied by a Sathar ship. The path may pass through transit boxes containing Sathar ships, but not star system boxes. Supply may be traced into star system boxes that contain both UPF and Sathar ships, but not through those systems.
A Sathar ship is in supply if a path can be traced from the Sathar ship to any Sathar Start Circle, without passing through a star system containing a UPF ship or space station.
Rearming. In order to rearm, the ship must spend one complete day at a planet in a star system that is in supply. The ship may not move or attack during that day. If the ship is attacked and fights back, it is not rearmed.
Fighters can be rearmed from their assault carrier or station twice while out of supply, but the carrier or station must be resupplied before the fighters can rearm a third time.
Repair
Ships that have been damaged in battle can repair that damage normally using their DCR. If the battle was fought using the Basic Rules, repairs cannot be made until after the battle. If any hull damage repair attempt fails after the battle, no further repairs can be attempted; the ship's hull can be repaired only at a space station. If a system other than the hull cannot be repaired in space (because a 99 or 00 was rolled), the ship must return to a space station to repair this system, also.
UPF Repairs
UPF ships can be repaired at any spaceship construction center in a system that contains no Sathar ships. Each SCC can repair a certain number of hull points per day. The Repair Capacity Table lists the number of hull points that can be repaired per day at each SCC. These repairs can be divided among as many ships as the UPF player has at that station.
Repair Capacity Table
| SCC: System/Planet | Daily HP Repair Cap. |
|---|---|
| Araks/Hentz | 20 |
| Cassidine/Rupert's Hole | 10 |
| Cassidine/Triad | 40 |
| Dramune/Outer Reach | 10 |
| Fromeltar/Terledrom | 20 |
| Prenglar/Gran Quivera | 40 |
| Theseus/Minotaur | 20 |
| Truane's Star/Pale | 10 |
| White Light/Gollywog | 10 |
To be repaired, a ship must spend a full day docked at the station. A ship can remain docked for repairs as long as its owner wants.
Damage other than hull damage also can be repaired at an SCC. One system can be repaired per day. The repaired system is completely restored. No other system repairs or hull repairs can be performed that day. For example, if a ship lost 3 ADF points and 8 hull points, it must spend two days in the shop to be repaired: One day to repair the hull, and one day to completely repair the drives.
Sathar Repair
Sathar ships can be repaired two ways: by returning to their home base, or by using captured construction centers.
To return to a Sathar base, the damaged ship must travel to a Sathar Start Circle and enter the Void. The ship counter is then placed on the time track, six days ahead of the Day marker. When the Day marker reaches the box the Sathar ship is in, that ship is placed in a Sathar Start Circle, completely repaired. Any number of ships can be repaired this way.
Sathar ships also can be repaired at captured SCCs. An SCC is considered captured when all space stations in its system have been destroyed and no UPF or Militia ships are in the system. Because of sabotage and unfamiliar tools, however, Sathar can repair only one-half as many hull points per day as the construction center's capacity. Other systems can be repaired normally, in one day.
Replacements (Optional)
This rule intensifies the strategy of the game, but also lengthens it. Its use is optional, so players should decide whether they will use it before starting to play.
Replacements can appear at the end of every 20 days.
UPF Replacements. The UPF's replacements depend on how many fortresses and fortified stations the UPF has remaining. For each fortress that has not been destroyed by the Sathar, the UPF can replace one ship larger than an assault scout (i.e., Frigate class or larger). For each Fortified station left undestroyed, the UPF player can replace two assault scouts, two fighters, or a fighter and an assault scout. These replacements are placed on the map at the start of the next turn at the appropriate station or fortress.
Sathar Replacements. The Sathar player can try to replace every ship destroyed in combat in the 20 days prior to the replacement phase. To do so, he must roll d100 for each ship. If the result of the roll is 35 or less, that ship can be brought back into the game through an SSC during the next turn. If the result of the roll is 26 or more, that ship is permanently removed from the game and no more attempts to replace it can be made. (As printed; the two thresholds overlap.)
Both players may only replace ships that have been destroyed; they can never increase their fleets beyond their original size.
Planetary militia ships may not be replaced at all during the war.
Shatter Drones (Optional)
Shatter drones were introduced by the Sathar, but by the time of the Second Sathar War they were being used by both sides. A shatter drone is essentially a ship that has been turned into a huge bomb. They are used to destroy large, tight formations of enemy ships.
Before the first turn, each player chooses two of his frigates to be shatter drones. The UPF can use either Spacefleet or militia frigates.
Shatter drones carry no live crew. Computer and robot controls allow them to perform as normal frigates. However, the ships are packed with hundreds of fusion bombs.
Shatter drones can be detonated at the end of the active player's movement phase, before defensive fire. When the drone detonates, the explosion inflicts one torpedo hit on every other ship in the drone's hex. No attack roll is needed. Every ship in the hex, whether enemy or friendly, must roll on the Damage Table with a -20 modifier (Advanced Rules). A shatter drone has a hull damage rating of 5d10 in both the Basic and Advanced Games.
A detonated shatter drone is completely destroyed. It is not counted as a destroyed ship for victory conditions, and it cannot be replaced.
Conditions for Victory
In order to win, the Sathar must destroy UPF space stations and orbital fortresses. Because so little is known about the Sathar, the UPF player never is sure exactly what must be done to defeat the Sathar.
Sathar Victory. The Sathar player wins immediately if the Sathar forces destroy 12 space stations, including all four fortresses.
UPF Victory. If the Sathar can be forced to retreat while the UPF has at least two fortresses left, the UPF wins the war. If the Sathar are forced to retreat, but the UPF has only one fortress remaining, the game is a draw.
Sathar Retreat. The UPF does not know what the Sathar want, or what type of damage hurts them the most. To reflect this, the Sathar player gets to select one of five Retreat Conditions before the first turn. This choice is written down, and revealed to the UPF player when the conditions are met.
Sathar Retreat Conditions (Choose One)
The Sathar fleet will retreat if:
- The Sathar have lost two assault carriers;
- The Sathar have lost five heavy cruisers;
- The Sathar have lost 40 ships, including fighters;
- A tenday passes without the Sathar destroying at least two stations, two fortresses or a station and a fortress;
- At the end of any tenday, the Sathar have lost more ships in combat than the UPF. Fighters and Militia ships are not counted toward this condition.
As soon as the chosen condition has been met, the Sathar player must retreat all of his ships as quickly as possible to the nearest Sathar Start Circle. The ships enter the Void, returning to the Sathar worlds, leaving the Frontier in peace once again.
Equipment Lists
Transcriber's note: the figures below are transcribed as printed on the Equipment Lists pages; several differ from the figures given in the Spaceship Equipment text above (for example weapon costs and atomic drive prices).
Spaceship Equipment
Hulls
| SCC Class | Cost |
|---|---|
| I | 50,000 x Hull Size |
| II | 60,000 x Hull Size |
| III | 75,000 x Hull Size |
Drives
Cost (Cr), by SCC type:
| Drive Type | Size | I | II | III |
|---|---|---|---|---|
| Atomic | A | 300,000 | 400,000 | NA |
| Atomic | B | 500,000 | 600,000 | NA |
| Atomic | C | 750,000 | NA | NA |
| Ion | A | 100,000 | 150,000 | NA |
| Ion | B | 150,000 | 200,000 | NA |
Life Support Systems
| Number Supported | Cost (Cr) of Equipment | Cost (Cr) of Computer Program |
|---|---|---|
| 1-2 | 300 | 1,000 |
| 3-6 | 500 | 2,000 |
| 7-12 | 900 | 2,000 |
| 13-20 | 1,500 | 2,000 |
| 21-35 | 2,500 | 3,000 |
| 36-60 | 5,000 | 3,000 |
| 61-100 | 9,000 | 3,000 |
| 101-200 | 18,000 | 4,000 |
| 201-500 |
Astrogation Equipment
| Ship Type | Cost (Cr) of Equipment | Cost (Cr) of Computer Program |
|---|---|---|
| Shuttle | 1,000 | 3,000 |
| System Ship | 5,000 | 6,000 |
| Starship | 15,000 | 24,000 |
| Starship, deluxe | 50,000 | 24,000 |
Computer Programs
Function points for levels 1 to 6:
| Program | 1 | 2 | 3 | 4 | 5 | 6 |
|---|---|---|---|---|---|---|
| Alarm | 1 | 2 | 4 | 8 | 16 | 32 |
| Computer Lockout | 1 | 2 | 4 | 8 | 16 | 32 |
| Damage Control | 2 | 4 | 8 | 16 | 32 | 64 |
* Cost for all programs is Function Points x 1,000 Credits.
Communication and Detection Equipment
| Item | Cost | Space Required (Cubic meters) |
|---|---|---|
| Videocom Radio | 1,000 | 2 |
| Videocom Screens | 100 | .5 |
| Subspace Radio | 20,000 | 3 |
| Intercom Panel | 50 | 1 |
| Intercom Speaker/Mike | 10 | .5 |
| Radar Unit | 10,000 | 5 |
| Energy Sensor | 200,000 | 20 |
| Porthole | 50 | - |
| Camera System |
Emergency Equipment
| Item | Cost | Cubic meters |
|---|---|---|
| Escape pod | 30,000 | 16 |
| Lifeboat | 100,000 | 80 |
Weapons
| Item | Cost | Cubic Meters |
|---|---|---|
| Laser Cannon | 15,000 | 40 |
| Laser Battery | 10,000 | 25 |
| Proton Beam Battery | 15,000 | 30 |
| Electron Beam Battery | 15,000 | 30 |
| Disruptor Beam Cannon | 30,000 | 60 |
| Assault Rocket Launcher | 20,000 | 10 |
| Assault Rocket | 10,000 | 10 |
| Rocket Battery Array | 40,000 | 40 |
| Rocket Battery Salvo |
Defensive Systems
| Item | Cost | Cubic Meters |
|---|---|---|
| Reflective Hull | 500 x HS | - |
| Masking Screen Launcher | 10,000 | 10 |
| Masking Screen Charge | variable | 25 |
| Electron Screen | 2,000 x HS | 10 x HS |
| Proton Screen | 4,000 x HS | 12 x HS |
| Stasis Screen | 3,000 x HS | 10 x HS |
| ICM Launcher | 20,000 | 10 |
| ICM | 2,000 | 5 |
Mining Equipment
| Item | Cost | Cubic meters |
|---|---|---|
| Digger Shuttle | 8,000 + shuttle | 150 |
| Orbital Processing Lab | 100,000 | 1,000 |
| Mineral Refinery | 200,000 | 2,000 |
Agricultural Equipment
| Item | Cost | Cubic Meters |
|---|---|---|
| Seeds | 500 x HS | 10 x HS |
| Nutrient Solution | 1,000 x HS | 40 x HS |
| Farming Robot | 3,000 x HS | 2 x HS |
| Solar Collectors | 4,000 x HS | 10 x HS |
Transport Equipment
| Item | Cost | Cubic Meters |
|---|---|---|
| Cargo Arm | 1,000 x HS | 4 x HS |
| First Class Cabin | 2,000 per cabin | 72 |
| Journey Class Cabin | 1,000 per cabin | 32 |
| Storage Class Berth | 2,000 per berth | 4 |
| Passenger Luggage | - | 1/3 cabin area |
Exploration/Research Equipment
| Item | Cost | Cubic Meters |
|---|---|---|
| Atmoprobe | 40,000 | 3 |
| Landing Drone | 100,000 | 25 |
| Laboratory | 100,000 | 60 |
| Remote Probe | 100,000 | 25 |
Space Vehicles
| Item | Cost | Cubic Meters |
|---|---|---|
| Launch (4 passengers) | 75,000 | 20 |
| Launch (10 passengers) | 100,000 | 50 |
| Workpod | 75,000 | 30 |
Personal Space Equipment
Spacesuits and Accessories
| Item | Cost |
|---|---|
| Spacesuit (except Vrusk) | 1,000 |
| Spacesuit (Vrusk) | 1,500 |
| Spacesuit life support refill | 50 |
| Spacesuit Armor | 1,000 |
| Rocket Pack (no fuel) | 2,000 |
| Rocket Pack Fuel | 50 |
| Magnetic Shoes (pair) | 100 |
| Velcro Boots | 50 |
| Additional Life Support Pack | 500 |
| Extra Patches (2) | 50 |
Tools
| Item | Cost |
|---|---|
| Engineer's Toolbox | 2,500 |
| Laser Powertorch | 5,000 |
| LPT Powerpack | 500 |
Spaceship Design Sequence
- Locate a spaceship construction center.
- Hire a starship design engineer.
- Buy a hull.
- Install engines and a drive program.
- Decide how large the standard crew will be.
- Install life support equipment.
- Purchase astrogation equipment.
- Purchase communication and detection equipment.
- Install cabins for the ship's crew.
- Install emergency equipment.
- Install specialty equipment.
- Purchase weapons and defensive systems.
- Purchase a computer control panel.
- Purchase any miscellaneous computer programs desired.
- Determine the computer's level.
- Determine the ship's hull points, DCR, ADF, and MR.
PART III: COMBAT TABLES (REFERENCE SHEET)
The one-page Combat Tables sheet reproduces the Advanced Game Combat Table (with its footnotes: "Weapon causes half damage (rounded up) on Hull hits." and "Shaded percentages apply to characters using Gunnery skills."), the Damage Table Modifiers and the Advanced Game Damage Table exactly as given in the Advanced Game section of Part I above, and adds the following table covering all weapons.
Weapon Restrictions
| Weapon | Restrictions | Range |
|---|---|---|
| Laser Cannon | FF, RD | 10 |
| Laser Battery | RD | 9 |
| Torpedo | MPO, LTD | 4 |
| Assault Rocket | FF, MPO, LTD | 4 |
| Rocket Battery | LTD | 3 |
| Proton Beam Battery | RD | 12 |
| Electron Beam Battery | RD | 10 |
| Disruptor Beam Cannon | FF, RD | 9 |
| Mines |