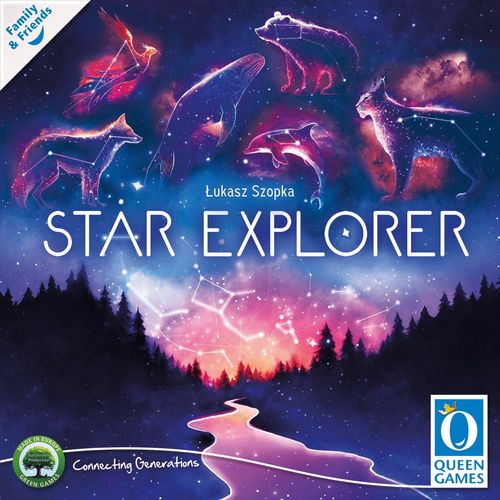
Star Explorer
Star Explorer Rulebook
Table of Contents
Table of Contents
Contents
- 4 player boards — they need to be assembled prior to your first game:
- Stick 6 adhesive dots to the marked spots of the part labeled "Middle", fold up and press firmly onto the part labeled "Base".
- Stick 6 adhesive dots to the marked spots of the part labeled "Middle". Then carefully align the bottom edge of the part marked "Top" with the bottom edge of "Middle + Base", place on and press firmly.
- 4 star discs
- 1 first player marker
- 6 double-sided start tiles
- 41 constellation tiles: 6× "5", 6× "6", 11× "7", 6× "8", 6× "9", 6× "10"
- 4 white dry erase markers
Note: The pens can be wiped clean with the cap or a damp cloth without leaving any residue. If the pens have not been used for a long time, you may slightly moisten the tip of the pen to be able to write again. It's best to always put the cap back on immediately after using the pens and store them horizontally.
Setup
-
Each player receives the following items: a player board, a star disc, and a dry erase marker. Slide the star disc into your player board. Make sure that the "I" on the rim of the star disc is alligned with the arrow at the top of your player board, as shown in the picture above. Place your player board in front of you.
-
Separate the constellation tiles according to the values with their reverse side up, then shuffle each pile separately.
Each player receives one constellation tile with a value of 5, 6, 8, 9, and 10 and two constellation tiles with a value of 7. Place those tiles face-down near your player board.
Note: You are allowed to look at the reverse side of the tiles in your pile. But you are not allowed to peek at the constellations on the front!
-
Shuffle the start tiles and deal 1 to each player. The start tiles are double-sided. Look at your tile and place it with your prefered side up in front of you.
-
Return any unused components to the box.
-
The last person to have seen a shooting star receives the first player marker.
Gameplay
The game STAR EXPLORER consists of 6 rounds. Each round consists of the following 4 consecutive steps:
- Select constellation size
- Mark constellations
- Score points
- End of the round
Constellation tiles and star disc in detail
Constellation tile, reverse side:
- Constellation size — the number of stars the constellation consists of.
- Star type and point value — there are 4 different types of stars.
Constellation tile, front:
- Constellation — pattern to be marked on the star disc.
- Latin name of the constellation.
Star disc and player board:
- Star — the individual points on the disc.
- A constellation marked by a player.
- Number of the round.
- 3 spaces to note down your points at the end of the round.
- Star disc rotation direction.
- Polaris.
- Axis.
- Central stars (highlighted with stardust).
- Stars at the outer rim (highlighted with stardust).
1) Select constellation size
The player with the first player marker selects a constellation size and takes the constellation tile of the chosen size from their pile. All other players also take the according constellation tile from their pile.
Special case: When size 7 is picked for the first time, every player chooses which of the two tiles in their pile they want to take (without looking at the front!). When size 7 is chosen again on a later turn, take the leftover tile of that size.
Now, all players reveal their tile und place it below the tile from the previous round, or, in round I, below their start tile.
2) Mark constellations
This step is performed simultaneously by all players: Draw the constellation as shown on the constellation tile you revealed this round on the currently visible section of your star disc.
Important: You are not allowed to rotate your star disc or remove it from the playerboard during this step!
Rules for drawing constellations
The following rules for drawing constellations must be followed:
- a) A constellation is made up of stars connected with lines.
- b) Only stars that are fully visible (not partially covered by the player board) can be used to create a constellation.
- c) Players can decide to skip a fragment of the constellation, not marking it on the map. (see: Fading stars)
- d) It is not allowed to divide one constellation into several smaller ones.
- e) Each star can belong to only one constellation.
- f) The lines connecting stars in constellations must not intersect.
- g) Constellations can be rotated freely, but must not be mirrored.
- h) The polaris in the middle of the star disk must not be used for constellations.
Fading Stars
When drawing constellations on their star discs, players can choose to draw only a part of it (or even to not draw it at all). This option may be useful due to a lack of space or to leave more space for upcoming rounds.
Every star skipped by a player turns into a fading star: For each fading star, cross off a 3-points-star on your player board. In a few exceptional cases it may happen that you can draw all stars according to the rules but not all connecting lines. In this case, also cross off one 3-points-star.
Note: There are seven 3-points-stars on your player board. You can continue to use fading stars after crossing off all seven, but you will not lose any further points at the end of the game.
Example: Stella has not drawn 2 stars of the constellation (marked in green). She crosses off two 3-points-stars.
3) Score points
After you all have drawn your constellations, you will score points for the following categories, which you can note down in the circles next to the current number of rounds on the rim of your star disc.
- (X) For each star of the type shown on the current constellation tile, you get the points indicated on the same tile.
- (Y) For each star of the type shown on the previous constellation tile, you get the points indicated on that tile.
- (X + Y) For each line that connects a star of the type on the current tile with a star of a type on the previous tile, you get points equal to the combined value of both tiles.
Enter the total of points scored in this round on the bottom part of your board, in the space marked with the number of the current round.
Example: For the constellation Nina has just drawn, she receives the following points:
- For each star of the type shown on her current constellation tile (here: the blue star) she receives 2 points. The constellation she has drawn contains 2 stars of this type: She receives 4 points.
- For each star of the type shown on her previous tile (here: the yellow star) she receives 1 point. The constellation she has drawn contains 3 stars of this type: She receives 3 points.
- For each direct connection (depicted with a green line) between the stars of the types shown on both tiles, she receives 3 points (2 points from the current tile plus 1 point from the previous tile). Her constellation contains 3 such connections: She receives 9 points.
The total of points scored by Nina in this round is 16, which she notes down in field I on the bottom of her player board.
4) End of the round
After everyone has scored their points for the current round, perform the following steps:
- Rotate your star disc in the direction of the arrow until you reach the next round marker.
- Flip your current constellation tile to its reverse side and place it on the stack of previously used tiles or on the starting tile.
- Pass the first player marker to the player who has scored the fewest points in the current round. In case of the tie, pass the marker to the first of the tied players in clockwise direction.
After performing these steps, start the next round with step 1) Select constellation size.
End of the Game and Final Scoring
The game ends after the sixth round. Return your leftover 7th constellation tile to the box. Score the following final points:
- Fading stars — Each 3-points-star that you have not crossed off is worth 3 points.
- Constellations — Add up the points you scored for your constellations in the 6 game rounds.
- Bonus points — Remove the star disc from your player board:
- You gain 1 point for each central star you used for your constellations.
- You gain 2 points for each connecting line of your constellations that crosses the white axis of your star disc.
- You gain 3 points for each star in the outer rim you used for your constellations.
Example (central stars): Nina used 4 central stars (marked in green) for her constellations. She gains 4 points.
Example (white axis): Nina crossed the white axis 4 times with the connecting lines of her constellations (marked in green). She gains 8 points.
Example (outer rim): Stella used 4 stars in the outer rim (marked in green) for her constellations. She gains 12 points.
Add up and compare your final scores: The person with the highest total score wins the game and is the best STAR EXPLORER! In case of a tie, the player who used fewer fading stars wins. If there is still a tie, all tied players share the victory.
Solo Version
The single player gameplay is very similar to a multiplayer game:
In step 1) Select constellation size of odd-numbered rounds (I, III, and V) shuffle your pile of constellation tiles and draw one randomly. In the even-numbered rounds, choose the constellation size, like the first player in a multiplayer game. All other rules remain unchanged.
What is your final score?
| Score | Title |
|---|---|
| <50 | astronomy enthusiast |
| 51-90 | novice astronomer |
| 91-130 | night sky expert |
| 131-150 | night sky explorer |
| 150+ | a worthy successor to Copernicus |
Overview
- 6 rounds, then final scoring
- Each round:
- Select constellation size
- Mark constellations
- Score points
- End of the round
1) Select constellation size — First player selects constellation size
2) Mark constellations — Simultaneously: draw your current constellation
3) Score points
- (X) For each star of the type shown on the current constellation tile: Gain the points indicated on the same tile.
- (Y) For each star of the type shown on the previous constellation tile: Gain the points indicated on that tile.
- (X + Y) For each line that connects a star of the type on the current tile with a star of a type on the previous tile: Gain points equal to the combined value of both tiles.
4) End of the round
- Rotate star disc
- Flip your current constellation tile to its reverse side
- Pass the first player marker to the player who gained the lowest total of points during the current round
Final Scoring Overview
- Fading stars — For each 3-points-star not crossed off: 3 points
- Constellations — Add up the points from the 6 game rounds.
- Bonus points
- You gain 1 point for each central star you used for your constellations.
- You gain 2 points for each connecting line of your constellations that crosses the white axis of your star disc.
- You gain 3 points for each star in the outer rim you used for your constellations.