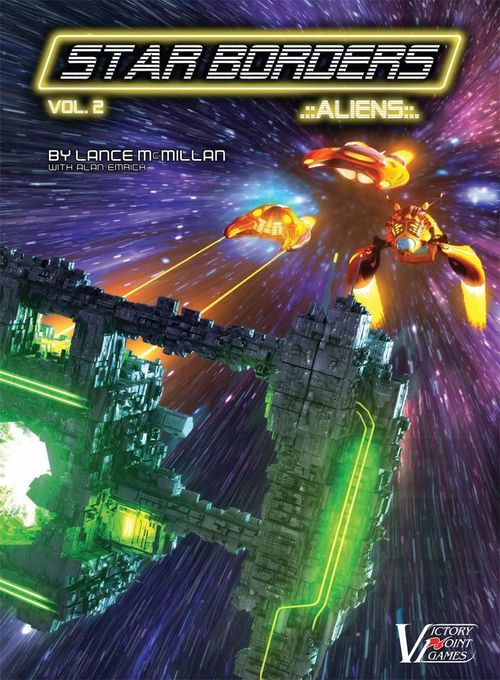
Star Borders: Aliens
Star Borders: Aliens Rulebook
Table of Contents
Table of Contents
- Designer's and Developer's Notes
- [0.0] Using These Rules
- [1.0] Introduction
- [2.0] Game Equipment
- [3.0] Setting Up the Game
- [4.0] Sequence of Play
- [5.0] The Action Phase
- [6.0] Movement
- [7.0] Combat
- [8.0] Housekeeping
- [9.0] Countdown
- [10.0] How to Win
- [11.0] Scenarios
- Card Retrofitting
- How to Read Scenarios
Designer's and Developer's Notes
Designer's Notes (Lance McMillan)
What you know today as the Star Borders universe began as a semi-serious challenge to create a game that only used sixteen counters. Star Borders: Humanity's success pointed us toward more grandiose plans to create an entire series that told the story of the Star Borders universe.
A funny thing happened on the way to Star Borders: Aliens. Designer Lance McMillan and myself (developer Alan Emrich) were very conscientious to create the first game in this series, Star Borders: Humanity, to be easily expandable. The goal was to publish a game that, if players were as enamored of it as we were, they would have sufficient materials in the package to invent their own scenarios and really put things through their paces. We'd hoped they would, and that we could offer your new scenario designs.
From the start, my idea was to keep the game as simple, quick-playing and as fun as possible. As we add each new installment of the series (with its new features), my goal is to hold to that design philosophy. It is important that we kept Star Borders focused on an obscure backwater sector of space (rather than have players trying to control huge grand fleets across a sprawling empire). With fewer resources and assets to maneuver, each choice, each move, becomes a critical decision with far-reaching local consequences.
I wanted to make sure that each faction have a separate and distinctive feel to it (and not just a different name and thematic background), the two new factions in this game needed their own asymmetrical attributes that balanced both against each other as well as the forces in Humanity. Our goal is to ensure that players must use different strategies not only to manage they side that they're playing, but then adapt those strategies based upon which side they're confronting. This rich design tapestry means that your plan that works when you are playing the Rhame Swarm against the C1B0R6 Collective should not work as well against the Alliance or Imperium – you'll have to make adjustments to confront those different foes.
With any luck, Star Borders not only offers players a tense and engrossing challenge, but it is also entertaining as a light "Space Opera." One thing that we very much wish to encourage is your participation in helping us write the storylines in that opera by making it easy for you to experiment in creating your own scenarios. We have more games coming and more stories to tell in the Star Borders universe, and if you'd like to create scenarios for this system, we would be thrilled to see them and share them.
While we waited for untold success and popularity for Humanity, Lance began designing two new asymmetrical Factions for the universe: one with an insectoid theme, and other cyborgs. The ship designs were very engaging, but the maps we came up with had some pretty long stretches of Deep Space, and those left the lumbering C1B0R6 (Lance's too-clever-by-half spelling of "cyborg") Collective forces at a real disadvantage maneuvering around the map. The solution came with an experimental playtest of a twisted idea, "Transit Crystals," allowing the C1B0R6 ships to move through each other for free (no Engine cost) in Deep Space. Well, that created some neat tactics on the board and interesting puzzles for both sides for very little rules weight, and that became a staple of the "Green" Faction. Lance saw them as weak in ground assault, and their good assault ships, the Query class, reflect that by requiring "breaking down" (i.e., removal from play) under a stressful assault. With an abundance of Flagships and two-steppers, the "Bots" have some staying power, even as they are lumbering and not great at ejecting an entrenched defender on a Planet.
Lance's vision for the Rhame Swarm was fun with their speedy ships, save for the Queen and "her court" of Stinger and Claw class mighty morphing "half-ships". (I call them half-ships, because one basically attacks and doesn't defend, and vice-versa; so you have to figure out how many of each you'll need at a Battle before diving in.) Those speedy ships are great, but weak, however with the addition of a Cloaking Device, the "Bugs" have a tremendous ability to mess up their opponents' rear areas and force them to waste a lot of Logistic Points (LPs) putting fires out. The real "oomph" for the Bugs in a stand up fight (as opposed to a "bug hunt," as referenced from the movie Aliens) comes from the Queen, plus some of her court, when combined with a Warrior ship or two. It's hard for the Bugs to put together a "big hammer" for a Battle, but once the Queen drags herself to where the action is, Rahme opponents should show some due caution. Her ability to spawn replacement half-ships helps give her staying (and striking) power, even if the Rhame must "borrow" against next turn's LPs to do so.
Developer's Notes (Alan Emrich)
We had Star Borders: Aliens on our workbench and got it ready to publish when, Shazam!, Victory Point Games changed its publishing method, upgrading component production from ink-jet printers and a hand-press die cutter for the cards and counters, to glorious color printing, full-size machine cut cards, and thick, laser-cut counters and mounted game boards. But this left every game in a connected series (such as the Star Borders universe) in an awkward position. VPG was not about to release new games using the old equipment – that would be silly. But if we shipped Aliens with the new, upgraded components, it wouldn't mate properly with the existing version of Humanity. So, the decision was made to reassess the entire series of six Star Borders products, which Lance and I dutifully did – mapping out every product to a degree where we really knew where each release was going to go and what was going to be in it, and with that "big picture" view in mind create a second edition of Humanity with the improved "Gold Banner" VPG components, and then try to get Aliens out as quickly as possible afterward. Well, Star Borders: Humanity made it out in the first quarter of 2013, and it contains some glorious new components, including ships, scenarios, and rules systems, that really advanced the state of the Star Borders universe and put this series "reboot" on a very solid footing. We'd hoped to get Aliens out in the second quarter, but circumstances have seen it slip to the third quarter of 2013, but now at last you hold it in your hand.
The rules are almost identical to that found in Humanity, but a couple of clarifications trickled in from player feedback since Humanity's release, and those are reflected in these v1.1 edition of the Star Borders universe rules. The ship graphics are by Richard Starke this time around, the 3-D artist who also does those lovelies flying around on the covers and scenario sheets. We had to order some green and yellow dice to round out the package, but they arrived in plenty of time to find their way into this game's box.
You'll note the addition of Nebula terrain on this game's boards, something we didn't need to include in Humanity's maps. They're an interesting source of all sorts of mischief, and we hope you enjoy discovering how to use them to your best advantage. Finally, combining the Aliens and Humanity Development cards can make for interesting games across both titles, should you own them – and you should. We'll tie these two games tightly together with our first expansion kit, Star Borders: Us Versus Them, which requires both games to create new scenarios that feature multi- (3- and 4-) player play, new ship types ("Carriers" and "Fighters") for every Faction, and terrain discovery tiles that can tweak the values and conditions of the terrain features on the maps.
[0.0] Using These Rules
New gaming terms, when they are initially defined, appear in dark red lettering for quick referencing.
The instructions for this game are organized into major "Rules" sections as shown in large CAPS font, and represented by the number to the left of the decimal point (e.g., Rule 4.0 is the fourth Rule). These Rules generally explain the game's subject matter, its components, the procedures for play, the game's core systems and mechanics, how to set it up, and how to win.
With each Rule, there can be "Cases" that further explain a Rule's general concept or basic procedure. Cases might also restrict the application of a Rule by denoting exceptions to it. Cases (and Subcases) are extensions of a Rule shown in the way that they are numbered. For example, Rule 4.1 is the first Case of the fourth Rule; and Rule 4.1.2 is the second Subcase of the first Case of the fourth Rule.
Important information is in bold text.
References to examples of a Rule or Case are in shaded boxes like this.
Text in boxes like this provide the voice of the game's designer, who is addressing you to explain an idea or concept that is not, itself, a Rule or a Case.
[1.0] Introduction
In Star Borders: Aliens, two factions are fighting to establish control of a contested region of the galaxy: the robotic C1B0R6 Collective and the insectoid Rhame Swarm (hereafter referred to as the C1B0R6 and the Rhame). Each player represents the leader of one faction's forces and controls the pieces representing those forces (e.g., the ships).
The game is played on small, connected maps arranged during set up to represent a contested region of space. The map shows various habitable planetary systems and other locations (collectively referred to as "locations") connected by hyperspace warp lines (called "links"). These links are used by the players to move their units between locations on the maps. Taken together, these linked spaces perform the same function as the squares on a checkerboard, regulating movement and showing the location of the pieces.
General Course of Play
One player controls the movement and combat of the C1B0R6 Spaceforce (the green pieces) while the other controls the movement and combat of the Rhame Spaceforce (the yellow pieces). Each player, in turn, moves and then engages in combat with his units, in an attempt to capture (or prevent from being captured) key locations (e.g., planets) on the map. Finally, resources called Logistics Points (LPs) are gathered.
Players take turns, moving and then initiating combat (i.e., conducting "Battles") with their units until the game ends. The game is then over and the winner determined. Basically, the player who has the most Control markers in play at the end wins.
[2.0] Game Equipment
Parts Inventory
- Two 8.5" x 8.5" Neutral Sector maps
- Four 8.5" x 5.5" Home Sector maps
- Two 8.5" x 5.5" Faction mats
- Two 8.5" x 5.5" Sequence of Play Aids
- Two 8.5" x 2.5" Play Aids (1 Countdown Track, 1 Terrain Effects)
- 7 Aliens Scenarios
- 1 Aliens + Humanity Bonus Scenario
- 1 Sheet of double-sided counters*
- 12 Aliens Development cards
- 2 plastic Logistics Points tokens (1 Green, 1 Yellow)
- Two 6-sided dice (1 Green, 1 Yellow – boxed edition only)
- 1 Rulebook
*Some slight soot and discoloration can occur during the laser cutting process.
If any of these pieces are missing or damaged, please email us at [email protected]
[2.1] The Map Sections: Each map section, called a sector, represents a small area of galactic space. When you place one or more (rectangular) home sectors and/or a (square) neutral sector together, they form a quadrant of space typically used to play the game (as illustrated here).
Notice that some home sectors and the neutral sectors are geomorphic, meaning you can arrange them in different configurations. Each scenario shows the layout of that game's quadrant.
Each player's sector planets are color-coded in that side's color (green for C1B0R6, yellow for Rhame) while the planets in the central sector are a neutral (brown) color. In each player's home sector, the large planet is its Sector Base planet.
There is a boxed, numbered grid on each map that will be used in future expansions but is not used in Star Borders: Aliens. Also included is the Countdown Track and other game aids.
[2.2] Faction Mats: Each player is the local military/political commander in charge of their civilization's interests in this unregarded frontier of space. Your side, or "faction," has its history outlined, special abilities explained, and resources managed on its individual Faction mat which is color coordinated with its pieces.
The double-sided mats show how to set up the scenario on the back and the history and scenario-specific special rules on the front.
[2.3] Playing Pieces: In Star Borders, the square cardboard playing pieces (also called "counters" or "units") represent the Spaceships composing a player's spaceforce. Each piece has a distinctive Ship Type ("Class") name and silhouette representing it. If there is a background stripe behind that name, it only has a single step to lose before its destruction. A stripe in the faction's color indicates that the ship only has one step (total), a dark stripe indicates that the ship has multiple steps, but it is currently damaged and has only one step remaining.
Each ship unit also has data along its bottom showing its Attack Rating (basically, what number it has to roll, or less, on a die to hit a target), Defense Rating (checked when that ship is hit to determine the result of that Hit), and its Engines (the number of Engine symbols it has, indicating how many links it can move per Logistics Point spent to move it). If the engine symbol(s) are circled, then the ship has the special Cloak ability.
Along the side, some ships are also noted to have other special abilities. Along the left side, a small flag icon indicates that the ship is a Flagship, and the bolted hexagon icon denotes it has the Repair & Salvage ability. Along the right side, a dark circle with a white number indicates that ship's Planetary Assault rating.
The double-sided round Control markers denote which player controls a planet, the planet's status of either being a Sector Base (denoted with a Flag icon) and/or Fortified (and to what level, as shown by a number of triangle icons) or Disrupted (as shown by the starburst icon). There is also a square Game Turn marker.
Note that the Control marker on a planet denotes its ownership. The printed color of the planet itself typically indicates control at the start of a game, but control can change during play.
"Friendly" units and markers are those in your Faction's color.
Development Cards: Development cards represent elements of the game's story (e.g., political, technological) that are unique to a given player / scenario and might be assigned during set up or drawn during play. The player possessing a particular card receives its benefit after revealing that card.
[3.0] Setting Up the Game
- Choose a scenario and follow its specific set up instructions, arranging the quadrant as illustrated and placing the specified ships as listed. Planets marked with a Control marker begin with that Faction's Control marker, and those with Sector Base markers begin with that Faction's Sector Base marker there. For your first game, we recommend that you start with Scenario A, it was designed to be an introductory scenario for this game.
- If either or both players set up with a specific Development card (or cards), they are assigned and placed in each player's hand. Shuffle the remaining cards and place them, face down, in a Draw Pile within reach of both players. If either or both players set up with a random card, they are drawn.
- Each player's unused markers, and ships that set up as "eliminated", are placed on the corresponding boxes of their Faction mat; this is positioned in front of the player and used to direct the war effort. Reinforcing ships might also be set up on the Countdown Track, as indicated in the scenario's instructions.
Each faction in the game comes with its own Special Abilities explained on its Faction mat. All players will want to familiarize themselves with these before starting play.
- Place the Game Turn marker on the scenario-defined Countdown Track turn number, with the color side up of the Faction that goes first that turn.
After setting up the scenario and noting who the First Player is, play proceeds according to the Sequence of Play until its conclusion.
[4.0] Sequence of Play
Each Game Turn is divided into Player Turns, one for each player. The "First Player" is listed in the set up instructions.
First Player Turn
- Pre-Launch Phase: If the scenario requires a dice roll-off for initiative to determine the player order, do so now. When the initiative changes, be sure to flip the Game Turn marker over as a reminder of who went first that turn. Note that this means a player could have consecutive Player Turns between Game Turns (by going last on the previous turn and first on the next one).
- Action Phase: Spend your LPs to accomplish your goals.
- a) Card Purchase Step: You may buy up to 1 card.
- b) Activity Step: You may move, repair, or rebuild your ships and improve your Planetary Defenses.
- Combat Phase: Battles occur between opposing ships; they are resolved at each contested location in whatever order you desire.
- Housekeeping Phase: Perform these four Steps in order:
- a) Planetary Control Step: You gain control of uncontrolled and unfortified planets where your ships are now located.
- b) Planetary Assault Step: You can assault fortified planets.
- c) Gain Logistics Points Step: You gain Logistics Points and add them to your LP Track on your Faction mat.
- d) Repair Disruption Step: You can repair Disruption on planets you control.
Second Player Turn
- The Second Player performs Phases 2-4.
- Countdown Phase: If required, roll for a Sudden Death ending. Otherwise, move the Game Turn marker one box to the right and begin a new Game Turn. When the game is over, check the Victory Conditions (10.0) to determine the winner.
[5.0] The Action Phase
During your Action Phase, you first bring on any Reinforcements that are due you as listed for that scenario. Unless otherwise specified, when there is a choice of possible Reinforcement locations for that turn, all Reinforcement ship units must arrive together at the same one.
After receiving your Reinforcements that turn, if any, you may then spend your Logistics Points (LPs) to possibly buy a Development card; move, repair, and/or replace lost ship units, and improve the defenses of your planets.
The Card Purchase Step
[5.1] Drawing a Card: The first decision that you must make during your Action Phase, before any LPs are spent for other purposes, is whether or not to purchase or replace a Development card. This is only allowed if you control (8.1) your Sector Base and it is unbesieged (but it can be disrupted, see 8.3).
Procedure: The cost to draw a Development card is half of your current LPs (rounded down), but always at least 2 LPs (even after applying any "discounts" on purchases that you might be entitled to). If you purchase a card, take the top card from the draw pile, read in secret, and then add it to your card hand.
[5.1.1] You do not need to reveal that card until the moment it is used. A card can be revealed at any time. Once revealed, a card remains revealed.
[5.1.2] The Card Rules Rule: The instructions on a card supersede these Rules and always take precedence when there is a conflict between them.
[5.1.3] No Sale: If no Development cards remain in the Draw Pile, do not reshuffle! None may be drawn from that depleted pile for the remainder of that scenario.
Example: Cheyenne begins her Action Phase with 7 LPs. She decides to draw a card and spends 3 LPs to do so (half of 7, rounded down). She examines it and places it face down in front of her, waiting to spring it on her opponent when the moment is ripe. She then spends her remaining 4 LPs to manipulate her units and markers that turn.
[5.1.4] Nebula Research (Card Replacement): During the Card Purchase Step of your Activity Phase, instead of purchasing a Development card that turn, if you have exclusive control of (i.e., there are no enemy ships also present at; see 8.1) at least one Nebula location, you may draw a free replacement Development card from the deck into your hand by either:
- Discarding one card from your hand; or
- Discarding (or ceasing to share; see 7.8) one of your non-Penalty Development cards ("Penalty" cards harm you and have a red circle with a white lightning bolt through it) that is currently face-up and applicable to your faction.
In this manner, you can get rid of a Development card that you no longer desire with a free "redraw" and hope for something better.
The Activity Step
[5.2] Replacing a Destroyed Ship: You can replace eliminated ships (i.e., those in your Eliminated Units box) and return them to play. You can move newly replaced ships on their turn of arrival onto the map. This represents asking that civilization's core worlds and central government to release ships from their strategic reserves to make up for your shameful losses suffered in this, the "critical sector" (at least "critical" in your opinion).
Procedure: It costs one (1) LP to request replacements from your superiors for that Turn. (This is just the "overhead" cost for your whining to your superiors that you can't make do with what you have.)
The cost to actually replace a ship in your Eliminated Units box after the request cost is paid (above) is one (1) LP per ship unit (regardless of the number of steps it has – ships are always replaced at full-strength from their civilization's "central reserve").
Your replacement ships may freely reenter play using either side (your choice) of that replaced unit should both sides be different class, full-strength ships. Place newly replaced ships at your unbesieged, friendly Sector Base planet (i.e., one with that side's distinctive +1 LP Control marker residing there).
Example continued: Cheyenne's position is grim. Her losses are substantial, and enemy ships threaten her Sector Base. She decides to spend her last 4 LPs to replace lost ships. She spends 1 LP just to make this request to her superiors (the cost of "complaining" to the government). With that "overhead" cost paid, she spends 1 LP to replace a destroyed Equation, another to replace a lost Parameter, and the last to replace a destroyed Query as its improved Statement version (by flipping it to that side).
[5.3] Repairing Damaged Ships: Multistep ship units that are currently on their reduced-strength ("damaged") side (shown by the dark stripe along their top when they are one step away from destruction) can be flipped back to their full-strength side.
Procedure: The cost to repair a damaged ship is one (1) LP per step. Only damaged ships at (or moved to) undisrupted (8.1), unbesieged (8.3) friendly-controlled planets OR at the same location where there is no enemy presence (i.e., a ship or marker that is an opponent's color) and a friendly ship with the Repair & Salvage symbol present, can be repaired.
- Stop: Repairing a ship is "movement," and it ends movement for that Player Turn for both the repaired and repairing ships (see 6.1.6). Ships whose movement has already ended for another reason (e.g., 6.1.3, or 6.1.4) cannot also be repaired that turn!
- Limit: Each available friendly planet, and each of your ships' Repair & Salvage symbols (some have more than one), can repair a maximum of 1 step per turn. Your available Sector Base planet can repair an unlimited number of steps per turn.
Example: Cheyenne's Parameter escaped damaged from a Battle during her opponent's turn. It is now her turn, and she wants it repaired. She spends 1 LP and uses its two Engines to move it two spaces to a Deep Space location where she has a Formula (with a Repair & Salvage icon). She pays another 1 LP to repair her Parameter and flips it back over to show its full-strength side again. Neither her Parameter or Formula can move further this turn.
[5.4] Improving Planetary Defenses: You may spend LPs to improve your controlled planets' defenses, making them easier to defend and harder to conquer.
Procedure: Each triangle printed on a Control marker denotes a level of Fortification. When first acquired, a planet receives a Control marker without any triangles on it (i.e., unfortified). Thereafter, its owner can increase its Fortification level by only one triangle per turn (maximum) at a cost of 1 LP + 1 LP per level of Fortification that planet is being raised to: e.g., to go from 0 to 1 Fortification costs 2 LPs; to go from 1 to 2 Fortifications costs another 3 LPs (i.e., it's a total investment of 5 LPs over two turns to build up to a level 2 Fortification); from 2 to 3 Fortifications costs an additional 4 LPs, etc. Replace or flip the Fortified Control marker necessary to reflect that planet's improved Fortification Level after building it up.
[5.4.1] Access: You can only improve undisrupted, unbesieged (8.3) planets.
[5.4.2] Limitations: Your Fortified Control markers (a.k.a. Fortification markers) are assigned by the scenario set up instructions or, if not mentioned at all, you set up in the "Stock" box on your Faction mat the number included in the game's counter mix. Each planet can have a maximum of one Fortified Control marker, and you cannot voluntarily eliminate your own Fortified Control markers once built. A Faction cannot have more planets fortified than its allotment of Fortified Control markers allows: that is, in Star Borders: Aliens, three 1 (and 2) level markers plus one Sector Base Fortress marker for the C1B0R6 Collective, and four 1 (and 2) level markers plus one Sector Base Fortress marker for the Rhame Swarm. These quantities represent Faction policies regarding how strongly the central government allows its distant Viceroys, like you, to fortify their positions, as this makes you potentially more difficult to get rid of. From your superiors' perspective, it is bad policy to let you get too comfortable and entrenched in your local power base, as you could become a threat to them.
[5.5] Reinforcements: When the scenario instructions grant you Reinforcements, newly acquired ships are received at any time during your Activity Step of that turn without LP cost. They are placed at your Sector Base (regardless of its Disruption or the presence of enemy ships there). The loss of your last (or only) Sector Base delays the arrival of your Reinforcements until your next Activity Step when you have again established a Sector Base. Note that the scenario's instructions might specify alternate or additional entry locations for your Reinforcements (including your Eliminated Units box, which means they must be "Replaced" in the normal manner, see 5.2, before entering play); those instructions take precedence over this standard rule.
[6.0] Movement
Movement is taking an individual ship and relocating it to a different place on the game map. If that ship has a Flagship symbol, other ships can accompany it at a lower movement cost each.
[6.1] Movement Limitations: Certain aspects restrict ship movement:
[6.1.1] Logistics: You must spend LPs to move ships, separately or in groups (paying for each ship), during your Activity Step each turn.
[6.1.2] Engines: For every LP spent to move a ship, it can transit a number of locations (e.g., a planet, asteroids, deep space, etc.) along connected links not exceeding its engine's capabilities. Thus, you can only move a ship with a single engine symbol to an adjacent, connected location; a ship with two engine symbols can transit up to two such connected locations (i.e., move two spaces), three engines can move up to three spaces, etc. within the following restrictions:
[6.1.3] Obstructions: A ship must end its movement for that turn when it enters an Asteroids or Nebula location.
[6.1.4] Enemy Presence: A ship must stop its movement for that turn when it enters a location containing one or more ships and/or any type of Control marker belonging to an opponent.
Important Exception: Friendly ships can freely move through spaces occupied by enemy ships at Deep Space locations.
[6.1.5] Cloaked Movement: A ship with the Cloaking ability (shown by a circle around its engines) can, once per turn only, continue moving after entering a location containing an enemy presence (an exception to 6.1.4) unless it is also an Asteroids or Nebula location (6.1.3), as these still end even a cloaked ship's movement for that turn.
[6.1.6] Stop Repairs: A ship that ends its movement due to entering an above location cannot make Repairs (5.3) there that turn, as Repairs are also "movement."
[6.2] How to Move Ships: A single "move" for a ship consists of spending 1 LP to then "use" that ship's allotment of engine symbols to move it, one location at a time up to the total number of its engines, from its current location to an adjacent location along a linked warpline.
If its current location is a Wormhole, it can move to any other Wormhole location in play. Think of every Wormhole as 'linked together' for movement purposes.
If its current location is a Nebula, that ship must pay one additional (+1) LP to exit that space. This is in addition to the cost to move that ship!
Movement Example: A C1B0R6 Formula (with 2 Engines) spends 1 LP and moves from its present location along a link to an adjacent Wormhole (i.e., its first move using 1 of its 2 Engines). There are no enemy ships there to stop it, so then it moves from that location (using its second Engine) to another Wormhole elsewhere on the map (i.e., its second move). There is an enemy ship at the receiving Wormhole location, so the Formula's movement for the entire turn is over and no more LPs can be spent to move it again that turn.
Alternative Example: The same ship makes the same first move, but there are opposing ships at the first Wormhole location. Its movement must cease at that location for the turn (6.1.4), even though it still had its second Engine left unused.
[6.3] Keep 'Em Moving: You can move a single ship multiple times during a single turn. It can be moved repeatedly as long as the LP cost is paid each time it moves its Engine # of spaces (6.1.2) and it has not yet encountered a move-ending situation for that turn (see 5.3, 6.1.3, and 6.1.4).
[6.4] That's Nowhere, Man: Ships cannot move along links leading off the edge of the sector map (to nowhere).
[6.5] It's My Turn: Opponents' ships do not move during your Action Phase.
[6.6] No Obligations: Players are never obliged to move any ships during their Action Phase.
[6.7] Group Movement: You normally pay for and move ships individually, but you can also pay for and move them in groups, as long as no ship exceeds its individual engine speed (6.1.2) and 1 LP is spent per ship moved in that group (unless that group includes a Flagship, see below).
Flagships: When 1 LP is spent to move a Flagship, other friendly ships at its location (including other Flagships) can be included in a group move with it (i.e., moving together in a stack at the speed of the slowest ship in that group) at a cost of only 1/2 LP each, rounded down; (i.e., it can take 1 ship with it "for free"; 2 or 3 ships for a total of +1 LP, etc.) This is only a movement cost discount; the price to exit a Nebula location, for example, remains +1 LP per ship (6.2), even if a ship's movement cost was lowered by moving as a group with a Flagship.
Ships "Towed" thus by a Flagship share all of that Flagship's Faction- (e.g., Transit Crystals) and card-based (e.g., Asteroid Plows) movement bonuses / penalties, and must end each 1/2 LP's towed movement with the Flagship that towed it.
Example: Cheyenne's opponent, Jack, moves in for the kill. He has a group of four ships together (with different Engine values), including his Queen Flagship, and pays 2 LPs to move the lot to an adjacent location (which is as fast as the Queen can go) where three more of his ships await. With his last 3 LPs, he leaves one of these seven ships behind and moves his Queen once more, this time with five other ships in tow, into battle with Cheyenne's forces.
[6.8] No Interruptions: You must complete all friendly ship movement, replacements, repairs, etc., before your Action Phase is over and the Combat Phase begins. There's no going back once you start the next Phase or Step.
[6.9] Stacking: There is no limit to the number of ships, enemy or friendly, that can be at a single location.
[6.10] Common Knowledge: Players may freely examine all of the pieces on the map at any time.
[7.0] Combat
Combat takes place as Battles between opposing ships and/or fortified Control markers at the same location.
A player currently taking their turn is called the Attacker. Their opponent at that Battle is called the Defender (regardless of the overall strategic situation on the map).
Battle Sequence: Conduct each Battle in a series of Rounds. Each Round follows this strict series of Steps:
-
- Pre-Battle Fire (Attacker, then Defender); apply all Hits
Battle Round
- Opponent's Hide (usually not allowed)/Retreat Option
- Your Hide (if all your ships are cloaked)/Retreat Option
- Victory Check; Post-Combat Salvage
- Defender's ships may form Engagement Groups and Fire; Attacker applies Hits
- Attacker's remaining (i.e., surviving) ships may form Engagement Groups and Fire; Defender applies Hits
- Victory Check; Post-Combat Salvage
If either side consists only of a Fortified Control marker, only Step 0 of the Battle Sequence (the Pre-Battle Fire Step; see 7.2) occurs. Afterward, that Battle immediately ends.
[7.1] Terrain Effects on Combat: Opposing forces located in a Deep Space location do not engage in Battle; they simply remain in place during the Combat Phase, ignoring each other.
Opposing forces located in a Nebula location:
- A) have their Battles end automatically after only one Round is fought;
- B) no Retreat is allowed by either side before that single Round of Battle; and
- C) any ship that is forced to flee that Battle must make a survival roll (7.6).
[7.2] Pre-Battle Fire Step: This Step represents surprise, "charging" to Battle, long-range or planetary preparatory missile attacks, etc. It occurs only before the first Round of Battle (i.e., it is skipped on the second and subsequent Rounds). When both sides have pieces capable of conducting Pre-Battle Fire (i.e., Missile Bases or pieces granted this ability by certain cards), the Attacker fires first (and the Defender applies any Hits), then the Defender fires (and the Attacker applies any Hits). This is the opposite order that ships fire on each other during Battle Rounds.
Missile Bases: At a Battle where you have a Fortified Control marker, you may attack with its "Missile Bases" during this Step. The number of triangles indicates: A) how many attack dice it rolls, and B) its Attack Rating (see 7.5 for the Firing Procedure). Missile Bases cannot combine with ships to form Engagement Groups (7.5.1).
Examples: A fortified planet Control marker with one triangle can fire one shot and Hits on a 1 or less; a fortified planet Control marker with two triangles can fire two shots and each Hits on a 2 or less, etc. You can see that each time you raise the Fortification level at a planet, its defenses improve exponentially, not arithmetically.
[7.3] The Fight or Flight Option: During your Hide/ Retreat Option Step of the Battle Round Sequence, you must decide whether to hide, stand and fight, or retreat from that location.
[7.3.1] All or Nothing: When exercising this Option, all of your ships at the Battle location must stay and hide, fight, or retreat together. You cannot split them up; that is, during this Step, you could not choose to retreat with some ships and stand and fight with others.
[7.3.2] Hiding: During your turn only, on the first Battle Round only, if all of your ships have the Cloaking ability, then you have the option to hide. That is, skip that entire Battle without fighting. These cloaked ships do not Retreat; they remain at that location. This is a one-time Option; once Battle commences, you cannot later hide your ships there using their Cloaking ability.
Important: Your opponent's cloaked ships cannot hide during your turn and must engage in Battle normally.
[7.3.3] No Retreat: A player has no option to retreat, and his ships must stand and fight, under the following circumstances:
- That Battle is at a Nebula location.
- On the First Round of a Battle (only) during your turn, your ships cannot retreat and must either fight or hide (7.3.2).
- On the First Round of a Battle during your turn, your opponent's ships cannot retreat and must fight if any of them have only one engine symbol.
Otherwise, your opponent's ships' First Round retreats (only; not individual ships fleeing as per 7.6), also called "Retreat Before Combat", are restricted to a Safe Refuge location, which is one that must contain only a Friendly Control marker and/or ships friendly to the retreating side.
Penetrating through enemy lines with your cloaked ships is a good way to cut off enemy retreat routes!
[7.3.4] Conducting a Retreat: Ships retreat to an adjacent location along a link (only; this means that ships cannot retreat through Wormholes).
After The First Round Of A Battle (see the restrictions, above) during your turn, your ships can retreat either along any one link that they used to enter the Battle location and that has no enemy presence (6.1.4, even if a friendly ship or Control marker is also present there) OR to an adjacent Safe Refuge location (defined above).
Your opponent's ships can retreat to any location that the Attacker's ships did not enter the Battle location from and does not have an enemy presence (6.1.4).
- If no such qualifying retreat location is available, a retreat cannot be performed and those ships must stand and fight until they either win or die.
- There is no LP cost for retreating; it is, in effect, a "free move."
[7.4] Victory Check: The Battle ends if:
- A) one side consists only of Fortified Control markers;
- B) the Attacker decides to hide during the first Round (7.3.2);
- C) when only one (or neither, they might have all been destroyed or retreated) player's ships remain at the Battle location; or
- D) automatically at the end of the first round of a Battle fought at a Nebula location.
If both players still have ships remaining at the Battle's non-Nebula location, continue performing the next Step in the Battle Round Sequence (starting a new Round, at Step 1 in the Battle Round Sequence, if necessary) until that Battle finally ends.
[7.5] Firing Procedure: The Defender fires first and inflicts damage upon the Attacker's forces, then the surviving Attacking forces return fire. Normally, the Defender is the side whose turn it isn't, unless the player whose turn it is has the Sub-Meson Tracking Computers card (from Star Borders: Humanity).
Forces fire during a Battle by rolling a die and comparing it to the firing ship or missile base's (7.2) Attack Rating. If the die roll is less than or equal to its Attack Rating, it scores a Hit; if the die roll is greater than its Attack Rating, the result is a Miss and has no effect.
[7.5.1] Forming Engagement Groups: When it is a player's Step to fire, their ships can all fire, either individually or combined into desired Engagement Groups. An Engagement Group consists of two (or more) ships firing together; when they do so, they combine their Attack Ratings into a single Attack Strength and add one (+1) to their total Attack Strength for each ship in that group, excluding the first one.
An Engagement Group receives this bonus to its combined Attack Strength as an important advantage for attacking simultaneously from multiple vectors.
Important: Engagement Groups (and modified ships) with a net Attack Strength of 6 or more automatically Hit (i.e., score an "Auto-Hit") when they fire!
Engagement Group Example: Three C1B0R6 Query ships (each with a 1 Attack Rating) are preparing to fire, and their owner considers forming Engagement Groups. They could all fire separately, rolling three dice, each hitting on only a 1. Alternatively, the player could have one fire separately, hitting on a 1, and the other two combine into an Engagement Group that would roll a single die and Hit on a 1, 2 or 3.
Another way to work this is that they could all be put together into a single Engagement Group that would Hit on a 1, 2, 3, 4 or 5 (1 for each ship's own Attack Rating, +1 for each additional ship in the group, excluding the first one, for a multi-vector attack).
[7.5.2] 0- and Null- Strength Ships: Ships with an Attack Rating of zero (0), can only fire as part of an Engagement Group (where they contribute nothing but the +1 for their attack vector). Ships with a null (—) value or negative value Attack Rating cannot fire during a Battle Round under any circumstances, even as part of an Engagement Group.
Firing: Roll a single die for each ship or Engagement Group firing and determine how many result in Hits. Once the total number of Hits inflicted is determined, the opponent applies those Hits to their own ships as they desire.
[7.6] Applying Hits: A player who is applying Hits to their ships does so one Hit at a time. For each Hit, they designate one of their surviving ships at that Battle, roll one die (called the "shield" or "defense" roll), and apply the following result.
- If the result is less than the designated ship's Defense Rating, that ship's defenses have successfully negated that Hit (via shields, armor, and/or evasive maneuvers) and it is treated as a Miss (for no effect).
- If the result is equal to the designated ship's Defense Rating, that ship is in danger. It must immediately either:
- A) Flee: this is like retreating (see 7.3.4), except only this ship retreats (and not that side's entire force at that location) and it can do so even on the First Round of Battle and without the First Round of Battle Retreat restrictions. When fleeing from a Nebula location roll for that ship's survival: on a 1, 2 or 3 it survives and on a 4, 5 or 6 it crashes and is eliminated while attempting to flee, OR
- B) Take damage (see below) and, if it is still intact, it remains at that Battle.
- Important: Ships that are unable to flee must take damage.
- If the result is greater than the designated ship's Defense Rating, that ship is damaged, which means it suffers one step loss. A single step loss flips a multi-step unit on its full-strength side to its reduced-strength side or eliminates a unit with only one step. Immediately remove eliminated units from the map and place them in their owner's Eliminated Units box (they can be replaced; see 5.2). Ships that are not eliminated after taking a step loss remain at that Battle and continue their participation at their newly reduced values.
Example: Continuing with the above example, the Query ships combine into a single Engagement Group and get a Hit with their die roll of 4. The Rhame Player designates a full-strength Warrior from among his ships in that Battle to receive the Hit and rolls against its Defense Rating of 4 to see the result. On a 1, 2 or 3 the Hit becomes a Miss. On a 4, the Warrior is in danger and must either flee or take damage. On a 5 or 6 it must take damage, which means that it would be flipped to its reduced-strength side and stay at that Battle.
Every Hit must be applied (i.e., rolled for) against a target ship still at that location (i.e., one that has not yet fled or been destroyed at that Battle) until either:
- Every Hit has been rolled for and the effects applied; OR
- There are no target ships remaining at that location.
Timing: Timing matters when applying Hits, because a ship can be designated to receive Hits as long as it remains in Battle.
Example: 3 Hits are suffered and only a single ship with a Defense Rating of 3 is there to apply them to. The first shield roll is a 1, which is a Miss, so the target ship remains to receive the second Hit. A 3 is rolled to shield it against the second Hit, meaning the target ship is in danger; the owning player opts to have that target ship flee. Now, with no targets remaining in that location, the third Hit is not even applied.
[7.7] Victory Check: A Battle Round ends during a Victory Check Step when either side has Retreated or all of its ships have been eliminated and/or fled (i.e., when only one side's ships currently remain). The side remaining is the "Victor" at that Battle; the other side is the "Vanquished."
[7.8] Post-Combat Salvage: At the conclusion of each Battle, if the victor (only) has surviving ships at that location with a Repair & Salvage symbol, he may sift through the wreckage of destroyed enemy ships to glean vital intelligence.
Procedure: Count the number of the vanquished player's destroyed (not merely damaged or fled) ships at that Battle (regardless of what exactly destroyed them), and then roll one die for each surviving victorious ship with a Repair & Salvage symbol.
- If any of those salvage rolls are less than or equal to the count of destroyed vanquished ships, then one Intelligence Coup takes place by the victorious player against the vanquished player. Only one Intelligence Coup can occur per Battle no matter how many successful salvage rolls are made.
- If every salvage roll is greater than the count, there is no effect.
Intelligence Coup: Achieving an Intelligence Coup allows that player to select one of the following effects on Development cards:
- No card: if, and only if, the vanquished player has no cards, you may examine the Discard Pile and take your choice of one card from there and place it in your hand, – OR
- A penalty card: if there is a card in front of you causing you to suffer a penalty (i.e., it has a red circle with a lightning bolt through it), you may elect to discard it after any successful Intelligence Coup by you, thus ending its detrimental effect.
Alternatively, you can select one of the opposing player's cards and "compromise" it as follows:
- An unrevealed (i.e., unplayed) card: if chosen, this card is selected at random from your opponent's hand and compromised by simply discarding it, face up, into the discard pile.
- A revealed (e.g., an already played with an ongoing "for the rest of the game" effect) card, if selected, is compromised in one of two ways:
- a) It can be discarded, thus immediately ending its effect, OR
- b) If its card I.D. # is on a yellow sun, it can be placed, face up, between those players, indicating that they now share that ability (or can both perform its single use one time each) from that point on. Cards with their I.D. numbers on a ringed planet background cannot be shared! Such cards can only be discarded when compromised.
Shared Abilities: A shared ability that is lost by one of the sharing players (e.g., by being discarded when compromised, the player's own decision to use it, its loss or expenditure as described on the card itself, etc.) is still retained by the other player(s) sharing it until they also lose it. If only one player remains with the use of that card, reposition it so that it is in front of that player only.
A shared card can, itself, be compromised again and either: discarded, shared by yet another player, or seized by any one of its shared players (i.e., placed in front of that player for their exclusive use).
[8.0] Housekeeping
The sector of space the players are contesting represents only a small piece of the larger galaxy in conflict. Typically, the players are commanding one "front" of what are often much larger interstellar wars along their shared Star Border.
During the Housekeeping Phase, you gain control of planets, conduct Planetary Assaults, add Logistics Points to your Logistics Points track and repair your Disrupted planets.
[8.1] The Planetary Control Step: Planet Control markers are placed at an unfortified enemy planet (only, see 5.4) when your ships are the only ones at that planet during your Housekeeping Phase. You must, at this time, place one of your unfortified Control markers there to symbolize your newly acquired control of that planet.
Important: Your Control marker is placed with its Disruption side showing, if you just fought and won a Battle there during your immediately preceding Combat Phase, OR if the Control marker that yours is replacing has its Disruption side showing; otherwise, it is placed with its normal side showing. Any additional Disruption markers on that planet remain there for you to clean up (these appear in future games)!
If you capture a Planet after fighting and winning a Battle over it during your turn, you have gained it in haste and left yourself a mess to clean up. If you wait to take control of it on a turn in which you did not fight a Battle at that Planet, you have deftly seized it without causing undue devastation and enjoy a smoother transition.
Note: Control markers are only placed at planet locations (and the Sector Base Control marker at that player's own Sector Base, as defined in the scenario instructions; if captured, you can replace it there when you reconquer that Planet). You retain control (represented by your Control marker) until that marker is itself removed (or flipped) for any reason. Deep Space locations cannot be controlled. Asteroids, Wormholes and Nebulas are only "controlled" while a friendly ship is present at that location and thus physically controlling it.
Effects of Control: While controlled, a planet location:
- can repair damaged ships (5.3)*,
- can have its defenses improved (5.4)*,
- stops enemy ship movement (6.1.4),
- prevents enemy retreats to that location (7.3.4),
- serves as a safe refuge location (7.3.3), if there is no enemy presence there,
- generates 1 Logistics Point per turn (8.4)*, and
- counts toward winning the game (10.0)*.
*But not if that planet is Besieged or Disrupted (see 8.3).
[8.2] The Planetary Assault Step: Planetary Assault: After you have gained control of all of the unclaimed and unfortified enemy planets during your Planetary Control Step (the "easy pickings"; see 8.1), you may then proceed to conduct Planetary Assaults against fortified enemy planets where only your side's ships are located and at least one of your ships has a Planetary Assault Rating.
Procedure: Total the Planetary Assault Ratings of all your ships at that location to obtain "the count," and roll a die.
- If the die roll result is less than or equal to the count, reduce the enemy's Fortification Level on that planet by one level (flipping or exchanging that enemy Fortified Control marker there, so that it ends up with one fewer triangle on it). If a Level 1 Fortified Control marker is reduced to a regular (unfortified) Control marker, it is placed with its Disruption side showing.
- If the die roll result is greater than the count, there is no effect.
Example: The two ships have a combined Planetary Assault Rating of 5 (3 + 2). The Rhame Player rolls a die and the result is a 5, which just gets the job done. The C1B0R6 Player replaces their Control marker so that it has one fewer triangle (i.e., it is unfortified and Disrupted in this case). This makes the planet ripe to fall to any Rhame ship next turn (8.1), its acquisition still in a Disrupted state.
If the die roll had been higher (i.e., a 6), the Rhame Player would have to consider assaulting that planet again next turn.
Example: The Rhame Player has one Mandible class and one Warrior class ship at a location with a C1B0R6-controlled planet that has one Fortification level. This planet needs to be assaulted (8.2)!
[8.2.1] Assaulting an Enemy Sector Base: When conducting a Planetary Assault against a fortified enemy Sector Base planet, you must roll the die twice and use the higher (i.e., worse) of those two results. Sector Governors (like you) tend to give their own local seat of government (i.e., their Sector Base Planet) the best defenses that they can arrange.
[8.2.2] Degradation: Just as fortifications can only be built up one level (triangle) per friendly Player Turn (5.4), so too can they only be reduced one level at a time per enemy Player Turn.
[8.3] Planetary Siege and Disruption: If enemy ships remain at a planet that you still control (i.e., your Control marker is there because it is not yet conquered by your enemy), that planet is considered Besieged. While Besieged or suffering any Disruption (see 8.1), you cannot improve its Defenses (5.4) nor repair your damaged ships there (5.3). In addition, you do not control that planet for the purposes of receiving its Logistics Point (8.4) during play or its Victory Point when the game ends (10.0).
A Besieged or Disrupted planet remains a nuisance to the enemy, however, stopping enemy ships that enter its space (6.1.4) and preventing them from retreating to that location (7.3.4).
There is no additional effect if a planet is both Besieged and Disrupted.
[8.4] The Gain Logistics Points Step: Gaining Logistics Points: The basic economic unit of Star Borders is the Logistics Point (or "LP"). These represent the faction's ability to draw (purchase) Development cards, move and rebuild eliminated ships, fortify planets, etc.
Procedure: Reset the translucent plastic LP marker to the 0 space on its track (unused LPs cannot be saved between turns). Count the number of your own (i.e., friendly) undisrupted and unbesieged (8.3) Control markers on planet locations; add that to the number of Asteroids locations containing at least one of your ship units, then add one (+1) if you retain your own undisrupted and unbesieged Sector Base. That sum is the number of Logistics Points that you receive.
Example: The C1B0R6 Player controls 6 planets (including his Sector Base) and 1 Asteroids location, providing a total of 8 LPs.
This LP income cannot exceed the maximum shown on your faction's Logistics Points Track found on your Faction mat. Any excess LPs received are lost (i.e., seized by higher levels of government or lost to corruption – perhaps your own!).
Example continued: However, as per its LP Track, the C1B0R6 has a capacity for only 7 LPs, so only 7 are received (i.e., a "full tank").
[8.5] The Repair Disruption Step: Removing Disruption: After receiving your LP income for the turn, you have the option to repair Disruption at planets you control (i.e., to flip them so their normal control side is showing) and thus end the effects of Disruption there (see 8.3). To repair Disruption (i.e., refit structures, quell unrest, cure disease, etc.) on your controlled planet, it must be unbesieged (again, see 8.3).
- If you have any friendly ships there with a Repair & Salvage symbol, each can remove one Disruption from that planet automatically (i.e., "for free").
- Otherwise, for each of your own Unbesieged Sector Base planets that you have (typically only one), you may spend 1 LP from your LP Track and repair 1 Disruption.
Example: After receiving 8 income, the Rhame has one Disrupted Planet that wants for repair. With no Repair & Salvage ship at its location, the Rhame Player's Sector Base Planet is Unbesieged, and so she spends 1 LP to repair that planet, flipping its Control marker over to indicate that it is now recovered. She will begin her next turn with only 7 LPs remaining on the Rhame LP Track.
[9.0] Countdown
During the Countdown Phase of each Game Turn (i.e., after all Player Turns have been completed for that Game Turn), the Game Turn marker is moved to the next lower-numbered box until doing so would move it off the '1' box into the '0; Game Over' zone, at which time the game automatically ends.
Sudden Death: When, at the end of a turn, the Game Turn marker is moved out of a box with a picture of a die in it, the First Player that turn rolls a die and, if the result is less than or equal to the die shown on the Countdown Track, the game ends immediately. If the die roll is greater than the die shown, play continues normally with another Game Turn.
[10.0] How to Win
Many scenarios determine the winner based upon an end-game score measured in Victory Points (VPs).
Procedure: Victory Points: In most scenarios, at the conclusion of the game (see 9.0), each side scores 1 Victory Point (VP) per undisrupted and unbesieged Control marker it has in play, and 1 VP per Nebula location having one or more of that player's ships there (this VP is earned by all players with ships at that Nebula location). The scenario's special instructions might also list other VP scoring methods or how to resolve ties.
Unless otherwise noted, the side with the most VPs at the game's end wins. A tied score results in a drawn game.
[11.0] Scenarios
The scenarios in Star Borders: Aliens show the arrangement of the Sector maps for the contested quadrant, who is the first player, etc., including any special rules required to play that scenario.
Faction Abilities: Each side or "Faction" receives its Faction mat when setting up a scenario. In addition to having that player's Logistics Points Track and holding boxes for its units and markers that can be brought into play on the map, these Faction mats also list the faction's special abilities that are employed in all scenarios.
[11.3] The Rhame Swarm: The yellow Rhame Faction can freely "morph" (flip) its Claw/Stinger ships during that player's Activity Step.
In addition, The Rhame have a special Housekeeping Step e where each Queen ship can "spawn" (i.e., Replace) one (and only one) Claw or Stinger ship at that Queen ship's location.
[11.4] The C1B0R6 Collective: The green C1B0R6 Faction uses its Transit Beacons to move large, slow ships in efficient lines. A moving C1B0R6 ship (i.e., one that has paid LPs to move and has remaining, unspent Engines to use) can enter a Deep Space location containing another C1B0R6 ship for free (i.e., at no engine cost to the moving ship).
C1B0R6 Planetary Assaults tend to be costly, as their Query ships must break up into "Com-Bots" to root out enemy ground forces. A C1B0R6 Query ship contributes its Planetary Assault Rating of 3 only if it is needed (thus the question mark after their Planetary Assault Rating as a reminder), and only by eliminating that ship. You make this decision to eliminate it, and thus contribute its Planetary Assault Rating, after the die roll for that Planetary Assault is known (see 8.2).
Example 1: Two Query ships (each with a Planetary Assault Rating of 3?) are about to conduct a Planetary Assault. On a roll of 1, 2 or 3, only one would have to be eliminated to succeed; on a roll of 4, 5, or 6, both would have to be sacrificed to succeed (and the C1B0R6 Player might want to wait until next turn and see if they can roll lower next time and get the Planet "cheaper").
Example 2: Two full-strength Parameter ships (each with a Planetary Assault Rating of 1) and two Query ships (each with a Planetary Assault Rating of 3?) are about to conduct a Planetary Assault. If the die roll is a 1 or 2, no Query ships need be sacrificed, as the Marines on the two Parameter ships can get the job done with their combined Planetary Assault Ratings of 2.
If the die roll is a 3, 4, or 5, the C1B0R6 Player must decide whether to break down one of their Query ships into Com-Bots, eliminating it to get the job done, or keeping their Query ship intact and failing on this Planetary Assault attempt.
If the die roll is a 6, the C1B0R6 Player would have to break down both Query ships to succeed! This would be a huge but "doable" sacrifice.
Card Retrofitting
You may freely combine the twelve Development cards (#1-12) from Star Borders: Humanity with the cards in this game (#13-24; the source prints the range as "#1324") to form a larger, more varied draw pile when setting up any scenario (and that is the premise of the example on the next page).
Example: It is the beginning of Scenario A: Irrational Numbers and the C1B0R6 Player received the Logistical Build-Up card from Star Borders: Humanity during set up and decides to play it on the first turn, and thus has a total of 8 LPs to spend for their opening move.
They spend their 1st LP to move their Formula ship to the Deep Space location in their Home Sector at 0401. Their 2nd LP moves one Query ship to the Deep Space location on the Chi Sector at 0103 (moving through 0401 at 0 Engine cost via Transit Beacons). Their 3rd LP sees the other Query moving to the Deep Space location at Chi 0201 (spending its two Engines at 1 + 0 + 0 + 1 to reach that location). The yellow arrows show the track of these 0-Engine Transit Beacon spaces being set up!
[Example sector map diagram omitted from this transcription; the diagram shows the Transit Beacon track and the LP cost printed on each space.]
They use their 4th and 5th LPs to take the Equation (a Flagship), a Statement and both Parameter ships from their Sector Base to the planet at their Home Sector at 0502. Their 6th and 7th LPs take that same stack together, using their one Engine, along the track of 0-Engine Transit Beacon spaces to the Chi Wormhole location at 0204 (the red arrows). With their last LP, they move their Formula once again, this time to the other Chi Wormhole location at 0601 (spending their two Engines as 0 + 0 through the two Query ships in Deep Space locations via their Transit Beacons, then 1 to enter the Deep Space location at 0401, and final 1 to enter the corner Wormhole location (the blue arrow). Note that the Formula could have also reached this space by moving through the other Wormhole location!
Next release: The next release in this series will be Star Borders: Us Versus Them. This expansion kit allows you to tightly knit Humanity and Aliens together with new (including multi-player) scenarios, rules for multi-player play, 25 new cards (5 specific to each of the four Factions that better narrates their individual "stories"), plus 5 additional Development cards that can supplement any scenario in the series), rules for individual Faction "deck building" prior to play, lots of new counters adding "Carrier" type ships and "Small Craft" for them to carry, four new Home Sector and two new Central Sector maps, plus a sheet of Exploration markers and rules for discovering variable map features (adding the 4th "X" to the Star Borders universe). With more components in the box then either Humanity or Aliens, Star Border: Us Versus Them, like The Force, binds this galaxy together and is more awesome than you can imagine.
How to Read Scenarios
Front:
- Identifying Letter and Title.
- Story Text (No rules within).
- Imagery.
- Special Rules that change and override the rulebook (applies to the specific scenario only).
- Rules on how the First Player changes from round to round.
- Side notes and warnings.
- Rules on how to win.
Back:
- Identifying Letter and Title.
- Ship container showing where a group of ships is placed for scenario set up. Each ship is represented with an image. If more than 2 of any single ship type is needed then a number followed by an "x" is shown to state how many of that ship type are in the group. (e.g., 4x)
- Faction specific rules for setting up.
- "First Player" shows who will begin the scenario as the First Player.
- Location of starting bases and control markers for set up.
- Bounding box shows that the player has the option of choosing which ships to put into a group.
- Board set up and orientation (Name shows how to orient board).
- Starting location of the Game Turn marker.
Note: The seven Aliens scenarios (A through G) and the Aliens + Humanity bonus scenario are printed on the scenario sheets (the double-sided mats), not in this rulebook PDF. The PDF's pages 14-16 contain only the reading guide above and artwork.