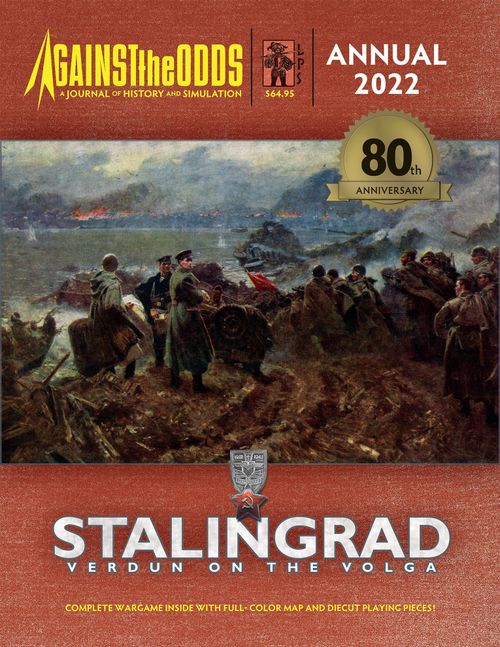
Stalingrad: Verdun on the Volga
Stalingrad: Verdun on the Volga Rulebook
Table of Contents
Table of Contents
- Learning to Play the Game
- 1.0 Introduction
- 2.0 Components
- 3.0 The Mapsheet
- 4.0 Playing Pieces
- 5.0 Prepare for Play
- 6.0 Sequence of Play
- 7.0 Stacking and Control
- 8.0 Impulses
- 9.0 Movement
- 10.0 Support Markers
- 11.0 Combat
- 12.0 The Advantage Marker
- 13.0 Refit
- 14.0 Fortification and Rubble Markers
- 15.0 Logistics
- 16.0 Zones
- 17.0 Reinforcements
- 18.0 Turn 1 Special Rules
- 19.0 Victory Conditions
- 20.0 Side Determination
- 21.0 The Campaign Game
Learning to Play the Game
Begin by familiarizing yourself with all the components listed for this game. Then skim through the charts and rules, reading all the titles and subtitles. Set up the game and play a trial game against yourself. During this trial game try referring to the rules only when you have a question and remember the numbering system the rules employ makes it easy to look up rules when you do. While a trial game may take you an hour or two, it is the quickest and most pleasant way to learn how to play (short of having an experienced friend teach you). Learning all of the rules, word for word, is not recommended—learning all the details of any game is a result few can achieve. The rules have been written so as to be as comprehensive as possible but are not meant to be memorized. Gradually absorbing the rules in the process of playing is the best approach to mastering this game.
Should you have any difficulty interpreting the rules you have several options. Go to the Against the Odds and Stalingrad: Verdun on the Volga discussion folders at consimworld.com and ask your question there. Regardless of how you forward your questions please phrase them so as to be answered with a simple "yes" or "no" or at most a single sentence. Questions about historical interpretations, design theory or design intent will be answered at the designer's discretion.
1.0 Introduction
Stalingrad: Verdun on the Volga is a two-player game that simulates the assault on the Soviet city of Stalingrad by the German 6th Army during September, October, and November 1942. One player commands the attacking German forces and the other player commands the defending Soviet forces.
In reading these rules, if any capitalized term or abbreviation confuses you, refer to the Glossary and Index at the end of this rulebook. The numerical references found therein and throughout these rules should be ignored during first reading and used only later to refer to related rules passages for greater clarity. The largest proper subset of the rules is called a module, a part of a module is called a section, and a part of a section is called a case. Every case has an index of three integers (for example, rule 8.4.6 is in Module 8, Section 4, Case 6).
2.0 Components
Stalingrad: Verdun on the Volga includes the following components:
- This rules booklet with two pull out Scenarios
- Two double-sided 17″ by 22″ mapsheets
- Two sheets of ⅝″ die-cut counters
- Four single-sided Setup/Reinforcement Cards
- One single-sided Player's Aid Card
- One single-sided AV/DV Track Card
3.0 The Mapsheet
The mapsheet depicts the portions of European Russia where the Stalingrad battle took place. The city of Stalingrad is depicted at a scale of approximately 1 inch = 750 meters.
3.1 Map Areas
There are Areas and Zones on the mapsheet. The main map is divided into 67 numbered locations called Areas. The Zones are found outside and around the area map. Adjacency between two Areas is shown by a common border; units may move directly from one to another. The map also contains Zones labeled from "A" to "M". Zones are considered to be the equivalent of Areas in every respect unless stated otherwise (Module 16.0). Adjacency between two Zones and between Zones and Areas is shown by a pair of arrows. All other rules pertaining to Areas apply equally to Zones.
3.1.1 Identifiers Each Area or Zone on the map contains an Identifier. The top of the Identifier in an Area contains a small number (from 1 to 67). The top of the Identifier in a Zone contains a small letter (from A to M). Area/Zone numbers/letters printed in black are German-Controlled at the beginning of the game. Area/Zone numbers/letters printed in white start Soviet-Controlled.
3.1.2 Terrain Areas have one of the following three terrain types: Clear, Forest, or Urban. Clear Areas have a light gray circle Identifier. Forest Areas have a green triangle Identifier. Urban Areas have a black square Identifier. Note that the terrain symbol is what matters, not the map art.
3.1.3 Area Terrain Effects Modifier (TEM) Each identifier contains that Area's Terrain Effects Modifier (TEM, from +1 to +4). This modifier is used in resolving attacks against units in that Area (Case 11.4.3). Note that TEMs can be different for the same type of terrain.
3.1.4 Boundaries Areas are separated from each other by one of two types of boundary lines:
- Gray: Open Ground
- Blue: Ravine or River
3.1.5 Victory Point Area A Victory Point Area is an Area with either 1 or 2 victory points (VPs) assigned to it.
3.2 Turn Track
The Turn Track printed on the mapsheet is used to note the current Game Turn. The Turn marker is placed in the space corresponding to the current Turn, with the side of the marker that is face up indicating the state of German logistics, "Attack" or "Pause" (Module 15.0). At the end of each Turn, advance the Turn marker one space to the next sequential number on the Turn Track. Note: The German and Soviet symbols on the Turn Track remind each player they have reinforcements appearing that turn.
3.3 Impulse Track
The Impulse Track printed on the mapsheet is used to record the current Impulse of a Turn. The Impulse marker is placed in the space corresponding to the current Impulse, with the side of the marker that is face up indicating whether it is a Daylight or Night Impulse. Note: As each turn represents four days, the terms Daylight and Night should not be understood literally, but rather as game terminology to indicate when first the Axis and then the Soviets have certain advantages in each turn.
3.4 Victory Point Track
The Victory Point Track is used to record the number of Victory Points (VPs) Controlled by the German player. Victory Points are used to determine German Operational Victory (Section 19.2).
3.5 Holding Boxes
The map contains boxes to hold the Advantage marker, the two German Air Support markers, the Soviet Storm Group and Hero markers, and both players' Artillery Support markers.
3.6 Dice
The players will need to roll one or two six-sided dice at various times when playing the game. Throughout the rules an abbreviation of "1D6" indicates the roll of a single die. An abbreviation of "2D6" indicates the roll of two dice. An abbreviation of "DRM" means "die roll modifier" which is a value applied to the die roll 1D6 or dice roll 2D6.
4.0 Playing Pieces
Included with the game are die-cut playing pieces called units, representing the various military formations that fought in the campaign, as well as several markers that assist in game play.
Note: There are a few duplicates of pieces which receive heavy use, like artillery markers and German air strikes. The rules call for the proper number of these to be in use during the game.
4.1 Unit Coloring
German units are gray. Soviet units are light brown.
4.2 Unit Types
There are three types of units: Infantry, Armor, and Pioneer (PNR). All armored units contain a vehicle icon of some kind printed on the counter. The front side represents a Full Strength unit while the reverse side (with a stripe) represents a Reduced Strength unit. Note: Soviet Worker units are considered "Infantry" for all game purposes.
4.3 Unit Information
All units have information printed on them to identify the unit and indicate its strength as well as its movement capability. The name of each unit is printed at the top of the counter.
4.3.1 Strength/Movement Factors Each unit has two numbers below its name. The first is the unit's Combat Value (CV) and the second is the unit's Movement Factor (MF).
4.3.2 Unit Integrity Units eligible for a possible Divisional Integrity Bonus (Case 11.4.2E), have their unit type or size symbol overprinting a color matching the other units in its Division for ease of identification. Units with their CVs and MFs printed in black are considered to be Independent units.
4.3.3 Unit Size and Organization The units comprising the German 6th Army are a mixture of regiments and battalions. Soviet units comprising the 62nd Army are a mixture of brigades, regiments, and battalions. Note: In the Campaign Game, there are also divisions. Note: KG=Kampfgruppe, an ad hoc Independent German battlegroup.
4.4 Markers
Markers represent non-combat units and are used to record game information.
4.4.1 Soviet Control Markers Soviet Control markers are placed in Areas and Zones to indicate Soviet Control; the absence of such a marker indicates German Control.
4.4.2 Turn Marker The Turn marker indicates both the current Turn on the Turn Track, and the current state of German Logistics ("Attack" or "Pause" — Module 15.0).
4.4.3 Impulse Marker The Impulse marker indicates both the current Impulse on the Impulse Track and the prevailing light conditions ("Daylight" or "Night").
4.4.4 Advantage Marker The Advantage marker is an abstract reflection of an edge that one side will temporarily possess due to factors such as morale, position, surprise, leadership, intelligence, and/or fate. Ownership of the Advantage marker can switch back and forth between players. Whoever currently owns the Advantage marker may use it to gain certain game benefits (Module 12.0) and (while they hold it) deny those potential benefits to their opponent.
4.4.5 Fortification and Rubble Markers The presence of a Fortification marker and/or Rubble marker in an Area can impact both movement and combat (Module 14.0).
4.4.6 Victory Point Markers The VP markers are used to record the value of the Victory Point Areas under German Control.
4.4.7 Support Markers Support markers provide benefits in combat. Each player receives a number of Artillery Support markers (Section 10.2). The German player receives two Air Support markers (Section 10.1). The Soviet player receives a Storm Group marker (Section 10.3) and a Hero marker (Section 10.4).
4.4.8 Out of Supply Markers Units marked with an Out of Supply marker suffer certain penalties (Case 15.2.2) and must make a Surrender die roll of 1D6 at the end of each Refit Phase (Case 15.2.3).
5.0 Prepare for Play
5.1 Marker Placement
- Place the Turn/Logistics marker in the "1" space on the Turn Track, "Attack" side up (to show the Germans begin the game with enough supply to attack).
- Place the Impulse marker in the "1" space of the Impulse Track, "Daylight" side up (to show the Turn begins with Daylight conditions).
- Place the Advantage marker in its holding box printed on the mapsheet, German side up (to show German possession of the Advantage).
- Place both Victory Point markers in the "0" space of the Victory Point Track.
- Place the Artillery Support markers, the two German Air Support markers, and the Soviet Storm Group and Hero markers, in their Support Marker holding boxes printed on the mapsheet.
- Place Soviet Control markers in Areas and Zones whose reference letter/number is printed in white. German-Controlled Areas and Zones are indicated by the absence of a Soviet Control marker; the initial ones have their reference letter/number printed in black.
- Place a Rubble marker in each of the following eight Areas: 11 (Train Station No. 2), 12 (Food Combine), 13 (Volga Station), 14 (Cemetery), 24 (Train Station No. 1), 25 (9 January Square), 34 (Oil Refinery), and 61 (Rynok).
- Place a Fortification marker in Areas 62 (Big Mushroom) and 63 (Little Mushroom).
5.2 Unit Setup
- Place the initial Soviet units on the mapsheet as indicated on the Soviet Setup Card with their Full Strength side face-up. The Soviet player's three Worker units may initially be placed in any Urban Area or Areas on the map. (Note: the setup numbers on the counters and locations shown below reflect a historical approximation but we prefer giving players the choice.)
- Place the initial German units on the mapsheet as indicated on the German Setup Card with their Full Strength side face-up.
Units with a Turn ("T") number printed on the counter are placed on that player's Reinforcement Card (Module 17.0). Unless playing the Campaign Game (Module 21.0) you may ignore all units entering after Turn 5 and all units that are placed in Zones A, B, C, I, and J.
6.0 Sequence of Play
A standard game has five Turns. Each Turn represents four full days and nights of combat and comprises four Phases and a number of "mini-turns" called Impulses.
6.1 Phases
The Phases of a Turn are conducted as follows: Reinforcement Phase, Maneuvers Phase, Refit Phase, and End Phase.
6.2 Reinforcement Phase
The German player places reinforcements (Section 17.1) on the map. The Soviet player then places reinforcements (Section 17.2) on the map. Note: Soviet reinforcements placed in Zones L and M may not activate until a Night Impulse (Case 9.3.4).
6.3 Maneuvers Phase
Each player may take one action each Impulse (Module 8.0) before the Impulse marker is advanced to the next space on the Impulse Track. The Soviet player always goes first, followed by the German player (exception: Section 18.1). Any Impulse rules specific to just one side will state the appropriate nationality.
6.3.1 Logistics dice roll 2D6 During the German Impulse the first German dice roll 2D6 made for any purpose also serves as the Logistics dice roll 2D6 (if the German player does not make a dice roll 2D6 during his Impulse, he makes a Logistics dice roll 2D6 at the end of his Impulse).
If the Logistics dice roll 2D6 is greater than the current Impulse number, then there is no special effect, just advance the Impulse marker to the next space on the Impulse Track.
If the Logistics dice roll 2D6 is equal to the current Impulse number then flip the Turn marker from "Attack" to "Pause" or from "Pause" to "Attack". Also, advance the Impulse marker to the next space on the Impulse Track. (German Logistical Pause, Section 15.1).
If the Logistics dice roll 2D6 is less than the current Impulse number one of two things happens:
- If the Impulse marker is "Daylight" side up then at the end of the Impulse the Impulse marker is flipped to its "Night" side and the Impulse marker is moved to the numbered Impulse space that matches the result of the Logistics dice roll 2D6.
- If the Impulse marker is already "Night" side up then at the end of the Impulse the Maneuvers Phase ends.
If the Impulse marker reaches Impulse 11 without a Night Impulse then Impulse 12 is always a Night Impulse. If the Impulse marker moves off the Impulse Track then the Maneuvers Phase ends. If both players declare a Pass Impulse during consecutive Daylight Impulses then the Impulse marker is flipped to its "Night" side. If both players declare a Pass Impulse during consecutive Night Impulses then the Maneuvers Phase ends.
Note: It is unlikely that any of these conditions will happen in a typical game.
6.4 Refit Phase
The player controlling the German side spends their available Replacement Points (RPs; Section 13.2). The player controlling the Soviet side then spends their available RPs. Note: Neither side receives any RPs during the final Refit Phase (Turn 5, or Turn 10 if playing the Campaign Game).
Artillery Support and Hero markers that were "Used" side up at the end of the Maneuvers Phase are now available again. Remove them from the Impulse Track and place them into the holding box facing the controlling player.
6.5 End Phase
Determine if the German player has won an Automatic Victory (Section 19.1).
In the absence of an Automatic Victory, return the Impulse marker to the "1" space on the Impulse Track "Daylight" side up and advance the Game Turn marker to the next space on the Turn Track "Attack" side up.
If the standard game has reached the End Phase of Turn 5 determine if the German player has won an Operational Victory (Section 19.2). The game is now over unless playing the Campaign Game (Module 21.0).
7.0 Stacking and Control
7.1 Stacking
Each player may have a maximum of four units per Area. Control, Fortification, Hero, and Rubble markers do not count against stacking limits.
Units may not move into, attack into, or end a retreat in an Area already stacked to the maximum. They may retreat through a fully stacked Area in order to reach an Area that is not fully stacked (Case 11.6.2).
Although most Areas are large enough to display all of the units therein, stacking all of a player's Full Strength and Reduced Strength units in separate piles may be done to conserve space. A player may freely examine stacks of enemy units at any time.
7.2 Control
Each Area is always Controlled by either the German player or the Soviet player. Control changes only when one side has a unit in a Vacant Area (Section 7.4) that is Controlled by the enemy. Control of an Area may be gained during movement without stopping to end an Impulse in that Area. Control is shown by placing or removing a Soviet Control marker as appropriate.
7.3 Contested
An Area is considered Contested if it contains units of both sides. Contesting an Area that is Controlled by the enemy does not alter Control of that Area.
7.4 Vacant
An Area is Vacant if it contains no enemy units, regardless of the presence of friendly units or who currently Controls it. A Vacant Area changes control the instant an enemy unit enters it, even if the unit does not stop.
7.5 Free
An Area is Free if it is Vacant and under friendly Control.
8.0 Impulses
The majority of the game is played during the Maneuvers Phase, consisting of a variable number of "mini-turns" called Impulses. The Soviet player performs one Impulse and then the German player performs one Impulse (Exception: Section 18.1). After both players have performed one Impulse the Impulse marker is advanced one space on the Impulse Track printed on the mapsheet (or moved to the appropriate space as called for by the Logistics dice roll (Case 6.3.1).
The active player during an Impulse is called the attacker; his opponent is called the defender. No enemy unit may move during a friendly Impulse except to retreat as a result of Combat Resolution (Section 11.4).
8.1 Types of Impulses
There are two types of Impulses:
- Assault
- Non-Assault
8.1.1 The Assault Impulse The attacker selects an Area or Zone of his choice as the Active Area. Units in the selected Area or Zone may move and/or attack during that Assault Impulse. During an Assault Impulse players perform the following steps in order:
- Attempt to build Fortifications (Soviet Impulse only)
- Movement (Units in an already-Contested Area who wish to attack skip Step 2 and proceed to Step 3 if German, Step 4 if Soviet.)
- Attempt to clear Rubble (German Impulse only)
- Declare Artillery Support (attacker first, then defender)
- Declare Air Support (German Impulse only) or Storm Group Support (Soviet Impulse only)
- Combat Resolution/Possible Rubble Creation
- Declare Hero (Soviet only)
- Overrun Movement (Any unit that participated in the original attack may be moved to any Area adjacent to the Area where combat was just resolved, regardless of printed MF.)
- Attempt to clear Rubble (German Impulse only)
- Overrun Combat Resolution/Possible Rubble Creation
8.1.2 The Non-Assault Impulse There are five types of Non-Assault Impulse. Only one of the five may be chosen each Impulse.
A) Regroup The attacker may activate every friendly unit on the map and move them one Area. Units beginning the Impulse in the same Area do not have to move to the same destination; that is, units may split up and move to different destinations. Units that Regroup may not enter any enemy-Controlled or enemy-occupied Area. Units within a Contested Area may not Regroup into another Contested Area, even if friendly-Controlled. Soviet units in Zones L and M may not Regroup across the Volga River during a Daylight Impulse. They may, however, Regroup between each other.
B) Redeploy The player may activate one friendly unit in a single Area and move that unit an unlimited number of Areas, subject to the following restrictions:
- A unit using Redeployment Movement must trace its movement Area by Area, and may never enter an Area that contains an enemy unit or is Controlled by the enemy.
- German units may not use Redeployment Movement on Game Turn 1.
- Soviet units may not use Redeployment Movement to move to/from Zones L and M and numbered Areas on the map.
C) Troop Transfer The player may flip one reduced unit to its Full Strength side while flipping a single Full Strength unit of the same type (Armor, Infantry, or Pioneer) elsewhere on the map to its reduced side. Exception: the Soviet player may not conduct a Troop Transfer to/from Zones L and M and numbered Areas on the map. They may, however, conduct a Troop Transfer between Zones L and M. The two units performing the Troop Transfer must both be in supply (Section 15.2) and must be able to trace a supply line between them to perform the Troop Transfer.
D) Consolidation The player may flip one Reduced Strength unit to its Full Strength side while eliminating another Reduced Strength unit of the same type (Armor, Infantry, or Pioneer) present in the same Area. The two units performing the Consolidation must both be in supply (Section 15.2) to perform the Consolidation.
E) Pass Impulse The attacker may elect to take no action at all during the Impulse (the German player must still make a Logistics dice roll 2D6 if it is possible to roll a Logistical Pause – Impulse 2 or later).
8.2 Handling Mistakes
A player may not change his move once either (A) a dice roll 2D6 or a die roll 1D6 has been made, or (B) his opponent has declared any action (including a Pass Impulse) he will take during his Impulse.
The results of an illegal move and/or attack become valid if the opposing player does not challenge it prior to completing his own next Impulse.
9.0 Movement
9.1 Mechanics of Movement
During an Assault Impulse the attacker chooses one Area to be the Active Area. Exception: Combined Operations (Case 9.1.2).
9.1.1 Area Activation All of the units in an Area may move/attack if the attacker has chosen that Area to be his Active Area. Units in the activated Area may move and/or attack until there are no units left to perform an action. Exception: Combined Operations (Case 9.1.2).
Units move one at a time. A unit may move from an Area to an adjacent Area, the number of Areas entered during movement being limited by the Movement Factor (MF) printed on the moving unit. Units that began the Impulse within a Contested Area may attack enemy units in the Area they currently occupy without moving. Combat Resolution (Module 11.0) may also occur after units have moved and entered an Area containing units of the opposing player.
9.1.2 Combined Operations Under certain circumstances, a player may activate two Areas instead of one during an Assault Impulse. The German player may do so freely during any Daylight Impulse. The Soviet player may activate either Zone L or Zone M in addition to any other Area or Zone on the map during any Night Impulse. The same units may not activate twice in the same Impulse.
Area activation during Combined Operations may be either simultaneous or sequential. If activation is simultaneous, units from different Areas may combine to participate in the same Combat Resolution. If sequential the player may activate one Area, conduct an Impulse, and then activate a second Area after observing the results of the first activation.
9.1.3 Soviet Night Movement All Soviet units have one extra MF during Night Impulses.
9.2 Movement Costs
Movement requires the expenditure of Movement Factors (MF) during an Impulse. A unit may continue to move into adjacent Areas until it either lacks enough MF to enter another Area or it enters an Area occupied by an enemy unit, where it must stop. Movement into an Area incurs the following MF costs (use only the highest cost that applies):
- ALL MF: Cross a Ravine boundary lacking a crossing symbol (Infantry and Pioneer units only)
- 4 MF: Enter an Area containing a Full Strength enemy unit
- 3 MF: Enter an Area containing only Reduced Strength enemy units
- 2 MF: Enter a Vacant Area adjacent to an enemy unit
- 1 MF: Enter a Vacant Area not adjacent to an enemy unit
If the Active Area is Contested, friendly units may exit the Area at normal MF costs indicated above, so long as the first Area they enter is Free (Section 7.5).
If a unit has not yet expended MF in the Impulse, and lacks sufficient MF to enter an adjacent Area that it is not otherwise prohibited from entering, it may enter that Area by expending all its MF.
If a player wishes to resolve combat within a Contested Area, then no movement takes place within the Contested Area. The attacker simply announces his intention to attack and performs the steps listed under Combat Resolution (Section 11.4). During Combined Operations (Case 9.1.2) units may enter the Contested Area and combine with units already in the Contested Area to make a single attack.
9.2.1 Multiple Area Destinations Units starting in an Active Area may move to and/or attack into different Areas during the same Assault Impulse. Attacks made into different Areas do not have to be designated in advance. The attacker may wait for the results of a move/attack before announcing a later move/attack into another Area in the same Impulse by other units starting in the Active Area.
Once an Area is attacked, additional units may not move into that Area during the same Impulse. Units that begin movement in the same Area do not have to end their movement in the same Area. Nor do all units moving during an Impulse have to move simultaneously.
9.3 Movement Restrictions
The following five situations restrict movement:
9.3.1 Overstacking Units may not move into a fully stacked Area (Section 7.1).
9.3.2 Rubble Units must stop and move no further that Impulse upon entering any Area containing a Rubble marker (Section 14.5). A Fortification marker does not restrict movement.
9.3.3 Zones Movement into and out of Zones is restricted to the connections printed on the map; no other options exist.
9.3.4 Volga River Only Soviet units may cross from an Area to Zones L or M and from Zones L or M to an Area. They may cross as part of either an Assault or Non-Assault Regroup Impulse. These units may only attempt to move across the Volga, in either direction, during a Night Impulse. If crossing from Zone L or M to an Area, the destination Area must be either Soviet-Controlled or Contested by a Soviet unit.
A maximum of three units per Impulse may cross at a single connection (3 total in both directions), but every single connection may potentially be used in a single Impulse.
Soviet units that successfully move from either Zone L or M to their intended destination Area may continue moving if the Area is not Contested. They may combine with units in the destination Area to make a single combined attack (Combined Operations; Case 9.1.2).
The Soviet player must make a dice roll 2D6 for each unit and consult the Soviet Volga Crossing Table on the Player Aid Card. There are five possible results for each unit.
Soviet units that failed to move may attempt to cross the Volga again but not until the next Soviet Night Impulse.
9.3.5 Ravines Armor units may not cross an unbridged Ravine boundary (Case 3.1.4). This includes Movement (Section 9.2), Regroup (Case 8.1.2A), Redeploy (Case 8.1.2B), Troop Transfer (Case 8.1.2C), Overrun (Case 11.4.5), and Retreat (Section 11.6).
Example: Combined Operations (Involving Soviet Volga Night River Crossing)
It is Turn 4, Night Impulse 7. German attacks during Daylight have captured Area 48 (Brick Factory) and almost captured Area 47 (Barrikady Ordnance Factory). If the Area is not reinforced during the Night there is a high probability the Germans will capture it once Daylight conditions resume.
As it is Night, the Soviet player declares a Simultaneous Combined Operation, declares his first Assault Impulse and activates Zone L (Dieniezhny Island). (Note: One of the two Assault Impulses in a Soviet Combined Operation must activate either Zone L or Zone M, Case 9.1.2.) He does this declaration to allow a second Assault Impulse where the last remaining Soviet unit in the Barrikady Ordnance Factory will be able to participate in an attack with the crossing units. Up to three units may attempt to cross the Volga at each crossing connection in a single Night Impulse (Case 9.3.4). The Soviet player selects all three regiments of the 193rd Infantry Division. The movement cost to enter Area 47 is 4 Movement Factors due to the presence of the Full Strength PNR/389; but the Soviet units in Zone L are still eligible to move to Area 47 so long as they expend all of their movement points doing so (Section 9.2). In addition Soviet units receive one extra Movement Factor during Night Impulses (Case 9.1.3).
The Soviet player now consults the Soviet Volga Crossing Table and makes a dice roll 2D6 for each of the three units attempting to move from Zone L to Area 47. The modifiers are as follows:
- +1 DRM Germans Contest Area 33 (Mamayev Kurgan, not pictured here)
- +1 DRM Germans Contest the destination Area (Area 47)
- +2 DRM Germans Control one riverbank Area adjacent to the destination Area (Area 48)
The Soviet player rolls for the 685/193 and rolls an "8" which is modified up to a "12" and consults the Soviet Volga Crossing Table: "The unit suffers an Attrition Point (Section 11.5) but may move to the intended destination Area and may continue to move/attack." The 685/193 is flipped to its Reduced Strength side and placed into Area 47. The 893/193 rolls a "7" which is modified to an "11" and consults the same table as before—"The unit may move to the intended destination Area and may continue to move/attack." The 893/193 is placed in Area 47 with its Full Strength side facing up. Finally the Soviet player rolls for the 895/193 and rolls a "9" which is modified up to a "13" and once again consults the Soviet Volga Crossing Table: "The unit suffers an Attrition Point (Section 11.5) but may move to the intended destination Area and may continue to move/attack." The 895/193 is flipped to its Reduced Strength side and placed into Area 47. If already Reduced Strength, the unit must Retreat to its starting point.
The Soviet player has done better than expected with all three units successfully crossing the Volga. Because the Barrikady Ordnance Factory Area was already Contested, attacking is optional, not mandatory. But the Soviet player decides to go ahead with the second Assault Impulse of the Simultaneous Combined Operation; he wants to get hits on the German units before the Refit Phase. The Soviet player designates 92N as the Lead Attacking Unit. The German player designates the Reduced Strength 245A as the Lead Defending Unit.
The Soviet player announces they will commit one of their 62nd Army artillery markers to provide Artillery Support to the coming Combat Resolution. The Soviet player places the artillery marker into the Area being attacked, Area 47.
The German player, having used the Artillery Support marker of the 389th Division during the Daylight portion of the Maneuvers Phase, cannot commit any Artillery Support.
The Soviet player then announces they will commit their Storm Group marker to the coming Combat Resolution. The Soviet player then places their Storm Group marker into Area 47 and rolls a die (1D6). The result is a "3".
Players now calculate their final Attack Value and Defense Value, then roll two dice (2D6) to determine their respective Attack Total and Defense Total.
The Attack Value is 3 (the Combat Value of the Lead Attacking Unit, the 92N), +3 for three additional attacking units (the 685/193, 893/193, and 895/193), +1 Divisional Integrity Bonus (for all three units of the 193rd Division), +2 for Artillery Support, +1 for Night Assault, +3 for Storm Group Support = 13. The Soviet player rolls two dice and the result is a "7" which is added to the Attack Value for an Attack Total of 20.
Note: Combat Resolution has the ability to generate Rubble. The attacker's dice roll is added to the TEM and if the result is greater than 12 a Rubble marker is placed in the Areas. In this case the result was 7+4 = 11 so no Rubble was generated by the Soviet attack.
The Defense Value is 3 (the Combat Value of the Lead Defending Unit, the 245A), +3 for three additional defending units (544/389, 545/389 and PNR/389), +4 (the Terrain Effects Modifier of Area 47) = 10. The German player rolls two dice and the result is a "7" which is added to the Defense Value for a Defense Total of 17.
The difference between the Attack Total (20) and Defense Total (17) is three: this is a "success" result. Three is the number of Attrition Points the German player must now absorb, and the first point must be applied to the Lead Defending Unit. The Reduced Strength 245A is eliminated for 2 AP, and the Full Strength PNR/389 is flipped to its Reduced Strength side.
The Lead Attacking Unit, the Soviet 92N, is flipped to its Reduced Strength side.
The Soviet unit that began the Impulse in Area 47 and the three Soviet units the crossed the Volga into Area 47 have now completed their action for this Impulse. The remaining Soviet unit in Zone L, the 385/112, could not attempt to cross the Volga at the same connection this Impulse because the maximum numbers of units moving across one connection is three per Impulse. The 385/112 could attempt to cross the Volga using a different connection or move to Zone M. The Soviet player declines to take any action with the 385/112. The Soviet Impulse is now over. Play proceeds to German Night Impulse 7.
10.0 Support Markers
10.1 Air Support
The air superiority of the German Luftwaffe is represented by the German player's two Air Support markers.
10.1.1 Air Support Availability An Air Support marker is a German marker that may potentially be placed during each and every German Daylight Impulse. It may not be placed during a German Night Impulse, nor during any Soviet Impulse. An Air Support marker may not attack on its own.
10.1.2 Air Support Placement One Air Support marker may be placed in one Area where Combat Resolution (Section 11.4) is taking place during a German Daylight Impulse, at the German player's discretion. As there are two Air Support markers, two Areas may be affected.
10.1.3 Air Support Combat Value The German player makes a die roll 1D6 and adds that result to his total Attack Value (Case 11.4.2) when resolving combat. If the Area where Combat Resolution is taking place contains a Fortification marker or a Rubble marker, reduce the result by one; if it contains both a Fortification and a Rubble, reduce the result by two. Regardless of the modifier, treat reduced results of less than "1" as a "1."
10.1.4 Air Support During Overruns If any combat results in an Overrun (Case 11.4.5) an assigned Air Support marker may continue to affect the Combat Resolution made by the units performing the Overrun (make a new die roll 1D6).
10.1.5 Air Support Removal After combat (including possible Overrun combat) has been resolved remove the Air Support marker from the map and place it in the German player's Support Units Box with its "Used" side facing up to indicate the marker has been committed and is not available until the next Impulse.
10.2 Artillery Support
Each player has a limited number of Artillery Support markers. Each German division receives one Artillery Support marker and the Soviet player receives two for the 62 Army. Artillery Support markers may not attack on their own. Note: Additional Artillery Support markers are included if playing the Campaign Game (Module 21.0).
10.2.1 Artillery Support Placement The attacker places any Artillery Support markers first, followed by the defender. One Artillery Support may be added to each Combat Resolution (Section 11.4) taking place during that Impulse, at the player's discretion.
A German Artillery Support marker may be used to support any unit in the associated division (the unit must only be participating in the attack—it does not have to be the lead unit). A Soviet Artillery Support marker may be used to support any brigade, regiment, or division with a CV and MF of the same color (white, red, or yellow) as that of the associated army. Independent Units may receive Artillery Support from any source.
After Combat Resolution remove any Artillery Support markers from the map and place them on the current Impulse of the Impulse Track with their "Used" side facing up.
10.2.2 Artillery Support During Overruns Should the Combat Resolution result in an Overrun, the defender's Artillery Support marker is removed from the map and placed on the Impulse Track "Used" side facing up. The attacker's Artillery Support marker is not removed from the map and may be assigned to one additional Combat Resolution made by units performing the Overrun. After this additional Combat Resolution, the attacker's Artillery Support marker is removed from the map and placed on the Impulse Track "Used" side facing up. If the defender has an unused Artillery Support marker it may be assigned to the Overrun Combat Resolution.
10.2.3 Artillery Marker Removal After all combat (including Overrun combat) has been resolved remove any Artillery Support markers remaining on the map and place them on the current Impulse of the Impulse Track with their "Used" side facing up. During sequential Combined Operations (Case 9.1.2) Artillery Support markers placed on the map are removed after the first Area has been activated and before the second Area is activated.
10.2.4 Artillery Support Combat Value Artillery Support adds +2 to the total Attack Value (Case 11.4.2D) or +1 to the total Defense Value (Case 11.4.3D) when resolving combat.
10.3 Soviet Storm Group
The superiority of the Soviet Army in close quarter night combat is represented by the Soviet player's Storm Group marker.
10.3.1 Storm Group Marker Availability The Storm Group marker is a Soviet marker that may potentially be placed during each and every Soviet Night Impulse. It may not be placed during a Soviet Daylight Impulse or during any German Impulse.
10.3.2 Storm Group Marker Placement The Soviet Storm Group marker may be placed in any Forest or Urban Area where Combat Resolution (Section 11.4) is taking place. The Storm Group marker may be added to one Combat Resolution taking place that Impulse, at the attacker's discretion. The Storm Group marker may not attack on its own.
10.3.3 Initial Placement Restriction During Turns 1, 2, and 3 the Soviet Storm Group marker may only be placed in an Area where a unit of the 13th Guards Division (arriving Turn 1) is acting as the Lead Attacking Unit.
10.3.4 Attack Value The Soviet player makes a die roll 1D6 and adds that result to his total Attack Value (Case 11.4.2) when resolving combat. If the Area where Combat Resolution is taking place contained Rubble at the beginning of the Impulse, increase the result by one. Treat results of more than a "6" as a "6".
10.4 Soviet Hero Marker
The Herculean efforts of small groups of Soviet soldiers are represented by the Soviet player's "Hero" marker. The Soviet player may elect to use their "Hero" marker once per an entire Turn after Combat Resolution in an Urban Area (only) to cancel a German Overrun (Case 11.4.5). Place the marker with its "Used" side facing up on the current Impulse of the Impulse Track to indicate the marker has been used.
11.0 Combat
Only units that begin an Impulse in the Active Area may attack. An attack incurs no additional MF cost beyond that for entering an enemy-occupied Area. If the Active Area was already Contested at the beginning of the Impulse, units that activate may either exit the Area or attack. Note: units within an Active Area may also decline to perform any action.
All defending units in an Area being attacked can potentially be affected by the combat results of that attack. An attack is resolved only after all units have entered the attacked Area in that Impulse. Other units starting in the Active Area not involved in the attack may move, but no additional units may enter the Area being attacked during the current Impulse once the attack is resolved.
11.1 Mandatory Attacks
Friendly units must make a Mandatory Attack whenever they enter an enemy-occupied Area that was not Contested at the beginning of the current Impulse. If a Mandatory Attack results in a Repulse (Case 11.4.4) all participating units must retreat (Section 11.6).
11.2 Optional Attacks
Unless required to conduct a Mandatory Attack the attacker may attack with all, some, or none of his units that entered the Area. If he chooses to attack, at least one unit must attack.
11.3 Contested Area
If the Active Area is already Contested at the start of the Impulse, all, some or none of the units starting in that Area may attack. If the attacker loses the attack, the attacking units do not retreat and must remain within the Active Area.
11.4 Combat Resolution
Attacks are resolved by comparing the Attack Value of the attacking unit(s) plus a dice roll 2D6 (called the Attack Total or AT) against the Defense Value of the defending units(s) plus a dice roll 2D6 (called the Defense Total or DT). During Combat Resolution players perform the following steps in order:
- Attacker designates the Lead Attacking Unit
- Defender designates the Lead Defending Unit
- Artillery Support markers may be assigned; attacker first, followed by the defender
- German Air Support or Soviet Storm Group marker assigned; perform a die roll 1D6
- Tabulate final Attack Value and Defense Value using the AV/DV Track Card
- Each player performs a dice roll 2D6 (Case 11.4.1) and computes the AT and DT (Case 11.4.4)
11.4.1 Dice When resolving combat each player rolls two dice (a dice roll 2D6).
11.4.2 Attack Value (AV) The AV is calculated using the list on the AV/DV Track Card.
11.4.3 Defense Value (DV) The DV is calculated using the list on the AV/DV Track Card.
11.4.4 Computing Results The result of the attack depends on the difference between the Attack Total (AT) and the Defense Total (DT).
Repulse If the AT < DT then the attacker has been repulsed and there is no effect on the defending units. All attacking units are flipped to their Reduced Strength side if currently Full Strength; if already Reduced Strength, they are eliminated. Retreat is required in cases of Mandatory Attack (Section 11.1).
Stalemate If the AT = DT then both the Lead Attacking Unit and the Lead Defending Unit are flipped to their Reduced Strength side if currently Full Strength; if already Reduced Strength, they are eliminated.
Success If the AT > DT then the Lead Attacking Unit is flipped to its Reduced Strength side; if already Reduced Strength, it is eliminated. The defender must absorb Attrition Points (Section 11.5) equal to the difference between the AT and DT. If an attack requires the defender to take more Attrition Points than can be absorbed by the defending units in the Area, an Overrun has occurred (Case 11.4.5). Note: if the attacker inflicts exactly 1 AP and the Lead Defending unit is either a Reduced Strength Soviet unit or any German unit (Full Strength or reduced) the Attrition Point may be absorbed by a retreat.
11.4.5 Overrun If a Success has led to an Overrun, the units that participated in the original attack may (at the attacker's discretion) activate a second time. Overrunning units may enter any Area or Areas adjacent to the Area where Combat Resolution took place. Attacker Support markers, if assigned to the original Combat Resolution, may be assigned a second time to one additional Combat Resolution (Case 10.1.4, Case 10.2.2). Otherwise they may not be assigned. There is no additional Overrun after this second combat. If a Mandatory Attack results in a Repulse, the units must retreat back to the Area where the original Overrun took place. Overruns may not occur in Zones (Section 16.3), Forest Areas, or if Combat Resolution took place in an Area containing a Rubble marker. An Overrun is canceled if the attacker's dice roll 2D6 created Rubble during Combat Resolution (Section 14.5), or if the Soviet player places a Hero marker (Section 10.4) into the (Urban) Area after Combat Resolution. Note: Yes, this means the Soviet player can "cancel" an Overrun! (But the Attack is still a success.)
11.5 Attrition Points (AP)
In order to satisfy losses the defender removes AP from his units in the defending Area.
AP may be taken in any combination, except that the Lead Defending Unit must suffer the first AP and that exact losses must be applied whenever possible (for example a player cannot eliminate a Full Strength unit in order to save a Reduced Strength unit if only 2 APs have to be applied).
The defender removes AP from an attack as follows:
- A. Each Full Strength unit eliminated: 3 AP
- B. Each Full Strength unit flipped to Reduced Strength: 1 AP
- C. Each Reduced Strength unit eliminated: 2 AP
- D. Each Reduced Strength unit or German Full Strength unit retreated (Section 11.6): 1 AP
11.6 Retreats
The attacker or defender may be called upon to retreat as a result of combat. Attacking units may only retreat into the Area from which they entered the attacked Area (Exception: Fully stacked Areas; see Case 11.6.2 to determine into which Area they retreat).
11.6.1 Retreat Procedure Units must retreat one at a time to determine if an Area becomes fully stacked. If it does, subsequent units must continue their retreat to another Area that is not fully stacked. In this event, both the attacker and defender must follow the Retreat Priorities to determine the second (or more) Areas to which they must retreat.
11.6.2 Retreat Priorities If there is more than one Area to which units may retreat the units must retreat based on the following set of priorities (owning player's choice in the case of equal priorities):
- A. A Free Area adjacent to the least number of enemy-Controlled Areas.
- B. A friendly-Controlled, Contested Area.
- C. An enemy-Controlled, Contested Area.
- D. Fully stacked Area.
11.6.3 Voluntary Retreat Some or all of the defenders in an Area being attacked may voluntarily retreat after Combat Resolution, even if the attacker suffered a Stalemate or Repulse result. The Lead Defending Unit does not have to be among the units that retreat.
Example: Combat Resolution with Overrun
It is Turn 1, Daylight Impulse 4. The German player declares an Assault Impulse and activates Area 21 (Hill 112.5). Two units in Area 21, KG-6 and 191/71, move to Area 27 (Flight School Settlement). The movement cost to enter Area 27 is 4 Movement Factors; both units have the necessary Movement Factors to conduct the move. Because the Flight School Settlement is not already Contested by German units the movement requires the German player to conduct a Mandatory Attack per Section 11.1.
Combat in Area 27 is then resolved per the sequence found in Section 11.4. The German player designates KG-6 as the Lead Attacking Unit. The Soviet player has only one defending unit so the 270/10NKVD is automatically the Lead Defending Unit.
The German player announces they will commit the artillery marker of the 71st Infantry Division to provide Artillery Support to the coming Combat Resolution. The German player places their 71st Division artillery marker into the only Area being attacked, Area 27.
The Soviet player announces they will not be committing any of their 62nd Army artillery markers to provide Artillery Support.
The German player then announces they will commit one of their air markers to provide Air Support to the coming Combat Resolution. The German player then places their Air Support marker into Area 27 and rolls a die (1D6). The result is a "3."
Players now use the AV/DV Track Card to calculate their final Attack Value and Defense Value, then roll two dice (2D6) to determine their respective Attack Total and Defense Total.
The Attack Value is 5 (the Combat Value of the Lead Attacking Unit, the KG-6), +1 for one additional attacking unit (the 191/71), +3 for Air Support, +2 Artillery Support = 11. The German player rolls two dice and the result is a "7" which is added to the Attack Value for an Attack Total of 18.
Note 1: Combat Resolution has the ability to generate Rubble. The attacker's dice roll is added to the TEM and if the result is greater than 12 a Rubble marker is placed in the Areas. In this case the result was 7+3 = 10 so no Rubble was generated by the German attack.
Note 2: During the German Impulse, the first German dice roll 2D6 made for any purpose also serves as their Logistics dice roll (if they do not attack they make a Logistics dice roll at the end of their Impulse per Case 6.3.1). It is possible for the Logistics dice roll to change "Daylight" to "Night" conditions or from "Night" conditions to ending the Maneuvers Phase. In this example the German roll of "7" during Combat Resolution is greater than "4" so the Impulse marker remains "Daylight" side up and the Impulse marker advances to the "5" space on the Impulse Track at the end of the German Impulse.
The Defense Value is 3 (the Combat Value of the Lead Defending Unit, the 270/10NKVD), +3 (the Terrain Effects Modifier of Area 27) = 6. The Soviet player rolls two dice and the result is an "8" which is added to the Defense Value for a Defense Total of 14.
The difference between the Attack Total (18) and Defense Total (14) is four: this is a "success" result. Four is the number of Attrition Points the Soviet player must now absorb. The 270/10NKVD is eliminated for 3 AP, but as there is one more AP to absorb and there are no additional Soviet units remaining in Area 27, the Success becomes an Overrun result. The German KG-6 is also reduced. Note that had the German attack generated Rubble the Overrun would have been canceled per Case 11.4.5.
With the removal of the only Soviet unit defending Area 27 Control of the Area has changed from Soviet Control to German Control. The Soviet Control marker is removed from the map.
The German player now has the option to take no further action or to continue to utilize the units that just successfully overran Area 27. Overrun rules allow units in the Area just Overrun to enter any adjacent Area (movement during an Overrun is bonus movement and does not require the expenditure of Movement Factors). Both the KG-6 and the 191/71 move from Area 27 to Area 23 (Red Barracks), which triggers another Mandatory Attack. Note that Attacker Air and Artillery Support markers used in the original Combat Resolution may be committed a second time to one Overrun combat. Per Case 10.2.2, a previously-committed Defender Artillery Support marker is removed from the map and placed on the Impulse Track, "Used" side facing up.
Combat in Area 23 is then resolved per the sequence found in Section 11.4. The German player designates 191/71 as the Lead Attacking Unit. The Soviet player has only one defending unit so the 399MB is automatically the Lead Defending Unit.
The German player announces they will again commit the artillery marker of the 71st Infantry Division to provide Artillery Support to the coming Combat Resolution. The German player places their 71st Division artillery marker into the only Area being attacked, Area 23. The Soviet player announces they will commit one of their 62nd Army artillery markers to provide Artillery Support. The Soviet player places a 62nd Army artillery marker into the Area being attacked, Area 23.
The German player then announces they will again commit their air marker to provide Air Support to the coming Combat Resolution. The German player then places their Air Support marker into Area 23 and rolls a die (1D6). The result is a "1".
The Attack Value is 4 (the Combat Value of the Lead Attacking Unit, the 191/71), +1 for one additional attacking unit (the KG-6), +1 for Air Support, +2 for Artillery Support = 8. The German player rolls two dice and the result is a "10" which is added to the Attack Value for an Attack Total of 18.
Note: Combat Resolution has the ability to generate Rubble. The attacker's dice roll is added to the TEM and if the result is greater than 12 a Rubble marker is placed in the Areas. In this case the result was 10+3 = 13 meaning that this time Rubble was generated by the German attack. A Rubble marker will be placed into Area 23 at the end of Combat Resolution.
The Defense Value is 2 (the Combat Value of the Lead Defending Unit, the 399MB), +1 for Artillery Support, +3 (the Terrain Effects Modifier of Area 23) = 6. The Soviet player rolls two dice and the result is a "7" which is added to the Defense Value for a Defense Total of 13.
The difference between the Attack Total and Defense Total is five: that is a Success result. Five is the number of Attrition Points the Soviet player must absorb. The 399MB is eliminated for 3 AP and the two remaining AP are ignored because there are no second Overrun results after the first. The Lead Attacking Unit, the 191/71, is flipped to its Reduced Strength side (indicated by a light gray stripe and reduced Combat Value).
With the removal of the only Soviet unit defending Area 23 Control of the Area has changed from Soviet Control to German Control. The Soviet Control marker is removed from the map. A Rubble marker is also now placed in the Area.
The two German units that attacked Area 27 and Area 23, KG-6 and 191/71, have now completed their action for this Impulse. The remaining German unit in Area 21, the 211/71, could now move and attack also (but is prohibited from entering any Area previously attacked during the Impulse). The German player declines to take any action with the 211/71. The German Impulse is now over. Play proceeds to Soviet Daylight Impulse 5.
11.6.4 German Operational Flexibility German Full Strength units may retreat. They absorb 1 AP just like Reduced Strength retreating units. Full Strength Soviet units may not voluntarily retreat.
11.6.5 Retreat Elimination If for any reason a unit is unable to retreat per the Retreat Priorities (Case 11.6.2), such as having to retreat off the map, into the Volga River, or ending in a fully stacked Area, it is eliminated. Units may not retreat from an Area to either Zone L or M in spite of the mapsheet connections.
12.0 The Advantage Marker
At the start of each Impulse one player will own the Advantage marker. This is indicated by the Advantage marker with the side of the owning player face-up in its holding box printed on the mapsheet.
The German player starts the game owning the Advantage marker. Ownership of the Advantage marker can change through voluntary use by the owning player or involuntarily when the type of Impulse changes.
12.1 Voluntary Use
During the Maneuvers Phase, the Advantage marker may be used to declare:
A. Fanatical Defense The defender may turn an attack that is a Success into a Stalemate. They may not turn an Overrun into a Stalemate.
B. Maximum Attack The attacker may turn an attack that is a Repulse into a Stalemate.
C. Release Reserves The German player may ignore the result of a German Logistics dice roll 2D6 that results in a Logistical Pause. The dice are not re-rolled. The Impulse marker simply advances to the next Impulse on the Impulse Track and play continues.
D. Prolong Daylight/Night Either player may ignore the results of a German Logistics dice roll 2D6 that flips the Impulse Marker from "Daylight" to "Night" or that ends the Night and concludes the Maneuvers Phase. The dice are not re-rolled. The Impulse marker simply advances to the next Impulse on the Impulse Track and play continues.
Note: Just to confirm, players can choose to use the Advantage marker AFTER they see die roll results.
E. Increased Replacements During a Refit Phase, the German player may use the Advantage Marker to receive one additional Replacement Point and the Soviet player may use the Advantage Marker to receive two additional Replacement Points.
F. Optional Reinforcements In the Campaign Game on Turn 8 or later, during any phase, either player may decide to use the Advantage Marker to enter all seven of their optional reinforcement units immediately; the units enter using the same rules as if entering during a Reinforcement Phase.
12.2 Voluntary Advantage Shift
After the Advantage marker is used voluntarily, it belongs to neither player until the end of the current Phase or player Impulse, at which time it becomes owned by the player that did not use it.
12.3 Involuntary Advantage Shift
If the Advantage marker is "German" side up when the Impulse marker is flipped from its "Daylight" to its "Night" side, the Advantage marker is also flipped, and the Soviet player now owns the Advantage marker. If the Advantage marker is "Soviet" side up at conclusion of the End Phase, it is flipped, and the German player now owns the Advantage marker.
13.0 Refit
Units can suffer attrition and elimination through Combat Resolution during the Maneuvers Phase. During the Refit Phase they may recover.
13.1 Refit Phase
The German player conducts his Refit Phase first, followed by the Soviet player. During their half of the Refit Phase each player performs the following steps in order:
- Spend Replacement Points (Section 13.2)
- Make any required Surrender checks (Case 15.2.3)
- Change Control of any Vacant Out of Supply Areas (Case 15.2.4)
13.2 Replacement Points (RP)
The German player receives one RP each Refit Phase. The Soviet player receives two RP each Refit Phase.
The German player may receive one extra RP, and the Soviet player may receive two extra RP during the Refit Phase by using the Advantage marker (Section 12.1E).
13.2.1 Free Zone German Refit The German player may select one Reduced Strength unit in a perimeter Zone each Refit Phase and flip that unit to Full Strength without any RP cost.
13.2.2 Final Game Turn There is no Refit Phase during any Turn when a Final Victory Check is scheduled to be made (Section 19.2; Campaign Game, see Section 21.1, Section 21.6, Section 21.7). Proceed straight to the End Phase after the end of the Maneuvers Phase.
13.3 Replacement Costs
Replacement Points may be spent in the following manner.
13.3.1 Eligibility Reduced Strength German and Soviet units must be able to trace a supply line (Case 15.2.1) to be eligible to take replacements. Exception: The Free Zone German Refit (Case 13.2.1) does not need to trace a supply line.
13.3.2 Spending Replacement Points One Replacement Point may be spent to do one of the following:
- Flip up to two Reduced Strength units on the map to Full Strength.
- Rebuild an eliminated unit at Reduced Strength.
Two Replacements Points may be spent to rebuild one eliminated unit at Full Strength.
Only Independent units may be rebuilt. Units with a Parent ID may never return to play when eliminated. Note: Each player has a space at the bottom of their Reinforcement Card to place their eliminated Independent units for possible rebuilding.
13.3.3 Rebuilt German Units Eliminated German units that are rebuilt enter play as reinforcements during the next Reinforcement Phase (Section 17.1).
13.3.4 Rebuilt Soviet Units Eliminated Soviet units that are rebuilt enter play as reinforcements during the next Reinforcement Phase (Section 17.2).
13.3.5 Dzerhezinsky Tractor Factory One Independent Soviet Armored unit per Turn may be rebuilt in Area 58 at Full Strength without any RP Cost. The moment the Germans Control Area 58 and/or when the Area contains a Rubble marker, then the ability to rebuild a Soviet Armored unit in this Area is lost for the rest of the game. If Area 58 is already fully stacked, then the Armored unit is not placed.
13.4 Free Soviet Worker Units
Soviet Worker units automatically return to play at full strength during the next Reinforcement Phase (Case 17.2.1). The Soviet player does not have to spend RP to rebuild eliminated Worker units.
13.5 No Accumulation
Any RP remaining at the end of the Refit Phase are lost. They do not accumulate from turn to turn.
Example: Refit Phase
It is the Turn 1 Refit Phase. The German player possesses the Advantage marker. The German player always conducts their Refit Phase first, before the Soviet player. They receive one Replacement Point (RP) each Refit Phase.
The German player chooses the reduced 244A Assault Gun unit in Area 11 (Train Station No. 2) and spends one-half (½) of an RP to flip the unit from its Reduced Strength side to its Full Strength side. Next he chooses the 274/94 unit in Area 14 (Cemetery) and spends one-half (½) of an RP to flip the unit from its Reduced Strength side to its Full Strength side.
Observing that his 94th Infantry Division in Area 11 is still understrength and wishing to attack Area 12 (Food Combine) on Turn 2 the German player announces he is spending the Advantage marker to allocate an additional RP (Increased Replacements, Section 12.1E). He then uses this RP to flip the PNR/94 and the 276/94 in Area 11 from their Reduced Strength sides to their Full Strength sides.
The Soviet player always conducts their Refit Phase second, after the German player. This gives the Soviet player some idea of where the German player might strike the next turn. They receive two Replacements Points (RPs) each Refit Phase.
The Soviet player chooses the 133/131 Tank unit in Area 13 (Volga Station) and spends one-half (½) of an RP to flip the unit from its Reduced-Strength side to its Full-Strength side. Next he chooses the 482/131 in Area 12 (Food Combine) and spends one-half (½) of an RP to flip the unit from its Reduced-Strength side to its Full-Strength Side.
The Soviet player then spends one (1) RP to rebuild a unit in the Eliminated Soviet Independent Units box on his Reinforcement Card. He selects the 42N unit and places it, with its Reduced-Strength side facing up, with his Turn 2 Reinforcements.
An eliminated Soviet Worker Unit is also in the Eliminated Soviet Independent Units box on the Soviet player's Reinforcement Card. This unit returns to play for free during the Reinforcement Phase of the following Turn. During the Reinforcement Phase of Turn 2 the Soviet player decides to place the Worker unit in Area 12 (Food Combine) with the 482/131 and decides to place the rebuilt 42N in Zone M (Krasnaya Sloboda).
14.0 Fortification and Rubble Markers
14.1 Fortification
Fortification markers may only be created by the Soviet player. Note: Fortification markers represent a variety of Soviet defensive efforts including minefields and trenches.
14.2 Creating a Fortification
The Soviet player may attempt to place a Fortification marker into the Active Area at the start of any Assault Impulse. There must be at least one Soviet infantry unit in the Area to make the attempt, but the Area does not need to be Soviet-Controlled. All of the Soviet units present in the Area may still move/attack. The Fortification creation attempt should be resolved before any movement and/or Combat Resolution takes place. The Soviet player makes a die roll 1D6, and consults the Soviet Fortification Creation Table on the Player Aid Card. There are two possible results.
If the attempt succeeds place a Fortification marker into the Area; if it fails, no Fortification marker is placed.
Note: There may never be more than one Fortification and one Rubble marker in an Area at one time.
14.3 Fortification Effects
Combat: A Fortification increases the Defense Value of an Area (Case 11.4.3E).
14.4 Fortification Removal
A Soviet Fortification is removed from an Area at the moment the Area becomes both German Controlled and not Contested. Note: There is no limit to the number of times a Fortification marker may be placed in an Area by the Soviet player after it has been removed by the German player.
Example: Soviet Fortification Construction
It is Turn 1, Daylight Impulse 2. The Soviet player declares an Assault Impulse and activates Area 5 (Minina Workers' Settlement). Fortification attempts precede any other Soviet action during an Assault Impulse (Case 8.1.1). To be eligible to make a Fortification attempt there must be at least one Soviet infantry unit present in the Area at the start of the Impulse; this precondition is met by the presence of the 482/131 and 271/10NKVD.
The Soviet player now resolves their Fortification attempt (Section 14.2) and makes a die roll 1D6. Because Area 5 is an Urban Area the roll will receive a +1 DRM. The Soviet player rolls a "3" which would ordinarily fail but because of the +1 DRM the final result is a "4" and the attempt succeeds. A Fortifications marker is now placed in the Area.
The Soviet player would now proceed with executing the rest of their Assault Impulse following the sequence set out in Case 8.1.1 or, should they desire to take no further action, simply announce the end of their Impulse. Play now proceeds to German Impulse 2.
14.5 Rubble
Rubble may only be created as a result of Combat Resolution. If the attacker's dice roll 2D6 plus the Area's TEM is greater than 12, then place a Rubble marker in that Area. Note: Rubble is NOT limited to urban areas. Any terrain may receive a "rubble" marker.
14.6 Rubble Effects
- Movement: Units must immediately stop and move no further that Impulse upon entering any Area containing a Rubble marker. This does not include units using Redeployment Movement during a Non-Assault Impulse (Case 8.1.2B).
- Combat: Rubble increases the Defense Value of an Area (Case 11.4.3F).
- Overruns: An Overrun result may not occur in an Area containing a Rubble marker (Case 11.4.5).
14.7 Rubble Clearance
The German player may attempt Rubble Clearance after he has completed any desired movement for that Impulse and before Combat Resolution. A Pioneer unit must have entered the Area containing the Rubble marker or have been present in the Active Area containing the Rubble marker at the start of the Impulse.
The German player makes a die roll 1D6 on the German Rubble Clearance Table on the Player Aid Card. Only one die roll 1D6 is made regardless of the number of Pioneer units present. There are two possible results. If the clearance attempt succeeds remove the Rubble marker from the mapsheet. The Soviet player may not attempt to remove Rubble. Note: There is no limit to the number of times that Combat Resolution may create Rubble in an Area after a Rubble marker has previously been removed by the German player.
15.0 Logistics
15.1 Triggering a Logistical Pause
The first time each Turn the German player's Logistics dice roll 2D6 equals the current Impulse number the Turn marker is flipped from its "Attack" to its "Pause" side (Case 6.3.1).
15.1.1 Effects of a Logistical Pause If the Turn marker has its "Pause" side face up, the German player may not declare an Assault Impulse during his next Impulse. He may only declare a Non-Assault Impulse.
15.1.2 Ending a Pause If the next German Logistics dice roll 2D6 equals the current Impulse number, flip the Turn marker from its "Pause" side back to its "Attack" side; otherwise it remains "Pause" side up. The Turn marker remains "Pause" side up until a German Logistics dice roll 2D6 is equal to the current Impulse, or the end of the Maneuvers Phase.
15.2 Out of Supply (OOS)
At the end of every Impulse, units must be able to trace a supply line to a friendly-Controlled Zone. Units unable to trace supply are marked with an Out of Supply marker, and suffer penalties in movement and combat (Case 15.2.2). They may regain supply in subsequent Impulses, but if still OOS when the Refit Phase happens, they are subject to Surrender (Case 15.2.3).
15.2.1 Tracing Supply A supply line is a path of consecutive adjacent Areas leading from the unit to a friendly-Controlled Zone. It may enter a Zone only via a connection arrow. The path may not enter an enemy-Controlled Area, nor may it cross an unbridged Ravine (Exception: Soviet units (only) may trace supply from Area 62 through Area 61 and back on to Zone L. This is an exception to this rule where normally unbridged ravines prevent the tracing of supply across them.) It may pass through a friendly-Controlled Area Contested by enemy units. A Vacant Area under enemy Control still blocks supply.
15.2.2 Movement and Combat Out of Supply units suffer a -1 MF penalty and a -1 penalty to both their AV and DV so long as they remain OOS.
15.2.3 Surrender Units marked with an OOS marker must check for Surrender during the Refit Phase (Section 13.1). The owning player makes a die roll 1D6 for each OOS unit on the Surrender Die Roll Table on the Player Aid Card. There are three possible results.
15.2.4 Area Control A Vacant Area that is enemy-Controlled becomes friendly-Controlled during the Refit Phase (Section 13.1) if it is OOS.
16.0 Zones
16.1 Location
Zones are located around the edges of the map. Each Zone is connected to other Zones and certain Areas on the map by connection arrows.
16.2 Movement
A Zone can only be entered by a unit starting its Impulse in an adjacent Area or Zone. The unit must immediately end its movement upon entry into that Zone. A unit beginning its Impulse in a Zone may move into an Area normally, paying the entrance costs of that Area. It may continue moving into additional Areas if movement factors are available. Friendly units moving between Zones may ignore the presence of enemy units in adjacent Areas, and friendly units moving between Areas may ignore the presence of enemy units in adjacent Zones, when calculating movement costs (Section 9.2).
16.3 Combat
Overrun combat is not allowed in Zones, nor can Rubble be created, but all other procedures for combat apply, including Support.
16.4 Occupation Limits
An unlimited number of units may stack in any Zone.
16.5 Flank Zone Restrictions
Neither side may enter Zones A, B, I, or J. Note: this rule is modified if playing the Campaign Game (Module 21.0).
17.0 Reinforcements
Reinforcements are placed during the Reinforcement Phase. Players should consult their Reinforcement Cards for any arriving units. Units that were rebuilt during the Refit Phase (Module 13.0) enter play at this time as well.
17.1 German Reinforcements
German Reinforcements may only be placed in Zones D, E, F and/or G. The Zone must be German-Controlled at the time of placement. It may be German-Controlled and Contested by one or more Soviet units.
17.2 Soviet Reinforcements
Soviet Reinforcements may be placed in Zones L and/or M. Exception: Worker units (Case 17.2.1).
17.2.1 Soviet Worker Units Eliminated Soviet Worker units return to play as Reinforcements each Reinforcement Phase. They may be placed in any Soviet-Controlled Urban Area adjacent to the Volga River. A maximum of one Worker unit may be placed in each eligible Area. Placement may not exceed Area stacking limits. If no eligible Area is available, the Worker unit may not be placed. If, during a later Reinforcement Phase there is an eligible Area available, placement is allowed.
18.0 Turn 1 Special Rules
To simulate the initial German onslaught during the opening days of the battle (when their forces were still relatively fresh and well-supplied) the following special rules are in effect on Turn 1 only.
18.1 Impulses
The Turn 1 Maneuvers Phase begins with German Impulse "1" and proceeds to Soviet Impulse "2" (that is, there is no Soviet Impulse "1").
18.2 German Blitzkrieg
During Turn 1 the German player may not use Redeployment Movement (Case 8.1.2B) or Troop Transfer (Case 8.1.2C).
18.3 German Logistics
During Turn 1 the German player may ignore any Logistics dice roll 2D6 that results in a Pause (Case 6.3.1).
18.4 German Advantage
During Turn 1 the German player may use the Advantage marker to simultaneously declare both a Maximum Attack (Section 12.1B) and a Prolong Daylight (Section 12.1D) in the same Impulse.
19.0 Victory Conditions
There are two ways to win the game: an Automatic Victory and an Operational Victory.
19.1 German Automatic Victory
The German player wins an Automatic Victory if, during the End Phase of any Turn, they Control every Area on the Volga River with a connection to Zones L or M such that each such Area must be able to trace a supply path of German-Controlled Areas back to Zones D, E, F or G.
19.2 German Operational Victory
The value of the Victory Point Areas Controlled by the German player are kept track of using the game's Victory Point markers on the Victory Point Track. If the German player fails to win an Automatic Victory, a victory check is made during the End Phase of Turn 5.
Soviet Areas have the following Victory Point value:
| 2 Victory Points | 1 Victory Point |
|---|---|
| 12) Food Combine | 4) 25th of October Lumber Mill |
| 13) Volga Station/The Docks | 34) Oil Refinery |
| 25) 9 January Square | 35) Lazur Chemical Factory |
| 36) Red October Steel Works | 49) Brick Factory |
| 47) Barrikady Ordnance Factory | 59) Spartakovka |
| 58) Dzerhezinsky Tractor Factory | 61) Rynok |
At the end of Turn 5, if Area 67 (Orlovka) has been held continuously by the Soviets, then the Germans suffer a penalty of 1 Victory Point, but taking it is not worth 1 Victory Point for the Germans.
At the end of Turn 5, if the German Player has 10 VP or more that can trace supply to Zones D, E, F or G then he wins. If he has 9 VP or fewer then the Soviet Player wins.
The Soviets do not receive Victory Points. Victory depends solely on the German Victory Point total unless the Germans achieve an Automatic Victory (Section 19.1).
20.0 Side Determination
If both players wish to play the same side this rule is used to decide which side each player commands and to compensate for either player's perceptions regarding the relative chances of each side.
20.1 Bids
Each player submits a secret, written VP bid to command the Germans. The higher bid plays the German side with the higher bid becoming the number of VP required for an Operational Victory. Automatic Victory rules remain unchanged. If both bid the same number, flip a coin to decide.
21.0 The Campaign Game
Those wishing to extend play beyond Turn 5 to Turn 10 may agree beforehand to do so with the following rules changes.
21.1 Turn 5 Victory Check
Check the German Victory Point total at the end of Turn 5. If he has 11 or more VP, then he wins an Operational Victory. If he has 5 VP or fewer, then he loses. If he has between 6 VP and 10 VP (inclusive), then the game continues.
21.2 Flank Zone Setup
During the Reinforcement Phase of Turn 6 place German units labeled Zone B, C, I, and J; and Soviet units labeled Zone A, I, and J in their respective Zones. Each player also receives new Artillery Support markers which should be placed in each player's holding box. Note: To distinguish units of the three Soviet armies and their Artillery Support markers from one another, units and markers of the 64th Army have their CVs and MFs printed in a deep red and those of the 66th Army have their CVs and MFs printed in yellow.
21.2.1 German Movement Restrictions German units setting up in Zones B, I and J may not move or attack until they are attacked by Soviet units. The four units belonging to the German 14th Panzer Division setting up in Zone C may not move or attack until either the German units in Zone B are attacked by Soviet units or the four units of the German 29th Motorized Division are also present in Zone C.
21.2.2 Soviet Movement Restrictions Soviet 64th army units (starting in Zone A) may only operate in Zone A and Zone B. Soviet 66th Army units (starting in Zones I and J) may only operate in Zones H, I, J, and K. These units may never enter a numbered Area; if forced to retreat into a numbered Area they are eliminated.
21.3 Soviet Artillery
The Soviet player receives four additional Artillery Support markers. The two markers coded to match the units of the 64th Army may only support units of that Army. Similarly, the two markers coded to match the 66th Army may only support units of that Army. Beginning Game Turn 6 the Soviet player also receives an additional +1 to their Attack or Defense Value when committing an Artillery Support marker (Case 11.4.2D, Case 11.4.3D).
21.4 Free Zone Refits
Beginning Turn 6 each player may select one Reduced Strength unit in each of Zones A, B, I, and J every Refit Phase and flip that unit to Full Strength without any RP cost. Players may spend available RP in these Zones as well.
21.5 Rebuilding Units in Flank Zones
Beginning Turn 6, either player may rebuild eliminated Independent units in Zones A, B, I, and J. Units of the Soviet 64th Army may only be rebuilt in Zone A and units of the Soviet 66th Army may only be rebuilt in Zones I and J. Soviet units may be rebuilt in Zones A, I, and J even if they are German-Controlled. Exception: Soviet Worker units may not be placed in Zones (Case 17.2.1).
21.6 Soviet Flank Breakthrough
At the end of any Maneuvers Phase if Zone B, H, or K are Soviet-Controlled, then the game ends in a Soviet Automatic Victory.
Design Note: The Soviets tried to break through German flank defenses to form a direct land route to the beleaguered 62nd Army defending in Stalingrad. Had they succeeded the entire nature of the campaign would have changed. Historically the attacks were not successful but they were a source of distraction for the German side. The failure of these attacks to achieve a breakthrough led to the Soviets deciding to send troops and supplies and then launch their Uranus winter offensive further to the north and south against Germany's poorly equipped allies.
21.7 Turn 10 Victory Check
At the end of Turn 10, check for a German Automatic Victory normally. If the Germans do not win an Automatic Victory, then calculate the German Victory Point total exactly as done on Turn 5 and then subtract 1 VP for each of the following Zones not having at least one German unit present within it: A, I, J. Note: Even if the German player takes Orlovka after turn 5, the 1 Victory Point penalty is still assessed if Orlovka had been continuously held by the Soviets from Turn 1 through Turn 5. If there are 15 or more German VPs, then it is a German Operational Victory. If there are 14 German VPs or less, then it is a Soviet Operational Victory.
21.8 Optional Götterdämmerung Campaign Game Victory Conditions
Players that want to depict the entire battle without counting victory points may agree beforehand to use only the Automatic Victory rules (Section 19.1).