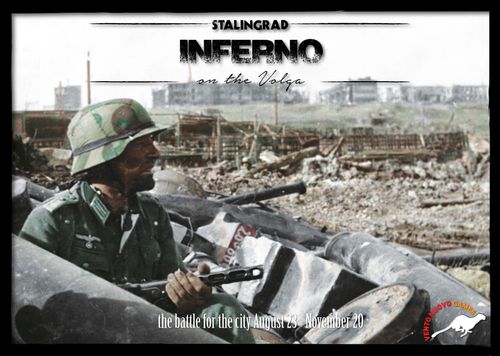
Stalingrad: Inferno on the Volga
Stalingrad: Inferno on the Volga Rulebook
Table of Contents
Table of Contents
Preface
Few subjects have captured the attention of both historians and history buffs alike as Stalingrad. I was more history fan than historian when I first read the Sven Hassel novel about Stalingrad, "S.S. General." However, the turning point of WW2 became a turning point for me as well. After reading that book, I plunged much deeper into history: with wargames, model kits, and lots more reading. I also gained the incentive to start learning English, as this was the 1970s and we had no Internet and few historical documents in Italian.
I think the first thing that appealed to me, even as a child, was the romantic – though menacing – vision of courageous men on both sides fighting for values beyond mere political dogma: homeland, honor, duty, and brotherhood above all. But I was also drawn to the stories of conscripted men fighting desperately because they had no other choice. This was a novel kind of education, and it changed my adolescence, with consequences reaching into my adult life.
But the more sources I read and compared, the more questions I had. Many of these questions remained unanswered, even after "Perestroika" and the increased availability of Soviet documentation from the era.
Ironically, given my fascination with the battle for the city beside the Volga, none of my previous designs have presented Stalingrad itself in any detail. I had too many questions unanswered, and I was seeking to create a game that would depict the battle as no other had before. And that was the point. With so many games on this key topic, why design another one? I knew the answer: I would not do it unless I could be truly innovative and give players a new insight into the battle.
It was historian David Glantz who gave me the answers to questions I had pondered for years. Stalingrad: Inferno on the Volga was born after David's writing and research filled in those blanks I had defined for myself. Further insights provided by a brilliant set of aerial reconnaissance photos were an inspiration as well.
Many things in this game may appear brand new to your eyes. That is my intention.
Let's start with a few questions:
Could the Germans have taken the city? Probably yes, especially if they had attacked sooner and recognized the need to change/adapt tactics much earlier.
Would a German victory in Stalingrad have changed the war? Probably no, but then we can never precisely guess the consequences for the Soviets if this "test of wills" had gone the other way.
Other questions abound:
What made Stalingrad so important? What would the outcome have been if the 6th Army had avoided the trap?
How much difference would it have made if the 6th Army had initiated an immediate breakout attempt toward Manstein's relief effort? Would the Germans have turned "Uranus" and "Saturn" into a disaster for the Soviets, or would that breakout have allowed the Soviets to capture Army Group A before they could withdraw from the Caucasus?
These questions represent some of the biggest "what ifs?" of the campaign. The outcome for the Germans might have been much better… or it might have been even worse!
Supposedly Hitler was ready to approve a breakout by Paulus until Goering, summoned back from shopping in Paris and desperate to impress, convinced Hitler that the Luftwaffe could fully supply 6th Army – something that was far beyond its capabilities.
But there were so many Axis mistakes made, including ones affecting my own countrymen. The Italian Alpini, crack mountain troops equipped with mules and light weapons, were deployed on the open Don Steppes instead of using them in the Caucasus mountains.
Even with modern research the questions outnumber the answers. So, we keep looking, keep asking, and (I hope) keep learning. Those of us who engage our love of history with games will keep exploring, keep looking for the hidden and subtle truths. Indeed, sometimes we may find an insight that goes beyond words on a page. We pore over wooden blocks on the terrain of a detailed map... and the veil may be lifted from another question.
I hope you will enjoy Stalingrad: Inferno on the Volga, and that it will answer some of your questions as well. I look forward to the conversations that will follow its release.
Emanuele Santandrea
Introduction
Stalingrad: Inferno on the Volga is a game about the battle for Stalingrad. The battle started on August 23 and lasted until November 20, when Operation Uranus commenced and resulted in the eventual destruction of the German 6th Army.
In the solitaire version, the German side is controlled by one player, while the Soviet side is controlled by an artificial intelligence algorithm (AI).
The game can also be played in any combination of one or two German players and a Soviet player or AI. The greater part of this rules manual refers to the solitaire mode, but there are addenda covering the three other modes of play.
Stickering
Apply the German unit stickers to the black Unit blocks, and the Soviet unit stickers to the red Unit blocks.
Fog of War
Place the mapboard in the centre of the table. The German player(s) sit at the western edge, whilst any Soviet player sits in front of him/them at the eastern edge. Wooden Unit blocks represent historical units employed during the battle of Stalingrad. The game is played with "Fog of War," so blocks are placed upright with the sticker facing the owning player(s) so that the other side cannot see them.
During the game some blocks may be flipped face up, revealing the Unit. Each side reveals a block by placing it faceup, with the top edge pointing toward the opponent. This happens during the "showdown" phase of a combat. Concealing a block means putting it back upright once the combat has been resolved.
The Game
The game is played in alternating rounds, with the Germans playing first and the Soviets second, until the game ends. The game ends at the end of a round if a side meets a Decisive Victory objective, or immediately if the last Soviet Card is drawn. Note that the OKH Card changes the German objectives.
How to Win the Game
German Decisive Victory:
A. The Germans control all six Soviet Spawn hexes or B. There are no Soviet units on the mapboard.
Soviet Decisive Victory:
A. 10 German Units (each of the five Units marked "R" counts double) are eliminated or B. Immediately when the last Card is drawn from the Soviet deck.
Basic Concepts
The map covers the city of Stalingrad and its suburbs, in a scale of 1 : 33,000 (1 cm = 330m). For game play purposes, the left edge of the upright board should be considered North, the top edge East, etc.
The playing area is represented by 109 hexes. At the start of the game, the Germans control the four hexes named W, X, Y, and Z, while the Soviets control all of the other hexes (those numbered from 1 to 105).
Hex control switches as soon as a Unit enters an enemy controlled hex (either during movement or advancing after combat). Control is not lost if a hex is left empty.
Types of Hexes
There are 3 types of hexes in the game:
- Clear Hex: Hex without major buildings or rough terrain. Long Move allowed. No Rubble Roll. Simultaneous Combat. Combined Force Bonus and Blitz (Hoth privileges) allowed.
- Rough Hex (brown inline): Hex with rough terrain, such as forests, gullies, and hills, but without major buildings. Long Move not allowed. No Rubble Roll. Simultaneous Combat.
- Urban Hex (white circle): Hex with major buildings. Long Move not allowed. Causes Rubble Roll. Defender rolls first in Combat.
| Hex Type | Long Move | Combat | Rubble | Hoth |
|---|---|---|---|---|
| Clear | Y | Simultaneous | - | Y |
| Rough | - | Simultaneous | - | - |
| Urban | - | Defender first | Y | - |
Stacking
Maximum Stacking is four units per hex. A stack is a group of one to four units in the same hex.
The Units
Each Unit represents a regiment or battalion for the Germans (40 blocks), and a division, a brigade, or battalion (53 blocks) for the Soviets.
There are two types of units: Tanks and Infantry.
German Panzer, Panzer Grenadier and Motorized Infantry gain Blitz capability once Hoth is in play. German Panzer Grenadiers are a mixed formation of both Infantry and Panzers. They may be hit by both Soviet Snipers and Anti-Tank Guns, but they gain both of Hoth's privileges (Blitz and Combined Attack).
Soviet Tanks, Motorized Infantry, and Workers battalions do not have any special ability. Soviet Marines have special landing capabilities. Soviet Guards, 1077th AA Rgt, and 20th Destroyer Brg gain special abilities when playing "The Designer's Way."
Additionally, two Uberblocks - representing the German General Erhard Raus, and the Soviet General Vasily Chuikov - are used when playing "The Designer's Way" (see The Designer's Way section).
Strength
The strength of a Unit is given by the number of Dots – from 4 to 1 – along the edges of the Unit, with each edge of the block representing a step. Units roll as many dice as their current Strength (example: a Unit with 3 dots on its top edge will roll 3 dice).
Firepower
Firepower determines the chance a Unit has of scoring a hit with each die roll. Firepower is represented by the color of that Unit's Dots:
- Black (Single Fire; SF): Hit on a 6;
- White (Double Fire; DF): Hit on a 5 or 6;
- Red (Triple Fire; TF): Hit on 4, 5, or 6.
Note: three units can have all the same strength, but different firepower.
Reducing Strength
For each hit taken in combat, Strength is reduced by rotating the unit 90° counter-clockwise. Units reduced below minimum Strength are destroyed. Destroyed Soviet Units go back in the appropriate Spawn box. Destroyed German Units are permanently removed from the game and placed in the German Death pool. They count toward a Soviet Victory.
Game Setup
- Remove the two Uberblocks, and the three German units marked with a yellow axe (these are used only if playing "The Designer's Way");
- Place the red factory in Hex #7, the four red plates (docks) in Hexes #9, twice in #13, and #15;
- Put the two Marines in the Marine Spawn Pool;
- Divide the remaining 51 Soviet Units into two groups: Infantry (38x) and Tanks (13x);
- Randomly draw 6 of the 13 Soviet Tanks and put them facedown in the Tank Spawn Pool (or in the appropriate Draw Bag);
- Mix the 4 Soviet Guard Infantry with 18 randomly drawn Soviet Infantry, and put them (22x) facedown in the Infantry Spawn Pool (or in the appropriate Draw Bag);
- Mix the remaining 7 Tanks and 16 Infantry, and then, without looking, randomly deploy them, one Unit per hex and at random strength, on the 23 hexes marked with a pink setup rectangle icon;
- Separate the White and Yellow German Infantry Units;
- Deploy at full strength the 2nd, 15th, and 79th Regiments in Hex W; the 120th Regiment, and one Yellow Infantry, randomly drawn, in Hex X; and two Yellow Infantry, randomly drawn, in Hex Y;
- Deploy the remaining 30 German Units facedown on the Reinforcement Track as follows: 6 White Infantry, randomly drawn, on the last column (one for each row), and the other 24, randomly drawn, on the remaining 24 boxes;
- Shuffle the German deck, and draw three Cards to make the German hand;
- Shuffle the Soviet deck and place facedown.
The Solo Mode
In its solo mode, Stalingrad: Inferno on the Volga is a fully functioning solitaire game wherein the German player must seize the city of Stalingrad as soon as possible. The Soviet side follows a logic algorithm, whereby decisions are fully implemented by the Artificial Intelligence and the (German) player needs only to move/draw the Soviet Units/Cards following the criteria described below, not revealing the Soviet Units/Cards until the Showdown step of Combat.
Random Deployment
When the (German) player is asked to deploy a random Soviet Unit on the mapboard (usually in a Soviet Spawn Hex, or a Battle Hex), he must randomly draw a Unit from the appropriate Spawn Pool (if asked to deploy an Infantry, he will randomly draw one Infantry from the Infantry Pool; if a Tank, he will draw randomly from the Tank Pool), without looking at the sticker of the Unit drawn.
As Soviet Units are always deployed at random strength, the player will apply a random spin to the block (without looking at the sticker) before deploying it upright with the sticker facing opposite to him (concealed).
German Units instead are always put in play (either during setup, or as Reinforcements) at maximum strength.
Adjusting Soviet Strength
When a Soviet Unit is revealed during combat with its strength showing no dots, the Unit is immediately adjusted to the minimum strength possible.
Example: A Soviet Infantry is revealed, and it has no Strength (one side of the four), and it is immediately adjusted to its minimum (1 step) strength.
Drawing Cards
When drawing Cards for the Soviet AI, the player should not look at them. The player will draw the top Card from the Soviet deck and place it in on the eastern side of the map (Soviet hand).
When the Soviet AI has to play a Card, the player will shuffle the Soviet hand (without looking), and then take one random Card from it, placing it facedown on the board until Showdown.
Moving a Stack
After rolling one die for each top stacked hex (see "Soviet Actions" later in these rules), the Soviet AI will try to move one Unit of the Stack according to the Soviet Compass. In order to do this, the player randomly chooses one of the units in the stack and moves it to the adjacent hex without revealing it, using the Compass to determine the direction.
The Soviet Compass
The Soviet Compass gives the direction in which one Soviet Unit (randomly chosen if the Stack has more than one Unit) in the stack must attempt to move. The Compass is a center hex surrounded by six numbered hexes, and the die result determines which hex the Unit moves to relative to its own hex.
Capturing an Enemy Spawn Hex
Each time a side captures an Enemy Spawn Hex (there are nine in the game: #3, #7, #9, #13, #15, #19, X, Y, and Z), the capturing side immediately draws a Card from its Deck.
The Actions
Stalingrad: Inferno on the Volga is played over a series of rounds - alternating between German and Soviet. The Germans play the first round and can perform only one of the following actions during each of their rounds:
- Call for Reinforcements.
- Make ONE Long Movement.
- Make up to TWO Short Movements.
- Make ONE Hasty Attack.
- Make ONE Deliberate Attack.
If the action undertaken includes an Attack (Hasty or Deliberate), then the combat sequence is followed to resolve the Attack. After the German action for that round has been completed, it is the Soviet round to play an Action.
The game is asymmetric, with the Germans able to choose between five different actions, and the Soviets mandated by the game algorithm to play one of two.
German Actions
1. Call for Reinforcements
The German player draws a Card from the German Deck, then rolls six dice. Each die rolled is deployed, one at a time, on the leftmost available facedown unit in the row of the Reinforcement Chart matching the die roll. The German player then picks up all the facedown Units with a die on them.
Example: The German player rolls one 2, one 3, one 4 and three 5's. The German player will get the leftmost unit from the second row, the leftmost unit from the third row, the leftmost unit from the fourth row and the three leftmost units from the fifth row.
The German player deploys all the Blue Units in the Blue Hex (Z), and all the Yellow Units in the two Yellow Hexes (X, Y in any combination). White Units may be deployed in any combination of hexes X, Y, Z. Units may not overstack. The stacking maximum is four Units per hex.
Units that cannot be deployed due to overstacking (or because the Soviets control the German Spawn Hex) are returned to the German Reinforcements Chart, starting from the row that has the fewest units left, or the one with the lowest row number (1-6) if two or more have the same number of units left.
If a die is placed in an empty box (due to lack of facedown units) the German player must remove the affected unit (shown on the right of each row), even if it has been just picked up in this phase. It is redeployed back into the designated space on the track. If the unit cannot be removed for any reason, then this has no effect. After a Unit has been removed in this way, it cannot be deployed on the map again and further rolls in its row have no effect.
Example: The 1st row is empty, and the Germans call for Reinforcements. Two of the player's die results are "1's". As the 1st row is empty, the Germans must remove the 64th Panzer Grenadier Regiment from the game and deploy it face up (to show that this unit has been removed from the game) on its icon on the last column of the 1st row. If this unit was not on the map (either because it was not already deployed, or it has already been eliminated), then nothing further happens. The second "1" rolled has no effect, as will all future "1" results for the 1st row.
Movement
Separating Blocks from the moving Stack is a Breakdown, and a moving Stack ending its move in the same hex as another Stack (without overstacking) is a Join-up.
2. One Long Move
A German Stack in a clear terrain hex not adjacent to a Soviet Stack may move up to two Clear Hexes, provided that both these entered hexes are not adjacent to a Soviet Stack. The first entered hex may contain a German Stack, but it cannot partecipate in the move, and stacking limit is ignored while moving through it. Join-up, Breakdown, Combat not allowed.
Example: The German stack in hex "1" moves into hex "3" performing a Long Move. Remember that a Long Move does not allow Breakdown or Join-up, that it can only start from a hex which is not adjacent to a Soviet stack, and that it must not pass or end adjacent to a Soviet stack or traverse or end in a Rough/Urban Hex.
3. Up to Two Short Moves
A combination of up to two German stacks and/or substacks broken down from one Stack may be moved to adjacent hexes (or an adjacent hex) that are not adjacent to or contain any Soviet stacks. Breakdown and Join-up is permitted, but no combat is allowed. When using this Action, the German player can choose to move no Units, effectively passing his turn.
Example: The only possible Short Move a German stack can make is by one stack into the hex indicated by the green arrows, as a Short Move cannot end into a hex adjacent to a Soviet stack. Other stacks already adjacent to a Soviet stack are pinned.
The same restrictions (relating to number of stacks, overall stacking limit and enemy adjacency) equally apply to moving two different stacks – or substacks – and to any ensuing joining-up or breakdown.
Example: The left German Stack can only do a Short Move west or southwest. The right German stack can only do a Short Move west. The left German stack could move one (a Breakdown) or both Units west and/or southwest. The right German stack could move one to three Units west as a single Short Move but could not move all four Units due to the stacking limit (one block is already present in the hex being moved to). Units from the left German stack could move southwest and Units from the right German Stack could move west as two short moves, but again no more than three Units total could move to that hex due to the stacking limit.
4. One Hasty Attack
An attack in which preparation time is traded for speed in order to exploit an opportunity.
The German player moves one stack which is not currently adjacent to any Soviet stack into a hex that is adjacent to a Soviet stack in order to make a Hasty Attack. This can be directed against only ONE adjacent Soviet stack, and all the German units in the Stack must participate in the Attack. Breakdown and Join-up (without violating stacking limit) is allowed; in the latter case the moving Stack may Join-up and attack with Units already adjacent to the target. A Stack starting its turn adjacent to a Soviet Stack may not make a Hasty Attack unless it is joined-up by a Stack that moved into it during this Action. A Hasty Attack does not allow Card use by the Germans. Hasty Attacks do not generate Rubble.
Example: Of two German stacks already adjacent to Soviet stacks and one that is not, only the stack not already adjacent to a Soviet stack is allowed to make a Hasty Attack. That stack can make a Hasty Attack in two different ways: it can join one of the other stacks, and then the newly formed stack would attack the adjacent Soviet stack; or it can move in the other direction, and then attack the adjacent Soviet stack.
Remember that during a Hasty Attack only one Stack can attack, it must include the Unit/s that actually moved, and it cannot start the turn adjacent to any Soviet stack, unless this is a Join-up, as described above.
5. One Deliberate Attack
A type of offensive action characterized by pre-planned and coordinated employment of firepower and manoeuvre to close with and destroy or capture the enemy.
If this option is played, then no movement occurs (and thus there is no breakdown nor join-up). The German player may choose one Soviet Stack adjacent to one or more German Stack(s) and make one attack against it with some or all of the adjacent German Stacks. The German player may also play a Card from his hand. The German player may choose which stack(s) will perform the attack, but all the units in the selected stacks must attack. A Deliberate Attack may generate Rubble.
Example: Each of two German stacks can perform a Deliberate Attack against one of two adjacent Soviet stacks, but not both in the same turn. Note that in this instance neither German stack can make a Hasty Attack this turn, as at the beginning of the Round all stacked units and attacking units were already adjacent to a Soviet stack – i.e. no join-up has taken place.
Example: The German player declares a Deliberate Attack from all four Stacks surrounding the dock in hex "9". Every Unit in each attacking Stack must attack the target hex.
Combat Sequence
The Combat Sequence is identical for both sides, but while the German player can make only one Attack per turn, the Soviet side may make up to six. Soviet combats are resolved in a specific order, and each combat is completely resolved before another one starts.
Once an Attack is performed, combat is declared, and the following sequence is applied:
- The Soviet side must play a random Card from the Soviet Hand, if available, and keep it facedown until Showdown. This mandatory Card is played even if it is the Soviets who are attacking;
- If resolving a Deliberate German Attack, the German player may play a Card of his choice, facedown;
- Showdown: both sides' Cards and Units involved in the Combat are revealed simultaneously;
- Adjust Soviet Units' Strength;
- Soviet Card effect is applied;
- German Card effect is applied;
- Discard used Support Cards;
- Soviet Opportunity Fire (only if available; needs Chuikov);
- Rubble die roll (only if the German attack is Deliberate, and the hex is Urban);
- Close Combat. Simultaneously, unless:
- A. Urban hex: the Defender always rolls first;
- B. Clear hex: the Germans may roll first if Hoth is in play and Combined Force Bonus is available;
- Advance after Combat (mandatory if the attacker wins; at least one Unit is required to advance);
- Blitz, if available (German only; needs Hoth);
- Conceal units.
Rubble
Rubble in an Urban Hex gives the defender Double Defence (attacker requires two hits to inflict one actual hit on defender) when defending in such a hex. Rubble may be generated in an Urban Hex only (maximum one Rubble per hex), in two ways:
A. A Soviet Anti-Air Card (four such Cards); B. A German Deliberate Attack with a "successful" Rubble die roll.
The Rubble die roll is successful if the sum of three D6 is greater than 18, after adding the following cumulative modifiers:
- The rubble modifier (+1/+2/+3) indicated on the German Card played (if any);
- +1 for each Hex from which the Germans are attacking (+1/+2/+3/+4/+5/+6);
- +1 for each German Panzer/Panzer Grenadier unit Attacking.
If the result is above 18, a Rubble Marker is immediately and permanently placed in the Urban Hex. No more than 15 Rubble Markers (in 15 hexes out of the 27 Urban Hexes in the game) may be placed during a game; any further die rolls are ignored.
Example: The German player decides to perform a Deliberate Attack into Hex "9" (Urban Hex) from four different Stacks (+4) with a total two Panzer (+2) and two Panzer Grenadier (+2) Units, supported by the Heinkel 111 Card (+3), for a total Rubble Modifier of +11. Thus a 3d6 roll of 8+ would generate Rubble. The Rubble Marker is placed after any German Card effect has been applied.
Close Combat
Units roll the same number of dice as their Strength (number of dots), with their Firepower (what result they hit on) given by the color of the dots.
During Close Combat, both sides roll for their units simultaneously, adding up their total number of hits. Each Unit will only roll its dice once per combat.
Each actual hit (bearing in mind the possible effect of Rubble) causes a reduction of the strongest enemy unit. Which Unit is the strongest, and thus takes the next hit, may well alter if multiple hits are inflicted on the same stack in the same combat. If two units have the same strength, the German player chooses which unit is reduced.
There are two exceptions to simultaneous combat:
- In an Urban Hex, the defender rolls first, and their hits are immediately applied to the attacker before the attacker rolls with his remaining units (if any);
- A German attacker rolls first and immediately applies hits if the combat is in a Clear Hex, Hoth is in play, and the Combined Force Bonus is available.
Example: Four Soviet Units (eight dots) are defending in an Urban Hex against 16 German Units (33 dots). Because they are defending in an Urban Hex, the four Soviet Units roll first (five dice SF, three dice DF - remember that Soviet Units are read from the Soviet perspective!), and all hits are applied immediately to the attackers.
Then, the Germans roll with their surviving units. Note that there is a Rubble Marker in the hex (Double Defence).
Note: The fire of a defending stack of units never creates Rubble; nor does its protective bonus (double defence) ever apply to an attacker receiving such fire.
Advance After Combat
If no units remain in the defending hex, the attacker must occupy the empty hex with at least one of the surviving attacking units (others may stay in their hex). If the Soviet side was the attacker, the advancing Soviet Unit must be the strongest (in number of dots - German player chooses if tied). The Soviets cannot advance with more than one unit. Up to four German Units may advance in any combination from among the attacking stacks.
Concealing Units
At the end of combat, all remaining revealed units are concealed by placing them upright on the mapboard, facing their owner.
Soviet Actions
The Soviet AI is governed by the following algorithm which compares the number of Soviet Top Stacked Hexes (the hex or hexes with the largest Stack by number of Units, which may be from one to four Units) to the number of Soviet-controlled Soviet Spawn Hexes (#3, #6, #7, #13, #15, #19):
- If the Soviets control at least ONE Soviet Spawn Hex, go to 2; otherwise draw a Card from the Soviet Deck, add it to the Soviet Hand, and go to 5;
- Check the Soviet Top Stacked Hex;
- Separately count the number of Soviet Top Stacked Hexes and Soviet-controlled Soviet Spawn Hexes;
- If the number of Soviet Top Stacked Hexes is:
- A. Greater than the number of controlled Soviet Spawn Hexes, then the Soviets must perform a Spawn Action;
- B. Equal to or below the number of controlled Soviet Spawn Hexes, then the Soviets must perform a Movement Action;
- The Soviet turn ends and play moves to the next German turn.
Note: X, Y, and Z are the German Spawn hexes and they do not count for this.
A. Soviet Spawn Action
The Soviets deploy the following Units – randomly drawn and at random strength (no looking!) – from the Infantry/Tank Spawn Pools into each Soviet-controlled Soviet (not German) Spawn Hex, in this order:
- one Infantry and one Tank each in hex #3 and in hex #19;
- one Infantry each in both hex #6 and in hex #15;
- one Infantry in hex #13;
- one Infantry in hex #7.
The maximum number of Units the Soviet may spawn is nine (six Infantry and three Tanks).
Card Drawing
If the Spawn Hex is already full stacked, then the Soviets draw a Card (exception: if there are already three units in hex #3, #13, or #19, then only one Infantry is deployed and no Card is drawn).
Any time a type of Unit is required to spawn, but that Unit's Pool is empty, the Soviets draw one Card for each Unit not available.
Example: The Soviets need to spawn Tanks in hex #3 and #19, but the Tank Pool is empty. The Soviets will then draw one Card for each of the Tanks that could not spawn (two Cards in this case).
Example: There are already two Marines on the board; if a third one needs to be spawned, the Soviets draw a Card.
B. Soviet Movement Action
The Soviets roll one die for each of their Top Stacked Hexes. As each die is rolled, it is deployed on the Stack, and then a new die is rolled for the next Top Stacked Hex and so on.
Die Rolls Order
Start from the northernmost hex (or the closest to the Volga if two or more hexes are farthest north) and continuing south.
Example: The Soviets have three Top Stacked Hexes (#7, #9, and #25) with 3 units each. The roll order is #7 (the northernmost), then #9, followed by #25 (as #9 and #25 are equally north, but #9 is closer to the Volga).
Note: The maximum number of dice rolled is six (as the Soviets may control maximum six Soviet Spawn Hexes; the German Spawn Hexes X, Y, and Z do not count). If the number of Top Stacked Hexes is seven or higher, the Soviets will always perform a Spawn Action.
Once the Soviets have rolled for all of their Top Stacked Hexes, each die roll will be resolved starting from the lowest die roll (1) up to the highest (6). Die roll can result in movement, drawing Card, or a Hasty Attack. Each die roll must be resolved, even if the number of Units in its hex changes.
Movement
For a die roll from 2 through 6, choose a random Unit in the Stack and move it into an adjacent hex corresponding to the die roll on the Soviet Compass. Please note the exceptions to this below.
Card Drawing
There are three circumstances under which the Soviets draw a Card instead of performing a movement:
A. If two or more die rolls are identical, then the Soviets draw one Card for each identical die roll and do not move a Unit from that hex; B. If a Movement cannot be made, either because there is not a playable hex (those marked with a letter W, X, Y, and Z or a number from 1 to 105) in that direction, there are no Units in the hex left to be moved, or because the hex in that direction is already occupied by four Soviet units, the Soviets draw a Card; C. If the die roll is a 1, unless this generates a Soviet Hasty Attack (see below), the Soviets draw a Card.
Example: If the die roll of 6 dice is 1, 1, 6, 6, 3, and 1 then the Soviets draw five Cards (three Cards for the 1s and two Cards for the 6s) and move one Unit from the hex that rolled a 3. These five Cards are added to the Soviet Hand.
Soviet Hasty Attack
If a Movement cannot be performed because a German stack occupies the hex, then the Soviet stack must perform a Soviet Hasty Attack (resolve the combat before proceeding to resolve the next die roll). In a Soviet Hasty Attack, the Soviet Stack must attack the German Stack and must play a Card, randomly chosen from the Soviet Hand, whilst the Germans cannot play any Card (the Germans may play a Card only when performing a German Deliberate Attack).
Example: The Soviets roll for hexes #7, #9, and #25 (the three Top Stacked Hexes). The die rolls are respectively a 6 for the hex #7, a 1 for #9, and a 5 for #25, with the die placed on each of the hexes as a reminder. Then, starting from the lowest result (1) the Soviets resolve the die roll, one by one:
- The 1 mandates a draw from the Soviet Deck, adding the Card to the Soviet Hand;
- The 5 mandates a move toward a German Stack, causing a Hasty Attack against the German Stack. In the combat the Soviets randomly play a Card from their Hand (which now includes the Card just added), and if combat eliminates the German stack in the attacked hex, the strongest Soviet Unit in dots (the German player chooses if more than one Soviet Unit has the same Strength) must advance into that hex;
- The 6 mandates a randomly chosen Unit from hex #7 move into hex #6.
Card Decks
The Soviet and German decks have both Leaders and Support Cards. When resolving a Soviet Card, keep in mind to resolve the entire effect before proceeding to the German Card. When a Card requires dice to be rolled, each hit is immediately applied. There is no maximum Hand size. Played Leader Cards are placed faceup on their player's side of the board.
German Leader Cards
Once drawn, a German Leader Card is immediately put in play, and the effect is permanent. Multiple Leaders may be in play at once.
- Paulus: The Germans now double the number of German Cards drawn, both when calling for Reinforcements and when conquering a Spawn Hex.
- Hoth: The Germans gain the ability to use Combined Force Bonus and Blitz Movement.
- Von Richthofen: The Germans now must roll double dice for airstrike Cards (Heinkel 111 and Stuka). The Rubble Modifier of these Cards (+2 and +3) must be doubled as well (to +4 and +6).
- Linden: The German player is now allowed to play more than one Pioneer Card during a German Deliberate Attack, cumulatively adding each Card's Rubble Modifier; no other German Cards can be played with the Pioneer Cards. The German player is also now able to play the 672nd Pioneer Card (cannot be played unless Linden is in play).
- OKH: To achieve Victory, the German player must complete one of the following: A. All Soviet Units eliminated from the map or; B. All 19 hexes from #1 to #19 are German controlled. The game may also last longer. When the Soviet Deck is empty, the German player can play an additional round for each of the five "R" marked Units he has removed from the board and deployed on the German Reinforcements Track. Each "R" Unit removed after the Soviet Deck is empty allows an additional round. Up to five extra rounds (as there are five "R" marked German Units) may be played.
Combined Force Bonus
When a battle occurs in a Clear hex in which the Germans have both Infantry and Tanks but the Soviets do not, the Germans may use the Combined Force Bonus. Panzer Grenadiers are considered a mixed formation of Panzer and Infantry. They always benefit from this bonus, even when attacking alone, while all the other German Units need a companion for this bonus to be applied.
Effect: In Close Combat, the Germans roll the dice before the Soviets, and hits are immediately applied. Then the Soviets roll the dice with their remaining Units. This bonus is eligible both attacking and defending.
Blitz Movement
After completing the Advance After Combat into a Clear Hex, each German Blitz Unit (dark background) that advanced may move again into any adjacent empty Clear Hex. The Stack may split into up to four different Clear Hexes, possibly leaving the original hex empty.
Note: Blitz German Units (Panzers 4x, Panzer Grenadiers 6x, and Motorized Infantry 3x) are the only Units able to Blitz, but only if Hoth is in play. Soviet Tank Units (13x) have no special function in the game (they cannot blitz).
German Support Cards
The Germans may play one Support Card during a German Deliberate Attack (not a Hasty Attack or while defending). All effects are resolved immediately (including hits and strength reduction) and the Card is discarded. While Sniper and PAK do not require a die roll and ignore Rubble, all other German Support Cards have TF (hit at 4+) and increase the chance of creating Rubble, adding a modifier from +1 to +3.
- Sniper (x3): Reduce the strongest Soviet Infantry by one step, ignoring Rubble, with ties chosen by the German player.
- Pak (x2): Reduce the strongest Soviet Tank by one step, ignoring Rubble, with ties chosen by the German player.
- Heinkel 111 (x4): 6 dice (TF); +3 to the Rubble Die Roll.
- Stuka (x4): 5 dice (TF); +2 to the Rubble Die Roll.
- Howitzer (x4): 6 dice (TF); +2 to the Rubble Die Roll.
- Pioneer (x5): 5 dice (TF); +1 to the Rubble Die Roll.
Two metal miniatures, representing a Heinkel 111 and a Stuka, are provided with the game and can be deployed in the hex under airstrike, to add a fun visual.
Soviet Leader Cards
Once drawn, Soviet Cards are kept hidden in the Soviet Hand, until they are randomly chosen and played during a combat. When a Soviet Leader Card is played (this happens only during a combat), the Leader is immediately put in play, and its effect is immediate and permanent. Multiple Leaders may be in play at once.
- Chuikov: The Soviets now always perform Opportunity Fire when defending and Soviet Hasty Attacks are now Deliberate Attacks.
- Zaytzev: When a Soviet Sniper Card is played, count it as being played twice, separately.
- Khrushchev: Each Soviet Unit now receives a hit bonus (+1 to hit) in Combat, including Opportunity Fire. This effect is not applied to Soviet Support Cards. Additionally, each 1 rolled by a Soviet unit - including Opportunity Fire - but not by Soviet Cards, counts as a hit against the revealed Soviet Units, and is resolved immediately. If every Soviet Unit in a defending Stack is lost from rolling 1s, resolve every other step of Combat except for Close Combat.
Note: The Khrushchev Hit Bonus when applied to Opportunity Fire makes the die hit at a 5 and a 6, not only the normal 6. However, each 1 is treated as a hit on the Soviet Units.
Opportunity Fire
After resolving and discarding Cards in a combat in which the Soviets are defending, each Soviet Unit adjacent to each German attacking Stack(s) - including those in the attacked Hex - rolls one die (SF). Each hit scored is immediately applied to the Germans. Soviet Units performing Opportunity fire are not revealed during this step.
Deliberate Attack
When a Soviet Stack performs a Hasty Attack against a German Stack during the Soviet Move Action, all the Soviet Stacks adjacent to that German Stack will join the attack (if Chuikov is in play). The Soviets still do not generate Rubble.
A Soviet Stack may participate in multiple Deliberate Attacks during a round if eligible.
Example: When a die result of 5 causes a Soviet Stack to attack an adjacent German Stack, other Soviet Stacks adjacent to the German Stack under attack would then automatically join the attack because of Chuikov's Deliberate Attack.
Soviet Support Cards
A Soviet Support Card randomly drawn from the Soviet Hand must be played in every combat (both attacking and defending), unless the Soviet Hand is empty. All effects are resolved immediately, including hits and strength reduction, and the Card is discarded.
Soviet Support Cards do not require a die roll, except Tommy Gunner and Volga River Flotilla.
- Sniper (x5): Reduce the strongest German Infantry Unit by one step (Motorized and Panzer Grenadiers included), ignoring Rubble, with ties chosen by the German player.
- Pak (x2): Reduce the strongest German Panzer/Panzer Grenadier Unit by one step, ignoring Rubble, with ties chosen by the German player.
- Infiltration (x4): Deploy a random Infantry (in the Soviet controlled Hex which has been attacked, or in the Soviet controlled hex which has started the attack). If the hex is already fully stacked, or no Infantry is available, then draw another Card and add it to the Soviet Hand.
- T-34 Dug in (x3): Deploy a random Tank (in the Soviet controlled Hex which has been attacked, or in the Soviet controlled hex which has started the attack). If the hex is already fully stacked, or no Tank is available, then draw another Card, and add it to the Soviet Hand.
- Tommy Gunner (x2): 2 dice (DF).
- Volga River Flotilla (x5): Roll three dice. If the Soviet hex is a coastal hex (hex #3 to #19), those three dice represent Gunboat support fire (DF). If the Soviet hex is not one of the above, then deploy a Marine Unit at random strength in the hex indicated by the sum of the three dice (Landing Hex), but only if the hex is not occupied by a German Unit (it may be German controlled and empty). If the Landing Hex is Soviet controlled and fully stacked, or if no Marine is available, then draw another Card and add it to the Soviet Hand. If the Landing Hex has enemy Units, then the Card has no effect.
- AA (x4): Cancel the effect of a German airstrike Card (including the Rubble Modifier), if played, and immediately place a Rubble Marker in the Hex indicated on the Card.
Addenda: Other Modes of Play
The Co-Op Mode
In the Co-Op mode, TWO German Players must capture the city of Stalingrad before Operation Uranus starts (the Soviet Deck is finished).
One Player controls the German 6th Army (Yellow Units), and the other Player controls the 4th Panzer Army (Blue Units).
Additional Rules
- A German Stack may NOT contain both Yellow and Blue Units (it may contain Yellow and White Units, or Blue and White Units);
- A German Stack containing at least one Yellow Unit is considered a Yellow Stack;
- A German Stack containing at least one Blue Unit is considered a Blue Stack;
- A German Stack containing only White Units is not controllable by either German Player until a Yellow/Blue Unit joins the Stack;
- The Yellow Player plays the first round, then alternates German turns with the Blue Player. The Yellow Player also controls the starting German Hand of three Cards and only he can use them;
- All other German Support Cards belong to the player who draws them, and cannot be used by the other player;
- German Leader Cards, once in play, affect both players - irrespective of who drew or played them;
- German players may freely choose one of the five German actions on his turn;
- When calling for Reinforcements, Units are distributed and deployed as usual, with the exception that all White units must be deployed in the Spawn Hex(es) whose color corresponds to the player who called for Reinforcements, until those hexes are fully stacked. Only then may White Units be deployed in the other player Spawn Hex(es);
- Cooperation during the execution of a Deliberate Attack (with either player agreeing to attack alongside the other against the same target), is the only direct way the two German players may cooperate during the game. This can also include attacking support from a completely White Stack, provided that at least one other attacking Stack belongs to the "in turn/active" German player;
- When the game ends, besides the standard Victory Conditions, the winning player is the one who controls more Soviet Spawn Hexes.
The 1 vs 1 Mode
In this mode, one Player will control the Germans and the other Player will control the Soviets.
The German player will follow the German rules for SOLO mode and the Soviet Player will use the rules below. The Soviet Player will be able to see the strength of his Units and the Cards in his Hand.
Soviet Player
On his turn, the Soviet Player follows the sequence below:
- Check the Soviet Top Stacked Hex (the hex or hexes with the largest Stack by number of Units, which may be from one to four Units);
- Count the number of Soviet Top Stacked Hexes and Soviet-controlled Soviet Spawn Hexes;
- If the number of Top Stacked Hexes is greater than the number of Soviet-controlled Soviet Spawn Hexes, the Soviet Player must perform a Spawn Action. If the number is equal or below, the Soviet Player chooses to perform a Movement Action OR a Draw Action.
Spawn Action
If the number of Top Stacked Hexes is above the number of Soviet-controlled Spawn Hexes, the Soviet Player must perform the Spawn Action as described in the Solo Mode.
Note: If the Soviet Player cannot spawn the type of Unit required (either because the Spawn Hex is full or because he ran out of that type of Unit) he will instead draw a Card.
Movement Action
The Soviet Player may perform a Movement Action if the number of Top Stacked Hexes is equal to or below the number of Soviet-controlled Soviet Spawn Hexes.
When performing a Movement Action the Soviet Player must move a single Unit from EACH Top Stacked Hex into a valid adjacent hex. The Unit may move or attack "backwards," i.e. the "1" direction on the Soviet Compass. The movement order and the Unit moved are chosen by the Soviet Player.
During the Movement Action, a Top Stacked Hex can, rather than move, declare a Hasty Attack into an adjacent hex with a German Stack. If Chuikov is in play, it is a Deliberate Attack, and all the Soviet Stacks adjacent to the German Stack must attack.
Draw Action
The Soviet Player may choose to perform a Draw Action if the number of Top Stacked Hexes is equal to or below the number of Soviet-controlled Soviet Spawn Hexes.
When performing a Draw Action, the Soviet Player does not move any Unit from any Hex. Instead, he will Draw one Card from the top of the deck and end his turn.
Combat
The combat sequence is the same as in Solo Mode with the following exceptions:
- The Soviet player is not forced to play a Card during combat;
- The Soviet player can choose which Card he wants to play.
The 2 vs 1 Mode
In this three-player mode, two players control the Germans, and a third player controls the Soviets.
In this mode of play, the German players will use the Co-Op Mode rules, and the Soviet player will use the 1 vs 1 Mode rules.
The Designer's Way
The Designer's Way is a set of additional rules that can be used in any of the Game Modes (Solo, Co-Op, 1vs1, 2vs1). These rules are designed to spice things up even more, giving both sides (German and Soviet) random advantages, and can be played in four different difficulty levels.
Normal Level
Before step 1 of Setup, the German player will roll two dice (one for the Soviets and one for the Germans). Each side will immediately get a number of advantages (randomly chosen) equal to the die roll.
Example: The German player rolls one die for the Soviets and gets a 4, then he rolls another die for the Germans and he gets a 2. The Soviets will have 4 advantages and the Germans only 2. From the list below, 4 advantages are randomly chosen for the Soviets, and 2 for the Germans.
German advantages: Paulus, Hoth, Von Richthofen, Linden, OKH, 6th Panzer.
Soviet advantages: Chuikov, Khrushchev, Zaytsev, Marines Empowered, Soviet Divisions' Late Deployment, Immortal Guard.
Leader Advantages (German Leader advantages, and Soviet Chuikov/Khrushchev/Zaytsev)
When one of these advantages is drawn, the corresponding Leader Card is set on top of the Deck (in random order if more are drawn).
6th Panzer Division
When calling for Reinforcements, as soon as the bottom row (6) of the Reinforcements Track is empty and a 6 is rolled, Erhard Raus - the 6th Panzer Division Commander - is deployed on the corresponding box on the Reinforcements Chart, and the three Units of the 6th Division become available as Reinforcements. Deploy these three Units as described for "Units that cannot be deployed due to overstacking." These Units count as White Units.
Chuikov
When the Chuikov Card is drawn, three dice are rolled, and the results are summed up. Chuikov's Uberblock is deployed in the corresponding hex (where his HQ is established), but only if it is Soviet controlled. If the hex is not Soviet controlled, or if the Germans enter the hex later in the game, the Chuikov Card is discarded, and all its effects end immediately. The Chuikov Block cannot be moved.
Immortal Guard
If one or more of these Units is in a combat, they adjust their strength to maximum immediately after the Showdown step of combat. They will do this at the start of every combat unless eliminated.
Marines Empowered
Soviet Marine Units are always deployed (spawned) at maximum strength.
Soviet Divisions' Late Deployment
During step 6 of setup, mix the 4 Soviet Guard Infantry with 18 of the 4 dot strength Infantry Divisions rather than 18 random Infantry. These Units still deploy at random strength.
Easy German Level
The Germans start the game with Paulus, Hoth, and Richthofen in the German Hand. Additionally, Linden and the OKH are removed from the German Deck before shuffling, and Linden is added on top of the Deck (it will be the first German Card drawn), while the OKH is put on the bottom (it will be the last German Card drawn).
Easy Soviet Level
The three Soviet Leader Cards are removed from the Soviet Deck before shuffling, then added in random order to the top of the Soviet Deck (they will be the first three Soviet Cards drawn). Remember that these Cards do not enter play until played by the Soviets during a Combat.
Impossible German Level
Use the rules for Easy Soviet Level in addition to the rules below.
Soviet Fortifications
Five Discs (three brown, and two red) are deployed after step 3 of Setup, brown in hexes #4, #21, #28 and red in hexes #26, #32. These are fortifications which provide a +1 bonus to Close Combat and Opportunity Fire rolls made by the Units in these hexes. This bonus does NOT apply if the Soviets are attacking from one of these hexes.
If the Germans enter one of these five hexes, the Fortification Marker is destroyed and permanently removed from the game.
As hexes #26 and #32 are Urban Hexes, a Rubble Marker (White Disc) may be deployed there as well.
These five discs represent the Big Mushroom (#4), the Little Mushroom (#21), the Mamayev Kurgan (#28), the Martin Furnace (#26), and the Grain Elevator (#32).
1077th AA Rgt and 20th Destroyer Brigade
These Units count as Infantry Units for all purposes, with one exception. After resolving step 4 of the Combat Sequence:
- The AA Regiment cancels any German Airstrike Card;
- The Destroyer Brigade automatically reduces the strongest German Panzer/Panzer Grenadier Unit by one step, ignoring Rubble, with ties chosen by the German player.