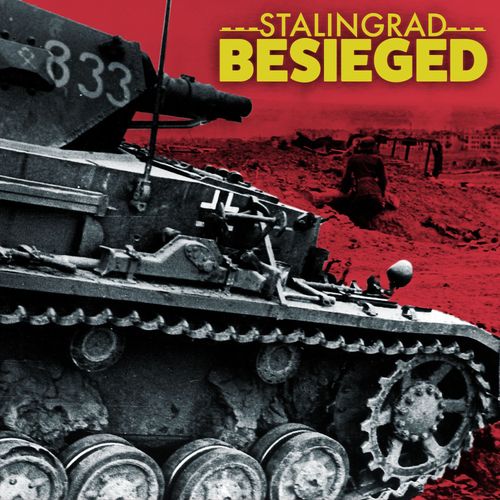
Stalingrad Besieged
Stalingrad Besieged Rulebook
Table of Contents
Table of Contents
1. Stalingrad Besieged 1942
The Battle of Stalingrad was one of the most important battles of World War II. The Axis failed to secure the ferry ports in Stalingrad (cutting off reinforcements) soon enough to prevent the Soviet counterattack that caved in the Axis flanks far from Stalingrad, and ultimately surrounded and captured Stalingrad and the 6th Army. Thereafter, Germany was on the defensive in the war as a whole. This game focuses on action in and around Stalingrad; the Axis must succeed there in time to reinforce their flanks against the Soviet November offensive.
This game depicts the battle in the city of Stalingrad itself. The Axis may have actually "won" this battle, securing all but a few beachheads, but too late to disengage troops to reinforce their flanks.
Stalingrad Besieged 1942 is a game for two players using cards, counters, and blocks representing the units. One player is the Axis (Germans) and the other is the Soviets (typically called Russians).
2. Objectives
At the end of the game, if one player controls both Ferry Points, he/she wins. If each player has one, then if the Tank Factory is still intact, Russians win; if it is destroyed, Germans win.
3. The Board
The battle takes place on a grid divided into nine columns and six rows. When the units are laid out, the play area will look like the illustration.
The Turn Record on the map is numbered from 1 to 7. At the end of his turn the Russian player moves the Turn marker to the next number (it begins on the 1). After turn 7 is completed the game ends, if it has not ended beforehand.
The map shows the cards divided into three sets of three columns, every three columns is a sector which is shown by a red line. This delineates the three sectors, left, right, and center, used to help govern movement and victory.
Each unit has a designator (such as "Infantry"), an attack number on the left, a defense number in the center, and a movement capability number on the right, as illustrated. Units come as a card unit, a counter unit, or a block unit.
The short side of the card is its front (and rear; front faces the enemy side of the board). The top of the counters and blocks represent the front facing. The sides are its flanks.
4. Setup
Germans set up first. Germans move first each turn.
Shuffle the Option Cards. Randomly deal three to each player, face down so the other player doesn't know what they are. After these are dealt the player may look at them, but will not want to show them to their opponent.
Each player takes the units for his army, places them face down, mixes them up, and randomly selects and sets these aside as his reinforcements; two for Russia, one for Germany. After these are set aside, the player may look at their own, but will not want to show them to his opponent.
Then each player places his army units, face down, in the locations shown in the illustration on his side of the board. Germans place first, but Russians can place at the same time if they so choose, as they're going to know where the Germans are anyway. Players may look at their units when deciding where to place them, and not shown to their opponents. Cards and counters should be placed on the board face down. Blocks should be placed standing up with the label facing the player, not the opponent.
The Russian player must place his Ferry Points and Tank Factory in specific spaces, one in each sector. Ferry Points are placed one per sector along the back row (Russian side) of the game board. The Tank Factory may be placed in a sector that does not have a Ferry Point; it may be placed in any eligible set-up space for the Russian player in that sector.
Players then turn face up the row closest to their opponent, if they are within two moves of an opposing unit.
5. Sequence of Play
During your turn you do the following:
- (At any appropriate time before combat) play an Option Card
- Choose replacements (if any; these may be placed before or during movement)
- Move some or all your units
- Conduct combat
- Draw an Option Card
- (If Russian) Move turn marker
6. Option Cards
The Option cards should be self-explanatory. Some cards have different choices for each side – you can only select the option for your side.
As part of your turn you may (before combat) play one of the Option Cards from your hand. Reshuffle the Option discards for a new draw pile when the draw pile becomes empty.
You may choose not to play an Option Card.
Note that many Option Cards have two choices; you choose which one to use, obviously the one favoring your side, when you play it; the other is ignored.
You can play an Option without executing it.
7. Reinforcements and Replacements
The battle in Stalingrad was a "meat-grinder", a battle of attrition more like World War I than World War II. Some destroyed units can be reconstituted, as units were rarely wiped out to a man.
Eliminated units can be reconstituted and rejoin the game as "Replacements".
Replacements are units returned from the "eliminated pile". Reinforcements are units that were removed from the deck at the start of the game.
Each side gets two replacements per turn, if available (you cannot "save up" an opportunity). On the other hand, reinforcements appear only when you play a Reinforcement Option Card.
The Ferry Points and Tank Factory markers must each be placed in a separate sector on the Russian side of the board. If a German unit is adjacent (along a side or length, not diagonally) to a Ferry Point or the Tank Factory, the Russians cannot receive replacements/reinforcements there.
When an Option Card allows a Russian reinforcement to be placed on the board, and the Russian also has two replacements, then two of the units can be brought in at the same Ferry Point. (Ordinarily you can bring in only one.)
If an entire sector is devoid of your units, reduce your replacements by one. If two of your sectors break, you lose the game.
7.1 Replacements
Each side normally gets two replacements per turn (if available). When you choose a replacement, you must have among your losses two units of the same type (indicated on the unit table at the end of these rules), for example two infantry, two tanks, two of the same type of artillery. The weaker of these units becomes the replacement while the stronger is out of play, back in the box.
For example, you'll never get heavy tanks as a replacement because there is only one on each side in the game, but you can pair an eliminated heavy tank and an eliminated normal or elite tank together to get the latter as a replacement while the heavy tank goes out of play for the game.
7.2 Placement
When a Russian Townspeople unit appears as a reinforcement or replacement, it may be placed in any space in the four rows closest to the Soviet player.
Otherwise, both replacement and reinforcements appear on the row closest to you, in a sector where you have not broken. Germans can appear in any unoccupied space along the back row. Russians must appear in the Ferry Points, or (for tanks only) in the (un-destroyed) Tank Factory, but cannot if the space is occupied by or adjacent to a German unit (forward, backward, left, or right, but NOT diagonally).
Reinforcements and replacements may move on the turn of appearance. If the Ferry Point or Factory of appearance is occupied by a Russian unit, the unit there (even if it is itself a replacement/reinforcement) may move out before the reinforcement/replacement appears.
7.3 Ferry Arrival Points
Russian replacements usually enter play through the Ferry Points (they're coming across the Volga River). (The exceptions are Townspeople units, and tank units.) If an Axis unit occupies a Ferry Point, no replacements or reinforcements can appear there. If the Axis unit later moves away, the Ferry Point is still in Axis hands (turn the marker over). If an occupier is destroyed, the Ferry Point is once again in Russian hands as a Russian unit moves in, and then it again becomes available for replacement appearance.
If the Russians have lost a Ferry Point to the Germans, they can receive only one replacement per turn, not two!
If the Russians are wiped out in a sector containing a Ferry Point, they lose the ferry immediately in that sector. Turn it over to indicate German control.
7.4 Tank Factory
The Russians were producing tanks in Stalingrad during the fighting (perhaps also using parts from destroyed tanks). Replacement and Reinforcement tanks may enter the game at the Tank Factory. A unit already in the Tank Factory can move (if otherwise able) to make room for a new tank unit, just as with units entering at Ferry Points.
If the Axis occupies the Tank Factory, they destroy it – remove the marker. When a German unit adjacent to the Tank Factory successfully attacks it, the German may move into the Factory (hence destroying it).
7.5 Reinforcement Bonus
If you break in a sector you automatically get a reinforcement in your next turn, if one is still available. (Reinforcements in response to the emergency of being broken.)
8. Movement
During your turn you may move all your units.
A unit can move one or two areas based on its movement rate. If the moving unit is not revealed, it must be revealed to prove it can move two rather than only one. (Exception: if a player's replacements can both move two, then in the turn they appear they can move two even though face down.) Diagonals are never counted in this game for any purpose, except Tanks and Townspeople.
A unit may move forward, backward, left, or right, but NOT diagonally. When a unit's front becomes adjacent to an enemy unit's front the moving unit must stop (and engage), or risk an attack by the fronting unit.
Tanks are an exception to this rule. They may move one space diagonally instead of two forward, backward, left, or right. This enables tanks to conduct minor breakthroughs as they can slip between two enemy units.
The Tank in the example can move diagonally. Non-tank unit can not do this.
A unit may move through another unit of the same side if that unit isn't adjacent (by its front, rear, or flank) to an opponent. It may move through its own artillery anytime. A unit may never move through an enemy unit.
8.1 Sectors
Sectors represent command and control limitations, not (so much) physical limitations. They are shown by red lines.
A unit cannot move to another sector unless:
- Its movement into the new sector does not place it adjacent (forward, backward, left, or right, but NOT diagonally) to an enemy unit, front, rear, or flank, and it began the move immediately adjacent to that sector (at the edge of the sector it currently occupies).
- The Change Sector Option Card is played to permit this, or…
- The enemy in the sector the unit is coming from has been broken or wiped out.
If a unit moves from one sector to another in the case 1, it cannot attack. If it moves through case 2 or 3 it can attack, if it is able to move to do so.
8.2 Shooting Between Sectors
If unit is in a sector its side has not won, it cannot fire into an adjacent sector.
If its sector has been won, though, the unit can attack an opponent who is adjacent to the dividing line between the sectors.
In the illustration, the Russian Infantry can attack the German Poor Infantry only. The Russian Artillery can attack the German Infantry and German Tank, but not the German Poor Infantry.
Allow full move when changing sectors with card. Without Option Card, unit must be adjacent to sector it's moving to, and can move only one.
8.3 Breaking Sectors
After all fighting, if one or zero units of a side are left in a sector, the sector "breaks" provided there are at least two opposing units in the sector. If it is 1 versus 1, neither breaks.
After a sector is broken, it cannot be re-established, though the broken side can send units into the sector. Once a side breaks an opponent in a sector, the sector is considered won and cannot be retaken or lost.
Once the enemy in a sector breaks, all units of the other side can move to adjacent sectors, none need stay there.
When your sector breaks, you are reduced from two replacements to one. If two sectors break, you lose the game.
8.4 Movement Procedure
A unit must finish its move before the next unit moves.
The purpose here is to avoid shuffling of a group of units to try to rearrange their locations. It is not intended to make it difficult for the players who are trying to control their units, so use common sense.
Moving units can stay face down until coming within two moves of an opponent, then must be revealed when their move is finished and stay revealed for remainder of the game.
When the opponent moves into sighting range of your unrevealed unit, and the opponent commits to the move (cannot take it back), then the unit is revealed. Then the opponent can continue his move, if he has further movement capability.
9. Combat
Combat occurs only after all of the units of the player taking their turn have moved, or chosen not to. You don't fight while moving (Exception, see optional rules)!
Making the correct choices is vital. For example, don't choose one of your units to attack when it can no longer be attacked, instead choose one that might still be attacked. If the potential attacker, you've possibly saved a unit.
The opportunity to attack alternates, beginning with the moving player. That player chooses a unit that can attack, and rolls. A marker is placed on the unit to indicate that it has attacked. Then the non-moving player chooses and makes an attack, and places a marker. Then it's the moving player's turn. This continues until there are no more possible attacks. Toward the end of the procedure one player may have several attacks in a row because the other has conducted all of their possible attacks. When all attacks have been made, remove the markers and start the next player's turn.
A unit must attack the unit in front of (toward the enemy edge of the board) if any, even if there is a potential target to the side.
In this example, the Russian Townspeople must attack the enemy tank in front of it, not the enemy infantry to the side.
A unit may only attack a unit to the side if there is no enemy directly in front to attack. A unit can "turn around" and attack the rear of a unit, if there is nothing directly in front.
In the example, the Russian Townspeople can attack the German Infantry to it's flank, because there is no enemy unit directly in front.
Units cannot attack enemies in another sector, unless the enemy has "broken" in the sector the attacker is in.
9.1 Combat Modifiers
Modifiers to the Attack Die Roll:
- Attack bonus of +1 for attacking from the side (flank) of a unit as long as the target is engaged to the front.
- Attack bonus of +2 for attacking from the rear as long as the target is engaged to the front.
If modifiers result in an attack needing a 7 or higher, then the attack cannot succeed! However, if the target is being attacked on a flank or the rear, then a 6 will succeed even if the calculated requirement is a 7.
Artillery do not get flank attack bonus.
9.2 Artillery and Air Attacks
All artillery units have a firing range of two. They cannot count diagonally (as for normal movement). Calculate their chance to hit as for any other combat. There is no range attenuation (loss of combat potential with greater range) except for anti-tank artillery (see below), but no unit on the board has a range greater than two. (The Option Cards represent heavy artillery firing from greater range.)
Anti-tank attack number varies. If firing at non-tanks, use the first number (6). If firing at tanks two moves away, use the second number (4 for German 88s, 5 for Russian). If firing at tanks adjacent, use the third number (3 for the 88s, 4 for Russians).
For example, German 88s attack a tank unit directly in front of them. The attack number is 3 (three).
Russian anti-tank artillery attacks a tank two moves away. The attack number is 5 (five).
9.3 Fortifications
Using a Fortify Option Card, place this card under any of your units (or even a Ferry Point or Tank Factory for Russians) before it moves this turn. Any unit in that location (this unit can move and another occupy, or it can be vacant) is one harder to hit, add +1 to the defense factor of the fortified unit. When the enemy occupies the space, the fortifications are destroyed.
9.4 Procedure for an Attack
One die is rolled for each attack. Begin with the attack factor on the attacking unit. Add the defense factor of the target unit. There may be other temporary bonuses or penalties as stated above (flank attack, rear attack, etc.). The die roll must be equal to or higher than this result for the attack to be successful.
Note, then, that a low attack factor is desirable (2 is better than 3), while a high defense factor is desirable (+1 is better than 0).
9.5 Results of Successful Attacks
A successfully attacked unit is "eliminated"– has suffered enough casualties that it loses coherence and plays no further part in battle. Add it to the dead but possible replacement pile (eliminated pile).
For example, a German Infantry unit with an attack factor of 4 is attacking a Russian Poor Infantry with a defense factor of -1. It is a frontal attack with no modifiers.
The computation for the attack is: 4+(-1)=3
Any attack die roll for the German player of 3 or higher eliminates the Russian unit. A roll of 1 or 2 causes no effect and ends the attack.
If the German Infantry was attacking from the flank, with another German Infantry unit facing the front of the Russian Poor Infantry unit, a +1 modifier would be added to the attack die roll.
The computation for this attack is still 4+(-1)=3 but the German die roll has +1 added to the total for the flank attack.
Therefore, any attack die roll for the German player of 2 or higher eliminates the Russian unit. A roll of 1 causes no effect and ends the attack.
A 6 is not always a hit, nor a 1 always a miss. It can happen, in certain situations, that a unit cannot possibly hit, or cannot possibly miss, in an attack.
10. Winning
At the end of the game, control of the Ferry Points and condition of the Tank Factory determine victory and defeat.
| GERMANS WIN IF | RUSSIAN WIN IF | |
|---|---|---|
| Decisive Victory | Control both Ferries and have destroyed the Tank Factory | Russians control both Ferries and the Tank Factory is intact |
| Major Victory | Control both Ferries but have not destroyed the Tank Factory | Russians control both Ferries but the Tank Factory has been destroyed |
| Minor Victory | Control one Ferry and have destroyed the Tank Factory | Germans control one Ferry but have not destroyed the Tank Factory |
11. Optional Rules
- Moving across an enemy front: when your unit moves across the front of an opponent, the opponent can fire at you immediately. It attacks immediately at -1 to the die roll. When this occurs, place a marker on the attacking unit so it cannot attack again during the attack phase.
12. Solo Game
The Germans are the game, the player is the Russians. The guidelines for playing the Germans are extensive in order to try to avoid "obviously dumb" plays.
The Russians deal off four cards (which they can see) that cannot be used during the game. Don't forget to deal off the reinforcements, one for the Germans, two for the Russians.
The Germans place five cards in each sector in U shape more or less (they also had the reinforcement to make 16 units). So it's more or less a symmetrical set up, these cards being face down so the player doesn't know what they are. Then the Russians set up.
Each side gets their three option cards. The German plays one of them at random each turn.
12.1 Movement
When the Germans are outnumbered in a sector 3-1 or worse (or 6-2) they will move backward in order to avoid fighting.
German units will not go forward if they cannot hit the opponent from there. Otherwise, the typical move for the German unit is to go forward, usually straight forward. If it cannot reach an enemy unit to attack, and it is still unrevealed, then it only moves one.
The German will not go forward two if that places him in jeopardy from both his flank and his front. Of course, if the unit on his flank also has one in front of it then moving forward two is okay because that enemy cannot attack the moving unit.
If a unit can't come into attack position going forward then it will go to the side one way or the other and then forward if that puts it in attack position.
If a unit is artillery, it avoids movement that would make it fight an enemy front (except 88s will do so against enemy tanks). Artillery will not move if it already has a target. Artillery moves to give itself a target; but not so that it can be attacked.
Exception: AT/AA will move directly adjacent to enemy tank even if that puts it in jeopardy. If artillery has more than one possible target, roll dice to decide which it wants to fire at (unless there's one directly in front of and adjacent to it, then it has to fire at that one as usual.)
Using the optional rule, the Germans have an opportunity to fire at a unit moving across their front, they will do so half the time (roll a die; 1-3 will fire, 4-6 will not).
The preferred German move is to have non-artillery move through artillery to confront an enemy rather than moving the artillery up (again barring 88s against tanks). In other words protect the artillery.
Germans are not going to change sector unless they play a Change Sector card or they are in a sector where the Russians have broken.
A German non-artillery unit will move through its own artillery in order to attack.
If a German unit was unrevealed and moves two, and it turns out to be a unit that can only move one, it stays revealed but only moves one.
Stronger non-artillery unit will move into place of weaker unit (which can move backward) in order to attack.
12.2 Shooting Order
This depends on how many units the Germans have in each sector, and how many have already shot. In general they will fire first in the sector where they are least numerous. But if that sector has shot more times than another, then choose another.
Order of attack within a sector, best odds first, except artillery that can be attacked by an enemy shoots first. If same odds, order is artillery, tanks, infantry. If equal chances shoot at someone who hasn't shot yet.
An 88 with a tank target at range of one fires before anyone else, even disregarding the sector guidelines. A unit in contact with a Russian unit (right in front of it) fires before one not in contact. Artillery in contact fires before non-artillery. Artillery not in danger of being attacked fires after units in danger of melee attack.
After sector considerations, units with the best chance to hit fire first. If there is a tie, artillery that might be attacked by the Russians fires first, followed by tanks. If there is still a tie then assign a die roll to each of the possibilities, for example if there are three units in the weakest sector with the same chance of hitting then you roll a six sided die after assigning 1 to 2 to one unit 3 to 4 to another, and 5 to 6 to the third. If there are two you might use odd and even.
After having a unit in the least numerous sector fire, then choose the next least numerous sector for the second shot and the third sector for the third shot. It's easy to tell the number of shots in the sector because of the markers on the cards.
12.3 Replacements
Germans use the strongest replacement available first - the best combination of attack and defense. This value is calculated in the unit table in the rules. However, always take the light artillery first if one is available (which would be if they were both eliminated). After that take tanks.
German replacements go in the sector (where Russians are unbroken) where they are least numerous and then the one following that, so the sector where they are most numerous will not get a replacement/reinforcement unless there is also the reinforcement coming onto the board.
12.4 Option Cards
Play the card before doing anything else.
Reinforcements: is the easy one to deal with.
Fortify: Germans fortify artillery first, light artillery before the 88's. After that, fortify the German unit closest to one of the three objective facilities.
Artillery barrage: fire at Russian light artillery first, then Russian tanks (strongest first). Fire at a revealed unit, not an unrevealed one.
Air Strike: obviously, don't attack within two of the Russian AA artillery (if located). Attack a revealed unit, not an unrevealed one. Attack the Russian unit closest to the German side of the board. If a tie, attack a Russian in the sector where the Russians have their largest number of units in comparison with the German.
Change Sector: this is a tough one. Take a unit closest to the sector border of another sector, in the sector with the largest number of German units, and have that change sectors if it can.
For Example; 4 Russian to 2 Germans is more than 5 Russians to 3 Germans.
Snipers: place it as far forward as you can; put it in the Germans least numerous sector (other than one that is broken). Likely there will be more than one spot possible, roll dice, put in front of strongest German infantry.
12.5 Harder or Easier
You can change the difficulty of this solo version by changing the number of cards the Russians take away from their force. Chance will vary the game in any case, especially if, say, the removed cards turn out to be the Russian heavy tank and light artillery!
13. Axis (Germans) Unit Chart
| Unit Type | Attack # | Defense # | Movement | Count | Value |
|---|---|---|---|---|---|
| Following three constitute Infantry for replacements | |||||
| Infantry | 4 | +1 | 2 | 7 | 3 |
| Elite Infantry | 3 | +1 | 2 | 1 | 4 |
| Poor Infantry | 5 | 0 | 2 | 1 | 1 |
14. Soviets (Russians) Unit Chart
| Unit Type | Attack # | Defense # | Movement | Count | Value |
|---|---|---|---|---|---|
| Following three constitute Infantry for replacements | |||||
| Infantry | 5 | 0 | 2 | 10 | 1 |
| Elite Infantry | 4 | +1 | 2 | 2 | 3 |
| Poor Infantry | 6 | -1 | 2 | 2 | -1 |
15. Option Card Explanations
AIR STRIKE: Attack any enemy unit in one location with an attack factor of 4. If unit is unrevealed, die roll result is -1. If enemy anti-aircraft artillery is within two and is/gets revealed, strike fails!
HEAVY ARTILLERY BARRAGE: Attack any unit in one location with an attack factor of 3. If unit is unrevealed, die roll result is -1.
SNIPERS AND INFILTRATION: Place this card in an empty location within 2 moves of your infantry. Any non-tank enemy unit moving into the sniper location suffers an attack factor of 5. After the sniper attack, regardless if it was successful or not, the sniper card is removed.
FORTIFY: Place this card under any of your units (or even a Ferry Point or Tank Factory for Russians) before it moves this turn. Any unit in that location (this unit can move and another occupy, or it can be vacant) is one harder to hit, add +1 to the defense factor of the fortified unit. When the enemy occupies the space, the fortifications are destroyed.
RUSSIAN FORTIFY: Place this card under any of your units (or even a Ferry Point or Tank Factory for Russians) before it moves this turn. Any unit in that location (this unit can move and another occupy, or it can be vacant) is one harder to hit, add +1 to the defense factor of the fortified unit. When the enemy occupies the space, the fortifications are destroyed.
GERMAN REINFORCEMENT: Germans reinforcements are placed in any unoccupied space along their back row. Reinforcements may move on the turn of appearance.
RUSSIAN CHANGE SECTOR: One Russian unit can change sectors to an adjacent unbroken sector. Its movement into the new sector cannot place it adjacent (forward, backward, left, or right, but NOT diagonally) to an enemy unit, front, rear, or flank, and it must begin its move immediately adjacent to that sector (at the edge of the sector it currently occupies).
GERMAN AIR STRIKE: Attack any enemy occupied location with attack factor of 4. If unit is unrevealed die roll is -1. Russian AA within two locations nullifies the attack.
RUSSIAN REINFORCEMENT: Russians reinforcements must appear in the Ferry Points, or (for tanks only) in the (un-destroyed) Tank Factory, but cannot if the space is occupied by or adjacent to a German unit (forward, backward, left, or right, but NOT diagonally). Reinforcements may move on the turn of appearance.
GERMAN CHANGE SECTOR: One German unit can change sectors to an adjacent unbroken sector. Its movement into the new sector cannot place it adjacent (forward, backward, left, or right, but NOT diagonally) to an enemy unit, front, rear, or flank, and it must begin its move immediately adjacent to that sector (at the edge of the sector it currently occupies).
RUSSIAN FORTIFY: Place this card under any of your units (or even a Ferry Point or Tank Factory for Russians) before it moves this turn. Any unit in that location (this unit can move and another occupy, or it can be vacant) is one harder to hit, add +1 to the defense factor of the fortified unit. When the enemy occupies the space, the fortifications are destroyed.
GERMAN HEAVY BARRAGE: Attack any enemy occupied location with an attack factor of 3. If unit is unrevealed die roll is -1.
RUSSIAN KATYUSHA BARRAGE: Katyusha Rocket Barrage from across the Volga. Attack any enemy occupied location with an attack factor of 3. Whether a unit is reveled does not matter.
GERMAN HEAVY BARRAGE: Attack any enemy occupied location with an attack factor of 3. If unit is unrevealed die roll is -1.