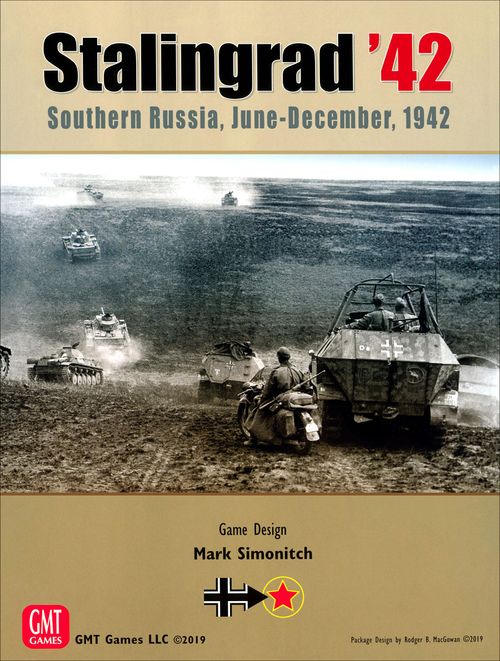
Stalingrad '42: Southern Russia, June-December, 1942
Stalingrad '42: Southern Russia, June-December, 1942 Rulebook
Table of Contents
Table of Contents
- 1. Introduction
- 2. Contents
- 3. Sequence of Play
- 4. Stacking
- 5. Movement
- 6. Zones of Control
- 7. ZOC Bonds
- 8. Combat
- 9. Combat Modifiers
- 10. Combat Results
- 11. Determined Defense
- 12. Retreats
- 13. Disruption & Recovery
- 14. Advance After Combat
- 15. Breakthrough Combat
- 16. Supply and Isolation
- 17. Railheads & Railroad Repair
- 18. Resource Points, ASUs and SPs
- 19. Non-Combat Units
- 20. Special Units
- 21. Replacements
- 22. Reinforcements & Entry Areas
- 23. Weather
- 24. Victory Points and Automatic Victory
- ADVANCED RULES
- 25. Reserves
- 26. Planned Offensive
- 27. Disengagement
- 28. Leaders
- 29. Contested City Hexes
- CAMPAIGN GAME ONLY
- 30. Trans-Caucasus Front Box
- 31. Soviet Reserve Armies
- 32. Removals and Upgrades
- 33. The Winter Offensive
- 34. Maskirovka
- SCENARIOS
- S1. Fall Blau Scenario
- S2. Caucasus Campaign
- S3. Operation Uranus
- S4. Campaign Game
1. Introduction
Stalingrad '42 is a game covering events in southern Russia from June to December, 1942. One player controls the Axis forces, the other the Soviet forces. Each player attempts to take and hold territorial objectives and to destroy the opposing enemy forces.
2. Contents
2.1 Inventory
A complete game of Stalingrad '42 contains:
- 4 Maps (A, B, C1, C2)
- 3 counter sheets
- This rule booklet
- 1 Playbook
- Two 6-sided dice
- 2 identical CRT/TEC player aid cards
- 1 Axis Campaign Game/Uranus setup card
- 1 Soviet Campaign Game/Uranus setup card
- 1 Uranus/Caucasus Turn Record Track
- 1 Axis Reinforcement Display
- 1 Soviet Reinforcement Display
The above list does not include the bonus material of the Little Saturn/Winter Storm scenario included in this edition.
2.2 The Map
(2.2.1) Scale and Terrain: Each hex represents an area approximately 10 miles across. Consult the TEC for a complete list of the map's terrain and how it affects movement and combat.
(2.2.2) Rivers Inside Hexes: Ignore rivers that flow through the middle of a City or Marsh—the importance of the river as a barrier to movement and an aid to defense has been negated by the terrain.
CLARIFICATIONS: Cities override the underlying terrain. A hex is mountain if there's any mountain in the hex. The Stalingrad hexes are connected by a secondary road.
(2.2.3) Impassable Terrain
Impassable Hexsides: Sea, unfrozen Lakes, and Alpine hexsides in Winter are impassable hexsides. Units separated by an impassable hexside or a Volga River hexside are not considered "adjacent". A hexside has to be completely covered by impassable terrain to be considered impassable.
Unplayable Terrain: Any dark Marsh or dark coastal bit of land is unplayable. Ignore it and treat it as part of the Sea or the Volga River (as appropriate) and treat the rest of the hex as playable.
2.3 The Game Pieces
(2.3.1) Types: There are three types of game pieces:
- COMBAT UNITS: Any unit with a Defense Strength greater than 0 is a Combat Unit (this includes units with their Defense Strength in parenthesis). These are the basic playing pieces of the game.
- NON-COMBAT UNITS: Any unit with a Defense Strength of zero is a Non-Combat Unit. See 19.0 for full details.
- MARKERS: These are simply play aids and status indicators, their use will be explained in the appropriate rule section.
Each counter shows: Unit Size, Unit I.D., Attack Strength, Defense Strength, Movement Allowance, and (where applicable) Turn of Arrival, Setup information, Troop Quality, and shift indicators. A stripe on the back of a counter indicates the unit is reduced. Units outlined with a thin line are Free Stacking Units. A solid dot indicates a Tank Shift Indicator (9.2). A star indicates a unit replaces another unit. Parenthesized Defense Strength indicates a special case (9.8). A black box around a unit's Movement Allowance means Extended Movement (5.3) is not allowed.
(2.3.2) How to Read the Units
- Attack Strength: The strength of the unit when attacking.
- Defense Strength: The strength of the unit when defending.
- Movement Allowance (MA): Is the maximum number of Movement Points (MPs) the unit may expend for movement and still attack in the Combat Phase. Units with a black box around their MA may not use Extended Movement (5.3).
- Unit I.D.: The actual name or number of the unit.
Troop Quality (TQ): All units with their Defense Strength in white in a red box plus all Soviet Guard units are Elite. Those with their Defense Strength in white in a white box are of Low quality. All others are normal. This rating is used for the following purposes:
- As a die roll modifier in a Determined Defense (11.2.4).
- As a die roll modifier on the Rally Table (13.5).
Unit Size: No effect on game play, only historical.
- II = Battalion
- III = Regiment
- X = Brigade
- XX = Division
- XXX = Corps
- XXXX = Army
- XXXXX = Front
†=Infantry Type: These units are doubled in Defense Strength when defending in City and Mountain hexes.
= Tank Units: Tank units can earn or deny the Tank Shift (9.2).
(2.3.3) Summary of Unit Types: All units are either Mechanized or non-Mechanized. This is important for determining the cost to move into each hex.
Non-Mechanized:
- Infantry†
- Security†
- Jäger Infantry†
- Naval Infantry†
- Mountain Infantry†
- Bicycle†
- NKVD†
- Engineer†
- Cavalry†
- Sturm†
- Ski†
Mechanized:
- Tank/Panzer
- Mechanized/Panzergrenadier†
- Tank Destroyer
- Motorized Infantry†
- Artillery (ASU, 18.2)
- Soviet Army HQ
- Front or Army HQ (ASU)
- T-34
- KV-1
- Sturmgeschütz
- Supply Point
(2.3.4) Unit Colors: The background color of a unit denotes its nationality or branch of service.
Soviet Units:
- Light Brown — Soviet regular army
- Brown — Miscellaneous Soviet units
- Dark Brown — Soviet Naval Infantry
- White — NKVD
- Red — Soviet Guards
Axis Units:
- Gray — Wehrmacht
- Black — Waffen SS
- Medium Blue — Luftwaffe
- Light Green — Italian
- Medium Green — Romanian
- Gray Green — Hungarian
- Dark Blue — Slovakian
- Blue — Croatian
- Yellow Ochre — North Caucasian Volunteers
(2.3.5) Steps: Units have either 1, 2, or 3 steps. 3-step units are indicated with a thin stripe across the reverse side of their counter (units on their last step are indicated with a much wider stripe). When a 3-step unit takes a second step loss it may be replaced with a Remnant (10.4, 21.3.4) of the appropriate unit type.
Non-Combat Units include Leader Units (with a Range, Leader's Name, and Movement Allowance), Supply Points, Immobile Supply Points, Tank Army HQs, Shock Army HQs, and Reserve Armies.
Markers include: Rail Movement (5.6), Railhead (17.2), Automatic DS Fortification (8.6/9.7), Disrupted (13.1), Full Retreat (13.3), Control (16.3.4), Out of Supply (16.1), Isolated (16.5), Weather (23.1), Victory Points (24.1), and Game Turn.
3. Sequence of Play
Stalingrad '42 is played in Game Turns. A Game Turn is composed of two Player Turns. Each Player Turn is subdivided into several Phases. Each Game Turn is played in the following order:
A. WEATHER PHASE
Starting on Turn 17, one player rolls a single die and consults the Weather Table to determine the weather for that Game Turn. On Turns 1-16 the weather is always Clear.
B. AXIS PLAYER TURN
-
INITIAL PHASE. The following activities are performed in any order:
- Collect all Air units and place them in their Holding Box on their Ready side (Axis only).
- Remove Train markers placed on Axis units (5.6.5).
- Axis Fortifications under construction are now completed (9.7).
- Allocate the two Axis Resource Points (18.1).
- Spend SPs to flip ASUs (18.6.4).
- Place Axis Reinforcements in friendly Entry Areas (22.1).
- Restore Axis units using Replacements (21.0).
- Flip Axis Leaders (28.1) to their Ready side.
- Flip any Planned Offensive markers (26.0) begun in the previous turn to their Ready Side.
-
MOVEMENT PHASE. The Axis player may move some, none or all Axis units. In addition, the following activities may occur during this phase (in no particular order):
- Conduct Rail Movement (5.6).
- Conduct Sea Movement (5.7).
- Conduct Automatic DS (8.6).*
- Voluntarily put friendly units into Full Retreat (13.1.3).
*Advance After Combat for these units is conducted at the end of the Combat Phase.
-
COMBAT PHASE. The Axis player may attack enemy units (8.0) or conduct Disengagement Attempts (27.0).
-
RECOVERY PHASE (13.4)
- All Axis units that are Disrupted or in Full Retreat and not in an EZOC recover one level. Those that are in an EZOC must roll for Rally (13.5).
C. SOVIET PLAYER TURN
The Soviet player now takes a turn, which is identical to the Axis turn, except substitute the word Soviet for Axis (and vice versa) in the appropriate paragraphs above. The Soviet player does not have Air Units or Railhead markers—so ignore those steps. The Soviet player does have Artillery Divisions and Front HQs which are flipped in the same way as Axis Army HQs. At the end of the Soviet Player turn determine Soviet fortification deactivation (9.7.7).
D. VICTORY DETERMINATION PHASE
VPs are counted at this time. If either player has enough VPs to win an Automatic Victory (24.2), the game ends. If not, the Turn marker is advanced one space and another turn is begun.
4. Stacking
4.1 Stacking Limits
Stacking refers to the placing of more than one playing piece in a hex. The stacking limits for each side are:
- SOVIETS: Two Combat Units plus one Free Stacking Unit
- AXIS: Three Combat Units plus one Free Stacking Unit
Non-Combat Units (2.3.1) and all markers do not affect stacking and may freely stack in a hex without limit.
4.2 Free Stacking Units
All units with a thin line around the edge of their counter are Free Stacking Units. One can stack for free in each hex. All other Free Stacking Units in the hex count as a full unit towards the stacking limit. Exception: ASUs (18.2) have no stacking value at all and any number may be in a hex.
4.3 Soviet Army HQs
These are Non-Combat Units (19.0) that allow the Soviet player to stack three Combat Units (plus one Free Stacking Unit) in a hex. Having more than one of these HQs in a hex provides no additional aid to stacking.
RESTRICTION: No more than two Tank and/or Mechanized corps may stack with the 1st Guards and 5th Shock Army.
4.4 Stacking Restrictions
The stacking limit can only be exceeded during the course of Movement, Retreat, and Advance After Combat. The stacking limit must be strictly observed by the phasing player at the completion of his Movement and Combat Phases and before each of his Breakthrough and Auto DS attacks (8.6) are resolved. The Phasing Player must correct all stacking violations at these times by eliminating enough units from the hex to satisfy the stacking limit.
QUICK SET UP: When setting up the game, players may ignore unit IDs as long as the unit is the same type, strength, TQ, branch of service, and nationality.
5. Movement
5.1 The Basics
Each unit has a Movement Allowance (MA) which is the normal number of Movement Points (MPs) it may expend for movement during the Movement Phase. Each hex entered costs a certain number of MPs to enter as specified on the TEC. Movement may be made by individual unit or by stack. If units are moved as a stack, they move at the rate of the slowest unit in the stack. A stack may drop off units as it moves. You must complete the movement of one unit or stack before starting to move another. A unit or stack may not enter a hex occupied by an enemy Combat Unit.
5.2 Road Movement
There are two types of roads—Primary and Secondary. They are identical except during turns when the weather is Rain or Mud (23.2.3, 23.3). A unit that follows the path of a road may use the reduced rate of the road. Whenever a road or railroad crosses a river, a bridge is assumed to exist. The road rate may be used when moving into and out of an enemy ZOC (6.2). Units may combine road and off-road movement in the same move.
5.3 Extended Movement
Units may use Extended Movement to increase their MA by 3 MPs. Units that use Extended Movement may not move adjacent to an enemy unit. A unit starting its move in an EZOC can use Extended Movement as long as it exits that EZOC with its first hex of movement. Units with their MA in a black box may not use Extended Movement.
EXAMPLES: Unit A has an MA of 3 and spends 3 MPs, one in each hex. Unit B uses Extended Movement to increase its MA by 3 and spends 6 MPs, one in each hex. The additional 3 MPs are shown in red. Units cannot enter an EZOC if they use Extended Movement. Unit C is a Mechanized unit so can use the Road rate of ½ MP when using roads. The cost to enter each hex is indicated. Unit D pays an additional 2 MPs to exit an EZOC and then uses Extended Movement to increase its MA by 3 MPs. As it moves it takes advantage of the Road Rate (½ MP) and moves a total of 9 MPs. Unit E uses Tactical Movement to move two hexes. Unit F cannot cross the unbridged Major River hexside because it did not start adjacent to it.
5.4 Tactical Movement
Tactical Movement does not use MA or MPs and allows a unit to move one or two hexes. Units that use Tactical Movement may attack in the Combat Phase. Units using Tactical Movement must abide by all the other rules of movement, specifically:
- Must stop upon entering an EZOC (6.2).
- May not cross or enter enemy ZOC Bonds (7.0).
- Must start adjacent to an unbridged unfrozen Major River hexside in order to cross it.
- May not cross a prohibited hexside.
5.5 Effects of Rivers on Movement
(5.5.1) Minor Rivers: There is no extra cost to cross unbridged Minor Rivers during Clear, Overcast, or Snow weather. If the weather is Rain or Mud it costs all units +1 MP to cross unbridged Minor River hexsides.
(5.5.2) Major Rivers: Units must start adjacent to an unbridged Major River hexside in order to cross it (exception: Pontoon Bridges [5.5.5] and Frozen Rivers [23.4]). It cost non-Mechanized units +2 MP to cross, and Mechanized units +3 MPs to cross. Units may move normally after crossing.
§ (5.5.3) The Volga: Treat as a Major River with limited crossing sites. Axis units may only cross at the Ferry sites (5.5.6) printed on the map. Soviet units may cross at those same sites plus the rail bridge at Saratov (hex 5902), plus any one additional hexside in or north of hex 5622 (representing use of the Volga Flotilla). The Volga Flotilla acts as a Ferry site. The Volga Flotilla hexside may change each Soviet Movement Phase. Indicate the Volga crossing site with the Volga Flotilla marker. Pontoon Bridges (5.5.5) may not be used to cross the Volga.
(5.5.4) Bridges: There are three types of bridges across Major Rivers—Road Bridges, Railroad Bridges, and Pontoon Bridges (5.5.5). Each allows units to cross a Major River without having to start adjacent to the hexside. Road and Railroad bridges have the following MP cost:
- ROAD BRIDGES: No extra cost. Units using a Road Bridge may use the rate of the road.
- RAILROAD BRIDGES: Cost +1 MP for non-Mechanized units and +2 MPs for Mechanized units.
When both Road and Railroad bridges are present, the Road Bridge movement rate is used.
(5.5.5) Pontoon Bridges: There are no Pontoon Bridge markers. Pontoon Bridges are assumed to exist at every Major River hexside where both hexes tangent to the river hexside are occupied by friendly Combat Units (regardless of type, Supply, or Disruption). One of the units can be the unit that is moving as shown in the example below. The pontoon bridge is built the instant this occurs and disassembled the instant the condition no longer occurs. This is true in the Movement Phase, during Advance After Combat, and during a Retreat.
A Pontoon Bridge allows a unit to cross a non-bridged Major River hexside (at the +2 Non-Mechanized or +3 Mechanized rate) without having to start its move adjacent to the Major River hexside. Units using Tactical Movement may also benefit from Pontoon Bridges.
EXAMPLES OF PONTOON BRIDGES: Unit A starts adjacent to the Major River so can cross without a Pontoon Bridge. Once A is across, unit B uses Tactical Movement to cross—Unit A's position on the far banks of the river creates the condition necessary for a Pontoon Bridge. Unit C moves one hex backward in order to build a Pontoon Bridge for the on-coming Panzer division. The Panzer division (Unit D) uses 6 MPs to reach the river and cross. The cost to enter each hex is indicated in the circles.
(5.5.6) Ferries: Treat as permanent Pontoon Bridges.
(5.5.7) The Vladimirovka Ferry: This is located on the Volga at 6424-6523. Treat it as a rail line connecting 6523 to 6424. One Soviet Combat Unit or Supply Point per turn may use that Ferry as part of its Rail Move—normal Movement is not allowed across it.
5.6 Rail Movement
(5.6.1) In General: Rail Movement occurs during the Movement Phase. Units using Rail Movement can move an unlimited distance along a Railroad. Units may rail move into a friendly Entry Area but may not leave that Entry Area until the following turn. Place a Train marker on units that use Rail Movement.
(5.6.2) Limit 4/1: The Phasing Player may move up to four Combat and/or Non-Combat Units per turn by Rail Movement. Only one of the four may start from a rail hex on the map, the rest must start the Movement Phase in a friendly Entry Area. Leaders do not count against the Rail Limit—they rail for free (28.1.5).
(5.6.3) Restrictions
- Units using Rail Movement must start and end their movement on a rail hex (or in an Entry Area), follow a path of connected rail hexes (and repaired for the Axis), and may not start in or enter an EZOC (friendly units do not negate EZOCs in the hexes they occupy for this purpose).
- Units must be in Good Order to use Rail Movement.
- Combat Units using Rail Movement may not end their Rail Move stacked with other Combat Units using Rail Movement.
- Soviet units may not rail into or pass an Axis Railhead marker.
- A unit that uses Rail Movement may not use any other type of Movement that turn.
(5.6.4) Combat Effects: A unit under a Train marker:
- Has no ZOC.
- May not attack or provide an Artillery Shift, and has a Defense Strength of 1 which is never doubled.
- May not earn or deny a Tank Shift.
- May not be used in a Determined Defense.
- Leader Units may not use their special abilities (28.0).
(5.6.5) Detraining: To detrain, simply remove the Train marker—the unit may move normally in the following Movement Phase. All units under a Train marker must detrain during the player's Initial Phase. Units forced to retreat must Detrain. A unit may detrain in any rail hex—it does not need to be in a Town or City.
(5.6.6) The Caspian Sea Railroad: The railroad along the Caspian Sea is there for historical interest only—it was built for transporting oil, not for troop movement. See 17.5 for Unfinished Railroads.
5.7 Sea Movement
(5.7.1) Shipping Paths: The Soviet Player (only) may use Shipping Paths. A limit of one non-Mechanized unit in Good Order or Supply Point per turn may use the Shipping Paths in each sea (one in the Sea of Azov and one in the Black Sea). Sea Movement may start and end in an EZOC. It costs a unit (except Soviet Naval infantry brigades) their entire MA, and if unit is a Combat Unit it becomes Disrupted upon landing. Units may not remain at Sea—they must embark and debark in the same movement phase.
Soviet Naval Infantry Brigades have three extra benefits when using Naval Movement—instead of "all MPs", they use Tactical Movement on the Shipping Paths, they do not become Disrupted upon landing, and they may land at vacant Axis controlled ports. The Sea move costs them one hex from their 2-hex allowance, so the other hex may be used before or after they move from port to port.
(5.7.2) The Kerch Strait: Only Axis units may cross the Kerch Strait and only if there is no Soviet unit in Taman (hex 1549). Any Axis unit in the W Entry Area, or any unit of Plan Blücher (20.7), may cross over to Taman. This costs the unit its entire MA and the unit becomes Disrupted upon landing. No more than one unit per turn may cross the strait.
(5.7.3) No Retreat by Sea: Any unit forced to retreat out to sea via a Port, coastal hex, or Sea Path is eliminated.
6. Zones of Control
6.1 General Rule
The six hexes immediately surrounding a hex occupied by one or more Combat Units (including Free Stacking units) constitute the Zone of Control (ZOC) of those units. ZOCs extend across all hexsides except the Volga River, Impassable hexsides (2.2.3), and Entry Areas. Non-Combat Units, units under Train markers, and all game markers have no ZOC.
6.2 ZOCs and Movement
All units must stop upon entering an enemy Zone of Control (EZOC). It costs no additional Movement Points (+0 MPs) to enter an EZOC; it costs two additional Movement Points (+2 MPs) to exit an EZOC. A unit that starts its move in an EZOC may move directly into another EZOC and stop, as long as it does not cross or enter an enemy ZOC Bond (7.0).
6.3 Other Effects of ZOCs
- EZOCs and Retreats: see 12.2-12.4.
- EZOCs and Advance After Combat: see 14.4.
- EZOCs and Lines of Supply: see 16.3.
- EZOCs and Railroad Repair: see 17.2-17.3.
7. ZOC Bonds
7.1 How to form a ZOC Bond
Any Combat Unit in Good Order can form a ZOC Bond. It takes two Free Stacking Units (4.2) in Good Order that are stacked together to form a ZOC Bond. When two such units (or stacks) are two hexes apart (with one vacant intervening hex) they create a bond between them that no enemy unit may enter or cross. Due to the pattern of a hex grid there are two types of ZOC Bonds—Hex Bonds and Hexside Bonds (see illustration below).
7.2 Effects of ZOC Bonds
- Units may neither enter an enemy Hex Bond nor cross an enemy Hexside Bond during the Movement Phase.
- Units forced to Retreat into an enemy Hex Bond or across an enemy Hexside Bond are eliminated.
- Units may not Advance After Combat into an enemy Hex Bond or across an enemy Hexside Bond, unless they are entering the defender's vacated hex.
- Supply can never be traced into an enemy Hex Bond or across an enemy Hexside Bond.
7.3 Negating ZOC Bonds
A Hexside Bond is negated when enemy units are located on each side of the intervening hexside (as between units D and E in the diagram at the bottom of the page). A Hex Bond is negated when the intervening hex contains an enemy unit (as between units E and F). A Bond is broken as soon as the condition occurs.
EXAMPLE: Unit A moves adjacent to unit B, thereby breaking the Soviet ZOC Bond. Unit B can now move into the hex with unit A.
EXAMPLES OF ZOC BONDS: Black lines indicate friendly ZOC Bonds, red lines indicate enemy ZOC Bonds, thin dashed lines indicate broken ZOC Bonds. There is no Hexside Bond between units D and E—it has been negated; likewise the Hex Bond between units E and F. The ZOC Bond between units C and D is not broken by the two minor river hexsides (7.6). Units F and G still have a ZOC Bond even though it is intersected by the enemy ZOC Bonds. Unit G has a Hexside Bond with the map edge, but not a hexside bond with the coastline as in some other games in the system.
7.4 Intersecting ZOC Bonds
If both players have intersecting ZOC Bonds, then neither player may cross the other's ZOC Bond until it is negated (as between units F and G in the diagram on page 7).
7.5 ZOC Bonds with the Map Edge
A unit can form a ZOC Hexside Bond (but not a Hex Bond) with a friendly map edge (Entry Area, 22.2). ZOC Bonds with an Enemy Entry Area or a neutral map edge are not allowed.
7.6 ZOC Bonds and Terrain
(7.6.1) A ZOC Bond cannot extend:
- across an Impassable hexside.
- across a Volga River hexside.
- across two unfrozen Major River hexsides (as in a loop of a river). When determining if a Major River breaks a ZOC Bond, push the Hexside Bond to one side or the other of the Major River, but it may not be pushed into a hex occupied by an enemy unit.
Examples: A-B is broken because the bond crosses two Major River hexsides. B-C crosses only one Major River hexside. C-D doesn't cross any river hexsides. D-E is broken because the bond has to be pushed to a hex that is not occupied by an enemy unit—this results in the ZOC bond crossing two Major River hexsides.
(7.6.2) The Coast: Unlike other games in this series, ZOC Bonds may not be formed with the Coast. Nor can they be anchored to an Alpine, Volga, or Lake hexside.
8. Combat
8.1 The Basics
Phasing units may attack adjacent enemy Combat Units in the Combat Phase. Attacking is voluntary: no unit or stack is forced to attack. No unit may attack or be attacked more than once per Combat Phase (Exception: Breakthrough Combat—15.2.5). Some units in a stack may attack while the others don't attack or attack different hexes. All defending units in a hex must be attacked as one combined Defense Strength. The attacker may conduct his attacks in any order and need not predesignate them. A unit may not attack into a hex or across a hexside it is prohibited from entering or crossing in the Movement Phase.
8.2 Multi-Hex Combat
- The attacker may attack only one hex at a time.
- A defending unit or stack can be attacked from up to six different adjacent hexes.
- Units in the same hex may attack adjacent defenders in different hexes as long as each attack is conducted separately.
- No unit may split its Attack Strength to attack multiple hexes.
8.3 Combat Procedure
Follow these steps for each combat:
STEP 1: Compare the combined Attack Strength of the participating attacking units against the total Defense Strength of the involved defending units and express the comparison as a numerical odds ratio (attacker to defender). Round off the odds ratio downward to conform to one of the odds ratio columns found on the Combat Result Table (CRT).
EXAMPLES: A 7 to 2 would be a 3-1. 9 to 4 would be a 2-1. 6 to 4 = 1-1, and a 5 to 6 = 1-2.
STEP 2: Players determine if a CRT column shift for Tanks is earned (9.2). The attacker must then declare any Air Support (9.3) and/or an Artillery Shift (9.4). The defender then declares Defensive Air Support (if any).
STEP 3: After taking column shifts into account, a 6-sided die is rolled, then cross-referenced with the appropriate column on the CRT, and the results are implemented. Players immediately remove any step losses (10.2), perform Retreats (12.0), and Advance After Combat (14.0).
8.4 Minimum and Maximum Odds
(8.4.1) Combat at odds less than 1-3 is not allowed. Combat at odds 8-1 or 9-1 is resolved on the 7-1 column. Combat at odds 10-1 or greater automatically achieves a DS result.
(8.4.2) Column Shifts: When applying column shifts beyond the 7-1 column assume that 8-1, 9-1, etc., columns exist. Apply the minimum and maximum restriction after calculating the net effect of both the attacker's and defender's column shifts.
EXAMPLE: Odds of 8-1 with one shift left for Fortifications would be resolved on the 7-1 column, not the 6-1 column. Odds of 7-1 with one shift right would be resolved on the 7-1 column.
8.5 Maximum Attack and Defense Factors
(8.5.1) 40 Attack Factors: The attacker can use a maximum of 40 Strength Points in a given combat. All Strength Points in excess of this are ignored. This limit applies after halving and doubling (9.1).
EXAMPLE: Six 10-8-6 Panzer divisions attacking a city hex would have a strength of 40—not 60.
(8.5.2) 20 Defense Factors: The defender can use a maximum of 20 Strength Points in a given combat. All strength points in excess of this are ignored. This limit applies after halving and doubling.
EXAMPLE: Two 4-6-3s defending in a city hex would have a modified strength of 20—not 24.
8.6 Automatic DS
(8.6.1) Procedure: Defending units can suffer an Automatic Defender Shattered (Auto DS) result during a Movement Phase when the Phasing Player has enough units adjacent to the defender's hex to ensure 10-1 odds against it. Stacking Limits (4.4) for the Phasing Player are enforced before each Auto DS is resolved. Tank shifts (9.2) may be used but not Air or Artillery shifts (which are only allocated in the Combat Phase). At that point the phasing player may declare an Auto DS against the hex. The defending unit(s) immediately suffer a DS result and survivors are retreated four hexes by the defender abiding by the Retreat Guidelines (12.1.3). All units that made the 10-1 possible are marked with "Auto DS" markers—they cannot move any farther that Movement Phase nor take part in regular combat in the upcoming Combat Phase.
EXAMPLE: The German units marked "A" are moved adjacent to Soviet unit "X". The odds are 25 to 3 = 8-1, with two CRT column shifts right for the Tank Shift (9.2.1) and the Elite Tank Shift (9.2.2) making it a 10-1. At this point the Soviet unit is immediately eliminated by the DS result and the three German units are marked with Auto DS markers. Their movement is over and they may not advance until the Combat Phase. German unit B now moves through the hole created by the Auto DS to attack unit Y at 5-1 odds (10-3 with two shifts right).
(8.6.2) Advance After Combat: During the Combat Phase, the units marked with Auto DS markers may, after all combats, Disengagement Attempts, and Reserve activations have been resolved, conduct their Advance After Combat at their full Advance rate (14.2), at which time the markers are removed. As in regular combat, only one stack in each Automatic DS attack may conduct Breakthrough Combat (15.0).
Important: Automatic DS markers are placed in the Movement Phase, never in the Combat Phase.
9. Combat Modifiers
9.1 Halving and Doubling
A unit can be halved more than once, but never doubled more than once. When halving, always halve by individual unit (not stack) and round any fractions up to the next higher whole number. If a unit is both halved and doubled (i.e., a Disrupted unit defending in a City hex), do the halving first. Units are halved for the following reasons:
- Attacking across a Major River (9.5.2).
- Attacking when marked Out of Supply (16.4).
- Disrupted units halve their Defense Strength (13.2).
EXAMPLE 1: Two units with an Attack Strength of 5 would have a combined strength of 6 after halving (3 + 3 = 6).
EXAMPLE 2: A defender in a City hex defending behind a river is only doubled—not tripled or quadrupled.
EXAMPLE 3: A 9-strength unit that is both Out of Supply and attacking across a Major River would have a modified attack strength of 3 (9 ÷ 2 = 5, 5 ÷ 2 = 3).
9.2 Tank Shifts
(9.2.1) The Tank Shift: Terrain permitting (9.2.3), the attacker and defender gain a favorable shift of one column on the CRT if they have one or more Tank Units (2.3.3) with a solid dot participating in the combat. The attacker earns a shift right and the defender earns a shift left. If both sides have such a unit then the shifts cancel out. The number of Tank units on each side does not matter—each side can earn a maximum of one shift per combat for the solid dot.
NOTE: Solid dots are almost always black except when type is reversed (SS units) when the solid dot is white.
(9.2.2) The Elite Tank Shift (red dot): Terrain permitting (9.2.3), the Axis player gains the basic Tank Shift (9.2.1) plus an additional shift if at least one unit participating in the attack or defense is marked with a red dot next to its Attack Strength. Unlike the basic Tank Shift, this shift is not canceled by Soviet Tank Units.
EXAMPLES: A 10-8-6 Panzer division attacks a 3-5-3 Soviet infantry division. The odds would be 10 to 5 with two shifts right = 4-1. A 10-8-6 Panzer Division attacks a Soviet 7-5-5 Tank Corps, the odds would be 10 to 5 with one shift right = 3-1.
(9.2.3) Where Tank Shifts are Prohibited: Tank (and Elite) Shifts cannot be gained by the attacker or defender if the defender is in a Woods, Wooded Rough, Marsh, Mountain, City (both types) hex, or any hex containing a completed Fortification (9.7). Tank units attacking across a river hexside (Major or Minor) or out of a Marsh hex cannot be used to gain a Tank Shift, but their presence is enough to prevent the defender from gaining the Tank Shift.
EXAMPLE: If a Tank Unit attacks an enemy Tank Unit across a river hexside, neither player would earn the Tank Shift.
(9.2.4) Anti-tank (hollow dot): Units with a hollow dot (or a white dot outlined in black) next to their Attack Strength are anti-tank units. They cannot earn the Tank Shift but do deny the Tank Shift when they are defending against enemy Tank Units. Anti-tank units have no effect on the Elite Tank Shift, and when attacking they do not cancel the defender's Tank Shift.
9.3 Air Support
(9.3.1) Availability: Only the Axis player has Air Units. The number of available Air Units received each turn is determined by the Weather. Each Axis Initial Phase all his available Air Units are returned to their Holding Box and flipped to their Ready side. Unavailable Air Units are set aside.
(9.3.2) Purpose: Air Units provide a CRT shift in combat and a +1 DRM to a Determined Defense. Those are the only air missions.
(9.3.3) Offensive Support: Adding an Air Unit to a combat in the Axis Combat Phase gives the Axis player a favorable shift of one column to the right on the CRT. Place the Air unit on the defending unit. No more than one Air Unit may be committed to each combat.
(9.3.4) Defensive Support: Adding an Air Unit to a combat in the Soviet Combat Phase gives the Axis player a favorable shift of one column to the left on the CRT. No more than one Air Unit may be committed to each combat. Alternatively, the Axis player may use it in a Determined Defense to provide a +1 DRM to the Determined Defense die roll (11.3). Place the Air unit on the defending ground unit.
(9.3.5) Range: Air Units may only be placed within 15 hexes of a friendly controlled City hex, Town, or Landmark that is located on a Connecting Rail Hex (17.4). Consider all railroads within a repaired hex as usable (e.g. hex 3327).
(9.3.6) Used Side: After the Romanian Air Unit is used for Offensive or Defensive Support it is flipped to its "Used" side. German Air Units are only flipped to their used side when used for Defensive Support. A flipped Air Unit may no longer be used that Player Turn and is placed in its holding box on its Used side.
(9.3.7) German Air Superiority: Due to German Air Superiority, German Air Units placed in the Axis Combat Phase remain with the units they supported and provide the following benefits:
A. BREAKTHROUGH SUPPORT: After it is used for regular Combat it must be placed on one of the stacks that participated in the combat and advance with that stack. If the stack is a Breakthrough Group (15.2.2) it may provide a shift to all Breakthrough Combats the stack conducts during its Advance After Combat.
B. AIR DEFENSE: After the Advance After Combat is completed it remains with the stack it accompanied (if no units advanced, then place it with any unit that participated in the attack). During the Soviet Combat Phase it may be used for Defensive Support (9.3.4) within one hex of its location. Once used for Defensive Support (shift or +1 DRM), it is flipped to its Used side and returns to the Holding box. It also returns to the Holding Box if the stack it is with is eliminated or retreats.
(9.3.8) The Romanian Air Unit: May only provide a CRT shift if the majority (determined by defense strength) of the attacking/defending units in that combat are Romanian. May only be used to provide a +1 DRM to the DD Table if the Lead Unit is a Romanian unit. It is removed from the game when the Winter Offensive starts (33.2.1).
(9.3.9) Allies Land in North Africa: During the German Initial Phase of Turn 27 remove one German Air Unit from play—it is redeployed to the Mediterranean. On Clear turns the Axis player now receives only one German Air unit and on Snow and Overcast turns, no Air Units.
9.4 Artillery Shifts
ASUs can provide a favorable shift of one column to the right on the CRT. If a Massive Barrage (18.5) is used, then two shifts are earned. See 18.2 for full details.
9.5 River and Marsh Combat Effects
(9.5.1) Defender Doubled: The defender is doubled if all participating attacking units are attacking across a river hexside (Major or Minor), out of a Marsh hex, or any combination of those two. If just one attacking unit is not attacking across one of those hexsides (or out of a Marsh hex), the defender is not doubled.
(9.5.2) Major Rivers: All units are halved attacking across a Major River hexside. This combat effect is cumulative with 9.5.1.
EXAMPLES: Units A, B and C attack unit X. Units A and B are halved attacking across a Major River hexside, while unit C attacks at full strength. Unit X is doubled because all attacking units are attacking across river hexsides. Odds are 11 to 10 = 1-1. Next, units D, E and F attack unit Y. Unit Y is NOT doubled because unit F is not attacking across a river hexside. Odds are 11 to 5 = 2-1.
(9.5.3) The Volga: Combat across is only allowed at Ferries (including the Volga Flotilla [5.5.3], but not the Vladimirovka Ferry [5.5.7]) or the railroad bridge at Saratov. Treat combat (and Advance After Combat) there the same as a Major River.
(9.5.4) Marsh Hexes: Defenders are doubled in a Marsh hex and are also doubled if all participating attacking units are attacking out of a Marsh hex (9.5.1). Tank Units cannot earn the Tank Shift defending in or attacking into/out of a Marsh Hex (9.2.3).
EXAMPLE: The two German units attack the Soviet unit. Unit A is halved attacking across the Major River, unit B is not halved. The Soviet unit is doubled per rule 9.5.1. No Tank Shift (9.2.3). The odds are 13 to 10 = 1-1.
(9.5.5) The Izium Bend (Hex 1521): The river flows inside this hex. Treat the river along the four hexsides normally, but ignore the river inside the hex.
(9.5.6) Lake Hexsides: Attacking across a Lake hexside is prohibited until the lake freezes. Lakes in the Kalmyk Steppe freeze over on Turn 28 (23.4).
9.6 Mountain, Alpine and City Terrain
(9.6.1) Mountain Hexes: All Infantry Type units have their Defense Strength doubled when in a Mountain hex. Axis Mountain Infantry units have their Attack Strength doubled when attacking into a Mountain hex (20.2).
(9.6.2) Alpine Hexsides: Only Mountain units may move and attack across non-road Alpine hexsides and their attack strength is not doubled. A full Alpine Hex is treated as a Mountain hex surrounded by Alpine hexsides.
§ (9.6.3) City Hexes: All units except ASUs, Soviet Tank Corps, and silhouetted Tank Units have their Defense Strength doubled when in a City hex.
9.7 Fortifications
(9.7.1) Combat Effects: Fortifications provide the defender with a column shift left (1L) on the CRT and prevents either side from gaining any Tank Shifts. Fortification benefits are cumulative with River and Rough terrain benefits—the Defender can receive both a shift for the fortification and be doubled behind a river. A fortification in a Rough hex would provide two shifts left.
(9.7.2) Building Fortifications: It costs one Resource Point (18.1) to build a Fortification. Construction is a two part process—it is begun in the Phasing Player's Initial Phase (place the counter on its reverse "Under Construction" side) and completed in the next friendly Initial Phase (flip to its front side). Fortifications must be placed in a hex that is currently in supply and not enemy controlled (16.3.4). A friendly Combat Unit is not necessary in the build hex unless the Fortification is built in an EZOC. Supply is not necessary in the following turn when the Fortification is flipped.
Important: No attack is allowed out of a hex where a Fortification is being built.
(9.7.3) Building Restrictions: No more than one Fortification is allowed in a hex. Fortifications may not be built in:
- City, Mountain, Marsh, or Wooded Rough hexes.
- In an EZOC unless a friendly Combat Unit is present when the Fortification is begun (a Combat Unit's presence is not required to finish construction in the next friendly Initial Phase).
- Each side is limited in the number of Fortifications they may have in play at one time by the number supplied in the counter mix (German = 12, Soviet = 24). Fortifications that are removed may be rebuilt.
(9.7.4) Vacant Fortifications: A Fortification marker by itself in a hex has no effect on enemy units and does not impede enemy movement in any way. Vacant Fortifications have no effect on tracing LOS. Vacant Fortifications may not be attacked and can not retreat.
(9.7.5) Removing Fortification Markers: Friendly Fortification markers may be removed at any time during the owning player's turn. They must be removed if an enemy unit enters its hex.
(9.7.6) Printed Fortification Hexes: Most Soviet front line hexes and the hexes north of Rostov contain printed Fortifications. These printed Fortifications are treated like a Fortification marker in every respect except they are never removed. Axis units never receive benefits from these printed Fortifications.
(9.7.7) Deactivation of Printed Fortifications: These Fortifications become deactivated in three stages. Determine deactivation at the end of a Soviet Player turn. The fortification hexes become deactivated as a group—not individually. Once deactivated they are ignored for the remainder of the game.
- All front line Fortification hexes north of Kharkov become deactivated if there are no Soviet units in any of those hexes.
- All front-line Fortification hexes south of Kharkov, except those four hexes around Rostov, become deactivated if there are no Soviet units in any of those hexes.
- The Rostov fortification hexes become deactivated once they are clear of Soviet units and Rostov is Axis controlled.
9.8 Parenthesized Units
The defense strength of these units is used only if they are the only unit in the hex. If there are multiple such units, only one is used. When stacked with other units, the unit may not be selected for a step loss until all other defending units are eliminated.
9.9 Other Combat Modifiers
- Rough and Wooded Rough hexes provide one shift left (TEC)
- Train marker: Defense Strength reduced to 1 (5.6.4)
- Defender Disrupted: Defense Strength halved (13.2)
- Defender in Full Retreat: Defense Strength = 0 (13.3)
- Attacker is Out of Supply: Attack Strength halved (16.4)
- Axis units during Winter turns on or north of hex row xx43: –1 Attack and Defense Strength. Winter cannot reduce Attack Strength < 1 and Defense Strength < 2 (23.4).
10. Combat Results
10.1 Explanation of Combat Results
The words "attacker" and "defender" refer only to the units participating in the combat in question—not to the strategic situation.
- DS = DEFENDER SHATTERED: The defender loses one step—the unit selected is determined by the attacker. Surviving defenders must Retreat 4 hexes and are marked in Full Retreat—no Determined Defense (11.0) is possible.
- DR4 = The defenders must Retreat 4 hexes and are marked in Full Retreat—no Determined Defense (11.0) is possible.
- D1 = The defender loses one step. Surviving defenders must Retreat 3 hexes and become Disrupted or conduct a Determined Defense.
- A1/D1 = Both sides lose one step. Surviving defenders must either Retreat 2 hexes and become Disrupted or conduct a Determined Defense.
- DR2 = The defender must either Retreat 2 hexes and become Disrupted or conduct a Determined Defense.
- A1/DR2 = The attacker loses one step. The defender must either Retreat 2 hexes and become Disrupted or conduct a Determined Defense.
- DRX = Both sides lose one step—the unit selected is determined by the opposing player. The defender must either Retreat 2 hexes and become Disrupted or conduct a Determined Defense.
- EX = Exchange: Each side loses one step—the unit selected is determined by the opposing player. No Retreat for the defender. If the defender had only one step involved, then the attacker may enter the vacated hex and stop—a Limited Advance (14.2.3).
- A1 = The attacker loses one step. No Retreat or Advance.
- Adv 2, Adv 3, Adv 4 = If the defender retreats, the attacker may Advance After Combat the number of hexes indicated. See 14.2.2 for maximum Advance After Combat rates.
10.2 Selecting Step Losses
(10.2.1) Step losses must come from participating units—a unit that contributed no Attack or Defense factors may not be selected until all other participating units are eliminated. Any participating unit can be selected, it doesn't have to be one that provided a shift.
EXAMPLE: Non-Combat units, overstacked units, and units that retreated into the hex from a previous combat would contribute nothing to the defense of the hex and could not be selected.
(10.2.2) Who Picks: The owning player selects the unit that will take the step loss unless an DS, EX, or DRX was rolled. When those results are rolled the opposing player selects the step loss.
(10.2.3) Selecting the Opponent's Step Loss: When selecting your opponent's step loss, you may select any participating Combat Unit except parenthesized units (9.8) and certain Axis Allied units (20.5.2); these units may only be selected if there are no other Combat Units remaining in the hex. Non-Combat Units and markers may never be selected.
10.3 Indicating Step Losses
Flipping a unit over indicates the unit has suffered a step loss. If it is a 1-step unit, or a 2-step unit that is already flipped, then it is eliminated. A reduced 3-step unit that suffers a step loss can either form a Remnant (10.4) or be placed in the Eliminated Box (10.4.2).
10.4 Remnants and the Remnant Display
(10.4.1) When a 3-step unit takes a 2nd step loss it may be replaced with a Remnant of the appropriate unit type. Place the division or corps in the Remnant Display printed on the map and place the Remnant on the map where the unit was.
§ (10.4.2) Skipping the Remnant: This rule has been deleted. If no Remnant is available when a reduced 3-step unit loses a step, then the last step is lost and the unit is placed in the Eliminated Box.
§ (10.4.3) Remnant Elimination: If a Remnant is eliminated, then the unit it was representing is placed in the Eliminated Box and the Remnant is placed back in the Remnant Display and may be used again for another unit. The eliminated unit may reenter play via the Replacement rules but must start out as a Remnant—spend the Replacement step, place the unit in the Remnant Display, and place the Remnant on the map (21.3.1).
11. Determined Defense
11.1 In General
(11.1.1) Purpose: The defender may attempt to cancel the Retreat portion of an A1/DR2, DR2, A1/D1, DRX, and D1 result on the CRT by using Determined Defense Table provided at least one step survived the combat and the CRT allows it (11.2.2). A successful result on the Determined Defense Table cancels the Retreat, the Disruption, and the associated Advance After Combat.
(11.1.2) Not One Step Back!: Until Turn 8, the only Soviet units that may use the Determined Defense Table are NKVD units, units that qualify for a Desperate Defense (11.5), and units that were doubled in Defense Strength or received a favorable Terrain or Fortification CRT shift in the current combat. Starting with Turn 8 the restriction is lifted.
DESIGN NOTE: This reflects Stalin's Order 227 issued on July 28, 1942 (Turn 8) that included the famous line "Not one step back!"
11.2 The Determined Defense Table
(11.2.1) Procedure: Step losses from the CRT are implemented before resolving the Determined Defense. If there are two or more surviving units in the defending stack, the defender picks one as the Lead Unit (11.2.3). If there is only one eligible unit, then that unit must be the Lead Unit. The terrain of the defender's hex determines the column to use on the table. Use the far right column for units in City hexes, use the "Clear/Desert" column for units in Clear or Desert hexes without Towns or Fortifications, and use the "Other" column for all other hexes (including Fortifications). Roll one 6-sided die and implement the result.
§ NOTE: Minor changes were made to the DD Table in the Clear and City Columns.
(11.2.2) CRT Color Codes: The background color of the CRT result means the following:
- A result shaded gray means Determined Defense is not allowed.
- A result shaded light-orange means the Determined Defense suffers a –1 DRM and is only allowed if the defender is in a VP hex or the defender qualifies for a Desperate Defense (it faces elimination if it retreats [11.5]).
(11.2.3) Lead Units: The Lead Unit determines any possible DRMs and will be the unit to suffer the step loss if one is called for. Any Good Order Combat Unit can be a Lead Unit except entrained units and ASUs.
(11.2.4) Die Roll Modifers:
- +1 Lead Unit is Elite (2.3.2)*
- –1 Lead Unit is Low Quality (2.3.2)
- +1 Defensive Support (11.3)
- –1 The CRT result is highlighted in light-orange.
*All German units defending in Fortifications or City hexes (both types) are considered Elite regardless of their TQ.
11.3 Defensive Support
The defender may use one Air Unit or one ASU within range to modify the die roll by +1. The defender must declare this before the die is rolled. Only Air Units and ASUs on their Ready side may be used, and no more than one may be used in each Determined Defense—the maximum modifier for Defensive Support is +1. Once used, the Air Unit or ASU is flipped to its USED side.
11.4 Explanation of Results
(11.4.1) List of Results
- S = Success: The Retreat is canceled
- P = Partial Success (11.6)
- F = Fail: the Determined Defense fails (11.4.3)
- #/# = Step losses, Attacker/Defender
- ***** = The defender picks the attacker's step loss.
(11.4.2) Single Step Defenders: If the defender had only one step, and that step was lost in a successful or Partial Success Determined Defense, the attacker receives a Limited Advance (14.2.3). If there are still friendly units in that hex (ASUs, Disrupted units, entrained units, retreated units, etc.), then the hex holds.
(11.4.3) Failed Determined Defense: If the Determined Defense fails "F", then the unit or stack must retreat unless it is a Desperate Defense (11.5).
11.5 Desperate Defense
(11.5.1) Players conducting a Determined Defense can declare it a Desperate Defense if all units in the defending stack:
- will be eliminated if they retreat, or
- they occupy a port hex and the loss of that port will cause those defending units to become OOS at the end of their retreat.
Units in a Desperate Defense may roll again and again until the retreat is either canceled or all the defending units are eliminated.
(11.5.2) Procedure: Declare that the defending units are in a Desperate Defense and conduct the Determined Defense in the usual manner. However, if the result is a Fail (F-/- or F-/1), ignore it, apply a step loss to the Lead Unit and try again. The Air/ASU +1 DRM is applied to every roll of the Desperate Defense. A new Lead Unit may be selected after each attempt.
EXAMPLE: An elite and a regular division are defending in a Woods hex with no Retreat path and the CRT result is a D1. The defender removes a step from his regular division and declares a Desperate Defense and selects his elite division as his Lead Unit. Using the "Other" column on the DD Table he rolls a 2, which is modified to a 3 for the elite unit, which is an "F -/-" result—a fail. He reduces his elite by one step and rolls again. He rolls a 4 (+1) = 5 = an "S -/1" result—the Retreat is canceled at the cost of another step from the Lead Unit. The defender lost a total of three steps.
11.6 Partial Success
The effects of a Partial Success depend on the terrain.
(11.6.1) Delay: If the defender's hex is not a City hex, then a Partial Success is considered a Delay—the retreat and advance stated in the CRT result are ignored, instead the defender must retreat one or two hexes and become Disrupted, the attacker may Advance After Combat one hex (in any direction). Breakthrough Combat is not possible. If the defender lost his last step in the Delay, the attacker still may only Advance one hex. If the defender is in a Desperate Defense and rolls a Delay, then treat this as a Fail result—remove one step and roll again. If another Delay is rolled in the same Desperate Defense, then treat the second one as an S-/1 result.
(11.6.2) City Battle: If the defender was in a City hex place a City Battle marker there on the "1" side and cancel the retreat. If a Partial Success occurs again and the City Battle marker is on the "1" side, flip the marker over to its 2 side and cancel the retreat. Once a Major City hex has a "City Battle 2" marker, treat all further Partial Success results in that hex as a Delay (11.6.1). Minor City hexes work the same way except they can only incur a City Battle 1 marker.
CLARIFICATION: In a Desperate Defense of a city hex, an F result results in a step loss and a City Battle marker (or flipping an existing City Battle marker). The defender continues to roll until either a P or S result is rolled or the defenders lose their last step.
These markers are removed if the defender vacates the City hex, or if at the original attacker is no longer adjacent to the City hex. A City Battle marker has no other combat or movement effect.
There is an Advanced Rule that allows both sides to occupy a City Battle Hex, see Contested City Hex (29.0).
EXAMPLE: In hex A a Partial result causes the defender to retreat one or two hexes; Axis units could advance one hex in any direction. In hex B a Partial result would just add a City Battle marker.
12. Retreats
12.1 Retreat Procedure
(12.1.1) Retreat Length: When called upon to retreat by the CRT or by an Auto DS, defending units must abandon the hex and be retreated the appropriate number of hexes by the owning player:
- 4 hexes on a DS or DR4 result
- 3 hexes on a D1 result
- 2 hexes on an A1/DR, DR2, A1/D1, and DRX result.
(12.1.2) Stacks: A stack of retreating units may split up and retreat to different hexes. Units can retreat through friendly units without disturbing the non-retreating units.
(12.1.3) Retreat Direction Guidelines: All retreats must follow the guidelines below. The guidelines are listed in order of priority (#1 takes priority over #2, etc.):
- Retreat to any hex that does not cause elimination (12.2).
- If possible, retreat to a hex that has a LOS (16.3).
- A stack must either end 2, 3 or 4 hexes (determined by the retreat result) away from the battle hex, or pay to reduce its retreat (#4), or qualify under the City/Fort Stops Retreat rule (#5).
- § PAY TO REDUCE RETREAT: The owning player may only pay to reduce a retreat if the stack ends its retreat in a hex occupied by friendly units that did not retreat. A stack may lose one additional step to reduce its retreat by one hex, or lose two additional steps to reduce a retreat by two hexes, or three additional steps to reduce the retreat by three hexes. The stack must have retreated at least one hex to use this rule.
- § City/Fort Stops Retreat: A stack can (not must) stop its retreat without a step loss penalty, if it ends its retreat in a friendly controlled Fort or City hex free of EZOCs. Friendly units that are not part of the retreat negate EZOCs in the hex they occupy. The stack must have retreated at least one hex to use this rule.
Neither procedure #4 or #5 shorten the attacker's advance or cancel the defender's Disruption/Full Retreat.
Important: Units are not required to avoid EZOCs—only to avoid elimination by EZOCs (see 12.2). Units may also voluntarily retreat to hexes where they are overstacked.
EXAMPLES OF RETREAT: Tinted hexes indicate EZOCs. Units A and B must retreat two hexes. Unit A has only one retreat path—into the hex containing unit "C". This is allowed since unit C cancels EZOCs in the hex it occupies for purposes of retreats. Unit B has a choice of four hexes to retreat to due to friendly units D and E.
MORE EXAMPLES OF RETREAT: Units A and B must retreat two hexes. Unit A is eliminated because it enters two consecutive hexes in an EZOC. Unit B avoids elimination by retreating through unit C and then retreating an additional hex (12.2, 4th bullet).
(12.1.4) Over-Stacking: Units may end their retreat in violation of stacking restrictions. However, the over-stacking must be corrected before the end of the owning player's next Movement Phase when all units in excess of the limit must be eliminated (4.4).
(12.1.5) Attacker Retreats: The attacker never retreats unless it is from a successful Disengagement (27.0).
12.2 Elimination Due to a Retreat
Units are eliminated if they retreat:
- Into a hex occupied by an enemy unit.
- Across or into an enemy ZOC Bond.
- Into two consecutive vacant hexes in an EZOC.
- Into an EZOC that is the final hex of the retreat (a unit may retreat one and only one additional hex if that hex will save it from elimination. This does not add one additional hex to the required distance from the battle hex). This does not allow a unit that has retreated into two consecutive EZOCs to survive.
- Across an unbridged, unfrozen Major River hexside. This applies even if the unit started its retreat adjacent to the river hexside. Units may retreat across bridged Major River hexsides (including Pontoon Bridges [5.5.5]) without restrictions. Ferry sites on Major Rivers are treated as permanent Pontoon Bridges.
- Across a Volga River hexside (even at a Ferry site or railroad bridge).
- Off the map, unless it is into a friendly Entry Area (22.2). (A unit that retreats into a friendly Entry Area automatically fulfills the number of hexes required by the retreat.)
- Into a hex or across a hexside they are prohibited from entering or crossing in the Movement Phase.
NOTE: Friendly units that have not retreated in the current phase negate EZOCs in the hex they occupy for purposes of retreats.
Important: Units facing elimination if they retreat are eligible to roll more than once on the Determined Defense Table (11.5).
12.3 Elimination Does Not Reduce the Advance
If the defender is eliminated, the attacker still receives the full Advance After Combat allowance.
12.4 Combat Against Previously Retreated Units
If a unit or stack is retreated into a friendly occupied hex and that hex undergoes an attack (not Breakthrough Combat) in the same Combat Phase, the retreated units do not add their Defense Strength to the combat, may not be the Lead Unit, may not be selected to satisfy a step loss, and, if required to retreat again, are eliminated. This rule is different for Breakthrough Combat—see 15.3.
13. Disruption & Recovery
13.1 Disrupted, Full Retreat and Good Order
(13.1.1) The Basics: Combat Units are always in one of three states: Disrupted, Full Retreat, or Good Order. A unit that is neither Disrupted nor in Full Retreat is classified as Good Order. Non Combat Units are always in Good Order.
(13.1.2) How Units become Disrupted:
- Any Combat Unit that suffers a 1-3 hex retreat result becomes Disrupted.
- Any ASU (18.2) on its Ready side which moves more than two hexes in the Movement Phase becomes Disrupted.
(13.1.3) How Units go into Full Retreat:
- Any Combat Unit that receives a 4-hex Retreat (CRT result of DR4 or DS) goes into Full Retreat.
- Any Disrupted unit that is forced to retreat again has its Disrupted status changed to Full Retreat.
- VOLUNTARY METHOD: During a friendly Movement Phase, a player may put any of his Good Order or Disrupted units into Full Retreat. This must be done before the unit moves. See 13.3.1.
13.2 Effects of Disruption
(13.2.1) A Disrupted unit suffers the following penalties:
- MOVEMENT: It may only use Tactical Movement. It may not use Rail or Sea Movement or exit an Entry Area.
- ZOC BONDS: It has a ZOC but cannot in any degree be used to form a ZOC Bond.
- COMBAT: It may not attack. Disrupted units have their Defense Strength halved (rounded up) and may not be a Lead Unit in a Determined Defense (11.2.3). Disrupted Tank units still earn or deny the Tank Shift when defending.
- REPLACEMENTS: It cannot receive Replacements (21.2).
- ASUs: May not flip to their Ready side, nor provide Combat Benefits (18.2.3).
(13.2.2) Abilities Retained: Disrupted units retain their ZOC and Tank Shift abilities. Other units may enter or pass through friendly Disrupted units without becoming Disrupted.
13.3 Effects of Full Retreat
(13.3.1) Full Retreat Benefit: Units in Full Retreat may move their full MA and use Extended Movement. Mechanized units in Full Retreat can use the reduced rate of roads. Units that voluntarily go into Full Retreat that start their movement in an EZOC may ignore the +2 MPs cost to exit that EZOC. (This is a change from previous games in this series.)
§ (13.3.2) Full Retreat Penalties: Units in Full Retreat suffer all the penalties of Disruption (except the movement penalty) with the following additional penalties:
-
NO ZOCS: Full Retreat units do not have a ZOC.
-
MOVEMENT: They may not move into an EZOC unless a friendly unit that is not in Full Retreat also occupies that hex, nor may they enter an enemy controlled City hex.
-
COMBAT: They have a Defense Strength of 0. If stacked with other units they contribute nothing to the defense (including Tank Shifts and Determined Defense). If the units they are stacked with are retreated or eliminated—follow 12.4 if applicable, if not the units are retreated per the CRT result.
-
Automatic Retreat: If an enemy Combat unit moves, advances, or retreats adjacent to any unit(s) in Full Retreat, that are not stacked with friendly Combat Unit(s) not in Full Retreat, then those unit(s) must immediately be retreated 2 hexes by the owning player and the enemy unit may then continue moving/advancing/retreating. There is no additional penalty if units in Full Retreat suffer another retreat.
PLAY NOTE: Once a unit goes into Full Retreat it is difficult to eliminate it since (if it is not stacked with a Combat Unit not in Full Retreat) it automatically retreats.
-
RECOVERY: They take longer to recover (13.4).
-
ELIMINATION: Any unit(s) in Full Retreat are eliminated at the beginning of any Movement or Combat Phase which they begin adjacent to an enemy unit unless they are stacked with one or more friendly Combat Unit(s) that are not in Full Retreat.
13.4 The Recovery Phase
During the Recovery Phase all friendly Disrupted and Full Retreat units that are not in an EZOC automatically recover one level—Disrupted markers are removed and Full Retreat are flipped to their Disrupted side. If a Disrupted/Full Retreat unit is in an EZOC then recovery is determined by a die roll on the Rally Table. Players may choose to not recover a unit in Full Retreat in order to retain its Automatic Retreat ability (13.3.2).
13.5 The Rally Table
| Die Roll | Result |
|---|---|
| 1-4 | Unit remains at its present state |
| 5-6 | Unit recovers one level |
DIE ROLL MODIFIERS:
- § +2 unit is in a City or Fort Hex*
- +1 unit is Elite
- –1 unit is Low Quality
Treat results less than 1 as 1, and greater than 6 as 6.
*DESIGN NOTE: This is a new DRM to help units recover in hexes where shelter and recovery would be more likely.
14. Advance After Combat
14.1 The Basics
If the defender is eliminated or retreats, then all Combat Units that participated in the attack (with the exception of ASUs that provided a shift) may Advance After Combat. Advance After Combat expends no MPs, you just count the hexes. Stacking limits must be observed at the end of each advance.
In addition, all Good Order Non-Combat/Combat Units that did not participate but are stacked with the attacking units, may also Advance After Combat (as long as they have not attacked or advanced previously in the Combat Phase). These "tag along" units may not attack after advancing.
14.2 Advance Allowance
(14.2.1) Advance Allowance: The number of hexes a unit may "Advance After Combat" is called its Advance Allowance. This is determined by the CRT result (i.e., "Adv 4" allows a 4-hex advance) and capped by the Advance Rates (14.2.2).
(14.2.2) Advance Rates:
- 4 hexes: Mechanized units (except the Soviet Army HQs with an MA of 3).
- 3 hexes: Cavalry units
- 2 hexes: all the rest (Infantry, Security, Bicycle, NKVD).
EXAMPLE: The three Axis units attacked the Soviet unit and the CRT result was DS Adv 4. The Mechanized unit can advance four hexes, the cavalry unit three hexes, and the Infantry unit two hexes.
(14.2.3) Limited Advance: The attacking units may only Advance After Combat into the defender's vacated hex and stop, or not advance at all. This occurs when:
- All defending units are eliminated in an EX result.
- The defender lost his last step in a successful Determined Defense.
(14.2.4) One Hex Advance: This only occurs on a Delay result on the Determined Defense Table. Units may advance in any direction, but no Breakthrough Combat is allowed.
14.3 Advance in Any Direction
Units may advance in any direction and do not have to enter the defender's vacated hex, except in the case of a Limited Advance (14.2.3). See also the restriction of Major Rivers (14.5).
14.4 Advance and Enemy ZOCs
(14.4.1) Enemy ZOC Bonds: These may never be entered or crossed during an Advance After Combat except when entering the defender's vacated hex.
(14.4.2) EZOCs: Units must stop upon entering an EZOC (even if the hex contains a friendly unit) with two exceptions:
- Units may pass through the defender's vacated hex without the need to stop for EZOCs. Once beyond the defender's vacated hex they must stop if they enter an EZOC.
- During Breakthrough Combat (15.0) units can free themselves from EZOCs by attacking again (see 15.2.6).
EXAMPLE: In this example, the unit can advance up to four hexes, only stopping if it enters an EZOC (other than in the defender's vacated hex). Enemy ZOC Bonds may only be crossed or entered when entering the defender's vacated hex. Green arrows are a reminder that units may advance in any direction.
14.5 Terrain and Advance
- No unit may advance into a hex or across a hexside that is prohibited to it in regular movement.
- MAJOR RIVERS: Units may only cross an unbridged Major River hexside during the first hex of their advance. That advance must be into the defender's vacated hex. If you are not attacking across a Major River you cannot advance across an unbridged Major River hexside. Units may cross at a bridge hexside (including Pontoon [5.5.5] and Railroad Bridges) at any point in their advance. These restrictions do not apply when the Major River is frozen (23.4).
- MARSH AND MOUNTAIN: Units must end their advance if they enter a Marsh or Mountain hex unless they entered the hex along a road. Mechanized units cannot advance into a Mountain hex unless following a road.
NO EFFECT: Minor Rivers, Cities, Towns, Desert, Rough, Woods, and Wooded Rough hexes have no effect on Advance After Combat.
15. Breakthrough Combat
15.1 In General
Any Regular Combat that achieves an Advance After Combat of 2-4 hexes allows units that participated in that attack to conduct Breakthrough Combat. Breakthrough Combat allows units to attack during their Advance After Combat. Breakthrough Combat is resolved like a normal combat using the Combat Results Table.
15.2 Procedure
(15.2.1) Sequence: Follow this sequence for each combat where Breakthrough Combat is allowed:
Step 1: Declare which stack will be the Breakthrough Group (15.2.2). If the Breakthrough Group will be formed in the Defender's vacated hex, do that now (15.2.3).
Step 2: Conduct the Advance After Combat of the Breakthrough Group and resolve any Breakthrough Combats as they occur.
Step 3: Conduct the Advance After Combat of the other units in the attack that were not part of the Breakthrough Group. These units may not conduct Breakthrough Combat.
(15.2.2) The Breakthrough Group: In each attack, only one stack may conduct Breakthrough Combat. That stack is called the Breakthrough Group. The Breakthrough Group must complete its entire Advance After Combat and all Breakthrough Combats before the other units that participated in the attack can advance.
(15.2.3) Forming a Breakthrough Group: The Breakthrough Group may be formed in the defender's vacated hex by advancing units that participated in the attack (up to that side's Stacking Limit). This movement into the defender's vacated hex costs one hex from their Advance After Combat allowance.
(15.2.4) Itemized Cost: The following is the cost (in hexes) of each action that can be conducted by the Breakthrough Group:
- 1 — Forming in the defender's vacated hex (15.2.3).
- 1 — Declining to advance into the defender's vacated hex (see example below). This only applies to the initial defending hex—not to hexes attacked during Breakthrough Combat.
- 1 — Advancing one hex.
- 1 — Conducting Breakthrough Combat (entering that hex after the defender retreats is free).
EXAMPLE: The CRT result allows an Advance After Combat of 3 hexes. If the Breakthrough Group advances to attack A it pays 1 hex to change directions and so can only advance 2 hexes.
EXAMPLE: The attack at X achieved a DS/Adv 4 result. The Axis player advances the three mechanized units into the defender's vacated hex and forms the Breakthrough Group there. The stack can now advance three more hexes. On its last hex it conducts Breakthrough Combat against unit Y (26 to 5 with two shifts = 7-1). After the defender retreats, the Breakthrough Group advances into the vacated hex (Y) for free. When the Breakthrough Group is done, the one infantry division (C) advances two hexes.
(15.2.5) Eligible Targets: Breakthrough Combat can target any enemy units that the Breakthrough Group moves adjacent to (including those that retreated in the initial combat). The target must be in a hex that the Breakthrough Group could legally advance into.
(15.2.6) EZOCs Stop the Breakthrough: If the Breakthrough Group advances into an EZOC other than the initial "defender's vacated hex", the Breakthrough Group must either stop there or conduct Breakthrough Combat. If that Breakthrough Combat clears away the EZOCs, or the Breakthrough Group frees itself from the EZOCs by advancing into the defender's vacated hex, then it may continue its advance.
(15.2.7) Failed Breakthrough Combat: If a Breakthrough Combat does not achieve a CRT result of either "Adv 3" or "Adv 4", then the Breakthrough Group must end its advance in the hex it attacked from or (if the defender was eliminated or retreated) enter the defender's vacated hex and stop.
(15.2.8) Successful Breakthrough Combat: If the Breakthrough Combat result was Adv 3 or Adv 4, then the Breakthrough Group may continue its Advance After Combat if it has hexes remaining in its allowance. The owning player has the choice of continuing the advance from the defender's vacated hex or from the hex the Breakthrough Combat was launched from. If continued from the defender's vacated hex the movement into that hex does not cost another hex of the advance—that price was already paid for by the 1-hex cost of the Breakthrough Combat.
Important: The attacker never earns additional hexes by successful Breakthrough Combats—always use the Advance After Combat allowance of the initial combat.
(15.2.9) Restrictions:
- TERRAIN: Breakthrough Combat is not allowed into a hex if the unit(s) could not legally advance into that hex (14.5).
- German Air Units may be used in Breakthrough Combat but only if they were used in the original combat (9.3.7).
- Artillery shifts are not allowed in Breakthrough Combat. All other Combat Modifiers apply (including Tank Shifts).
(15.2.10) Splitting the Breakthrough Group: The Breakthrough Group may drop off units from the stack as it moves. A Breakthrough Group may split up and go separate ways—but only one stack may continue to conduct Breakthrough Combat.
EXAMPLE: The initial attack result was a DS/Adv 4. The first hex of the advance is used to move the stack into the defender's vacated hex, the second hex is used to conduct Breakthrough Combat against hex X, after which the stack declines to advance into that hex (X). The third hex is spent conducting Breakthrough Combat against Y (movement into Y after the Breakthrough Combat is free), and the last hex is spent conducting Breakthrough Combat at Z (and the stack advances into the defender's vacated hex after the combat). It is assumed all Breakthrough Combats were successful.
15.3 Multiple Attacks Against the Same Unit or Stack
(15.3.1) A unit or stack that was attacked by a Breakthrough Group can be attacked again by a different Breakthrough Group.
(15.3.2) Unlike retreats from regular Combat (12.4), units that have already retreated may defend against Breakthrough Combat and are not eliminated if forced to retreat again. If the defender's hex exceeds the Stacking Limit (12.1.4), then all units in excess of the Stacking Limit (defender's choice) contribute nothing to the defense.
15.4 Breakthrough Combat and Auto DS
Each Auto DS achieved in the Movement Phase can generate only one Breakthrough Group.
PLAY NOTE: Often a single Auto DS will result in 2-4 hexes receiving an Auto DS marker—be careful that no more than one Breakthrough Group is formed from those stacks.
16. Supply and Isolation
16.1 The Supply Phase
Units are checked for supply during the owning player's Supply Phase. Units able to trace a Line of Supply (16.3) to a Supply Source (16.2) are "In Supply." If any unit or stack cannot trace a Line of Supply, it receives an Out of Supply marker. If the unit was already marked Out of Supply from the previous turn, there is no additional penalty. If any friendly unit or stack bearing an Out of Supply marker can now trace a Line of Supply, the marker is removed.
16.2 Supply Sources
(16.2.1) Where: Supply originates at friendly Entry Areas and Ports.
(16.2.2) Entry Areas: Friendly Entry Areas are easily indentified by color. See 22.2 for details.
(16.2.3) Ports are Supply Sources if the player controls the sea the Port is located on. The Soviet player always controls the Black Sea.
(16.2.4) Temryuk (hex 1949): The player who controls Temryuk and is able to trace a Line of Supply to Temryuk, controls the Sea of Azov.
DESIGN NOTE: Temryuk was the Soviets' main naval base on the Sea of Azov.
(16.2.5) Taman (hex 1549): This port on the Kerch Strait is not a Supply Source for the Soviet player, but is a Supply Source for the Axis player if friendly controlled.
PLAY NOTE: Once Taman is captured, the Axis player can start receiving the Plan Blücher reinforcements (20.7).
16.3 Line of Supply
(16.3.1) In General: A Line of Supply (LOS) is a path of contiguous hexes. It starts in the hex of the friendly unit, runs via an Overland path (16.3.2) to a Road (16.3.3). From there it will be traced along roads to a Supply Source. The Overland Portion (if any) must always come before the Road Portion.
(16.3.2) The Overland Portion of the Line of Supply may be up to five hexes long. Count each Mountain or Marsh hex the Line of Supply enters that does not follow a path of a road as two hexes. Don't count the unit's hex when counting the distance. The Overland Portion can follow a road. The Overland Portion can go directly to an Entry Area without the need to get to a road first. It may traverse all types of terrain but the path may not:
- Cross an Impassable hexside (2.2.3).
- Cross an Alpine hexside unless following the path of a road.
- Enter an enemy-occupied hex.
- Cross or enter an enemy ZOC Bond.
- Enter two consecutive hexes in an EZOC. Friendly units negate EZOCs in the hex they occupy for this purpose.
DESIGN NOTE: The last restriction allows a Line of Supply to reach units partially surrounded by enemy units.
(16.3.3) The Road Portion of the Line of Supply may be of any length but must follow a path of contiguous road hexes. Roads that meet at a Ferry crossing are considered contiguous. At no time may the Road Portion of the Line of Supply:
- Enter an enemy-occupied hex.
- Enter an EZOC—Friendly units negate EZOCs in the hex they occupy for this purpose.
- Enter an enemy controlled Major or Minor City hex (16.3.4).
EXAMPLE: Tinted hexes indicate EZOCs. Soviet units A, B, C and D are in Supply. Their Line of Supply does not cross or enter an enemy ZOC Bond, nor enter two consecutive hexes in an EZOC.
(16.3.4) Control Markers: Control markers are only used for City and VP hexes—the last player to occupy or pass through a City or VP hex controls it. A LOS may not be traced through a vacant enemy controlled City/VP hex (assume the hex is garrisoned by enemy units not represented by a counter). All other vacant hexes free of ZOCs are friendly to both players when tracing a Line of Supply.
PLAY NOTE: There are not enough Control markers for every city hex—just use the ones where control is not obvious by the position of units (which should be very few, if any).
16.4 Out of Supply Penalties
A unit bearing an Out of Supply marker (white or red) suffers the following penalties:
- MOVEMENT: Mechanized units may only use Tactical Movement (5.4). Non-Mechanized units are unaffected.
- COMBAT: Its Attack Strength is halved (fractions are rounded up so 1 halved is still 1).
- ADVANCE AFTER COMBAT: Limited to two hexes.
- REPLACEMENTS: It cannot receive Replacements (21.2).
ABILITIES RETAINED: Out of Supply units retain their full Defense Strength, ZOCs, TQ and Tank effects.
16.5 Isolation Attrition
(16.5.1) Isolation Attrition of Combat Units: During each friendly Supply Phase all friendly Combat Units (except ASUs) that are Isolated and adjacent to an enemy Combat Unit suffer Isolation Attrition. Non-Combat Units and ASUs are immune from Isolation Attrition. A unit is Isolated if it cannot trace an Unlimited LOS (a LOS with an Overland Portion of unlimited length) to a friendly Supply Source. Place an OOS marker on its red side to indicate they are Isolated. Isolation Attrition occurs each friendly Supply Phase the unit(s) remain Isolated and adjacent to an enemy Combat Unit (including the first turn).
(16.5.2) The Isolation Attrition Table
| Die Roll | Result |
|---|---|
| 1-4 | Unit loses 1 Step |
| 5, 6 | No effect |
(16.5.3) Procedure: Roll one die for each Combat Unit that is Isolated and adjacent to an enemy Combat Unit and consult the Isolation Attrition Table. Isolated Combat Units that are not adjacent to an enemy Combat Unit do not have to roll for Isolation Attrition. If a stack is Isolated, roll for each unit in the stack. A unit can lose its last remaining step due to Isolation Attrition.
(16.5.4) Die Roll Modifiers
- +? AIRFIELD: (+1 for Soviet units/+2 for Axis units) if the unit can trace an Unlimited LOS to at least one friendly Town, Landmark, or Clear Terrain hex that is not adjacent to any enemy Combat Units. This represents a functioning airfield inside the pocket. Airfields adjacent to enemy units are not usable, exception: Pitomnik (S5.6). During turns when the Weather is Snow the Axis Airfield modifier is reduced to +1. Reduce the Airfield modifier by one if the closest Connecting Rail Hex is more than 15 hexes away.
- +1 CITY: If the unit can trace an Unlimited LOS to at least one friendly occupied or controlled City hex (Major or Minor).
- +1 HQ: If the unit can trace an Unlimited LOS to at least one friendly Army (Axis)/Front (Soviet) HQ.
- –1 Unit is in a Desert hex
All modifiers are cumulative. Maximum modifier is +4.
(16.5.5) Isolated Pocket Markers: If a group of units is Isolated, players may use an "Entire Pocket" OOS marker to mark the entire group instead of marking every individual unit or stack in the group.
17. Railheads & Railroad Repair
17.1 The Basics
Rail hexes that initially lie east of the June 28th start line must be repaired before the Axis player may use them. Only rail hexes highlighted in green need to be repaired. All other rail hexes are automatically repaired if each end of the line is repaired (for example when Axis Railheads reach Kastornoye (hex 2002) and Valuyki (2013) the rail line between those two towns is instantly repaired. Rail lines that dead-end with no green highlight can never be repaired. Example, the 2338-2839 line in the Kuban.
17.2 Indicating Repair
(17.2.1) Railhead Markers: The Axis player has Railhead markers to indicate the progress of rail repair. Moving a Railhead marker forward indicates repairing those hexes. Railhead markers may only move along rail hexes highlighted in green. During each Axis Supply Phase the Axis player may move up to four Railhead markers forward up to two hexes each. The Railhead may not enter enemy occupied hexes or vacant hexes in an EZOC.
(17.2.2) Railroad Junctions: When a Railroad marker reaches a split in the green line (hexes marked with a small RR), place an additional Railroad marker in the junction hex. That new Railroad marker, within the limit of four, can start to move forward two hexes per turn in the next friendly Supply Phase.
17.3 Railheads and Soviet Units
Soviet units may not destroy rail lines; they may only push back or stall the Axis Railhead markers.
(17.3.1) Push Back: To push back a Railhead marker a Soviet unit must enter the hex occupied by the Railhead marker or put it in its ZOC. If that happens, the Railhead is immediately pushed back (down the rail line towards the west) until it reaches a hex clear of Soviet units and their ZOCs (which is usually one hex). Axis units negate EZOCs in the hex they occupy for this purpose. Pushing back a Railhead only occurs during a Soviet Player Turn. Soviet units using Rail Movement may not Push Back railheads.
(17.3.2) Stall: Railheads that are not on a Connecting Rail Hex (17.4) cannot be moved forward. Flip the Railhead marker to its Inoperative side until the track behind it have been cleared of enemy units and their ZOCs, and the Railhead is once again on a Connecting Rail Hex.
17.4 Connecting Rail Hexes
A Connecting Rail Hex is a rail hex that is connected by a contiguous line of rail hexes, of any length, to a Supply Source. The entire length of the rail line must be free of enemy Combat Units and their ZOCs, and for the Axis player must be repaired (17.2). Friendly units negate EZOCs in the hex they occupy for this purpose.
17.5 Unfinished Railroads
Unfinished railroads are ignored until their construction is completed. The turn they may be used is printed near the rail line. The completion date is unaffected by supply or who controls those hexes. Once completed they may be used like any other rail line. Exception: The Caspian Sea line is shown for historical interest only.
18. Resource Points, ASUs and SPs
18.1 Resource Points
Each player receives two Resource Points per friendly Initial Phase. Resource Points that are not used immediately are forfeited. Each Resource Point can do one of the actions listed below:
- Begin the construction of a Fortification (9.7).
- Flip an ASU (18.2) that is located on a Connecting Rail Hex to its ready side. The ASU must be in Good Order.
- Place a Supply Point (18.6) in a Friendly Entry Area.
- Place a Planned Offensive marker on a Front (Soviet) or Army (Axis) HQ that is in Good Order and in Supply (26.2).
18.2 Artillery Support Units (ASUs)
(18.2.1) Artillery Divisions, Soviet Front HQs, and Axis Army HQs are collectively called Artillery Support Units (ASUs). Each ASU on its Ready side may be used to provide one shift right on the CRT in an attack (18.3.1) or a +1 DRM in a Determined Defense (11.3). Once used, ASUs must be flipped to their "Used" side. Used ASUs may not be used again for the shift until they are flipped back to their Ready side by a Supply Point (18.6) or in the friendly Initial Phase using Resource Points (18.1).
(18.2.2) Movement: ASUs are Mechanized units but may not use Extended Movement. An ASU that moves more than two hexes, Advances After Combat, or uses Reserve Movement, becomes Disrupted at the end of its move or advance.
PLAY NOTE: The Disrupted marker is likely to be removed at the end of the turn but serves to prevent the unit from supporting an attack in the upcoming Combat Phase.
(18.2.3) Properties: ASUs have the following properties:
- Have no stacking value at all—any number may be in a hex.
- Have the same ZOC ability as a Free Stacking Unit. (Remember, it takes two Free Stacking Units to form a ZOC Bond.)
- If Disrupted, in Full Retreat, or under a Train or Replacement marker, they may not be used for any of the Combat Benefits listed in 18.3.
- Have only one step, and if eliminated may be replaced with a Special Replacement (21.1.2). When replaced they arrive on their Used Side.
18.3 Combat Benefits
(18.3.1) Offensive Support: Each ASU on its Ready side may be used to provide one shift right on the CRT to any hex within range (18.4). A Soviet Front or Axis Army HQ can provide shifts to more than one combat as long as there is a Supply Point on its Ready side (18.6.2) stacked with the HQ (18.6.5). Each shift either flips the ASU to its used side or expends one Supply Point. No more than one column shift per combat is allowed unless an Artillery Division is used (see 18.5).
(18.3.2) Defensive Support: ASUs never provide a defensive CRT column shift. Instead, the defender may use his ASUs in a Determined Defense to provide a +1 DRM (11.3). ASUs may provide Defensive Support to any defending hex in Range or to the hex they occupy. Each Defensive Support flips the ASU or expends one Supply Point.
(18.3.3) Other Restrictions:
- Offensive Support may not be used in Breakthrough Combat.
- Romanian, Hungarian, and Italian HQs may only be used for a CRT shift if at least one unit of their nationality is involved in the attack. Likewise, the HQs may only be used to provide Defensive Support if the Lead Unit is the same nationality as the HQ.
- An ASU in an Entry Area can provide Offensive or Defensive Support only to a hex adjacent to the Entry Area (the map edge).
18.4 Range
Each ASU has a range printed on its counter. This is the maximum distance (measured in hexes) that the ASU may be from at least one friendly unit that is participating in the attack, or from the Lead Unit if the ASU is providing Defensive Support. The path may enter and cross any terrain except non-road Alpine and Impassable hexsides. The path may not enter an enemy occupied hex, cross or enter an enemy ZOC Bond, or enter two consecutive hexes in an EZOC. Friendly units negate EZOCs in the hex they occupy for this purpose.
EXAMPLE: The German Army HQ has a Range of five hexes—it is in Range of at least one of the friendly participating attacking units. The path enters only one unnegated EZOC.
18.5 Massive Barrage and Artillery Divisions
The Soviet player may use two Artillery Divisions or an Artillery Division in conjunction with a Front HQ to provide two CRT shifts. Players may not use two Supply Points, or two Front HQs, or an HQ in conjunction with an Supply Point to achieve two shifts. A Soviet Artillery Division is necessary to achieve the double shift. Once used for a CRT shift or Massive Barrage, Artillery Divisions are removed from the game permanently.
DESIGN NOTE: These units were reserved for the start of an offensive and would return to Stavka Reserve after it started.
18.6 Supply Points (SPs)
(18.6.1) Purpose and Arrival: Think of SPs as mobile Resource Points. Their only function is to flip ASUs to their Ready side or provide Artillery Shifts (18.6.5). SPs are placed during the Initial Phase at any friendly Entry Area by spending a Resource Point. During the Movement Phase they may move or be railed onto the map.
PLAY NOTE: Supply Points represent artillery ammunition and have no effect on Isolation Attrition.
(18.6.2) Full Movement and Ready Sides: SPs have two sides—a Full Movement side (0-0-5) and a Ready side (S-0-T). The owning player can flip an SP during a friendly Movement Phase to either side, but only before it moves. An SP on its Ready Side can be used for an Artillery Shift (18.6.5)—on its Full Movement side it cannot.
(18.6.3) Properties: SPs are Non-Combat Units (19.0). On their Full Movement side SPs move as Mechanized Units—they may use the 1/2 MP road rate, but may NOT use Extended Movement. They may also use Rail and Sea Movement. On their Ready Side they may only use Tactical Movement (2 hexes).
(18.6.4) Flipping ASUs: During either the Initial Phase or the Supply Phase—never during a Movement or Combat Phase—an SP may be used to flip an ASU to its Ready side. The SP must be stacked with the ASU—it does not matter if the SP is on its Full Movement side. SPs used in this way are removed. Only ASUs in Good Order may be flipped.
(18.6.5) Artillery Shifts: When a Ready SP is stacked with a Good Order ASU (Ready or Used), the SP may be used for an Artillery Shift. Remove the SP after it is used.
PLAY NOTE: This allows one ASU to provide more than one shift during a single Combat Phase.
EXAMPLE: The 6th Army HQ provides an Artillery Shift to Combat A while the Supply Point underneath provides an Artillery Shift for Combat B. The 6th Army HQ is flipped to its USED side and the Supply Point is removed.
(18.6.6) SPs Never Retreat: If stacked with friendly units that retreat they remain in the hex and are eliminated if an enemy Combat Unit enters the hex.
(18.6.7) SPs and Rail Movement: SPs may use Rail Movement and do count against the Rail Movement Limit. SPs under Train markers may not be used for Artillery Shifts or flipping ASUs.
(18.6.8) Non-mobile Supply Points: The Axis player may have no more than five Mobile SPs on the map at any one time, the Soviet player may never have more than four Mobile SPs. All SPs above this limit must be non-Mobile. Use the 0-0-0 SPs for this purpose, these non-Mobile SPs are considered Ready SPs and follow all the same rules as SPs. If two non-Mobile SPs are in the same hex you may combine them into one unit (the back side represents two non-mobile Supply Points). Mobile SPs may switch to non-Mobile and vice-versa at any time in the owning player's Movement Phase but only before they move. Non-Mobile SPs may use Rail and Sea Movement but may not be used in the following Combat Phase if they do.
19. Non-Combat Units
19.1 Non-Combat Units Defined
Any unit with a Defense Strength of zero is a Non-Combat Unit. Supply Points (18.6), Reserve Armies (34.1), Soviet Army HQs (20.1), and Leaders (28.0) are all Non-Combat Units.
19.2 Properties of all Non-Combat Units
- They have no Zone of Control
- no Stacking Value
- are never affected by Disruption and Full Retreat
- are affected by lack of Supply, but are immune to Attrition
- by themselves they can never impede enemy movement. If caught alone in a hex by an enemy Combat Unit they are removed from the map (19.3).
19.3 Non-Combat Units in Combat Situations
Non-Combat Units may not attack, defend, or be selected for a step loss in combat. Non-Combat Units are immediately removed if an enemy Combat Unit enters their hex. Non-Combat Units (except SPs) may retreat after combat if at least one friendly Combat Unit in the hex survived the combat. If not, they are immediately removed. SPs (mobile and non-mobile) may never retreat after combat. If stacked with a unit in Full Retreat, a Non-Combat Unit may retreat with that unit if an enemy Combat Unit gets adjacent.
19.4 Returning Non-Combat Units to Play
SPs return to play using Resource Points (18.1). The other non-Combat Units—Leaders, Reserve Army HQs, and Soviet Army HQs (20.1) return to play after a two turn delay. Place them on the Turn Record Track two spaces away from the current turn. Their arrival location and restrictions are the same as other Replacements.
EXAMPLE: If a Leader is removed on Turn 3, then he will return to play on Turn 5.
20. Special Units
20.1 Soviet Army HQs (3 units)
(20.1.1) Purpose: These are Non-Combat Units that allow the Soviet player to stack three units plus one Free Stacking Unit in a hex (the same stacking as the Axis player).
(20.1.2) Off Map Display: The Soviet player may use the off-map boxes for these armies if he wishes. Units in these boxes are considered stacked with the HQ for all purposes.
(20.1.3) Movement and Advance After Combat: All three of these HQs are Mechanized, but that does not make non-Mechanized units stacked with them Mechanized. HQs may freely pick up and drop off units during movement. HQs may Advance After Combat like other Combat Units, and are not required to remain with the stack they started the combat with. The Tank Army HQ Advances After Combat at the Mechanized rate, while the Guards and Shock Army HQ advance at the Non-Mechanized Infantry rate.
20.2 Mountain Divisions (11 units)
Mountain units are the only units that may move and attack across non-road Alpine hexsides. Axis Mountain Divisions have their Attack Strength doubled if they are attacking into a Mountain hex (the superscript number is a reminder of this rule). Soviet Mountain Divisions are not doubled when attacking into Mountain hexes.
20.3 NKVD Units (8 units)
Before Not One Step Back! (Turn 8), NKVD units are the only Soviet units that may do a Determined Defense in open terrain (11.1.2). Some NKVD units are also Garrison Units (20.4).
20.4 Soviet Garrison Units (12 units)
Soviet units with a blue Unit Type box may not be moved from their starting location until an Axis Combat Unit moves within five hexes of their hex. Once this happens the restriction is lifted.
20.5 Axis Allies
Romanian, Hungarian, Italian, Slovakian, Croatian, and North Caucasus Volunteer units are classified as Axis Allies. They have the following two restrictions:
(20.5.1) Combat Restriction: They may stack together and defend together, but they may not participate in the same attack. Being stacked together does not prohibit them from attacking—one nationality can attack while the others do nothing or attack a different hex. An Axis Ally may participate in an attack with German units as long as there is no other Axis Ally of a different nationality participating.
(20.5.2) Step Loss Restriction: When selecting a step loss, if possible a full-strength non-Parenthesized German unit (including 1-step units) must be selected before a reduced Axis Ally unit can be eliminated. This is to prevent them from being used as cannon-fodder.
20.6 North Caucasus (15 units + 2 Front HQs)
In the Campaign Game and Fall Blau scenario, Soviet non-Garrison units that start south of Rostov may not move until an Axis Combat Unit crosses the Don River between the Sea of Azov and Kalach, or moves within five hexes of a Stalingrad City hex. Once this happens the restriction is lifted. Soviet units that move into this area before the units are released are not affected by the restriction.
PLAY NOTE: These units have a light-blue Unit Type box to help identify them. The BlkSea and NCau Fronts do not have the light blue but are still affected by the restriction.
20.7 Plan Blücher Units (5 units)
The five Axis units marked Blü can only leave Entry Area W via the Kerch Strait (5.7.2). This means they can only leave their holding box when Taman (hex 1549), is captured.
Hence, the German player should try to capture Taman as soon as possible!
20.8 North Caucasian Volunteers (6 units)
These are troops raised by the Germans locally and from POWs and expatriates. One arrives each turn once both Krasnodar and Voroshilovsk are Axis controlled, until all six are selected. They arrive at either Krasnodar (hex 2850) or Voroshilovsk (hex 4549) during the Axis Initial Phase. On the first turn of arrival they may move only one hex and may not engage in combat (similar to the way a unit arrives from the Eliminated Box). They may move normally the following turn.
20.9 Linden Engineer (1 unit)
This unit's attack strength is doubled when attacking a Major or Minor City hex (the superscript number is a reminder of this rule). This unit may not be replaced if eliminated.
21. Replacements
21.1 The Basics
(21.1.1) Each Replacement can restore a reduced Combat Unit one step or bring a unit out of the Eliminated Box on its lowest step. Replacements are received and used during each player's Initial Phase. Soviet and Axis Replacement rates are listed on the Turn Record Track. Players may not save Replacements—those not used are forfeited.
(21.1.2) Types of Replacements:
- Tank/Panzer: Used for Soviet Mechanized Corps, and any Tank/Panzer type unit (2.3.3).
- Infantry: Used for any Infantry unit except NKVD, Mountain Infantry, Naval Infantry, and motorized Infantry brigades.
- Cavalry: Used for any Cavalry unit. They may also be used as an Infantry Replacement.
- Special: Used for Motorized Infantry, Mountain Infantry, Naval Infantry, Panzergrenadier divisions, NKVD, Tank Destroyer divisions, or any Free Stacking Unit (ASUs, Tank brigades, Sturmgeschütz, etc.). They also may be used as an Infantry Replacement.
- Axis Allies: May only be used for the nationality listed on the replacement: Hun = Hungarian, Rom = Romanian, or Ital = Italian. If it says Axis, then it may be used for any non-German Axis Combat Unit. The Replacement may be used for any unit of that nationality, regardless of type, including their HQ units. German Replacements may never be used for Axis Allied units.
21.2 Replacement Restrictions
- For a unit on the map to receive a Replacement, it must be:
- in supply (judged at that instant)
- in Good Order.
- No unit may receive more than one Replacement per turn.
- § The Soviet player may use only one of his replacements each turn on a Guards unit.
PLAY NOTE: As long as those restrictions are followed, any unit on the map can receive a Replacement—even units in an Entry Area or adjacent to an enemy unit.
21.3 Units Returning from the Eliminated Box
(21.3.1) Eligible Locations: Units that come out of the Eliminated Box must be placed in either:
- a friendly Entry Area,
- a friendly controlled Major City hex on a Connecting Rail Hex (17.4),
- a hex containing an in-Supply (determined at that instant) Army (Axis) or Front (Soviet) HQ that is in Good Order, and is on or within two hexes of a Connecting Rail hex. Axis units returning from the Eliminated Box may only use an HQ matching their nationality. It does not matter if a Soviet Front is currently Frozen (31.0, S1.2).
Additionally:
- Units may not be placed in a hex adjacent to an enemy Combat Unit, even if the hex contains another friendly Combat Unit.
- Soviet Tank and Mech Corps arriving from the Eliminated Box must arrive at Entry Areas A, B, or C.
- No HQ or Major City hex may receive more than one unit from the Eliminated Box per turn. If a hex contains both an HQ and a Major City then two units may arrive in that hex.
(21.3.2) Over-stacking is allowed in the Initial Phase but it must be corrected by the end of the player's Movement Phase.
(21.3.3) ASUs brought back into play via a Replacement start on their USED side.
(21.3.4) Remnants: If a Remnant receives a Replacement of the appropriate type, the Remnant is placed back in the display (10.4), and the unit it was representing is brought back into the game on its reduced side.
PLAY NOTE: Please be careful that the 3-step unit and the Remnant are not both in play at the same time—there should always be a unit in the Remnant Display, either the Remnant or the unit it is representing.
21.4 Replacement Markers
Indicate each unit that receives a Replacement (including those that come out of the Eliminated Box) with a Replacement marker. That unit may move a maximum of one hex in the Movement Phase and may not use Rail Movement, move between Entry Areas, or enter Full Retreat. It may not attack, Advance After Combat, or Disengage in the Combat Phase. A unit with a Replacement marker prevents ALL combat out of the hex—not just combat involving the unit receiving the Replacement.
DESIGN NOTE: This rule allows units to remain in the front line and take replacements as long as that hex has no combat.
REMOVAL: All Replacement markers are removed during the Recovery Phase.
21.5 Replacement Notes
(21.5.1) Panzergrenadier Divisions: These units were motorized infantry divisions with either a Panzer or Sturmgeschütz battalion attached—they can use either Tank or Special Replacements to restore.
(21.5.2) Silhouetted Tank Units: These units are both a Tank Unit and a Free Stacking Unit, so they can use either Tank or Special Replacements to restore.
22. Reinforcements & Entry Areas
22.1 Reinforcements
(22.1.1) Arrival Locations: Soviet Reinforcements with a "C" (for Caucasus) suffix on their Turn of Arrival are placed in one of the southern Entry Areas (G-L). All other Soviet Reinforcements are placed in either Entry Area A, B, or C. Axis units are placed in Entry Area W, X, Y, or Z.
(22.1.2) Procedure: Reinforcements are placed in their Entry Area during the owning player's Initial Phase. During the Movement Phase they may enter the map via Rail Movement (5.6) or with their full MA through the Entry Area by paying the terrain cost of the first hex entered. In lieu of entering the map, a unit may remain in the Entry Area or move to a different friendly Entry Area (see 22.6).
(22.1.3) Triangle Symbol: Units with a triangle in the upper right corner of their counter begin the Campaign game reduced.
22.2 Friendly Entry Areas
Depends on the scenario. For the Campaign game Entry Areas A-L are friendly to the Soviet player and Entry Areas W-Z are friendly to the Axis player.
22.3 Entry Areas in General
(22.3.1) Movement: Friendly Entry Areas may be entered during movement, retreat, or advance after combat. During the Movement Phase, the cost to enter an Entry Area is 1 MP. Upon entering an Entry Area the unit must stop and may not exit until a later friendly Movement Phase. The cost to re-enter the map is always the cost of the first hex entered; Mechanized units may use the Road rate if applicable. Only Good Order units may leave an Entry Area.
(22.3.2) Enemy ZOCs: Units may enter the map directly into an enemy ZOC, but they may not cross or enter an enemy ZOC Bond as they enter. A unit can anchor a Hexside Bond (not a Hex bond) with a friendly Entry Area.
EXAMPLES: Red and blue lines show ZOC Bonds. Soviet units enjoy ZOC Bonds with the map edge since it is friendly. Soviet units cannot enter the map across the German ZOC Bond created by units A and B. Soviet unit C has ZOC Bonds with the map edge trapping German division B.
22.4 Properties of Entry Areas
- No stacking limit except for units attacking onto the map (22.7).
- Units cannot be attacked while in an Entry Area.
- ZOCs do not extend into or out of Entry Areas.
- Units in a Friendly Entry Area are not adjacent to any Enemy units.
- Soviet units cannot enter Axis Entry Areas and Axis units cannot enter Soviet Entry Areas (with the exception of the Entry Area that leads to the Baku oil fields [24.1.2]).
22.5 Retreating Off the Map
A unit that retreats off the map into a non-friendly Entry Area is eliminated. A unit that retreats off the map into a friendly Entry Area is placed in that Entry Area and marked as Disrupted or Full Retreat (as appropriate).
22.6 Movement Between Entry Areas
(22.6.1) The Basics: There is no limit to the number of units that may move between friendly Entry Areas. Moving to a different Entry Area costs the unit its entire MA and does not count against Rail Limits. Units that move to a different Entry Area may not attack onto the map (22.7) until the following Game Turn.
(22.6.2) Axis Movement Between Entry Areas: An Axis unit that starts its move in an Axis Entry Area (W-Z) may move to any other Axis Entry Area (W-Z).
(22.6.3) Soviet Movement Between Entry Areas: Soviet units that start their move in an Entry Area north of the Caspian Sea (Entry Areas A-E) may move to any other Entry Area that is north of the Caspian Sea or to the Caspian Sea Transit Box. Likewise, Soviet Units that start their move in an Entry Area south of the Caspian Sea (Entry Areas G-L) may move to any other Entry Area south of the Caspian Sea or to the Caspian Sea Transit Box.
(22.6.4) The Caspian Sea Transit Box: A Soviet Unit in the Caspian Sea Transit Box (F) can move to any Soviet Entry Area at the cost of its entire MA. Soviet units may remain in the Caspian Sea Transit Box. No more than two Combat Units may ever be in the Caspian Sea Box at any time (two may leave the box in the same turn that two enter the box).
DESIGN NOTE: The rail line between Entry Area E and the Caucasus may not be used to rail units (5.6.6).
22.7 Attacking Onto the Map
Units that started their Movement Phase in an Entry Area and do not move can attack onto the map during the friendly Combat Phase if enemy units are adjacent to the Entry Area. Units that will attack onto the map are stacked at the edge of the Entry Area abiding by the stacking limit (assume hexes extend into the Entry Areas for this purpose). Units attacking onto the map can attack in conjunction with on-map units and benefit from ASUs and Offensive Air Support (if available). If the defender is eliminated or retreats, they may advance onto the map, but are not required to do so. Breakthrough Combat is not allowed from an Entry Area—units advancing after combat must enter the map first. If the attack fails to eliminate or retreat the defenders, the units remain in the Entry Area.
23. Weather
23.1 The Weather Table
During each Weather Phase starting on Turn 17, determine the weather for the turn by rolling one die and consulting the Weather Table. Place the Weather marker according to the result. Before Turn 17, the weather is always Clear.
| Die Roll | Summer | Early Fall | Rasputitsa | Winter |
|---|---|---|---|---|
| 1 | Clear | Overcast | Rain* | Snow* |
| 2 | Clear | Overcast | Rain* | Snow* |
| 3 | Clear | Clear | Overcast | Overcast-W |
| 4 | Clear | Clear | Overcast | Overcast-W |
| 5 | Clear | Clear | Clear | Clear |
*If the previous turn was Rain or Snow, apply a +1 DRM to the Weather die roll.
23.2 Explanation of Results
(23.2.1) CLEAR: No effect. The Axis receives all available Air Units (the Romanian air unit is only available during clear weather).
(23.2.2) OVERCAST and OVERCAST-W: The Axis player receives only one German Air Unit. During Winter turns (Overcast-W) he receives no Air Units. There are no other effects.
(23.2.3) RAIN has the following effects:
- The Axis player receives no Air Units.
- SEASONAL Marsh Hexes: Treat as a Marsh hex for the remainder of the game. Before that, they are Clear hexes.
- Movement: The road rate of Secondary Roads is increased to 1 MP for Mechanized units. Crossing an unbridged Minor River costs +1 MP for all units.
- Halve (round up) all Advance After Combat results. So "Adv 2" becomes an Adv 1, and "Adv 3" and "Adv 4" become Adv 2. A Limited Advance, a 1-hex advance (Delay), and all retreats are not affected.
- SUPPLY PATHS: The Overland portion of a Supply Path shortens from five hexes to three hexes.
(23.2.4) SNOW has the following effects:
- The Axis player receives no Air Units.
- The Axis Airfield modifier on the Isolation Attrition Table is reduced to +1.
- MOVEMENT: All Movement Allowances are reduced by one, Extended Movement and Tactical Movement are unaffected.
- All Advance After Combat results are reduced by one hex but never below one. Snow does not affect the length of retreats. This –1 is cumulative with the –1 for 15.2.3.
23.3 The Rasputitsa
(23.3.1) In General: The Rasputitsa is indicated with a Brown stripe on the Turn Record Track. These are the only turns that can have mud. A Mud turn will occur if the previous turn was Rain and the current turn's weather is Overcast or Clear.
(23.3.2) The Mud Marker: When a Rain turn occurs (between turns 21 and 26), place the Mud marker on the Turn Record Track one turn ahead as a reminder that Mud will apply to that turn if the rain stops.
EXAMPLE: Rain on Turn 20 will result in Mud on Turn 21. Place the Mud marker on Turn 21. If Rain again occurs on Turn 21, then the marker is moved to Turn 22, and so on.
(23.3.3) Effects of Mud: Same as a Rain turn except it has no effect on Air Unit availability.
23.4 The Russian Winter (Winter turns)
The Russian Winter starts on Turn 28 and has the following effects:
- AXIS ATTACK STRENGTHS: All Axis units on or north of hexrow xx43 (the two north maps) have their Attack Strength reduced by 1, but never below 1.*
- AXIS DEFENSE STRENGTHS: All Axis units on or north of hexrow xx43 that are not in a City (either type), Town, or completed Fortification, or adjacent to a friendly controlled Major City, have their Defense Strength reduced by 1, but never below 2. Units with a Defense Strength of 1 or 2 are unaffected. Always apply the –1 before halving or doubling.*
- All Alpine hexsides are now impassable for all units (including Mountain units) for the rest of the game.
- Entry Area K is no longer usable. Any units currently there are displaced to Entry Area J or L.
- All Major Rivers (not the Volga) on maps A and B freeze. This has no effect on their combat benefit but movement across is reduced to +1 MP for Non-Mechanized and +2 for Mechanized. Units do not have to start adjacent to a Frozen Major River hexside to move or advance across, nor are they eliminated if they retreat across an unbridged Frozen River hexside.
- All Lakes in or touching desert hexes freeze. For combat and movement purposes they are treated as a Frozen Major River hexside.
DESIGN NOTE: The defensive benefit of frozen rivers and lakes represents the excellent field of fire they would provide.
*§ The combat penalties of Out of Supply (half attack) and Disrupted (no attack + half defense) are never cumulative with The Russian Winter combat penalties (first and second bullet items above)—if both apply use only the penalty least favorable to the Axis unit.
24. Victory Points and Automatic Victory
24.1 Victory Points (VPs)
(24.1.1) In General: Only the Axis player earns VPs and records them on the VP Track. VPs are awarded for the capture of objective hexes and for exiting Axis units off the East map edge towards Baku (24.1.2). Each objective hex has a red circle with the number of VPs the hex is worth. Surrounding or isolating an objective hex does not earn the Axis player VPs. Axis controlled VP hexes that do not have a Line of Supply during the Victory Phase are not counted for determining victory.
(24.1.2) Baku Oil Fields: The Axis player earns 3 VPs for exiting five divisions off the map through Entry Area G. The units must exit all in the same Movement Phase and at least one of the divisions has to be a Panzer division. Count all full-strength Axis-Allied divisions and reduced German divisions as half of a division. No VPs are earned for reduced Axis Allied units, non-divisional units, or Remnants. The Axis player keeps those VPs as long as at least five divisions (including at least 1 Panzer division) remain in G and have a road-bound Supply Line from G to an Axis Supply Source. Axis units that exit the map at G may return to the map during any Axis Movement Phase, but only via Entry Area G. Axis units in G are affected by lack of Supply, and, if Isolated must roll for Isolation Attrition. If Isolated, assume the units are adjacent to an enemy Combat unit and can trace to an airfield.
(24.1.3) Entry Area G: If there are any Soviet units in G at the time the five Axis units enter, the Soviet player must shift them to an adjacent Entry Area (H or J) and mark all as Disrupted. Until all Axis units have exited G, no Soviet units may enter or use G. Axis occupation of Entry Area G does not make it an Axis Entry Area.
(24.1.4) Subtraction of VPs: The Axis player must subtract VPs for the following situations:
- –3 VPs if one or more Soviet units are at the map edge adjacent to an X, Y, or Z Entry Area. No more than –3 VPs may be earned for each Entry Area (so a total of –9 VPs if Soviet units are adjacent to all three).
- –3 VPs for each Major City located west of the June 28th start line (Kharkov and Stalino) that is occupied by a Soviet unit.
- –1 VP for each Minor City located west of the June 28th start line that is occupied by a Soviet unit.
This could make the Axis VP total a negative value. These VP penalties are removed as soon as the condition no longer applies.
24.2 Automatic Victory
The Axis player is under pressure to achieve success quickly, while the Soviet player is under pressure to hold his ground as long as possible. Each space of the Turn Record Track has a benchmark (those numbers in the colored bands at the bottom) which indicates the number of VPs the Axis player should have achieved by that turn. If Axis VPs are six or more points above the benchmark, the Axis player wins automatically (the Victory Determination Phase). The Soviet player wins automatically if the Axis player is at least six points short of the benchmark at the end of any Game Turn. Play continues if neither player has an Automatic Victory.
EXAMPLE: If the Benchmark was 8, the Axis player would win if the VP count was 14 or more, and the Soviet player would win if the VP count was 2 or less.
24.3 Mt. Elbrus
The Axis player earns one temporary VP if an Axis Mountain unit occupies the Mt. Elbrus hex (4860) at some point during the game. This VP is not lost if the Soviet unit later occupies the hex. The VP is only valuable for Automatic Victory and the Turn 28 Benchmark (S4.4) and is not counted on the last turn of the game.
ADVANCED RULES
Advanced rules are optional and can be used in whole or in part.
25. Reserves
25.1 Purpose
Allows additional units to Advance After Combat besides those that were attacking.
25.2 Procedure
(25.2.1) Indicate a unit or stack is in Reserve by placing a Reserve marker on top of them during the friendly Movement Phase. Only Good Order units that did not move, or moved only one hex without entering an EZOC can be placed in Reserve. Units that received a Replacement may not be marked Reserve. Once marked in Reserve they may not move until the Combat Phase.
(25.2.2) Limit: Each side has only three Reserve markers.
(25.2.3) Activation: At any time during the owning player's Combat Phase the owning player may activate one or more Reserve stacks. Removing the Reserve marker allows the stack to Advance After Combat up to two hexes. Follow all rules for Advance After Combat. Reserves activated after a specific combat, may ignore EZOCs in the defender's vacated hex in the same way as the other friendly participating units. Units activated as Reserves may not:
- conduct Regular or Breakthrough Combat.
- cross unbridged Major River hexsides unless frozen (they may cross bridges—including Pontoon Bridges).
It is not necessary for the Reserve stack to be anywhere near any combat to be activated, and they can be activated even without any combat. It is legal to stack Reserve units with units attacking. Remove all Reserve markers at the end of each Combat Phase.
26. Planned Offensive
26.1 Cost
It costs one Resource Point to place a Planned Offensive (PO) marker on a Front (Soviet) or Army (Axis) HQ.
26.2 Procedure and Effects
After spending the Resource Point in the Initial Phase, place the PO marker upside down on any HQ that is in Good Order and in Supply (judged at that instant). In the next Initial Phase the PO marker is flipped to its Ready side. Once Ready it may be used in any one combat that is in Range of the HQ and at least one unit of the HQ's nationality is participating. It may not be used in Breakthrough Combat or a Determined Defense. Once used, it is removed. POs may be reused, but neither player may have more than two on the map at any time.
MOVEMENT: If the HQ retreats, advances, or moves more than two hexes in a single Movement Phase the PO marker is removed.
EFFECTS: When used the attacker uses two dice on the CRT and may use either die result. Both POs may be used on the same combat in order to use three dice and choose one of the three results.
27. Disengagement
27.1 Purpose
A way for the Phasing Player to retreat during the Combat Phase.
27.2 The Disengagement Table
| Die Roll | Result |
|---|---|
| 1, 2 | No |
| 3 | Yes (–1 step) |
| 4-6 | Yes |
(27.2.1) Procedure: Any unit (including Disrupted units and Full Retreat units stacked with other units) that does not attack in the Combat Phase and is adjacent to an enemy unit, can attempt Disengagement. Disengagement can be resolved at any time in the friendly Combat Phase. To resolve the attempt use the Disengagement Table. The owning player can roll once for each unit in a stack or roll once for the entire stack (his choice). The Phasing Player may see the result of each attempt before deciding to conduct the next Disengagement Attempt. A unit may either attack or roll for Disengagement—it cannot do both.
(27.2.2) Die Roll Modifiers:
- +1 if the unit is Cavalry or Mechanized. (If disengaging as a stack, this modifier applies only if all units in the stack are Cavalry and/or Mechanized)
- –1 if the unit or at least one unit in the stack is Disrupted.
(27.2.3) Explanation of Results: A "No" result means the Disengagement fails and the unit remains in place. A "Yes" result allows the unit to retreat 1 or 2 hexes and become Disrupted (or converted to Full Retreat if already Disrupted), following all rules of Retreats except a unit using Disengagement may not retreat into an EZOC unless the hex contains a friendly unit. If the result is "Yes –1" then the unit loses a step before it retreats.
PLAY NOTE: Units that use Disengagement recover like any other unit in the Recovery Phase.
EXAMPLE: Trying to free units B and C, the Axis player moves unit A to hex X and breaks the enemy ZOC Bond allowing unit B to move into hex X. Unit C moves to hex Y. During the Combat Phase all three units (A, B and C) conduct Disengagement Attempts to try to retreat. Unit D is trapped by enemy ZOC Bonds and can neither move nor conduct a Disengagement Attempt.
28. Leaders
28.1 Leader Units
(28.1.1) In General: Leader Units are Non-Combat Units that use the Mechanized movement rates. Each leader has a special ability to reroll a die roll once per turn. If a re-roll is used, it must be taken—the player cannot choose between the two die rolls. Flip the leader over when the ability is used, and flip the leader back to its front side during each friendly Initial Phase.
(28.1.2) Range: Each leader's special ability may only be used within the Range of the leader. The range is measured in the same way that ASUs trace Range (18.4).
(28.1.3) Chuikov: Allows the Soviet player to reroll one friendly Determined Defense die roll per turn.
(28.1.4) Manstein: Allows the Axis player to re-roll one CRT (regular or Breakthrough Combat), one Determined Defense, or one Disengagement Attempt die roll. The CRT die roll may be either friendly or enemy, but a Determined Defense or Disengagement Attempt re-roll must be for an Axis unit.
(28.1.5) Leaders and Rail Movement: Leaders do not use Train markers when they use Rail Movement, instead flip them to their Used side.
29. Contested City Hexes
This rule is mandatory when playing the Uranus scenario.
(29.1.1) When a City Battle marker is placed due to a Partial Success result on the DD Table, the attacker must advance at least one unit into the City hex and share it with the defender. This is called a Contested City hex. Stacking Limits apply separately for both sides. When one side totally leaves or retreats from the hex the marker is removed. Units in a Contested City hex:
- Are doubled in defense if they would normally be doubled in a city hex (both sides are doubled).
- Do not exert a ZOC or form ZOC Bonds.
- Are not considered adjacent to the surrounding six hexes in regards to the Airfield modifier for Isolation Attrition (16.5.4).
(29.1.2) Movement and Contested City Hexes
Units first enter a Contested City hex as a result of a Partial Success result on the Determined Defense Table. During subsequent friendly Movement Phases, other units may enter the City hex only by using Tactical Movement. Units may also enter a Contested City hex via a retreat or an Advance After Combat. During a friendly Movement Phase units in a Contested City Hex may only exit the hex using Tactical Movement. Movement from the City hex may not be into an EZOC (friendly units negate EZOCs in the hex they occupy for this purpose).
(29.1.3) Combat and Contested City Hexes
-
Units inside a Contested City Hex may combine with other friendly units outside the city to attack the enemy units in the city hex.
PLAY NOTE: At Voronezh, the Axis units inside the city would not be halved while the other Axis units in 2403 attacking across the Don would be.
-
Units in a Contested City hex may never attack out of the hex.
-
If the original defender counterattacks and achieves a Partial Success then the City Battle Marker is reduced one level. If reduced to 0, then the original attackers must retreat from the city hex and the City Battle marker is removed.
(29.1.4) Control: The Contested City hex is controlled by the original defender. Always place the City Battle marker over the original defenders to indicate that.
CAMPAIGN GAME ONLY
30. Trans-Caucasus Front Box
These Soviet reinforcements are triggered when an Axis unit enters or moves south of hex row xx40 (the Caucasus maps). Starting on that turn, one unit (Soviet player's choice) arrives each turn until all are selected. They arrive at any Soviet Entry Area south of the Caspian Sea (G-L) during the Soviet Initial Phase and may move normally that turn.
31. Soviet Reserve Armies
The 5th, 6th, 7th, and 8th Reserve Armies may not move until released. The 8th Reserve Army at Saratov is released on Turn 15 or when an Axis unit moves within six hexes of Saratov—whichever comes first. The Soviet player may release the other three armies (one army per turn) starting on Turn 2. Until released, these armies ignore stacking restrictions. Players may use the four red "Frozen" markers as reminders. These armies have nothing to do with the six Reserve Army non-Combat units used in the Maskirovka rules (34.1).
32. Removals and Upgrades
32.1 Turn 10 German Removals
During the Axis Initial Phase of Turn 10, the Axis player must remove two Elite Panzer divisions plus the Panzergrenadier Division Grossdeutschland. Priority for the Panzer divisions must go to divisions that are not Isolated. Remove the Grossdeutschland regardless of its status or position on the map.
DESIGN NOTE: Historically, it was the 9th and 11th Panzer divisions that withdrew.
The removal of those three divisions must result in the removal of at least seven steps (full strength being 3 steps). If the current combined step value of those three divisions is less than seven steps, then other Panzer divisions must be reduced (not withdrawn) until seven steps have been removed.
EXAMPLE: If the 9th Panzer, 11th Panzer, and Grossdeutschland were all in the Eliminated Box, then the Axis player would remove those three divisions from the Eliminated Box plus reduce the on-map Panzer divisions by seven steps.
If removing those three divisions removes more than seven steps, then the Axis player may allocate the extra steps immediately to reduced Panzer or Panzergrenadier divisions that are currently in Supply (no need to use the Replacement procedure or marker—the extra step is absorbed without slowing down the receiving division). A division can receive more than one step if available. Those steps not used immediately are lost.
32.2 Soviet Tank Corps Removals
A number of Tank Corps get removed throughout the game. Some go into Stavka Reserve and three (13th, 14th, and 28th) get converted to Mechanized Corps. The Soviet player can remove any Tank Corps as long as it is currently in supply or in the Eliminated Box—it doesn't have to be the one that was historically withdrawn. However, the removal of the Tank Corps must result in the removal of at least one step. If the Tank Corps is in the Eliminated Box, then a Tank Corps somewhere on the map must be reduced by one step. If the Soviets don't have any tank corps on the board to withdraw, just remove them from the eliminated box without removing anything from the board. If removing the Tank Corps removes more than one step, then the Soviet player may allocate the extra step immediately to any reduced Tank Corps currently in Supply (no need to use the Replacement procedure or marker), or place a non-Guards Tank Brigade from the Eliminated Box in the hex of the departing Tank Corps. Removals occur in the Initial Phase.
32.3 Other Removals
- 1 RFSS: On Turn 11, the SS unit 1 RF must be removed. If it is eliminated or reduced in strength then the Axis player loses his next Special Replacement point.
- German Infantry Divisions: On Turns 9 and 17, remove any one in supply, full-strength, 3-step, German infantry division from play.
- Barbò: On Turn 23 remove the Italian cavalry brigade from play. There is no penalty if it was eliminated.
32.4 5th SS Wiking Division Upgrade
On Turn 13 increase the 5th SS Wiking Division by one step (its 3rd regiment arrives). No replacement marker is placed. If it is already at full strength, then use the 8•-10-6 unit, which now becomes its full strength version. If currently in the Remnant Display or Eliminated Box, then it receives a replacement per the normal Replacement rules. From now on this unit has four steps.
32.5 The 27th Panzer Division
On Turn 20 upgrade the Michalik KG to the 27th Panzer Division. If Michalik is in the Eliminated Box, then the 27th Pz arrives as a reinforcement on its reduced side. Remove Michalik from play.
33. The Winter Offensive
33.1 The Vasilevsky Marker
On Turn 25 the Soviet player receives the Vasilevsky marker. During any Soviet Initial Phase starting with Turn 25, the Soviet Player may use the marker to announce the start of the Winter Offensive. Remove the marker once it is used.
33.2 Effects of the Winter Offensive
(33.2.1) During the Soviet Initial Phase on the turn the Winter Offensive starts:
- Remove the Romanian Air Unit from play (it suffered heavy losses at the start of Uranus and lost most of its forward airfields).
- Place two Planned Offensive markers and two Supply Points (all on their Ready side) with any friendly HQ that is currently in supply. They may all placed with one HQ or distributed as the Soviet player wishes.
(33.2.2) Turn Order Flips: On the turn following the start of the Winter Offensive the sequence of play switches—the Soviet Player Turn goes first for the rest of the game. Between the two back-to-back Soviet Player turns, the Axis Player has an Interchange Turn (33.2.3)—this is a mini-Player Turn that allows the Axis player some movement and rally before the turn order switches.
NOTE: After the turn sequence flips, if the Germans have any air units saved for use in the Soviet turn and the weather is Snow or Overcast-W, the units cannot be used.
(33.2.3) The Interchange Turn: After the Soviet Player Turn is completed and before the next turn begins, the Axis player conducts his Interchange Turn. It is composed of three parts:
- MOVEMENT PHASE: During this phase all Axis units that are not in Full Retreat may use Tactical Movement. Units in Full Retreat can use full movement. Units may voluntarily go into Full Retreat to move their full Movement Allowance. Units may detrain in this phase but no Train Movement is allowed.
- LIMITED COMBAT PHASE: Units may conduct Disengagement (27.0), but no Combat is allowed.
- RALLY PHASE: All Axis units may Rally per normal rules.
There is no Initial Phase or Supply Phase. After the mini turn is completed, the turn order switches and play proceeds normally from then on.
DESIGN NOTE: Essentially the Axis player gets two Player Turns on the turn the Winter Offensive starts—his regular Player Turn and the Interchange Turn.
34. Maskirovka
DESIGN NOTE: The Maskirovka ("disguise" in Russian) rules allow the Soviet player to keep units hidden from the Axis player.
34.1 Maskirovka Reserve Armies
Do not confuse Reserve Armies with Reserves (25.0).
(34.1.1) Arrival: The six Reserve Armies and the six Maskirovka markers arrive as Reinforcements on Turn 21. They are placed in any Soviet friendly Entry Area, and the Soviet player secretly assigns a Maskirovka marker to each by placing the marker underneath the Reserve Army.
(34.1.2) Maskirovka Markers: These markers identify the Holding Box of the Reserve Army. The Axis player will know what is inside the Holding Boxes but not with which Reserve Army the Holding Box is associated with (the Maskirovka marker is hidden from view).
Once assigned to a Reserve Army, Maskirovka markers must always remain with that army unless the Reserve Army starts a Movement Phase:
- in the same hex as another Reserve Army.
- in the same Entry Area as another Reserve Army.
In either case above, the Soviet player may secretly switch (or pretend to switch) the Maskirovka markers.
34.2 Properties of Reserve Armies
Reserve Armies have the following characteristics:
- are non-Mechanized Non-Combat Units (19.0).
- if eliminated or removed, they return to play with their Maskirovka marker after a two-turn delay (19.4).
- may hold up to eight Soviet units in their Holding Box.
- Have a ZOC and may form ZOC Bonds only if an applicable unit in their Holding Box is revealed and placed on top of the Reserve Army.
34.3 Movement and Reserve Armies
(34.3.1) Land Movement: Reserve Armies have an MA of 3 MPs and may use Tactical and Extended Movement. If the Reserve Army has units in its Holding Box, then it moves at the rate of the slowest unit in the box. If any unit in the Reserve Army received Replacements, then the Reserve Army may move a maximum of one hex. A Reserve Army can move before but not after it receives units into its Holding Box.
(34.3.2) Rail Movement: May only use Rail Movement if there are no units in its holding box. This must be revealed to your opponent.
(34.3.3) Entry Areas: Reserve Armies may move from one Soviet Entry Area to another (22.6). Reserve Armies with Disrupted units or units receiving Replacements may not move between Entry Areas.
34.4 Movement Into and Out of Reserve Armies
(34.4.1) Movement Into a Reserve Army: There are four ways to enter a Reserve Army's Holding Box. Each expends the entire MA of the units involved and does not use Rail Movement.
- From Reinforcements: Each turn the Soviet player may place some, none, or all his Reinforcements into any Reserve Army that is currently in Supply via Entry Areas A-D.
- From One Reserve Army Box to Another: Each turn the Soviet player may move any one Soviet unit located in a Reserve Army Holding Box that is currently in Supply via Entry Areas A-E to another Reserve Army Holding Box that is currently in Supply via Entry Areas A–E.
- From a Friendly Entry Area: — § deleted
- From Strategic Movement: Each turn the Soviet player may move up to two Soviet units located on a Connecting Rail Hex, or in an Entry Area, to any Reserve Army Holding Box. Distance has no impact on this movement. Both the Connecting Rail Hex and the Reserve Army must be in supply.
PLAY NOTE: Units may never enter a Reserve Army via Land Movement.
(34.4.2) Movement Out of a Reserve Army Holding Box: This must occur before the Reserve Army moves. A unit that starts its movement in a Reserve Army Holding Box may leave that box by any one of the following methods:
- To another Reserve Army Holding Box (34.4.1) or to Entry Areas A-E. Limit one per turn. Starting hex and ending location must be in supply from Entry Areas A-E.
- Placed on the map over the Reserve Army associated with the Holding Box and moved normally from there. This reveals the identity of the Reserve Army and will force it to be removed (34.7).
34.5 Reserve Armies and Replacements
Replacements (both from the Eliminated Box or to restore a reduced unit) can also go straight into the holding boxes. This action does affect the movement of the Reserve Army (34.3.1).
34.6 Reserve Armies and Combat
(34.6.1) May Not Attack: Units in a Reserve Army holding box may not attack until they leave the Reserve Army box (34.4.2).
(34.6.2) Defending: If attacked, up to three units, within stacking limits (4.1), may exit the box, be placed on top of the associated Reserve Army and defend the hex. Units still inside a Holding Box have a Defense Strength of 0, a Stacking Value of 0, and may not be used in a Determined Defense. If the Reserve Army retreats, all units still inside the holding box suffer the same Disrupted or Full Retreat result as the other defending units. If the Reserve Army marker is eliminated in the retreat, then all units still in its holding box are also eliminated. Reserve Armies without any units inside are considered Non-Combat units and follow the rules of 19.3.
(34.6.3) ASUs may not be used while inside a Reserve Army, and they are never Disrupted by moving more than two hexes.
34.7 Removing Reserve Armies
When a Reserve Army is revealed due to 34.4.2 or 34.6.2 it must be removed by the end of that Soviet Player Turn—place all units still in the box in the hex (over-stacking is allowed but must be corrected by the end of the next Soviet Movement Phase). Reserve Armies may return to play (34.2).
SCENARIOS
S1. Fall Blau Scenario
S1.1 Set Up and Scenario Data
- Game Length: 8 turns. Starts on Turn 1 and ends in the Victory Check Phase of Turn 8.
- First Player: Axis
- Maps: Only Map A is used
- Setup: Use the Campaign Game At Start Cards. Units have the army/front they started the campaign with printed on their counter to aid setup—it has no effect on game play.
S1.2 Special Rules
- The game starts with the Axis Initial Phase.
- During the Movement Phase of Turn 1 Axis Combat Units may only use Tactical Movement (2 hexes). Supply Points may move their full MA. Axis units may cross Army boundary lines.
- Soviet reinforcements are placed in Entry Area A or B and can enter the map using normal movement or Rail Movement. Alternatively they can enter the map entrained from the east or south map edge—assume the Soviet player has rail connections to the east and south edge rail lines. In lieu of entering the map Soviet reinforcements may be moved to any friendly Entry Area.
- Exiting Axis Units from the Map: Axis units may exit the map via Entry Areas M-R to fulfill victory conditions. This has no effect on the ability of Soviet units to use that Entry Area. Axis units that enter these Entry Areas may not reenter the map or be used to attack back onto the map.
- Frozen Units: The Soviet units that start south of Rostov may not move until released by rule 20.6.
- 5th Reserve Army (5 units): Enters play on Turn 3 at Entry Area M. They may enter the map by moving into any hex between 4100 and 4111. One unit may use rail movement, but the others must move onto the map via normal movement.
- 6th Reserve Army: All four units start in hex 3806 and may move normally on Turn 2.
- § 1st Panzer Army: The 14Pz, 22Pz, and 60PzG divisions of 1st Pz Army may not move or attack on Turn 1. (They were in the process of refitting. This rule change also helps balance the scenario.)
S1.3 Victory Conditions
The Axis player wins by having at least 8 VPs in the Victory Determination Phase. If this does not happen by the end of Turn 8 the Soviet player wins. For this scenario only, the Axis player may count VP hexes that are Isolated from all Soviet Supply Sources but not yet captured. In addition to the VPs printed on the map, the Axis player earns:
- 2 VPs for exiting at least five steps of Mechanized units off the east map edge.*
- 2 VPs for exiting at least five steps of Mechanized units off the south map edge.*
- 1 VP for having at least one German Combat Unit south of the Don River below the xx31 hex row.
*These VPs only count if the Axis player can trace a road-bound Supply Line from an Axis Entry Area to the appropriate Soviet Entry Area during the Victory Determination Phase.
S2. Caucasus Campaign
S2.1 Set Up and Scenario Data
- Game Length: 18 turns. Starts on Turn 10 and ends in the Victory Check Phase of Turn 27.
- First Player: Soviet pre-move (S2.4.1), then Axis Player Turn.
- Maps: Only maps C-1 and C-2 are used. Half hexes along the north-map edge are not playable.
- Setup: Use the Caucasus Campaign At Start Cards.
S2.2 Special Rules for the Axis Player
- Axis Air Units: One German Air unit each Clear or Overcast turns. No air units on Rain turns and on Turns 15-22. Air support can be traced from imaginary hex 3139.
- Axis Resource Points: One per turn starting on Turn 11.
- Axis Reinforcements: Treat the north map edge as an Entry Area. On the first turn Axis Reinforcements may enter on or between hexes 2740-4240. After the first turn their Entry Area expands to hexes 2140-4740.
- Axis Reinforcements: The Axis player receives the Plan Blücher (20.7) and North Caucasian Volunteer Units (20.8) per standard rules.
- Axis Supply Sources: The port of Taman (1549) if Axis controlled, and any road leading off the north-map edge west of hex 4440.
- Axis Replacements: Use the Replacement rate found on the Caucasus Turn Record Track.
- Axis Rail Repair: The first Railhead marker appears on the fourth turn of the scenario—place it on hex 3140 in the Initial Phase. Both Railhead markers (Tikhoretsk [3443] to Taman being the second one) can repair two hexes per turn.
S2.3 Special Rules for the Soviet Player
- Soviet Resource Points: One per turn.
- Soviet Reinforcements: Soviet reinforcements with the letter C (Caucasus) or TC on their Turn of Arrival code arrive at any Entry Area from G-L. If the unit has no C or TC code, then start it in the Caspian Sea Transit Box in the Initial Phase and during the Movement Phase move it to one of the Entry Areas (G-L).
- Soviet Replacements: Use the Caucasus Turn Record Track.
S2.4 Special Turn 1 Rules
The first turn of this scenario uses the following special sequence:
- Soviet Pre-Move: Before any Axis units move, the Soviet player may move some, none, or all on map Soviet units (except his Garrison Units [20.4]) their normal Movement Allowance. Extended or Rail Movement is not allowed. The Soviet Reinforcement that arrives on the first turn may not move or enter play until the Soviet Movement Phase.
- Skip the Axis Initial Phase: There are no Axis Replacements or Resource Points the first turn. Place the Axis Reinforcements for Turn 10 on the north map edge.
- Axis Movement Phase and Beyond: The game proceeds normally from this point on. Axis Reinforcements enter play during the Movement Phase through hexes 2740-4240 and may move their full MA.
S2.5 Victory Conditions
Auto Victory (the Benchmark numbers) are not used in this scenario. The Axis player wins by having at least 12 VPs in the Victory Determination Phase of Turn 27 (they start with 0). The Soviet player wins if the Axis player has earned less than 12 VPs. Captured VP hexes are not counted if the VP hex is Isolated. The Mt. Elbrus VP (24.3) counts as a permanent VP for this scenario.
S3. Operation Uranus
S3.1 Set Up and Scenario Data
- Game Length: 9 turns. Starts in the Soviet Player Turn of Turn 28 and ends in the Victory Check Phase of Turn 36.
- First Player: Soviets.
- Maps: Use only Maps A and B.
- Setup: Use the Uranus Scenario At Start Cards.
- South Edge: Entry Areas Q and R are Axis Entry Areas. The Soviet player may not enter them.
- Use Rule 29: Contested City Hexes.
S3.2 Reinforcements and Replacements
- Axis Reinforcements: Units arrive in the same manner as in the Campaign Game except those units indicated for "South" entry must arrive from the south map edge Entry Area (see above).
- Soviet Reinforcements: All arrive at Entry Area A, B, or C.
- Replacements: Use the Turn Record Track. There are no Replacements on the first turn of the scenario.
- § Wiking arrives at full strength (8-10-6) on Turn 35 instead of at reduced strength. (Tanks were repaired or replaced between late November and mid-December.)
S3.3 Turn Order Switches
Starting on the second turn of the scenario the turn order switches, with the Soviet player going first for the rest of the game.
S3.4 Special Turn 1 Rules
- Skip the Axis Player Turn and the Soviet Initial Phase. Play begins with the Soviet Movement Phase and proceeds from there.
- The Weather for the first turn is Overcast-W.
- Soviet units may only use Tactical and Rail Movement on Turn 1.
- The Axis Player receives his Interchange Turn (33.2.3) after the first Soviet Player Turn is completed and before Turn 29 starts.
S3.5 Victory Conditions
Auto Victory is not used in this scenario. The Axis player wins if he accomplishes both of the objectives below:
- Holds at least one hex of Stalingrad until the start of his Player Turn on Turn 34.
- Has at least 11 VPs in the Victory Determination Phase of Turn 36. Do not count VP hexes that are Isolated. The Axis player starts with 15 VPs—so he can lose 4 VPs and still win.
The Soviet player wins if the Axis player fails in either of those objectives.
S4. Campaign Game
S4.1 Set Up and Scenario Data
- Game Length: 36 turns. Starts on Turn 1 and ends in the Victory Check Phase of Turn 36.
- First Player: Axis
- Maps: All maps are used
- Setup: Use the Campaign Game At Start Cards
- Railroads: All rail hexes (green or not) west of the Start Line start the game repaired.
S4.2 Special Turn 1 Rules
- The game starts with the Axis Initial Phase of Turn 1.
- During the Movement Phase of Turn 1, Axis Combat Units may only use Tactical Movement (2 hexes). Supply Points may move their full MA. Axis units may cross Army boundary lines.
- Frozen Units: Same as in S1.2
- 1st Panzer Army: Same as in S1.2
S4.3 Additional Rules for the Campaign Game
Use rules 30-34.
S4.4 Victory Conditions
If neither player achieves an Automatic Victory, then the Axis player wins by having at least 21 VPs in the Victory Determination Phase of Turn 36; otherwise, the Soviet player wins. The Soviet player wins if he prevents the Axis player from winning. Do not count Axis VPs that are Isolated.
Turn 28 Benchmark: If the German player does not have at least 24 VPs at the end of the Axis Player Turn, then the game ends immediately in a Soviet Victory. If the Axis player does have 24 or more VPs, then the game continues.