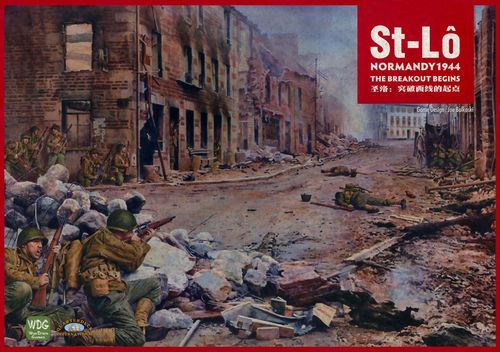
St-Lô: Normandy 1944 – The Breakout Begins
St-Lô: Normandy 1944 – The Breakout Begins Rulebook
Table of Contents
Table of Contents
- 1.0 Introduction
- 2.0 Component Description
- 3.0 Sequence of Play
- 4.0 Zones of Control
- 5.0 Assets
- 6.0 HQ Activation
- 7.0 Tactical Actions
- 8.0 Movement
- 9.0 Combat
- 10.0 Artillery in Combat
- 11.0 Observation
- 12.0 Reorganization
- 13.0 Entrenchments
- 14.0 Barrage Fire
- 15.0 US Air Strikes
- 16.0 Interdiction Fire
- 17.0 Recon Units
- 18.0 Reinforcements
- 19.0 The Headquarters Phase
- 20.0 Setting Up
- 21.0 Victory Conditions
- 22.0 Counter-Battery Fire (Optional)
- 23.0 Glossary
- 24.0 Player Notes
- 25.0 Historical Notes
- 26.0 Bibliography
- 27.0 Examples of Play
1.0 Introduction
1.1 The Situation
After the successful invasion of Europe at Normandy on 6 June 1944, Allied planners hoped for a quick breakout from the constricting beachheads. But a lack of supply and ferocious German resistance stalled the Allied armies in the infamous bocage of Normandy. Because every hedgerow was a potential German redoubt, Allied advances were cautious and slow. As casualties mounted, so did Allied frustrations; breakout plans were methodically drawn up and issued to corps and division commanders.
For the breakout to succeed, critical road and rail junctions had to be seized to block the flow of German supplies and reinforcements to the front and to ease logistical pressure on the Allied armies. On the American front the most important such junction was a typical Norman town of 12,000 inhabitants, St. Lô.
The seizure of St. Lô was the task of the US XIXth Corps, comprising two National Guard divisions: the 29th Blue and Gray Division (Marylanders and Virginians, veterans of D-Day at Omaha Beach) and the 35th Santa Fe Division (troops from Kansas, Nebraska, and Missouri).
Opposing the Americans was the redoubtable II Fallschirmjäger (Paratroop) Corps, consisting of the battered, but effective, 352nd Division (which had opposed 29th Division at Omaha Beach on D-Day), and the fanatical 3rd Fallschirmjaeger Division, an elite unit whose soldiers averaged 18 years of age.
1.2 The Game
St. Lô is a grand tactical simulation of the first major US offensive following D-Day. Players maneuver infantry battalions and heavy weapon assets, using supporting artillery units to capture or hold the town of St. Lô.
Each turn includes a variable number of Operations Phases, in each of which one player undertakes a single operation. The most common operation is HQ Activation.
A player who activates an HQ can undertake tactical actions with its battalion, expending tactical action points. The number of points an HQ can spend depends on its morale when activated. Tactical actions include movement, attacks, entrenching, and so on. The same HQ can be activated several times in a turn, but at a cost to its morale. Players activate HQs one at a time; there is never more than one HQ on the map. St. Lô contains many unusual concepts; even experienced gamers should keep this in mind while learning the game. There is a glossary at the end of these rules to aid in understanding unfamiliar terms. The rules include many sequence summaries. Refer to these during your first games. It may help to keep the summary charts (Tactical Actions Chart, Artillery Summary, etc.) handy while reading the rules and during play. The charts and tables include a summary of all numerical information in the rules, to aid your memory during play.
1.3 Abbreviations
Also see Unit Abbreviations (2.2.8.3).
| Abbr | Meaning | Abbr | Meaning |
|---|---|---|---|
| CRT | Combat Results Table | MP | Movement Point |
| DD | Division Display | OV | Observation Value |
| DRM | Die Roll Modifier | TAP | Tactical Action Point |
| EZOC | Enemy ZOC | TEC | Terrain Effects Chart |
| LOC | Line of Communication | TOT | Time on Target |
| LOS | Line of Sight | VP | Victory Point |
2.0 Component Description
A. A copy of St. Lô includes:
- One 22" x 34" mapsheet
- 400 die-cut playing pieces
- One US DD sheet
- One US Artillery Display sheet
- One German Division Display sheet
- One German Artillery Display sheet
- One Rulebook
- Charts and Tables
- One six-sided die
B. [Replacement-component address omitted.] Indicate which components are missing or damaged. Because of delicate registration requirements for game counters, counters are sometimes misprinted, with small portions not wholly within the counter area. The publisher cannot replace such counters unless they are wholly illegible or otherwise unusable.
C. [Correspondence instructions omitted.] Please phrase questions so they can be answered with short responses.
2.1 The Map and Displays
The US player sits on the north side of the map and the German player on the south. To prepare for play lay out the Division and Artillery Display sheets nearby.
2.1.1 Terrain
The most important terrain features are elevation levels (11.2). The Terrain Key on the mapsheet shows how to read the various symbols and the Terrain Effects Chart (TEC) summarizes the effects of terrain features.
Play Note: There is no clear terrain on the map. Every hex is either woods or hedgerow. The entire area (except for the woods and the city of St. Lô) was covered with hedgerows: tall, thick, earthen banks dividing up fields.
2.1.2 Tracks
The three map tracks have markers placed on them to indicate the number of tactical action points (TAPs) an active HQ unit has remaining, the current turn, and weather.
2.1.3 The DD
These sheets are divided into several individual Division Displays (DDs). These also include:
- Divisional Asset boxes, to hold assets not currently assigned, and
- Holding boxes for Inactive HQs which are never on the map. Beneath each of these is a box to hold a numbered marker to indicate the HQ's current morale.
- Each display sheet also includes a box to hold substitute company units, an Asset Holding box in which asset units sometimes sit out portions of the game, and a track to record initiative level.
2.1.4 The Artillery Displays
These hold all artillery units throughout the game. Each unit moves along its individual track, like a marker, to indicate the number of fire missions used in the current turn (10.1).
2.1.5 Display Visibility
Each side's Division and Artillery Displays are in full view of the opposing player; however, if you wish to introduce additional suspense and uncertainty, keep them hidden.
2.2 The Playing Pieces
A. The cardboard playing pieces (counters) represent the military units that participated in the Battle of St. Lô. The counters consist of German units, US units, and neutral markers. US units belong to the 29th, 35th, or 2nd Division, or the XIX Corps. German units belong to either the 3rd Fallschirmjäger or 352nd Division, or the II Fallschirmjaeger Corps. The color shading of the counters indicates divisional affiliations.
Design Note: The units indicated as belonging to the 352nd Division actually include regiments from four different divisions. They had all been placed under the command of the 352nd for this battle.
B. There are five types of units; each has a radically different function. These are headquarters, infantry, assets, artillery, and observation posts. Many of these units are held off-map on the Division and Artillery Displays.
C. Where an attribute is the same across types (such as unit size, unit type, designation/battalion, and regiment, among others), it is only identified once.
2.2.1 Headquarters Units
Headquarters (HQ) units represent command elements of infantry battalions; they are the most important units in the game.
A. The designation reads: Battalion/Regiment. (For example, the HQ 1/115 is the HQ of the 1st Battalion of the 115th Regiment.) Each HQ unit controls the battalion and companies that bear its designation. Each HQ is placed in the holding box with its designation printed by it on the DD.
B. All HQs have an Inactive (IA) side and an Attempted Activation (AA) side. HQs begin each turn on their Inactive sides on the DDs.
C. Reinforcement HQ units bear an R on their front sides.
D. The morale value is the HQ's starting morale; it fluctuates during play.
2.2.2 Infantry Units
A. Infantry units are the core of each side's combat forces. They come in two sizes: battalion and company. Battalions can be broken down and replaced by three companies. Infantry battalions are always deployed on the map unless they have been eliminated or broken down into companies. Each battalion is printed on both sides. When the front-side is showing, the battalion is at full strength. Combat losses may cause the battalion to be flipped over, showing it at reduced strength.
B. The designation is read in the same manner as an HQ's. (Even a company unit's designation is read battalion/regiment.) Each infantry unit is subordinate to the HQ whose designation it bears. This HQ will be referred to as the unit's HQ.
C. The combat value is the unit's basic fighting strength.
D. The anti-tank value is used to determine die roll modifiers (DRMs) in battles involving tanks.
E. Setup locations for units that begin the game on the map are printed on the counters. These are four-digit hex numbers. The notation DD indicates that the unit starts the game on the DD, and R indicates that it enters play as a reinforcement.
2.2.3 Companies
A. Companies that begin the game on the map have printed battalion/regiment designations. (Their battalions have broken down before the start of the game.)
B. Other companies are generic, substitute companies that enter play through the breakdown process and may represent the subordinates of any infantry battalion that breaks down. Instead of battalion/regiment designations, they have the notation SUB and their division number. They also bear numerical codes to differentiate them from one another. Battalion/regiment designations for them should be recorded on paper when they enter play.
C. At the start of the game substitute companies are placed in the Substitute Company boxes of the DDs.
Play Note: Substitute companies do double duty; companies for one division are printed on the back of companies for another division.
2.2.4 Asset Units
A. These represent heavy weapons (tanks, assault guns, anti-tank guns, etc. that support the infantry) and begin the game faceup on the DDs. During play they are assigned to infantry units, and placed on the map with those units. They can be reassigned to the division pool, in which case they are placed in the Divisional Assets box with the To Division side up.
B. There are three types of assets: Major, Minor, and Engineer. Major and minor asset units display a silhouette or tactical weapons symbol. A stripe across the counter indicates a major asset.
- Engineer asset units display an engineer symbol.
- Major assets are US tanks and tank destroyers, German antitank guns and SIIIs.
- Minor assets are assault guns and flak weapons.
C. Armor and anti-tank values contribute DRMs in combat. These are parenthesized to remind you that they are not combat values.
D. Weapon types are printed on the face of each asset counter. (e.g., M4 tank, 75mm gun, etc.) An asset's designation is purely for historical interest.
Counter notes: All asset counters have "To Division" on their reverse.
2.2.5 Artillery Units
A. These spend the entire game on the Artillery Display in the tracks corresponding to their designation (10.1) and have no counters on the map itself. (The guns are located in various places in the rear and off the map.)
B. Designations for artillery units are either battalion/regiment or GS (General Support). The designation is very important in play.
C. Support value, defensive value, and long-range value are the artillery's combat values; each is used for different types of fire.
D. Types of artillery (howitzer, mortar, or rocket) and caliber are for historical interest only.
E. Flip an artillery unit to its reverse side when it is disorganized by enemy fire.
2.2.6 Observation Posts
Observation posts (OPs) remain off-map except when deployed for observation. Each division has one.
2.2.7 Recon Unit
Recon units (RCNs) are read the same as infantry battalions, except that they have no designations. The US has six of these and the German has none (17.0).
2.2.8 Markers
These are used to record various information. A summary of all game markers and references to the rules sections which explain their uses appears below.
2.2.8.1 Two-Sided Markers
Front: Improved Position (13.0); Strongpoint.
Back: Pin (14.2); Disruption; Morale (6.1.1); Numbers 1-6.
2.2.8.2 One-Sided Markers
These are blank on their reverse side.
- Turn Record
- Air Strikes (15.0)
- Weather (3.3)
- US Initiative Level (3.4)
- Tactical Action Points (6.0, 7.0)
- German Initiative Level (3.4)
2.2.9 Counter Abbreviations
| Abbr | Meaning | Abbr | Meaning |
|---|---|---|---|
| AA | HQ Attempted Activation | M5 | Stuart Tank |
| AG | Assault Gun | M8 | US Assault Gun |
| DD | Division Display | M10 | US Tank Destroyer |
| FJ | Fallschirmjäger (Paratroop) | OP | Observation Post |
| GS | General Support | R | Reinforcement |
| HQ | Headquarters | RCN | Reconnaissance |
| IA |
2.2.10 Unit Size Symbols
| Size | Symbol |
|---|---|
| Platoon | ••• |
| Company | I |
| Battalion | II |
2.3 Scale
A. Each hex represents 306 yards from side to side.
B. Each complete turn represents one day.
C. Each infantry battalion (at full strength) represents about 400 to 800 men. Each company represents from 100 to 200 men. Each artillery unit represents 8 to 12 guns.
D. Each gun or tank asset represents about 15 armored fighting vehicles or six guns, and engineer assets are platoons, about 40 men.
E. Each recon unit represents about 40 men.
F. Each HQ unit represents a staff of about 30 men.
G. Each OP represents about two to four men.
3.0 Sequence of Play
St. Lô consists of eight turns, each of which follows a rigid sequence of actions. The sequence outline below will help you learn the rules and has been written as a helpful reference during play.
11 July, 1815 hrs
Gen. Gerhardt (Commander, 29th Division): How is it going?
Col. Ordway (Commander, 115th Infantry): The Blue outfit has not progressed at all. Red thinks they are going to move. We just got word that the outfit on the right stopped for the night.
Gen. Gerhardt: Better have your S-3 come up here so we can outline a plan agreeable to all concerned. Don't worry about the 35th stopping for the night. I want some definite results out of both those battalions tonight.
Design Note: The quotes from Gerhardt and Ordway above, and all quotes appearing in these rules, are from stenographers' transcripts made at 29th Division HQ. The essential purpose of St. Lô is to portray battalion and company-level operations in the Second World War during the Normandy Campaign. To achieve this, a sequence of play reflecting the unpredictability of infantry combat was called for. Actions alternate between the players an indefinite number of times per turn. Because of this, the players are never able to determine with any degree of certainty what can be done during a given turn, nor are players unoccupied for more than a minute or so at a time. This alternating sequence simulates simultaneity of events much more accurately than the standard you-move-everything/I-move-everything approach.
3.1 The Turn (Sequence Outline)
3.1.1 Weather Phase
The US rolls the die to determine the weather and number of air strikes allowed this turn (3.3).
3.1.2 Reinforcement Phase
A. Each player rolls the die. Exception: The US does not roll the die on the first three turns.
B. Germany receives reinforcements on a 1-4.
C. The US receives reinforcements on a 1-3.
D. Each side immediately places its reinforcements (if any) on the map or on displays (18.0).
3.1.3 Initiative Phase
A. Place the Initiative Level markers in the 0 boxes of the Initiative Tracks on the DDs. Exception: On Turn 1, place the German marker in the 2 box.
B. Each player, German first, may make one interdiction fire attempt. The US applies a weather DRM.
C. If interdiction fire is successful the enemy's initiative level is reduced (16.0). Exception: On Turn 1 there is no Interdiction Fire.
3.1.4 Asset Phase
This does not take place on Turn 1.
3.1.4.1 Availability Segment
Flip all assets in the Divisional Asset box to their faceup sides. (They are now available to be assigned this turn.)
3.1.4.2 Reassignment Segment
A. All engineer assets on the map are reassigned to their divisions.
B. Other assets may be reassigned if the owner wishes.
C. Assets in Asset Holding boxes are reassigned to their divisions, To Division side up.
D. A reassigned asset is removed from underneath its infantry unit and placed in the Divisional Asset box on its To Division side.
3.1.5 Operations Phase
The players now perform a variable number of Operations Phases. Operations Phases continue until either the players pass consecutively or both roll an unmodified 1 in the Initiative Segment; otherwise, return to the Initiative Segment.
3.1.5.1 Initiative Segment
Both players roll a die, adding their current initiative level as a DRM. The player with the higher modified roll has initiative and can perform an operation in this phase.
3.1.5.2 Operation Segment
The player with initiative declares and performs a single operation (3.2).
3.1.6 Recovery Phase
Remove all Pinned and Disrupted markers from the map.
3.1.7 Artillery Rally Phase
Return all artillery units to the 0 Fire Mission boxes. If using the Counter-Battery Fire rule (22.0), both sides roll a die for each of their disorganized artillery units. On a 1-2, the unit rallies flip it to its front side.
3.1.8 Headquarters Phase
A. Examine all HQs on the DDs.
B. Increase the morale of each HQ on its IA side by 2.
C. Flip each HQ on its AA to its Inactive Side. Its morale is unchanged.
D. At the end of each turn, advance the Turn Record marker one space along the Turn Record Track. This concludes the turn. Repeat the sequence above each turn.
3.2 The Operations Phase
Most game activities take place in the Operations Phase, which is repeated an indefinite number of times; sometimes there is only one, but usually there are many.
3.2.1 Initiative Segment
A. Both players roll a die, adding their current initiative level as a DRM. The player with the higher adjusted roll has initiative for this phase. In case of a tie, the German has initiative.
B. If both rolls (before modification) are 1, Operations Phases immediately end for that turn and play proceeds to the Recovery Phase. Exception: During the first twelve Operations Phases of Turn 1, and the first eight Operations Phases of Turn 2, if both rolls are 1, disregard them and roll again (3.2.6).
3.2.2 Operation Segment
A. The player with initiative declares one of the following operations and may perform exactly one operation per segment.
B. After the operation is performed, play proceeds to the Initiative Segment again and another Operations Phase begins. Exception: If both players declare a Pass operation in succession, the Operations Phase ends and play proceeds to the Recovery Phase (3.2.5).
3.2.3 Operations
A. HQ Activation (6.0)
- Attempt to activate one HQ (6.0).
- Initiate tactical actions with the active HQ (7.0).
- If the US won initiative and has completed tactical actions, US recon units that are within command radius of the active HQ may be moved (17.0).
B. Barrage Fire
- Observe (11.0) one enemy-occupied hex and perform Barrage Fire (14.0) against it using the Barrage Table.
C. Air Strike (US only)
D. If weather (3.3) allows, observe one enemy-occupied hex and perform an air strike (15.0) against it using the Air Strike column of the Barrage Table.
E. Counter-Battery Fire (optional rule 22.0)
- Perform counter-battery fire with any artillery units, using the Long-Range Artillery Table.
F. Pass
- Do nothing. Another Operations Phase begins.
3.2.4 Requirements and Restrictions
A. A player may declare the same operation any number of times per turn.
B. A player may declare Pass in one Operations Segment and declare other actions in later phases; a Pass applies only to the current segment.
C. After each Operations Segment, return to the Initiative Segment and begin a new Operations Phase. This process continues until the Operations Phase ends.
3.2.5 Ending the Operations Phase
A. The Operations Phase ends when one of the following occurs:
- One player wins initiative and Passes, and, in the immediately following Operations Phase, the other player does the same.
- Both players roll an unmodified 1 in the Initiative Segment. Exception: Turns 1 and 2 (3.2.6).
B. When the Operations Phase ends, no more operations may be performed that turn, and play proceeds to the Recovery Phase.
3.2.6 Turns 1 and 2 Special Rule
During Turn 1, there are at least 12 Operations Phases, and during Turn 2, at least 8 (unless players Pass consecutively.) During these phases of these turns disregard initiative rolls of unmodified 1s; roll again.
Design Note: Under the initiative system, a turn can end after hardly anything has happened. In war, many accidents can occur and halt operations: a sudden storm can come up, or a division commander can be killed. On the first two days of a prepared offensive, however, advance plans would allow at least a certain minimum amount of activity regardless of such accidents.
3.2.7 Operations Phase Example
In the first Operations Phase of a turn, the German rolls 3 and the US rolls 1. Suppose the German initiative level is -2, so their roll is modified to 1. The modified rolls are tied, so the German has initiative and declares a Barrage operation. After resolving the barrage, play returns to the Initiative Segment and the players roll for initiative again. This time the US wins and declares HQ Activation, activating an HQ, and moves that HQ's battalion. In the third phase, the German wins initiative and declares Pass. In the next phase, both players roll 1 and the Operations Phase ends; play proceeds to the Recovery Phase.
3.3 Weather
1. During the Weather Phase, the US rolls the die and places the Weather marker in the box of the Weather track corresponding to the roll.
2. Weather may be clear, cloudy, or rain. The weather modifies the US rolls for long-range artillery fire and air strikes.
3. The same roll that determines weather also determines the number of US Air Strikes allowed that turn. Place the Air Strike marker in the corresponding box of the Air Strike track on the map.
3.4 Initiative
A. Players possess an initiative level at all times. The only purpose of the initiative level is to modify the initiative roll which takes place in each Operations Phase.
B. During the Initiative Phase of each turn, except Turn 1, each side's initiative level for the current turn is determined. Both levels are first set at 0, but can be changed by interdiction fire (16.0).
C. On Turn 1, however, the US initiative level is set at 0 and the German initiative level is set at -2.
D. Interdiction fire occurs during the Initiative Phase of all turns except the first, and may reduce initiative levels (16.0). On Turn 1, however, there is no interdiction fire.
E. After interdiction fires have been made, initiative levels do not change for the remainder of the turn.
F. Keep track of initiative levels by placing the Initiative Level markers in the boxes of the Initiative Track.
4.0 Zones of Control
Every infantry or recon unit exerts a Zone of Control (ZOC). A ZOC consists of the six hexes surrounding an infantry or recon unit. These are called controlled hexes. ZOCs extend into all types of terrain. Only infantry and recon units exert ZOCs.
11 July, 1825 hrs
Col. McDaniel (29th Division Chief of Staff): I'm down at Sheppe's place and they're having a little trouble.
Gen. Gerhardt: Are they advancing on a broad front?
Col. McDaniel: About a 700-yard front.
Design Note: Defensive frontages for infantry battalions were generally between 1,000 and 2,000 yards. On the attack, unit density was much higher. At the St. Lô scale of 306 yards per hex, zones of control for infantry units obviously are a must. Even so, for a battalion to achieve its maximum frontage on the map, it must extend itself up to six or seven hexes; hence the need for breakdown in the game.
4.1 Effects on Movement
A. A unit that begins its movement in an enemy-controlled hex may leave it, but may not enter another enemy ZOC (EZOC) for the duration of that Movement Action.
B. A unit must stop movement on entering an EZOC and may move no further during that Movement Action, even if the enemy-controlled hex is occupied by a friendly unit.
4.2 Other Effects
A command radius or line of communication (LOC) cannot include an enemy-controlled hex unless a friendly unit occupies that hex.
5.0 Assets
A. Assets begin the game on the DDs. (The setup instructions indicate which assets are assigned to each division.) Each asset remains on a display until assigned to an infantry unit during combat (9.3). Once an asset is assigned to an infantry unit, it must remain with that unit until it is reassigned to the division or eliminated (5.3). Assets enter the map only by assignment to infantry units.
B. An asset may never occupy a hex that does not contain an infantry unit. Assets move with the infantry units to which they have been assigned and participate fully in every tactical action those units perform. Assets may never perform tactical actions of their own. Assets may not be dropped off in a hex by their parent infantry units.
11 July, 1301 hrs
Maj. Howie (116th Infantry): We're moving out Lemon Blue behind Lemon White. The Colonel wants to request B Company of the 747th Tank Battalion to follow up Blue. We also need some engineers with demolitions to prepare hedgerows for tank crossings.
Design Note: As weapons have become more deadly, attackers have searched for increasingly sophisticated means of overcoming defensive firepower. As rapid-fire weapons evolved, so did offensive tactics. One of the most effective means of overcoming automatic weapons proved to be the tank. In the US Army of 1944, it was common practice for tank platoons to be parceled out to infantry that was bogged down by enemy fire. In response, the Germans employed their dreaded 88s and other potent anti-tank weapons in masterful defenses that American tanks rarely dared attack from the front. The game gives the attacker an advantage in asset allocation because the attacker chooses the time and place of the attack, using resources drawn from diverse sources. The defender has less flexibility and little time to call on supporting arms when attacked.
5.1 Reassignment
This means removing an asset from the map (or from the Asset Holding box) and placing it back in the same Divisional Asset box with its To Division side up (assets may not be reassigned to a different division). Being on the To Division side indicates that the asset cannot then be assigned to another infantry unit in that same turn. Reassignment takes place during the Reassignment Segment of each turn.
5.2 Engineer Assets
Such assets on the map must be reassigned to their Divisional Asset boxes in each Reassignment Segment. Reassignment of other assets at this time is voluntary.
5.3 Parent Unit Elimination
Elimination of an asset's parent combat unit causes the asset(s) to be placed in its Asset Holding box immediately. This takes place before enemy units may advance into the hex; the asset(s) escapes their advance.
5.4 Assets in the Asset Holding Box
Assets in the Asset Holding box are reassigned to their divisions in the Reassignment Segment of the following turn. Thus, when an asset's parent unit is eliminated, the asset sits out the rest of the turn in the holding box. It spends the following turn on its To Division side in the Divisional Asset box. On the following turn, it may be assigned to another infantry unit.
5.5 Transfer
A. Assets may not be transferred directly from one combat unit to another but must go through the reassignment procedure. The only exception occurs when companies reorganize into battalions or vice versa. In this case, assets are transferred from the old unit(s) to the new unit(s) (12.1.3, 12.2.5).
B. The Availability Segment precedes the Reassignment Segment in the turn sequence. Therefore, reassigned assets are not available for assignment in the current turn.
5.6 Example of Reassignment
The US battalion 1/115 attacks. At the moment of attack (before resolution) the US assigns three M4 major assets, one engineer, and one M8 minor asset to the battalion. After the attack is resolved, these five assets remain assigned to 1/115 (underneath the infantry counter). In the ensuing turn's Reassignment Segment the US must reassign the engineer asset and decides also to reassign the M8 asset. The reassigned units are flipped to their To Division sides and are placed in the 29th Division's Divisional Asset Box. In the same turn, 1/115 is eliminated by an attack. The three M4 assets are immediately placed in the Asset Holding box, because they now find themselves unassigned. In the Asset Phase of the next turn, the engineers and the M8 will be flipped to their front sides and be available for assignment to combat units. The M4 assets will be placed in the Divisional Asset box with their To Division sides up.
6.0 HQ Activation
A. All HQs begin the game on the DDs, Inactive (IA) side up. They are placed on the map only when activated. Activation is not guaranteed; it requires a roll.
B. When an HQ is successfully activated, it is placed on the map in the hex occupied by its subordinate battalion. If the battalion has broken down to companies, it may be placed in a hex occupied by one of its subordinate companies. In either case, the HQ cannot be moved from that hex for the duration of its activation.
11 July, 2109 hrs
Gen. Gerhardt: Cliff's outfit got off, did it?
Col. Ordway: They got across the stream with no opposition. I gave them an objective north of Emelie. Sheppe has reached the sunken road. Johns is moving his right forward pretty well, but is having a tough time.
Gen. Gerhardt: Resume at 8, main effort on the left. You will get an order; call me back at 10.
Design Note: The battalion was the key tactical formation in the Second World War. Accurate portrayal of the dilemmas of battalion command was a primary design consideration for the game. Battalion HQ was the bridge between higher echelons and the fighting man; the battalion commander was the highest-ranking officer to see the fighting firsthand. In the game, to move or attack with a unit, a player must first activate its superior HQ. Thus, HQ activation is the most vital action performed during the game.
It was almost impossible for a battalion's commanding officer to know what was happening on his flanks: he was far more concerned with the action directly to his front. In the Battle of St. Lô, the front was rarely clearly defined. Battalions sometimes raced a mile ahead of their nearest compatriots. For example, a battalion of the 116th Infantry was virtually surrounded for two days outside St. Lô.
6.1 HQ Activation Procedure
A. Choose any HQ on your DDs (even one that has attempted activation before in the current turn, successfully or unsuccessfully).
B. Roll the die and compare this roll with the HQ's current morale value.
C. If the roll is greater than or equal to the morale value, the HQ has not been activated.
D. If the roll is less than the morale value, the HQ has been activated. Subtract the roll from the HQ's current morale value. The result is the number of TAPs available to the HQ. Place the TAP marker in the corresponding box on the TAP Track.
E. Decrease the HQ's morale regardless of whether activation succeeded.
F. If the HQ was on its IA side, subtract one from its morale. For the first activation attempts of all 35th Division HQs, subtract two (6.3).
G. If the HQ was on its AA side, subtract two. The HQ's morale is never reduced to less than 1.
H. Flip the HQ to its AA side if it was on its Inactive side, even if activation did not succeed.
I. If activation succeeded, place the HQ on the map directly underneath the battalion or any company that bears the same designation as the HQ. (There will either be one battalion or up to three companies. If there is more than one company unit available, the player may choose which one to place the HQ with.) The player may now use this HQ to initiate tactical actions.
J. If activation did not succeed, the operation ends; begin a new Operations Phase.
6.2 Morale
A. Every HQ has a printed morale value of 6 or 7. When a player attempts to activate an HQ, its morale is reduced. If an HQ remains inactive throughout the turn, however, its morale is increased by two during the Recovery Phase.
B. When an HQ's morale value must be adjusted, take a numbered marker that reflects the new morale value and place it in the HQ's Morale box on the DD. Whenever there is no numbered marker in the Morale box, the HQ's morale is considered to be the printed value.
C. An HQ's morale is never reduced to less than 1 nor increased to more than its printed value.
6.3 US 35th Division
The very first time in the game that activation is attempted for each HQ of the US 35th Division, the HQ's morale decreases by two instead of one.
Design Note: St. Lô was the 35th Division's first battle experience. The first time a unit goes into battle, it suffers disorganization faster than veteran units.
6.4 Flipping to AA Side
Any attempt to activate an HQ, successful or unsuccessful, requires the HQ to be flipped to its AA side. When an HQ is deployed on the map following successful activation, it is placed with its AA side up. HQs on their AA sides may not be flipped to their Inactive sides again until the Headquarters Phase.
6.5 Activation Attempts After Failure to Activate
A. If a particular HQ fails to activate in one Operations Phase, the owner may try again in a later Operations Phase, though the HQ will be on its AA side and its morale will have decreased.
B. The owner may attempt to activate the same HQ any number of times in the same turn.
6.6 Examples of HQ Activation
A. The US gains initiative, declares HQ Activation and chooses the 1/115 HQ unit (current morale 5; IA side) on the DD and rolls a 5. Since 5 is equal to the 1/115's current morale, the HQ is not activated. The HQ is flipped to its AA side and its morale is immediately reduced to 4.
B. A new Operations Phase then begins. The US again wins initiative and chooses the 2/175 HQ unit (current morale 4; AA side). This time the roll is 2. Because 2 is less than 4, the HQ is activated. Four minus two is two, so the HQ has 2 TAPs. The TAP marker is placed in the 2 box of the TAP Track. The 2/175's morale is reduced by two because it was on its AA side when the activation attempt was made. The US may now place the HQ on the map underneath the 2/175 battalion and expend up to 2 TAPs.
7.0 Tactical Actions
A. After an HQ has been activated and deployed onto the map, the player uses it to initiate tactical actions. There are eight tactical actions available:
- Movement
- Strategic Movement
- Hasty Attack
- Deliberate Attack
- Intensive Attack
- Recovery
- Reorganization
- Entrenching
B. These are also listed on the Tactical Actions Chart. Refer to the chart while reading the rules that follow.
17 July, 1600 hours
General Cota (Assistant Commander, 29th Division): What is the matter with that outfit of Smith's and Johns'? They aren't getting anywhere. All they need is a little fire and movement in there to get moving. Get them moving; we've got to get to that place.
Design Note: When a battalion was given a mission, its performance was dependent upon many factors, the most important of which was morale. A unit's morale was determined by such diverse factors as training, experience, and cohesion. An elite unit going into battle fresh was capable of much more than a tired, inexperienced formation. Thus, units vary greatly in what they can accomplish in the game or in a given turn. Some will attack and advance two miles in a day; others will not pass their line of departure.
7.1 Declaring Tactical Actions
A. Choose one tactical action. Any action may be chosen provided you have the required number of TAPs.
B. Check the HQ's LOC and command radius (7.4, 7.3).
C. Expend the required number of TAPs as listed on the Tactical Actions Chart. Adjust the TAP marker to reflect this expenditure.
D. Perform the action with the battalion (or companies) bearing the same designation as the active HQ. (When the US has finished initiating tactical actions with an active HQ, US recon units may be moved (17.0.C).
E. If the HQ has any TAPs remaining, return to step A and declare another tactical action. (You may declare the same action more than once.) After completing tactical actions, remove the HQ from the map and place it back on the DD, AA side up.
F. Begin a new Operations Phase.
7.1.1 Tactical Action Points
A. Each tactical action costs a number of TAPs. The Tactical Actions Chart lists the cost of each action. LOCs (7.3) and command radius (7.4) affect these costs.
B. An action may be chosen only if the HQ has sufficient TAPs to pay the full cost.
C. You are never required to spend all of an HQ's TAPs, but may voluntarily end its activation at any time.
D. TAPs may not be accumulated from one Operation Segment to another. When ending an HQ's activation, any remaining TAPs the HQ has left are forfeit.
7.1.2 Strategic Movement and Entrenching Restriction
A. Neither Strategic Movement nor Entrenching may be chosen as a tactical action unless it is the first and only action an HQ initiates during its deployment on the map.
B. The notation all on the Tactical Actions Chart indicates that these actions expend all of an HQ's TAPs. Either action may be chosen if one or more TAPs is available.
C. Following either of these actions, return the HQ immediately to the DD (AA side up).
7.2 Performing Tactical Actions
7.2.1 Unit Restrictions
Only units subordinate to the active HQ may perform tactical actions. These include battalions and companies that bear the HQ's designation and assets assigned to them. Units bearing other designations may not participate.
7.2.2 HQ Restrictions
An active HQ remains in the hex in which it was placed until it finishes initiating actions and returns to the DD. An active HQ only initiates tactical actions; it never participates in them.
7.2.3 Assets
Assets may not perform tactical actions by themselves. But when an infantry unit performs an action all its attached assets must accompany it.
7.3 Lines of Communication
A. An LOC is a path up to ten hexes from a unit's hex to a road hex, and subsequently a path of unlimited length along continuous roads to a depot hex of the unit's nationality. Do not count the unit's hex but do count the road hex when determining length.
B. Once an LOC reaches a road hex, it may not deviate from roads.
7.3.1 When Initiating Tactical Action
When initiating a tactical action, check that the HQ can trace an LOC.
7.3.2 Effects for No LOC
If an HQ cannot trace an LOC, it:
A. May not initiate Strategic Movement, Entrenching, Deliberate Attacks, or Intensive Attacks.
B. May initiate any other action, but the cost is 3 TAPs instead of 1. An HQ may not initiate any actions at all if it has only one or two points remaining.
Design Note: The Tactical Actions Chart includes a column with LOC restrictions.
7.3.3 Effects on Assets
A. Assets cannot be assigned to a defending unit which cannot trace an LOC at that moment.
B. Assets cannot be assigned to an attacking unit if its HQ cannot trace an LOC at that moment.
C. Any assets which were already assigned (at some earlier time) to such units continue to move and fight with it.
7.3.4 Effects on Morale
If a combat unit (battalion or company) cannot trace an LOC during the Headquarters Phase, then its HQ cannot increase morale (19.0).
7.4 The Command Radius
All units exert a command radius. An HQ's command radius is important for initiating tactical actions and placement of Observation Posts (OPs) for on-call fire. Other units' command radii are important for placement of OPs for barrage fire, defensive fire, and US air strikes.
7.4.1 Within Command Radius
A. A hex is within a unit's command radius if there is a path no more than four hexes long, from the unit (exclusive) to the hex (inclusive), the path does not enter any enemy-occupied or controlled hexes (unless the enemy-controlled hex is friendly-occupied).
B. A unit's own hex is always within its command radius.
7.4.2 Out of Command Effects on Battalions
A. A battalion-size unit that is beyond the command radius of its HQ suffers these penalties:
- It may not participate in Strategic Movement, Entrenching, Deliberate Attacks, or Intensive Attacks.
- It may perform any other tactical action but at a cost of 2 TAPs instead of 1.
B. If the active HQ also cannot trace an LOC, the unit may not undertake any tactical actions.
7.4.3 Out of Command Effects on Companies
A. A company-size unit that is beyond the command radius of its HQ cannot take part in any tactical actions.
B. You may still, however, execute tactical actions with any subordinate companies that are within the HQ's command radius.
7.4.4 Movement Beyond Command Radius
A unit performing Movement or Strategic Movement, or advancing after combat, may move beyond its HQ's command radius without penalty.
7.4.5 When to Determine Effects of Command Radius
A. All command radius effects apply to units which begin an action beyond command radius. Check command radius at the start of each action, not just at the time an HQ is activated.
B. Because an HQ cannot move, it remains in the hex in which it was placed on the map. Therefore, if you move beyond command radius of your HQ in one action, and then wish to declare a second Movement action right afterwards, the penalties for being beyond command radius apply.
7.5 Actions by Company Units
When an HQ initiates an action, each of its subordinate companies within its command radius may perform the action. The TAP cost is the same no matter how many companies participate.
7.5.1 Prohibited Actions by Companies
Company-size units may not participate in the following actions:
- Strategic Movement
- Deliberate Attacks
- Intensive Attacks.
7.5.2 Out of Command Effects
Company-size units beyond the command radius of their HQ at the time an action is initiated may not participate in that action.
8.0 Movement
Units may move only when an active HQ initiates a Movement or Strategic Movement Action. Only the battalion or companies bearing the same designation as the active HQ may move. Movement and Strategic Movement are two distinct actions.
11 July, 1445 hrs
Gen. Gerhardt: Get after Johns' outfit. And are you going to commit Sheppe?
Col. Ordway: Don't want to do it until Johns gets down there. Just got word that Johns is getting mortar fire down by those hedgerows.
Gen. Gerhardt: Keep pushing them now. We want to take that objective.
Design Note: In the game, the critical factor determining how far a battalion can move is its morale. In reality, movement under combat conditions was extremely careful and deliberate, especially in the Normandy campaign. In the hedgerows, a single sniper could significantly inhibit the movement of an entire company. Mobility deteriorated even further if the unit could not communicate effectively with its commanding officer. This is reflected in the game by penalties imposed upon units which are beyond their HQ's command radius, or whose HQs are surrounded and incapable of communicating with higher echelons.
8.1 The Movement Action
A. A unit has a movement allowance (MA) of three movement points (MPs) when performing a Movement Action.
B. A unit expends 1 MP per hex entered as it moves from hex to contiguous hex.
C. A unit pays +1 MP to cross a stream hexside.
D. Roads have no effect on Movement Actions. They are used only in Strategic Movement (8.2).
E. A unit may perform more than one Movement Action per Operations Phase.
F. Friendly ZOCs and friendly-occupied hexes entail no additional MP cost in either type of movement, but EZOCs do inhibit movement (4.1).
G. In both types of movement, a unit may move as many or as few hexes as its owner desires, provided it does not exceed its MA. Unused MPs may not be saved from action to action nor transferred from unit to unit.
H. A unit may never move off the map, nor into an enemy-occupied hex.
8.2 The Strategic Movement Action
A. A battalion may perform Strategic Movement only if it remains more than four hexes away from enemy units throughout its movement, including at the beginning and the end of this movement. (Thus, if a unit is located four or fewer hexes from an enemy unit, it cannot perform Strategic Movement.)
B. A battalion performing Strategic Movement has a MA of 8 MPs. Unless it is moving along roads, it expends these MPs just as in a Movement Action.
C. When performing Strategic Movement, a battalion that enters a hex through a hexside crossed by a road ignores the normal MP cost of the hex (including the stream effect). The cost to enter a road hex via a road hexside is ⅓ MP. Units may combine road and non-road movement in the same Strategic Movement Action.
8.3 Stacking
A maximum of one battalion or three companies may occupy the same hex. This limit applies at the end of each Movement Action and during the placement of reinforcements. (Thus, a unit can never end its move overstacked.)
8.3.1 Exempt Stacking Limits
The following are not subject to stacking restrictions and do not count against infantry stacking limits.
A. Markers,
B. HQs,
C. Recon units, and
D. OPs.
8.3.2 Companies
Companies with different designations may stack together.
8.3.3 Assets
Asset stacking limits are explained under Assignment of Assets (9.3).
8.4 Divisional Boundary Restrictions
There are two divisional boundaries on the map restricting the movement of US (and some German) infantry units.
8.4.1 US 2nd Division
US 2nd Division infantry units may not enter or attack a hex that is west of the 2nd Division boundary.
8.4.2 US 35th Division
US 35th Division infantry units may not enter or attack a hex that is east of the 35th Division boundary.
8.4.3 2nd and 35th Division Artillery
Both 2nd and 35th Division artillery units may use barrage fire against any hex on the map that is observed by their OPs.
8.4.4 German 1/5FJ Battalion
The German 1/5FJ battalion (which enters with the first German reinforcements) can never move west of the 2nd Division boundary line. (It had to stay in touch with the rest of its regiment, which was off the map to the east.)
8.4.5 US 29th Division and Other German Units
US 29th Division units and all German units except the 1/5FJ battalion have no boundary restrictions.
8.4.6 Boundaries and Observation Posts
Boundaries do not restrict the placement of OPs. The 2nd Division OP may be placed west of the 2nd Division boundary, for instance.
9.0 Combat
A. Combat takes place only when an active HQ initiates an Attack Action. Its subordinate units must then attack adjacent enemy units. Only its subordinate units (and their attached assets) can attack.
B. There are three kinds of Attack Actions: Hasty, Deliberate, or Intensive. The Deliberate and Intensive Actions cost more TAPs, but add valuable DRMs. The initiation of an Attack Action is always voluntary.
11 July, 1344 hrs
Lt. Wentworth: Situation on 2nd Division front remains static. Companies are beginning to shift about, but may bypass Hill 192. Tanks have been reported on southwest slope of Hill 192. Will keep you advised and inform you as soon as anything different occurs.
Design Note: In St Lô, battalions function as independent entities for combat purposes. If a unit attacks, it must do so without the help of its neighbors. An examination of the 29th Division After Action Reports makes it abundantly clear that each battalion fought its own separate little war. It is evident that a typical battalion commander was far too busy controlling his own companies and calling in artillery fires to have the time to coordinate his actions with his neighbors, only a few hedgerows apart, but seemingly half a world away to the men in the foxholes.
The effective employment of supporting arms (tanks, artillery, and engineers) can significantly improve an attack's chance of success. It is important to note that the greater the expenditure of TAPs in an attack, the more likely the assault will succeed. This simulates increased time and effort taken by a battalion to prepare its attack.
9.1 Participation in Combat
A. Units may attack adjacent hexes only.
B. If an HQ initiates an Attack Action, each of its subordinate infantry units which occupies an EZOC and is eligible to attack must attack all adjacent enemy units.
C. All eligible infantry units attack individually, even company units stacked together. (Assets assigned to attacking units participate in these attacks.) Thus, an HQ initiating an attack with its subordinate battalion will trigger one attack; an HQ initiating an Attack Action with subordinate companies will trigger as many attacks as there are subordinate companies in EZOCs.
D. When a unit attacks, no other units except its assigned assets may join in the attack, not even units stacked in the same hex.
9.1.1 Adjacent Enemy Units
An attacking unit must attack all adjacent, enemy units in a single attack. To resolve this combat, the combat values of all defending units are added into a single sum.
9.1.2 Attack Limits
A. A unit can attack only once per Attack Action. However, it can attack more than once per Operations Phase, because its HQ could initiate several Attack Actions in a single phase.
B. A unit can be attacked more than once per Attack Action. The only way this can occur is if two or three companies subordinate to the active HQ are adjacent to the same enemy unit. In this case each company attacks separately. The attacker chooses the order in which to resolve the attacks. These attacks are treated as individual attacks in all respects.
9.1.3 Units Prohibited From Attacking
The following units may never attack:
A. Company units beyond the command radius of their parent HQs,
B. Disrupted or pinned units,
C. Recon units,
D. Infantry units bearing designations different from the active HQ, and
E. HQ units.
9.2 Resolution of Combat
An attack is performed by comparing the combat value of the attacker to the combat value of the defender. Artillery, assets, and other factors may affect the outcome.
A. Strength Calculation: Sum the combat values of participating units.
B. Asset Allocation: Subject to the assignment limits, the attacker may allocate up to five assets, and the defender one major and one minor asset (9.3).
C. On-Call Artillery: The attacker may place the OP of the active HQ's division anywhere within the active HQ's command radius (7.4). If the OP successfully observes the defending hex, the attacker may use on-call artillery fire (10.4). The artillery unit's final fire value (10.3) is added to the attacker's combat value.
D. Defensive Artillery: The defender may place one OP belonging to the same division as any defending unit anywhere within that unit's command radius. If the OP successfully observes any hex occupied by an attacking unit, the defender may use defensive artillery fire (10.5). The artillery unit's final fire value is added to the defender's combat value.
E. Combat Results Table: Compare both sides' final combat values and find the ratio: attacker to defender. Round down the ratio (in favor of the defender) to one of the ratios on the Combat Results Table (CRT). Determine the DRMs (9.4). Then the attacker rolls one die, applies relevant DRMs, and cross-references the modified roll with the ratio in the proper terrain line of the CRT (9.2.1) to locate the combat result. Apply the result immediately.
9.2.1 Terrain and the CRT
A. The defender's terrain determines which line on the CRT to use.
B. Find the line which corresponds to the terrain in the defender's hex.
C. If more than one defending hex is involved, use the line which is favorable to the defender (the line closest to the top).
9.2.2 Combat Results
All combat results consist of a letter (A or D) followed by a number (1-7). Results with the letter A apply to the attacker; results with the letter D apply to the defender. The number indicates the number of steps lost by that side. That player must remove losses immediately.
9.2.3 Steps
Units consist of the following numbers of steps:
A. A battalion on its front side consists of two steps. All battalions begin the game on this side. When a full-strength battalion loses a single step, it is flipped over to its reverse side. If a full-strength battalion takes two step losses, it is removed from play.
B. A battalion on its reverse side consists of one step. If it takes one step loss, it is removed from play.
C. Companies, assets, and US recon units consist of one step. When any of these units takes one step loss, it is removed from play.
9.2.4 Applying Step Losses
A. Step losses must be taken first by infantry units. If all such units are eliminated, any remaining losses must be satisfied by eliminating assets.
B. Recon units (if any are participating) take losses only after all infantry and assets in the hex have been eliminated.
C. If there are not enough steps among all the affected units to satisfy the combat result, all the units are eliminated and any excess losses are ignored.
9.2.5 HQ Units
HQ units can never be eliminated in combat. If all other units in its stack are eliminated, the HQ remains in the hex.
9.2.6 Retreats and Advances
A. There are no retreats after combat. However, if an attack eliminates all the infantry and recon units in a defending hex, the attacking unit may advance into the vacated hex immediately, without expenditure of movement or TAPs.
B. Assets in the defending hex are placed in the Asset Holding box before the advance occurs (5.3).
C. Defending units may never advance.
9.2.7 Eliminated Units
A. Eliminated units are placed aside and may not be used for the remainder of the game. Exception: Substitute companies (12.2.3).
B. If all an HQ's subordinate unit(s) have been eliminated, the HQ is removed from the DD and may not be activated again.
9.2.8 Odds Above or Below Listed
If the combat ratio is greater or less than those listed on the CRT, use the highest or lowest column respectively.
9.3 Assignment of Assets
A. During combat, both players may assign assets to their units. Simply take the asset from the Divisional Asset box, placing it directly underneath the unit to which it is assigned.
B. In each combat the attacker may assign up to five assets to a unit, up to the limits stated in 9.3.1.
C. After the attacker has allocated assets (if any), the defender may allocate up to one major and one minor asset. The defender can allocate no more than one major and one minor asset, no matter how many units are defending.
9.3.1 Limits
A. Assignment is subject to the following limits:
- A single battalion may have no more than three major assets, one engineer asset, and two minor assets assigned to it (stacked with it) at a time.
- A single company may have no more than one major asset, one engineer asset, and two minor assets assigned to it at a time.
- The total number of assets assigned to all three companies of a single battalion may never exceed the battalion limit.
Example: You could not assign two major assets to each of two companies of the same battalion, because that would be a total of four.
B. Subject to these limits, a unit that already has assets may be assigned additional assets. A unit can be assigned assets each time it attacks (up to the limits stated above).
9.3.2 LOC Requirements
A. A defending unit can be assigned new assets only if it can trace an LOC at that instant.
B. An attacking unit can be assigned new assets only if its HQ can trace an LOC at that instant.
C. If a unit's LOC is cut off, any assets it already has may continue to move and fight with it; it may not be assigned new ones.
9.3.3 Assignment Requirements
A. Each asset may be assigned to only one unit; it is placed directly underneath that unit. When companies are stacked together, the players must be careful to show exactly which assets are assigned to which company.
B. An asset can be assigned only to units of its own division.
C. Assets cannot be assigned to recon units.
D. Only infantry units can be assigned assets.
E. Only assets on their front sides in the Divisional Asset box can be assigned. Those on the To Division side, or in the Asset Holding box, or currently assigned to another unit cannot be assigned.
F. Assignment takes place only at the time of combat.
G. Assets which already are assigned to an attacking unit at the time of combat cannot be withheld from the combat.
9.4 Combat DRMs
The combat roll may be modified for the following:
A. Attacker armor superiority
B. Engineer assets
C. Defending armor
D. Deliberate or Intensive attacks
E. Pinned or disrupted status
F. Entrenchments
9.4.1 Armor Superiority
A. If the attacking unit has assets with armor values of 1 or more, the players must go through this procedure to determine the armor differential in the combat.
B. Armor Differential Determination Procedure
- The attacker sums the armor values of all assets assigned to the attacking unit.
- The attacker rolls a die and adds the result to the sum of the armor values.
- The defender sums the anti-tank values of all defending units, including assets.
- The defender rolls a die and adds this roll to the sum of the anti-tank values.
- Subtract the defender's sum obtained in step 4 from the attacker's sum obtained in step 2. The result is the armor differential.
C. If the armor differential is +2 or greater, the attacker has achieved armor superiority. Multiply the armor differential by one-half (dropping fractions), applying that number as a DRM.
D. If the armor differential is between -2 and +1 (inclusive) armor superiority is not achieved. There is no DRM and the assets take no losses.
E. If the armor differential is between -3 and -6 (inclusive), armor superiority is not achieved and the attacker does not receive a DRM. Moreover, the attacker must immediately eliminate a single asset (attacker's choice) that has a positive armor value.
F. If the armor differential is -7 or worse, armor superiority is not achieved and the attacker must immediately eliminate two assets (attacker's choice) that have positive armor values. If the attacker has only one such asset, that one is lost, with no further effect.
G. The Armor Superiority Chart, found beside the CRT, summarizes these rules.
9.4.2 Engineer Assets
If the attacking unit has an engineer asset, the attacker applies a +1 DRM. Engineers give no benefit to defenders.
9.4.3 Defending Armor
A. If after each side has assigned assets the defender possesses one or more major assets having a positive armor value, and the attacker possesses no such asset, then the attacker applies a -1 DRM. The defender can get this benefit only if the attacker possesses no asset having a positive armor value. The attacker never applies a DRM other than -1, no matter how much armor the defender has.
B. The defender does not get this benefit when the attacker loses all its assets during the armor superiority procedure, only if the attacking units had no such assets.
9.4.4 Other DRMs
The following DRMs also apply:
| DRM | Condition |
|---|---|
| +1 | Deliberate Attack |
| +2 | Intensive Attacks |
| +2 | Any defender is pinned.* |
| +3 | Any defender is disrupted.* |
| -1 | Any defender is in an Improved Position.** |
| -2 | Any defender is in a Strongpoint.** |
* If one defending unit is pinned and another disrupted, apply a +3 DRM (as though all were disrupted).
** If one defending unit is in an Improved Position and another is in a Strongpoint, apply a -2 DRM (as though all were in a strongpoint).
9.4.5 DRM Limits
All DRMs are cumulative. However, the roll may never be modified by more than +5 or -2. Ignore excess modifiers in either direction.
9.5 Example of Combat Resolution
A. US battalion 1/115 (combat value 11) is making an Intensive attack against German company 1/8 (combat value 2, antitank value 2). The German unit is in a village hex and underneath a strongpoint marker. It is also pinned. Neither unit currently has any assets. The US decides to assign three M4 major assets and one engineer asset from the 29th Division to 1/115. The German assigns a single 75mm anti-tank asset (anti-tank value 5) from the 3rd FJ Division to 1/8. Assume that neither player has any available artillery, so on-call and defensive fire are not used. The final combat ratio is then 11-2, or 5-1 when rounded down.
B. The US has assets with armor values, and so the armor differential must be determined. Each M4 has armor value 5; their combined total is 15. The combined anti-tank value of the German units is 7. The US rolls a 3 and the German rolls a 5. The US sum is then 18 and the German sum is 12, for an armor differential of 6. Since 6 is a positive number, the US multiplies it by one-half, yielding 3, so receives a +3 DRM.
C. Additionally the US receives a +1 DRM for the engineer asset, a +2 DRM for the Intensive attack, and a +2 DRM because the German unit is pinned. The US must apply a -2 DRM because the German unit is in a strongpoint. Thus, the sum of all applicable DRMs is +6 (3 + 1 + 2 + 2 - 2 = 6). But the maximum DRM allowed is +5, so a +5 DRM will be applied. The US rolls a 1, modified to 6. Consulting the CRT and cross-referencing 6 with the 5-1 ratio on the village line since 1/8 is in a village, yields a result of D1.
D. The German immediately loses one step. Step losses must be removed from infantry units first, and so 1/8 is eliminated. The anti-tank asset is then alone in the hex and is therefore immediately placed in the Asset Holding box. (On the following turn, it will be reassigned to the 3rd Fallschirmjäger Divisional Asset box, on its To Division side.) Thus the defender's hex has now been vacated and the 1/115 unit (along with its assigned assets) may advance into this hex.
10.0 Artillery in Combat
A. Artillery units may make five different types of fires in St. Lô: barrage, on-call, defensive, interdiction, and counter-battery. Two of these, on-call fire and defensive fire, are made in direct support of combat.
B. Each of an artillery unit's three values is used only in specific types of fire. The Artillery Summary indicates which value is used for each type of fire. Players will find it helpful to refer to the Artillery Summary while reading the following rules and also during play.
C. Except for interdiction fire, which occurs just once per turn in the Initiative Phase, an artillery unit can perform the same type of fire more than once per turn.
15 July, 1420 hrs
Gen. Gerhardt: The 175th plans an artillery concentration opposite and south of their forward elements. We are not going to call off this mission or withdraw your patrols.
Lt. Strickland: My last report says they were there at 548630 — nobody near the place where we are going to put this thing.
Design Note: German officers were quick to decry American infantry tactics in the Second World War, criticizing in particular the American infantry's reliance on artillery. American tacticians responded that this reliance was intentional given the US Army's abundance of excellent artillery ordnance. In addition, many American officers were the first to admit that their hastily raised and inadequately trained army was incapable of tactical subtleties on the battlefield, so dependence on supporting arms was a necessity.
The proper use of artillery in the game should become evident after a little experience. An attack on a strong, entrenched enemy can succeed only if preceded by barrage fire to pin or disrupt the enemy, and aided directly by on-call fire. It will also become clear that both players must be selective in their use of artillery; both sides (particularly the Germans) were suffering from acute ammunition shortages at this stage of the Normandy campaign. This is simulated by the limited number of fire missions available each turn.
10.1 Fire Missions
Each time an artillery unit fires, it uses a number of fire missions. The Artillery Displays have a track for each artillery unit. Each unit's designation is printed at the head of its track. The number of boxes in a unit's track is the number of fire missions it receives each turn. When setting up the game, place each artillery unit in the 0 box of its track. During play, move each unit along its track to indicate the number of fire missions it has expended. (The unit functions as a marker.)
10.1.1 Mission Limit
When a unit has used all its fire missions during a turn (reached the last box of its track), it may not fire for the remainder of that turn.
10.1.2 Resetting During Artillery Rally Phase
During the Artillery Rally Phase, return all artillery units to the 0 fire mission boxes of their tracks. Thus, artillery units can expend their full allowances of fire missions each turn.
10.2 Normal, Rapid, and Maximum Fire
Each time an artillery unit fires, the owner must state the intensity of the fire: normal, rapid, or maximum. A unit can fire at a particular intensity only if it can expend the required number of missions.
10.2.1 Fire Intensities
There are three fire intensities:
- Normal fire uses the printed value of the artillery unit and expends one fire mission.
- Rapid fire uses twice the printed value of the artillery unit and expends two fire missions.
- Maximum fire uses three times the printed value of the artillery unit and expends three fire missions.
10.2.2 Defensive Fire Restrictions
Defensive fire may be only normal; rapid or maximum fire cannot be used. For any of the other four missions, any intensity is allowed.
10.2.3 Multiple Firing Units
Different artillery units may declare different intensities of fire even if firing at the same target. A player declares the intensity of each unit's fire individually.
10.2.4 Example of Fire Missions
The US artillery unit 110/115 (support value 2, defensive value 1, long-range value 1) has six fire missions. The US uses this unit for interdiction fire, declaring maximum fire. Thus, the long-range value is multiplied by 3 (yielding a value of 3) and the unit expends three fire missions. Next, the US uses the unit in barrage fire, declaring rapid fire. Thus, the support value is multiplied by 2 (yielding a value of 4) and the unit expends two fire mission boxes. Finally, the US uses the unit for defensive fire. This fire must be of normal intensity, and the artillery unit has only one fire mission left anyway. The unit fires with its printed defensive value and expends its last fire mission.
10.3 The Final Fire Value
When an artillery unit fires, the owner must calculate its final fire value, as follows:
A. Determine the proper value to be used in the fire (support, defensive, or long-range). This can be found on the Artillery Summary.
B. Multiply the printed value by the intensity of the fire: 1, 2, or 3 (normal, rapid, or maximum, respectively).
C. If this is barrage, on-call, or defensive fire, multiply the value in step B by the observation value (OV, 11.3.7). There is no modification for observation in interdiction or counter-battery fire.
10.3.1 OP Limits
You may use only one OP for each fire, giving just one multiplier for observation.
10.3.2 Example of Final Fire Value
The US artillery unit 110/115 (support value 2) is participating in barrage fire. The US declares maximum fire for the unit. The 29th Division OP successfully observes the target hex with an OV of 4. Thus, 110/115th's final fire value is 24: 2 x 3 (for maximum fire) x 4 (for OV 4).
10.4 On-Call Fire
Artillery units bearing a numeric regimental designation may use on-call fire to support attacking units. The attacking unit must have the same regimental designation as the artillery unit. On-call fire is an integral part of the combat procedure; it is not a distinct operation or tactical action. On-call fire is performed by the attacker as follows:
A. Place the active HQ's divisional OP anywhere within the HQ's command radius. This OP must successfully observe (11.3) the defender's hex. (If there is more than one defender, the OP may observe any one defending hex.) On-call fire may be used only if observation is successful. If observation is successful, calculate the OV (11.3.7). The OP remains on the map until the combat has been resolved.
B. If observation is successful, select one artillery unit. The artillery unit must bear the same regimental designation as the active HQ.
C. Declare the fire to be normal, rapid, or maximum, and expend the proper number of fire missions.
D. Calculate the artillery unit's final fire value (10.3) and add the strength of the attacking unit.
E. An artillery unit uses its support value for on-call fire.
10.4.1 Non-Regimental Artillery
An artillery unit which bears no numeric regimental designation cannot conduct on-call fire. Only an artillery unit which bears the same regimental designation as the active HQ may conduct on-call fire.
10.4.2 Terrain Effects
Except for observation purposes, terrain does not affect on-call fire.
10.4.3 Example of On-Call Fire
The US artillery unit 110/115 (support value 2) is conducting on-call fire in support of an attacking US battalion, 1/115. The US places the 29th Division OP on the map; the OP achieves an OV of 2 against the defending hex. The US declares rapid fire. The final value is 8: 2 (support value) x 2 (OV) x 2 (rapid fire). 8 is added to the strength of the attacking unit.
10.5 Defensive Fire
Defensive fire is used to support combat units when they are being attacked. One artillery unit may add its final fire value to the combat value of one defending unit that has the same regimental designation. Defensive fire is an integral part of the combat procedure; it is not a distinct operation or tactical action. The procedure and restrictions are the same as for on-call fire except as noted below.
10.5.1 Intensity
Defensive fire must be of normal intensity, expending only one fire mission; it may never be rapid or maximum. Use the artillery unit's defensive fire value.
10.5.2 Observation Points
A. An OP of the same division as any one defending unit conducts observation. The OP may be placed anywhere within that unit's command radius.
B. The OP may not be placed adjacent to the hex the attacker's OP occupies unless that hex is occupied by one of the defender's units.
C. The OP may never be placed in the same hex as the attacker's OP.
10.5.3 Regimental Designation Requirement
A defensive-firing artillery unit must have the same regimental designation as one of the defending units. The artillery unit must also belong to the division whose OP did the observation.
10.5.4 Example of Defensive Fire
A US company (combat value 3) with the designation 1/115 is under attack. The US decides to use defensive fire and places the 29th Division OP on the map. This OP achieves observation of value 1 against the hex occupied by the attacking German unit. The US uses the 110/115 artillery unit for the fire. (This is the only artillery unit that has the same regimental designation, 115, as the defending company.) 110/115 has defensive value 1. The fire must be of normal intensity, as rapid or maximum fire is not allowed in defensive fire. Thus, the final fire value of 110/115 will be 1. This is added to the 1/115 company's combat value to produce a total combat value of 4.
11.0 Observation
To use on-call, defensive, or barrage fire, players must observe the target hex.
11 July, 1821 hrs
Gen. Gerhard: Can you see St. Lô from Hill 192?
Col. Witte (29th Division G-3): No, I don't think so.
Design Note: An important design objective in St. Lô was to simulate the critical effect of observation on infantry tactics during the Second World War. Particularly in the US Army, artillery was the linchpin of successful operations. Any enemy position which could be observed and was within range could be hit hard by artillery within minutes. Moreover, sophisticated communications, particularly American radios, allowed this fire to be adjusted quickly as the situation demanded. Shooting at targets without observation (firing by the map, in artillery parlance) was generally an unprofitable tactic, except for missions against specific road junctions behind enemy lines or against suspected command facilities.
Observation was particularly important in Normandy because the ubiquitous hedgerows prevented most front-line infantry from seeing beyond about 50 yards in any direction. Any hill of moderate elevation usually gave a significant advantage to the controlling side. Control of hills 192 and 122 proved to be critical in the battle for St. Lô.
11.1 Observation Posts
To attempt observation, players place OPs on the map. Only OPs can observe. The artillery fire and air strike procedures specify exactly when to place OPs.
11.1.1 Placement
A. OPs are placed within the command radius of either an active HQ (for on-call fire) or unit (for defensive or barrage fire). When placing them, remember that a command radius cannot extend into an enemy-controlled hex unless that hex is friendly-occupied, and can never extend into an enemy-occupied hex.
B. An OP may even be placed within the command radius of a pinned or disrupted unit. It also does not matter if a unit is cut off from other friendly troops when placing an OP.
C. A player may place only one OP on the map per artillery fire.
11.1.2 Restrictions
OPs never participate in combat and may never be eliminated. An OP placed on the map for barrage fire or an air strike remains on the map only until that fire/strike has been resolved, and then is returned to the DD. An OP placed on the map for on-call or defensive fire remains on the map until the combat has been resolved. As soon as the die has been rolled, but before losses are removed or advances take place, the OPs are returned to the DD.
11.2 Levels
The map is divided into 14 levels of terrain. Each hex possesses one and only one level. Each level is portrayed by a color or color combination.
11.2.1 In General
A. Odd-numbered levels consist of a single color only. Even-numbered levels consist of a combination of the colors of the next-lowest and next-highest levels. Thus, each even-numbered level is a one-hex-wide strip separating two odd-numbered levels.
B. In St. Lô, unlike most games, each solid color represents an altitude two levels up from the previous solid color, not just one level up.
11.2.2 Steeples
When an OP occupies a hex containing a steeple symbol, that hex is considered to be one level higher than its normal level. (An OP in hex 5613 is considered to be at level 15, even though there is no level 15 on the map.) For all other purposes, a steeple hex is considered to be its normal level.
11.2.3 The Cathedral
Hex 2725 is considered level 7 when observing from it. For all other purposes, it is considered to be its normal level.
11.3 Successful Observation
Successful observation occurs when an OP is able to observe the target hex (and therefore, fire can occur). After placing an OP on the map, point to the enemy-occupied hex that you wish to observe.
11.3.1 Target Within Two Hexes
A. Observation is automatically successful if the target hex is one or two hexes away from the OP, regardless of intervening terrain or line of sight.
Example: An OP in hex 2918 can observe a unit in hex 2916.
B. Observation is impossible if the target hex is more than 12 hexes away from the OP.
Design Note: At a distance of two hexes or less, it is assumed that the observers are operating in their parent unit's ZOC, observing from such a close range that obstructions are negligible.
11.3.2 Target 3-12 Hexes Away: Determining Line of Sight
A. If the target hex is from 3-12 hexes (inclusive) from the OP, use a straightedge to connect the center of the OP's hex with the center of the target hex. The line of hexes through which the straightedge runs is called the line of sight (LOS).
B. If the LOS passes directly along a hexside between two hexes with different levels or characteristics, the player attempting observation may choose which of the two hexes the LOS will be considered to pass through.
11.3.3 Successful Observation 3-12 Hexes Away
At 3-12 hexes, observation is successful if these conditions are satisfied:
- The OP is at least two levels higher than the target hex, and
- The LOS does not pass through blocking terrain.
11.3.4 Blocking Terrain
Blocking terrain is:
A. Any hex of higher level than the OP.
B. Any woods hex. (Woods in the target hex itself do not block.)
C. A hex adjacent to the target and at a higher level than the target hex.
Exceptions: Where Higher Adjacent Hex Does Not Block (11.3.5).
11.3.5 Where Higher Adjacent Hex Does Not Block
There are three cases in which a higher adjacent hex (the third case above) does not block the LOS:
- If the OP is only one or two hexes away from the target hex (11.3.1).
- If the OP is exactly three hexes away from the target hex and is three or more levels higher than the target hex.
- If the OP is exactly four hexes away from the target hex and is four or more levels higher.
Design Note: Notice that the OP must be two or more levels higher than the target, not just one level higher. The reason for this requirement is that the whole area of the map is covered with hedgerows. An observer needed to be two levels higher to see over those obstacles. The woods on the map are substantially higher than any of the elevations, high enough to block vision between any two points. If an OP were very high above someone at very short range, it could see over any ground not higher than itself. The exceptions cover such situations. Observation is not necessarily mutual, the enemy may be able to observe you without you being able to observe him.
11.3.6 Buildings and Units
A. The various buildings on the map do not block observation. These include towns, steeples, and villages.
B. Units do not block observation either.
11.3.7 Observation Values
A. Successful observation is assigned a numerical OV from 1-4. The higher the value, the more dominating the observation; the OV affects the final fire value (10.3).
B. OVs are awarded in the following manner.
| OV | Condition |
|---|---|
| 4 | The OP is four or more levels above the target hex. |
| 3 | The OP is three levels above the target hex. |
| 2 | The OP is two levels above the target hex. |
| 1 | The OP is less than two levels above the target hex. This occurs only if the OP is one or two hexes from the observed hex. At greater ranges the OP must be at least two levels higher for observation to succeed in any event. |
C. Remember to add one to the terrain level of the OP's hex if the hex contains a steeple.
12.0 Reorganization
The Reorganization Action is used to buildup three companies into a battalion, or breakdown a battalion unit into three companies. Buildup and breakdown can be accomplished only through the Reorganization Action. A battalion can breakdown and buildup any number of times during the game.
18 July, 1306 hrs
Col. Witte: How about getting a company of Johns' for Task Force C?
Col. Ednie (Commander, 115th Infantry): O.K.
Col. Witte: Will pick them up on the road at 1430.
Design Note: A battalion is a far more powerful unit than the sum of its subordinate companies, not so much in its numerical combat value as in its ability to attack as an integral whole. Companies are extremely inefficient in the attack. However, a battalion-size unit does possess fewer steps (two) than its three component companies (three). The battalion simulates a relatively dense formation, and therefore would take loss at a higher rate than a company in a dispersed, defensive deployment.
12.1 Buildup
Companies may be reorganized into battalions through buildup. Companies can combine only with companies that have the same designation. They are then replaced on the map by the battalion with the same designation.
12.1.1 Conditions to Perform Buildup
A. An active HQ may perform buildup only if:
- At least two of its subordinate companies are on the map, and
- All its companies on the map are within the active HQ's command radius.
B. Buildup Procedure
- The active HQ expends 1 TAP.
- All companies bearing the HQ's designation are removed from the map and placed in the HQ's box on the DD.
- The active HQ's battalion is placed on the map with the HQ; it is taken from the DD and placed on the map in the same hex as the active HQ.
12.1.2 Unit Strength
A. The strength of the newly built battalion varies with the number of companies which combined to form it.
B. If three companies were combined, place the battalion on its full-strength side.
C. If two companies were combined, place the battalion on its reduced-strength side.
12.1.3 Assets
Assets assigned to the companies that were removed from the map are automatically assigned to (and placed underneath) the new battalion unit.
12.2 Breakdown
A. A full-strength battalion unit may be reorganized into three companies through breakdown. A battalion may be broken down only if it is at full strength; a battalion which has lost a step may not breakdown.
B. Breakdown Procedure
- The active HQ expends 1 TAP.
- The HQ's battalion is removed from the map and placed in the HQ's box on the DD. Unlike buildup, it is not necessary for the battalion to be within the HQ's command radius.
- Three company units are placed in the hex (12.2.1) just vacated by the battalion.
12.2.1 Replacement Companies
A. If the counter mix includes three companies with the same designation as the broken-down battalion, then the battalion is replaced by those three companies. Otherwise it is replaced by three substitute companies from its division's Substitute Company Holding box.
B. Except for breakdown of US 2nd Division battalions, the companies must be from the same division as the broken-down battalion. The US 2nd Division does not have its own substitute companies, but its battalions may breakdown using 29th Division companies.
C. The number of substitute companies provided with the game is intended as a limitation. If no companies are available, a battalion may not breakdown.
12.2.2 Battalion Designation
When substitute companies are placed on the map they are considered to have the same designation as the battalion they replace. To indicate this, write down the numerical codes of the three companies on a piece of paper (or record in electronic format). Next to these codes, indicate the battalion/regiment designation they have just assumed. It is vital that a record be kept of each substitute company's designation.
12.2.3 Reuse of Substitute Companies
The same substitute company can be used for breakdown of any number of different battalions during the game. The company takes on the new battalion designation in each case. An eliminated substitute company can be used again for breakdown. (This is the only case in which an eliminated counter ever comes back into play.)
12.2.4 Restrictions
Companies with printed battalion/regiment designations may not be used for the breakdown of any other battalion.
12.2.5 Asset Assignment
Any assets assigned to a battalion which breaks down are immediately assigned to the companies in any way the owner desires subject to the limit of one major asset, two minor assets, and one engineer asset per company (9.3.1).
13.0 Entrenchments
A. There are two types of entrenchments: Improved Positions and Strongpoints. Each player may construct entrenchments using the Entrenching Action. Strongpoints are constructed by upgrading Improved Positions. The German also has permanent entrenchments printed on the map.
B. The benefits of entrenchments always apply to all units in the hex. There is no distinction between being inside and outside entrenchments.
13 July, 1412 hrs
Maj. Swensen (29th Division Air Operations Officer): Flight returned and reported that they sighted what appeared to be a Strongpoint of houses at 528640. Called for a medium battalion to put a concentration on it and the effect was very good.
Design Note: Entrenchments represent prepared defensive positions making use of trenches, dugouts, barbed wire, and mines. Entrenchments were especially significant in Normandy because they adapted so readily to the bocage. In fact, it should be noted that every hex on the map is in effect an entrenchment. And hence the CRT has been heavily weighted in favor of the defender. Hedgerows were much more than simple rows of trees and bushes. They were earthen banks, sometimes eight feet high and six feet across, that even the heaviest tanks could not penetrate without special equipment.
13.1 The Entrenching Action
An active HQ may choose the Entrenching Action if that is the first and only action the HQ initiates while on the map; Entrenching uses all of an HQ's TAPs.
13.1.1 In General
A. When an active HQ initiates an Entrenching Action, entrenchments are constructed in each hex that is within the HQ's command radius and occupied by an infantry unit subordinate to the HQ.
B. If the hex already contains an Improved Position marker, flip the marker over to the Strongpoint side. Strongpoints are constructed only in this way, by upgrading from Improved Positions.
C. If the hex contains no entrenchments, place a single Improved Position marker in the hex. Exception: German construction in permanent Improved Positions (13.1.3).
13.1.2 Restrictions
Only one entrenchment marker may occupy a hex at a time.
13.1.3 Permanent Improved Position
A. The German may construct a Strongpoint in a permanent Improved Position hex (13.2) using one Entrenching Action, just as if the hex contained an Improved Position marker.
B. The US may not use German permanent entrenchments, but may construct entrenchments in permanent entrenchment hexes the same as in any normal hexes.
13.1.4 Multiple Entrenchment Operations in Same Turn
An active HQ may place an Improved Position marker in a hex during one Operations Phase, and, in a later phase of the same turn, use a second Entrenching Action to convert the Improved Position into a Strongpoint.
13.1.5 Other Requirements
A. If a hex with an entrenchment marker contains no infantry battalion or companies at the end of a tactical action or Operations Phase, remove the marker from the map. A recon unit or HQ does not suffice to keep an entrenchment on the map.
B. Entrenchments may not be moved.
13.1.6 Infantry Requirement
Both battalions and companies can build entrenchments. The rules are the same for both.
13.1.7 Countermix
If you need more entrenchment markers than are provided with the game, make your own.
13.2 Permanent Entrenchments
Many Improved Position and Strongpoint hexes are printed on the map.
13.2.1 Benefits
A. Only German units benefit from permanent entrenchments; US units receive no benefits.
B. The benefits for German units are the same as for Improved Position/Strongpoint markers.
Design Note: Many of the hexes we have classified as improved positions had fortifications as extensive as those represented by a strongpoint marker. But most of the front had stabilized for some days prior to the battle and the American troops had a good idea of where these resistance nests were located. As a result, they could deal with them using special equipment (such as hedge-cutting bulldozers) issued for just this purpose.
13.2.2 Permanence
Permanent entrenchments are never eliminated, even if left unoccupied or if US units enter them. There is no way for the US to destroy permanent entrenchments.
14.0 Barrage Fire
13 July, 1335 hrs
Col. Reed (Commander, 175th Infantry): Request platoon of engineers with bulldozers to cut new road for 400 yards. Present road under observation and is drawing enemy fire.
Design Note: Barrage fire was essentially an artillery attack without infantry. Unless it was extremely heavy, barrage fire generally did not inflict serious losses. Instead, it reduced the enemy's cohesion and made him vulnerable to subsequent infantry attack. However, barrage fire using commanding observation could be a deadly weapon in itself. In the actual battle, the 116th Infantry advanced down the south side of the Martinville Ridge purposefully to avoid German observation from Hill 122. Despite this precaution, the battalion received heavy German artillery fire, directed by observers on the heights to the south around the villages of La Capelle and Bure. This fire inflicted severe casualties on all three battalions of the 116th, so severe that they were barely capable of determined offensive action for the rest of the battle.
14.1 Barrage Fire Procedure
A. Artillery units use the Barrage Fire operation to attack by themselves, instead supporting infantry units. Each barrage fire is performed against a single enemy-occupied hex.
B. Barrage Fire Procedure
- Place a single OP within the command radius of any unit belonging to the same division as the OP. The OP must successfully observe the target hex. If it cannot, barrage fire cannot take place. If the OP does observe the target hex, compute the OV (11.3.7).
- State which artillery units will fire. Only corps artillery and artillery of the same division as the OP may fire.
- State the intensity of each artillery unit's fire, compute final fire values, and add them into a single sum.
- A unit uses its support value for barrage fire.
- Consult the Barrage Table and locate the column corresponding to the sum of the firing units' final fire values. Roll one die, applying DRMs for Improved Positions (-1) or Strongpoints (-2) in the target hex. Cross-reference the roll with the column obtained above to obtain the result.
14.1.1 Barrage Fire Results
The possible results are:
| Result | Explanation |
|---|---|
| N | No Effect: The fire is unsuccessful and nothing further occurs. |
| P | Pinned: Place a Pin marker in the target hex. If the hex already contains a Pin marker, replace it with a Disruption marker. |
| D | Disrupted: Place a Disruption marker in the target hex. |
| DL | Disrupted/Loss: Place a Disruption marker in the target hex. The units in the hex suffer a step loss (14.1.2). |
14.1.2 Applying Step Losses
If a hex suffers a DL result, one unit in the hex must lose one step. This step loss must be taken by an infantry unit (of the owner's choice) if possible. If no infantry units are in the hex, the loss must be taken by a recon unit (of the owner's choice). It may not be taken by assets.
14.1.3 Applying Results to Pinned/Disrupted Hexes
A. If a hex containing a Pin marker suffers a D or DL result, replace the Pin marker with a Disruption marker.
B. There is no additional effect when a hex containing a Disruption marker suffers disruption. However, if it suffers a DL result, the units in the hex must suffer a step loss.
14.1.4 Example of Barrage Fire
Having won initiative in the current Operations Phase, the US declares barrage fire as its operation, indicating the target hex and placing the 29th Division OP on the map within the command radius of the 1/115 battalion. Assume the OP achieves an OV of 4.
A. The US points to the artillery units 110/115 and 111/116 (both 29th Division and each with a support value of 2) and also 793/GS (a corps unit with a support value of 5). The US specifies that each unit will perform maximum fire, multiplying their support values by 3 and expending three fire missions each. Since the OV achieved by the 29th Division's OP is 4, each unit's value is further multiplied by 4. Thus, the final fire values of the 29th division units are both 24 (2 x 3 x 4) and the final fire value of the corps unit is 60 (5 x 3 x 4). The combined final fire value is 108.
B. A final fire value of 108 corresponds to the 100+ column of the Barrage Table. The US rolls a 1. Assuming the target hex contains a Strongpoint marker, there is a -2 DRM, modifying the roll to a -1. The result is P. Place a Pinned marker in the target hex and the fire is over.
Design Note: Players will discover that the divisional GS battalions perform the same missions as corps artillery, but are simply less flexible. In reality, divisional GS battalions could give their divisions heavy fire support much more rapidly than corps artillery. For reasons of simplicity we did not simulate this. Also, the number of battalions in the corps artillery at this battle was the most that the communication nets could sustain; the additional GS battalions simply had to be controlled at the lower (division) level.
14.2 Pinned and Disrupted Status
Pin or Disruption markers may be placed as a result of barrage fire or a US air strike. A marker applies to all units which occupy the hex when the marker is placed or which subsequently end a move in that hex. All the units are said to be pinned or disrupted respectively.
14.2.1 Effects
The effects of pinning and disruption are:
A. A unit that is pinned or disrupted may not participate in any tactical actions except Recovery.
B. When resolving combat, if any defending unit is pinned or disrupted, the attacker receives a DRM (9.4.4).
14.2.2 Subsequent Pin/Disruption
A maximum of one Pin or Disruption marker may occupy a hex at a time. If a hex with a Pin marker suffers either a second pin or a disruption, the Pin marker is converted to Disruption (14.1.1).
14.3 The Recovery Action
14.3.1 Removal
A. Pin or Disruption markers are removed:
- By the Recovery Action, or
- Automatically during the Recovery Phase at the end of each turn. In this phase all Pin and Disruption markers are simply removed from the map.
Design Note: If you can afford to wait until the end of the turn you can remove pinning and disruption markers at no cost, during the Recovery Phase. This simulates reorganization during the night. But often you will need to bring your units back into action earlier. To do that you must use the Recovery Action. This simulates personal action by commanding officers during the day.
B. Recovery Action Procedure
- The active HQ expends 1 TAP.
- Roll one die for each hex within command radius of the active HQ containing a pinned or disrupted subordinate unit. Roll separately for each hex, but just once per hex. Either all subordinate units in the hex succeed, or they all fail.
- If the roll is even, recovery succeeds and the marker is removed from all subordinate units in the hex and attached assets. Recovered units immediately regain their normal capabilities.
- If the roll is odd, recovery fails and the marker(s) remain in place.
14.3.2 Affected Units
A Recovery Action causes Pinned or Disrupted markers to be removed only from units subordinate to the active HQ which initiated the action. Other units are never affected.
14.3.3 HQ Abilities
An active HQ may initiate as many Recovery Actions as it can pay for during a single activation.
14.3.4 Example of Recovery
Three US 1/115 companies occupying different hexes are all pinned. The 1/115 HQ activates with 2 TAPs and is placed on the map underneath one of these companies. The US declares the Recovery Action. (Those companies could do nothing else. Pinned companies can take part in no other action.) Assume that all three companies are within the HQ's command radius, as required. Rolling for each of the three hexes, the US obtains a 2, a 3, and a 5. Thus, the marker is removed from only the first of the three companies, because only that roll was even. For the second and last tactical action, the US declares another Recovery Action and rolls the die once for each of the two remaining hexes with pinned companies, getting a 6 and a 1. Thus, another pin marker is removed, but the third one remains. The HQ has now used up its TAPs and is removed from the map. During the Recovery Phase of the current turn, the last remaining pin marker is automatically removed.
15.0 US Air Strikes
Only the US may perform an Air Strike operation. The weather roll determines the number of air strikes that the US is allowed during that turn.
11 July, 1148 hrs
Col. Witte: Will you get in touch with Ivanhoe and let me know when the air strike will be the best? Both requests are in. Ivanhoe wants it for 1145 and we want it for 1230.
Design Note: The Allies controlled the skies over Normandy, but American tactics for air-ground cooperation were still nascent at the time of the Battle of St. Lô. The infantry's desire for support was constant; the problem was that communication between air and ground elements was inefficient and slow. In suitable weather, air strikes were generally so laboriously preplanned, that the front had often moved by the time the aircraft arrived. And there was always the fear of hitting one's own troops, a problem that had not yet been solved. (It was brought to the attention of the high command when several hundred American troops and a lieutenant general were killed by Allied bombers during Operation COBRA late in July.)
Despite these weaknesses, Allied air power was used to good effect at St. Lô, particularly in a devastating strike by the 506th Fighter-Bomber Squadron at 2100 hours on 17 July. This strike broke up a German counterattack that was threatening to dislodge the 116th Infantry from its tenuous hold on the village of La Madeleine east of St. Lô.
A. Air Strike Procedure
- The US player successfully observes the hex to strike. For this purpose the US may place an OP marker within the command radius of any US infantry unit. The OP's divisional affiliation and the unit's designation are irrelevant.
- Consult the Barrage Table and roll the die, cross-referencing with the Air Strike column. Apply any DRMs for any improved positions (-1) or strongpoints (-2) in the hex.
- The US moves the Air Strike marker one box down on the Air Strike track.
B. P, D, and DL results are read the same as in barrage fire (14.1.1).
C. A US result means that the strike has mistakenly bombed US positions. A single US-occupied hex within two hexes of the target hex immediately suffers a DL result. The original target hex, and all German-occupied hexes, are unaffected.
D. If there is more than one US-occupied hex within two hexes of the target hex, the German chooses which hex will suffer the DL result.
E. If there is no US-occupied hex within two hexes of the target hex, the strike has no effect on either side.
F. OV is not used when making air strikes.
16.0 Interdiction Fire
A. During the Initiative Phase, each player (Germany first) may make one interdiction fire attempt. Exception: On Turn 1, no interdiction fire is allowed.
B. Interdiction fire is neither an operation nor a tactical action.
C. A player is never required to attempt interdiction fire.
13 July, 2237 hrs
Col. Warfield (29th Division Artillery Executive Officer): Since talking with you, Corps Artillery S-3 has been in and we plan to fire not only our own battalions, but corps also. Very heavy harassing fire. We are supplying them targets to fire at. We are trying to break up any developments that may be taking place in front of Lagoon.
Design Note: Interdiction fire simulates harassing artillery missions aimed at suspected enemy HQs, supply depots, observation posts, and road junctions. Interdiction fire was a favorite American technique because US artillery units were more plentifully supplied with ammunition than their German counterparts. They could expend shells liberally even on missions with potentially little payoff. A common technique was to rush captured enemy maps back to cannoneers as fast as possible so that fires could be laid down on enemy positions shown on the maps. The dreaded American Time on Target (TOT) barrage was often employed in this way. Under TOT, all available guns within range, sometimes well over 100 tubes, would synchronize their fire so that all their shells would land on a single enemy position within two or three seconds of one another. Needless to say, the result was horrifying to the enemy troops occupying the target area. The Americans also commonly employed small aircraft, one per artillery battalion, for observation. These planes were small enough to land in a large field. The pilot would fly the aircraft back and forth along the lines while an observer searched for lucrative targets below.
A. Any or all of a player's artillery units may participate in interdiction fire, regardless of divisional or corps affiliation.
B. Interdiction Fire Procedure
- Select artillery units to use and state the intensity of fire for each, expending fire missions.
- Calculate each unit's final fire value and combine the values into a single sum. The artillery unit's long-range value is used for interdiction fire.
- Consult the Long-Range Artillery Table and roll the die. The US, when firing, applies weather DRMs (+1 for cloudy, +2 for clear).
- Cross-reference the roll with the column which corresponds to the sum of the fire values obtained in step B.
- If the result is 1 or 2, the enemy's initiative level immediately is reduced by that amount (but never to less than -2).
- If the result is 0, the fire has no effect.
No interdiction fire is made on Turn 1.
17.0 Recon Units
The US has six recon units. Recon units do not possess parent HQs.
12 July, 1705 hrs
Lt. Jones (CO. 29th Recon Troop): Effective immediately, 29th Cavalry Recon Troop, using one platoon, will protect the right flank of the division and will maintain contact between 35th Division and 115th Infantry.
Design Note: Each US infantry division possessed a reconnaissance troop (company) mounted in jeeps and small armored cars. The troop's function was to patrol gaps on the division's flanks and keep in contact with neighboring units. In the Battle of St. Lô, US recon forces played a significant role in keeping the widely dispersed infantry battalions in touch with one another. And the first American troops to enter St. Lô (on 18 July) belonged to the 29th Recon Troop, under the command of 1st Lt. Edward Tent Peg Jones.
A. Recon units never participate in tactical actions, including any kind of attack, even if stacked with US units which are attacking.
B. A recon unit's combat value is used only for defense.
C. The US may move recon units when an active US HQ has completed its tactical actions (even if no Movement Actions were ordered by the active HQ). All recon units, regardless of divisional affiliation, which are within the active US HQ's command radius may move a distance of 4 MPs. A recon unit may move in this way any number of times per turn.
D. Recon units have 4 MPs and may not perform Strategic Movement; otherwise, recon unit movement is identical to infantry performing Movement Actions.
E. Recon units exert ZOCs the same as infantry units.
F. A recon unit by itself cannot call down Defensive Fire from artillery.
18.0 Reinforcements
10 July, 2322 hrs
S-2 115th Infantry: Two drunken POWs picked up at 527664. They are from 12th Company, 984th Infantry Regiment. They moved from Brest over three weeks ago, straggled behind and were picked up by the 352nd Division. They have been with them for three weeks.
Design Note: Reinforcements are not guaranteed because their arrival depended on variable factors beyond the scope of the game. On the American side, the XIX Corps was attacking just to the west of the Vire simultaneously with the St. Lô assault. In the early stages of the battle, the American reinforcements portrayed in the game were held back by General Corlett (XIX corps commander) in response to the activities of the dreaded Panzer Lehr division west of the Vire. As fears over the use of this powerful division abated, the reinforcements were released for the St. Lô battle. And in fact the 134th Infantry, released from corps reserve on 14 July, played a decisive role in the American victory by capturing Hill 122.
On the German side, kampfgruppen of battered divisions were shuttled back and forth in response to local crises. Allied air power often hindered the movement of these units. Moreover, only a limited number of crossing sites over the Vire could carry vehicles, so German reinforcements coming from the west faced bottlenecks as they approached St. Lô.
18.1 Availability of Reinforcements
A. Availability of reinforcements is determined by a roll during the Reinforcement Phase of each turn.
- The Germans roll each turn; on a 1-4 they receive a reinforcement that turn.
- The US rolls each turn, starting with Turn 4 (July 14). On a 1-3 it receives a reinforcement that turn.
B. The Reinforcement Chart lists the reinforcements available to each side.
18.1.1 German Reinforcements
The Germans must take their groups of reinforcements in the order listed on the Reinforcement Chart. They receive one group on each successful roll.
18.1.2 US Reinforcements
A. The first time the US receives a reinforcement, it receives both the 1/134th and 2/134th battalions, as indicated on the Reinforcement Chart.
B. On the turn immediately following, it does not roll for reinforcements but automatically receives the 3/134th battalion.
C. In each turn after that, the US rolls as usual, and on the next successful roll, receives the 1/175th battalion.
Example: On Turn 4 the US rolls a 4 so receives no reinforcements. On Turn 5, the roll is a 3, so receives the 1/134th and 2/134th. On Turn 6, the US then automatically receives the 3/134th. On Turn 7, the US rolls the die again.
18.1.3 Waiver of Reinforcements
A player cannot voluntarily waive rolling for reinforcements.
18.2 Placement of Reinforcements
Reinforcements are placed on the map or on the displays during the Reinforcement Phase.
18.2.1 Combat Units
A reinforcement combat unit is placed in the hex indicated on the reinforcement list. If that hex is currently occupied by an enemy unit, or by a friendly unit with which the reinforcement cannot legally stack, the reinforcement is delayed. It arrives at the beginning of the first Reinforcement Phase in which it can legally be placed in the hex. After placing a delayed reinforcement a player may roll for a normal reinforcement.
18.2.2 HQ Units
A reinforcement HQ unit is placed on the DD in the HQ box corresponding to its designation.
18.2.3 Artillery Units
A reinforcement artillery unit is placed on its track on the Artillery Display.
18.2.4 Voluntary Delay Prohibited
Reinforcements may not voluntarily be delayed.
19.0 The Headquarters Phase
In the game, the morale of an HQ unit decreases each time you attempt to activate it. After several attempts its morale drops so low that activation is impossible. But by leaving the HQ at rest throughout a turn, you can increase its morale again. It takes a day or two for a tired battalion to recover cohesion. Historically, most of the 29th Division was so exhausted by 14 July (after only four days of battle) that General Gerhardt ordered a virtual division-wide rest. As it turned out, much more time was needed for reorganization, but because of the time pressure to take St. Lô, Gerhardt could give his men no more rest.
16 July, 0525 hrs
Gen. Gerhardt: The only solution to this thing is to have Bingham get everything he can with him, get himself set, and just hang on. The thing is, I'm trying to have ourselves in position to do something tomorrow. If we become involved today, it might spoil things tomorrow.
Design Note: Nightfall was generally a time for units to count their losses, treat their wounded, and prepare for the next day. Food, ammunition, and replacements were usually transferred at night from rear area depots to the front lines. The Germans often made troop movements under the cover of darkness in order to avoid the ever-present Allied fighter-bombers.
A. During the Headquarters Phase examine each HQ on the DDs and perform the following actions.
- If an HQ is currently on its AA side (that is, the owner attempted to activate it some time during the turn), flip it to its Inactive side. Its morale remains unchanged.
- If an HQ is currently on its IA side it remains on that side. Consult the mapsheet. If the subordinate battalion can trace an LOC (7.3) at that moment, the HQ's morale increases by two (but never more than its printed morale value). If the subordinate battalion cannot trace an LOC, the morale remains unchanged.
B. If an HQ's subordinate battalion has broken down to companies, the HQ's morale increases only if all its subordinate companies on the map can trace an LOC. If any cannot, the HQ's morale does not increase.
20.0 Setting Up
10 July, 2050 hrs
Gen. Gerhardt: I think we are pretty well set. Everything's in hand. I talked to Robby and everything's set, ready to go.
Gen. Corlett (Commander, XIX Corps): Good luck to you, fellow.
Gen. Gerhardt: O.K., I'll keep you informed.
Design Note: The starting deployment of the US forces is based on the After Action Reports of the 2nd, 29th, and 35th Divisions, as well as the telephone log of the 29th's war room. Information on the German deployment is less certain. The 352nd Division had become such a hodgepodge of different units that no one will ever be able to determine its exact makeup and strength on 11 July. The composition of the 3rd Fallschirmjäger Division, however, is documented adequately.
A. Each unit that has a four-digit setup number is placed in the hex with that number.
B. Each unit with setup designation DD is placed on the Division Display in its HQ's box. (These are infantry battalions which begin the game broken down into companies. The companies start on the map, and the battalion counter on the display.)
C. Each unit with setup designation R is set aside until it enters play as a reinforcement.
D. Each HQ unit, except those with setup designation R, goes into the box corresponding to its designation on the DD, IA side up.
E. Assets go in the Divisional Asset boxes.
F. Each artillery unit, except those with setup designation R, is placed on its individual track on the Artillery Displays. (Note: The US 216/134 artillery unit is available from the start of the game, even before the infantry of the 134th Regiment has entered play.)
G. Substitute companies are placed in the Substitute Company box of their divisions.
H. The Turn Record marker is placed in the first box of the Turn Record Track. Place the TAP marker in the 0 box of the TAP Track. Place the Weather, Air Strike, and Initiative Level markers on their respective tracks.
- The US initiative level is set at 0.
- The German initiative level is set at -2.
- Initiative levels remain fixed throughout game Turn 1; there is no interdiction fire on the first turn.
I. In case you lose a counter, here are the starting setups. Set-up hex follows unit designation. The notation (C) indicates a company-sized unit. Other abbreviations are as listed in section 2.2.
20.1 US Setup
20.1.1 35th Division
| Hex | Unit | Hex | Unit | Hex | Unit |
|---|---|---|---|---|---|
| DD | 2/320 | 2001 | 2/137 | 2904 | 3/320 |
| 1600 | RCN | 2202 | RCN | 2906 | 2/320(C) |
| 1700 | 1/137 | 2503 | 1/320 | 3108 | RCN |
| 2000 | 3/137 | 2805 | 2/320(C) | 3008 | 2/320(C) |
- Major Asset Box: A/737 (M4), B/737 (M4), C/737 (M4), D/737 (M5), A/654 (M10), B/654 (M10), C/654 (M10)
- Minor Asset Box: AG (M8)
- Engineer Asset Box: 1A/60, 2A/60, 1B/60, 2B/60, 1C/60, 2C/60
20.1.2 29th Division
| Hex | Unit | Hex | Unit | Hex | Unit |
|---|---|---|---|---|---|
| DD | 1/115 | 3710 | 2/115(C) | 4710 | 1/115(C) |
| DD | 2/115 | 3910 | 3/115(C) | 4810 | RCN |
| DD | 3/115 | 4009 | 3/115(C) | 4908 | 1/116 |
| R | 1/175 | 4110 | 3/115(C) | 5010 | 2/116 |
| 3307 |
- Major Asset Box: A/747 (M4), B/747 (M4), C/747 (M4), D/747 (M5), A/821 (M10), B/821 (M10), C/821 (M10), B/803 (M10)
- Minor Asset Box: AG (M8)
- Engineer Asset Box: 1A/121, 2A/121, 1B/121, 2B/121, 1C/121, 2C/121
20.1.3 2nd Division
| Hex | Unit | Hex | Unit | Hex | Unit |
|---|---|---|---|---|---|
| 5409 | 2/38 | 5507 | 3/38 | 5609 | 1/38 |
- Major Asset Box: A/741 (M4), B/741 (M4), C/741 (M4), D/741 (M5)
- Minor Asset Box: AG (M8)
- Engineer Asset Box: 1A/2, 2A/2, 3A/2
20.1.4 Substitute Companies
Nine SUB companies in Substitute Company box.
20.1.5 Artillery
All US artillery units begin the game on the Artillery Display.
20.2 German Setup
20.2.1 3rd Fallschirmjäger Division
| Hex | Unit | Hex | Unit | Hex | Unit |
|---|---|---|---|---|---|
| DD | 1/8 | 3815 | 2/8 | 4812 | 2/9(C) |
| DD | 3/8 | 4012 | 3/8(C) | 5012 | 2/9(C) |
| DD | 2/9 | 4212 | 3/8(C) | 5211 | 2/9(C) |
| DD | 3/9 | 4412 | 1/8(C) | 5216 | 1/9 |
| R |
- Major Asset Box: 1/3AT (75), 2/3AT/75, 3/3AT (SIII)
- Minor Asset Box: AG (JGP), FLAK (88)
- Engineer Asset Box: 1/3E, 2/3E
20.2.2 352nd Division
| Hex | Unit | Hex | Unit | Hex | Unit |
|---|---|---|---|---|---|
| DD | 1/897 | 1607 | 2/897 | 2707 | 1/916 (C) |
| DD | 1/916 | 1702 | 1/897 (C) | 2722 | FUS/915 |
| DD | 1/943 | 2003 | 1/897 (C) | 2809 | 1/916 (C) |
| R | 517/915 | 2107 | 2/914 | 2812 | 2/915 |
| R |
- Major Asset Box: 1/352AT (75), 2/352AT/75, 3/352AT (SIII), 4/352AT (SIII)
- Minor Asset Box: AG (JGP), FLAK (88)
- Engineer Asset Box: 1/352E
20.2.3 Substitute Companies
Twelve SUB companies in Substitute Company box.
20.2.4 Artillery
All German artillery units except 6/894 and 7/985 (reinforcements) begin the game on the Artillery Display.
21.0 Victory Conditions
Only the US earns victory points (VPs). The game lasts eight turns. At the end of the last turn, sum the US VPs to determine the winner. The US earns VPs for occupying certain hexes on the map at the end of the game.
18 July, 1340 hrs
Gen Gerhardt: Captain Putenny, you sure did a masterful job and are going up for promotion; you'll keep that battalion. Where is Howie's body?
Capt. Putenny (Commander, 2nd Battalion, 116th Infantry): On the way down.
Gen. Gerhardt: The performance of that battalion is responsible for us getting that town; be sure and tell the men. Many congratulations.
Design Note: The players' goals in St. Lô are fairly straightforward: the US must capture St. Lô by 18 July and the Germans must prevent this. The significance of St. Lô arose from its place in the upcoming COBRA offensive. In early July, the American 1st Army sector was split right down the middle by the Vire River. This river ran in a north-south direction from south of St. Lô to the sea about ten miles west of Omaha Beach.
Seven major roads met at St. Lô, many of them running parallel to or behind the German lines. 1st Army needed these roads for supply routes and troop movements, so the capture of the town was a prerequisite for the COBRA jump-off. With St. Lô in Allied hands the Germans would be hard pressed to reinforce the sector west of the Vire, the sector in which COBRA was to be launched. XIX Corps therefore was under enormous pressure from SHAEF to capture St. Lô by 18 July. If the Germans can hold out beyond that time, they have succeeded.
21.1 Victory Points
21.1.1 Depot Hexes
A. There are two types of German depot hexes: ordinary and special. Depot hexes 2626, 2727, and 2927 are special; all others are ordinary.
B. The US receives VPs for each depot hex occupied by either a US infantry or recon unit at the end of the game: 1 VP per ordinary depot hex and 2 VPs per special depot hex.
C. In both cases the occupying unit must be able to trace a LOC, as defined in 7.3, to a US depot. If it cannot, no VPs are awarded.
21.1.2 St. Lô Victory Point Area
The US receives 8 VPs if at the end of the game at least one US infantry or recon unit occupies any hex within the St. Lô Victory Point Area and this unit can trace a LOC to a US depot. 8 VPs is the most the US can receive for this accomplishment, even if more than one unit occupies the area.
21.2 Victory Determination
The total number of US VPs determines the winner:
| US VPs | Victory Level |
|---|---|
| ≥ 21 | Decisive US |
| 16-20 | Substantial US |
| 11-15 | Marginal US |
| 8-10 | Marginal German |
| 6-7 | Substantial German |
| ≤ 5 | Decisive German |
22.0 Counter-Battery Fire (Optional)
Counter-Battery Fire is an artillery mission directed against enemy artillery. Counter-Battery Fire is an operation.
13 July, 1521 hrs
Maj. Swenson: Saw ten flashes at four distinct spots at approximately 534608. Fired a medium battalion on it. Adjustments were made and now corps is firing some big stuff on it.
Design Note: The enormous range of Second World War artillery made counter-battery work difficult, for artillery positions could be so far behind the front lines as to be near impossible to spot. American artillery was vastly superior at this role because of air observation, superior sound-flash ranging techniques, excellent weapons, and highly skilled cannoneers. Generally, counter-battery work was the job of heavy corps and army level artillery because of the extended range and superior accuracy of those pieces. The 155mm gun, for example, was one of the most efficient weapons at this task. During the battle, the 110th Field Artillery was unwisely ordered to support infantry at night from a position on the forward slope of a ridge. In the darkness the unit's gun flashes could be pinpointed for miles around. Shortly, the battalion was devastated by a lengthy barrage from well-hidden German 150mm guns, igniting the unit's ammunition piles and killing seven cannoneers.
22.1 Counter-Battery Procedure
Any or all of a player's artillery units, regardless of designation, may participate in a Counter-Battery Fire operation. Simply designate which units will fire and then obtain a number result from the Long-Range Artillery Table, following exactly the same procedure as for Interdiction Fire. An artillery unit uses its long-range value for counter-battery fire. As with interdiction fire, the US applies a weather DRM (+1 for cloudy, +2 for clear).
22.1.1 Results
Results are a number from 0-2.
A. If the result is 0, the fire is unsuccessful and the operation is over.
B. If the result is 1 or 2, that number of enemy artillery units are disorganized.
22.1.2 Applying Results
A. When Counter-Battery Fire results in disorganization, the firing player chooses which units will be disorganized according to the following restrictions.
B. Choose the unit which has expended the greatest number of fire missions, among all the enemy artillery units, in the current turn. If more than one unit meets this criterion, the owner may choose from those.
C. A unit that is already disorganized may not be disorganized again.
Design Note: The units which were firing the most would be the easiest to locate for counter-battery fire, and so we require that these be disorganized first.
D. Flip a disorganized artillery unit to its reverse side.
22.2 Disorganization and Rally
22.2.1 Effects
Disorganized units may not fire.
22.2.2 Reorganization
During the Artillery Rally Phase, the owner rolls a die for each disorganized artillery unit.
A. On a 1-2, the unit rallies. Flip it back to its front side. It regains all its capabilities.
B. On 3-6, the unit remains disorganized.
22.2.3 Subsequent Reorganization Attempts
A player may roll just once per disorganized artillery unit per turn, but may continue to roll turn after turn as long as the unit fails to rally.
23.0 Glossary
Numbers indicate the rules in which terms are explained.
| Term | Explanation |
|---|---|
| Action | Units undertake one of the eight tactical actions when HQs are activated (7.0). |
| Advance | After combat, an attacker can advance into a vacated defending hex (9.2.6). |
| Armor Differential | Players compute the armor differential in combats involving armor assets (9.4.1). |
| Armor Superiority | The attacker can gain armor superiority in combat if he has a positive armor differential (9.4.1). |
| Asset | A type of unit representing support weapons (5.0). |
| Assignment | Placing an asset with a combat unit (9.3). |
| Barrage Fire | An attack by artillery units alone (14.1). |
| Boundary | Certain US units cannot cross the divisional boundaries on the map (8.4). |
| Breakdown | The substitution of three companies for a battalion (12.2). |
| Buildup | The substitution of a battalion for three companies (12.1). |
24.0 Player Notes
24.1 German
A. You must accept that the American assault will push you back. But remember, the American objectives are far behind your initial line, and the victory conditions require only that you hold those objectives for eight days. So you must plan to trade space for time. Back up and build strongpoints. And cause the American as much frustration as you can. The game system offers you a number of subtle ways to do so.
B. Put the maximum possible effort into interdiction fire each turn. A one-point modification to initiative is the most valuable return you can get from your guns. It cuts down the number of moves the US will have that turn.
C. The rest of your artillery is best used in small amounts to pin US units that look like they are ready to attack. The US then will have to waste actions rallying those units before attacking with them. For your part, at any time the US pins one of your units and you then win the next initiative, you should immediately try to rally. If you do rally, the American barrage has been wasted.
D. A careless or overenthusiastic US may leave gaps in while advancing. Be on the alert for a chance to sneak a small unit into the US rear, astride a road. The US then has to delay advancing and waste effort clearing that unit out.
E. A bad mistake is to try to hold your initial line when it is no longer tenable. This will bleed your army to death. Once the US has taken Hill 192 (hex 5613), which usually occurs on the first turn, anything within observation range becomes a target for devastating American artillery fire. You should plan to fall back immediately to a line stretching roughly from 4724 to 4123 to 3815. Along this line you can find a number of hexes which are shielded from enemy observation. This withdrawal may look precipitate, but your new line will hold a lot longer than the first one did. Hexes 4417 and 4418 are good places to leave a small garrison; they are out of sight of Hill 192 and afford you good observation.
F. The other decisive map feature is Hill 122 (hex 2917). You must hold this, literally, for dear life. For the US, the ridge between hex 4012 and hexes 3513/3514 is a critical stepping stone to Hill 122. The Americans will not be able to mount a good attack against Hill 122 as long as you have units entrenched on that ridge. Often you can place a strong garrison here during time when the US is occupied with attacks on either flank.
G. You have only a few assets, so you should be cautious about committing them. You should be especially careful about attaching an asset to a company; on a D2 result, you will lose your asset. Assets are best saved for use in mass against a really critical attack, or when the US desperately needs an armor benefit.
H. You should also be cautious about counterattacks. In the actual battle the Germans suffered very heavily when they tried to counterattack; the same can easily happen in the game. As a rule counterattack only against companies or reduced battalions, and only when you have excellent artillery observation. These conditions can be achieved when the US unsuccessfully attacks a position backed by a hilltop, leaving US units weakened and exposed.
24.2 American
A. Tactically, try to drive deep and fragment the German line. Your artillery, if it has good observation, can be a shockingly deadly weapon against retreating German units. Beware of letting small German units slip behind your lines. Usually, the best attack procedure is first to pin or disrupt the defender with barrage fire, and then to hit them with a deliberate or intensive attack. If you have achieved a high combat ratio, you can save time and also surprise the Germans by omitting the barrage.
B. Efficient use of your assets is very important. You will attach engineer assets to most of your units. You must attach other assets with care. Beware of German anti-tank assets. Your tanks may contribute no modifiers and get themselves killed for nothing. It is best if you can attach assets at the beginning and then leave them attached for most of the game, to avoid having to go through reassignment. This implies that you will not group all your assets with any single battalion. Also, if you distribute your assets fairly evenly among your units, you give the Germans a real problem. They must either spread assets out evenly as well, and face gradual destruction, or else load up on a few units and watch the rest of their forces be destroyed until the few large stacks are isolated.
C. Operationally, you must have a clear picture of your priorities and then use operations as efficiently as possible in line with those priorities. You have only eight days, and a snake eyes roll could end the turn at any time. Each operation must advance your plan.
25.0 Historical Notes
25.1 The Game as History
25.1.1 Turn 1 (11 July)
A. The seizure of Hill 192 was the most important American objective on the first day of the offensive. The 38th Indian Head Division had made limited attempts to capture this dominating height for almost a month because, from its peak, German observers could see as far as Omaha Beach and the Vire valley. After a bitter struggle on the hill's northern slope, the 38th seized the crest and advanced southwards to capture the road junction at La Calvaire.
B. The capture of Hill 192 significantly eased the advance of the 29th Division, for the German defenders of the 9th Fallschirmjäger Regiment were reluctant to hold their positions with American observers staring down at them from the commanding hill. The major effort of the 29th Division was made on the left by the 116th Infantry. Jumping-off about 1,000 yards northwest of the crest of the hill, and advancing on a narrow front, the 29ers made unexpectedly easy progress down the St. Andre de l'Apine-La Calvaire road. By the end of the day, the 2nd Battalion was near Le Mesnil Sigard on the Martinville Ridge and the 1st and 3rd Battalions were slightly behind. The 2nd and 3rd Battalions of the 175th Infantry were committed to the fight and followed closely in the 116th's wake. The 115th Infantry made insignificant progress on this day because of the regiment's extended deployment. More importantly, a vicious German surprise attack against the 1st Battalion in the early morning threw the whole regiment into disarray.
C. Meanwhile on the 29th Division's right, the 35th Santa Fe Division was going into action for the very first time. Along the boundary with the 29th, near the hamlet of La Nicollerie, three battalions of the 320th Infantry attacked westward toward German strongpoints on the Le Carrillon high ground. At the same time, the 137th Infantry attacked southwards down the Vire valley. Both regiments made little progress and at very high cost. In its first day of hedgerow fighting, the 35th Division was harshly introduced to the realities of war against a determined opponent.
25.1.2 Turn 2 (12 July)
A. July 12th was the 29th Division's day of opportunity, for the 116th Infantry had made a decisive breach of the German lines on the 11th; another day's advance of equal aggressiveness would put the regiment into the outskirts of St. Lô. However, the 116th (and the accompanying two battalions of the 175th) were drained. The most this force could accomplish on the 12th was an advance of a few hundred yards down the Martinville Ridge.
B. Meanwhile, the Germans masterfully redeployed their forces. Three full Fallschirmjäger battalions were placed in a line from Les Cauchais south to Martinville and subsequently southeast to La Monnaie. German observation of the 116th's spearheads from the high ground around La Capelle resulted in a fearsome barrage of the American positions, causing considerable casualties and disrupting US command and control.
C. Meanwhile, the 115th Infantry continued to press its attack. This assault was costly and slow: by the end of the day, only the hamlets of La Luzerne and Belle Fontaine had been captured. On the 35th Division front, the 137th and 320th Infantry made virtually no progress. The division's inexperience was beginning to tell; American GIs often became mired in vicious battles for German strongpoints, such as the St. Giles church or a stone farmhouse at La Petite Ferme, which could have been bypassed.
25.1.3 Turn 3 (13 July)
A. July 13th was a day of dismal failure for the 29th Division. The 116th and 175th Infantry around the Martinville Ridge were ordered to shift the axis of their assault to the St. Lô-Bayeux road. However, the Germans enhanced their defense at La Capelle and La Monnaie and increased the severity of their bombardment of the exposed GIs. The 29ers were suffering enormous casualties and were incapable of gaining ground. All of the 175th's communications just got shot to hell, radioed Brig. Gen. Dutch Cota, assistant commander of the 29th, to the Blue and Gray Division's HQ. To the northwest, the 115th Infantry was continuing its unsuccessful assault astride the St. Lô-Isigny road. German resistance was tenacious, and virtually no gains were realized.
B. Meanwhile, the 35th Division continued to bash the German defenders head-on with limited results. Extensive German fortifications were encountered on the Le Carillon nose. The 320th Infantry was virtually at a standstill; the 137th Infantry made a little progress down the Vire valley, attempting to skirt the German strong-points at Le Carillon. The three-day failure of the 35th to achieve a significant breakthrough led General Corlett, the XIX Corps commander, to release the 134th Infantry from corps reserve. The 134th was ordered to proceed to the battle area on the next day and take over the 115th's sector west of the St. Lô-Isigny road. The 115th, after its equally fruitless assault, was to reorganize and redeploy around La Luzerne in order to support the 116th's right flank.
25.1.4 Turn 4 (14 July)
July 14th was a day of rest for the Americans, most of whom were exhausted. However, the 137th Infantry made significant progress attacking down the Vire valley on the 14th, advancing to the St. Lô-Carentan road. From here, the regiment was in good position to outflank the German enclave at Le Carillon.
25.1.5 Turn 5 (15 July)
A. Deciding that the St. Lô-Bayeux road was too tough, Gen. Gerhardt, the 29th's CO, shifted the axis of his assault back to the Martinville Ridge. The objective of the 116th was Martinville, a hamlet on the western slope of the ridge. However, German artillery fire again proved devastating and the attack was stopped. An evening assault by the 2nd Battalion, however, netted significant gains despite a divisional order to stop for the night, an order which never reached Maj. Sidney Bingham, the battalion CO. By nightfall, the 2nd Battalion occupied a position around La Madeleine, only a few hundred yards east of St. Lô.
B. In the 35th Division's sector, the freshly-committed 134th Infantry made excellent progress in its first attack. By the end of the 15th, the 1st Battalion had captured Emelie, a hamlet at the foot of Hill 122, and the 2nd Battalion was fighting for Les Romaines, a few hundred yards to the east. The 137th and 320th continued to probe against Le Carillon and along the Vire valley; the German strongpoints on the Le Carillon high ground were slowly being surrounded.
25.1.6 Turn 6 (16 July)
A. Dawn found the 2nd Battalion, 116th Infantry a lost battalion, about 1,200 yards in front of the nearest Blue and Gray unit. Unfortunately for Gerhardt, his remaining battalions were utterly drained and relief was impossible. Recuperation and planning for the next attack was the order of the day. German fallschirmjägers launched some limited counterattacks along the St. Lô-Bayeaux road, but they were repulsed.
B. The 35th Division concentrated on the capture of Hill 122. This was accomplished shortly after midnight and observers from the Santa Fe could now look directly south into St. Lô. The Germans on the Le Carillon high ground realized their predicament and hastily abandoned their positions, pressed by the 137th and 320th Infantry on the west and east.
25.1.7 Turn 7 (17 July)
A. Early on the 17th, Gerhardt ordered a determined effort to reach the beleaguered 2nd Battalion, 116th. The 3rd Battalion, commanded by Maj. Tom Howie and deployed near La Roulage, was selected for this relief attempt. In a dynamic assault, Howie's men reached their compatriots but suffered grievously. When Gerhardt ordered the two battalions to press on to St. Lô, Howie promptly replied, "Will do." Immediately thereafter, he was killed by a mortar shell. The two battalions were too exhausted to move on; essentially, the Blue and Gray now had two lost battalions.
B. In the 115th's sector, however, there were positive developments. The 2nd Battalion was pulled out of line at Le Cauchais and ordered to move along the 116th's right flank. Upon completing this end run, the battalion found itself beyond La Planche, only a few hundred yards from St. Lô. In Gerhardt's opinion, this battalion was the key to the battle. "Expend the whole battalion if necessary," he ordered.
C. Helped by the abandonment of the Le Carillon strongpoints, the 35th Division made significant advances on the 17th. Along the Vire the 137th Infantry met collapsing resistance and was well on the road to Rampan by day's end. The 134th Infantry consolidated and fortified Hill 122.
25.1.8 Turn 8 (18 July)
A. With St. Lô almost within grasp, Corlett ordered the 29th Division to husband its resources for one final push into the city. As events developed, the 29ers discovered that their hardest fighting was now behind them, for the Germans, too, were at the end of their rope. The final nail in the German coffin was the 35th's capture of Hill 122. American observation from this commanding height could call down massive artillery fire anywhere near the city. Gerhardt realized that the 116th and 175th were too drained to continue operations. Instead, the 115th was assigned the task of taking the city. Gerhardt also organized a special all-motorized task force under the command of Dutch Cota to push on into St. Lô. Labeled Task Force C, this force consisted of tanks, tank destroyers, recon units, engineers and, later, most of the 1st Battalion, 115th Infantry. As the 115th's attack began, the 1st Battalion occupied a position north of St. Lô near the hamlet of Bois Andre; the 2nd Battalion was situated at La Planche; the 3rd Battalion was at Martinville.
B. The 1st Battalion discovered the path of least resistance and joined with the vehicles of Task Force C. This force pushed into the city center by 1900 hours, but was hardly capable of holding the city on its own. However, the retreating Germans were disorganized and could not mount a significant counterattack. "I have the honor to announce to the corps commander that Task Force C of the 29th Division secured the city of St. Lô after 43 days of continuous combat from the beaches to St. Lô," Gerhardt cabled to Corlett. When the Germans finally got around to counterattacking the city, the Americans had a coherent defense. "The infantry may have occupied St. Lô, but the artillery held it," said a 29th Division artillery officer.
C. The German defenses on the 35th Division front collapsed on the 18th. In the Vire valley, the 137th Infantry raced forward against very little opposition to occupy the Vire crossing site at Rampan. The 320th Infantry secured the ground to the west of Hill 122, while the 134th moved into the outskirts of St. Lô from the north. (Corlett denied 35th Division units permission to enter the city for fear of accidentally engaging the 29th.) On the 2nd Division front, the 38th Infantry held a secure defensive position south of the St. Lô-Bayeaux road. Stiffening German opposition and casualties taken by the regiment in its capture of Hill 192 prevented further offensive action on the part of the Indian Head Division.
D. By July 20th, St. Lô was fully secure and the 29th Division was withdrawn from the front for a short period of rest and absorption of replacements. Its position was assumed by the 35th Division and the 113th Cavalry Group. The stage was set for Operation COBRA, which was scheduled to commence in a few days.
25.2 Casualties
A. The battle for Normandy was a titanic struggle that strained the US Army to its limits. From the moment they set foot in Normandy, the Allies suffered losses at an unexpectedly high rate. So much so that the replacement rate, particularly that of the British, could hardly handle the load. With the Germans contesting every inch of ground in the bocage, Allied divisions were thrown into a meat grinder in which 25 percent losses in a few days of combat proved to be the norm. Compounding the problem was an alarming number of battle fatigue cases, over 10,000 in the US Army alone in July. Inadequate US infantry training, and remarkably inefficient procedures for replacement assimilation contributed significantly to this problem. St. Lô was typical of the struggles in the Normandy slugfest. Many historians have compared these battles to Grant's Wilderness/Spotsylvania/Cold Harbor campaign in the spring of 1864.
B. During the battle of St. Lô, the 29th Division suffered 3,706 casualties and the 35th, 2,437. Considering that the two divisions had a combined strength of about 25,000 on July 11th (not counting attached corps units), this represents a loss rate in the eight-day battle of about 25 percent. When one remembers that several other allied divisions were conducting simultaneous offensives of a similar nature, and suffering similar losses, the horror of the bocage battles becomes apparent.
C. Little is known about German losses during the battle of St. Lô. At the close of the struggle, both the 352nd and the 3rd Fallschirmjäger Divisions were skeleton formations. On the day the American offensive opened it is known that 9th FJ Regiment alone suffered 575 casualties: 104 killed, 250 wounded, 197 missing, and 24 captured. This one-day loss is staggering. Allied commanders realized that the Germans could tolerate this kind of slugfest for a far shorter period than the Allies. Just as Lee's army was bled white by Grant in 1864, the Germans could not withstand many more St. Lôs. When Operation COBRA opened a few days after the battle, the Germans finally reached the end of their rope and collapsed.
25.3 The City
A. Before the war, St. Lô was a thriving market town of some 12,000 inhabitants, capital of the Norman Department de Manche and named after Bishop Laudus of Coutances, who later achieved sainthood. The city has medieval origins. Its steep bluff was the site of ancient fortifications and the city occasionally witnessed ferocious warfare; in 1754, French Catholics stormed the city and defeated its Calvinist garrison during the religious wars. Because of St. Lô's market value, the city became a major road junction and an important crossing site of the Vire.
B. St. Lô was virtually destroyed before the 29th Division had even approached the city. Prior to D-Day, St. Lô was a major communications center and supply depot for the German 7th Army and was heavily bombed by Allied aircraft. Despite warnings that air attacks were to be expected, hundreds of French civilians were killed by these bombardments. By mid-July, the city was a mere shell of its former self, and most of its residents had fled. When the 29th Division entered the city on July 18th, the rubble was almost impenetrable. Vehicles had to carefully negotiate each street; it was not until the last few days of July that motorized convoys were able to make their way through the tortured city without difficulty.
C. As the 29th Division entered St. Lô, the 200-foot double spires of the cathedral of Notre Dame were still standing. Lt. Col. John Cooper, CO. of the 110th field Artillery Battalion, and Capt. Eli Gifford, of the division artillery staff, climbed one of the towers to observe the panorama below. Recognizing the importance of the spire, the two men descended to arrange appropriate communications equipment for observers. At that moment the tower they had just left crashed to the ground with a tremendous roar. The other spire, however, remained standing and was used to good effect by the Americans.
D. After the fall of the city, the Germans shelled it mercilessly for three days. Virtually the only spot that was safe from exploding shell was the ornate Blanchet family mausoleum in the St. Lô cemetery. Used by the 115th infantry as headquarters, the tomb was shellproof and a critical command post during the consolidation of St. Lô. The irony of using sarcophagi as map tables and a tomb as refuge is a memory vividly recalled by 29ers.
E. Soon after the fall of St. Lô, the 29th Division was withdrawn from the front for a few day's rest. Enjoying a USO show featuring Dinah Shore, the men of the 29th blew off a little steam and experienced their first taste of Norman culture after 43 days of near continuous combat. One of their more pleasant discoveries was the infamous Norman Calvados, a potent apple cider that was readily attainable from local farmers. To this day, veterans of the division swear that Calvados could be used in jeeps for fuel as well as gasoline.
26.0 Bibliography
26.1 Primary Sources
29th Infantry Division. After Action Reports, July 1944.
29th Infantry Division. Divisional HQ Telephone Log, July 1944.
116th Infantry Regiment. Unit Journal, July 1944.
Blumenson, Martin. Breakout and Pursuit. Washington: Office of the Chief of Military History, 1961.
26.2 Secondary Sources
Allsup, John S. Hedgerow Hell. Bayeux: Editions Heimdal, 1985.
Binkoski, Joseph. The 115th Infantry Regiment in World War Two. Washington: Infantry Journal Press, 1948.
Cawthorn, Charles. July 1944: St. Lô, American Heritage. Volume 25, Number 4 (June 1974).
Cooper, John P. The History of the 110th Field Artillery. Baltimore: Maryland Historical Society, 1953.
Ewing, Joseph. 29, Let's Go! Washington: Infantry Journal Press, 1948.
Fruhbeisser, Rudi. Opfergang deutscher Fallschirmjäger. Germany: Eigenverlag, 1966.
Garth, David. St. Lô, 7 July-19 July 1944. Nashville: The Battery Press, 1984.
Huston, James. Biography of a Battalion. Washington: Infantry Journal Press, 1950.
Johns, Glover. The Clay Pigeons of St. Lô. New York: Bantam, 1985.
Madej, Victor. US Army Order of Battle, European Theater of Operations. Pennsylvania: Game Publishing Company, 1983.
Weigley, Russell. Eisenhower's Lieutenants. Bloomington: Indiana Univ. Press, 1981.
26.3 Personal Interviews
Maj. Gen. John P. Cooper, former CO, 110th Field Artillery Battalion.
Colonel Robert Miller, former CO, Company F, 175th Infantry.
Lt. John Allsup, former CO, 1st Platoon, Company A, 175th Infantry.
27.0 Examples of Play
27.1 Examples of HQ Activation and Tactical Actions
A. The US HQ unit 1/116 is successfully activated with 4 TAPs. The HQ is placed on the map directly underneath the 1/116 battalion in hex A. The US decides to initiate a Movement Action. Assume the HQ can trace an LOC; the cost is one TAP. The US moves 1/116 to hex G, reducing the TAPs marker from 4 to 3. The HQ unit remains in hex A. Next, the US decides to initiate another Movement Action, moving the battalion from hex G to hex H at the cost of one more TAP. Finally, the US initiates a third Movement Action, moving the battalion from hex H to hex I. However, since hex H is beyond the command radius of the 1/116 HQ in hex A this action costs two points. The TAPs marker is reduced to zero, ending the HQ's activation. The HQ is removed from hex A and placed back on the DD.
B. The US HQ unit 2/115 is activated with 6 TAPs. The HQ is placed on the map directly underneath the 2/115 battalion in hex B. Assume the HQ can trace an LOC. The US decides to initiate a Strategic Movement Action and moves 2/115 in the path shown and reduces the TAPs marker from 6 to 0, because Strategic Movement can be chosen only if it is the first and only action an HQ initiates. The HQ is removed from hex B and placed back on the DD.
C. The US HQ unit 3/115 is activated with 5 TAPs. The HQ is placed on the map directly underneath the 3/115 battalion in hex C. Assume that this HQ unit cannot trace an LOC. Nevertheless the US declares a Movement Action, moving 3/115 to hex J. He must expend 3 TAPs for this action because the HQ could not trace an LOC. Any action the HQ could now undertake would cost 3 TAPs, and since it has only two remaining it cannot perform any more actions.
D. The US HQ unit 1/115 is activated with 2 tactical actions. The 1/115 battalion has broken down to the three companies in hexes D, E, and F. The US decides to place the HQ underneath the company in hex D. Assume the HQ can trace an LOC. The US decides to initiate a Movement Action. The company in hex F is beyond the command radius of the HQ, and so it may not participate in any actions at all. (Compare rule 7.4.2 with 7.4.3.) However, the companies in hexes D and E move to hexes L and K respectively. This expends 1 TAP. Next, the US initiates a Hasty Attack against the German unit in hex M. This expends the HQ's last TAP. After the attack is resolved, the HQ is removed from hex D and placed back on the DD.
27.2 Example of Attack Initiation
A. The US HQ 2/115 is active and situated in hex F. The US declares a Hasty Attack Action. Three companies are directly subordinate to this HQ (hexes D, G, and H).
B. German ZOCs prevent the active HQ from tracing a command radius to hex D, and therefore the company in hex D may not participate in this attack (9.1.3). If, however, the German unit in hex C1 were situated in hex C2, the US company would be within command radius and would be required to attack (as are the companies in hexes G and H; see 9.1.1). In this case, the company in hex D would execute a single attack against the German units in hexes C2 and E. (The 1/116 battalion in hex A could not participate in this attack because it is not subordinate to the active HQ.)
C. The US company in hex G or H must attack the German unit in hex I. If this attack does not eliminate the German unit, the other US company is then obligated to attack that same unit.
D. The Hasty Attack Action would cost 1 TAP even though more than one attack was made.
27.3 Examples of Observation
A. The US 29th Division OP occupies hex A (level 9). German units occupy hexes B (level 8), C (level 7), D (level 8), and E (level 7).
B. Hex B is just two hexes away from the OP. Therefore, the unit in hex B can be successfully observed even though the LOS is blocked by hex G. The OV is 1, because the OP is just one level higher than the target.
C. The German unit in hex D cannot be observed, because it is more than two hexes away and the OP is not at least two levels higher.
D. The German unit in hex E cannot be observed. Hex F blocks the LOS: it is adjacent to hex E and is of a higher level. Note that hex F is not higher than the OP, but it still blocks the OP's observation of hex E.
A. The German 352nd Division OP occupies hex A (level 10). US units occupy hexes B (level 6), C (level 7), D (level 6), and E (level 8).
B. The unit in hex C can be observed; the OP is three levels higher and the LOS is clear.
C. The OV is 3, since the OP is three levels higher.
D. The unit in hex D also can be observed. Hex G is adjacent to hex D and of higher level, and so normally it would block the LOS. But hex D is only four hexes away from the OP and the OP is four levels higher; so by rule 11.3.5, exception (3), observation succeeds. The OV is 4.
E. The unit in hex B cannot be observed. Hex F blocks the LOS: it is adjacent to hex B and is of a higher level. Though hex F is not higher than the OP, it still blocks the OP's observation of hex B.
F. The unit in hex E can be observed because it is only two hexes away from the OP. Hex H blocks the LOS, but observation always succeeds at a range of two hexes or less. The OV is 2.