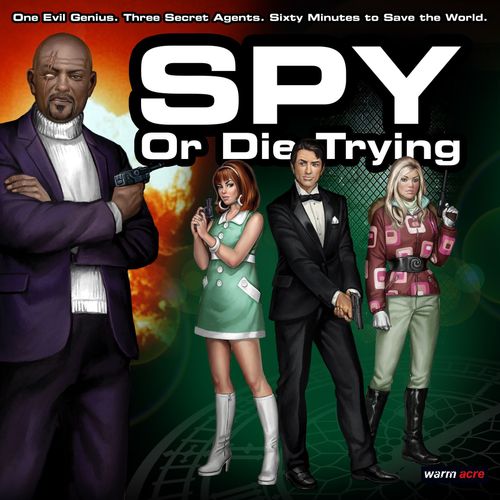
Spy or Die Trying
Spy or Die Trying Rulebook
Table of Contents
Table of Contents
Countdown to Doomsday
The Secret World Order (S.W.O.R.D.) is the most powerful crime syndicate in history. It has hidden bases on every continent where evil masterminds hatch their plans for world domination.
The Peace Enforcing Nations (P.E.N.) was founded to combat international crime and terrorism. Its elite agents (Peacekeepers) are sent to infiltrate, investigate and eliminate S.W.O.R.D. bases.
Pick a Side
Spy or Die Trying is a game for 2 to 4 players. One plays the Base Defender (representing the S.W.O.R.D.); the others are Intruders (agents of the P.E.N.) who play cooperatively against him.
Designer's Note
Spy or Die Trying is designed to be challenging and balanced but can sometimes feel 'one-sided', especially if your opponent is more experienced. I'd encourage players to create their own handicap systems – such as varying the number of Guards or allowing Intruders to start with two or three Talents – whatever makes the game more fun for everyone.
Components
- Rulebook: everything you need to know to play Spy or Die Trying.
- Game board: comprises the Base, Mission Timer, Alert Monitor and Master Plan.
- Dice (8): dice rolls determine whether actions succeed or fail.
- Intruder profiles (3): these keep track of an Intruder's status (stealth, injury, items and intelligence gathered, plus the agent's unique Talent).
- Doors (11): double-sided markers (locked/unlocked).
- Body/Alarm (15): a Body marker is placed in the Base whenever a Minion is knocked out or killed. Alarm markers are collected on the Alert Monitor whenever Intruder activity is detected. If 9 markers are collected, the Base's Alert Level goes up.
- Cameras (6): Cameras can spot hidden Intruders and monitor the activity of exposed Intruders.
- Traps (8): automated defences (armed/disarmed).
- Timer: Intruders have just 60 minutes to complete their mission. This marker keeps track of the minutes remaining on the Mission Timer.
- Alert Level: this marker is placed on the Alert Monitor GREEN side up at the start of the game. It is flipped over when the Base goes to AMBER alert and removed when the Base goes to RED alert.
- Doomsday Weapon (6): the Doomsday Weapon consists of 3 components, each made of 2 parts. The parts are placed on the Master Plan as they are researched by Scientists.
Set-Up
Base Defender
- Open up the game board and place a Door in each of the doorways with the red (locked) side face-up. The Base's Entrance has an extra-large Door marker.
- Place the Boss's figure on one of the corner (Spawn) squares in the Sanctum.
- Place a Guard figure on the yellow (Security) square in the Control Room.
- Either: place a Scientist on one of the Spawn squares in the Infirmary or a Technician on one of the Spawn squares in the Generator.
- Place 1 Guard directly outside a room's doorway for each Intruder playing.
- Place 4 Camera markers on different junction squares.
- Place a Secret Passage marker on an empty square in any room except the Sanctum.
- Shuffle the 9 Intelligence markers and place one face down on the Intelligence square of each room without revealing them to the other players.
- Shuffle the Doomsday Weapon markers and place them face down in a pile beside the game board.
- Put the Alert Level marker on its space, GREEN side up.
- Put the Time marker on the Mission Timer track to show 60 minutes remaining.
- Put all unused markers into piles of the same type.
Each Intruder
- Choose one of the Agent profiles.
- Take a Stealth marker and place it green (hidden) side up on the profile.
- Choose a Talent marker and place it on one of the yellow spaces. Any unused Talent markers are put back into the box.
- Take a Handgun marker and place it on one of the light blue (Item) spaces.
- Choose another Item marker and place it on one of the Item spaces. Any unused Item markers are given to the Defender to be used later in the game.
- Put the Intruder's figure on one of the Agent Start squares outside the Base. Any unused Intruder figures and profiles are put back into the box.
- Decide on the order of play (which Intruder will go first, second, third) during the game.
The Game
Objective
The Base Defender must prevent the Intruders from escaping with vital Intelligence before the Base goes into lockdown.
If the Mission Timer reaches '00', the Defender wins.
The Intruders must collect Intelligence and escape from the Base. The more Intruders sent on the mission, the more Intelligence they must collect.
Scoring
There are 9 Intelligence markers hidden in the Base. They are categorized by colour (yellow, red and blue) and nation (United Kingdom, United States and Soviet Union).
Each Intruder can carry a maximum of 3 Intelligence markers – and once a marker is collected it cannot be dropped, lost or swapped during the game.
Each combination of 3 markers has a scoring value. At the end of the game, Intruders who have escaped from the Base pool their markers and try to make the best scoring combinations they can. A single Intelligence marker can only be used in one combination.
| Combination | Example | Scores |
|---|---|---|
| 1 of each nation | one UK, one US and one Soviet marker | 3 points |
| 3 of the same colour | three markers of one colour | 6 points |
| 3 of the same nation | three markers of one nation | 6 points |
| Any other combination | – | 1 point |
Winning
The number of Intruders playing determines the score they need to win. It is also possible to score a tie (neither side wins) or an 'epic victory' for the Intruders (something to brag about when comparing games).
| Intruders | Tie | Victory | Epic Victory |
|---|---|---|---|
| 1 | 1 point | 3 points | 6 points |
| 2 | 3 points | 6 points | 12 points |
| 3 | 6 points | 12 points | 18 points |
If the Intruders escape but fail to make the required score, the Defender wins.
The Mission Timer
Time is critical in Spy or Die Trying. The Mission Timer keeps track of the number of (game) minutes remaining before the Base locks down.
Whenever there is an instruction to 'take time', advance the Time marker along the track a number of spaces equal to the number of minutes taken.
The game ends when either…
- The Mission Timer reaches '00'.
- There are no Intruders in the Base.
Time is lost when…
| Event | Time lost |
|---|---|
| A hidden Intruder 'takes time' on an action | 0 to 2 minutes |
| An Intruder hides | 0 to 4 minutes |
| An Intruder is knocked out and captured | 3 minutes |
| An Intruder is 'fatally' injured and captured | 6 minutes |
| A Doomsday Weapon component is researched | 10 minutes |
| The Doomsday Weapon is completed | 10 minutes |
| The Defender ends his turn | 1 minute |
Play Summary
After the players have chosen their roles and set up the Base, play proceeds as follows:
- Intruders' Turns. Each Intruder takes a turn in the pre-agreed order. This order cannot be changed during play. On his turn an Intruder may perform 2 actions.
- Defender's Turn. The Defender's turn consists of 3 phases in the following order:
- Phase 1: Spawn. Spend Alarm markers to bring one new Minion into play (optional).
- Phase 2: Actions. Each Minion in play may perform 2 actions.
- Phase 3: Time. Take 1 minute from the Mission Timer.
- Repeat steps 1 and 2 until one side wins.
Dice
When any figure (Intruder or Minion) tries to do something that has a chance of failure, the player must roll one or more dice. The more dice you roll, the more likely one of them will be a 'success'.
- Intruders: for an Intruder a roll of 4, 5 or 6 on a dice is a success. Any other roll is a failure.
- Minions: for a Minion a roll of 6 on a dice is a success. Any other roll is a failure.
- Time or Chance? A hidden Intruder can 'take time' when performing certain actions, which means the action is guaranteed to succeed. However, the Intruder must still roll dice to see how long the action takes; this can be anything up to 2 minutes for most actions.
- Combat: when you roll dice in combat (fighting or shooting) getting more than one success can cause extra injury to your enemy… it may even prove fatal.
- Talents: Intruders have unique Talents that allow certain actions to succeed on a roll of a 3, 4, 5 or 6.
- Minion recovery: this action has three possible outcomes (die, flee or recover) depending on the dice roll.
Markers
Spy or Die Trying uses a variety of card markers to represent all sorts of things. A summary of markers and icons can be found on page 24.
If a rule tells you to bring a figure or marker into play but there are none left off the board, the rule is overridden. For example there are only 6 Guards in the set, which means you can't have more than 6 Guards running around the Base; you can only spawn another one if an on-duty Guard is eliminated.
Taking Turns
The order of play is very important and must always be observed, the strategy and tactics of both sides depends on it.
Like a game of chess the opening turns are more about manoeuvring than confrontation. The Intruders will decide which direction to take and how best to deal with Guards and Cameras. The Defender will usually move his figures to cut off one of the Intruders so that they can be spotted and neutralized. There's no right or wrong way to play, you'll soon develop your own playing style.
Intruders
Intruder Actions
Each turn an Intruder can take 2 actions. All actions require a dice roll unless they are marked as 'automatic'.
The first Intruder action of the game is always to breach The Base's Entrance.
A roll of 4, 5 or 6 is a success for an Intruder.
- Take a chance: this icon means the Intruder must 'take a chance.' The action will either succeed or fail depending on the result of a dice roll.
- Take time: this icon means the Intruder can 'take time.' The action has a base time (minutes taken from the Mission Timer) and a number of dice which must be rolled; each success reduces the time taken by 1 minute. After taking time the action is always successful.
If an action has both icons, the Intruder can choose whether to take time or take a chance.
Taking time on most actions is only an option if the Intruder is hidden.
The table below summarizes the Intruder actions. "Dice" entries are the dice rolled for the action; "min" entries are the base time taken for an action that is taken with time.
| Action | Hidden | Exposed | Success ✔ / Fail ✘ | Page |
|---|---|---|---|---|
| Move | up to 4 squares | up to 6 squares | automatic | 12 |
| Pick up | automatic | automatic | Take Item or face-up Intelligence marker | 13 |
| Sneak (each square) | take a chance: 1 dice; take time: 2 min – 2 dice | not possible | ✔ May continue turn; ✘ Intruder's turn ends | 18 |
| Breach | take a chance: 1 dice; take time: 2 min – 2 dice | take a chance: 1 dice | ✔ Unlock locked Door | 12 |
| Search | take a chance: 1 dice; take time: 2 min – 2 dice |
Items
Items are weapons and equipment that help Intruders to accomplish their mission. Each Intruder starts with a Handgun and one other Item.
- Handgun: the Intruder can perform the shoot action.
- Silencer: no Alarm markers are collected when shooting with the Handgun.
- Painkiller: Intruder suffers no move penalty from being wounded.
- Stimulant: no action penalty for being stunned.
- Medical Kit: can heal a wound on self or an adjacent Intruder.
- Lockpicks: roll 1 extra dice to breach a Door.
- X-Ray Specs: roll 1 extra dice to search or explore.
- Submachine Gun (SMG): the SMG cannot be taken by an Intruder at the start of the game.
When shooting with the SMG, if at least one success is rolled, the shooter may either: re-roll one failed dice, or take a second (free) shoot action at a target no more than 4 squares from the original.
Collecting Items during play
Intruders can obtain other Items during the game:
- An Intruder can pick up an Item from his square or an adjacent square as an action.
- After eliminating a Guard, an Intruder can place a Submachine Gun marker where the body fell.
- Items taken from captured Intruders are placed in the Vault.
- Medical Items can be picked up in the Infirmary.
Agents
Each Intruder is one of three agents. Each agent has a nationality, former occupation and specialization, and a set of Talents that the Intruder may choose from at the start of the mission (see Set-Up).
Kimberly Parker (Kim)
- Nationality: American
- Former occupation: Detective
- Specialization: Science
Kim may choose from the following Talents:
- Detective: Search and explore rolls succeed on a 3, 4, 5 or 6. Can place a Secret Passage marker once per game.
- Saboteur: Sabotage rolls succeed on a 3, 4, 5 or 6. Sabotage action can remove adjacent Camera or Trap.
- Locksmith: Breach rolls succeed on a 3, 4, 5 or 6. Can move 1 square after a successful breach action.
Harry Swift
- Nationality: British
- Former occupation: Criminal
- Specialization: Stealth
Harry may choose from the following Talents:
- Evader: Hide rolls succeed on a 3, 4, 5 or 6. Minions roll 1 less dice to spot the Intruder.
- Prowler: Sneak rolls succeed on a 3, 4, 5 or 6. Can move up to 6 squares (rather than 4) while hidden.
- Imposter: Conceal rolls succeed on a 3, 4, 5 or 6. Can disguise as a Minion after concealing the body.
Anna Chekhova
- Nationality: Russian
- Former occupation: Assassin
- Specialization: Combat
Anna may choose from the following Talents:
- Assassin: Reaction roll succeeds on a 3, 4, 5 or 6. Free hide action after successful fight or shoot.
- Sniper: Shoot roll succeeds on a 3, 4, 5 or 6. Can move 1 square after a shoot action.
- Judoka: Fight and sneak-attack rolls succeed on a 3, 4, 5 or 6. Opponents roll 1 less dice to fight the Intruder.
Defender
Defender's Turn
The Defender controls the Base and all the Minions (Boss, Guards, Technicians and Scientists) who work in it. His turn consists of 3 phases which must be carried out in the following order:
Phase 1: Spawn
The Defender can pay Alarm markers (taken from the Alert Monitor) to bring a new Minion into play. The cost depends on the Alert Level. Only 1 Minion can be spawned each turn.
| Alert | Cost to spawn |
|---|---|
| GREEN | 3 Alarm markers |
| AMBER | 2 Alarm markers |
| RED | 1 Alarm marker |
Place the new Minion's figure on a corresponding Spawn square when it comes into play.
- Guards spawn in the Guardroom.
- Technicians spawn in the Generator.
- Scientists spawn in the Infirmary.
- The Boss re-spawns in the Sanctum.
- Any type of Minion can be spawned from the Cafeteria, if the Boss is in the room.
Phase 2: Actions
Each Minion can perform 2 actions. Most actions require the player to roll dice. A roll of 6 is a success; a roll of 1, 2, 3, 4 or 5 is a failure.
Important: if a rule says 'the Minion's turn ends' it applies only to that figure and not to the Defender's entire turn.
You must complete actions with all Minions of the same type before moving on to the next. They perform actions in the following order:
- The Boss
- Guards
- Technicians
- Scientists
Phase 3: Time
At the end of his turn the Defender takes 1 minute from the Mission Timer.
Remember: if the Mission Timer reaches '00', the game is over and the Defender wins.
Claymore
'Claymore' was a respected atomic physicist in his native Haiti when the dictator François 'Papa Doc' Duvalier came to power. After government thugs murdered his wife and family, Claymore fled to Miami and became an American citizen but was forced to turn to crime to survive. To his own amazement he rose through the ranks of the underworld like a rocket. His intellect, natural charisma and ruthless pragmatism forged a criminal empire that stretched down the east coast and deep into Latin America. As a crime boss he destroyed his rivals and spurned alliance proposals until the S.W.O.R.D. approached him with an irresistible offer: they would provide the facilities to restart his atomics research if he helped them to 'liberate' the world's underdeveloped nations. Claymore has an unshakable hatred of superstition, derived from Papa Doc's use of Voodoo to terrorize Haiti into submission.
Minion Actions
Some actions can only be performed by specific Minions (B – Boss, G – Guard, T – Technician and S – Scientist). A roll of 6 is a success for a Minion.
| Action | Minions | Roll | Success ✔ / Fail ✘ | Page |
|---|---|---|---|---|
| Move | All | automatic | GREEN Alert: up to 2 squares; AMBER Alert: up to 4 squares; RED Alert: up to 6 squares | 12 |
| Spot | All | 1, 2 or 3 dice | ✔ Hidden Intruder in Line of Sight is exposed. Place Alarm marker on Alert Monitor. Can also be performed by a Minion standing on the Security square in the Control Room | 19 |
| Discover | All | automatic | Remove adjacent Body marker and place Alarm marker on Alert Monitor | 18 |
| Fight | B, G (3 dice); T, S (2 dice) | 3 dice / 2 dice | ✔ Injure adjacent enemy figure; ✘ Opponent may fight back | 21 |
Minions
The Boss
The Boss is the S.W.O.R.D.'s representative in the Base. He has some wicked tricks for dealing with Intruders, so a smart Defender should learn to exploit the special rules below.
- Re-spawned: Sanctum
- Weapon: Handgun
- Fight: 3 dice
Special rules:
- 'I've been expecting you': if the Boss successfully spots an Intruder, the Defender collects 3 Alarm markers rather than just one.
- 'My house!': the Boss moves through locked doors as if they were unlocked, without unlocking them. He can also use the Secret Passage to move instantly from one room to another.
- 'Get back to work!': if the Boss is in the Cafeteria, the Defender can spawn any type of Minion there (at the normal cost) in Phase 1 of his turn.
- 'I shall return!': if the Boss is K.O'd or fatally injured, he does not leave a Body marker behind. He may be re-spawned in the Sanctum.
- Exception: if there are 10 or fewer minutes remaining on the Mission Timer, the Boss can no longer re-spawn.
- 'Avenge me!': if the Boss is not in play, the Defender puts 1 Alarm marker on the Monitor at the end of his turn.
Claymore's special ability:
- 'Welcome to the Atomic Age!': if Claymore is in the Laboratory, any Scientists make a successful research roll on a 5 or 6.
Guards
Guards are the S.W.O.R.D.'s first line of defence against Intruders. The Defender starts the game with one Guard in the Control Room, plus one Guard (standing Sentry) for each Intruder playing.
- Spawned: Guardroom
- Weapon: SMG
- Fight: 3 dice
Special rules:
- Sentry: if a Guard is standing outside a room adjacent to a Door, any hidden Intruder must make a sneak roll to move within 4 squares of him.
- Submachine Gun: Guards are armed with rapid firing Submachine Guns. After making a shoot roll, if at least one roll is a success, the shooter may either:
- Re-roll any one failed dice, or
- Take a second (free) shoot action at another eligible target that is no more than 4 squares away from the original.
Technicians
Although not trained for combat, Technicians can defend the Base by constructing Traps.
- Spawned: Generator
- Weapon: Unarmed
- Fight: 2 dice
Special rules:
- Construct (action): a Technician must be standing on (or adjacent to) an empty junction square to construct a Trap.
- Roll 1 dice: if successful, place a Trap marker on the square.
- The marker is placed with the green (disarmed) side face up as shown.
- Traps can be armed and disarmed from the Control Room. See page 15.
- Repair (action): Roll 1 dice: success removes an adjacent sabotage marker.
Scientists
Scientists working in the Laboratory can dramatically advance the Doomsday Weapon's progress and bring victory to the S.W.O.R.D.
- Spawned: Infirmary
- Weapon: Unarmed
- Fight: 2 dice
Special rules:
- Research (action): the Scientist must be on a Research square in the Laboratory to perform this action.
- Roll 1 dice: if successful, turn over the top marker from the Doomsday Weapon pile and place it on the appropriate space of the Master Plan.
- If this results in a complete weapon component being revealed, take 10 minutes from the Mission Timer and place the Scientist on one of the Spawn squares in the Cafeteria – he's earned a tea break!
- If this results in the entire Doomsday Weapon being uncovered, take an additional 10 minutes from the Mission Timer.
The Base
Moving
Intruders and Minions get around The Base from square to square using the move action. A figure can use one or both of their actions to move.
Intruder's move
The maximum number of squares an Intruder can move depends on their current Stealth and Injury status.
- A hidden Intruder can move up to 4 squares.
- An exposed Intruder can move up to 6 squares.
- A disguised Intruder can move up to 4 squares on GREEN or AMBER Alert and up to 6 squares on RED Alert.
- A wounded Intruder has their move halved (2 when hidden, 3 when exposed).
Minion's move
The current Alert Level determines the number of squares a Minion can move per action.
| Alert | Move |
|---|---|
| GREEN | up to 2 squares |
| AMBER | up to 4 squares |
| RED | up to 6 squares |
Adjacent squares
A figure can only move from one square to another if the squares are adjacent. Squares that share a side or corner are said to be adjacent unless the side or corner contains a wall or locked Door.
Occupying a square
- Only one figure can be on a square at any one time. This applies whether the figure is standing or prone.
- Body markers do not count as figures.
- A figure cannot move through a square containing a standing enemy figure.
- A figure can move through a square containing a friendly figure or a prone enemy figure, provided it has enough squares of movement to do so.
Special circumstances
- A figure can only move into a room through a doorway.
- If a figure moves into an enemy figure's Kill Zone (see page 22), it must end its move immediately and make a reaction roll. This does not apply to hidden or disguised Intruders.
- Hidden Intruders must make a sneak roll when moving within 4 squares of a Sentry.
- Prone (stunned or wounded) Minions cannot move.
Interacting with squares
Some activity can be performed on an adjacent square or on the figure's own square.
- Adjacent or same: Search, Pick up, Sabotage, Repair, Construct
- Same square only: Secret Passage, Explore, Security, Research, Spawn
Doors
Doors are double-sided markers. The green light means the Door is unlocked and open, the red light shows that it is locked and closed.
- At the beginning of the game all Doors are locked.
- Any figure can move through an unlocked Door to get into or out of a room.
- Only the Boss can move through a locked Door. It remains locked after he has moved through it.
- Locked Doors can be breached by an Intruder as an action. If successful, the Door is unlocked.
- A Minion standing on the Security square in the Control Room can lock or unlock any Door in the Base as an action.
- Exception: a Door cannot be locked if a figure is standing adjacent to it.
Breach (action)
An Intruder must stand directly in front of a Door (not diagonally adjacent) to perform this action.
- Take a chance: roll 1 dice. If successful, unlock the Door (flip the marker over to show the green side). If the roll fails, the Door remains locked and the action is wasted.
- Take time: only a hidden Intruder may use this method. Roll 2 dice. The base time is 2 minutes minus 1 minute for each success rolled. After taking the required minutes from the Mission Timer, the Door is unlocked.
Locksmith
If Kim Parker has the Locksmith Talent, her breach rolls are successful on a 3, 4, 5 or 6. In addition she may move 1 square for free immediately after a successful breach action.
The Entrance
The Base's Entrance is the first Door that must be breached. Once an Intruder has entered the Base, he may not move through the Entrance again unless he wishes to leave.
As soon as an Intruder leaves the Base, he can play no further part in the game except to contribute to the final score. If there are other Intruders left in the Base, they're on their own!
Minions may never move through the Entrance.
Example
The first turn of the game sees Anna and Harry about to enter the Base. Anna has taken the Lockpicks which provide an additional dice when performing the breach action.
She decides to take time on the action and rolls… She gets one success, so it takes her 1 minute to breach the door.
Anna uses her second action to move into the Base.
Rooms
The S.W.O.R.D. Base consists of 9 rooms, each with a specific purpose. Both the Defender and Intruders should familiarize themselves with all the workings of the Base.
Intelligence
Each room contains a piece of vital Intelligence that could be used to foil Claymore's plans for world domination.
- At the start of the game an Intelligence marker is placed face-down in each room.
- Each Intruder can hold a maximum of 3 Intelligence markers on their profile.
- Once a piece of Intelligence is collected, it cannot be dropped.
Search (action)
An Intruder must be standing on or adjacent to a face-down Intelligence marker to search for it.
- Take a chance: roll 1 dice. If successful, the Intruder turns the marker over and may take it if he wishes. If the roll fails, the Intelligence remains face-down and is not taken.
- Take time: only a hidden Intruder may use this method. Roll 2 dice. The base time is 2 minutes minus 1 minute for each success rolled. After taking the required minutes from the Mission Timer, the marker is turned face up and the Intruder may take it if he wishes.
Pick up (action)
An Intruder standing on or adjacent to a square that contains a face-up Intelligence marker may take it as an action. This is automatic – you do not need to roll any dice.
This action can also be used to pick up any Items on the square, provided that the Intruder has enough room on his profile.
Intruder Tip: think carefully about the combination of Intelligence you want to collect.
Sanctum
This is the Boss's lair. He starts the game in this room and can be re-spawned here if he is 'killed' or knocked out.
Boss re-spawn: in Phase 1 of the Defender's turn he may spend Alarm markers to re-spawn the Boss on a square with this icon.
Secret Passage
The Secret Passage links the Sanctum to another room in the Base chosen by the Defender at the start if the game. If the Boss is standing on a Secret Passage square, he can (as an action) move to any other Secret Passage square on the board – provided that no one is standing on it.
The Boss is the only Minion who can use the Secret Passage.
Explore (action)
An Intruder can also use the Secret Passage but it is not an automatic action.
- Take a chance: roll 1 dice. If successful, move the Intruder to any other unoccupied Secret Passage square in the Base. If the roll fails, the Intruder stays where they are and the action is wasted.
- Take time: only a hidden Intruder may use this method. Roll 2 dice. The base time is 2 minutes minus 1 minute for each success rolled. After taking the required minutes from the Mission Timer, move the Intruder to any other unoccupied Secret Passage square in the Base.
Detective
If Kim Parker has the Detective Talent, her search and explore rolls are successful on a 3, 4, 5 or 6. Once per game she may place a Secret Passage marker on any square in any room before taking her actions. This Secret Passage remains in play for the remainder of the game and can be used by the Boss and by other Intruders who explore it.
Placement of Secret Passages can give either side a huge tactical advantage. The Boss can use them to quickly access rooms which activate his special rules (such as the Cafeteria), Intruders can use them to facilitate their escape from the Base.
Infirmary
The Infirmary contains the Base's medical facilities and serves as a dorm for the S.W.O.R.D.'s hardworking Scientists.
Spawn Scientist: in Phase 1 of the Defender's turn he may spend Alarm markers to spawn a Scientist on a square with this icon.
Medical supplies: an Intruder standing on or adjacent to this square may, as an action, pick up one of the following Items provided it is not already in use: Medical Kit, Painkiller or Stimulants.
Cafeteria
This is where Minions come for some R and R. There is always a chance that one or more off-duty Minions will be hanging out here.
Surprise! whenever an Intruder finishes a move action in the Cafeteria, if there are no other figures already in it, the Defender rolls 4 dice. For each success, he places a Minion (of any type) on one of the room's Spawn squares.
Spawn Minion: if the Boss is in the Cafeteria, the Defender can spend Alarm markers to spawn any type of Minion on a square with this icon in Phase 1 of his turn.
When the Alert Level goes up, any type of Minion can be spawned here in the 'Mob Spawn', in this instance the Boss does not have to be present.
Tea break: Scientists are immediately re-spawned in the Cafeteria whenever they reveal one of the three Doomsday Weapon components using the research action.
Generator
The Generator provides the Base with almost all of its power. Without power the Base loses much of its operational and defensive capability.
Spawn Technician: in Phase 1 of the Defender's turn he may spend Alarm markers to spawn a Technician on a square with this icon.
Power: the Power square is the heart of the Generator. If it is sabotaged, the power supply to the Control Room and Laboratory is cut off. This means…
- Doors cannot be locked or unlocked remotely.
- Traps cannot be armed or disarmed remotely.
- Cameras cannot spot Intruders or monitor exposed Intruder actions.
- Scientists cannot research the Doomsday Weapon.
Sabotage (action): an Intruder standing on or adjacent to the Power square can attempt to sabotage it as an action.
- Take a chance: roll 1 dice. If successful, place a Sabotage marker on the Power square.
- Take time: only a hidden Intruder may use this method. Roll 2 dice. The base time is 2 minutes minus 1 minute for each success rolled. After taking the required minutes from the Mission Timer, place a Sabotage marker on the Power square.
Repair (action): a Technician on or adjacent to a sabotaged Power square can attempt to repair it as an action. Roll 1 dice: if successful, remove the Sabotage marker.
Guardroom
The Base's Guards are barracked here.
Spawn Guard: in Phase 1 of the Defender's turn he may spend Alarm markers to spawn a Guard on a square with this icon.
Control Room
Minions can operate Cameras, Doors and Traps from here. If the Control Room is not operational, the Base's defences will be severely compromised.
Warning! None of the rules below for Cameras, Doors and Traps apply if the Generator is sabotaged.
Security: any type of Minion can operate the Base's security. To do so, they must be standing on the Control Room's Security square.
Cameras: four Cameras are placed on junctions at the start of the game. They have two functions:
- A Minion on the Security square can attempt to spot a hidden Intruder in any Camera's Line of Sight (see page 19) as an action. The rules apply as if the Minion were standing on the Camera's square. An Intruder standing on a Camera's square cannot be spotted by it.
- Put an Alarm marker on the Alert Monitor each time an exposed Intruder finishes a move or performs an action within 4 squares of a Camera. This does not apply if the Intruder finishes his move on the Camera's square or performs the action while standing on it.
Doors: a Minion on the Security square can lock or unlock any one Door in the Base as an action.
- Exception: a Door may not be locked if there is a figure standing adjacent to it.
Traps: Traps are constructed by Technicians (page 11). They always come into play 'disarmed'.
- Disarmed and Armed states are shown by the two Trap markers.
- A Minion on the Security square can arm or disarm a Trap as an action.
- An armed Trap is triggered if any figure (Minion or Intruder) finishes a move within 4 squares of it. It is not triggered if the move finishes on the Trap's square.
- If a Trap is triggered, roll 1 dice. This is the Trap's range, counting squares adjacent to the Trap as '1'. Any figure in the corridor within range receives an injury depending on the Base's Alert Level. Figures outside this range, or standing on the Trap's square, are unaffected.
- After a Trap has been triggered, turn its marker over so that it is 'disarmed'.
| Alert | Type of Trap | Injury |
|---|---|---|
| GREEN | 'Shock' | Stun |
| AMBER | 'Gas' | K.O |
| RED | 'Laser' | Wound |
Intruders: an Intruder standing on the Security square can use an action to lock/unlock any Door or arm/disarm any Trap in the Base.
Saboteur: if Kim Parker has the Saboteur Talent, her sabotage rolls are successful on a 3, 4, 5 or 6. In addition, she may sabotage a Camera or Trap on her square or on an adjacent square as an action.
- Take a chance: roll 1 dice. If successful, remove the Camera or Trap from the Base.
- Take time: only a hidden Intruder may use this method. Roll 2 dice. The base time is 2 minutes minus 1 minute for each success rolled. After taking the required minutes from the Mission Timer, remove the Camera or Trap from the Base.
Laboratory
The Doomsday Weapon is being developed in this lab. The Defender can speed up the project by sending his Scientists here.
Warning! None of the rules below apply if the Generator is sabotaged.
Research: if a Scientist is standing on a square with this icon, he can use the research action.
- Roll 1 dice: if successful, take the top marker from the Doomsday Weapon pile and place it on the Master Plan grid in the correct position. See page 16.
- If this results in a component being revealed, take 10 minutes from the Mission Timer and place the Scientist on one of the Spawn squares in the Cafeteria. If it results in the entire Doomsday Weapon being revealed, take an additional 10 minutes from the Mission Timer.
Welcome to the Atomic Age! If Claymore is standing in the Laboratory, his Scientists will work with even greater zeal and their research rolls will succeed on a 5 or 6.
The Doomsday Weapon
The Master Plan screen shows the progress of the Doomsday Weapon. It is not necessary for the Defender to complete the Weapon during the game, but if he manages to do so, the Intruders will be in real trouble.
The Doomsday Weapon consists of 3 components (warhead, guidance and propulsion) each made up of 2 parts.
- Warhead (parts I and II)
- Guidance (parts III and IV)
- Propulsion (parts V and VI; the second numeral is partly cropped in the source scan)
The parts of the Doomsday Weapon are represented by markers which are shuffled face-down at the start of the game.
If a successful research roll reveals a part, turn over the top Doomsday marker and place it on the Master Plan.
If a complete component is revealed, take 10 minutes from the Mission Timer and place the Scientist on one of the Spawn squares in the Cafeteria. He's earned a tea break!
When the whole Doomsday Weapon is revealed take an additional 10 minutes from the Mission Timer. It's almost game over for the Peacekeepers!
Prison
An Intruder can break into the Prison like any other room in the Base. However, different rules apply if an Intruder arrives here because he is captured or has surrendered.
Detention: these are holding cells for prisoners. An Intruder may never voluntarily move onto one of these squares.
Stand Down: at the end of the Defender's turn, if all Intruders are on Detention squares, the Defender must lower the Alert by one level (RED to AMBER, or AMBER to GREEN) and remove all Alarm markers from the Alert Monitor.
Breaking out: when an Intruder wakes up in Prison, his position is precarious. Without a gun he can't shoot, so getting into a Guard's line of fire is not recommended. It is often a good idea to hide before venturing out. Then a well-timed sneak-attack and the acquisition of a Guard's SMG (or a trip to the Vault) will get the Intruder back in the game.
Injury & Capture: an Intruder who is seriously injured is captured.
- If an Intruder fails to resist a K.O, take 3 minutes from the Mission Timer and place him in Prison.
- If an Intruder is fatally injured, take 6 minutes from the Mission Timer and place him in Prison.
Surrender: surrender is an acceptable strategy for an Intruder who is injured or horribly outnumbered. Some sneaky Intruders even use it as a way to get deeper into the Base.
An Intruder who surrenders is sent to the Prison but does not suffer a time penalty.
An Intruder can surrender…
- If he starts his turn in an enemy Kill Zone.
- After taking a reaction roll in an enemy Kill Zone, whatever the result. See page 22.
When an Intruder is sent to the Prison:
- Stand the Intruder on one of the Detention squares (Defender's choice).
- Remove any Stun or Wound markers from the Intruder's profile.
- Place all the captured Intruder's Items on one of the Storage squares in the Vault.
- No Minion may attack (shoot or fight) an unarmed Intruder inside the Prison. They can still fight back if attacked themselves.
Vault
Captured Intruder Items are stored here. There are four Storage squares; the Defender can choose which squares to place the Items on. Be sure to place them face-up.
Pick up (action): an Intruder standing on or adjacent to a Storage square containing Item markers can pick up any of the Items as an action. Remember that an Intruder can only hold a maximum of 3 Items.
Alert!
Alert Monitor
The Alert Monitor keeps track of the Base's state of readiness to deal with Intruders.
There are three Alert Levels (from lowest to highest): GREEN, AMBER and RED. At the start of the game the Alert Level is GREEN. To progress to the next Alert Level the Defender must collect 9 Alarm markers.
Alarm Markers
Alarm markers are placed on the Alert Monitor when Intruder activity is detected. If a ninth marker is collected, take all the markers from the Monitor, then turn over (or remove) the Alert Level marker. When the Base reaches RED Alert, it can't go any higher but the Defender can still collect up to 8 Alarm markers.
Some events collect 3 Alarm markers. If this takes the number of markers on the Monitor above 9, any 'spare' markers are lost and not carried over to the next Alert Level.
At RED Alert things like noise and fleeing Minions are less significant in the hubbub of pitched battle and no longer collect Alarm markers.
The Defender collects an Alarm marker when…
| Event | Alert Level | Page |
|---|---|---|
| An Intruder is exposed (see Spotting) | GREEN & AMBER only | 19 |
| Anyone uses the shoot action (see Shooting) | GREEN & AMBER only | 22 |
| A Minion flees (recovery roll of 2–5) | GREEN & AMBER only | 20 |
| A Minion discovers a Body | All | 18 |
| An Intruder's action is caught on Camera | All | 15 |
| No Boss in the Base (in the Time phase) | All | 11 |
Spotting
If the Boss spots an Intruder, the Defender collects 3 Alarm markers rather than just one.
This also applies if the Boss spots the Intruder via a Camera from the Control Room.
Shooting
The effect of a single gunshot is very dramatic when the Base is slumbering, much less so when the alarm is sounded.
This rule applies each time anyone (Guard, Boss or Intruder) uses the shoot action:
- On GREEN Alert each shoot action collects 3 Alarm markers.
- On AMBER Alert each shoot action collects 1 Alarm marker.
- On RED Alert shooting does not collect Alarm markers.
Silencer
If an Intruder has the Silencer (Item), no Alarm markers are collected when he shoots with a Handgun.
Spawning Minions
Alarm markers can be spent to bring a new Minion into play in Phase 1 of the Defender's turn. Spent markers are simply removed from the Alert Monitor. The cost of spawning a new Minion goes down as the Alert Level goes up.
Mob Spawn
When the Alert Level goes up, the Defender immediately receives a wave of new Minions (3 at AMBER, 6 at RED) these are placed on their normal Spawn squares. If this spawning occurs during the new Minions' Action phase, they can perform actions on the turn they arrive.
Alert Levels
The Alert Level can change in either the Defender's or the Intruders' turn. As soon as it happens the rules for the new Alert Level apply. Here is a summary.
GREEN
The Base is unaware that it has been infiltrated. Any aggressive activity by Intruders is likely to raise an alarm.
- A Minion can move up to 2 squares as an action.
- Spawning a Minion costs 3 Alarm markers.
- Traps cause victims to be stunned.
- Noise from shooting collects 3 Alarm markers.
- As soon as a ninth Alarm marker is collected, remove all markers from the Alert Monitor and go to AMBER Alert by turning over the Alert Level marker.
AMBER
The Base has been breached! Minions start to move around purposefully, looking for Intruders.
- As soon as the Alert goes to AMBER, the Defender can spawn up to 3 Minions of any type on their normal Spawn squares.
- A Minion can move up to 4 squares as an action.
- Spawning a Minion costs 2 Alarm markers.
- Traps cause victims to be K.O'd.
- As soon as a ninth marker is collected, remove all markers from the Alert Monitor and go to RED Alert by removing the Alert Level marker.
RED
Peacekeeper agents have been identified. Initiate S.W.O.R.D Directive Omega: search and destroy!!!
- As soon as the Alert goes to RED, the Defender can spawn up to 6 Minions of any type on their normal Spawn squares.
- A Minion can move up to 6 squares as an action.
- Spawning a Minion costs 1 Alarm marker.
- Traps cause victims to be wounded.
- A maximum of 8 Alarm markers can be collected on the Alert Monitor. Any additional markers collected are lost.
Stealth
Hidden
At the start of the game all Intruders are hidden and doing everything possible to avoid being detected.
Put the Stealth marker green side up on the Intruder's profile to show that he is hidden.
Benefits
- Cannot be attacked.
- Can take time when performing most actions.
- Uses the more powerful sneak-attack instead of fighting.
- Does not end his turn when entering an enemy Kill Zone.
Drawbacks
- Can only move up to 4 squares as an action.
- Must attempt to sneak when moving within 4 squares of a Sentry.
- Cannot shoot.
Being Exposed
An Intruder who loses his hidden status is exposed. This can happen in one of three ways:
- He is spotted by a Minion.
- He voluntarily reveals himself.
- He fails a sneak-attack.
Reveal (action): a hidden Intruder can become voluntarily exposed by using an action. If they do this in a Minion's Kill Zone, their turn ends and they must make a reaction roll. See page 22.
Prowler: if Harry has the Prowler Talent, his sneak rolls are successful on a 3, 4, 5 or 6. In addition, he can move up to 6 squares (rather than 4) when hidden.
Sneaking
Any Guard standing directly outside a room's doorway is called a Sentry. Sentries are very sensitive to suspicious activity, so hidden Intruders must sneak when moving close to them.
Sneak (action): a hidden Intruder who wants to move within the first 4 squares of a Sentry's Line of Sight must make a sneak roll for each square he moves into.
- Exception: an Intruder cannot sneak through a square containing another figure.
- Take a chance: roll 1 dice for each square. A success means the Intruder can continue his turn. Failure means that his turn ends – even if he has any movement or another action remaining.
- Take time: roll 2 dice for each square. The base time is 2 minutes minus 1 minute for each success rolled. After taking the required minutes from the Mission Timer, the Intruder continues his turn.
Example: Harry wants to sneak up to a Sentry who is standing outside the Cafeteria. He starts his turn 5 squares from the Sentry and must roll for each square he moves into within the Sentry's 4 square 'Kill Zone'.
Harry decides to 'take time' for each square because taking a chance and failing will end his turn – and he's not feeling that lucky!
It takes Harry a total of 4 minutes to sneak up to the Sentry. He's now set up for a sneak-attack.
Sneak-attack
Attacking a Minion in hand-to-hand combat is far more effective when they don't see it coming. The lost art of the 'judo chop' can render an enemy unconscious instantly.
Sneak-attack (action): if a hidden Intruder is adjacent to a Minion, he may attempt to sneak-attack it as an action.
- Roll 3 dice: if at least one is a success, the Minion is eliminated. Replace its figure with a Body marker.
- Exception: the Boss does not leave a Body marker behind, just remove his figure.
- If the roll fails, the Minion is unharmed, the Intruder is exposed and his turn ends immediately.
Judoka: if Anna has the Judoka Talent, her sneak-attack rolls are successful on a 3, 4, 5 or 6.
Conceal Body: after a successful sneak-attack on a Guard, Technician or Scientist, an Intruder can spend time to conceal the body. This is an optional bonus action but does not count as one of his 2 actions that turn.
- Roll 2 dice: the action takes 2 minutes minus the number of successes rolled.
- Remove the Minion from the board.
- If the victim was a Guard, the Intruder can take a Submachine Gun from the body. Take an SMG marker and put it on the Intruder's profile if he has a free Item space.
- If the Intruder has the Imposter Talent, he may disguise himself as the Minion.
Discover (action): a Minion standing on or adjacent to a Body marker can discover it. No roll is necessary, the action always succeeds.
Take the Body marker from the board, and place it Alarm side up on the Alert Monitor.
Imposter
If Harry has the Imposter Talent, he gets a success on a 3, 4, 5, or 6 when rolling to conceal a body. In addition, he can disguise himself as a Minion.
After successfully concealing a body, replace the Intruder's figure with the Minion's figure. It is very important that the Intruder keeps track of this figure!
Exception: he cannot disguise himself as the Boss.
A disguised Intruder is effectively hidden in plain sight. He is subject to the normal rules for hidden Intruders except…
- He can move up to 4 squares per action on GREEN or AMBER Alert, and up to 6 squares on RED Alert.
- He can move through Minions and vice versa.
- He does not have to sneak around Sentries.
- If a Minion successfully spots the disguised Intruder, the Intruder rolls 1 dice. A success (3, 4, 5 or 6) means that he stays hidden.
- He cannot use any form of attack (including sneak-attack) while disguised.
- He cannot spend time on actions if he is in a Minion's Line of Sight.
- He can be caught on Camera (Alarm marker for each action within 4 squares of a Camera).
If the disguised Intruder is exposed, he must use his normal figure again. The disguise is lost and he must sneak-attack another Minion if he wishes to disguise himself again.
Spotting
Minions cannot attempt to neutralize Intruders until they are exposed. The most effective way to make this happen is to spot them.
Line of Sight
Line of Sight (LOS) determines what a figure (or Camera) can 'see'.
It is important for spotting, shooting and determining Kill Zones (see page 22).
- In a corridor LOS extends 12 squares from the figure or Camera in every direction until it is blocked by a wall, locked door or another figure.
- In a room Line of Sight extends to every unblocked square within the room. A figure can only see out through an open Door if he can trace a straight (not diagonal) line to it.
- Standing figures (friendly or enemy) block LOS. This includes hidden Intruders.
Spot (action): a Minion can attempt to spot a hidden (or disguised) Intruder in their LOS as an action. Roll a number of dice depending on the distance between the two figures; include the target square but not the spotter's square.
| Range | Roll |
|---|---|
| 1 – 4 squares | 3 dice |
| 5 – 8 squares | 2 dice |
| 9 – 12 squares | 1 dice |
If any dice is successful, the Intruder must flip his stealth marker over to show that he is exposed and the Defender puts an Alarm marker on the Alert Monitor.
A Minion standing on the Security square in the Control Room can use any Camera in the Base to perform a spot action.
Example: the Guard has Harry in his Line of Sight and can attempt to spot him rolling one dice (12 squares). Although Kim is exposed, the Guard cannot see her because his LOS is blocked by the Scientist.
Example: Harry and Claymore have LOS of one another but Harry cannot see the Guards. Kim has LOS of the two Guards (and vice versa) but her LOS of Claymore is blocked by a Guard.
Exposed
An exposed Intruder has given away his position and loses the advantages of being hidden. However he can move more quickly and behave more aggressively.
Put the Intruder's stealth marker red side up to show that he is exposed.
Benefits
- Can move up to 6 squares as an action.
- Can shoot and fight to his heart's content.
- Can use reaction rolls to cause total mayhem – if he's lucky!
Drawbacks
- Can be attacked.
- Must take a chance on most actions.
- Must make a reaction roll whenever he enters an enemy's Kill Zone. See page 22.
- Can be caught on Camera (Alarm marker for each action within 4 squares of a Camera).
Hide (action): an exposed Intruder can become hidden again by getting out of sight and using this action.
- Roll 4 dice: the action takes 4 minutes minus the number of successes rolled. After taking the required minutes from the Mission Timer, put the Intruder's stealth marker green side up.
- Exception: an Intruder cannot hide in an enemy's Line of Sight.
Evader
If Harry has the Evader Talent, his hide rolls are successful on a 3, 4, 5 or 6.
In addition a Minion must roll 1 less dice when attempting to spot the Evader. This means it is impossible to spot him if he is more than 8 squares away.
Assassin
If Anna has the Assassin Talent, she may take a free hide action after any successful fight or shoot action. The normal restriction for hiding outside of an enemy's Line of Sight applies.
Combat
Injury
There are four types of injury. They affect Minions and Intruders differently.
| Injury | Minion | Intruder |
|---|---|---|
| Stun | Place figure prone | Take a Stun marker |
| Wound | Place figure prone | Take a Wound marker |
| K.O* | Replace figure with Body marker | Lose 3 minutes and go to Prison |
| Fatality | Replace figure with Body marker | Lose 6 minutes and go to Prison |
A figure who receives a K.O must attempt to resist by rolling 1 dice. If successful, the effects are negated.
Minion Injury
Minions are fragile compared to Intruders and the lightest love-tap can knock them down, put them out of action or make them run for their lives.
Stun or Wound: if a Minion suffers a stun or wound, place its figure prone. On its next turn it must use its first action to recover.
Roll 1 dice and follow the instructions below:
| Roll | Result |
|---|---|
| 1 | The Minion is dead (or as good as). Replace its figure with a Body marker. |
| 2–5 | The Minion flees. Remove the figure from the board. If the Alert is GREEN or AMBER, put an Alarm marker on the Monitor. |
| 6 | The Minion recovers. Stand its figure upright. It may use its remaining action this turn. |
A prone Minion is placed like this. (Illustration.)
K.O (Knock-out): a Minion who receives a K.O must attempt to resist falling unconscious. Roll 1 dice: if successful, the Minion stays upright (unless it is also stunned or wounded). If the roll fails, remove the figure from play and replace it with a Body marker.
- Exception: if the Boss is K.O'd, do not place a Body marker.
Fatality: if a Minion suffers a fatal injury, remove the figure from play and replace it with a Body marker.
- Exception: if the Boss is fatally injured, do not place a Body marker.
The Boss: S.W.O.R.D. Bosses are cunning and resourceful and have a habit of returning from the dead. Even though he is a unique character, the Boss may be re-spawned like any other Minion except during the last 10 minutes of the game.
Bodies: fallen Minions are replaced by Body markers. These can be discovered by other Minions and converted into Alarm markers, which can then be used to bring more Minions into play. An Intruder can reduce re-spawning by eliminating Minions with a sneak-attack, which allows him to conceal the bodies. However this is only possible if the Intruder is hidden.
Intruder Injury
It takes more than a stray bullet to send a Peacekeeper to the great vodka martini bar in the sky. On each Intruder profile are Injury spaces marked as shown. Markers are placed on these spaces if an Intruder is stunned or wounded.
Stun
A stun is a concussive injury that hampers an Intruder's activity. If an Intruder receives a stun:
- Place a Stun marker on the Intruder's profile.
- The Intruder may only perform 1 action per turn while the Stun marker is in effect.
- The Intruder may attempt to rest to remove the marker.
- If an Intruder has a Stun marker and receives a subsequent stun, he must roll 1 dice to resist being K.O'd and captured.
Rest (action)
Resting is the most effective way to shake off a stun.
- Take a chance: roll 1 dice. If successful, remove the Stun marker from the Intruder's profile.
- Take time: only a hidden Intruder may use this method. Roll 2 dice. The base time is 2 minutes. Each success rolled reduces the time by 1 minute. Then remove the Stun marker.
After successfully resting, the Intruder may perform another action in the same turn.
Stimulants
An Intruder carrying Stimulants (Item) can perform his normal 2 actions per turn while stunned. However, the Stun marker must still be placed on his profile and the Intruder must attempt to resist a K.O if he suffers a subsequent stun.
Wound
An Intruder suffering from a wound will have their mobility impaired until they receive medical attention.
- Put a Wound marker on the Intruder's profile.
- The Intruder's move is halved while the Wound marker is in effect.
- The wound may only be removed by using the heal action. See below.
- If a wounded Intruder receives a subsequent wound, he must roll 1 dice to resist being K.O'd.
Heal (action)
This action can only be performed by an Intruder with a Medical Kit. It can be performed on themselves or on an adjacent wounded Intruder.
- Take a chance: roll 1 dice. If successful, remove the Wound marker from the Intruder's profile.
- Take time: only a hidden Intruder may use this method. Roll 2 dice. The base time is 2 minutes. Each success rolled reduces the time by 1 minute. Then remove the Wound marker.
Painkiller
An Intruder carrying the Painkiller (Item) is unaffected by the move penalty from a wound. However, the Wound marker must still be placed on his profile and the Intruder must still attempt to resist being K.O'd if he receives a subsequent wound.
K.O (Knock Out)
If an Intruder receives a K.O he will be captured unless he successfully resists by rolling 1 dice. If successful, the Intruder stays upright and suffers no additional penalties.
Otherwise, take 3 minutes from the Mission Timer and put the Intruder in the Prison (see page 16).
Fatality
A fatal injury doesn't necessarily mean game over for an international super-spy. Instead take 6 minutes from the Mission Timer and put the Intruder in the Prison (see page 16).
Multiple Injuries
If a figure sustains more than one type of injury at the same time, apply the rules for each, starting with the most severe. An Intruder who is already stunned and sustains a stun and K.O simultaneously must successfully roll to resist twice in order to stay conscious.
Prison
Most S.W.O.R.D. Bosses like to keep their arch-enemies in one piece while incarcerated. Whenever an Intruder is captured (page 16) all his Injuries are patched up – remove any Stun or Wound markers.
Heroic Sacrifice
An Intruder captured in the final minutes of the game can potentially jeopardize the mission for his team. To avoid this, he has the option of making the ultimate sacrifice: after suffering a K.O or fatal injury, the Intruder removes his figure from the board and places his Item markers in a neat pile where he fell. He does not suffer a time penalty. The Intruder takes no further part in the game and any Intelligence he collected is permanently lost. R.I.P.
Fighting
Fight (action)
Fighting means slugging it out hand-to-hand with fists or pistol butts. A figure may fight an adjacent standing enemy figure as an action.
Exception: a Minion cannot fight a hidden Intruder and a hidden Intruder cannot fight a Minion.
- Roll 3 dice (Boss, Guards and Intruders)
- Roll 2 dice (Technicians and Scientists)
| Successes | Result |
|---|---|
| 1 | Stun |
| 2 | Stun and K.O |
| 3 | Stun, Wound and K.O |
Fight back: if the attacker rolls no successes, the target may fight back. This is a free action even though it is not the figure's turn. Note: if a fight back attempt fails, the target does not get to fight back …back.
Opportunity strike: if a figure is adjacent to a (standing) enemy and performs any action other than to fight that enemy, the enemy gets a free fight attack against him before the action is performed.
The target of an opportunity strike may not fight back. This does not apply to hidden Intruders.
Example: Harry attempts to fight a poor Technician. He rolls… …whoops! The Tech fights back and rolls… POW!!! – that's a stun and a potential K.O. Harry rolls 1 dice to resist falling unconscious… Luckily he doesn't go down. Unfortunately he does take a Stun marker which means he cannot perform another action this turn and will be only able to perform one action on subsequent turns until he rests.
Example: The game nears its end. Kim stands at the entrance which has been relocked. With only a minute left she doesn't have time to get into a fight, so she opts to breach the Door. The adjacent Guard rolls for an opportunity strike…and misses! Kim's breach roll is successful, now all she has to do is leave the Base.
However, before she can perform her second action (move), the Guard gets another opportunity strike. The result will determine which side wins the game…
Judoka: if Anna has the Judoka Talent, her fight rolls are successful on a 3, 4, 5 or 6. In addition, any Minion attempting to fight Anna rolls one less dice (this includes fighting back and opportunity strikes).
Intruder Tip: fighting does not make noise and you cannot be shot at while adjacent to an enemy.
Shooting
Shoot (action)
To use the shoot action a figure must be armed with a Handgun or Submachine Gun.
- A Minion cannot shoot at a hidden Intruder and a hidden Intruder cannot shoot at a Minion.
- The target must be a standing enemy figure in the shooter's Line of Sight.
- A figure cannot shoot if an enemy is standing adjacent to him.
- A figure cannot shoot if there is a friendly figure standing adjacent to the target.
- Roll dice according to the range. The number of successes determines the injury – see below.
| Range | Roll |
|---|---|
| 2–4 squares | 3 dice |
| 5–8 squares | 2 dice |
| 9–12 squares | 1 dice |
| Successes | Result |
|---|---|
| 1 | Wound |
| 2 | Wound and K.O |
| 3 | Fatality |
Submachine Gun: submachine guns fire a hail of bullets. After making a shoot roll, if at least one roll is a success, the shooter may either:
- Re-roll any one failed dice.
- Take a second (free) shoot action at another eligible target as long as it is no more than 4 squares from the original.
Sniper: if Anna has the Sniper Talent, her shoot rolls succeed on a 3, 4, 5 or 6. In addition she may make a free 1 square move after any shoot action, this includes shooting as a reaction.
Weapons
- Scientists and Technicians are unarmed and cannot use the shoot action.
- Claymore (the Boss) is armed with a Handgun.
- Each Intruder starts the game with a Handgun.
- Guards are armed with Submachine Guns.
Acquiring weapons
Intruders who are captured have their weapons taken from them and put into the Vault.
Whenever a Guard is K.O'd, killed or flees, the Intruder who attacked them can ask the Defender to place a Submachine Gun marker on the Guard's square.
An Intruder can pick up a weapon (or other Item) as an action.
An Intruder can only use one weapon at a time. If carrying more than one weapon, he must place the weapon he intends to use on the left-most Item space of his profile. Changing an Intruder's primary weapon counts as an action.
Reaction
You rush around a corner, straight into an enemy's gun sight, adrenaline surges – it's kill-or-be-killed time!
The following rules add tactical intensity to combat. With a little luck, judgement and courage, they can turn an agent into a killing machine.
Kill Zone
Every standing figure has a Kill Zone (KZ) extending 4 squares along their Line of Sight (see page 19). A figure that enters an enemy's Kill Zone on his own turn must make a reaction roll to determine whether he keeps his cool or freezes in panic.
Exceptions:
The following do not have a KZ and are unaffected by enemy Kill Zones:
- Prone figures. They're too busy sleeping.
- Hidden Intruders.
- A figure that is already adjacent to another enemy (who is not prone or hidden). These figures are assumed to be fighting and are oblivious to all else.
Entering a Kill Zone
There are several ways a figure can enter an enemy Kill Zone:
- Move into it, including appearing from a Secret Passage.
- A figure that blocked the enemy's Line of Sight is removed or placed prone.
- An Intruder uses the reveal action to become exposed within a Minion's KZ.
- A Minion successfully recovers (stands up) in an exposed Intruder's KZ.
However:
- A figure can move through a friendly figure in an enemy's Kill Zone. He is only affected if he moves into an empty square within the KZ.
- A figure that starts his turn in an enemy's Kill Zone is not affected by it.
- A Minion that is spawned within an Intruder's Kill Zone is not affected by it.
Reaction
As soon as a figure enters an enemy's Kill Zone, their normal turn ends.
Roll 1 dice: if it fails, the figure cannot do anything else this turn, except surrender (optional).
If the roll succeeds, the figure can do one of the following:
- Shoot at an enemy figure (if it is more than 1 square away).
- Fight an enemy figure (if it is adjacent).
- Move 1 square.
- Surrender (Intruders only). See page 16.
This applies even if the figure had already performed two actions on that turn. If the action results in the figure entering another enemy's Kill Zone, they must make another reaction roll.
Assassin: if Anna has the Assassin Talent, her reaction rolls are successful on a 3, 4, 5 or 6.
Above: a classic stand-off. It is Anna's turn and she must decide whether to enter the Guard's Kill Zone, or wait for him to come to her on his turn. A successful reaction roll will give her the option of fighting or moving because she is adjacent.
Example of Play
Intruders: Harry Swift. Talent: Imposter. Status: Hidden / Uninjured. Items: Silenced Handgun. Intelligence: None.
Defender: Boss, 2 Guards, 1 Technician. 54 minutes remaining; GREEN Alert; Power ON.
1. Intruder
- Moves 4 squares.
- Breaches Door. Takes time (1 minute). 53 minutes remaining.
Defender, Phase 2
- Guard A: 1. Attempts to spot Harry on Camera (3 dice) – fail. 2. Attempts to spot Harry on Camera (3 dice) – success. Harry is exposed (1 Alarm marker).
- Guard B: 1. Moves 2 squares. 2. Moves 2 squares into Harry's Kill Zone. Rolls for reaction – success. Shoots (3 Alarm markers for noise) – miss.
- Technician: 1. Moves 2 squares. 2. Attempts to construct a Trap – fail. Phase 3: 52 minutes remaining.
2. Intruder
- Shoots Guard B (3 dice) – hit (wound). No noise for silencer. The action is caught on Camera (1 Alarm marker).
- Moves 1 square into Guardroom. This action is not caught on Camera because his move finishes outside of its view.
Defender
- Phase 1: spawns Guard C in Guardroom (costs 3 Alarm markers).
- Phase 2:
- Guard A: no actions. He can't lock the Guardroom Door because Harry is adjacent to it.
- Guard B: 1. Recovery – success (stands up). 2. Moves 2 squares.
- Guard C: shoots at Harry (3 Alarm markers) – miss. Shoots at Harry (3 Alarm markers) – hit (wound).
- Technician: 1. Attempts to construct a Trap – success. 2. Moves 2 squares.
- Phase 3: 51 minutes remaining.
3. Intruder
- Shoots Guard C – hit (wound).
- Hides (3 minutes).
Defender, Phase 2
- Guard A: arms Trap.
- Guard B: stays put.
- Guard C: rolls to recover – fails and flees: 1 Alarm marker. AMBER Alert!!!
Mob Spawn: the Defender spawns Guards D, E and F.
- Guard D: 1&2. Attempts to spot Harry – fails twice.
- Guard E: 1. Attempts to spot Harry – success! (1 Alarm marker). 2. Shoots at Harry (1 Alarm marker) – miss.
- Guard F: 1. Shoots at Harry (1 Alarm marker) – hit (wound). Harry attempts to resist K.O – success. 2. Shoots at Harry (1 Alarm marker) – miss.
- Technician: 1. Moves 4. 2. Attempts to construct a Trap – fail.
- Phase 3: 47 minutes remaining.
4. Intruder
- Attempts to search for Intelligence – success (the marker found is shown with a UK flag).
- Moves out of room into Guard B's Kill Zone, ending his normal turn. The Trap is triggered. The Defender rolls for range. Harry, Guard B and the Technician are hit by Knock Out Gas and must roll to resist.
- Guard B resists. The Tech is Knocked Out.
- Harry manages to keep it together.
- Harry now rolls his reaction for entering the Guard's Kill Zone – success!
With the Base approaching RED Alert and 4 gun-toting Guards on his tail, the wounded Intruder decides that enough is enough and surrenders to Guard B.
Harry is put into the Prison on a Detention square. His silenced handgun is put into the Vault. Because all Intruders are incarcerated the Alert Level goes down to GREEN and all markers are removed from the Alert Monitor.
Harry's wound is healed. He's unarmed and outnumbered but his mission is far from over…
Icon List
Summary of the icons and markers used in the game.
| Icon | Name | Description |
|---|---|---|
| Agent Start | Agent Start | Each Intruder starts the game on one of these squares. |
| Alarm | Alarm | Placed on the Alert Monitor when Intruder activity is detected. If 9 are collected, the Alert Level increases. |
| Alert Level | Alert Level | Shows current Alert: GREEN, AMBER or RED. |
| Assassin | Assassin | Talent. Reaction on a 3, 4, 5 or 6. Free hide action after successful fight or shoot. |
| Body | Body | Replaces dead or K.O'd Minion. Can be discovered by a Minion and converted into an Alarm marker. |
| Boss Spawn | Boss Spawn | The Boss can be re-spawned from here. |
| Camera | Camera | Spots hidden Intruders. Alarm marker from exposed Intruder action within 4 squares. |