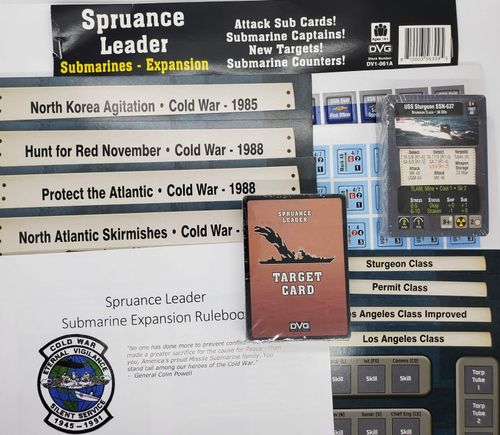
Spruance Leader: Submarines Expansion
Spruance Leader: Submarines Expansion Rulebook
Table of Contents
Table of Contents
- 14 SSN Expansion Overview
- 15 SSN Expansion Updates
- 15.1 SSN Campaign Set Up
- 15.2 SSN Mission Set Up
- 15.3 SSN Mission Execution Phase
- 15.4 SSN Encounter Set Up
- 15.5 SSN Encounter Steps
- 15.6 SSN Encounter Complete
- 15.7 Mission Debriefing
- 15.8 Campaign Evaluation
- 16 Example of Play
- 17 Subs and Ordnance
14 SSN Expansion Overview
14.1 Introduction
The SSN Expansion adds submarines to your Task Force. While executing your missions, your SSN can fire missiles at ships and torpedoes at other subs, while varying your depth above and below the Thermal Layer.
The SSN (SS = Submarine, N = Nuclear Powered) is an attack submarine that can perform a variety of missions; including anti-ship (ASuW) and anti-sub (ASW) warfare, laying mines, gathering intelligence, special forces delivery, and destroying enemy ballistic missile submarines (SSBNs).
The US nuclear powered attack subs are very capable and typically operate alone. They can also cooperate with a Task Force to scout ahead for enemy subs. For the SSN Expansion Campaigns, each SSN missions will be performed with only SSN.
The SSN operates in an underwater environment that impacts detection ranges. The ocean can have a Thermal Layer (thermocline) where ocean water temperatures change. Subs can operate above or below the Thermal Layer, and can influence detection of subs and ships on the other side of the layer.
The SSN Towed Array can be placed on the opposite side of the Thermal Layer to detect ships/subs. The SSN must use the Spherical Array in the current layer of the SSN. The SSN must use the Spherical Array in the current layer side if the Towed Array is on the other side.
14.2 Game Components
See the Game Components diagram. The diagram labels the following SSN Expansion components:
- SSN Expansion Rulebook
- SSN Campaign Sheets
- SSN Tactical Display Overlay
- Sub Sensor Performance Cards
- Sub Cards
- Sub Target Cards
- SSN Cards (6 Skill levels)
- SSN Commander Cards (6 Skill levels)
- SSN Counters
- SSN Counter
- Noise Markers
- Chit Cup Counters
- SSN Crew Skills
- SSN Ordnance
- Towed Array Counter
- Countermeasures
- Enemy Helicopters
14.1 Submarine Warfare
(The source prints this subsection as 14.1 again, after 14.2. Numbering kept as printed.)
Prior to attacking, the SSN must have detected an enemy ship or sub using Passive or Active Sonar.
Passive Sonar listens for sounds that are made by enemy ships and subs as they operate. Sounds propagate through the water and are picked up by receivers on the enemy sub (Spherical Array) or by an array of listeners in a deployed Towed Array.
In many cases, a thermal layer (thermocline layer) at some depth can reduce or deflect sound moving across the thermal layer. The SSN can be above or below the Thermal Layer. The SSN can also have the Towed Array on the other side of the Thermal Layer.
Convergence Zones carry noise across long distances, allowing the SSN to detect enemy ships and subs beyond normal detection ranges.
Active Sonar is where a ship or sub transmits a sonar signal (also called a Ping) and listens for the signal that is reflected from a ship or sub. Because a signal is transmitted, other ships and subs can hear the transmitted signal, learning that something is there to transmit. Only Subs can be detected by Active Sonar.
Explanation notes printed beside this section:
- Enemy ships can launch Enemy ASW Helicopters that can attempt to detect your SSN. If detected, the ASW Helicopter will drop an ASW Torpedo to attack your SSN.
- Your SSN can launch missiles and torpedoes through Torpedo tubes. To fire ordnance, it must be loaded into a Torpedo tube (or use the Vertical Launch System (VLS)). If ordnance in a torpedo tube is not what you want to use, the ordnance must be unloaded and then the desired ordnance loaded. Once ordnance is fired from a torpedo tube, it is empty and can be reloaded. The US SSNs only have 4 torpedo tubes. VLS tubes are pre-loaded at port and cannot be reloaded.
- Your SSN can fire missiles against enemy ships, or fire torpedoes against enemy ships and subs. Launching missiles and torpedoes increases the SSN Noise level that can be detected by enemy ships and subs. Wire Guided Torpedoes have a better chance of hitting an enemy ship or sub.
15 SSN Expansion Updates
15.1 SSN Campaign Set Up
Perform the steps to set up a SSN Campaign.
15.1.1 Select SSN Campaign
SSN Campaign Sheets are very similar to the Core campaign sheets, but you execute each mission using one SSN. Follow Campaign Set up steps 2.1.1 through 2.1.5.
SSN Campaigns are set up the same way as Core game Campaigns. Instead of purchasing ships, select up to two SSNs (or the number of SSNs identified on the Campaign sheet). Instead of selecting Commanders, select SSN Commanders.
15.1.2 Purchase SSNs
Similar to purchasing Task Force Ships, select SSNs to include in your Task Force. Pay the SO cost and select a Skill level that fits within the Campaign Skill constraints.
Make sure that the SSNs were available in the year identified in the Campaign Title and were assigned to the appropriate area (Atlantic (Atl) or Pacific (Pac)).
Purchase SSNs using SO Points from the Campaign.
15.1.3 SSN Commander Selection
For each SSN selected, select an SSN Commander. Select the Skill level that fits within the Campaign Skill Constraints.
Assign each SSN Commander to a specific SSN. The Commander and SSN must be paired together when executing a mission throughout the Campaign.
SSN Commanders can perform more actions than TF Ship Commanders.
15.1.2 SSN Card & Notes
(The source prints this subsection as 15.1.2 again, after 15.1.3. Numbering kept as printed.)
The SSN card explanation, read from the printed callouts:
- Maximum amount of ordnance that is loaded into a torpedo tube and available to be fired.
- Maximum amount of Ordnance allowed to be loaded for a mission.
- Maximum number of Crew Skills allowed.
- The SSN can carry and deploy mines.
Towed Array (TA): An array of sensors that are towed behind the SSN. The Towed Array can be placed above or below the Thermal Layer.
Spherical Array (SA): An array of sensors on the SSN that can detect enemy ships and subs. The Spherical Array is always on the same side of the Thermal Layer as the SSN.
NOTES:
- The SSN cannot detect or attack enemy aircraft or helicopters. The SSN cannot be attacked by enemy aircraft, but can be attacked by enemy helicopters.
- The SSN does not have a Missile Defense (MD) value. Enemy ships and subs can fire missiles at the SSN, but the missile releases a torpedo that attacks the SSN. Use the Torpedo Defense (TD) for all attacks. Only use the Torpedo side of damage counters drawn when the SSN is damaged.
15.1.4 Purchase SSN Crew Skills
SSN Crew Skills can be purchased with SO points to provide some benefit to the SSN during Tactical Encounters. Only one skill can be purchased for each Sub Crew member. Each Crew Skill can be used once per turn. No Action is required to use a Crew Skill.
The SSN card identifies the maximum allowable number of crew skills (ex: Sk 2 means you can have a maximum of 2 Crew skills).
The SSN contains the following crew officers:
- Commander (C)
- First Officer (FO)
- Sonar Operator (S)
- Comms Operator (CO)
- Chief Engineer (CE)
Each skill token shows a Sub Crew abbreviation, a Crew Skill and an SO Cost on its back.
- Sub Crew: Identifies which SSN crew member the skill applies to. A Sub Crewmember can only have one skill.
- Sub Crew Abbreviation: Abbreviation for the Sub Crewmember.
- Crew Skill: Identifies the Crew Skill.
- SO Cost: The SO point cost for the skill.
Crew skills (SO cost in brackets):
- Torpedo Defense +1 (C) [10] – Add 1 to the SSN Torpedo Defense value for 1 attacking Torpedo.
- Torpedo Attack +1 (C) [8] – Add +1 to one SSN Torpedo. If firing multiple torpedoes, only apply the modifier to one torpedo.
- +1 Slow Action (C) [8] – Add one additional SSN Slow Action.
- Weapons Max +3 (FO) [8] – The SSN can carry an additional +3 weapons above the Weapons Max.
- Harpoon Attack +2 (FO) [6] – Add +2 to the SSN UGM-84 Harpoon Attack. If firing multiple Harpoon missiles, only apply the modifier to one Harpoon attack.
- Enhanced Detect (S) [8] – Use a Sub Action and Commander Action to add +3 to the SSN Detection roll.
- Sub Detect +1 (S) [8] – Add 1 to a SSN Sub Detection roll.
- Helo Detect -1 (CO) [8] – Subtract 1 from all enemy Helicopter detection rolls against the SSN.
- Surface Detect +2 (CO) [8] – Add +2 to the SSN Ship Detection roll.
- Noise Management +1 (CE) [10] – Add +1 to the SSN NM value when an enemy ship or sub attempts to detect the SSN.
- Damage Repair +2 (CE) [4] – Add +2 to a SSN Repair Attempts.
15.1.5 SSN Tactical Display
Place the SSN Tactical Display as an overlay on the Spruance Leader Tactical Display over the Ship Positions.
The SSN Tactical Display lets you manage the following information about your SSN:
Slow/Fast
A Slow sub is in a defensive posture where you are handling your sub in a more stealthy mode. This reduces the amount of crew stress suffered for an encounter, and also makes your SSN harder to detect (NM +1). Because of the defensive posture, you will perform SSN actions after the enemy ship and sub actions.
A Fast sub is in an offensive posture and more aggressively seeking out the enemy. This increases crew stress suffered for an encounter. It also means your crew is focusing on detecting enemy ships and subs (Detect +1).
Display notes:
- Subsurface Environment: Place the Sensor Performance card here for the current encounter.
- Fast Sub Position: Placing the SSN sub counter in the Fast Sub position allows the Sub action to be performed as Fast, and all detection attempts get a +1 modifier.
- Slow Sub Position: Placing the SSN sub counter in the Slow Sub position allows the Sub action to performed Slow, and the Sub gets a NM +1 modifier.
Sub Depth
You can set the depth of your SSN relative to thermal layer (if there is one). Depending on the environment, it impacts how well you can detect ships/sub within the layer or on the other side of the layer. It also impacts enemy ship and sub detection of your SSN.
Display notes:
- Periscope Depth: Place the SSN counter in this box to place the Sub at Periscope Depth, with a NM -1 modifier.
- Above Thermal Layer: Place the SSN counter in this box to place the Sub at a depth above the Thermal Layer.
- Below Thermal Layer: Place the SSN counter in this box to place the Sub at a depth below the Thermal Layer.
Sub Detection Modifiers
As your sub performs actions, your noise level increases, making your SSN easier to detect. Sub detection modifier counters are placed in this section as you use Active Sonar (Ping), and fire torpedoes or missiles.
The modifiers aren't cumulative, so select the highest negative NM modifier and apply it to your SSN NM value.
Display notes:
- Sub Detection Modifiers: Place any Sub Detection modifiers (Ping, Torpedo, or Missile modifiers) in this box when appropriate. The modifiers are not cumulative, so select the highest negative modifier.
15.1.6 Sub Sensor Performance Cards
Shuffle the Sub Sensor Performance Cards and put them beside the Tactical Display.
15.1.7 Sub Organization Card
Based on the SSN types that you selected, find the appropriate Sub Organization card. This card is optional to use, and cards aren't provided for Allied SSNs. It allows you to organize crew skills, ordnance in Torpedo tubes, ordnance storage, towed array depth, stress, and damage.
SSN Campaign Start (Example)
I decide I want to play the Medium Campaign for the SSN North Atlantic Skirmishes Cold War – 1988. For the Short Campaign, I get 100 SO Points to purchase my two SSNs and crew skills. I place the Task Force, Activity, and War counters on the Campaign sheet.
Now I set up my Target Deck. Based on the Campaign map, I pull out the following Target cards: 5, 7, 12, 15, 16, 19, 24, 34, 35, 57, 58, 59, 62. I shuffle the deck and put them near the Tactical Display.
I shuffle the Encounter cards and put them on the Tactical Display.
For the Enemy Sub deck, I remove the Argentina subs, as well as SSN K-335 (deployed in 1991, which is after 1988) and SSBN TK-17 (Special Target Only). I shuffle the remaining Enemy Sub cards.
For the Enemy Ship deck, I remove the Argentina ships, as well as DDG Nastoychivyy, DDG Admiral Panteleyev, and DDG Bespokoynyy (all employed in 1991 or 1992), and the 6 Special Mission cards (CV Minsk, CV Kiev, CV Moskva, DDG Boevoy, CBN Kalinin, and CBN Kirov). The two decks are shuffled and placed on the Tactical Display.
I shuffle the Event cards and place them face down near the Tactical Display.
I shuffle the Sub Sensor Performance cards and place them face down near the Tactical Display.
I create my two draw cups of Enemy Sub counters and Damage counters.
It is now time to purchase my SSNs and skills with my 100 SO points.
I purchase the Atlantic (Atl) USS Providence. The Type II Los Angeles Class SSN can launch TLAMs through the VLS and has pretty good Noise Management and Torpedo Defense. I downgraded the skill level of the USS Archerfish to get a Skilled level.
I selected Skills to support attacks on ships and subs. I can use each skill once per battle turn.
I selected Mancuso to support enemy detection, starting with Sub detects. As skilled, I get a fast action and 2 slow actions.
I purchase the Atlantic (Atl) USS Archerfish and reduce the Skill level to Green to increase USS Chicago to Skilled. The Sturgeon class holds less ordnance and typically is noisier than the LA class. This is my backup sub that I will only use when necessary.
McCafferty has an attack focus, but at Green skill level doesn't have any specialized actions.
Allocated SOs: 100 Spent SOs: 94 Remaining SOs: 6
15.2 SSN Mission Set Up
15.2.1 Mission Set Up Steps
Perform the following steps to set up an SSN mission (see 4.1 for normal campaign set up).
- Mission SO Points (4.1.1)
- Target Selection (4.1.2)
- Priority R&R (4.1.3)
- Replace Destroyed SSN (15.2.2)
- Purchase SSN Skills or Equipment (15.2.3)
- Select SSN/Commander for Mission (15.2.4)
- Set up SSN on Tactical Display (15.2.5)
- Purchase SSN Ordinance (15.2.6)
- Fill Out Log Sheet (4.1.11)
- Place SSN Counter (15.2.7)
- Roll for Enemy TF Placement (4.2.2)
- Shuffle Decks (4.2.3) – including Sub Sensor Performance cards
15.2.2 Replace Destroyed SSN
If your SSN was destroyed on the previous mission, replace the destroyed SSN with a Newbie SSN at no SO cost. You only receive half of your Weekly SO Points. A new Commander is also selected (no SO cost), and must be at the Newbie level also.
15.2.3 Purchase SSN Skills/Equipment
If desired, purchase a Crew Skill (don't exceed the maximum allowed) or SSN Equipment (Towed Decoy or Noisemaker).
SSN Equipment:
- Towed Decoy: The Towed Decoy can destroy an incoming torpedo if deployed. When deployed during a torpedo attack, roll a d10. If the die roll is greater than the Towed Decoy hit number (6+), the torpedo is destroyed, along with the Decoy.
- Noise Maker: A Noisemaker can help with the Torpedo Defense (TD). When deployed during a torpedo attack, increase the sub's TD value by 1.
The Towed Decoy is considered deployed during a mission. You must deploy a Noise Maker prior to resolving the Towed Decoy and Torpedo Attack. Only one Noise Maker can be deployed per torpedo attack.
15.2.4 Select SSN/Commander for Mission
If performing an SSN mission, select the SSN and Commander to perform the mission.
15.2.5 Set Up SSN on Tactical Display
15.2.5.1 Place SSN Tactical Display Overlay
If not placed already, place the SSN Tactical Display Overlay on the Tactical Display.
15.2.5.2 SSN Placement
Place the appropriate SSN counter on the desired Sub square (Fast or Slow). Place the SSN counter at the desired Sub Depth. Place the Mission Location counter in the area where the Target is located.
15.2.6 Purchase SSN Ordnance
Per the SSN card, purchase SSN ordnance to attack enemy ship and subs. You can only purchase the amount of ordnance that is less than or equal to the Weapon Storage value on the SSN card.
SSN ordnance is used by the US SSNs to attack Ships (UGM-109, UGM-84), subs (MK-48), or to drop mines (Mk-60). Ordnance must be loaded into the SSN Torpedo Tube to be fired.
- UGM-84 Harpoon: The UGM-84 is a submarine launched Harpoon anti-ship missile. The UGM-84 can only be fired against detected ships.
- UGM-109 TASM: The UGM-109 is a submarine launched Tomahawk anti-ship missile that can be fired at detected or undetected ships in search mode.
- Mark 48 Torpedo: The Mark 48 torpedo can be fired at detected enemy ships and submarines. With a Commander action, the torpedo can be fired in Guided mode (G) to increase the chances of hitting the target. Firing in Guided mode requires a Commander action.
- MK-60 Mine: The Mk-60 mine can be deployed as part of a mission.
15.2.7 Place SSN Counter
Place the SSN counter in the Campaign start area denoted by the Blue Star.
SSN Mission Set Up (Example)
Mission SO Points (4.1.1) – The Campaign sheet indicates I get 22 SO Points per mission. Plus, I have 6 SO Points remaining from the original 100 SO Points, for a total of 28 SO Points available.
Target Selection (4.1.2) – I pick the first target card off of the Target pile. It is Target #24 – Enemy Assault Force. Because it is on the Campaign sheet in red, I must immediately attack this target. The Penalty part of the target card indicates that if I don't destroy all of the amphibious ships, the Campaign immediately ends. I want to send my best sub and commander for this critical mission.
Priority R&R (4.1.3) – Not needed for the first mission.
Replace Destroyed SSN (15.2.2) – I don't have any destroyed SSNs, so I skip this step.
Purchase SSN Skills or Equipment (15.2.3) – I choose to not purchase additional skills or equipment.
Select SSN/Commander for Mission (15.2.4) – I decide to take my Skilled SSN-719 (USS Providence) and my Skilled Commander Mancuso. Because the SSN-719 is a LA Type II SSN, I use the LA Class Improved sub card.
Set up SSN on the Tactical Display (15.2.5) – I set my SSN-719 to Fast and Above the Layer. My Towed Array starts below the layer.
Purchase Ordnance (4.1.9) – For the main target, I have to take out 2 military ships and 3 amphibious ships, plus deal with a random sub. I also may have some random encounters on the way. I have 28 SO points to spend on ordnance if I want. The Providence can store up to 25 (non-TLAM) ordnance. I decide to purchase 10 Mark 48s (10 SO points), 10 UGM-84s (5 SO points), and 5 UGM-109s (5 SO points) for a total of 20 SO points. I put them on my SSN card in the Weapon Storage section.
Fill Out Log Sheet (4.1.11) – I fill out my log sheet showing Target 24 and taking SSN-719 and SSN Commander Mancuso.
Place SSN Counter (15.2.7) – I place the SSN counter on the Campaign Sheet.
Roll for Enemy TF Placement (4.2.2) – The Task Force counter on the Campaign Sheet is 3, so I roll to place 3 Soviet Task Forces. I roll a 6, 10, and 3. I place the enemy TF counters in the appropriate locations on the Campaign Map.
Shuffle Decks (4.2.3) – I shuffle the Encounter, Enemy Sub, and Enemy ship card decks and place them on the Tactical Display. I also shuffle the Sub Sensor Performance cards and put them nearby.
15.3 SSN Mission Execution Phase
Perform the following steps to move the SSN through each Campaign area to the Target area.
15.3.1 SSN Movement
On the Campaign map, move the SSN counter one area closer to the Target.
15.3.2 Enemy Task Force Activity Check
Check to see if a Random Encounter occurs per 5.3. If so, set up an Enemy TF Engagement (15.4).
15.3.3 Target Area Check
Target Area Check (5.4). Check to see if SSN can attack the Target. If so, set up the Target TF Engagement (15.4).
15.3.5 Mission Complete Check
Mission is complete after the Target Engagement.
(The source has no 15.3.4 heading; numbering kept as printed.)
SSN Mission Execution (Example)
I advance the SSN counter on the Campaign Map two spaces until I reach the first potential random TF Encounter. The current Campaign Activity level is +1. I roll a 4, modified to 5. Based on the Encounter card, the Activity Level is None.
I advance into the Mission Location. There is another enemy TF counter, so I perform another Enemy Task Force Activity Check (15.3.2), and this time I roll a 6, modified to 7. The Activity Level is Low. I flip the card, and I have two random subs.
I set up the Random Encounter per section 15.4 and resolve the random Encounter.
I now perform a Target Area Check (15.3.3). Since I am in the Target area, I set up the Target Encounter per Target TF Engagement step 15.4. During the Target encounter, I destroy the amphibious ships.
I perform the Mission Complete Check (15.3.5), and the Mission is determined to be Complete.
15.4 SSN Encounter Set Up
The following steps are performed to resolve a Tactical Engagement.
Encounter set up for the SSN Encounter follows the exact same steps as the core game, with the exception of the first step (SSN Set up).
15.4.1 SSN Set Up
15.4.1.1 SSN Tactical Display Set Up
Draw a Sub Sensor Performance card and place it on the SSN Tactical Display Overlay in the Subsurface Environment box.
Decide whether you want the SSN to be Fast or Slow. When Fast, the SSN gets a Detect +1 modifier, but suffers 2 Stress after the encounter. When Slow, the SSN has a NM +1 modifier, but only suffers 1 Stress during an encounter.
Decide the depth for the Towed Array and place the Towed Array counter on the Above Layer or Below Layer box on the Tactical Display.
15.4.1.2 Load Torpedo Tubes
Depending on how many torpedo tubes the SSN has, you can load ordnance into each tube so that it can be fired.
15.4.2 Enemy Encounter Set Up
If the Encounter is based on drawing an Encounter card with an Activity Level of High or Low, go to Section 6.1.2 and complete set up (6.1.2, 6.1.4, 6.1.5, and 6.1.6).
If the Encounter is based on attacking the Target, go to Section 6.1.3 and complete set up (6.1.3, 6.1.4, 6.1.5, and 6.1.6).
Use the Sensor Performance Cards rules section 10.2 to determine if the enemy subs are above or below the layer. Place a Deep counter next to enemy subs that are below the layer.
For Event cards that mention the Task Force or TF ship, apply the event to the SSN. Some Event cards are ignored (Alert Crew, Engine Trouble, Enemy Bear Attack). The Fighter Cover event means no Enemy Helicopter launches are made during the encounter.
SSN Encounter Set Up (Example)
I am setting up the encounter for the Enemy Assault Force target encounter. It consists of 5 ships and one enemy sub.
I draw a Sub Sensor Performance card from the deck and place it on the Tactical Display. There is a weak Thermal Layer, so I will need to roll to see if any enemy subs are above or below the layer.
I decide to keep SSN Providence as Fast to increase the chances of Detection (Detect +1) at the cost of 2 Stress for the encounter. I place my SSN Above Layer and my Towed Array below the layer to help detect enemy subs that are below the layer. I can change this with an action if required during the encounter.
Because it is likely that the enemy sub will be closer to my SSN than the ships, I decide to load my four torpedo tubes with two Mark 48 torpedoes, one Harpoon missile (UGM-84), and one TASM missile (UGM-109).
15.5 SSN Encounter Steps
Perform the following steps for the SSN Encounter. Repeat the steps until the Encounter is over.
- Perform Fast SSN/Commander Actions (15.5.1)
- Move Enemy Ships/Subs (6.2.3)
- Perform Enemy Ship/Sub Actions (15.5.2)
- Perform Slow SSN/Commander Actions (15.5.3)
- Decrease Detection Levels (6.2.6)
- Reset Commander Actions (6.2.7)
- Decrease Battle Turn Counter (6.2.8)
- End Encounter Decision (6.2.9)
15.5.1 Perform Fast Actions
The SSN (in Fast location on Tactical Display) and SSN Commander can perform Fast Actions. Fast Actions can be deferred to Slow Actions if desired. See the following pages for Action descriptions.
15.5.2 Perform Enemy Ship & Sub Actions
Perform the following Enemy Ship and Sub actions:
15.5.2.1 Helicopter Launch Check
If an Enemy Ship has a Helicopter, roll a d10 and compare it to the Launch value. If the die roll equals or exceeds the Launch value, the enemy Helicopter launches. For each launched Helicopter, perform a Helicopter SSN Detection Check (15.5.2.2).
Perform this check for all enemy ships that have Helicopters.
Example: The DDG Udaloy is on the Tactical Display. It has a Ka-25 Helicopter, and it launches on an 8+. I roll a 9, which means the Ka-25 Helicopter launches and begins searching for my SSN.
15.5.2.2 Helicopter Detection Check
Find the Enemy Helicopter counter that launched. The dark red section is used to Detect and attack submarines.
For launched Helicopters, roll a d10 and subtract the SSN NM and Thermal Layer modifier (if the SSN is below the layer). Compare the modified die roll to the Helicopter Sub Detect values. If the SSN is detected, place an SSN counter and the appropriate Detection counter next to the Enemy Helicopter and perform a Helicopter Attack (15.5.2.3).
Example: The Ka-25 Hormone helicopter launched from the DDG Udaloy and begins searching for my SSN. The USS Providence has a NM of 2 and is above the thermal layer. I roll a d10 and it is 10, modified by the NM (-2) to 8. My SSN has been detected by the Helicopter. I place a Detected SSN counter along with a Detection +1 counter next to the Helicopter counter.
15.5.2.3 Helicopter Attack
If the SSN is detected, roll for a Helicopter Torpedo attack. Modify the die roll with by subtracting the SSN TD. The SSN can deploy one Noise Maker if available. If a Towed Decoy is deployed, check to see if the torpedo is decoyed. Compare the modified die roll to the Atk value. If the SSN is hit, draw a Damage chit from the Damage cup. Remove the Detected SSN counter and Detection counter. The Helicopter returns to its ship.
Example: The Ka-25 Hormone helicopter had detected my SSN, and now performs an attack. The helicopter has a Sub Attack (Atk) value of 8 and gets modified by my SSN's Torpedo Defense value (TD = 2), so I need a roll of 10 to hit my SSN. I roll a 6, modified to 4. The Helicopter torpedo attack fails. I remove the Detected SSN and Detection counters. The Ka-25 Hormone returns to its ship.
15.5.1 / 15.5.3 SSN Actions
Detection Attempt
The SSN can attempt to detect an enemy ship or sub using the SSN Towed Array (TA) or Spherical Array (SA), but not both in the same action. The Sub can attempt detection out to Range 6. Do not use Range Modifiers.
The Sub Sensor Performance card is used to determine Detection modifiers based on range or Thermal Layer modifier. Enemy Subs with a Deep counter are considered below the Thermal Layer.
The SSN can also use Active Sonar (Red Detection numbers) to attempt enemy sub detection. If the SSN uses Active Sonar, place the Ping counter in the Sub Detection Modifiers box.
SSN Detection Modifiers:
- Skill Level (Okay/Shaken)
- Current Enemy Detection Level (add detection level)
- Fast Sub Position (+1)
- Enemy Ship/Sub NM (subtract NM of Target)
- Damage Modifiers
- Sub Sensor Performance cards
Fire Torpedo
The SSN can fire one or more torpedoes (up to the maximum loaded in the Torpedo Tubes) against a detected sub or ship. For the SSN Fire Torpedo action, only unguided Torpedoes can be fired. A Commander Action is required to fire a Guided Torpedo.
Resolve the Torpedo attacks similar to Ship TF Torpedo Attacks. Place a Torpedo Fired counter in the Sub Detection Modifiers box.
Fire Missile
The SSN can fire one or more missiles (up to the maximum loaded in the Torpedo Tubes) against a detected ship. Missiles cannot be fired when the sub is below the Thermal Layer. Resolve using the same procedures as the Core Game. Place a Missile Fired counter in the Sub Detection Modifiers box.
Load/Reload Torpedo Tubes
Load the SSN Torpedo Tubes with desired ordnance. Loading one or more torpedo tubes requires only one Action. As part of the action, ordnance in a torpedo tube can be removed and reloaded with different ordnance.
Lay Mines
The SSN can lay mines in the designated Mission Area.
Evasion
The SSN can perform an Evasion action when attacked by an enemy torpedo. An Evasion action increases the SSN TD by 1. The Evasion action temporarily disrupts the Towed Array, so no Towed Array detections can be performed during the Slow Action phase. Evasion can be performed by a Slow action.
Deploy Countermeasures
If the SSN has countermeasures (Towed Decoy or Noisemaker) and the SSN is attacked by a torpedo, the SSN can activate the desired countermeasure. No SSN Action is required to deploy countermeasures.
- Towed Decoy: The Towed Decoy can destroy an incoming torpedo if deployed. When deployed, roll a d10. If the die roll is greater than the Towed Decoy hit number (6+), the torpedo is destroyed, along with the Decoy.
- Noisemaker: A Noisemaker can help with the Torpedo Defense (TD). When deployed, increase the sub's TD value by 1.
Adjust Towed Array Depth
Change the depth of the Towed Array. The Towed Array counter can go on the Tactical Display or the Sub Organization card.
Repair Attempt
If the SSN has suffered repairable damage, it can use an Action to attempt to repair damage that is repairable. Roll a d10. If greater than or equal to the SSN Repair value, remove the damage counter.
15.5.1 / 15.5.3 SSN Commander Actions
Move Sub
The SSN can move to close or open the range to/from the enemy ships and subs. Use the same procedures as the Move Task Force Actions.
Change Depth
The SSN can be at one of three depths; Periscope, Above Layer, and Below Layer. Most environments have a Thermal Layer that dampens detection between sensors and subs above and below the layer.
- Periscope Depth: Some missions require the SSN to be at Periscope Depth to gather intel. When at Periscope Depth, modify NM by -1. Place a Periscope Depth counter in the Sub Detection Modifiers box.
- Above Layer: The SSN is located above the Thermal Layer, making it easier to detect ships and other subs also above the Thermal Layer. The SSN can still detect subs below the layer without the layer reducing detection if the SSN Towed Array is placed below the layer.
- Below Layer: The SSN is located below the Thermal Layer, making it easier to detect subs also below the layer and harder to be detected by enemy ships and subs above the Thermal Layer.
Sub Action
The SSN Commander can give an additional Action to the SSN. The SSN can perform any Action it is allowed to do.
Guided Torpedo
The SSN can fire one or more Guided Torpedoes at an Enemy target using a Commander Action. This requires an SSN Fire Torpedo action also.
Focus Detect
The SSN Commander can use 2 Actions (along with a Sub Action) to perform an SSN Focus Detect, which adds a modifier to the Detection Attempt.
Specialized Actions
- Harpoon Attack +X – Spend a Commander Action to add a modifier to a UGM-84 Harpoon Attack made using an SSN Action. The modifier applies to the entire missile volley.
- Torpedo Attack +X – Spend a Commander Action to add a modifier to a Torpedo Attack made using an SSN Action. The modifier applies to the entire Torpedo volley.
- Ship Attack +X – Spend a Commander Action to add a modifier to any Ship Attack made during an SSN Action.
- TD +X (Slow Action) – Spend a Slow Commander Action to increase the Torpedo Defense value when the SSN is attacked. Subtract a Slow Action during the Slow Action phase.
- Sub Detect +X – Spend a Commander Action to add a modifier to a Sub Detection attempt during an SSN Action.
- Ship Detect +X – Spend a Commander Action to add a modifier to a Ship Detection attempt during an SSN Action.
- Silent Running (NM+1, No Attacks) – Add a NM +1 modifier for the entire Encounter turn, but no Attacks can be performed that turn.
- Inspirational Speech – Spend 3 Commander Actions to reduce 1 Stress from a Shaken sub.
- Skill +X – The SSN can add additional Crew Skills to the SSN.
15.5.2.4 Enemy Ship Actions
Perform the Enemy Ship actions per 6.2.4 (Enemy Ship/Sub Actions), only apply their actions against the SSN (no draw cup). Ignore the Draw for Contacts (6.2.4.2) step.
Use the Sub column on the Enemy Ship and Sub cards to detect and attack the SSN. For ships and subs that have Contacts 2 or greater, assume Contacts is 1 and only perform one action against the SSN.
Apply the Sub Sensor Performance card modifiers when enemy ships and subs attempt SSN detection. Do not use the Range Modifiers on the Tactical Display. No Sub Sensor Performance card modifiers are used to attack.
All SSN hits use the Torpedo side of the Damage counter.
Example: The CBN Kirov is at Range 4. My SSN is above the layer and has a NM = 2. My SSN is currently undetected by any ships. The Kirov (Ship #1) performs a Detection Attempt (6.2.4.3). Per the Sub Sensor Performance card, the R4 modifier is +1 and a Surface Detection Modifier is +1. My NM is 2 (-2 modifier). The total detection modifier is 0. Using the Sub Detect numbers, I roll a 6. My SSN is detected at Level 1. The Kirov actions are complete.
Example: The Udaloy (Ship #2) is the second ship and is at Range 3 (within Weapons range). Since my SSN is detected, I perform a Command & Control check. The CC on Target 24 is 5+. I roll a 7, so the Udaloy is in Command and Control. Which means that it performs an attack on my SSN. I roll to see if one or two missiles is fired per the Attack note. I roll a 4, so the Udaloy only fires one missile. The Udaloy Missile Attack is 6/9 [R3]. The Missile releases a Torpedo that attacks my SSN. My SSN has a TD of 2 (-2 modifier) and is detected at Level 1 (+1 modifier), for a total modifier of -1. I roll an 8, modified to 7. One hit. I pull a Damage chit from the cup and look at the Torpedo side. It is Sub Attack -2 (Repairable). I place the damage counter on my SSN card. Since I destroyed the Enemy Sub earlier, I only have the three Ropuchka ships that can't detect or attack me at Range 5 and 6. The Enemy Actions turn is complete.
15.5.3 Perform Slow Actions
The SSN and SSN Commander can perform Slow Actions.
15.6 SSN Encounter Complete
Perform the following steps after the Encounter:
- Draw Event Card (6.3.1)
- Evaluate Encounter (6.3.2)
- Remove Repairable Damage (6.3.3)
- Add Stress to the SSN/Commander (6.3.4)
- Record Experience (6.3.5)
- Group Promotions (6.3.6)
15.7 Mission Debriefing
Perform the following steps after the Mission:
- Target Evaluation (8.1)
- Adjust Campaign Tracks (8.2)
- Rested SSNs, Commanders (8.3)
- Unused Ordnance (8.4)
- Unused SO Points (8.5)
15.8 Campaign Evaluation
Perform the following steps after the Campaign:
- Victory Point Total (9.1)
- Campaign Evaluation (9.2)
16 Example of Play
SSN Tactical Encounter
The following walks through a couple of Battle Turns for an SSN Tactical Encounter. I have the USS Dallas (Average) and SSN Commander McCafferty (Average).
Encounter Start
I am facing two unknown subs (one Deep) and one Ship (Sovremenny). I placed my SSN above the layer, but put my Towed Array sensor below the layer since the closest Enemy Sub is Deep (i.e. below the layer). I decided to load 3 torpedoes and 1 Harpoon into the sub torpedo tubes to start. I also decided to put my sub in the Fast box so that I get an additional Action prior to the Enemy, at the cost of +2 Stress after the encounter.
Turn 1
My first Action is to attempt to detect the unknown Enemy Sub at Range 4. I need a 6/9 to detect the sub with my Towed Array (TA). I roll a 4 (-1 total modifier) for a 2… no detection. Commander Bowman uses his Fast Action to give my sub an additional action, so I will perform another detection attempt. I roll an 8 (-1) for a 7. I detect the sub at Level 1.
Detection modifiers shown in the example:
- Enemy NM Value = 1 (-1 modifier)
- Sub Card Sub Modifier: -1
- Fast SSN: +1
- TOTAL Modifier: -1
I flip the Enemy Sub counter over a roll a d10. I roll a 5, so I draw an Enemy Sub card from the pile. I draw an Akula nuclear sub, which requires 2 hits to destroy it. I replace the Enemy Sub counter with a Sub 1 counter, starred side up, and place a Detect 1 counter under it.
I roll for enemy movement now. I roll a 5 for Akula (Range -1), a 4 for the Enemy Sub (Patrol), and a 6 +2 (Range -1) for the Sovremenny.
The Akula attempts to detect my SSN. The Akula is at Range 3 below the layer, and my SSN is above the layer (applies a -2 detection modifier). It needs a 5/9 to detect my SSN. I roll a 9 (-4), which is a 5 (Detected Level 1).
Detection modifiers shown in the example:
- Thermal Layer: -2 modifier
- SSN NM: -2 modifier
- TOTAL Modifier: -4
The unknown Enemy SSN is out of detection range. The Sovremenny is at Range 5 and within detection range (7/9 -2 SSN NM). I roll a 6, so no detection.
Commander Bowman still has 2 Slow Actions. The Akula is out of range of my torpedoes. I can move my SSN to decrease the range and fire unguided torpedoes (Akula has a TD of 1). I also have 2 Actions in the next turn. I decide to move my SSN (reduce the range of all Enemy units). I then give an Action to my SSN, which performs another Detect of the Akula (+1 Environment card, +1 Range, +1 Detect, -1 Sub card), -1 Enemy Sub NM). I roll an 8 (+1), which is Detect Level 2.
End of Turn 1
I reduce the Detection levels of all units and move the Battle Turn counter to 4.
Turn 2
I have an SSN Fast Action and a Commander Fast Action. I decide to fire two guided torpedoes at the Akula (guided torpedoes require a Commander Action). I roll a 5 and an 8, getting 3 hits. Only 2 hits is required to sink the Akula. I remove the counters associated with the Akula and earn one XP for destroying a Starred sub. I place a Torpedo counter in the Sub Detection Modifiers box.
Modifiers shown in the example:
- Range Modifier: +1
- Detection Level: +1
- Environment Card: 0
- Torpedo Defense: -1
- Volley Fire (2nd torp): +1
- TOTAL Modifier: +1/+2
I then move on to the enemy Sub/Ship movement step.
17 Subs and Ordnance
Los Angeles Class SSN
The "688 class" Los Angeles nuclear-power fast attack submarine can carry 25 tube-launched weapons, including Mark 48 torpedoes, Harpoon missile (UGM-84), and Tomahawk TASM (anti-ship) and TLAM (land attack) missiles. The sub can also deploy MK-60 mines also.
Los Angeles Class Type II SSN
The Los Angeles class Type II is an updated version of the Los Angeles class sub that includes 12 VLS tubes to launch TLAM missiles.
Los Angeles Class Improved SSN
The "688i class" Los Angeles class improved is an updated version of the Los Angeles class sub that includes the 12 VLS tubes to launch TLAM missiles. The improved class also is quieter and has advanced electronics and sensors.
Permit Class SSN
The Permit class submarine (also known as the Thresher class) is an older fast attack submarine that is noisier than the 688 class. It cannot use the UGM-109 TASM. It can carry up to 23 tube-launched weapons.
Sturgeon Class SSN
Source note: the printed Sturgeon Class box repeats the Permit Class text word for word (it is transcribed here as printed, not corrected; it appears to be a copy error in the source).
The Permit class submarine (also known as the Thresher class) is an older fast attack submarine that is noisier than the 688 class. It cannot use the UGM-109 TASM. It can carry up to 23 tube-launched weapons.
Sub to Surface Missiles
- UGM-84 Harpoon: The UGM-84 is a submarine launched Harpoon anti-ship missile. The UGM-84 can only be fired against detected ships.
- UGM-109 TASM: The UGM-109 is a submarine launched Tomahawk anti-ship missile that can be fired at detected or undetected ships in search mode.
When the SSN fires a missile at a ship, place the Missile fired in the Sub Detection Modifiers box. This increases the sub noise (NM -2) and increases the chance of getting attacked by an enemy helicopter.
Sub to Sub Torpedo
- Mark 48 Torpedo: The Mark 48 torpedo can be fired at detected enemy ships and submarines. With a Commander action, the torpedo can be fired in Guided mode (G) to increase the chances of hitting the target.
When the SSN fires a torpedo at a sub or ship, place the Torpedo fired in the Sub Detection Modifiers box. This increases the sub noise (NM -1).
Sub Mines
- Mk-60 Mine: The Mk-60 mine can be deployed as part of a mission.