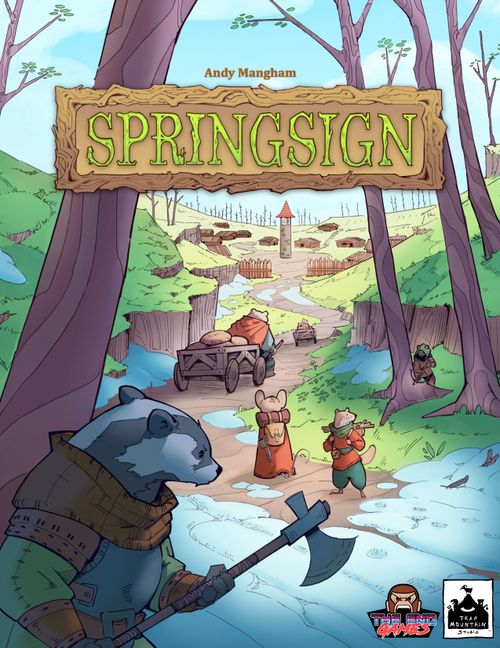
Springsign
Springsign Rulebook
Table of Contents
Table of Contents
Components
- A. Rulebook, Game Board
- B. Folkwarden Hat Token
- C. Reference Cards x6
- D. World Cards x53
- E. Settler Cards x34
- F. Resource tokens x120
- G. Player boards x6
- H. Harvest Tiles x6
- I. Market Surplus Tiles x6
- J. Player Markers x33
- K. Anarchy markers x2
- L. Rage Card
Setting Up
- Lay the game board on the table. Pool the resource token supply and market surplus tiles somewhere nearby.
- Add the harvest tiles to the "Harvest" section of the game board.
- Shuffle the Settlers Deck and the World Deck and set them on the game board.
- Draw settler cards from the Settlers Deck equal to double the number of players (to a minimum of three cards) and play them face-up in "People" (below the game board).
- Draw cards from the World Deck until you have six relic cards, three building cards, and two outlaw cards. Shuffle any extra cards you drew back into the deck.
- Relics: Shuffle the relics, then play them (face-up) into the three relic markets (two per market, one stacked on the other).
- Buildings: Shuffle the buildings, then play them (face up) into the three building markets (one per market).
- Outlaws: Put the two outlaws face-up in "People".
- Give the Folkwarden Hat to whoever owns the most hats. You are the Folkwarden!
| Place | Starting resources and popularity |
|---|---|
| Folkwarden | fish, work, metal, lore, favors |
| Player 2 | fish, fish, work, lore, favors |
| Player 3 | fish, work, metal, strength, lore, favors |
| Player 4 | fish, fish, work, strength, lore, favors |
| Player 5 | fish, fish, work, strength, lore, favors, 1 popularity |
| Player 6 | fish, fish, work, strength, lore, favors, 2 popularity |
(The manual prints this table as icons; the rows above are transcribed from the printed icons. The star-marked heart on the Player 5 and Player 6 rows is one and two popularity respectively.)
The Rules
Popularity & Votes
To win Springsign, you'll need to score the most votes by the Election (which is the end of the game). You'll learn more about the Election later, but for now, just know that the Election only occurs once someone has scored the target number of votes.
Votes are gained by having more popularity than your opponents. Track both with your markers on the game board.
| Players | Votes to Trigger Election |
|---|---|
| 1-2 | 5 |
| 3-4 | 4 |
| 5-6 | 3 |
Note: the votes track is technically unlimited (you can score more than six votes if you're doing really well), but the popularity track is limited to eight. If you have eight popularity and gain more, you may choose to immediately score a vote, reset your popularity to "Start", and continue from there. Otherwise, remain at eight popularity.
Anarchy
Anarchy represents unrest and dissent among the townsfolk, and behaves like another player: it can gain popularity, score votes, and even win the game if you're not careful! Anarchy is mainly fueled by outlaw cards.
Note: If Anarchy gains more popularity while already at eight, always reset its popularity and score a vote.
Areas of the Game
- Homestead: the area in front of you, where you keep your stuff (your player board, cards you've acquired, your resource tokens, etc.). Only you may use anything in your homestead. You can hold any number of cards in your homestead.
- Town: the public area in the middle of the table, and is where the game board is kept, as well as anything on it. Anything in "People" is also in Town.
-
Markets: six special areas in Town which hold cards (there are three "building" markets and three "relic" markets) and resource tokens of a particular type. A market can hold any number of cards and tokens.
Multiple cards in the same market are stacked on top of one another. Only the top, uncovered card is active (in the case of buildings) or available (in the case of relics). Ignore any covered cards — they don't count as being in play or in Town until they're uncovered again.
You only take resource tokens from a market when you shop from them.
-
- Discard Pile & Resource Token Supply: The card discard piles and the supply of resource tokens are their own small areas. They aren't part of Town or a homestead.
Resources
There are six resource types in Springsign: fish, work, metal, strength, lore and favors. Sometimes you'll also see any resource, which represents any resource — your choice.
Resource tokens you take are stored in your inventory slots. If you ever have more tokens than inventory slots, you'll need to immediately discard tokens of your choice until you can fit what remains.
Important: Resources are never wasted in Springsign. Whenever you pay or spend resources they go back to the supply, but whenever you discard resources, they go straight to the appropriate market.
When you shop a token, take it from a market. If there aren't any more of those tokens left in the markets, you won't take anything.
Cards
The types of cards in Springsign are settlers, outlaws, relics, and buildings. Whenever a card is discarded, it goes into the appropriate discard pile, and if a deck is ever empty, shuffle its discard pile to make it the new deck. Whenever you take a card, it goes to your homestead. Cards are only face-down while in a deck; they're face-up in all other areas.
Settlers generate new resources every season by "replenishing" them. While a settler is in your homestead, any tokens on it immediately go to your inventory.
Outlaws are troublemakers found in the World Deck. They'll stick around Town causing Anarchy until someone "Tussles" with them (gaining their bounty as a reward).
Relics give you powerful new abilities while they're in your homestead; while in a relic market, they have no effect. When you play a new relic, play it in a relic market of your choice, covering any cards that might be beneath it.
Buildings have abilities which award popularity. You never take buildings — they're stored in the three building markets. So long as it's uncovered, any player can use a building's ability or action. Using buildings is the main way you'll gain popularity, so pay attention to them! When you play a new building, play it in a building market of your choice, covering any buildings that might be beneath it.
When are new cards played? New settlers enter town during the "Inbound Traffic" step of the Cleanup Phase. New outlaws, relics, and buildings enter town from various effects, usually the "Explore" action.
Actions
Actions (identified by the action arrow symbol) are the main way you'll interact with the game. To take an action, you must fully pay its cost, then fully resolve its effect. You may only take actions on your player board, on relics in your homestead, and on active buildings in Town. You may take the same action multiple times so long as you can pay its cost and resolve its effect.
Example: if you take the "Hire" action on a simplified homestead, pay two favor tokens and a third token of your choice, then take a settler card in Town, then pass your turn.
Player Boards & Markers
Each player board has two sides:
- A simplified side, with straightforward actions and no abilities. Recommended for new players.
- A unique side, which has asymmetric actions and some unique abilities. Recommended for players looking for more challenge, or experienced gamers.
Both sides are equally powerful; each player may freely choose which side to play with.
Some unique boards have abilities that mark cards. To mark a card, put one of your extra player markers on it (markers are different than tokens). There is no limit to the number of cards you may mark, so if you run out of markers, find a suitable substitute. A mark is only removed when its card is covered or discarded.
Playing the Game
Springsign is played over several "seasons" — most games take around four seasons until someone reaches the number of votes required to trigger the Election and end the game. Each season is broken up into three phases: the Replenish Phase, the Actions Phase, and the Cleanup Phase. After setting up, simply proceed with the Replenish Phase and follow along!
1) The Replenish Phase
Resolve all replenish abilities by taking the indicated resource token from the supply and placing it on the ability. Every settler in play and each market will replenish.
Players immediately take all the tokens that their settlers or other effects generate (which, if you run out of inventory space, may force you to discard some tokens into the appropriate markets).
Replenish each market. You can use the surplus tiles to represent a stack of tokens.
2) The Actions Phase
During this Phase, each player takes turns in clockwise order, starting with the Folkwarden. On your turn, you must take actions until one makes you "pass", at which point your turn is over and the player to your left begins. You only end your turn by taking an action that makes you pass.
At this point, we recommend you pause to look over the actions on your player board, and then try playing a few turns. Remember to look at the buildings currently in play — they will reward you for pursuing certain strategies.
Eventually, you'll have to take the "Return Home" action (which costs no resources). Once you "Return Home", you can't take any more turns for the rest of the season, and the remaining players will ignore your place in the turn order.
"Return Home" lets you take one of the limited harvest tiles in Town and immediately gain its benefits.
Harvest Tile Benefits
- Fish icon: take a fish token from the supply.
- Popularity icon: gain a popularity.
- Folkwarden Hat icon: take the Folkwarden Hat token (if you don't have it already).
Once all players have "Returned Home", move on to the Cleanup Phase.
3) The Cleanup Phase
a. Return Harvest Tiles: Each player returns their harvest tiles to the game board.
b. Trouble Brews: Anarchy gains two popularity for each outlaw in Town. If an outlaw is somehow in a player's homestead, it does not add to Anarchy.
c. Town Votes: Whoever has the most popularity scores a vote (if there's a tie, everyone tied each scores a vote). Then, whoever just scored a vote moves their popularity marker back down to "Start" (all other markers remain where they were). At this point, if anyone has reached the target number of votes, immediately resolve the Election (see below). Include Anarchy in all of the above, as if it were another player.
d. Outbound Traffic: Each settler with at least one token on it is discarded, its tokens discarded into the appropriate markets. Settlers move on if they aren't fed or can't find enough work!
e. Inbound Traffic: Reveal and play cards from the settlers deck equal to the number of players (to a minimum of three cards). The cards go in "People".
The Election (Game End)
The Election is when the winner of the game is determined, and can only occur during the Town Votes step of the Cleanup Phase. For the below cases, treat Anarchy like another player.
If a player has more votes than anyone else, they win the game. If there's a tie in votes, the tied player with the most popularity wins. If there's still a tie, the tied player with the greater number of cards and resource tokens (added together) in their homestead wins (count outlaws in Town as cards for Anarchy. It has no tokens). If there's still a tie, the tied players share the victory (or they could always play again)!
If a player wins the game, that player has been elected Mayor of Springsign and enjoys a long and fruitful career as the head of a booming new frontier town. If Anarchy wins the game, the townsfolk have finally gotten fed up with their council's shenanigans and have chased you all from town. In either case though, don't worry if you didn't win: there will be more towns in need of your guidance in the future!
Challenges
If you and your playgroup are looking to add a twist to your Springsign game, try playing with one or more of the following optional challenges!
- Disgruntled Settlers: Whenever a Settler in Town is discarded, increase Anarchy's popularity by 2.
- Inbound Outlaws: At the end of the Cleanup Phase, add an additional step called "Inbound Outlaws". During this step, reveal and discard cards from the World deck equal to Anarchy's current votes. Whenever you reveal and discard an outlaw card this way, immediately play it in "People".
- Ruthless Outlaws: Each outlaw adds an additional popularity to Anarchy during the "Trouble Brews" step of the Cleanup Phase. If you wish, you may increase the severity of this challenge by increasing the popularity each outlaw adds!
- Marathon: Play till an additional vote is reached, such as playing to 4 votes in a 5-6 player game, instead of the normal 3. This will usually make the game longer by roughly one season, and give each player more of an opportunity to develop their engines.
Solo Mode
Springsign may be played with just one player with a few minor alterations to the basic rules:
- Take out the World cards with the "multiplayer only" symbol (the 2+ badge) and leave them in the box.
- Play with the Inbound Outlaws game challenge (see above). You may add additional challenges if you wish.
- Each market has a maximum capacity of three resource tokens. Whenever an additional token would be added to a market with three tokens, instead return that token to the supply, then reveal and discard the top World card. If it was an outlaw, immediately play it in "People".
Once you've made these changes, you're ready to proceed with the game as normal. Keep in mind that this mode will feel very different from normal Springsign — the various challenges will cause Anarchy to increase rapidly, and you may feel like you're trying to bail water out of a sinking boat! Stay cool, and remember your goal isn't to stop Anarchy, just to keep it at bay just long enough for you to slip ahead and secure enough votes. Good luck!
Clarifications
The rules in this section are not necessary during most games of Springsign, though you may need to refer here if you come up with questions during the game or want a deeper understanding of how the game works.
The Golden Rule
In Springsign, there are many effects and abilities which can twist (or break) the normal rules of the game. If you encounter a card or an ability that conflicts with this rulebook, ignore the rulebook and follow the card or ability.
The Silver Rule
In Springsign, multiple abilities and effects will usually activate (or "trigger") at once. Usually these effects don't conflict with one another and the order in which they're resolved doesn't matter, but sometimes the order does matter. In this case, the active player (whoever's turn it is) decides in which order the abilities resolve. If there is no active player (like during the Cleanup or Replenish Phase), the Folkwarden chooses the order.
F.A.Q.
When do you take the resources in the markets?
You only take the resources in the markets when an ability or action (such as the "Explore" action) tells you to shop those resources. You do not automatically take tokens from the markets when you trigger a building or take a relic, unless there is an additional effect explicitly telling you to.
What happens if everyone has 0 popularity during the Town Votes step?
Everybody scores a vote.
Is the resource supply limited?
The resource tokens in the supply are not limited to what comes with the game. In case you run out, find a suitable substitute.
What happens if I can't find an explanation of what happens?
If you have a rules question and can't find an answer elsewhere in the rulebook, vote on it as a table. If the vote is tied, flip a coin.
When are cards replaced? When do new cards come out?
New settlers are only added to Town once per season, in the "Inbound Traffic" step of the Cleanup Phase. New relics, buildings, and outlaws are only added to Town when a particular ability plays a card from the World deck (most commonly this is done with the "Explore" action). Cards are never replaced automatically, e.g. a new relic is not automatically played when someone takes one from Town. It's technically possible that the Town will completely run out of cards until something refills them.
Simplified Player Boards
Each "Simplified" side of each player board is the same as every other Simplified board.
"Feed"
Take a resource token from a settler (the only ones that have tokens are settlers in Town, since settlers in homesteads automatically give their tokens to their player). If no settlers have any tokens on them, you may not take this action.
"Hire"
Choose a settler in Town, then take it by moving it to your homestead. If the settler has any tokens on it, the tokens immediately go to your inventory. If there are no settlers in Town, you may not take this action.
"Study"
When you "Study", choose any revealed relic in Town and take it by moving it to your homestead. When you take a relic in Town, it is not replaced until a new one is discovered with the "Explore" action, though it may uncover a new relic under it. When a relic enters your homestead, its ability immediately becomes active. You may not take this action if there are no relics in Town.
"Buy"
When you "Buy", take a token of your choice from the supply. You may choose to pay with any three of your resources (they may be different), or a metal and a resource of your choice.
"Tussle"
The "Tussle" action is one of the few ways to discard outlaws. You may not take this action if there are no outlaws in Town. When you "Tussle", gain the outlaw's "Bounty" ability (the Bounty is printed on the outlaw).
"Explore"
To play the top World card, simply flip it face up and play it in the appropriate area in Town.
If you play a building or relic, play it into one of the three appropriate markets for that card type (covering up any cards below it), then take any tokens in that market. You may choose to place the card in a market that has no tokens in it, though you won't get a reward for doing so.
If you play an outlaw, play it to the "People" section below the game board. You shop up to three resources (they may be the same or different). If there aren't enough tokens in any of the markets, take what you can.
"Return Home"
"Return Home" forces you to stop taking turns in a season, and lets you gain fish and other benefits for the next season by taking a harvest tile and immediately resolving its effects. You may not take a tile that has already been taken this season. You may take a tile that gives you more fish than you can carry in your inventory. If you do, you must discard resources of your choice, putting them in the appropriate markets, until you can fit the resources you want to keep (as per the usual inventory rules). If there are any bonus tokens on the harvest tile (from the Unique Gardener's abilities), take those tokens in addition to the harvest tile's normal benefits.
If nobody takes the tile that awards the Folkwarden Hat, the hat remains with the current Folkwarden.
Unique Soldier
The Soldier is especially good at "Tussling" to remove outlaws from Town. However, if he gets too angry, he'll scare the townsfolk, costing him popularity.
The Rage Card
The Unique Soldier comes with a special component, the Rage Card. At the start of the game, slide the card under the bottom-right side of your player board (so that it lines up with your "Tussle" action), until only the Cool level is showing.
The Rage Card has five levels (Cool through Berserk), each with their own abilities. When you gain or lose rage, move the card down or up respectively to reveal or hide new levels. Whenever you take the "Tussle" action, resolve all of the revealed abilities in order, from top to bottom. Therefore, high rage will make your "Tussle" more powerful.
Gaining too much rage will cause the Soldier to go beyond Berserk. When this happens, leave rage at Berserk, and instead lose a popularity. If the Soldier is at the "Start" space of the popularity track, each opponent and Anarchy gains a popularity instead.
"Meditate"
The only way to reduce rage is with the "Meditate" action, which lets you raise or lower your rage to any level.
"Explore"
When you "Explore" and play an outlaw, you must increase your rage by 1, 2, 3, or 4 (your choice), but you then shop any an equal number of times.
Unique Magus
By using her "Intuit" action and her Yorkhallow Savant ability, the Unique Magus can gain access to many relics very cheaply.
"Intuit"
With "Intuit", you may mark a relic in play. This could be one that's revealed in a market or in a player's homestead. Note that if you mark a relic in Town, a player may decide to "Explore" and cover it with a new relic. If this happens, your mark is discarded (as per the normal rules of marks).
Yorkhallow Savant
Yorkhallow Savant allows you to use any relic with your mark as if it were in your homestead. The card may still be taken if it's in Town, or used by an opponent if its in their homestead.
Because you can share relic abilities with other players, you might need to figure out the order in which two or more effects resolve. Remember The Silver Rule: the active player chooses what order to resolve triggers, and if there is no active player, the Folkwarden chooses.
"Explore"
Your "Explore" lets you look at two cards before picking one to discover. If you play an outlaw, take all marked relics in Town. Note that this will trigger your Stolen Secrets ability.
Stolen Secrets
When any player (including you) takes a relic you've marked, they shop any any. Be sure to remind your opponents this ability exists — it's actually a good thing if they take the relics you mark, since you can still use them, and now they can't be covered up in Town.
Unique Smuggler
Despite not being able to carry many resources herself, the Smuggler can use settlers in Town as a near-limitless extension of her inventory.
Inventory Slots & Smuggle
You only have four inventory slots, and they can only hold fish. Whenever you take another resource, you'll have to discard it. This means at the beginning of the game, you'll have to immediately discard some of your starting resources.
Whenever you discard a token, instead of having to put it into the appropriate market by default, you may choose to discard that token onto a settler in Town, so long as that settler has fewer than four tokens already on it.
Illicit Goods & Contraband Queen
So long as a token is on a settler that doesn't produce that type of resource, that token is considered "contraband". You may spend contraband tokens as if that token was in your inventory. For this reason, whenever you discard a token, you should use Smuggle to put it on a settler that doesn't produce that type of resource if you can, thereby giving you usage of it.
While a token is on a settler, it may still be taken by an opponent through "Feeding", "Hiring", or other effects. Whenever this happens, you gain a popularity.
Keep in mind that during the Cleanup Phase, any tokens left on settlers in Town will cause those settlers to be discarded, tokens and all (losing you the token).
Unique Gardener
By taking many small turns and harvesting extra fish she generates over the course of a season, the Gardener tends to be at her most powerful when her opponents are "Returning Home".
Slow and Steady
Whenever you pass, put a fish from the supply on a harvest tile. This is referred to as a "bonus fish". You may put the bonus fish on a harvest tile in Town or one that a player has already taken from "Returning Home". Note that when you "Return Home", you may also resolve this ability (after you take a harvest tile).
Shared Supper
Whenever a player takes a harvest tile by "Returning Home", they take any bonus fish you put on it. For each bonus fish an opponent takes though, you may immediately either shop any or mark a settler in Town. Note that if you put a bonus fish on a harvest tile that a player has already taken, they don't take that token.
"Harvest"
When you "Harvest", take all bonus fish you've placed on a harvest tile of your choice. You don't get the printed reward of the tile. You may choose a tile that another player has already claimed, though note they will have already taken all the tokens placed on that tile before they "Returned Home". As part of taking this action, you also may mark a settler in Town.
"Explore"
When you "Explore" and play an outlaw, you gain popularity or shop any for each settler in play with your mark on it. This means if there are no settlers with your mark, then playing an outlaw would give you no reward.
Unique Scoundrel
The Soundrel "Hires" outlaws instead of settlers, and uses them for a variety of benefits. His most powerful use of outlaws is to use them in conjunction with "Explore" to mark settlers and thereby steal their resources.
"Hire"
Instead of taking a settler in Town, you take an outlaw in Town. Your various actions and abilities give you benefits for having outlaws, so make sure to "Hire" them early and often.
"Explore"
When you "Explore" and play an outlaw, you get to mark settlers in Town equal to the number of outlaws you already have in your homestead. This means that you get no benefit from playing an outlaw if you haven't previously "Hired" any outlaws.
Could You Do Me a Favor?
With this ability you may freely spend resources on settlers in Town that you've marked, essentially treating them as extensions of your inventory. This doesn't mean you can freely take those resources, so they're still vulnerable to being taken and used by your opponents.
Crime for Cash
You replenish any every Replenish Phase for each outlaw in your homestead.
"Grift"
"Grift" lets you swap one of your outlaws for a settler in Town, or one of your settlers for an outlaw in Town. This does not count as "taking" the card you're swapping for.
You may spend popularity to take this action, though you may not spend the popularity if you're at the "Start" space of the track.
Unique Proprietor
The Unique Proprietor "Invests" in buildings, and gets rewarded whenever one of his buildings is used. Having a small inventory, the Proprietor relies on regular building triggers to sustain his seasons.
"Invest" & Reasonable Prices
"Invest" lets you mark a revealed building in Town, and "Reasonable Prices" lets you shop any whenever a player triggers that building, including you.
Since you get to shop any every time a building is triggered, try to mark buildings that you think are particularly easy to activate. Be wary of marking a building that has a full market, since your opponents will be even more incentivized to "Explore" and discover a new building to place there (removing your mark).
"Barterer"
You may trade resources or cards with your opponents on your turn or that opponent's turn. Trades must be agreed upon by both parties. Trades that can be fulfilled immediately are binding, but trades based on future promises may or may not be honored.
"Sell"
Your "Sell" action is cheap but restrictive, since it only allows you to gain resources by shopping them. If you're desperate for a resource that isn't in a market, you may "Sell" to swap that token into the market from the supply.
"Explore"
When you "Explore" and play an outlaw, identify the market with the most tokens in it and shop any any from there. If there are multiple markets with the most tokens in them, you get to shop any any from each of those markets.
Building Cards
Barter House
The decision whether or not to discard a card happens in turn order, so after you the person to your left must decide, and so forth until all players have made the decision.
Bounty Office
This may trigger multiple times in a season, but only once per turn.
Grey District
You only gain popularity equal to the number of tokens you put on the settler. Therefore, if there are fewer than three tokens in the market you choose (or if you choose to put fewer than three tokens on it) you will gain fewer than three popularity.
Hillroot Fort
This triggers immediately upon paying for the action, before resolving the action.
Jacklander Bank
This does not trigger if you're given or swap for the relic.
Meetinghouse
Giving a card does not count as taking it for the recipient.
Quality Goods Store
This triggers by "Exploring", discovering a relic card, and playing it into a market that's empty of resource tokens.
Scouting Outpost
You may choose any combination of cards to discard or leave on top of the deck, and you may rearrange the cards you do leave on top.
The Cookhouse
This does not trigger if you're given or swap for the settler.
The Ol' Post Office
The shopping happens in turn order, so after you the person to your left must shop, and so forth until all players have shopped. In case all markets are empty, a player skips their shop.
The Ugly Duckling
This triggers at the end of each player's turns.
Town Hall
The tokens may be of the same or different types. They must be spent on a single action to trigger the effect.
Traveling Circus
Remember "Feeding" counts as an action. The action that makes you pass is counted. "Return Home" counts as an action.
Ty's Fish Shack
This building triggers only if the settler being fed has a single token sitting on it.
Untouched Scrapyard
You may choose which opponent and which of the Town's relics to give to that opponent. This doesn't count as the opponent taking the relic.
Outlaw Cards
When an outlaw's Bounty tells you to gain some benefit for each outlaw in Town, include the first outlaw in that number if it's still in Town when you're resolving its Bounty.
"Chalent" Charlie
You may re-take a settler or relic you discarded in this way (which may trigger benefits).
John Tonic, Thief
The relic you swap may be in Town or a player's homestead.
Neville Beville
Ignore any bonus tokens on the tile.
Relic Cards
Relic cards do nothing while in Town; their effects are only active while in a player's homestead. The only exception to this rule is the Unique Magus, who may use relics while they're in Town.
Axe of Hesselberth
Every Replenish Phase, you replenish two resources of your choice, which immediately go to your inventory.
Brem's Lucky Shovel
You may tell the other players what card you see, but you may not show it. If you discard the card, reveal it.
Chest of Colding
If you lose this card, you do not lose the resources you stored with it, unless you now have more resources than inventory slots (in which case you discard resources as normal). If the Unique Magus has marked this relic while it's in another player's homestead, each player independently has two additional slots.
Chroma Stones
In case multiple markets are tied for having the most tokens, you choose which of those markets to shop from.
Claw of Oldthrone
This triggers before the first step of the Cleanup Phase if you have the Folkwarden Hat.
Cylinder Dispenser
Take all tokens in a market of your choice.
Enigma Hedron
This may only be triggered once per turn. Note that you will have multiple turns in a season.
The Emperor's Fist
You resolve this card after declaring you're going to "Tussle" and paying for its resource cost, but before actually resolving any of the "Tussle" action's effects.
The Fairbanks Quilt
This card isn't triggered by swapping or trading (with the Unique Proprietor).
Fancy Plumes
This triggers before the first step of the Cleanup Phase if you have the Folkwarden Hat.
Hand-Carved Pipe
You may tell other players what cards are there, but you may not reveal them. You may discard any number from the four you peek at and rearrange the remainder before returning them to the top of the deck. If there are fewer than four cards in the deck when you take this action, shuffle the discard pile and put it below the deck.
Image Cube
The settler that you take from the discard pile does not immediately replenish.
Lynara's Map
You don't need to be the player who played the outlaw to trigger this card.
Oldtree Acorn
This doesn't trigger if you're given the relic, swap for it, or trade for it with the Unique Proprietor.
Piggy Bank
This action doesn't cost any resources to use.
Secret Headstone
Swapping does not count as taking. You may use this card in the swap.
Smuggler's Raft
Swapping does not count as taking. If you swap this card with another player's relic, they may use this card on their turn.
Tattered Banner
The cost you're negating is specifically the resource or popularity cost pictured in the action bubble. You must still resolve the "Tussle" or "Explore" action fully.
The Bottomless Pot
While you have this relic, you may hold any number of fish tokens, and may use your inventory slots for other resources.
The Skillet of Might
This triggers before the first step of the Cleanup Phase if you have the Folkwarden Hat.
Trickster's Banjo
To use this card you must pay a popularity as a resource. You may not use the action if you are at the "Start" space of the popularity track.
Vox Library
You may choose which resources each of your settlers replenish every Replenish Phase, though you may not choose fish.