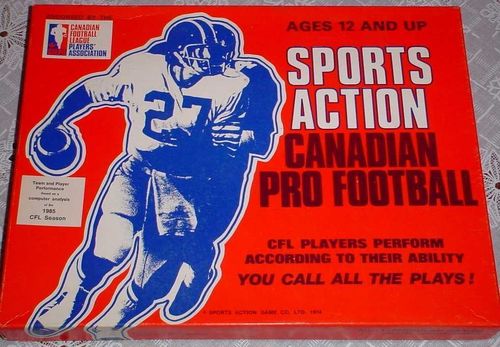
Sports Action Canadian Pro Football
Sports Action Canadian Pro Football Rulebook
Table of Contents
Table of Contents
The Basic Game
Disregard any rating information found after RUN and RECEIVING (PR) on the player cards and after PASSING on the quarterback card. This information is used only in the advanced game.
Each team contains the following cards:
- Individual player cards for running backs, receivers, and quarterbacks; there is a passing card and running card for each quarterback.
- Defensive team card (DTC).
- Kicking cards; one card contains punting and kickoff information, one card place kicking information.
- Return cards; one card contains kickoff return information, one card contains punt return information.
- Club roster cards containing starting lineups for offense and defense as well as substitutes. This card is only used in the Advanced Game.
Preparation for Play
- Place playing field and clock between you and your opponent.
- Give each player a basic play call selector.
- Cut out football marker and 10 yard yardstick marker and place on the football field.
- Cut out discs and place 2 on each of the basic play card selectors, 1 on the 15:00 circle of the timing clock found below the football field, and 1 on each of the down and quarter areas of the field.
Sequence of Play
- Start (a) Each player selects a team and die color; players designated as running backs can play any of the FB, HB, or WB positions; all other players must play only those positions designated on their player's card. Use the information listed at the bottom of each player card to help select players for each position. (b) Flip a coin to determine choice of kickoff or return.
- Scrimmage Play (a) Defensive coach selects one of 5 initial defensive settings (circles numbered 1-5) on the basic play call selector; shields choice from offensive coach. Choice of circles 1 and 2 positions linebackers close to the line of scrimmage and is strong against the run; 4 and 5 drops the linebackers back and are strong against the pass. (b) Offensive coach selects play by moving one disc marker over the designated player he wants to receive or carry the ball and another over the type of play he wishes to call. (c) Offensive coach throws all 4 dice. (d) Total of dice of one color are referred to defensive coach's DTC (Defensive Team Card) under the appropriate category (Run, Pass S, Pass M, Pass L) to note any change in the defensive setting. (e) Total of other dice color refers to the player designated to carry the ball for a running play, or the quarterback for a pass play. (f) Play results are read directly from the player cards.
NOTE: The overall team record on defense for each category is given at the bottom of each DTC (V.G. = Very Good, Gd. = Good, Fr. = Fair, Pr. = Poor).
Examples of Play
(Refer to the cards listed in Appendix A. For these examples, Montreal will have the red dice total and Edmonton will have the white dice total.)
-
Montreal kicks off – uses the kicking card, kickoff section. (a) Montreal player throws all 4 dice, obtains the red dice roll total, and refers to the kickoff section of the kicking card. (b) Number found beside dice roll total indicates the distance of the kick in yards and the adjacent column gives the yard line the ball has been kicked to. (c) Symbol "A" or "B" on the kick distance indicates which column to use on the kickoff returner's card to obtain the kickoff return yardage.
(e.g.) Dice roll total of 6 on Mark Harris is a kickoff of 53 yards to the 12 yard line and B indicates the second column on the kickoff returner's card. NOTE: A "-12" (minus 12) would have indicated the ball had been kicked 12 yards deep into the end zone.
-
Edmonton returns kickoff – uses kickoff return card. (a) White dice total from kickoff above is used to determine which player will return the kickoff (use the numbers appearing immediately below the player names). (b) Roll 2 dice again, total, use the appropriate column on the player designated and read the yardage directly.
(e.g.) Dice roll total of 4 indicates Larry Highbaugh will return the kickoff (4 falls in the range of 2 – 8 under Highbaugh's name). Assume dice roll 9 occurs on second roll. Dice roll total of 9 in column B indicates a return of 29 yards. Ball now on 41 yard line, 1st and 10 for Edmonton. (Column B was used on Highbaugh because Montreal kickoff by Harris indicated B). Move football marker to 41 yard line and set 10 yard marker at 41 to 51 yard lines.
-
Edmonton calls running play with Roy Bell on 1st and 10. (a) Montreal coach has selected setting 2 on basic play call selector. (Places disc marker over circle 2 and shields choice from Edmonton coach.) (b) Edmonton coach selects running play with Bell. Places one marker on the run circle and the other over the HB circle. Edmonton coach throws all 4 dice. (c) Red dice total is used to refer to the Run section of the Montreal DTC. (d) White dice total is used to refer to Roy Bell's card. (Use the 5 columns under Run).
(e.g.) Red dice total is 4, white dice total is 2. The entry for dice roll 4 under Run on Montreal DTC is –1. The new defensive setting is now 1 (2 – 1 = 1). Dice roll 2, column 1 on the Run section of Roy Bell's card is 0. No gain on the play. The football marker does not move. NOTE: If a NC had appeared on the DTC, there would have been no change in the original defensive setting. In this case, column 2 would have been used on Roy Bell's card, and he would have gained 6 yards.
Explanation of Symbols Used
F – Indicates fumble has occurred. To determine who recovers ball, refer to opponent's DTC under Turnovers, column F and throw 2 dice. If no F appears, team that fumbled has recovered the ball. If F appears, opposing team has recovered. Rethrow 2 dice and refer to R column adjacent to F column to determine if there is any fumble return. If a number appears, refer then to CFL Playboard under Turnover Return Chart using number for appropriate column. Throw 2 dice, total, and read yards returned directly. If a blank space occurs on R column on DTC, ball is recovered at spot of fumble and there is no return. There is no return if the team that fumbled recovers the ball.
P – Indicates a penalty. If a P appears on offensive player's card, penalty is against offense. If on DTC, penalty is on the defense. Refer to penalty chart on CFL Playboard under the type of play the penalty occurred on in order to obtain a penalty number. Refer to the lower chart for the type and yards penalized.
X – Indicates possible interception. FOR AN INTERCEPTION TO OCCUR, AN X MUST APPEAR ON DTC (e.g. – 1X) AND ALSO APPEAR ON QUARTERBACK'S CARD (e.g. X or RX) ON THE SAME PLAY. An example – if red dice total is 5 and white is 3. Edmonton has called a long pass to George McGowan. Referring to Montreal DTC with dice roll 5, we find +2X. This indicates a possible interception on the play as well as an increase in the defensive setting by 2. White dice roll 3 on Lemmerman's card under Pass Rush – X section, Column L has an X. The pass has been intercepted. To determine spot of interception, throw 2 dice and refer to the designated receiver under the type of pass thrown (column L in this case). Mark off this yardage from the line of scrimmage as the distance downfield that the interception has taken place.
To determine the amount of interception return by the defense, refer to DTC under Turnovers, column X-R, throw 2 dice and obtain column number to be used on Turnover Return Chart on the CFL Playboard.
If an X appears on the DTC, but no X appears on the quarterback's card, there is no interception. Rethrow the 2 offensive dice, total, and determine if pass is complete noting first any changes to be made to the initial defensive setting (+2 in this example).
R – Indicates possible quarterback sack. FOR A QUARTERBACK SACK TO OCCUR, AN R MUST APPEAR ON THE DTC (e.g. +1R) AND ALSO APPEAR ON THE QUARTERBACK'S CARD (e.g. R or RX) ON THE SAME PLAY. If quarterback has been rushed, refer to Scrambling Column (Sb) of quarterback's card to determine if there is a loss involved (e.g. – is a 9 yard loss). If result reads RUN, rethrow 2 dice and refer to Column 5 on Running columns on the quarterback's card.
If an R appears on DTC and no R is found on the quarterback's card, the quarterback is not forced to scramble. Rethrow 2 dice and determine if pass in complete noting first any changes to be made to the initial defensive setting.
N – Indicates an injury has occurred on the play. Refer to injury section of CFL Playboard and throw 2 dice. Consult appropriate column on the Injury Table that corresponds to the type of play the "N" appeared on. Disregard any injuries to linemen. Add the injury number from the table below with that of player designated as being injured and refer the total to the Injury Duration Chart for the length of injury.
| Dice Roll | 2 | 3 | 4 | 5 | 6 | 7 | 8 | 9 | 10 | 11 | 12 |
|---|---|---|---|---|---|---|---|---|---|---|---|
| N Number | 1 | 7 | 3 | 2 | 7 | 3 | 5 | 1 | 5 | 7 | 2 |
(e.g.) Dice roll 6 column 4 on Lemmerman's card is an incomplete pass but there is an injury on the play. Consulting the Injury Table under Pass, a dice roll of 4 reads Quarterback and the injury number is 3 (from the above table). Lemmerman's injury rating (+1) is added to this value to give 4 and 4 on the Injury Duration Chart reads "Remainder of Game". Lemmerman is unable to play the remainder of the game.
NC – No change.
K – On kicker's card indicates column 2 on kickers card is to be used for this particular punt. Rethrow dice, total, and obtain yards kicked from column 2.
BLK – Kick is blocked. Treat all blocked punts as loose balls 15 yards behind the line of scrimmage and use DTC for recovery and return. On blocked field goals, treat as loose balls 10 yards behind line of scrimmage and handle the same.
A – Advanced game information. Treat a play such as 3A as a 3 yard gain and so forth.
Blank Spaces – Indicates incomplete pass on QB's card, no rush or interception on QB's card, no return on fumble recovery.
CP – Occurs on Passing column of quarterback's card. Indicates pass is complete, but there is a penalty against the offense.
F (on quarterback and punter cards) – On Passing column of quarterback's card indicates snap is fumbled. Treat as normal fumble at line of scrimmage. On Punter's card indicates snap is fumbled. Treat as a normal fumble 20 yards behind the line of scrimmage.
Onside Kickoffs – Refer to kicking card, kickoff section and use onside column (OS). If R appears, kicking team has recovered ball on defensive yardline indicated. All other figures refer to defensive yardline where defensive team has recovered ball.
XP – Convert after touchdown. Refer to kicking card, convert section. Throw 2 dice and read results directly. (WD – wide).
Field Goals – Refer to place kicking card under Field Goals. Use appropriate column that coincides with the line of scrimmage. Throw 2 dice and read results directly. If a figure appears, field goal is no good. Treat figure obtained as a punt from the line of scrimmage and symbol following as appropriate column to be used on punt returner's card. (GD – good; SG – single). NOTE: Some field goal kickers cannot attempt a field goal at the longer distances. Check the place kicking card under correct line of scrimmage prior to any attempts to see if red column numbers are available and field goal is possible.
Timing – Move clock marker 3 circles (30 sec.) on each and every complete play. In the Last 3 minutes of the second and fourth quarter, the clock stops at the 3:00 minute mark. Move the clock only 2 spaces on each play for the remainder of these quarters. Clock does not move on converts or onside kickoffs.
Supplementary Rules (Basic Game)
-
You cannot throw to the same receiver or run with the same back on three consecutive plays. However, it is permissible to run and then pass to the same player on consecutive plays.
-
Note that it is not possible to throw medium or long passes to some players as well as run with certain players. Only those players that have red numbers in the respective columns can receive passes for that particular distance or run with the ball. Also in all cases you cannot run with a player positioned at SE, FL or TE even if this player has been rated for running. Only players at the FB, HB, and WB positions can carry the ball on running plays.
-
Both end zones are 25 yards deep. All punts or wide field goals that are still playable in the endzone must be returned or a single point is scored. A player can concede a single by simply so announcing, but the dice for the receiving team must be rolled to determine any penalty possibilities. There would be no fumble possibility in this case.
-
On a safety touch, the ball is brought out to the 35 yard line and the team scored on must give up the ball by kicking off from this yard line. Use normal kickoff column and kickoff return sequence but add 20 to the kickoff yardline stated.
-
Circles 0 and 6 cannot be chosen as a defensive setting. Use these circles for recording changes in the original setting that are less than 1 or greater than 5. Also, plays that result in these columns being used are found on the CFL Playboard. Consult these for the result of the play.
-
For rough play penalties, mark off penalty in addition to any yards gained on the penalized play. On pass interference penalty by defense where pass is incomplete, treat as a completed pass by offense, throw dice and use appropriate heading on receiver's card for amount of yards gained as a result of the penalty.
-
The football marker is moved on the field to denote the present position of the ball. The 10 yard marker is used to denote yards necessary in order to obtain a first down.
-
If an F appears on the Turnover Return Chart, the ball has been fumbled. Use opponent's DTC, turnover section, column F to determine who has possession of the ball. Regardless of who recovers, there is no further return. The ball is put in play at point of fumble as 1st and 10 situation.
The Advanced Game
The same fundamental rules of play found in the Basic Game apply to the Advanced Game. However, the game now takes on more complexity and all the intricacies and players of the CFL come into play. Only undertake to play the Advanced Game after you are quite familiar with the Basic Game.
The Major Differences in Play
On Defense – Choosing a formation card on each play in addition to a defensive setting. Depending upon the play called by the offense, changes to this initial setting are made if a player's rating is involved as indicated by being listed in RED on the formation card.
On Offense – There are 9 areas of the field to throw to (3 being short, 3 being medium, and 3 being long). They correspond to the 9 areas listed on a zone formation card under Pass. On the run, choice of playcall is among 8 holes (those areas found between two blocking linemen) and offer opportunities to run behind your stronger offensive linemen and/or at weaker defensive linemen.
Prior to beginning play, make the following preparations:
(a) Reverse your basic play call selector to the advanced side. (b) Place 3 markers on each selector. (c) Take your Team Roster card and record in pencil your starting defensive and offensive ratings on a defensive sheet supplied with your game. Note that ALT POS on the Team Roster card indicates any alternate playing positions for each player. (d) Also pencil in the dice roll numbers for the two major types of penalties found at the bottom of the Team Roster card. (e) Throw 2 dice to determine the weather conditions at game time found on the CFL Playboard. If weather is a factor in play, always make the necessary changes on each play where it is applicable.
To assist you, use the following position designations:
1. Defense
| Abbrev. | Position | Abbrev. | Position |
|---|---|---|---|
| DLE | Left End | LCB | Left Cornerback |
| DLT | Left Tackle | LH | Left Halfback |
| DRT | Right Tackle | S | Safety |
| DRE | Right End | RH | Right Halfback |
| LLB | Left Linebacker | RCB | Right Cornerback |
| MLB | Middle Linebacker | CB | Cornerback (left or right) |
| RLB |
2. Offense
| Abbrev. | Position |
|---|---|
| LT | Left Tackle |
| LG | Left Guard |
| C | Center |
| RG | Right Guard |
| RT | Right Tackle |
Scrimmage Play
(a) Defensive coach selects an initial defensive setting (1 – 5) on the advanced play selector as well as one of the 10 Formation Cards (e.g. 4Z-70 Zone formation card). Coach shields both choices from the offensive coach. (b) Offensive coach selects an offensive play by moving one marker over the designated player and another marker over a passing zone if a pass play is called or a running hole if a run is considered. (c) Offensive coach throws all 4 dice. (d) Total of one dice color refers to defense, other dice color total to offensive back if running play, quarterback if a pass play.
Sequence of Play for Determining the Final Defensive Setting
(Refer to 4Z formation card for examples used.)
-
Running play called. Consult hole number at top of formation card that corresponds to that hole number called by the offensive coach. Note the two key blockers listed above and below the hole number involved. (a) If either blocker is listed in RED – move the defensive setting in accordance with that player's run rating (e.g. hole 5 calls for the MLB's run rating). (b) If neither blocker is listed in RED – no change is made to the initial defensive setting (e.g. see hole 6). (c) If neither blocker is indicated in RED but 1) A red "P" is listed beneath the hole number – determine if defensive dice roll total falls within the dice roll range of the defense for penalty against the run. If so, a penalty has occurred against the defense (e.g. hole 8). 2) A red "WK" appears and defensive coach is keying a running back other than the ball carrier – move defense setting +2 for a wrong key. There is no wrong key if defensive coach is not keying any player (e.g. hole 4).
-
Pass play is called. With a ZONE formation card, consult the passing zone on the formation card that corresponds to that chosen by the offensive coach. If in that zone: (a) Receiver is indicated in RED – use pass receiver's RECEIVING (PR) rating for the respective type of pass thrown (short, medium, or long). Check rush possibilities with defensive dice roll total if R is indicated. (e.g. Roy Bell's medium pass rating of +2 would be used on a pass to Zone 4. Defensive dice roll total would be checked against the rush dice roll range of the DRT). (b) Defensive player is indicated in RED – first determine if defensive dice roll total falls within the X range of the defensive player. Then move initial defensive setting in accordance with defensive player's pass rating (e.g. Zone 5). (c) No player is indicated in RED or zone is blank, but 1) A red "P" is listed in the zone – determine if the defensive dice roll total falls within the dice roll range of the defense for penalty against the pass. If so a penalty has occurred against the defense (e.g. Zone 2). 2) A red "LP" appears – refer to quarterback's card for long pass rating (found after the word PASSING) and move initial defensive setting accordingly. (e.g. a pass to Zone 8 would call for Bruce Lemmerman's rating of –1 to be used).
With a MAN formation card, consult the designated receiver on the formation card for rush, interception, penalty, long pass or defensive back involved. Move defensive setting in accordance with the same rules outlined for a Zone formation card.
If a red "WDC" appears and defensive coach is double covering a receiver other than the intended pass receiver, move defensive setting –2 for wrong double coverage. There is no wrong double coverage if defensive coach is not double covering any player or double coverage on both the SE and FL has been called and a pass is thrown to either receiver.
Keying the Running Back (WB, HB, FB positions)
Unlike the Basic Game, the offensive coach can run with the same player on consecutive plays. To stop an opponent from doing this, the defensive coach may KEY (concentrate) on a particular player. Keying is only successful if the back designated to carry the ball by the offensive coach is the same player keyed by the defensive coach and the initial defensive setting chosen was 1, 2, or 3. To key a player, place a marker over the back intended when setting your original defensive setting. If keyed correctly, DECREASE the defensive setting by 2 (–2).
Double Coverage on a Receiver
Double coverage can ONLY be called with a MAN coverage formation card and an initial defensive setting of 3, 4, or 5. Unlike the Basic Game, the offensive coach can pass to the same player on consecutive plays. To stop an opponent from doing this, the defensive coach may DOUBLE COVER a pass receiver (have 2 men pass defend against the player). To double cover a receiver, move one marker over the "Double Coverage on Pass" area of the advanced play call selector, and another marker over the player intended when making the initial defensive setting. The second defensive player covering the receiver is listed on the formation card under double coverage. If a double covered receiver is passed to by the offensive coach, disregard the rating of the second defensive player and change the defensive setting +2. Then make any changes to the defensive setting in accordance with the rules outlined for passing plays against a Man formation card.
(e.g.) Suppose a 4M-70 Man Formation card has been chosen by the defense. The offense has called a short pass to Bell on an initial defensive setting of 3. Bell is covered by a main defender with a rating of –2 and a second defender with a rating of –1. The final corrected column for referring to Lemmerman's card would be 4 (3 + 2 – 1), i.e. (Initial setting + double coverage + Bell's short pass rating). Defensive dice roll total would also check the rush possibilities of the offensive RG.
To double cover the SE and FL at the same time, move the marker over the SE/FL circle on the Selector when making the original setting. This circle is not available to plays called by the offensive coach.
Blitzing the Quarterback
The defensive coach can supply extra rush on the quarterback by blitzing with his linebackers. To properly blitz, the defensive coach selects one of the 2 blitz cards but does not choose an initial defensive setting (uses those supplied on the blitz card). Changes are made to this defensive setting in the normal manner outlined previously for RUN and PASS plays. Double coverage of a pass receiver is not possible when blitzing. If the offensive coach calls a Draw or Trap play, use those numbers listed at the top of the blitz card as the initial defensive setting for the defense.
Counteracting the Blitz
The offensive coach can overcome the blitz by calling a draw or trap play with his running backs. To call a DRAW or TRAP play the offensive coach positions markers over a running back and hole as in a normal running play, but also verbally calls "Draw" or "Trap". Any changes to be made to the defensive setting, in addition to those made for a normal running play, are found at the top of the formation card. All holes can be used in calling these plays, however, no IN or OUT ratings are utilized.
Advanced Timing
The following table denotes the timing to be used for the respective plays regardless of penalty. Always use the times listed in Column A except for the last 3 minutes of the second and fourth quarters when Column B is used. The Hurry Up offense is an Optional Advanced Game Rule and times for using this procedure are listed in Column C. (NOTE: Each circle is 10 sec. So 3 circles are equivalent to 30 sec., 2 circles equivalent to 20 sec., and 1 circle equivalent to 10 sec.).
| Play | A | B | C |
|---|---|---|---|
| Running play | 30 sec | 20 sec | 10 sec |
| Completed pass play | 30 sec | 20 sec | 10 sec |
| Wide field goal and runback | 30 sec | 20 sec | 10 sec |
| Kickoff or punt and runback | 30 sec | 20 sec | 10 sec |
| Interception and fumble returns | 30 sec | 20 sec | 10 sec |
| Incomplete pass plays | 20 sec | 10 sec | Clock Does Not Move * |
* – If two incomplete passes occur consecutively, move clock 1 circle or 10 sec. In Column C, the three rows marked "Clock Does Not Move *" are one merged entry in the source, reading Clock / Does Not / Move *.
Clock does not move on any onside kick or normal convert attempt. On a two point convert attempt, move clock 1 circle or 10 sec. In the last 3 minutes of the second or fourth quarters, the clock stops with 3 minutes to go regardless of the time of the preceding play. If the clock stops at the 0:10 mark and a 1 circle play follows, there is still time for one more play.
Supplementary Rules (Advanced Game)
-
Treat all punts, kickoffs, runbacks, field goals and converts the same as in the basic game.
-
If a running play results in a figure such as 4A appearing on a running back's card, use the A= figure near the top of the player's card as the yards gained on the play.
-
If on a running play the words IN or OUT appear above the hole number called, make a further adjustment to the defensive setting by consulting player's card for the appropriate rating involved. This reflects a player's ability to run inside or outside.
-
It is not possible to KEY and DOUBLE COVER on the same play.
-
If a quarterback is forced to scramble and RUN appears, disregard any hole number, running ability of quarterback or any blocker's rating and go directly to column 5 on quarterback's running columns.
-
On a play with an injury, handle the same as in the Basic Game, but include all the players. Injury ratings for all players can be found on the Roster sheet or on the player cards. However, a player with a specialty (e.g. punting or kick returns) cannot be injured for that specialty.
-
Zone pass coverage is a strong formation against the long pass, but weak against the short pass. Move the defensive setting additionally as shown on a zone formation card (–1 for short, +2 for any long pass). There is no change on a medium pass.
-
If a pass is thrown to a receiver who is double covered, do not check any X possibilities for the second defensive player. Move setting +2 only and then follow normal passing rules outlined for MAN coverage.
-
When the blocking ability of the TE, WB, or RB is for, use the B rating on the respective player's card to move the defensive setting. For blocking purposes only, RB refers to the FB or HB positions.
- If FB carries ball, the HB is the blocking RB and vice versa.
| MAN FORMATION | FL | TE | FB | HB | WB | SE |
|---|---|---|---|---|---|---|
| Main defender | LCB | LH | MLB | S | RH | RCB |
| ZONE FORMATION | 1 | 2 | 3 | 4 | 5 | 6 | 7 | 8 | 9 |
|---|---|---|---|---|---|---|---|---|---|
| Main defender | LLB | MLB | RLB | LH | MLB | RH | LCB | S | RCB |
Optional Advanced Game Rules
All, some or none of the following game rules can be incorporated into the game. Their use, however, will give you increased maneuverability as a coach as well as present you with the true-to-life decisions faced by CFL coaches.
1. Intentionally Punting the Ball Out of Bounds. On any 3rd down play, the offensive coach can indicate he is punting the ball out of bounds. As a result, all punting distances in Column 1 of the punter's card are decreased by 5 yards and all dice rolls that read KA or KB are 30 yard punts out of bounds. There is no return on the play and the clock moves 20 sec (2 circles).
2. Quarterback Sneaks. This play is called whenever very short yardage is necessary to obtain a first down. It can ONLY be called with quarterback in a 2nd or 3rd down and one yard to go situation. Disregard any defensive setting or formation card and refer the offensive dice roll total directly to the chart below or on the CFL Playboard.
| Dice Roll | 2 | 3 | 4 | 5 | 6 | 7 | 8 | 9 | 10 | 11 | 12 |
|---|---|---|---|---|---|---|---|---|---|---|---|
| Gain | -1 | 0 | 1 | 1 | 2 | 2 | 1 | 1 | 0 | 3 | 0F |
3. The "Hurry Up" Offense. In the last 3 minutes of the 2nd or 4th quarters an offensive coach can receive more plays by calling the Hurry Up offense. Plays called using this tactic use less time. Use Column C in the Advanced Timing section. If a Delay of Game occurs as a result of a penalty, disregard and rethrow 2 dice for another type of penalty.
4. Quick Kicks on 1st or 2nd Down. To obtain better field position, the offensive coach can quick kick the ball and catch the defensive coach by surprise. To call a quick kick, the offensive coach announces he is quick kicking on the throw of the 4 dice. The offensive dice roll total is referred to the Quick Kick section of the CFL Playboard for the distance of the kick. Any kick distance is increased by 5 yards for each initial defensive setting less than 5 (e.g. dice roll 4 with a defensive setting of 2 is a 61 yard kick). The defensive dice roll total is referred to the return column of the CFL Playboard for the amount of return. If the kick is blocked, treat as a loose ball and use receiving team's DTC to determine who recovers and if there is any return. There is no return if the kicking team recovers the ball. Credit any quick kick to the offensive coach's choice of the WB, HB, or FB.
5. Punting the Ball Back Following a Punt. On any kick, the receiving team can return the ball by kicking it back. This play normally occurs in a tie game when the kicking team is punting the ball into the end zone in the final few minutes of a game to score a single. To call, the receiving team coach announces he is punting the ball back when he receives the punt, throws 2 dice, and refers to the quick kick section of the CFL Playboard. The distance of the kick is decreased by 10 yards in all cases (treat any blocked punt as a FUMBLE and loose ball at point of catch). The receiving team for this second punt can return the punt using column B or kick the ball back again provided an initial dice roll total of less than 7 is obtained. If obtained, rethrow two dice, use the quick kick section once again, but decrease all kicks by 20 yards. The receiving team for this third kick must return it using Column A on a punt returner's card. If a third kick was not attempted because of a dice roll total of 7 or more being obtained, the ball is dead at point of third kick.
6. Individual Running Plays Can Be Called. The offensive coach can call specific running plays with a running back. This is accomplished by designating certain hole numbers as being indicative of certain types of plays. Holes 2 and 3 are Plunge plays and a ball carrier's IN rating is used on every play. Holes 4, 5, 6, and 7 are Off tackle plays. Holes 8 and 9 are Sweep plays and a ball carrier's OUT rating is used on every play.
7. Screen Passes Can Be Called. To offset the frequent pass rush of an opponent, the offensive coach can call a screen pass to a running back. ONLY THOSE PLAYERS WITH ASTERISKS IN THEIR SHORT PASS GAIN COLUMN ARE ELIGIBLE TO RECEIVE A SCREEN PASS (e.g. 2*). To call, the offensive coach declares he is throwing a screen pass at the time of his play call and throws 4 dice. Determination of final defensive setting and pass being complete is handled in the same manner as for a Short Pass. If complete and amount of gain on "S" column of receiver's card has an asterisk, disregard the gain, throw 2 dice and refer to the table below or on the CFL Playboard for the amount of gain. If in normal determination of pass being complete, an "R" appears for the defense but QB is not rushed and screen pass is complete, disregard the need for an asterisk and go directly to the table. If a screen pass is intercepted, treat spot of interception as taking place 5 yards behind the line of scrimmage. LG refers to the receiver's longest gain as shown on the player's stats at the bottom of his card.
| Dice Roll | 2 | 3 | 4 | 5 | 6 | 7 | 8 | 9 | 10 | 11 | 12 |
|---|---|---|---|---|---|---|---|---|---|---|---|
| Gain | 22 | 10 | 13 | 9 | 14 | 8 | 15 | 12 | 11 | 25 | LG |
8. Changing the Defensive Alignment from the Basic 4-3-5. At times it becomes favorable for the defense to depart from the basic 4-3-5 formation (4 defensive linemen, 3 linebackers, and 5 defensive backs) and present the offense with an alignment that is stronger against certain situations. By verbally stating before each offensive play, the defensive coach can utilize the other major formations used in the CFL. Play proceeds as normal with the defensive coach choosing a defensive setting, formation card, and then announcing his new alignment. The offensive coach then calls his play in the normal manner. Any changes to be made to the defensive setting as a result of the new alignment are shown below.
| Pass Called | 4-4-4 | 4-2-6 | 3-4-5 | 3-3-6 | 5-3-4 | 5-2-5 |
|---|---|---|---|---|---|---|
| Short | +1 | -1 | +1 | NC | NC | -1 |
| Medium | NC | NC | +1 | +1 | NC | NC |
| Long | -1 | +1 | NC | +1 | -1 | NC |
| Run Called | 4-4-4 | 4-2-6 | 3-4-5 | 3-3-6 | 5-3-4 | 5-2-5 |
|---|---|---|---|---|---|---|
| Def. in Red | NC | NC | +1 | +1 | -1 | -1 |
| Off. in Red | -1 | +1 | NC | +1 | -1 | NC |
Example of Play: If the defensive coach has chosen a 4Z formation card, an initial defensive setting of 2 and has verbally called an alignment of 4-2-6 and the offensive coach has called a long pass to zone 8, the new setting would be 5 (+2 for the zone and +1 from the table above added to the initial 2 setting). If a run had been called through hole 7, the setting would have been 3 plus the run rating of the LT (+1 from the table added to the initial 2 setting).
Treat any interception, rush or penalty possibility in the normal manner. Blitzing can take place only from the normal 4-3-5 alignment.
A Few Hints on Strategy for the Advanced Game
Your chances of winning greatly improve when you have a thorough knowledge of your own players' limitations as well as your opponents.
On offense, your ability to call the strongest possible play to the weakest area of your opponent's defense will always be your goal. To accomplish this, vary your play calls until your opponent settles on 1 or 2 formation cards that he prefers. These formations will be ones that call for player ratings from strong defensive players and weak offensive players. Once you are familiar with these 2 formations, you are then in a position to call the big play to the defense's weakness. Also, use draws, traps, and screen passes liberally if you are faced with frequent blitzing. Remember as well that zone defense is a strong defense against the long pass and it is best to call running plays or short passes if your opponent favors this type of pass coverage. Become familiar with your running backs. Ability to run outside is a definite asset to a balanced attack. Periodically call an outside running play to break the momentum of the defensive coach's play calls.
On defense, about 60% of your success depends on your ability to position your linebackers relative to the line (choosing an initial defensive setting). The remaining 40% will depend on your ability to key, choose proper formation cards, and double cover receivers. In choosing a formation card, pick one that minimizes ratings needed from strong offensive linemen, but correspondingly calls for ratings from strong defensive players. To adopt this strategy on every play, however, severely limits the number of formation cards available to you, so pick one weak formation card periodically to throw your opponent off guard. If your opponent has weak outside running ability, choose a formation card that calls for ratings from strong interior defensive players and weak offensive players. If you possess a strong MLB, be bold in your defensive calls since you are in a strong position to stop both off tackle and sweep type running plays. Blitz periodically on first down hoping for a quarterback sack. With only 3 downs to make 10 yards, a second down and 10+ yards to go presents an obvious passing situation. If you are coaching a weak defensive team and playing a strong offensive team, you will have to maneuver your opponent to throw or run where no player ratings are necessary for determining the final play result. In such a case, about 90% of your success will depend on your ability to choose an initial defensive setting that counteracts the offense. Also, it is wise to favor a zone defense coverage if your defensive backfield is generally weak. Since your opponent cannot throw long inside the 5 yard line, it is wise to pick MAN coverage for maximum coverage when setting your defense in these situations.
Player Ratings
Because of the team nature of football, many numerical ability ratings for the players are based on the overall defensive team's ability as well as the individual's ability. For this reason, any player's rating that may appear lower than usual may be the result of the overall performance for the team rather than his own performance. Also, some running back's cards have been computed by reducing their average by their longest run, and some quarterbacks who threw very few passes in a season have had their cards computed by reducing them below the team's starting quarterback's performance.
Rules for Playing Basic Game Solitaire
Obtain a large green (or other color) die from your local department store. Roll this die along with the 4 regular dice on any play. Use the green die roll number to refer to the following chart to find the initial defensive setting.
The source prints the "Down" and "Yds to Go" labels once, beside the first block of rows. The three blocks are reproduced in the order printed; the source does not label the second and third blocks.
| Yds to Go \ Green die | 1 | 2 | 3 | 4 | 5 | 6 |
|---|---|---|---|---|---|---|
| 11+ | 5 | 2 | 3 | 4 | 5 | 5 |
| 10 | 1 | 2 | 3 | 4 | 5 | 3 |
| 5 | 1 | 2 | 3 | 3 | 5 | 1 |
| Yds to Go \ Green die | 1 | 2 | 3 | 4 | 5 | 6 |
|---|---|---|---|---|---|---|
| 11+ | 5 | 2 | 3 | 4 | 5 | 5 |
| 10 | 5 | 2 | 3 | 4 | 5 | 5 |
| 7-9 | 3 | 2 | 3 | 4 | 5 | 4 |
| 4-6 | 1 | 2 | 3 |
| Yds to Go \ Green die | 1 | 2 | 3 | 4 | 5 | 6 |
|---|---|---|---|---|---|---|
| 11+ | 5 | 5 | 3 | 4 | 5 | 5 |
| 10 | 5 | 2 | 3 | 4 | 5 | 5 |
| 7-9 | 3 | 2 | 3 | 4 | 5 | 4 |
| 4-6 | 1 | 2 | 3 |
Rules for Playing the Advanced Game Solitaire
The Basic Game solitaire chart is used to obtain an initial defensive setting, however, the defensive dice roll total is now used to refer to the hole number if a run, or zone number if a pass from the tables below. If an X, R, or P situation arises, rethrow 2 dice and determine if the new dice roll total falls within the appropriate range.
Run Thru Hole Number
Holes are printed in this order: OUT 9, 7, 5 | IN 3, 2 | IN 4, 6 | OUT 8.
| Dice Roll | 9 | 7 | 5 | 3 | 2 | 4 | 6 | 8 |
|---|---|---|---|---|---|---|---|---|
| 2 | NO CHANGE TO INITIAL DEFENSIVE SETTING | |||||||
| 3 | RB | LT | LG | C | C | RG | RT | RB |
| 4 | RB | LT | LG | C |
Pass to Zone Number
REC = Receiver's Rating. Where the source prints a second line under a cell, it is shown after the first value, separated by a slash.
| Dice Roll | 1 | 2 | 3 | 4 | 5 | 6 | 7 | 8 | 9 |
|---|---|---|---|---|---|---|---|---|---|
| 2 | -1 / RLB | -1 / MLB | -1 / LLB | NC / RH | NC / MLB | NC / LH | +2 / RCB | +2 / S | +2 / LCB |
| 3 | -1 | -1 | -1 | NC / R-DRT | NC | NC | +2 / LP | +2 / LP | +2 / LP |
| 4 |
(e.g) Defensive dice roll of 9 and pass to zone 7 would change defensive setting +1 and a further roll of two dice would check if RCB may intercept. Dice roll 8 for defense would call for pass rating of RCB only.
When playing either solitaire version, observe the following rules:
- Do not throw to or run with the same player on consecutive plays.
- Do not throw to the same passing zone or run through the same hole on consecutive plays.
- There is no keying, blitzing, man coverage, or double coverage on any player.
Appendix A
Appendix A is the sample card sheet referred to by the Examples of Play. It shows the Montreal Alouettes and Edmonton Eskimos sample cards: the punting, kickoff and kickoff return cards, the Edmonton quarterback's passing and running cards, the defensive team cards (DTCs) and the 1973 season record charts.
Note: Appendix A is a graphic card layout in the PDF. Its player cards and charts do not survive as clean text, so they are not reproduced here. The numbers used in the Examples of Play (for instance, Mark Harris's 6 for a 53 yard kickoff to the 12, Larry Highbaugh's 2–8 kickoff return range, Bruce Lemmerman's Pass columns) are as printed in the examples. Use the printed sheet for the full card values.