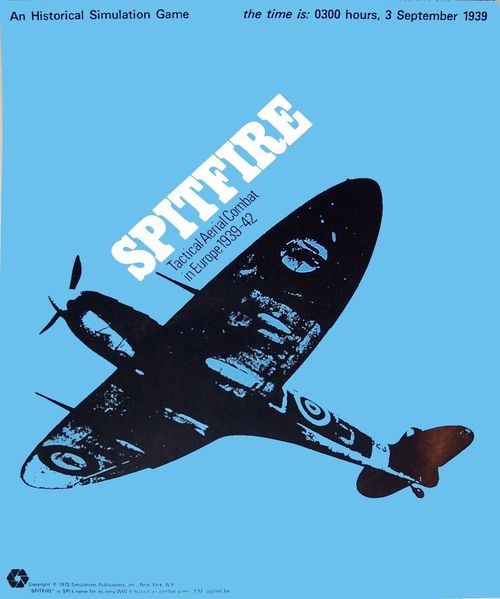
Spitfire: Tactical Aerial Combat in Europe 1939-42
Spitfire: Tactical Aerial Combat in Europe 1939-42 Rulebook
Table of Contents
Table of Contents
1.0 Introduction
Spitfire simulates the individual and small group aircraft warfare which occurred from 1939 to 1942 in Western Europe. Two basic scenarios, Bomber and Air Superiority, provide for demonstration of various characteristics which will influence the combat results. Each Scenario describes the situation, the objectives, special problems and victory conditions for both sides.
2.0 Game Equipment
2.1 GAME MAP: The map has no true terrain features (necessarily, since action is in the air). Set-up positions are clearly indicated by hex number in the Scenario Charts. Target Objectives for the Bombing Scenario are indicated by hex number.
Hex Location System: Players will note that the hexagons on the playing surface are numbered. The four-digit numbering system employed enables Players to precisely locate the position of any aircraft for purposes of scenario starting hexes, play-by-mail, tearing down an interrupted game for completion at a later date, etc. The first two digits (on the left) indicate the vertical row of hexes that that particular hex is a part of; the second two digits indicate which hex it is in that row (counting from north to south).
2.2 GAME SCALE: Each hex represents 46 kilometers horizontally. The time span from one First Player Movement Phase to the next is 3.3 seconds. Each step of speed is equal to approximately 50 kilometers per hour (30 mph). Each level of altitude is equal to 55 meters (180 ft.). Neither fuel nor ammunition supply is a consideration due to the extreme brevity of the total time represented by an entire game.
2.3 PLAYING PIECES: Each aircraft in the game is represented by a series of Altitude Markers numbered from 1 to 20. Different Players' aircraft are distinguished by basic color; individual aircraft are distinguished by tints of that color. For each aircraft there is a corresponding Current Speed Marker, Maximum Speed Marker, and Climb Progress Marker. The Altitude Marker is placed on the mapsheet, indicating the location, facing, and altitude of the aircraft. The other three markers are placed on the Aircraft Chart to record pertinent data concerning the aircraft.
Playing piece key (as printed):
- Altitude Marker (example: 16)
- Current Speed Marker ("Current Speed")
- Maximum Speed Marker ("MAX Speed")
- Climb Progress Marker ("Climb Progress")
2.4 AIRCRAFT CHARTS: There are fifteen Aircraft Charts, one for each of the fifteen types of aircraft in Spitfire. The charts are color-coded to indicate whether they are German or Allied. Each chart is used to keep track of the Current Speed, Maximum Speed, and Climb Progress of the aircraft. As many as four planes of a given type may be displayed on a single card. Also indicated on the charts are details about that aircraft's performance characteristics, including: acceleration, turn mode, costs for rolling, diving, or climbing, and Combat Results Table. These are briefly described as follows:
2.41 Turn Mode: The first number of the Turn Mode indicates the number of hexes an aircraft must move in a forward direction before it may turn one hexside. The second number indicates the number of hexes the aircraft must move in a forward direction before executing a second turn of one hexside in the Phase. For example, an aircraft with a Turn Mode of 3/4 must move at least three hexes forward, then it may turn one hexside, then move four more hexes forward, turn one more hex side, move three, turn, move four, turn, and so on. Special rules apply during a Split-S, Wing-Over or Snap Roll.
2.42 Maximum Acceleration: is indicated by a number. This denotes the number of steps that the speed of an aircraft may be increased by at any one time. An aircraft with a maximum acceleration of "5," moving at a speed of "6," may increase speed up to "11" in one phase.
2.43 Roll Cost: is a number which indicates the Movement Point cost to execute a snap roll.
2.44 Wing-Over/Split-S (WO/SS) Cost: is a series of three numbers. These indicate the cumulative number of Movement Points expended for each hexside turned during a Split-S or a Wing-Over.
2.45 Fuel Injection: Aircraft which have their Vertical Dive Cost coded "f" on their Aircraft Chart, are fuel injection equipped.
2.46 Combat Results Table: an index which provides information regarding damage inflicted on target aircraft. The numbers along the top indicate the Range in hexes. The numbers from 1 to 6 down the left side of the table indicate the die-roll. The die-roll is cross-indexed with the range on the firing aircraft's Combat Results Table. The result equals the number of Damage Points inflicted on the target aircraft. Damage is reflected by moving the Target Aircraft's Maximum Speed Marker downward a number of steps equal to the number of Damage Points inflicted.
2.47 Vertical Dive Track: a track of spaces containing numbers. To execute a Vertical Dive, the Player must consult the space on the Vertical Dive Track corresponding to the current speed of the aircraft. The number of Altitude Levels the aircraft can dive at that particular speed is shown on the Vertical Dive Track. The number of Movement Points expended to execute a Vertical Dive is shown to the left of the track.
2.48 Climb Progress Track: the track of spaces beginning with Zero and ending with the number of steps a plane must climb to reach the next higher level of altitude. When the plane's Climb Progress Marker has completed the circle and is back at Zero, the Altitude Marker on the map is replaced with one which is one Altitude Level higher.
2.49 Speed Track: a track of spaces beginning with the lowest possible speed and ending in spaces marked "Dive." This speed track denotes both the speed at which the plane is travelling as indicated by the Current Speed Marker, and the maximum possible speed, indicated by the Maximum Speed Marker. The speed is stated in Movement Points. A plane moving at a speed of 12 expends 12 Movement Points in one Movement Phase.
2.5 SCENARIOS: are used for setting up each game. The Scenarios indicate the aircrafts' starting positions, altitude, and directional facing. Also explained in the Scenarios are the time period, the objectives of the Scenarios, Victory Conditions, and Special Conditions.
3.0 Preparation for Play
Cut the Aircraft Charts along the dotted lines. The results are: 5 British, 7 German, 2 French, and 1 Polish Aircraft Charts. Charts are color-coded to the counters. After the map has been laid out, the counters separated, and the aircraft charts cut into separate sheets, the Players are ready to decide which of the Scenarios they wish to employ and which groups of aircraft they will use.
The Players refer to the Scenario for instructions on how to set up. The altitude at which the planes start is indicated in the Scenario. Take the appropriate Altitude Markers corresponding to the "Starting Altitude" level, and place them on the hexes indicated, facing in the direction indicated (refer to the compass rose on the mapsheet).
Place all the Climb Progress markers on Zero on the Aircraft Charts. Place the Maximum Speed markers on the space farthest right on the Speed Track marked "Max Speed," and the Current Speed Marker on the Speed Track in the space marked "Level Max" (unless otherwise indicated by the Scenario). Place remaining Altitude Level markers (there should be nineteen remaining for each color in use) in numerical order to the right of the Speed Track (off the chart) containing the matching colored markers.
4.0 General Course of Play
Spitfire is basically a two-player game. Although it is relatively easy for more than one person to play one side in the game, the rules assume that two players, only, are involved. Each Player maneuvers his Altitude Markers (hereafter called planes or aircraft) in an attempt to destroy Enemy planes while preventing the same fate from befalling his own, or to bomb targets or prevent them from being bombed. Combat is resolved by reference to the attacking plane's Combat Results Table. A die-roll (firing) result is cross-indexed with the range (distance between opposing aircraft). The result is Damage Points, which reduce the Aircraft's Maximum Speed, and may result in the destruction of the aircraft.
5.0 Sequence of Play
5.1 GENERAL DESCRIPTION
Spitfire is played in a continuous series of Phases occurring in the following sequence:
First Player Movement Phase Joint Combat Phase Second Player Movement Phase Joint Combat Phase
A Joint Combat Phase (one in which both Players actively participate) always occurs between Movement Phases. The determination of which Player is the "First Player" is given in the Scenario being played. During each Phase there are specific operations and decisions which must be made by the Players. The following detailed outline indicates the sequence in which these decisions occur.
5.2 SEQUENCE OF PLAY OUTLINE
1. FIRST PLAYER MOVEMENT PHASE
A. Altitude Decision Segment: The Player must decide whether he will climb, remain in level flight, horizontally dive, or vertically dive during this Movement Phase. If a given aircraft is to dive, it must be determined (and announced) how many Altitude Levels that aircraft will dive.
B. Speed Decision Segment: The Player must decide at what speed his aircraft will be flying in his Movement Phase. The Current Speed of an aircraft may never be increased more than allowed by the Maximum Acceleration given on the Aircraft Chart for that type of plane. A plane may decelerate only by climbing. The Current Speed Marker of an aircraft, once in place, indicates the number of Movement Points that the aircraft must expend during that Movement Phase.
C. Movement Execution Segment: The Player now actually moves his aircraft, according to the speed and altitude decisions of Segments A and B. During its Movement Phase an aircraft must expend all the Movement Points allotted by its Current Speed setting.
2. JOINT COMBAT PHASE
Each Player is permitted to fire the guns of each of his aircraft every Combat Phase, assuming that the firing aircraft (a) meets the Field of Fire and Sighting requirements, and (b) is within range of a target aircraft (indicated on the aircraft's Combat Results Table). Fire is considered to be simultaneous; that is, all fire takes place before any results of that fire are taken into account. Damage is recorded and losses extracted at the end of the Combat Phase.
3. SECOND PLAYER MOVEMENT PHASE
The Second Player now makes altitude and speed decisions for all of his aircraft following the same procedure as outlined for the First Player. The Second Player moves his aircraft. The First Player may not move any of his aircraft during the Second Player's Movement Phase.
4. JOINT COMBAT PHASE
Players participate in another Joint Combat Phase.
Continue to repeat the above sequence until the game is ended, as outlined on the Scenario Sheet being played.
6.0 Movement
GENERAL RULE:
During each Movement Phase, each aircraft must expend the full allotment of Movement Points shown on its Speed Track. Movement Points must be expended in accordance with the rules below.
PROCEDURE:
Move each aircraft individually, tracing the path of its movement through the hexes. Finish the movement of one aircraft before moving another.
Straight Movement Example: A Spit-I with a Current Speed setting of "5," expends all its Movement Points in straight, level flight. Note that the aircraft moves only in the direction indicated by the nose of the aircraft silhouette.
(Movement example diagram: Phase Start to Phase End, Straight Level Flight, Speed 5.)
CASES:
(A) Movement is calculated in terms of hexes. Each aircraft expends one Movement Point to enter a hex. The total number of Movement Points which an aircraft must expend is indicated, on the Speed Track, by the positioning of the Current Speed Marker. Current Speed may be reduced by climbing (see Case C). Current Speed may be increased by accelerating. Each aircraft has a Maximum Acceleration Rating, which denotes the maximum number of steps that the speed of the aircraft may be increased during a single Movement Phase.
(B) TURNING: At the beginning of each Movement Phase, a Player may choose to make a turn of one hexside (in place). This counts as the expenditure of one Movement Point. Thereafter, unless performing a Special Maneuver (Case G), an aircraft must move forward at least a number of hexes equal to its Turn Mode before making a turn of no more than one hexside to the right or left. Only the performance of a Special Maneuver can negate standard Turn Mode requirements. When making a normal turning maneuver, an aircraft expends one Movement Point for each 60° turn it makes.
EXAMPLE: A Spit-I (3/3 Turn Mode) with a Current Speed of "10," begins its Movement Phase by making a 60° turn-in-place (expending one MP) and moves straight ahead for a distance of three hexes, at which point it exercises the option to turn 60° (expending one MP). It then proceeds three more hexes and executes another 60° turn (having thereby expended nine MP, total). It finishes its movement by moving straight ahead one hex.
(Turning example diagram: Speed 10, Phase Start to Phase End, with turns at each hex as described above.)
(C) CLIMBING: Aircraft may increase their altitude by climbing. On each Aircraft Chart there is a Climb Progress Scale. The number of steps (boxes) on this scale represents the number of Movement Points which must be spent in climbing in order to change from one Altitude Level to the next highest Altitude Level. In the case of fighter aircraft, for each Movement Point spent climbing, the Player moves the Climb Progress marker up one step on the scale. Bomber types expend two Movement Points per step. When the marker reaches the Zero position, exchange the Altitude Level Marker on the mapsheet for the next highest one. At the very end of a Movement Phase in which a climb was performed the Player has the option of reducing the Current Speed of the aircraft by a number of steps equal to the number of Movement Points expended in climbing during that phase. The speed may be reduced by a lesser amount or not be reduced at all, at the discretion of the Player. In a Movement Phase in which an aircraft climbs, turn its Current Speed Marker "nose up" at a 90° angle until the next Altitude Decision segment. Note that as long as a given Altitude Marker is on the map (representing the aircraft) the aircraft is considered to be at that altitude no matter what its position on the Climb Progress Scale. Even if the aircraft is near the top of the Climb Progress Scale, it is for all purposes still considered to be at the altitude printed on the counter in play.
Climbing Example: A Spit-I, at Altitude Level "12" (Climb Progress Step "15"), begins its Movement Phase with a Current Speed setting of "8" (and chooses not to accelerate). It moves forward two hexes (expending two MP) and expends the remainder of its MP's in climbing to Altitude Level "13," Climb Progress Step 4. It may now, theoretically, reduce its Current Speed setting by as many as six steps; practically it may reduce its speed by only five steps (down to its Minimum Speed of "3"). It chooses, however, to reduce its speed by only three steps, to "5."
(Climbing example diagram: Speed 8, Level 12, Step 15 to Level 13, Step 4.)
(D) DIVING: In order to perform a dive, exchange the Altitude Level Marker on the mapsheet for a lower one, immediately as the dive is performed, according to the following rules:
Diving is calculated in whole Altitude Levels; the position of the Climb Progress Marker may not be changed during a Movement Phase in which the aircraft performs a dive. All dives are performed at the start of a Movement Phase. Any other movement is done after the Altitude Level Markers are exchanged on the map. An aircraft may not dive and climb in the same Movement Phase.
The Speed Track has several positions labelled "Dive"; the aircraft must perform a dive during every Movement Phase in which it is to move at such a speed.
Horizontal Dive Example: 3 Levels (Max. due to Vertical Dive Track).
There are two methods of diving:
1. Horizontal Dives: During a Friendly Movement Phase, any aircraft which does not climb may always, at the Player's option, drop a single level of altitude in that Phase, free of any Movement Point cost, regardless of the Current Speed of the aircraft. This is a relatively mild, Drifting Horizontal Dive.
Alternately, providing that the number of altitude levels that the aircraft could drop if it were executing a Vertical Dive is not exceeded, any aircraft which does not climb may drop as many as four levels in altitude, free of penalty, during a Movement Phase. This is a Horizontal Dive. When an aircraft performs a Horizontal Dive, turn its Current Speed Marker to point downward at a 45° angle.
2. Vertical Dive: The Vertical Dive is a much steeper descent with a greater drop in altitude. On the Vertical Dive Track, the number of Altitude Levels that are dropped when travelling at a given speed is shown. The cost in Movement Points for a Vertical Dive is shown on each Aircraft Chart. All Vertical Dives are executed at the start of a Movement Phase before any lateral movement takes place. Notice that the Vertical Dive cost for a given aircraft type is almost always the same regardless of the "depth" of the dive. When a plane performs a Vertical Dive, point its Current Speed Marker "nose down" at a 90° angle.
Planes without fuel-injection may never accelerate on their first Phase of Vertical Dive. This is because a plane equipped with gravity carburetors must flip over on its back for a steep dive, thus slowing its lateral movement considerably. The plane will be able to accelerate during the following consecutive Phases of Vertical Dive. Planes with fuel-injection (so noted on their Aircraft Charts) may freely accelerate (up to their Maximum Acceleration) during any Phase of Vertical Dive.
Those aircraft which can accelerate in the first Phase of Vertical diving have an "f" code after their Vertical Dive Cost on their Aircraft Chart. This indicates that they are equipped with fuel injection.
Vertical Dive Example: Speed 8, Cost 7+1.
(E) Aircraft may not end their Movement Phase in the same hex as other aircraft (Enemy or Friendly) at the same Altitude Level. Any number of aircraft may be in the same hex at the end of a Movement Phase as long as there are no two aircraft at the same altitude in the hex at the end of a Movement Phase. There are no restrictions in moving through occupied hexes regardless of Altitude Level.
(F) FACING: Facing is tremendously important for movement and combat. The front of an aircraft is indicated by the small abstract plane silhouette above the Altitude Level number. Aircraft must always be unambiguously pointed at a single hexside. If the marker is found to be ambiguously placed, then the Enemy Player has the option to adjust it, facing towards one of the two possible hexsides. When a plane executes a turn, the facing of the plane is changed to conform with the turn.
(Facing example diagram.)
(G) SPECIAL MANEUVERS: There are three Special Maneuvers which certain planes are allowed to make. All three maneuvers have particular rules for their execution. The hex in which a Special Maneuver is performed may not be counted toward the Turn Mode requirements; nor may it be counted toward sighting requirements if the aircraft performing the special maneuver is the firing aircraft. If the aircraft performing the special maneuver is the target aircraft, the hex it performed the special maneuver in may be counted toward sighting requirements. After an aircraft performs a Special Maneuver, it may move farther (if it has the Movement Points to expend) and fire as long as the Sighting and Field of Fire requirements are met. Descriptions of the three Special Maneuvers follow.
1. Snap Roll. (Possible for all aircraft except Ju.87, Ju.88, He.111, Bf.110, Blenheim, Po.63.) The Snap Roll is a movement of one hex at a 60° angle to the direction the plane is facing. Unlike normal turns, it does not alter facing of the aircraft. All planes capable of executing a Snap Roll have a Roll Cost Movement Point penalty noted on their Aircraft Chart. This is the number of Movement Points which are expended in performing the maneuver.
Snap Roll Example: 6 MP's Roll Cost.
The Snap Roll may be repeated as long as there are sufficient Movement Points to expend in performing it. The Snap Roll may be executed either to the left or right of the direction the plane is moving. If two or more Snap Rolls are executed in one Movement Phase, they must be to the same side. Snap Rolls have no effect on altitude.
2. Wing-over. (Possible for all aircraft except Ju.87, Ju.88, He.111, Blenheim, Po.63.) The Wing-over is a method of climbing entailing a reversal of direction with a brief flip on the back. The aircraft must spend its entire Movement Allowance in one Movement Phase climbing. In the very beginning of the following Friendly Movement Phase, the aircraft may turn up to three hexsides (in place), expending a given number of Movement Points for the turn. The Movement Point cost for each possible number of hexsides turned (the WO/SS cost) is shown on the Aircraft Performance Chart. For instance, the cost is shown on the Bf.109 Chart as 1/3/6. This means that if the aircraft were to turn one hexside the cost would be 1 Movement Point; to turn two hexsides would cost 3 Movement Points (total); to turn three hexsides would cost 6 Movement Points (total).
3. Split-S. (Possible for all aircraft except Ju.87, Ju.88, He.111, Blenheim, Po.63.) The Split-S is a reversed Wing-over using a dive and a flip on the back to loose height rapidly. The Split-S is executed in the same manner as the Wing-over except that a Vertical Dive must be made at the beginning of the Phase prior to the Phase of performing a Split-S.
WO/SS Example: 1 MP; 2 MP (1+1); 4 MP (1+1+2).
Wing-over/Split-S Notes: A Wing-over or a Split-S is performed at the very beginning of a Friendly Movement Phase, before any other Movement Point expenditures take place. Aircraft performing a Wing-over or Split-S may not make the one hexside, in-place turn described in Case B (the Special Maneuver occurs instead). Aircraft may not dive or climb in the Movement Phase in which they actually execute the Split-S or Wing-over. Aircraft may only execute one Split-S or Wing-over per Phase, and the greatest frequency with which a Split-S or Wing-over could be performed would be once per aircraft every alternate Friendly Movement Phase.
(H) TRIAL MARKERS: The pieces with the large aircraft top-views on them and no Altitude Level number are trial-run markers which may be used by the Players to test out a move before actually committing themselves to it. This allows a Player to leave the actual Altitude Marker in its Phase-start position and thereby not lose track of its position when figuring out a maneuver. When the final maneuver is decided upon, leave the Trial Marker in the hex of destination and move the Altitude Level Marker to it.
(J) An aircraft which moves off the edge of the map or dives below Altitude Level "1" is considered to be shot down if it does so before completing its mission. In the Air Superiority Scenario "completing the mission" is defined as staying on the map at Level "1," or above, for ten Friendly Movement Phases.
7.0 Combat
GENERAL RULE:
Combat occurs during the Joint Combat Phase. Aircraft fire in an attempt to inflict damage upon Enemy aircraft.
PROCEDURE:
Aircraft must first sight their target. The target must also be in their Field of Fire and range must be computed. The die is rolled and the result cross-indexed against the range on the firing aircraft's own Combat Results Table. The result is expressed in terms of Damage Points. For each Damage Point, the Maximum Speed marker of the target aircraft is moved down one increment; as soon as the Maximum Speed marker reaches the space on the Speed Track marked "Destruct Point," the aircraft is destroyed.
Example: A Bf.109E-3 at Altitude Level 10 is moved 8 hexes in a straight line to within two hexes of the tail of a D.520 also at Altitude Level 10. Sighting and Field of Fire requirements are met. During the Joint Combat Phase, only the Bf.109's guns are able to bear on a target (the D.520 has neither tail gun, nor all-around defense). To resolve combat, a die is rolled. If the die result were a "2," three Damage Points would be scored on the D.520. The D.520's Maximum Speed Marker is moved down three increments. This gives the D.520 a new Maximum Speed of 9, and limits its maximum Vertical Dive to one level (See D.520 Aircraft Chart). Note that if, after scoring damage, the damaged plane's Current Speed setting is higher than the new Maximum Speed, the Current Speed is adjusted down to the new top speed.
(Example diagram: D.520 at Altitude Level 10 and Bf.109E-3 at Altitude Level 10.)
Sighted Markers: As an aid to memory, Players have been provided with "Sighted" markers. Place one of these markers on an Enemy aircraft (during the Movement Phase) if sighting requirements have been fulfilled upon it by the Friendly aircraft of the same color as the marker. Remove the marker at the end of the Joint Combat Phase.
CASES:
(A) Both players may fire their guns during every Combat Phase. Fire is always voluntary, it is never required.
(B) A given aircraft may only fire at a given target if the Sighting requirements have been met.
(C) FIELDS OF FIRE AND GUN TYPES: All guns of all aircraft may fire during every Joint Combat Phase. Each type of aircraft has its own Combat Results Table(s). There are three armament configurations in Spitfire aircraft.
1. Bomber All-around Defense. (Ju.88A-1, He.111H-3, Blenheim IV.) These aircraft have a generalized defensive ability. They may direct their firepower against one Enemy aircraft each Combat Phase. They may fire in any direction as long as their target is within range and the Sighting requirements have been met.
(Bomber all-around defense diagram.)
2. Fixed Forward Armament and Rear Gunner. (Ju.87B-2, Bf.110C-3, Po.63.) These aircraft have two separate Combat Results Table indications, one for the forward and one for the rear gun. Both guns are treated as separate entities. Both guns have Fields of Fire limited to the hexes in a straight line corresponding with the facing of the aircraft (for the forward gun) and to the straight line 180° opposite of facing (for the rear gun).
(Fixed forward armament and rear gunner diagram.)
3. Fixed Forward Armament. (All other aircraft.) These aircraft may only fire directly into the row of hexes corresponding to the forward facing of the aircraft.
(Fixed forward armament diagram.)
Aircraft may only fire at Enemy aircraft which are at the same Altitude Level (regardless of differences in the Climb Progress Scale). Aircraft which are at different Altitude Levels during the Joint Combat Phase may under no circumstances fire at one another.
(D) Although more than one target aircraft may be in the Field of Fire of an aircraft, only one target per aircraft may be shot at. Exception: Those planes which have two guns (one forward and one rear) may fire at separate targets with each gun (one target per gun) during the same Combat Phase as long as Sighting Requirements have been met.
(E) Each Aircraft attacks individually, even if two aircraft happen to be shooting at the same target in the same Combat Phase. Damage is cumulative.
(F) HOW TO RESOLVE COMBAT: Each type of aircraft has its own Combat Results Table. In the case of aircraft with Fixed Forward Armament and Rear Gunner, there are separate Tables for each gun. Within a given Combat Results Table, the sole determinant of how effective an attacker's gunfire will be is the range-to-target (and, of course, the die-roll). There are no "Combat Odds" to calculate as in most other SPI games. To resolve combat, simply count the range (in hexes) to the target aircraft, find the appropriate Result column on the correct Table and roll the die once to determine the outcome (cross-indexing the die-number rolled with the proper range column to find the result). Results are given in terms of Damage Points inflicted upon the target. Each Damage Point reduces the Maximum Speed of the target aircraft by one step (except in the case of the Ju.88, He 111, and Blenheim). Once an aircraft's Maximum Speed has been reduced to the "Destruct Point" or below, the aircraft is considered to be shot down, and eliminated from the game. When the Maximum Speed is reduced to the point that there are no corresponding Vertical Dive Track increments left, the Horizontal Dive Capability of one level only per Movement Phase remains. Note that the basic ability to fire is never directly affected by sustaining damage. Fire is always simultaneous in a single Joint Combat Phase. Damage does not take effect until all possible aircraft have fired in a Joint Combat Phase.
The Destruct Point of a given aircraft is indicated by the burst-like star on its Speed Track. Players should bear in mind that the only marker which has any relation to this Destruct Point is the Maximum Speed marker. When the Maximum Speed marker is moved into the speed step containing the star, then that aircraft is "shot down."
Destruct Symbol: In order to record damage in the case of the three bomber-types which take two hits to reduce their Maximum Speed one step, turn the Max Speed marker face-down to indicate the first hit (leaving it in place) then turn it face-up and move it down one step to record the second hit.
(G) Aircraft may fire through a hex containing aircraft (Enemy or Friendly) in order to hit a target beyond the intervening aircraft; they may not fire through two occupied hexes. Firing through hexes has no effect upon the planes in those hexes. Friendly or Enemy aircraft which are beyond the aircraft being fired upon, are not affected by that fire in any way. Fire only affects the target aircraft.
(H) CALCULATING RANGE: Simply count the shortest distance from the firing aircraft to the target aircraft. Various guns have different effective ranges, obvious from the make-up of their Combat Results Table. Differences in Climb Progress Scale between firing and target aircraft have no effect upon range.
(Range example diagram: Target Aircraft and Firing Aircraft.)
8.0 Sighting
GENERAL RULE:
In order to fire at a target aircraft, the target must be sighted by the firing aircraft. Sighting requires that the target must have been continuously in the firing aircraft's Extended Field of Fire for at least the last one-third of the Movement Point expenditure during the immediately preceding Movement Phase. This represents the time necessary to line up a shot. The Extended Field of Fire is defined as all hexes an aircraft's guns could reach if range were unlimited. Both target and firing aircraft must be at the same Altitude Level during the Joint Combat Phase. Sighting need not take place at the same altitude; but aircraft must be at the same Altitude Level during the Combat Phase in order to fire at one another.
(Sighting example diagram: Bf.109E-3 and Spitfire I.)
Example: A Spitfire-I is moving seven hexes (Current Speed = 7) and is at the same altitude as a Bf.109E-3. The Spitfire must move at least the last three hexes (one-third of seven, rounded up) with the Bf.109E-3 in the direction the Spitfire is facing for the Bf.109E-3 to be fired upon. If the Spitfire did move so, it could then fire at the Bf.109E-3 provided that range was not greater than seven hexes (the maximum effective range of the Spitfire armament, as indicated on the Spitfire-I Combat Results Table). If it happened that the Bf.109E-3 was facing directly at the Spitfire-I (regardless of Spitfire facing) and the Spitfire-I had fulfilled Sighting requirements (one-third of movement in Extended Field of Fire), the Bf.109E-3 could fire — since it is a Joint Combat Phase.
CASES:
(A) If the immediately preceding Movement Phase was that of the target aircraft, then the target aircraft must have spent the last one-third of its Movement Allowance continuously within the Field of Fire of the firing aircraft.
(B) If the immediately preceding Movement Phase was that of the firing aircraft, then the firing aircraft must have expended the last one-third of its Movement Allowance with the target aircraft continuously in its Field of Fire.
(C) Even if the target aircraft was in the Field of Fire of the firing aircraft for one-third of the last Movement Phase, it may not be fired at if it was not in the Field of Fire continuously during the last third of the Movement Phase. For instance, a target aircraft moving at a speed of nine which flies within the Field of Fire of an Enemy aircraft during the first seven Movement Points of its Movement Allowance and then moves out of the Field of Fire as it expends its last two Movement Points could not be fired upon by the Enemy Aircraft during that Joint Combat Phase.
(D) Sighting need not take place at the same altitude level, although aircraft may only fire at Enemy aircraft at the same Altitude Level.
(E) As long as the Sighting and Field of Fire requirements have been met, aircraft which have climbed or dived, turned, or performed any Special Maneuver may fire at Enemy aircraft in the ensuing Joint Combat Phase.
(F) If the Movement Phase immediately preceding the Joint Combat Phase was that of the target aircraft, then any Movement Points expended (during the last third of its Movement Phase) in climbing, diving, turning, or executing Special Maneuvers may be counted towards the fulfillment of Sighting requirements (assuming that these Movement Points were expended within the Field of Fire of the firing aircraft). Note that in the case of a Snap Roll, half the cost of the roll (rounding up) is considered to be expended in the hex of initiation and half in the finishing hex. If the Movement Phase immediately preceding the Joint Combat Phase was that of the firing aircraft, then any Movement Points expended in turning or executing Special Maneuvers (except the last half of a Snap Roll) do not count towards the fulfillment of Sighting requirements. Movement Points expended in diving or climbing do count, assuming other requirements have been met.
(G) When calculating one-third of an odd-numbered movement, round off any fractions upward. For example, if a Spitfire-I is traveling 13 hexes, its sighting requirement is set at 5 hexes.
9.0 Scenarios
Scenarios nr. 1 and 2 represent two basic types of encounters: fighter vs. bomber and fighter vs. fighter. The time periods covered range from Autumn 1939 to Summer 1942.
The aircraft in each Scenario Chart are listed in two groups, one for each Player. Each group of aircraft is identified as either bombers or fighters. Any type of aircraft may be used in any Scenario, but all aircraft used in a Scenario must be taken for the same time period as per the Aircraft Availability List. For example, the PZL 11 should never enter combat with any aircraft other than the Bf.109E-3, the Ju.87B-2, or the He.111H-3. Neither side, in any Scenario, should use more than one type of aircraft. All aircraft are either fighters or bombers (or fighter-bombers, which may be used as either fighters or bombers in the Scenarios). Only fighters may be used where fighters are called for in the Scenario; only bombers may be used where bombers are called for in the Scenario.
Altitude Markers are placed on the mapsheet in accordance with the information on the Scenario Sheet. The Altitude Marker of the proper color and altitude is chosen, and placed in the numbered hex indicated, facing in the correct direction.
The Maximum Speed Marker is placed on the farthest-right space on the Speed Track. The Climb Progress Marker is placed at "Zero." The Current Speed Marker is placed on the Speed Track at the position specified in the Scenario. After set-up is completed, play begins, starting with the movement of the aircraft marked "First Player."
AIRCRAFT AVAILABILITY LIST
When selecting aircraft types for opposing sides, Players should select their aircraft from the same time period.
1st PERIOD SEPTEMBER 1939
Allied Aircraft Available: PZL.11, Fighter, Poland.
German Aircraft Available: Bf.109E-3, Fighter; Ju.87B-2, Bomber; He.111H-3, Bomber.
2nd PERIOD MAY 1940
Allied Aircraft Available: Hurricane-I, Fighter, Britain; D.520, Fighter, France; Po.63, Bomber, France.
German Aircraft Available: Bf.109E-3, Fighter; Bf.110C-3, Fighter-Bomber; Ju.87B-2, Bomber; Ju.88A-1, Bomber; He.111H-3, Bomber.
3rd PERIOD AUGUST 1940
Allied Aircraft Available: Hurricane-I, Fighter, Britain; Spitfire-I, Fighter, Britain.
German Aircraft Available: Bf.109E-3, Fighter; Bf.110C-3, Fighter-Bomber; Ju.87B-2, Bomber; Ju.88A-1, Bomber; He.111H-3, Bomber.
4th PERIOD 1941 AND 1942
Allied Aircraft Available: Hurricane-II, Fighter, Britain; Spitfire-V, Fighter, Britain; Blenheim-IV, Bomber, Britain.
German Aircraft Available: Bf.109F, Fighter; Bf.110C-3, Fighter-Bomber; Fw.190A, Fighter; Ju.88A-1, Bomber.
9.1 SPITFIRE AIR SUPERIORITY SCENARIO
First Player:
- Force: 3 Fighters
- Starting Altitude: 19
- Starting Hexes: 5628, 5629, 5630 (facing Northwest)
- Starting Speed: Level Maximum
Second Player:
- Force: 3 Fighters
- Starting Altitude: 15
- Starting Hexes: 3512, 3412, 3413 (facing Northwest)
- Starting Speed: two less than Level Maximum
Victory Conditions: The Player with the greatest number of Victory Points at the end of the game is declared the winner. A Player receives one Victory Point for every hit scored on an Enemy plane, or, if an Enemy plane is shot down, the Victory Point Value of that plane. The Second Player is automatically awarded 20 Victory Points to compensate him for his poor initial position.
Ending the Game: At any time after the conclusion of the Second Player's tenth Movement Phase, either Player may end the game by flying all of his aircraft off the map and/or below Altitude Level One.
9.2 SPITFIRE BOMBING SCENARIO
First Player:
- Force: 3 Fighters
- Starting Altitude: 12
- Starting Hexes: 5628, 5429, 5230 (facing North)
- Starting Speed: Level Maximum
Second Player:
- Force: 3 Bombers
- Starting Altitude: 10
- Starting Hexes: 5415, 6518, 5614 (facing Northwest)
- Starting Speed: Level Maximum
(Legend: Ground Target marker, "Ground / Target".)
Victory Conditions: The game is won by accumulating Victory Points. The Second Player receives 10 Victory Points each time a single bomber passes over a single ground target while flying at Altitude Level One. Ground targets are located at hexes 1323, 1424, 1723, 2021. Place Ground Target markers on these hexes as a visual aid. The same target may be passed over more than once by the same (or different) bombers and still be worth 10 Victory Points for each pass by each plane. The Second Player also receives 50 points for each bomber that flies off the east edge of the map after having made at least one pass at a ground target. The Second Player receives 1 Victory Point for each point of damage inflicted on an Enemy fighter. The First Player receives 50 Victory Points for every Enemy bomber shot down. He receives no points for scoring damage on bombers.
Ending the Game: The game ends when all the bombers have been either shot down or have been exited off the east edge of the map. Bombers may exit off the east edge after having participated in at least one pass over at least one target. They may all exit in the same Movement Phase or in different Movement Phases.
9.3 SPITFIRE FORMATION SCENARIO
First Player:
- Force: 3 Fighters (flying in Vee formation)
- Starting Altitude: 2? [transcriber's note: the final digit is illegible in the scan (it reads as a clipped "0" or "2"); verify against a clean copy of the printed Scenario before relying on it]
- Starting Hexes: 5811, 5810, 5910 (facing Northwest)
- Starting Speed: Level Maximum
- Permissible Types: Hurricane I, D.520
Second Player:
- Force: 4 Fighters (flying in Schwarm formation)
- Starting Altitude: 15
- Starting Hexes: 3207, 3107, 2906, 2905 (facing Southwest)
- Starting Speed: Level Maximum
- Permissible Types: Me109E3
Special Formation Rules: This scenario requires that the Players operate their aircraft in the formations which reflect the aerial doctrine of the times. The older (and less effective) formation is known as the "Vee" and as its name implies, the three planes must fly in the classic inverted "V" formation. The more sophisticated "Schwarm" formation (developed by the Germans) uses four planes flying in two groups of two.
(Diagram: the shaded area indicates the permissible zone of operation for the Wingmen.)
The Vee Formation: The aircraft in the center is the Leader (Start Hex 5810 in the Scenario) and the other two are his Wingmen. Wingmen must stay within four hexes, and plus or minus one Altitude Level of the Leader. The Left Wingman (Start Hex 5811) must stay in the Left Rear 60° of the Leader and the Right Wingman must stay in the Right Rear 60° of the Leader. Either or both Wingmen may be in the stream of hexes directly behind the Leader. Wingmen need not face the same direction as the Leader as long as they "keep position" relative to the Leader at the beginning and the end of the Movement Phase. Left and Right Wingmen may not trade positions. If one of the Wingmen is shot down, the other may operate in the entire 120° arc behind the Leader. If the Leader is shot down, either one of the remaining two planes becomes the new Leader.
(Diagram: the shaded areas indicate the permissible zone of operation for the Wingmen.)
The Schwarm Formation: The Schwarm consists of two Leaders each having a single Wingman who must operate in the 120° arc behind his respective Leader at a distance of no more than four hexes and plus or minus one Altitude Level. Each two plane "Section" is independent of the other and need not maintain any set distance between themselves. In the Scenario the aircraft starting in hex 3107 is the Leader of the first Section and his Wingman starts in 3207. The aircraft in 2906 is the Leader of the second Section and his Wingman starts in 2905. If one of the four aircraft is shot down, the Schwarm degenerates into a Vee formation, operating under all the restrictions for the Vee. If the surviving plane of a Section is far removed from the remaining whole Section, it must join up into the Vee as soon as possible (without firing its guns before doing so).
Victory Conditions: The game is won as soon as one Player has only one aircraft remaining (the Player with more than one aircraft remaining being declared the victor). If both Players are simultaneously reduced to a single aircraft, the owner of the single aircraft with the fewest number of hits on it is the winner. If the number of hits are identical, a draw results.
In addition to the above, the game is immediately lost by any Player who at the beginning or the end of his Movement Phase has an aircraft which does not conform to the formation restrictions (except, of course, in the case of a Section survivor attempting to join up with the remaining whole Section.)
Scenario Variant: Both Players fly in the Schwarm formation. The First Player starts with a force of four fighters beginning in hexes 5315, 5316, 5517 and 5617 facing Southwest. Speed and Altitude are the same. In this variation, Players may select Fighter aircraft from the period August 1940 and onward.
10.0 Experimental Facing/Field of Fire System
Commentary:
Spitfire was tested and developed using a movement system which defines a straight line as a perfectly straight row of hexes. As well as this system works, it has inherent in it a logical flaw: It is impossible to describe a straight line between all two-hex "sets" on the map, since going against the grain of the hex pattern is not considered as a viable straight line. This means that there are artificial blind spots in the 360° horizon surrounding a given aircraft's position. For example, it is impossible for any aircraft to fly from hex 0102 to hex 0302 without making a turning maneuver. It also means that (except for All-Around fields of fire) it is impossible to shoot "against the grain." The designer of the game feels that this is an acceptable compromise with reality. The physical systems designer disagrees, and therefore is including this alternate system (and rule 11.0) for examination by the players. It's being done in the form of an experiment simply because all of the testing of the game used the standard system and to tack on a radical change at the very last moment is somewhat risky.
This experimental system will be called (for lack of a better name) the Hexagonal Space system. It is based upon the logical proposition that since there are only six possible directions in a hexagonal grid, then all points lying within a 60° arc projected from a given position, should be reachable by straight-line travel and fire. This will greatly increase the field of fire of fixed armament aircraft and the apparent maneuverability of all aircraft.
General Rule:
Aircraft will always be faced so that the nose of the aircraft silhouette points at one of the corners of the hexagon and all turning maneuvers will be executed in terms of hex corners instead of hex sides. As the aircraft moves, it may fly to either of the two hexagons directly ahead of its position without being considered to have executed a turning maneuver. As the aircraft moves ahead in a "straight line" it does not change its facing.
Cases:
(A) All of the standard rules apply except as specifically modified by this variant.
(B) FIELD OF FIRE: The Field of Fire of Fixed Forward and Rear armament is redefined as being (in the case of a Forward Gun) the 60° arc in front of the aircraft and in the case of the rear gun, the 60° arc directly to the rear of the aircraft. All around Field of Fire remains as in the Standard rules.
(C) SNAP-ROLL: Snap Rolls are executed into the hex directly to the right or left of the aircraft.
(Experimental facing/field of fire diagram and snap roll diagram.)
11.0 Inter-Altitude Combat (Experimental Optional Rule)
General Rule:
Aircraft at different Altitude Levels may fire at each other if the firing aircraft are in the proper attitude, i.e., aircraft in a dive attitude may fire at targets at lower Altitude Levels; aircraft in climb attitude may fire at targets at higher Altitude Levels. Aircraft in a level attitude may only fire at targets at the same Altitude Level.
Procedure:
Sighting requirements remain the same. Range is calculated by treating each difference in Altitude Level as the equivalent of an additional hex of distance. Relative position on respective Climb Progress Scales have no effect upon range calculation.
Cases:
(A) Whenever a Player executes a climb or dive with his aircraft he must decide whether or not to level off or to remain in the climb or dive attitude at the end of his Movement Phase. Note that if the Player plans on performing a Wing Over or Split-S in his subsequent Movement Phase, then he must keep his plane in the climb or dive attitude.
(B) Attitude is indicated by pointing the Current Speed marker nose-up, level, or nose-down.
(C) Aircraft may not level off if they expend no Movement Points in lateral motion, i.e., if all Movement Points are used to climb, or to dive.
(D) Aircraft may not fire at targets which are in the same hex as they at a different Altitude Level.
(E) Only aircraft in a level attitude may fire at aircraft at the same Altitude Level.
(F) The attitude of the target aircraft has no effect upon combat.
12.0 Designers Notes
In many respects, the 1939-42 period was the beginning of the "classical" period of tactical air warfare. The aircraft available during this period, as well as the tactics and strategy employed, would develop little more before jet aircraft and electronic technology changed everything.
During World War I aircraft merely "fought" and little else. During 1914-18 it was more difficult to keep the aircraft in the air than it was to "fight." It was a very delicate operation getting the fragile wooden planes into a position enabling the pilot to use his unreliable machineguns. There were no parachutes, so a mistake in "flying" could be more fatal than a mistake in "fighting."
By 1939, aircraft were made of metal (most of them). Parachutes were used and aircraft reliability was quite high. The Spitfires and Me-109s could, and did, maneuver violently. Their weapons were much more formidable than those of 1914-18. And these weapons usually worked. Aircraft speed tripled, but the 1939 "dogfight" was obviously a direct descendant of the 1918 air combats.
With the coming of jet propulsion aircraft, speed more than tripled again. More important, electronic technology made air combat something humans alone could not handle. Man became an extension of a "black box" complex after 1945. But during 1939-45, man was in control. In control of the best machines he was capable of handling.
In the game Spitfire each turn represents only 3.3 seconds. Each movement point represents some 30 miles per hour (50 kph) of air speed. In Spitfire, man and machine both had about the same limits (before this the machine would fail first; after 1945 the man couldn't take it). Each flier has a repertoire of maneuvers, such as wing overs (sliding from side to side without losing speed) and rapid turns during climbing (snap rolls) or diving (split S). These were the major maneuvers that are obvious in the game by the special rules required for their employment. Many other maneuvers are implicit in the maneuver capabilities of the aircraft. A good pilot was one who could pick the right maneuver for the right situation. One thing the game brings out is the value of a good pilot. A player who has mastered these maneuvers can take an inferior aircraft and rather easily defeat a better player. But between pilots of equal skill, the quality of the aircraft and the tactical situation will usually be decisive. Because it is a game that allows players unlimited time to plan their next move the most vital attribute of a good fighter pilot — a fast mind — is neutralized.
Like 1914-18 air combat, the typical 1939-40 air battle opened with one side or the other having a tactical advantage. If both sides came at each other on equal terms, with equally good pilots and roughly comparable aircraft, the result would usually be an undecisive draw. Even with the game situations given in Spitfire, a few planes would come near expending all of their ammunition. Therefore there is no "ammunition" rule. In addition, the altitude counters given do not cover the full altitude range of the aircraft. Even during this period, fighting was becoming constricted by technology. Radar and radio control restricted the "air space" taken up by any single air combat. Radio control also made possible larger battles. With radio, one pilot officer could control up to fifty fighters. But the basic fighting unit was still two or three fighters on each side.
In Spitfire we have dealt with a wide range of technological and psychological factors. We hope that, after playing the game, you will agree with us that we have done so successfully.
13.0 Credits are omitted from this transcription (attribution only).