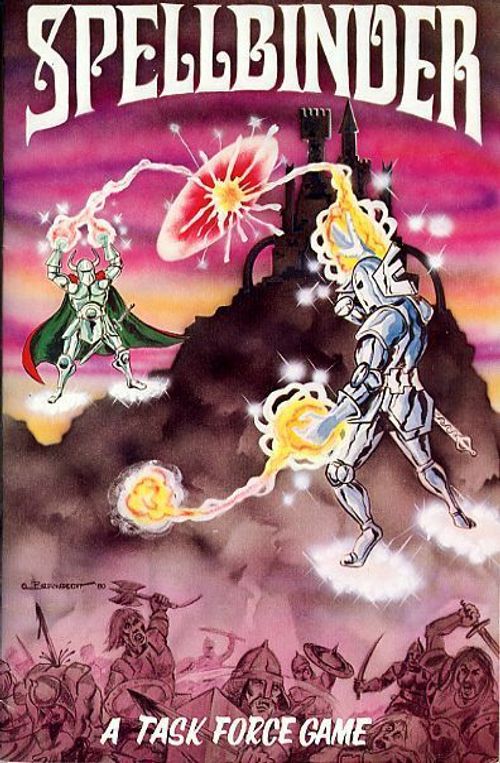
Spellbinder
Spellbinder Rulebook
Table of Contents
Table of Contents
(2.0) Game Equipment
(2.1) The Game Map
The 16 x 20 inch map represents the land of Silomant where the chief wizards had built their strongholds. The hexagonal shapes (hexes) on the map are important for the placement and movement of the playing pieces. To make the map lay flat, back-fold it against the creases. Players may wish to use small pieces of masking tape on the corners to hold the map flat, or they may wish to place a sheet of glass or plexi-glass over the map. Various terrain features are depicted on the map through the use of symbols and colors. The effect of these terrain features on the movement of the playing pieces will be described later.
(2.2) The Playing Pieces
The half-inch square playing pieces represent various wizards, armies, ships, and record keeping markers used in the playing of SPELLBINDER. The "wizard" and "army" playing pieces will hereafter be referred to as "units," and the "ship" and "record keeping" playing pieces will be referred to as "markers."
(2.21) Wizards
The four wizard playing pieces represent the actual leaders of the four factions. The name of each wizard will be found on the playing piece representing him.
(2.22) The Armies
There are nine playing pieces each that represent the armies of the four factions. The army of each wizard is printed in the same color as the playing piece for the wizard.
(2.23) Garrison Troops
There are four playing pieces of garrison troops (yellow on black) which will be used to represent various castle guards or armies depending on the scenario played (9.0).
(2.24) The Ships
There are two markers which represent ships. These markers are used to move units onto the island of Yof-Pintre. Their function will be fully explained later in the rules (4.6).
(2.25) Record Keeping Markers
Each player of SPELLBINDER will have a "spellbinder point" marker and a "spell" marker. These markers are neutral and may be used by any player. Their use will be fully described later in the rules.
(2.3) Game Scale
Each hex represents about 500 yards. Each game turn is about one hour of time. Each wizard playing piece represents one individual, and each army unit represents about 1,000 warriors.
(2.4) Parts Inventory
A complete game of SPELLBINDER includes one rulebook, one 16 x 20 inch map, one sheet of 54 die-cut playing pieces, and one set of charts and tables for each player. Also needed but not included in the game is one six-sided die.
(3.0) Sequence of Play
The game is played in successive game turns, each of which consists of a number of Player Phases equal to the number of players in the game. The number of game turns will vary according to the scenario played (9.0).
During each game turn, each player will have an opportunity to move his units and conduct attacks on enemy units within the limits of the game rules. At the conclusion of the specified number of turns, the Victory Conditions for the specific scenario being played are consulted to determine the winner.
At the beginning of each turn, the first player is determined by all players rolling a die. The player rolling the highest number will be the first player for that turn (in case two players roll the same number, the die should be re-rolled). The player to the first player's left will always be the second player. The player to the second player's left will be the third player, and the player to his left will be the fourth player (assuming that there are that many players). At the end of each game turn, the players will roll to determine who has the first Player Phase of the next turn. Players will follow the procedure above to determine the order of the other players. The player whose turn is currently in progress is called the Phasing player. The other player(s) is called the non-Phasing player(s). Each player will be the Phasing player once during each game turn.
(3.1) Sequence Outline
SPELLBINDER is played in turns, each of which consist of a number of player-turns equal to the number of players participating. Each of these player-turns consist of the following steps:
Movement Phase Combat Phase Magical Combat Segment Regular Combat Segment
(3.2) Explanation of the Sequence of Play
Certain functions are carried out in each of the various phases. These are as follows:
1. First Player Phase
A. Movement Phase — The Phasing player may move all, some, or none of his units within the restrictions of the Movement Rules (4.0). The non-Phasing player's units may not be moved during this phase.
B. Combat Phase — The Combat Phase is further broken down into two types of combat which must be done in the following order:
-
Magical Combat — If the Phasing player has his wizard within two hexes of unfriendly armies or adjacent to an unfriendly wizard and if he has spellbinder points remaining, he may make a magical attack on that unfriendly army or wizard. The non-Phasing player being thus attacked may be able to throw a defensive spell (6.2) if his wizard is within two hexes of his armies which are being attacked.
-
Regular Combat — If the Phasing player has an army adjacent to any unfriendly army(s), he may make an attack using the rules on Regular Combat (6.5). After the first player has completed his turn, the second player becomes the Phasing player and executes the above steps. This process continues until each player has been the Phasing player. After each player has been the Phasing player, one game turn has passed.
Note: Everytime a player uses spellbinder points or takes losses in his armies, he must make a record of this (6.6).
(4.0) Movement
During the Movement Phase, the Phasing player may move as many or as few of his units as he wishes subject to movement allowance and terrain restrictions. These armies may be moved from hex to hex in any direction or combination of directions.
Units may be moved one at a time or in "stacks" (5.0) tracing a path of contiguous hexes through the hex grid. As a unit enters each hex, it must pay a portion of its movement allowance for entering that hex. The costs for this movement are found on the Terrain Effects Chart (4.2). Each army unit has a basic movement allowance of 5 hexes per turn; each wizard has a basic movement allowance of 8 hexes per turn; and each ship has a movement allowance of 10 hexes per turn.
(4.1) Restrictions Against Movement
(4.11) Units must move from hex to adjacent hex and may not "skip" hexes.
(4.12) Any time an army or wizard moves adjacent to an army of another player during the Movement Phase, the moving army or wizard must cease movement for the remainder of that turn. However, a unit does not have to cease movement when it moves adjacent to a wizard that is alone in a hex (exception: see Alliances (8.1) ). A wizard WOULD have to stop if he moved adjacent to another wizard, whether or not the enemy wizard was alone in the hex and whether or not the moving wizard was moving in a stack with some of his armies.
(4.13) A player may never move any units into or through a hex containing any enemy units. (Exception: see (8.1) Alliances.)
(4.14) The only time a player may move his units is in the Movement Phase when he is the phasing player. A player may not move his units when another player is the phasing player.
(4.15) Whenever a wizard, ship, or army has used its entire movement allowance, it must cease movement for that turn.
(4.2) Terrain Effects Chart
| Types of Terrain | Movement Point Cost |
|---|---|
| Clear | 1 |
| Road/Bridge | 1/2 |
| Water | Only passable by bridge or ship |
| Forest | 2 |
| Mountain/Hill | 3 |
| Castles | 2 |
(4.21) The various features may be identified by colors. The colors are as follows:
- Clear — tan
- Water — blue
- Road/Bridge — black
- Forest — green
- Mountain — dark brown
- Castles — yellow
(4.3) Road Movement
Units moving along roads may take advantage of the Road Movement Rate only if they are moving from a road hex to an adjacent road hex through a road hex side (along the road). Bridges are considered to be road hexes if they are entered from a road hex.
(4.4) Strongholds
Strongholds may only be entered along a road. Units may not cross castle wall hex sides except by a road hex side (exception: see (4.5) Scaling).
(4.5) Scaling
Any of the strongholds (Castles) may be entered from a nonroad hex by "scaling" the walls.
Procedure: If a player wishes to have his units scale the walls, he must stop the unit(s) that will attempt to scale adjacent to the walls of the stronghold. On the player's next turn, these units may not move or attack in the Combat Phase. On the second turn following, the player must roll to see if the attempt to scale has been successful. On a roll of "1-4", the attempt is successful, and the player may place his scaling unit(s) in an adjacent stronghold hex. If the attempt was unsuccessful, the player may roll on each successive turn until he is either successful or abandons the attempt to scale the walls.
(4.51) If the die roll for the scaling attempt was '1', the attempt was successful, but the unit(s) involved has possibly suffered some casualties. To determine the number of casualties, roll one die and subtract '2'. This result will yield the number of casualties scored against that player (6.6). If this result is less than zero, consider it to be zero.
(4.52) A player may not end a successful scaling attempt in a hex containing any unfriendly wizards or armies. Obviously, there is no point in rolling for a scaling attempt if the only hexes adjacent to the scaling units are occupied by unfriendly wizards or armies.
(4.53) If, at the end of a successful scaling attempt, the player has moved units adjacent to enemy units, he may attack them in the subsequent Combat Phase.
(4.6) Movement by Ship
There are two ships included in the game. At the start of the game, these ships should be placed (one each) in hexes 1817 and 2714. Ships may only be moved on water hexes of the lake surrounding Yof-Pintre.
(4.61) A maximum of two army units may be transported by a ship at one time. One or more (if allied see (8.1) ) wizards may also be transported in addition to (or instead of) army units.
(4.62) A ship may either load or unload units during a given turn. It may combine either activity with its normal movement; however, all movement must be done either before or after any loading or unloading activities. It may not load and unload units (be they different or the same units) during a single turn.
(4.63) Once unloaded from a ship, units may take their ground movement immediately. However, if units moved by ground on the turn they boarded they may move by ship but may NOT unload on the same turn.
EXAMPLE OF SHIP MOVEMENT: On turn 2, Umaron moves all his forces into hexes 1718, 1618, 1519, and 1419. Since he has reached the docking hex, he boards the ship with two of his armies (for a maximum load). Now the player has a choice. He may either move the ship to hex 1311 and leave the ship loaded until his next Movement Phase when he may unload and move or he may leave the ship in dock and on his next Movement Phase he may move the ship, unload, and use ground movement.
(4.64) Once unloaded a ship may be returned "empty" to a dock on the opposite shore by the controlling player using the normal movement rules. The controlling player does not have to have units on the ship to retain control of it (4.66). If there are other units to be transported, they may load but may not move on the turn the "empty" ship returns.
(4.65) Units on a moving ship may only be attacked by armies or wizards on another adjacent ship. Units on a docked ship may not be attacked until the third successive turn they have remained in the dock hex without moving.
(4.66) Once a player has used a ship, he controls that ship until control of it is taken from him. (See (4.67) and (4.69) ). During his Movement Phase, he may move any ships he controls anywhere on the lake in accordance with the rules on the movement of ships.
(4.67) An empty ship may be "captured" by moving an army or wizard onto the ship (see (4.78) ).
(4.68) On the "land" side of the lake, the ship may only be loaded onto or unloaded from hexes 1718 and 2715. Thes two hexes are known as "Dock Hexes." On the island side, players may unload onto or load from any island hex adjacent to the ship.
(4.69) A player may attempt to gain control of an empty ship by "challenging" the wizard of the player who is currently in control of the empty ship. This can only take place during a player's magical Combat Phase.
PROCEDURE: In his Movement Phase, the player attempting to gain control must move his wizard adjacent to the wizard of the controlling player. Both players roll one die. If the challenging player rolled a higher number, he now has control of the ship and may immediately move it where he desires. If the challenging player's roll is lower, the other player retains possession of the ship. If the rolls are equal, players must re-roll until the rolls are not equal.
(4.691) The player who made the challenge must, even if he loses the challenge, subtract the number rolled on his die roll from his wizard's spellbinder points.
(4.692) A player may only make one challenge per turn.
(5.0) Stacking
A maximum of two friendly armies may be stacked together in any hex at the end of the Movement Phase. Note that this does not include wizards which may be freely added to any stack. The stacking limit is only in effect at the end of the owning player's Movement Phase.
(6.0) Combat
Magical combat may take place in the magical combat portion of a Player's Phase if his wizard is within two hexes of any unfriendly armies or adjacent to unfriendly wizards.
(6.1) Magical Combat vs. Armies
(6.11) At the start of the game, each wizard has a number of spellbinder points (25 unless specified differently in the scenario). These points are used in the casting of various spells.
(6.12) To use a spell, a wizard must have at least one spellbinder point remaining. The casting of spells requires the expenditure of spellbinder points. Also, as an adverse effect of combat, a wizard may lose spellbinder points (6.33). One spell allows a wizard to replenish his spellbinder points (7.1).
(6.13) A wizard may use only one offensive spell per turn, and it may be used only in the owning player's turn. A wizard may use a defensive spell once in each opposing player's turn.
(6.2) Defensive Spells
If a player's army is being attacked by magic and his wizard is within two hexes of the army being attacked and has spellbinder points, he has the option of casting a defensive spell.
Note: As a result of attacking an enemy army (when a non-phasing wizard is casting a defensive spell), an attacking wizard may suffer damage (additional loss of spellbinder points) if the defensive spell is more powerful than his offensive spell. However, a wizard who is defending his armies by casting a defensive spell can never personally suffer an adverse combat result (loss of additional spellbinder points). Only when a wizard is attacked directly can he suffer combat damage (loss of spellbinder points) when he is the defender (non-phasing wizard) in combat.
(6.3) Procedure for Magical Combat
If a player is using an offensive spell and the player owning the armies under attack is NOT using a defensive spell, that spell will take effect immediately. (See (6.6) for how to score casualties.)
If an offensive and defensive spell are being used, players choose their spells simultaneously and secretly. After selecting, each player reveals to the other the spell he has chosen.
(6.31) Six offensive and six defensive spells are listed on the MAGICAL COMBAT MATRIX (See (7.0) Spells). The phasing player may choose one of the six offensive spells and the non-phasing player one of the six defensive spells. Even if able to cast a defensive spell, the non-phasing player is not required to do so. He may chose to cast "no spell". There may be advantages in doing this since it might encourage the phasing player to use more spellbinder points that would otherwise be necessary. The players should then place their "SPELL" counter in the corresponding box on their SPELL TRACK. (For example, offensive spell # 2 is "THUNDER." If a player chooses that spell, the "SPELL" counter is secretly placed in the number two box on that player's SPELL TRACK.) Players using "no spell" place the "SPELL" counter in the "O" box.
(6.32) Players must now decide how many spellbinder points they wish to put into a spell, up to a maximum of 10. The amount of these points put into the spell will affect how well the spell works. If a player chooses to use a spell, he must put at least one spellbinder point into the spell. However, if he does not choose to use a spell, he does not use any points. The players should write on scratch paper the amount of spellbinder points they have put into a spell as this will be used in determining the number of casualties. Players then subtract from their Spellbinder Point Track the number of spellbinder points which they put into the spell by moving the spellbinder point counter down the Spellbinder Point Track. (For example, if a player started with 25 spellbinder points and puts 5 into a spell, he would move his spellbinder point counter to the 20 box.)
(6.33) To determine the effects of combat, players should both locate the number of the spell that they used on the MAGICAL COMBAT MATRIX. Players should then cross-index the spell numbers. The resulting box will contain a '1', '2', '3', 'NE', or 'S'. If a number is in the box, this is the base number of casualties the phasing player has inflicted. This number may then be modified to indicate either more or less casualties by subtracting (from the number found on the matrix) the number of spellbinder points the defender (non-phasing player) put into his spell and then adding the number of spellbinder points the attacker (phasing player) put into his spell. If the final result is a positive number, this is the number of casualties scored on the armies under attack. If this number is a negative number, it indicates the number of spellbinder points subtracted from the attacking wizard (i.e. damage to his power resulting from a backfired spell.)
EXAMPLE: The Algona player is the phasing player and is attacking armies belonging to the Sharn player. Both wizards are within the two-hex range of the hex containing the two armies being attacked, and both players decide to use spells. The Algona player secretly chooses offensive spell # 3 (Hammer) and puts one spellbinder point into it. The Sharn player secretly chooses defensive spell # 2 (Stillness) and puts five spellbinder points into it. Both players make adjustments on their Spell Track and Spellbinder Point Track to reflect the changes, and then they write down the number of spellbinder points used in their spells. The players then reveal their sheets to one another. They cross-reference their spells and find a '3' in the box where the two meet. To this result is added the one point used by Algona. The five used by Sharn are subtracted. This results in a negative one (3 + 1 - 5 = -1). The spell has backfired and done damage to the attacker (phasing player). This means that Algona will have the result, '1' in this case, subtracted from his spellbinder points. In this example, if the Algona player had put five spellbinder points into his spell and the Sharn player one, the result would have been 3 + 5 - 1 = 7. This would mean that the Sharn player has lost 7 strength points from the armies which were attacked (provided he had that many left in that army) (see (6.6) How to Score Casualties).
(6.34) If the result of two spells is a 'NE' (No Effect), this means the spell did not work, and nothing further takes place (after players have removed the appropriate number of spellbinder points.)
(6.35) The last two offensive spells will always be successful ('S') unless one particular defense is used against them. In this case the spell would have no effect ('NE'). In any case the spellbinder points one player uses will not be subtracted from those the other player uses. Offensive Spells # 5 and # 6 cost a fixed number of spellbinder points (five), and defensive spells # 5 and # 6 cost a fixed number of spellbinder points (two).
(6.36) If the non-phasing player did not use a spell, the base number of casualties will always be '3'. To this number will be added the number of spellbinder points which the phasing player put into his spell.
(6.4) Wizard vs. Wizard Combat
Wizards may attack each other directly, with combat results being applied to each other (by reducing their spellbinder points). The procedure for computing the results is the same as outlined in (6.33) - (6.35). (Also, see (6.6) How to Score Casualties.)
(6.41) In order for two wizards to engage in magical combat, the two wizards must be in adjacent hexes during the magical combat segment.
(6.42) The phasing player must announce whether he is attacking an army or a wizard (if both are available) before making the attack.
(6.43) Casualties scored against a wizard are subtracted from that wizard's spellbinder point total.
(6.5) Regular Combat
Regular combat takes place between armies in the regular combat segment of each Player Phase. In order for a player to engage his armies in combat with armies of another player, he must have his attacking armies adjacent to the armies he wishes to attack. The phasing player is always the attacker, and the non-phasing player is the defender, regardless of the overall strategic situation.
(6.51) Combat is never mandatory. A player does not have to attack another player's armies simply because he has armies adjacent to them.
(6.52) To determine the results of combat, players must first determine a differential. To do this, the phasing player (attacker) adds together the current strenghts of all armies attacking a single hex. The non-phasing player (defender) then determines the current strength of the army(s) in the hex being attacked. The current strength of the defender is then subtracted from that of the attacker, even if this results in a negative number. This is the differential.
EXAMPLE: The Algona player has two armies stacked in hex 2308. Due to previous losses, the current combined strenth of the two is 14. The Umaron player, who is the phasing player, is attacking the Algona armies with four armies. Two armies are attacking from hex 2307 and two from hex 2407. The Umaron player's current combined strength for the four armies is 32. This makes the differential 18 (32 - 14 = 18).
Players must then locate the proper column on the Combat Results Table (see (6.54) Combat Results Table). A player may not attack at a differential less than -3. The attacking player then makes any terrain adjustments applicable (see (6.55) ) and rolls one die. This will yield a result (see (6.54) Combat Results Table).
(6.521) On the Combat Results Table will be found letters and numbers. The number is the number of strength points subtracted from the affected units. If there is an "A" the attacking player (or Phasing Player) loses strength points. If there is a "D" the defending player (or non-Phasing Player) loses strength points. A "NE" means there is No Effect.
EXAMPLE: In the above example, the defender is in clear terrain so there are no terrain adjustments. The Umaron player locates the proper column on the Combat Results Table (11 + ) and rolls one die. He rolls a '4', which results in the Algona player losing three strength points.
(6.53) No army may attack more than once in a turn. An army may be attacked once by magical combat and once by regular combat during a single Player Phase. Note: Four players are involved in some scenarios. Between a given player's current turn and his next turn, all three of the other players will have the opportunity to attack his armies by regular and magical combat. An army in a particularly critical position might be attacked as many as six times: three times by regular combat and three times by magical combat.
(6.54) COMBAT RESULTS TABLE (see separate sheet).
(6.55) Certain terrain features will aid the defender and will result in a modification to the die roll. Mountains and castles subtract one from the die roll, and a forest will subtract two from the die roll.
EXAMPLE: In the example above, if Algona's armies had been in a forest hex, the die roll would be modified to become a '2'. Thus, the Algona player would have only lost two strength points.
(6.6) How to Record Casualties
Each of a player's armies (A thru I) will have a certain number of strength points (usually 10) specified in the scenario being played (see (9.0) Scenarios). At the beginning of the game, each player should write the letters A thru I on a sheet of scratch paper and list the initial strength of each army next to the appropriate letter. Each time an army takes casualties, the player must mark this beside the appropriate army, reducing the strength by the number of casualties. When the strength of an army is reduced to zero, that army is removed from the game. If casualties are scored on a hex where two armies are stacked together, the owning player may subtract the casualties from the strength record of either or both armies so long as the total casualties thus subtracted is equal to the number resulting from the combat. The number of casualties scored on a hex is limited to the number of strength points of the armies in the hex. If more casualties are scored against an army (or two armies in the same hex) than the army or armies have strength points, the armies are eliminated, and no further casualties are scored.
(6.61) Players may combine armies as long as there is never more than 10 points (or the maximum number specified in the scenario) in one army. To do so, the armies must be moved into the same hex.
EXAMPLE: The Umaron player has three strength points left in army A and seven in army E. In his Movement Phase, he has moved them into the same hex. He decides to combine the two by bringing E to full strength, removing A from the game, and making adjustments on his scratch paper.
(6.62) Wizards take damage by losing spellbinder points. For example, if the second part of the example of combat in (6.33) had been Algona vs. Sharn with no armies involved, Sharn would have had his spellbinder points reduced by seven as a result of the combat in addition to the one point he used for the spell.
(6.621) Wizards may regain one spellbinder point, up to the maximum of 25, for each turn they remain in either their own stronghold or Yof-Pintre without using any spellbinder points.
(6.7) Wizard Recovery
If a wizard's spellbinder point total is reduced to exactly zero, he must immediately return to his castle. (This is not done by regular movement. Simply remove the wizard, and place him in the castle.) All of his armies outside of his castle are removed from play (temporarily). Once he regains five spellbinder points, the temporarily eliminated armies are placed anywhere in his castle, with their strength levels the same as the instant they were removed. If his home castle contains unfriendly wizards and no friendly or allied wizards when he is forced to return to it, he is permanently eliminated from the game.
(6.8) Wizard Elimination
If a wizard's spellbinder points are reduced to less than zero, he and all of his armies are removed permanently from the game.
(7.0) Spells and Their Effects
There are four offensive spells which have a varying effect depending on the defensive spell chosen. There are four defensive spells that will have a varying effect on the first four offensive spells.
The offensive spells are:
- Ring of Shand (Mind) — causes enemies to kill one another through mind control.
- Invocation of Thunder — calling upon forces of nature to destroy enemies.
- Hammer of Goron Troll — the war hammer of the famous Troll given the power of flight.
- Sword of Corth — a famous sword given the power of flight.
The defensive spells are:
- Force of Umaron — developed by Umaron to block out mind control.
- Stillness of Barrow Waste — stills the violent forces of nature.
- Armor of Dismoth — the only spell to stop the Hammer Spell.
- Shield of Deathstay — actually small shields which cover all warriors.
(7.1) The fifth offensive spell is a Regeneration Spell. This spell, when successful, will bring back up to 10 army strength points. These strength points will appear immediately in the hex with the wizard that cast the spell. They may be added to armies in that hex or used to create a new army (if a counter is available). This spell cannot be used to regenerate more strength points than a player originally had and cannot be used to regenerate more than 10 strength points per turn even if some of the player's armies had more than 10 strength points to begin with. The cost for this spell is five.
(7.11) The defensive Fear of Battle Spell is the only spell which can stop the Regeneration Spell. The cost for this spell is always two.
(7.2) The sixth offensive spell is the Spellbinder Spell. This spell may only be used by each wizard successfully once per game. However, the only limit to the number of times a player may fail and keep trying is that the player must have at least five spellbinder points left to try it. If this spell is successful, it immediately moves the spellbinder point counter back up to 25. The cost is always five.
(7.21) The only spell which will stop the Spellbinder Spell is the Force Crusher Spell which always costs two points.
(7.3) The Regeneration and Spellbinder Spells must always be cast on another wizard or on an army other than the player's own. (Note that allies can cast these spells on one another but cannot always be trusted.)
(8.0) Alliances
The optimum number of players for SPELLBINDER is four although alliances can become interesting in the three player game as well. Alliances are encouraged, and within the framework of the rules, almost any "deals" may be made. However, alliances may be broken at any time and often with disastrous results.
(8.1) With the permission of an ally, a player may ignore the zones of control (4.12) of his ally.
(8.2) Players may still only move in their own Movement Phase. A player may not move an ally's armies, and an ally may not move the player's armies.
(8.3) A player who controls a ship may loan the ship, or turn over control of it, to his ally.
(8.4) Armies belonging to different players may not stack together. However, allied wizards may stack together.
(8.5) A player who allows another player any of the privileges of alliance (8.1), (8.3), (8.4), is said to be "allied" with, or "acting in alliance with," that player. Conversely, if a player accepts such privileges, he is also considered to be an "ally" of the first player.
(9.0) Scenarios
There are three scenarios plus a Campaign Game included for SPELLBINDER. Although SPELLBINDER is basically a four-player game, provisions will be made in the scenarios for two or three players. Each scenario will include:
Background
- Starting positions for players
- Strengths of armies
- Any special rules
- Number of game turns
- Victory conditions
(9.1) Each on His Own
The four wizards, Darman, Sharn, Algona, and Umaron, all decide to take possession of Yof-Pintre.
-
Each wizard begins the game anywhere inside his castle: Darman-Castle Elsmoor; Sharn-Pindragalf; Algona-Castle Coving; Umaron-Aramet Shur. All armies start the game anywhere in the castle with their wizards. (Note: The player controlling Pindragalf may overstack in his castle.)
-
All armies start with 10 strength points each.
-
A. If there are two players, each player may choose two wizards and the armies controlled by those wizards. However, one player may not control both ships.
B. If there are three players, a garrison of four armies of the wizard not used are placed in that wizard's castle. If a player comes adjacent to these armies, the unowned armies immediately attack. However, the garrison will never attack at a negative differential.
C. The black garrison armies are placed in hexes 1911, 1910, 1811, and 1912 of Yof-Pintre. These armies are presumed to be guards Yamantsar left behind, and each army contains 20 strength points. They are used as in "B" above.
D. Anytime a player has no armies in his home castle and a non-allied player enters armies into that castle, the player entering the castle is said to have "occupied" it. The player who has had his castle occupied immediately loses 10 spellbinder points from his wizard, and the player who occupied the castle immediately gains 5 spellbinder points for his wizard.
-
The game will last 20 turns.
-
Victory Conditions: The player with the most victory points at the end of 20 turns is the winner. Victory points are awarded as follows:
A. Each player receives 25 points for each stronghold in which he has at least one army at the end of the game.
B. Each player receives 10 points for having at least one army in hexes 1718, 2715, or 1804 at the end of the game.
C. Each player receives 50 points for having at least one army in Yof-Pintre at the end of the game.
D. A player may receive 80 points for being in sole possession of Yof-Pintre at the end of the game (must be the only player with at least one army there). This does not count any garrison troops which happen to be in Yof-Pintre at the end of the game.
(9.2) Early Arrival
One of the wizards has made a move early, surprising the garrison Yamantsar left behind and capturing Yof-Pintre.
-
At the start of the game, the players should all roll one die. The player with the highest roll (players involved in a tie for the highest die roll result roll again) may choose whichever wizard he desires and may deploy his units in Yof-Pintre. The other players will deploy as in (9.1). The four garrison armies are deployed in Yof-Pintre. Each of the four players deploys one of these armies.
-
All armies start with 10 strength points each
-
A. The wizard starting in Yof-Pintre will use it as his home castle. His regular starting castle may not be used to gain victory points. (However, see D below.)
B. (Same as B of (9.1) ).
C. The player who starts in Yof-Pintre may, under the following conditions, gain control of the garrison units.
(1) If there are three other players, the player starting in Yof-Pintre immediately gains control of the garrison armies if each of his three opponents has:
(a) attacked him (either a magical or regular attack, against either his wizard or any of his units).
— or —
(b) has acted in alliance (8.5) with another opponent that has attacked him.
If this happens, the garrison armies are treated just like the owning wizards troops. They will have 10 strength points each.
(2) If there are only two other players, the conditions are the same except the Yof-Pintre player may only use two of the garrison units.
D. This is the same as D in (9.1) with the following change. The player who starts in Yof-Pintre may at anytime he desires take all his units (including any garrison units he may have gained) and go (by regular movement within the rules) to what would have been his original starting castle. The player does not lose the 10 spellbinder points when another player moves units into Yof-Pintre nor does the other player gain five points. However, from the point he enters his original castle on, that becomes his castle again, and it may later in the game be "taken over" by another player for victory points.
-
The game will last 25 turns.
-
Victory Points: The victory point total is the same as for (9.1).
(9.3) The Return of Yamantsar
Yamantsar has returned and found the other wizards trying to take over Yof-Pintre. They will soon feel his full fury.
-
The set-up for this scenario is rather unusual. First, the players will all roll one die. The player rolling the highest number will be the Yamanstar player and will take any one wizard (which will represent Yamantsar), that wizards units, and all four garrison units. (It may be presumed that, in Yamantsar's initial burst of fury, the fourth wizard was totally destroyed.) Next, the other players roll again. The player with the highest result may set-up his units anywhere on the map he desires. Then the player with the next highest die roll may set up his units anywhere on the map he desires as long as he does not set up any units adjacent to units belonging to another player. Finally, the fourth player may do the same. On turn 1 Yamantsar and his units may enter anywhere on the edge of the map that the owning player desires.
-
All units start the game with 10 strength points.
-
A. The Yamantsar player starts the game with 50 spellbinder points which he may renew to 50 one time by using a Spellbinder Spell.
B. The black on yellow garrison troops of Yamantsar are "elite" magic troops which may use spells as if they were a wizard. The only restriction is that they may not use a Regeneration Spell or a Spellbinder Spell. The spellbinder points used by garrison troops come from Yamantsar's spellbinder points. These units may also be used as regular infantry. They begin with 10 strength points. They may not use magical and regular attacks in the same turn.
C. The loss of spellbinder points for losing a castle (3.D of 9.1) applies. However, Yamantsar does not lose spellbinder points due to other player's units in Yof-Pintre until after he has had sole possession of Yof-Pintre for a turn.
-
The game lasts 30 turns.
-
Victory Conditions: The victory point totals are the same as found in (9.1).
(9.4) The Campaign Game
The CAMPAIGN GAME will essentially be a series of the (9.1) scenarios. However, players will start each new scenario where they left off on the last scenario. At the end of each scenario, each player must record:
- The location (by hex) and strengths of all his units.
- His wizards current spellbinder point total.
- His current alliances and ownership of the ships.
- His current victory point total.
A player whose wizard ends a scenario in sole possession of any castle (i.e. containing no unfriendly units or wizards) or in joint possession with an ally (or allies) of any castle may regain strength points and spellbinder points at the following rates:
-
Up to 30 army strength points. (However, he may never gain more than he had originally.)
-
Up to 15 spellbinder points. (however, never more than he had originally.)
Any wizard whose spellbinder point total goes below "0" is eliminated along with his units, and he may not return to the CAMPAIGN GAME. However, a wizard in danger of elimination may, if possible, exit from the map along any edge. Such a wizard is said to be in "exile." An exiled wizard may reenter any non-castle map edge hex during a later scenario. He will gain strength points and spellbinder points between scenarios as follows:
-
Up to 15 strength points. (However, never more than he had originally.)
-
Up to 10 spellbinder points. (But a wizard that exited the map in the last game may never begin the next game with more than 15 total spellbinder points.)
All units begin the CAMPAIGN GAME with a total of 25 strength points.
Victory Conditions: Play continues until one wizard has eliminated all other wizards or driven them into exile (from which they have not yet returned).
(10.0) Players Notes
The key to winning in SPELLBINDER is control. Control of the bridges and ports can be the deciding factor in the game. By all means do not lose your home castle. For not only will this reduce your spellbinder points and eliminate the possiblity to regain some, but your opponent(s) will gain spellbinder points and victory points.
Another important factor is the use of your spellbinder points. Do not use spellbinder points in just any situation as if they were worth a dime a dozen! But, on the other hand, do not be afraid to use them in key situations where they may swing the battle in your favor. It is usually a good idea to save enough spellbinder points for an emergency (i.e. losing your home castle). Another possibility is to simply sit in your home castle and regain points (assuming you still have a home castle). However, sitting at home too long can mean that you do not get back into the action soon enough to be effective. Also, in the CAMPAIGN GAME it is wise to exit a weak wizard off the board and live to fight again another day!
The making of alliances can also win or lose the game for you. Be careful who you ally with as your ally may have more to gain from the alliance than you do. If one player has an advantage (such as Yamantsar in the RETURN scenario), an alliance of the other players is almost mandatory. Of course, you may wish to ally with the stronger player, provided you can give him some reason to ally with you and split the spoils. An ally may be used as a target for a Spellbinder or Regneration Spell, but he could also decide to turn the tables on you with the Force Crusher or Fear of Battle Spells! A good rule is "do not be afraid to ally, but trust no one!"
Just a word on strategy . . . If you attempt to grab everything that is worth victory points at the start, the other players will probably gang up on you. Play cautiously at first, and watch for openings. Keep your forces as strong as possible for late in the game, but never let one player become too strong!
The most basic advice (and the most basic principle of the game), however, is use your armies to fight your battles and win the game, and use your spellbinder points to influence key battles. Consider that if you threw nothing but uncontested one point spells you would destroy 75 strength points, or about three-fourths of the army of one of your three opponents. That is not nearly enough to win. But a key spell at a key battle could shift the differential by three or more points, greatly influencing the outcome. Anyone who thinks that his armies are just excess baggage should try to play one game without them!
(11.0) Designers Notes
SPELLBINDER was designed primarily to be a four player game. As such, it works best within that frame. A great deal of the excitement of the game hinges on alliances made — and suddenly broken.
In the early stages, we tested the game with more than four players. However, as always seems to happen when there are more than the optimum number of players, the game bogged down and lost some of its appeal. Players spent too much time waiting for their turn, and too much could happen before they had a chance to react. On the other hand, a two-player game, while enjoyable, lost much of the excitement found in trying to determine who one should trust and not trust.
In the beginning, the game had 10 offensive and 10 defensive spells. It soon became apparent that it was so hard for a defender to outguess his opponent that the defensive spells were not being used. To solve this problem, we eliminated some of the spells, cutting down the odds of guessing correctly, making defensive spells workable, and livening up the game.
The combat system as you see it was greatly streamlined from the original (mostly thanks to the developer). In the original version, there was a fixed cost for each spell, but this tended to severely limit a player whose wizard had just a few spellbinder points left.
Player Aid Chart (Spellbinder Charts)
The printed player-aid sheet. Rows are the defensive spells, columns the offensive spells. Cross-index the two spell numbers to find the base result (see (6.33)).
Magical Combat Matrix
| Defensive \ Offensive | 1. Mind | 2. Thunder | 3. Hammer | 4. Sword | 5. Regeneration | 6. Spellbinder |
|---|---|---|---|---|---|---|
| 1. Force of Umaron | NE | 1 | 2 | 3 | S | S |
| 2. Stillness of Barrowaste | 2 | NE | 3 | 2 | S | S |
| 3. Armor | 3 | 2 | NE | 1 | S | S |
| 4. Shield | 2 | 3 |
Offensive/Defensive Spell Track
0, 1, 2, 3, 4, 5, 6
Spellbinder Point Track
The track is printed as a two-column strip of boxes numbered 0 through 25, shown here in printed pairs (left column / right column):
| Left | Right |
|---|---|
| 0 | 13 |
| 1 | 14 |
| 2 | 15 |
| 3 | 16 |
| 4 | 17 |
| 5 | 18 |
| 6 | 19 |
| 7 | 20 |
| 8 | 21 |
| 9 | 22 |
| 10 | 23 |
| 11 | 24 |
| 12 |
(6.54) Combat Results Table
Columns are the differential (see (6.52)); rows are the die roll.
| Die Roll | -3 | -2 | -1 | 0 | 1-3 | 4-6 | 7-10 | 11+ |
|---|---|---|---|---|---|---|---|---|
| -1 | A3 | A2 | A2 | A1 | NE | NE | D1 | D1 |
| 0 | A3 | A2 | A1 | A1 | NE | D1 | D1 | D2 |
| 1 | A2 | A1 | A1 | A1 |
Subtract 1 from the die roll if the defender is in woods or mountain. Subtract 2 from the die roll if the defender is in a castle.
Printing note: the chart's terrain modifiers (woods or mountain subtract 1; castle subtracts 2) differ from the text of (6.55), which says mountains and castles subtract one and a forest subtracts two. Both are reproduced as printed; the text example in (6.55) (a forest hex giving a '2') follows the text.