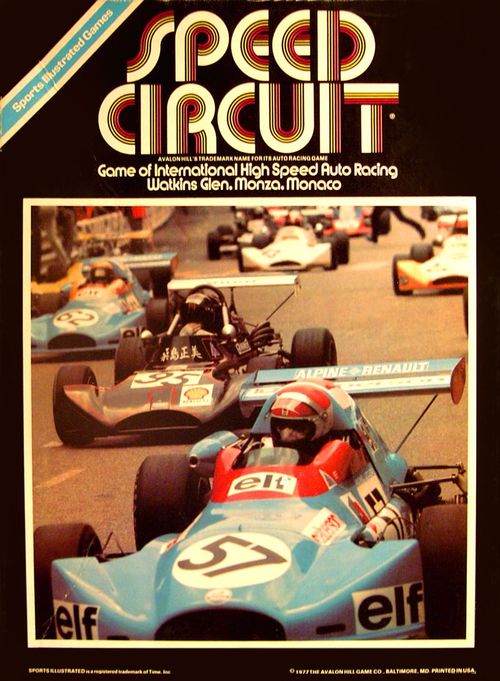
Speed Circuit
Speed Circuit Rulebook
Table of Contents
Table of Contents
Race Preparation
- Select a course. When first learning the basic movements of the game, it is suggested players use the Monza course before attempting the more difficult courses – Monaco and Watkins Glen.
- Select a car and Speed Calculator of the same color.
- Thoroughly mix the six Performance Cards and place them, face down, on the table. (When three or less play, remove all cards for the second row starting positions.) Each player draws one card.
- Place your car on the course in the starting position indicated by your Performance Card.
- As each player reads aloud his car's Performance specifications (listed on card), they are written on the Performance Chart opposite his name.
Performance Chart
The above Chart is posted for the first race in accordance with the specifications found on the Performance Cards. The figures posted on this chart will be used for all following examples.
| Driver | Start Speed | Acceleration | Deceleration | Top Speed | Wear |
|---|---|---|---|---|---|
| A | 60 | 0–40 | 0–20 | 160 | 6 |
| B | 40 | 0–60 | 0–40 | 180 | 4 |
| C | 40 | 0–60 | 0–20 | 180 | 5 |
| D | 40 | 0–60 | 0–40 | 180 | 4 |
| E |
Write only with marking pencil – erase with tissue or cloth.
- Start Speed – speed allowed on first turn
- Acceleration – maximum speed change (increase) allowed from previous turn
- Deceleration – maximum speed change (decrease) allowed from previous turn without penalty
- Top Speed – maximum speed allowed during race
- Wear – maximum number of units allowed for greater braking ability and for increases of speed when cornering
- Place Performance Chart in holder and set where all players may see it.
- "Start your engines!"
Racing Procedure
- Check Performance Chart for your car's start speed and set your Speed Calculator accordingly.
- Order of start is as follows:
- First Row
- Car with highest start speed moves first, then car with second highest speed, etc.
- If two or more cars have same start speed, car on inside moves first.
- Second Row – follow same procedure as first row cars.
- First Row
- Each car advances one space for every 20 mph on its Speed Calculator, i.e., 40 mph = 2 spaces. Cars may only move straight ahead or diagonally.
- The turn ends when all cars have moved.
- At the start of each succeeding turn, drivers (players) may decide to:
- Accelerate (see How To Accelerate)
- Decelerate (see How To Decelerate)
- Remain at the same speed
- After all drivers have secretly recorded their new speeds on their Speed Calculators, they simultaneously place them, face up, on the table.
- Cars move in order of their position on the board; car in the lead moves first, etc. If two or more cars are tied for the lead, car with the highest speed moves first; if there is a tie for highest speed, car on the inside moves first.
- When approaching a corner, a car may have to decelerate to conform to posted speed limits (see Cornering).
Winning the Race
Race continues until one or more cars cross the finish line on a given turn. When two or more cars cross on the same turn, the car that travels the farthest is the winner. If there is a tie, car crossing the line first wins.
How to Move
- Each car must advance one space for each 20 mph posted on its Speed Calculator. Thus, a car going 40 mph will move 2 spaces and a car traveling 180 mph will move 9 spaces.
- Cars may move straight ahead or diagonally. They may never move sideways or in reverse.
- A car may change lanes at any time.
- A car may not move onto or through a space occupied by another car (see Collisions).
Example 1: Drivers are in the Monza starting rows impatiently awaiting the start. Each has his start speed posted on his Speed Calculator. Driver A with the fastest speed moves first – 3 spaces. Drivers B and C are both starting at 40 mph; since B is on the inside, he moves first. After B and C have moved their 2 spaces, drivers D, E and F move. As each is starting at 40 mph, D moves first being driver on the inside. At the end of the first turn, it's Driver A in the lead followed closely by B and C. (New positions are shown in red.)
The starting grid diagram shows six cars — A through F — arranged on the board in two starting rows near the Monza start/finish line, then in their new positions after the first turn: A, D on the front row, B, E behind them, and C, F at the back, with A leading.
How to Accelerate
- If, at the beginning of the turn, the driver decides to accelerate, he first checks the Acceleration column of the Performance Chart to determine his acceleration range.
- He then adds the desired acceleration (in multiples of 20) to his previous speed and secretly sets the new speed on his Speed Calculator.
- A driver may never accelerate more than his maximum and may never exceed his top speed.
Example 2: At the beginning of the second turn, all drivers, after secretly posting their new speeds on their Speed Calculators, simultaneously turn them face up. Everyone has decided to accelerate to his maximum. Driver A in the lead moves first. With his maximum acceleration of 40 added to his previous speed of 60 mph, he can now go 100 mph – 5 spaces. The other drivers also have accelerated to 100; their maximum acceleration of 60 added to their start speed of 40 gives them 5 spaces. As they are all going the same speed, driver on the inside moves first. After all have moved, it's still A in the lead followed by B and C.
Example 3: With the corner approaching, drivers must consider which lane to take, if they may be blocked and in what order they will move. After considering all these things, they secretly post their new speeds for the third turn. Driver A moves first. He has decided to accelerate his maximum (40 added to his previous speed of 100). Knowing he can only decelerate by 20, he decides to take the outer arrow through the corner. He moves 2 spaces diagonally to the outer lane and then proceeds 5 more spaces. Driver B, thinking that Driver C will probably accelerate his maximum, decides to go 160 mph rather than to try to go 140 and slipstream A. With 160 mph, he is assured of moving second and not being forced into the inside lane. Driver C, recognizing the possibility that he will move third, decides to accelerate 40 rather than his maximum of 60. He knows that this will allow him to pick his own lane rather than be forced into the inside lane just before the corner. He moves 7 spaces, ending just behind B on the arrow. Since D and E have both posted 160 mph on their Calculators, D moves first as driver on the inside. He elects to take the outer lane and moves two spaces through the arrow hoping to follow it through the corner. Driver E is in a pickle – he must move eight spaces. This puts him on the inside lane going 160 mph just before the corner. Poor E! Driver F had more foresight. Realizing that he would probably move last, he chooses to accelerate 40. Going only 140 puts him at the end, but – he is on the arrow ready to go into the corner!
How to Decelerate
- Driver follows the same procedure as for accelerating except that he checks the Deceleration column on the Performance Chart and subtracts the desired deceleration from his previous speed.
- To decelerate more than the maximum posted on Performance Chart, the driver must use the chart below. Each Wear unit used is marked on the Performance Chart.
| MPH More Than Maximum | Penalty |
|---|---|
| 20 | Use 1 Wear unit |
| 40 | Use 2 Wear units |
| 60 | Use 1 Wear unit and Spinout* |
| 80 | CRASH! (Out of race) |
See Spinouts.
Cornering
- To enter a corner without penalty, the driver must comply with the posted speed limits.
- When changing lanes in the corner, the driver must comply with the new speed or be penalized.
- By following the entire path of an arrow when cornering, a driver may exceed the posted speed by 20 mph without incurring a penalty.
- If a driver is unable to reduce his speed to the posted limit or if he intentionally exceeds the limit, he must pay a penalty, as follows:
| MPH Over Limit | Penalty – Without Arrow | Penalty – With Arrow |
|---|---|---|
| 20 | Use 1 Wear unit | – |
| 40 | Use 2 Wear units | Use 1 Wear unit |
| 60 | Use 2 Wear units and Spinout* | Use 2 Wear units |
| 80 | CRASH! (Out of race) | CRASH! (Out of race) |
See Spinouts.
- If the driver is unable to complete the corner during the turn, no penalty is imposed at the start of the next move since he has already paid the penalty.
Slipstreaming
- At the beginning of a turn, any car directly behind another on the straightaway may elect to slipstream the front car.
- If the front car is traveling at 120 mph to 160 mph, the slipstreaming car will receive a bonus of one space providing he is not traveling faster than the front car.
- If the front car is traveling 180 mph, the slipstreaming car receives a bonus of two spaces.
- A driver may not slipstream if either car is on a space in a corner at the beginning of the turn or if his car would enter a corner due to the bonus.
Example 4: In calculating their speeds for the fourth turn, drivers must consider how they intend to take the corner, if they will give up some wear and in what order they will move. Everyone secretly posts his new speed on his Calculator. When the Calculators are turned face up, surprise! Everyone is going 120 but F; he decided to go 140. Driver B on the inside moves first. Since he is following the arrow, he may exceed the posted speed of 80 by 20 mph. Thus, he can go through the corner at 100 mph with no penalty. However, he is traveling 120 mph – 20 mph more than the "safe" speed. To do this, he must give up 1 Wear unit. He moves 6 spaces – staying in the middle lane after leaving the arrow. Driver A decides to continue to follow the arrow moving 6 spaces. Since he is on the arrow, he may exceed the speed of 100 by 20 mph with no penalty. Driver E, on the inside, has two choices. He could travel through the space marked 80 and give up two Wear or he could go through the spaces marked 100 and give up only one Wear. He opts for the 80 space which will put him one space further ahead. He moves 6 spaces and gives up two Wear units. Driver C could have decelerated to 100 (maximum deceleration of 40 subtracted from his previous speed of 140); however, he decides that this would put him too far behind. Instead of traveling through the corner safely at 100 mph (on the arrow), he goes 120 mph giving up one Wear. This puts him directly behind B – in a good position to slipstream on the next turn. Driver D follows A through the corner on the arrow. Since he is traveling 120 mph, he incurs no penalty. Driver F is last to move. He takes the corner on the arrow, giving up one Wear to pull even with Driver D. In this position, he has the possibility of slipstreaming on the next turn. The fourth turn ends with Driver B in the lead.
The corner diagram shows the six cars approaching a banked hairpin, with speed markers of 80, 100 and 120 mph posted on the inner, middle and outer lanes of the arrow through the corner, and red arrows tracing the paths taken by Drivers A and B/E through the turn.
Spinouts
- When a spinout is indicated, the driver stops on the first space with a posted speed.
- On his next turn, he must begin at his Start Speed (as shown on Performance Chart).
- On subsequent turns, he may accelerate according to his Acceleration limits.
Collisions
- Drivers must avoid collisions whenever possible.
- If a driver is forced to ram into a car ahead, he must stop on the space directly behind this car and follow points 2 and 3 under Spinouts.
- The car which was hit incurs only minor damage and is able to continue the race in the usual manner.
Advanced Game
Once you have mastered the basic racing procedures you will be ready to attempt the advanced game.
Race Preparation (Changing Specifications)
- Players may build their racers to their own exacting specifications. In this case, the specifications listed on the cards are disregarded.
- Each player is allowed five Preparation Points for each course.
- Initially all cars have the same minimum specifications – listed on the Performance Chart above 0 Preparation Points.
- Each player should study the course to determine the strategy he will use during the race before deciding where he will use his allowed Preparation Points.
- After deciding on his Start Speed specification, each player sets his Speed Calculator accordingly.
- All Speed Calculators are placed face up on the table simultaneously.
- The indicated Start Speeds are recorded on the Performance Chart.
- Points 5, 6 and 7 are repeated for the remaining specifications.
- A player may never exceed his allowed Preparation Points.
Example: For the Monaco course Players A and B used their five Preparation Points as follows:
| Specification | Player A | Player B |
|---|---|---|
| Start Speed | 60 – 1 point | 40 – 0 points |
| Acceleration | 60 – 2 points | 60 – 2 points |
| Deceleration | 40 – 1 point | 60 – 2 points |
| Top Speed | 160 – 1 point | 140 – 0 points |
| Wear | 4 – 0 points | 5 – 1 point |
| Total | 5 points | 5 points |
Extra Laps
- Players may decide before the game to race more than one lap per course.
- When racing more than one lap, the Wear specification will change. When racing two laps, double the Wear specification; when racing three laps, triple the specification, etc.
Circuits
- Players will find it even more exciting to race an entire circuit (all three courses).
- On each course, players compete for points as follows:
| Place | 6 Cars in Race | 2–5 Cars in Race |
|---|---|---|
| First place | 5 points | 4 points |
| Second place | 3 points | 2 points |
| Third place | 2 points | 1 point |
| Fourth place | 1 point | – |
- At the completion of the circuit, players total their points; player with the highest total is the grand winner.
- In case of tie for grand winner, tying players may race one lap over the course of their choice to determine the winner or winner may be determined by lot or coin-flip.
Lost or Misplaced Playing Pieces
Replacement parts available: Performance Cards (Set of 6) @ $.30, Car and matching Speed Calculator (specify color such as blue, aqua, etc.) @ $.45, special marking pencil @ $.25. Send order plus $.25 for postage and handling to: SPEED CIRCUIT, 3M Company, Box 33350, St. Paul, MN 55133.