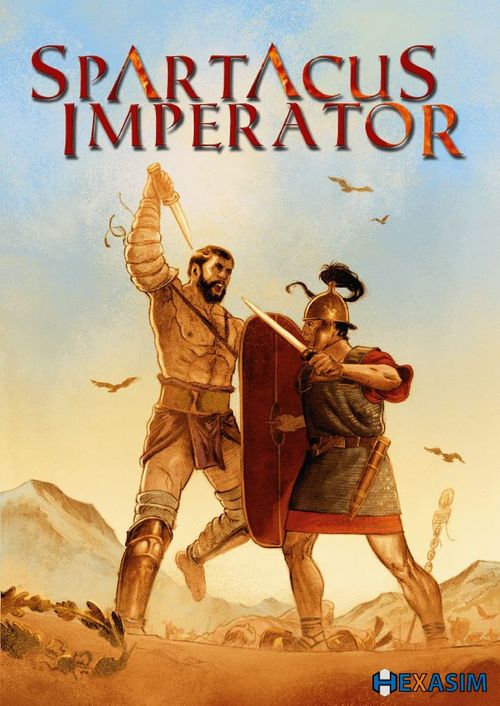
Spartacus Imperator
Spartacus Imperator Rulebook
Table of Contents
Table of Contents
- 0 - The Components
- 1 - The Game Sequence
- 2 - Actions
- 3 - Combat
- 4 - The Poliorcetic art (or the art of Capturing Cities...)
- 5 - Getting Started
- Example of Play
- A Little Dog Latin
0 - The Components
0.1 - The game board
The game board is reversible depending on whether the scenarios that you play are on the map of Italy (Italia) or Greater Greece (Magna Græcia) including Sicily and southern Italy.
Each map is composed of:
- Mountain zones (maroon marble),
- Plains zones (gray marble),
- Cities (red square) and,
- Sea zones (blue zone).
Each map also has a turn record, below the red Roman standard, recording the year and Season being played.
Two columns of Action Points, one per side, are used to record the number of Action Points remaining for each leader. (see 2.1)
On the Magna Græcia map, certain zones have ports (anchor) and the cities have a defensive value of I to IV.
0.2 - The units
There are 3 types of units: leaders, military units and markers.
0.2.1 - The leaders
A leader unit represents an officer without troops. A leader counter shows: Name of Leader, Strategic Rating, Tactical Rating, Edging Colour.
Tactical Rating: (shown by one, two or no dice on the counter): (This represents the ability of a leader to direct his men in battle.) In the game it indicates the number of dice that can be rerolled by the leader in a combat.
Strategic Rating: (representing the command capacity of a general) This indicates the maximum number of units that can be commanded by this leader.
The edging colour shows the scenario in which the leader participates: yellow = scenario 1, blue = scenario 2, red = scenario 3.
Each leader also has a marker without a rating but with his name, this is his Action Points marker. It records the number of Action Points of that leader remaining for that Season. It is placed on the map, in the relevant Action Points column.
0.2.2 - Military units
A military unit represents a unit of 500 to 2,000 foot or 500 to 1,000 cavalrymen. In the following rules, the terms military unit and unit mean the same thing.
An army is composed of one or more units with or without a leader.
A unit counter shows: the name of the unit; the Shooting Combat Value (0 to 3 arrows); the Melee Combat Value (0 to 3 swords). The black letter S circled in yellow means that the unit is only used in the scenario with Spartacus.
The majority of units have a coloured square around their Melee Value. These show that in a full battle, the unit with the blue square is placed in the first line if the player is using the "Screening" tactic or if it has a yellow square when being used with the "Frontal Attack" tactic (see 3.3).
The Loss steps
A unit has 2 loss steps.
When it suffers 1 loss, it becomes Out of Action. It can no longer inflict damage. However, it moves normally.
If it suffers a further 1 loss, it is eliminated.
If the player spends 1 Point of plunder, a Out of Action unit once again becomes Ready for Combat.
Face Front-Back
The units have a visible, front, side (a silhouette with arrows or a sword) and a hidden anonymous, back, side: hands with broken chains for the Rebels; the Imperial eagle for the Romans.
The rebel units are placed with their hidden side uppermost on the army sheets or on the map board. The Rebel Player may freely look at the front of the units but the Roman Player may not.
The hidden face of the Roman units is not used in the basic rules but in an optional rule (see 5.7).
The Roman military units
A marbled pink Roman unit represents a unit of legionaries: Legio, Hastati, Triarii or Velites.
A legion is composed of the 3 units carrying the same Roman numeral. These will differ depending on the period: that is 3 Legio, or that is 1 Hastati, 1 Triarii, 1 Velites.
A marbled grey Roman unit represents a unit of auxiliaries: Milites, Cohortes, Ala (cavalry), Sagittifer, Funditores.
0.2.3 - The markers
The markers are neither leaders nor units.
- Alea: Represents a dice that may be re-rolled by a leader in combat. It is reversed (on the ... Jacta Est side) once used.
- Tempus Anni ("Time of the year"): Indicates the current Season. It is placed in the corresponding box on the game board.
- Anno ("Year"): Shows the current year. It is placed in the corresponding box on the game board.
- Classis (Fleet): Shows the side that controls a sea-zone.
- Coins (Plunder Point): The number of coins on the front of the counter gives the number of points of plunder. The Plunder Points are gained by Ravage (see 2.4.1) in a zone or following a victorious battle (see 3.5.2). They permit the rebel player only to benefit from a bonus to the recruitment dice and/or to choose the troops recruited. They permit both sides to recover Out of Action units.
- Ravage: Shows a zone ravaged by a rebel army.
- Vae Victis: Indicates Out of Action units on the map.
- Battle: Indicates a combat zone.
- Memento Mori: Used to record the losses of each side during a battle.
0.3 - The playing cards
The game has 40 playing cards.
0.3.1 - The stratagem cards
Each side has 5 stratagem cards per scenario, identifiable by a stripe in yellow (scenario 1), blue (scenario 2), or red (scenario 3). The back shows which side uses the card.
A Stratagem card is a special case, rather like a joker that is played by spending an Action Point (see 2.3.3). You then follow the rule or event noted on the card.
A Combat Stratagem card is shown by a sword in the bottom left corner.
0.3.2 - The Tactical Cards
During a battle, each player secretly chooses a tactical card from the 4 that he has.
The card shows which units may be placed in the first line (see 3.3). It also states which enemy tactic is "destroyed" (see Pursuit Table 3.5) in the event of victory.
0.3.3 - The Siege Card
During a siege, the attacker takes the siege card and chooses the tactic that he wishes to use: Harass or Assault.
This card is allotted to the player whose army won the previous battle. (as printed)
0.3.4 - The FORTUNA Card
The player who was victorious in the previous battle or siege takes this card. It gives a die-roll bonus and a rebel recruitment bonus.
The FORTUNA card is neutral (it belongs to neither player) at the beginning of the game or after a Retreat in Good Order by the besieger (see 4.2).
During a Siege, if the besieger makes a Retreat in good order during a phase that he has the FORTUNA card then it becomes neutral.
0.4 - The play aids
- A Battle play aid:
- On the front, "battlefield" where the two armies face each other (see 3.).
- On the back, "siege" with a fortress on which is a "Fossa" (ditch) (see 4.).
- A description of each scenario.
- 3 army sheets front-back where the players place the commanded units in the box of the respective leader.
- Rebel Recruitment Dice table (see 2.4.2).
0.5 - The pool
You will need a bowl (or other receptacle...) into which are placed the Rebel units according to the scenario instructions. When the player recruits a unit he randomly draws them from this bowl (see 2.4.2).
1 - The Game Sequence
SPARTACUS IMPERATOR moves through a series of game turns each representing one of the 4 Seasons.
Each Season has 3 to 5 Segments (5 in Spring [Ver], 4 in Summer [Aestas] and in Autumn [Autumnus], 3 in Winter [Hiems]).
Segment 1: Reconstruction: in Spring [Ver] ONLY
- Throw a dice for each zone with a Ravage marker: on a score 4 or greater, remove the Ravage marker.
- All the Out of Action Roman units in Roma are changed to Ready for Combat.
- Rebel units eliminated (which were placed in the Elysii Campi box) in the previous year may now be recruited again, place them in the pool.
Segment 2: Place Fleets EXCEPT in Winter [Hiems]
- The Roman fleet (Classis Romana) is placed in one of the seas at the choice of the Roman Player. The rebel player may then place the Cilician Pirates fleet (Classis Piratarum) where he wishes EXCEPT in the sea with the Roman Fleet.
- Each scenario describes how to use the fleets.
Segment 3: Place reinforcements
According to the information given on the scenario notes
- Remove from play the Roman leaders sacked.
- Place the reinforcements.
Segment 4: Alternating Activation Phase
- At the beginning of the Segment each leader receives Action Points the number of which depends on the Season (see 2.1). The Action Points marker of each leader is placed on the Action Points column. Whenever an Action Point is used by a leader, his marker is moved down one box.
- An operation consists of an action ONLY with one leader (UNLESS otherwise stated on the Stratagem Cards).
- The Rebel player always takes first action of each Season.
- Players alternate operations until the completion of their respective actions.
- A leader who has no more Action Points can do nothing further that turn.
- Action Points cannot be stored from one Season to another. Unused points are lost.
Segment 5: End of the turn
- The Tempus Anni marker is advanced by one Season.
- At the end of winter, advance the Anno marker.
2 - Actions
2.1 - Distribution of Action Points
Each Season gives a number of Action Points per leader, whatever their strategic and tactical ratings:
- 4 in Spring [Ver],
- 3 in Summer [Aestas],
- 3 in Autumn [Autumnus]
- and 1 only in Winter [Hiems].
This number is recorded in Roman numerals on the box of each Season on the game board.
2.2 - The Leaders and units that activate
A leader activates only with the units that he commands based on his Strategic Rating.
A. Units in command:
The Strategic Rating of the leader shows the maximum number of units that he can command. (Example: 8 units maximum for the Rebel leader Crixus)
- They move with their leader.
- They can be placed in the front line for combat.
- They are kept on the player's Army Sheet, beside their leader (face down for the rebels).
B. Units not in command:
- They cannot move.
- They participate in battles but may not be in the front line.
- Without a leader, they are placed on the map (face down for the rebels).
- An Out of Action unit, placed on the map without leader, must have a Vae Victis marker placed on it. If there are several in the same zone, they should be stacked under the same marker.
2.3 - Actions common to both sides
2.3.1 - Action: Do nothing
The leader passes his turn and spends 1 Action Point.
2.3.2 - Action: Move an army
2.3.2.1 - Moving
For 1 Action Point, a leader may move with a number of units equal to or less than his Strategic Rating. Movement occurs from a zone or a city to an adjacent zone or city. Terrain (plains or mountain) has no influence on movement.
For Example, move from Roma to Latium or from Sabinia to Umbria. Similarly, it is not possible to move from Roma to Campania without first passing through Latium.
Clarification: it is impossible to move directly from Salento to Lucania. It is necessary to go via Apulia.
Units may not be left voluntarily without a leader. Exception: a leader may leave up to 3 units in a city on the Magna Græcia map.
Units may find themselves without a leader, if the latter is sacked (for the Romans) or dies following a stratagem.
Un-commanded units can be collected by a leader of their side, without exceeding his Strategic Rating. He can exchange these for units he commands without leaving in the zone more units than were there originally.
Units cannot be exchanged between 2 leaders (there were too many rivalries and dissensions between leaders!).
2.3.2.2 - Restrictions
Having several leaders of the same side in the same zone is prohibited.
Exception: in Roma, the Roman player has no limit of leaders present, but they still cannot exchange units.
Exception: sometimes because of a retreat, two leaders of the same side are in the same zone. Their next action must be to leave. If they are attacked, this is done separately (exchanges of units between leaders remains impossible) and the attacking leader chooses which leader defends first.
Attention, for each scenario, there are specific restrictions.
2.3.3 - Action: Play a Stratagem Card
A leader spends 1 Action Point to play a Stratagem card. A Stratagem card can only be played in the player's turn; however, a combat Stratagem can be played in a battle even if this has been started by the other side.
Each Stratagem Card may be used ONCE ONLY per scenario. After use, it is discarded.
It only applies to units commanded by the leader who uses it. If a leader is named in the text of the Stratagem card, only he may benefit.
Certain Stratagems are only playable starting at certain dates.
Sometimes, a player may be able to spend 2 Action Points consecutively because a Stratagem card improves the current action.
For Example during a combat: 1 point to move his army and 1 point to play the Stratagem card in combat. For the same reason, an attacked leader can use a combat Stratagem card, and then carry out his operation, if he has an action point remaining of course.
2.4 - Specific actions
2.4.1 - Rebel Action: Ravaging
Ravaging a zone and pillaging the land and ransoming the inhabitants allow you to collect plunder to equip your troops.
A Rebel leader spends 1 Action Point and may ravage the zone he occupies (with the exception of cities and Vesuvius Mons). A Ravage marker is then placed in the zone.
- In Mountain, the leader automatically gets 1 Plunder Point.
- In Plains, the player rolls a dice. On a score of 6, the leader gets 2 Plunder Points, otherwise one only. (See table below)
- Place the Plunder marker on the Army Sheet in the box of the leader ravaging.
- A zone cannot be ravaged again if it has a Ravage marker in it.
- The Ravage marker is only removed in Spring [Ver] following a die roll of 4 or more.
Ravaging & Recruiting table
| Leader in Mountain | Leader in Plains | |
|---|---|---|
| Ravaging: Plunder Points gained | 1 | Dice result 1 to 5: 1; Dice result 6+: 2 |
| Recruiting: reinforcements | Dice result 1 to 6: 1; Dice result 7+: 2 | Dice result 1 to 5: 1; Dice result 6+: 2 |
For Example, 5 on the dice gives 1 reinforcement OR 1 Plunder Point depending on the action chosen. If the Rebel army recruits in Plains and has the FORTUNA card, it gets 2 reinforcements (5+1=6).
2.4.2 - Rebel Action: Recruiting
2.4.2.1 Recruitment
A Rebel leader spends 1 Action Point to recruit in the zone he occupies. To do this, he rolls a dice and adds the following modifiers:
- +1 is added to the dice if the Rebels have the FORTUNA card.
- After rolling the dice, the leader may spend Plunder Points if he has them. Each Plunder Point gives a bonus of +1 to the score.
In Plains, if the modified score is 6 or +, the leader recruits 2 units, otherwise 1. In Mountain, if the modified score is 7 or +, the leader recruits 2 units, otherwise 1. (See table above)
The Rebel player recruits his units randomly by drawing them from the pool. If he pays 1 Plunder Point per unit, he may choose from the pool instead of drawing randomly. The player must announce his decision BEFORE drawing.
A Rebel leader may recruit more units than his Strategic Rating and choose the units to keep (this reflects the better equipping of his men). He returns the excess units to the pool.
A recruited unit is placed on the Army Sheet with the leader who recruited him. Only the Rebel player may look at it before placing it face down.
2.4.2.2 Limitations
The Rebel leader cannot recruit if he is in a zone with a Ravage marker or on Vesuvius Mons or in a city.
An eliminated unit can only be recruited again starting the Spring [Ver] of the following year.
2.4.3 - Roman Action: Restore
For 1 Action Point, a Roman leader in a zone without a Ravage marker or a city may return to Ready for Combat one of his Out of Action units.
Clarification: the Roman player does not recruit (all his reinforcements are automatic or by stratagem).
2.5 - Free actions
2.5.1 - Actions involving Plunder Points
In Antiquity, the soldier was motivated above all by plunder, especially where they did not receive a wage like the rebels!
The Plunder Points are gained by a Ravage action (see 2.4.1) or a military victory (see 3.5.2).
Each Rebel leader or Roman may use his plunder for his own army only.
Each time a leader receives Plunder Points, he can immediately spend them to return to Ready for Combat his Out of Action units and without spending 1 Action Point. After all this, there may remain a maximum of 3 Plunder Points for a Rebel leader or 0 Plunder Point for a Roman leader. The surplus is offered to the gods!
A Roman leader who gains plunder must use it immediately (He renders to Caesar...).
A Rebel leader, may retain up to 3 Plunder Points, place the Plunder marker on the Army Sheet.
During a Recruitment action (see 2.4.2.1), the Rebel player may spend plunder to augment the number of recruited units and / or to choose them.
2.5.2 - Retreat or disengage
Retreat movement is obligatory movement, and is therefore a free action (see 3.5.3).
When the besieger disengages from a siege to return to his starting zone, this is a free action (see 4. the siege rules).
Example: The first turn of Scenario 1 Spartacus Imperator
We are in Spring [Ver], with 4 Action Points per Leader.
Spartacus goes from Vesuvius Mons to Campania. In addition to an Action Point, he uses the Stratagem card "Vines of Vesuvius Mons", he thus exceptionally uses 2 Action Points in the same operation.
This action starts a combat which the prætor Glaber loses. As a result, he retreats for 0 Action Point into Latium.
1st Operation for Glaber: he uses 1 Action Point to return to Ready for Combat a unit that had become Out of Action during the previous battle.
Then Spartacus recruits in Campania for 1 Action Point.
Glaber decides to move to Roma. 1 Action Point used.
Finally, with his Action Point, Spartacus ravages Campania.
There remain 2 Action Points for Glaber who decides not to do anything more.
End of the Season: move the Season Marker (Tempus Anni) to Summer [Aestas].
3 - Combat
Combat is initiated with the action: Move an Army. Thus, the combat and its phases do not cost a further Action Point.
When opposing armies (with or without leaders) are in the same zone, combat is obligatory.
If two leaders of the same side are in the same zone and are attacked, they resolve it separately (the exchange of units between the leaders is not possible) and the attacked player chose which leader will defend first.
3.1 - The course of a battle
A battle is composed of several segments.
Segment 0: Deployment
- Place the Battle marker on the map in the zone where the clash will occur.
- Take the play aid "Battlefield" and set up:
- Each leader in his command box (with the helmet).
- The units of each side in the second line [Secunda Acies].
- The units that are already Out of Action in the Vae Victis box.
- The Rebel units are placed face down.
- Each player takes as many Alea Jacta Est markers (in his colour) as the Tactical Rating of his leader. They are placed with Alea side upwards in the boxes above Tactikos.
- Place a Memento Mori marker for each side in box 0. This allows the recording of losses during the course of the battle.
Segment 1 Simultaneously and secretly: Choose Tactic
- Each player secretly chooses a Tactical card (EXCEPT in the case of a Skirmish, see 3.2.1) which is placed face down on the Tactikos box.
- The Tactical Cards are revealed simultaneously.
- The player who chooses the Tactical card "General Attack" [Signa inferre] receives an extra Alea Jacta Est marker.
- The Rebel units are turned face up.
Segment 2: Battle array
In phases 1 to 3, announce, before throwing the dice, to which unit the roll relates. The players roll their dice simultaneously to allow them to quickly make the re-rolls for leaders.
Phase 1 simultaneous: Shooting
- All the Ready for Combat units which have a Shooting Rating (symbolised by one or more arrows) may Shoot (see 3.4).
- Apply the results of this (see 3.4).
- At the end of this phase, a Retreat in Good Order can be chosen by a leader who has selected the Tactical card "Screening" [Infestis Pilis] (see 3.4.6).
Phase 2 simultaneous: Melee
- All of the in-command Ready for Combat units covered by the tactical card chosen by the player are placed in the front line [Prima Acies]. Move the corresponding units on the battle field.
- If the attacking leader cannot command all units, leave the un-commanded units in the second line [Secunda Acies].
- All of the Ready for Combat units with a melee rating (symbolised by one or more swords) may participate in the melee (see 3.4).
- The units in the front line may score Critical hits (see 3.4.1).
- Apply the results as they occur (see 3.4).
- At the end of this phase, a Retreat in Good Order can be chosen by a leader who has selected the Tactical card "Screening" [Infestis Pilis] (see 3.4.6).
Phase 3 simultaneous: General Melee
Same as phase 2.
Segment 3: Determination of victory
- To find out who has won a battle, the players compare losses since the beginning of the battle. (see 3.5).
- Then, there are different consequences for the victor (see 3.5.2) and the vanquished (see 3.5.3).
- Finally, the units are placed back on the game board or the army sheets (see 3.5.4).
3.2 - Specific cases in battles
3.2.1 - Skirmish
If one of the two armies has 3 units or less, the battle is a Skirmish. There is no choice of a tactical card (segment 1 is ignored) nor are there critical hits or Retreat in Good Order.
Clarification: if each army has at least 4 units even if some are Out of Action, it is not a Skirmish!
3.2.2 - Army without a leader
One or more un-commanded units may fight normally if attacked, they form a single army.
A defender without a leader cannot choose a Tactic; therefore there are no Critical hits or Retreat in Good Order for him.
On the other side, the attacking leader chooses his tactic (if the two armies have more than 3 units) and benefits from his bonus but may not destroy his opponent by his tactical choice (see 3.5.1).
3.3 - Tactical Cards
Each side secretly chooses a Tactical card, which will allow certain units to be placed in the front line. Units in the front line may then score Critical hits, in melee only, but must suffer the first two losses received during each Melee Phase.
- Only in-command units may be placed in the front line and inflict Critical hits.
- To choose a tactical card, one must have at least 1 in-command unit which can go to the front line EXCEPT for General Attack where it is always possible.
Wings [Ala]
The units of cavalry (Ala) are in the front line (while attacking from the flanks).
Card text: Your cavalry units with a blue sword in the second line move to the front line during the Melee phases. They then suffer the first two losses and make the critical hits.
General Attack [Signa Inferre]
The player has an extra re-roll, he takes an extra Alea Jacta Est marker.
Card text: You gain a re-roll for this battle. Take an extra ALEA JACTA EST marker IMMEDIATELY.
Screening [Infestis Pilis]
The units with a blue square under their swords (Cohortes, Milites, Velites, Ala, Cilicius, Germani, Servi, Servuli, Syrii) are placed in the front line (to harass the enemy with their javelins and pila). The player may attempt a Retreat in Good Order at the end of each Shooting and Melee Phase.
Card text: All your units with a blue sword in the second line move to the front line during the Melee phases. They then suffer the first two losses and make the critical hits. Your army may retreat at the end each phase, on a 6 in plains or 4, 5 and 6 in mountains.
Frontal Attack [Ad Gladios]
The units with a yellow square under the swords (Legio, Hastati, Triarii, Daci, Galli, Gladiator, Thraces) are in the first line (to crush the enemy by blows of their swords and the bosses of their shields).
Card text: All your units with a yellow sword in the second line move to the front line during the Melee Phases. They then suffer the first two losses and make the critical hits.
Example: The Rebel player chooses Tactical card "Frontal Attack". He suffers 1 loss during the Shooting Phase, he decides to apply it to a Funditores (a wise choice as the latter does not have a Melee Rating). During the Melee Phase, he suffers 3 losses. He is obliged to attribute the 2 losses to a unit in the front line which is eliminated or to two units in the front line which are both rendered Out of Action. For the third loss, he may pick a unit of his choice.
It is always possible to inflict losses on the same unit, and to sacrifice it, rather than make two units Out of Action.
The losses during a combat are simultaneous and take effect at the end of each phase then in process (Shooting, Melee).
3.4 - Shooting and melee
During the Shooting and Melee phases, the players must follow these stages:
- The players roll a dice for each Ready for Combat unit with a Shooting or Melee Rating, whichever is the case.
- Units in the front line may score Critical hits (see 3.4.1) (Melee Phase only).
- Losses are calculated (see 3.4.1),
- Any re-rolls of the dice are made (see 3.4.2).
- Losses are then distributed (see 3.4.4) and recorded (see 3.4.5).
3.4.1 - Calculating losses
General rule
If the score of the dice is less than or equal to the Shooting Rating (phase 1) or Melee Rating (phase 2 & 3) of the unit, 1 loss is inflicted on the enemy. The player places a dice on the unit.
On the other hand, if the dice score is greater, there is no effect.
Example: A Roman Funditores inflicts a loss in the Shooting Phase on 1, 2 or 3 on the dice. It cannot take part in Melee. A Germani inflicts a loss in the Shooting Phase with 1 on the dice and on 1 or 2 in the Melee Phases.
Critical hits
During melee only (phase 2 & 3), a unit in the front line inflicts 2 losses on a score equal to its Melee Rating. It inflicts 1 loss on scores less than its Rating.
Example: A Gladiator (3 in Melee) inflicts losses in the Melee Phases on 1, 2 or 3 on the dice. If the Rebel Player chose "Frontal Attack", the Gladiator is placed in the front line and it inflicts ONE loss on 1 or 2 on the dice and TWO losses if it scores 3 on the dice.
A Germani is in the front line if its leader had chosen the "Screening" tactic, he inflicts ONE loss 1 on the dice and TWO losses, if he scores a 2 on the dice.
3.4.2 - Re-rolls
During a Battle, each player may re-roll as many dice as he has Alea (Jacta Est) markers.
During the Shooting Phase or Melee Phase, he can roll again before the calculation of losses for his own units or those of his enemy.
It is not possible to re-roll a dice for a Retreat in Good Order.
For each dice re-rolled, an Alea marker ...is turned over to ...Jacta Est.
3.4.3 - The Effects of losses
A unit may suffer two losses.
At the first loss, they are treated as Out of Action (or Vae Victis) and cannot fight further. They are placed in the Vae Victis section of the "Battlefield" play aid.
At the second loss, the unit is eliminated. In is placed in the Elysii Campi box of the "Battlefield" play aid.
3.4.4 - Distribution of losses
The losses are distributed as decided by the player who suffers them respecting the two following imperatives:
- Initially, the units in the front line must suffer the first two losses received in each Melee Phase.
- Then, Roman blood must be saved. This is why the auxiliaries must be destroyed first then the Velites and finally the heavy legionaries (Legio, Hastati and Triarii). You must however respect the minima of losses imposed by the tactical choices.
3.4.5 - Calculating losses
In each Shooting and Melee Phase, the losses suffered by each side are recorded by the Memento Mori marker. This is advanced on the scale - running from 0 to 9.
If one side suffers more than 9 losses, the marker is turned to its +10 side.
3.4.6 - Retreat in Good Order
At the end phases 1 to 3, the player who chose the Tactical card "Screening" may attempt to make a Retreat in Good Order. To do this, he rolls a dice.
With a score of 6 if the battle in fought on Plains and 4, 5 or 6 in Mountain, then the retreat succeeded. He is declared vanquished, but no destruction is possible, the leader keeps his units. They are put back on the Army Sheet depending on their status: Ready for Combat or Out of Action. The leader retreats into an adjacent zone according to the rules. (See 3.5.3)
In the case of a failure to Retreat in Good Order, the battle runs its course.
This option is free; the player may attempt another Retreat in Good Order during the next phase.
3.5 - The Final Results
3.5.1 - The end of the battle
A battle ends when:
- One of the armies suffers a Retreat in Good Order (see 3.4.6).
- One of the armies is destroyed (all its units are in the Elysii Campi box).
- 3 phases have been played.
If the 2 armies have non eliminated units after the 3 phases of combat, that which suffered the greater number of losses is declared vanquished.
Remember: to eliminate a unit, it must suffer 2 losses. One side may have, for example, 2 units eliminated (4 losses) and win against an opponent who has 5 units Out of Action (which equals 5 losses).
In the case of an equality of losses, there is a Statu Quo (see 2.5.4).
EXCEPT Statu Quo or Skirmish, check the Pursuit Table below and cross reference the tactics chosen by the two sides to find what fate is suffered by the vanquished army.
PURSUIT Table
| Tactics of the winner | Loser: Frontal | Loser: General | Loser: Screening | Loser: Wings |
|---|---|---|---|---|
| Frontal | R | AD | R | R |
| General | R | R | AD | R |
| Screening | R | R | SQ | AD |
| Wings | AD | R | R | R |
AD: The vanquished army is entirely destroyed. R: The vanquished army retreats. SQ: Statu Quo (see 2.5.4).
3.5.2 - The Results for the Victor
- The victor takes (or keeps) the FORTUNA card.
- He takes possession of the plunder of the vanquished.
- He receives 1 Plunder Point for each enemy unit eliminated during battle.
- The army of the victor may spend Plunder Points to refresh his Out of Action units. (see 2.5.1)
3.5.3 - The Results for the Vanquished
- If all his units are destroyed, a leader is killed. He is removed from play.
- If the vanquished leader has any troops, they retreat into an adjacent zone.
- It is not possible to retreat into a zone occupied by the enemy or occupied by the enemy just before the battle or by crossing a sea.
- If the attacker is vanquished, he returns to the zone he occupied before the attack.
- If there is no other choice, the vanquished may retreat into zone with a friendly army (without being able to exchange units between them).
- If the vanquished cannot retreat, all his units are eliminated and these new losses are added to the Plunder calculation, in addition to eliminated units during the battle.
3.5.4 - Statu Quo
- Neither player gets a Plunder Point.
- The attacker moves back its original zone.
- The FORTUNA card does not change sides.
- If a Rebel army has previously acquired Plunder Points, they can be spent to return to Ready for Combat status the Out of Action units.
3.5.5 - Reposition of units
At the end of battle, reposition the units.
- The eliminated units on the Elysii Campi box on the map.
- The undamaged units are returned to the Army Sheet.
- The Out of Action units are placed in the Vae Victis box on the Army Sheet.
- If a unit does not have a leader, place it on the map. If it is Out of Action, place it under a Vae Victis marker of its side.
- Rebel units are placed face-down.
- The Battle marker is repositioned by the victorious leader.
4 - The Poliorcetic art (or the art of Capturing Cities...)
These rules are not used in scenario I Spartacus Imperator.
4.1 - Occupation of cities
- A city without an army is Roman.
- A city without an army is captured without combat by a Rebel leader who goes there.
- Exception, a leader has the ability to leave up to 3 units in a city that he controls.
- A leader who arrives in a city may incorporate the units left as a garrison in his own army. If there are more units than his Strategic Rating, the excess units of his choice are eliminated and go to the Elysii Campi box on the game board.
- If the city is occupied by an enemy army, a leader can only take it by siege. (see 4.2).
4.2 - Sieges
A siege consists of several segments.
Segment 0: Declaration of siege
A leader spends 1 Action Point to move to the city and attack it.
Segment 0 bis: Besieged Sortie
The besieged can decide to make a sortie by spending 1 Action Point. The combat proceeds like a combat on the battle field (see 3) EXCEPT that the besieged may attempt a Retreat in Good Order in phases 1 to 3 whatever his tactical choice and even if the battle is a Skirmish (see 3.2.1). He succeeds his Retreat in Good Order on a 4, 5 or 6 on the dice.
In the case of the total destruction of the besieged, the besieger takes the city and gets the benefits of the victor in a battle (see 3.5.2).
If the besieged survive, they must return to the city. The besieger is replaced in the original zone. The sortie action is completed as in a siege.
The besieger may attempt a new siege in his next operation.
Segment 1: Deployment
-
Take the "Siege" play aid and place on it:
- Each leader in his command box (with the helmet).
- The units of the besieger in the Fossa zone.
- The units of the besieged in the Castrum zone.
- Units already Out of Action in the Vae Victis box.
The Rebel units are placed face down.
-
Each player may take Alea Jacta Est markers (in his colour) equal to the Tactical Rating of its leader. They are placed on Alea in the boxes next to the leader.
-
The besieged player also receives Alea Jacta Est markers (in the neutral colour (blue)) equal to the Defence Rating of the city. The Alea Jacta Est markers are discarded after each siege and redrawn for each new siege.
For Example, for a city at III like Murgantia, take 3 Alea jacta Est markers.
-
The besieger chooses one side of the Poliorcetic Tactical card: Harass or Assault, then reveals it and places it in the Tactikos box.
-
The Rebel units are turned face-up.
Segment 2: Siege
The conduct of Segment 2 differs according to the tactic chosen by the besieger: Harass or Assault.
The losses during a siege are not recorded.
Harass:
Phase 1 Simultaneous: Shooting
- All the Ready for Combat units that have a Shooting Rating may Shoot (see 3.4).
- After shooting, a Retreat in Good Order is possible for the besieger which succeeds automatically.
Phase 2 Simultaneous: Shooting
- All the Ready for Combat units that have a Shooting Rating may Shoot (see 3.4).
End of siege.
Card summary: Phase 1: Shooting, Besieger retreat in good order? Phase 2: Shooting, End of siege.
Assault:
Phase 1 Simultaneous: Shooting
- All the Ready for Combat units that have a Shooting Rating may Shoot (see 3.4).
- Apply the results as they occur.
- After shooting, a Retreat in Good Order is possible for the besieger which succeeds automatically.
Phase 2 Simultaneous: Melee (on the ladders)
- All the Ready for Combat units that have a Melee Rating may participate in a mêlée (see 3.4).
- Besieged Funditores and Sagittifer units have a Melee Rating of 1 and not of 0. Place them in the Vallum box.
- After the mêlée, a Retreat in Good Order is possible for the besieger which succeeds automatically.
Phase 3 Simultaneous: Melee (on the walls)
- Units with a yellow square under their swords (Legio, Triarii, Hastati, Thraces, Galli, Daci) are now in the front line. Place these units in the Prima Acies zone.
- All the Ready for Combat units that have a Melee Rating may participate in a melee (see 3.4).
- Besieged Funditores and Sagittifer units have a Melee Rating of 1 and not of 0 leave them in the Vallum box.
End of siege.
Card summary: Phase 1: Shooting, Besieger retreat in good order? Phase 2: Melee (VALLUM: Besieged Funditores and Sagittifer are worth 1 in melee), Besieger retreat in good order? Phase 3: Melee (VALLUM: Besieged Funditores and Sagittifer are worth 1 in melee; First Line: Units with at least one yellow sword make critical hits and suffer the first two losses). End of siege.
Segment 3: Determination of victory
To win a siege, all the besieged units must be destroyed. The enemy leader is then removed from play.
The besieger wins
The besieger takes the city and benefits from the results of the victor following a battle (see 3.5.2).
The besieger loses
If the besieged has at least one unit at the end of all the segments or if the besieger decides to retreat at the end of any phase, the besieger is vanquished.
In this situation, the besieger:
- Retreats into his original zone.
- Loses the FORTUNA card, if he had it.
- Retains his Plunder Points and may spend them.
Exception: if the besieger makes a Retreat in Good Order during a segment and if he had the FORTUNA card, the latter becomes neutral until the next combat.
The besieged:
- Wins Plunder Points only if he has eliminated all besieger units. 1 Plunder Point per eliminated unit.
5 - Getting Started
5.1 - Read
- After reading the rules, chose one of the 3 scenarios. They provide situations that are very different from each other. Scenario I with Spartacus is the simplest to grasp, scenario III is the longest to play.
- Before starting, we recommend that you read the play-aids and the cards of each side; that will prevent you falling into enemy stratagems too easily!
5.2 - Choose a side
If no-one agrees, it is the player that does not own the game that decides, this is a game of the rebellious!
5.3 - The map, the play aids and the markers
- Take the chosen scenario sheet.
- Place on the game board the markers:
- Tempus Anni at Spring [Ver],
- Anno on Anno I.
- The FORTUNA card is neutral.
5.4 - The units
Place the leaders and units as shown on the scenario sheets.
- The leaders in play are placed on the map.
- The Action Points markers of each leader are placed on box IV on the Action Points display.
- Units having a leader are placed on the Army Sheets on the space of the specific leader.
- The Rebel units are faced place down. Only the Rebel player may check their fronts. Units without a leader are placed directly on the map (face down for the Rebels).
- The remaining Rebel units are placed in the pool.
A legion is comprised of 3 pink-marbled units, differing between scenarios covering -107 and -104, after several bloody defeats, Marius reformed the Roman army to defeat the Cimbrii and Teutons.
Scenario I with Spartacus occurs after the reform, a Marian legion is comprised of 3 Legio units.
Scenario III occurs before the reform, a legion has as follows: 1 Velites unit, 1 Hastati unit and 1 Triarii unit.
Scenario II is in the midst of the reform. The legions at the beginning are formed of 1 Velites unit, 1 Hastati unit and 1 Triarii unit, the reinforcement legions are comprised of 3 Legio units.
Regarding auxiliary units, only take the ones with an (S) for the Spartacus Imperator scenario I. For scenarios 2 and 3, take those without the (S).
5.5 - The Stratagem Cards
Take your Stratagem cards. They are specified by each scenario. Read them well! They are invaluable assets.
5.6 - Play!
A game can be very quick if Fortune smiles on you. Rebellion often starts with a handful of men which if it is not nipped in the bud, may degenerate into a slave war. In case of a savage defeat, do not hesitate to start again and change sides!
5.7 - Variations
You can play with one or two variations at the same time.
- The Roman player may play with his units face down.
- Place the auxiliary units in the pool. When the Roman player recovers an auxiliary unit (by stratagem or reinforcement), he draws the counter randomly from the pool.
Example of Play
Example of play at the start of Scenario I Spartacus Imperator illustrating the different actions of a Season and the unfolding of combats.
Initial set-up
The Rebels: Spartacus is in Vesuvius Mons. A Gladiator is with him.
The Romans: Glaber is in Campania. Two Milites are with him.
The Fortuna card is neutral.
Spring [Ver] -73, there are 4 Action Points per Leader.
Rebel player (he always goes first): Spartacus (1/4) moves from Vesuvius Mons to Campania.
There is combat between Spartacus and Glaber! The combat is a skirmish (less than 3 units of each side). There is therefore no choice of tactical card (Segment 1 is ignored).
Rebel player: Spartacus (2/4) prolongs his action by playing the Stratagem card 1: Vines of Vesuvius Mons.
Segment 2 Battle Array
Phase 1 simultaneous: Shooting. There is no Shooting segment for the Roman because of the Stratagem. The Rebel unit has no Shooting Value.
Phase 2 simultaneous: Melee. There is no Melee segment for the Roman because of the Stratagem. The Gladiator has a Melee Value and therefore rolls a dice. He scores 5 and misses. The Rebel player uses a re-roll for the Gladiator. He scores 3, which is 1 loss. The Roman player puts Out of Action one of his Milites.
Phase 3 simultaneous: General Melee. The Gladiator scores 2 on the Melee dice. He inflicts 1 loss. The Out of Action Milites cannot roll a dice. The Roman player scores 1 on the dice with his remaining Milites and thus inflicts 1 loss. The Rebel player uses his last re-roll and forces the Milites to re-roll his dice. The Milites scores 6, he misses. The Roman player puts Out of Action his remaining Milites unit. He could have eliminated the Out of Action Milites during phase 2, but in that case, the Rebel player would have gained 1 Plunder Point as the result of victory.
Segment 3 Determination of victory: The Rebel player carries the combat (2 losses inflicted against 0).
Consequences of combat: Glaber retreats to Latium for 0 Action Point with his two Out of Action Milites counters. The Rebel player takes the FORTUNA card. No unit having been eliminated, the Rebel player does not gain a Plunder Point.
Rebel player: Spartacus (3/4) recruits. He scores 6 on the dice. He draws 2 Rebel units from the pool.
Roman player: Glaber (1/4) restores a unit. He returns to Ready for Combat one of the 2 Milites units which became Out of Action during the preceding battle.
Roman player: Glaber (2/4) moves from Latium to Roma.
Roman player: Glaber (3/4) restores a unit. He returns to Ready for Combat the other Milites unit which became Out of Action during the preceding battle.
Rebel player: Spartacus (4/4) recruits. He scores 5 on the dice. He draws 2 Rebel units from the pool and not just 1 because he has the FORTUNA card.
Roman player: Glaber (4/4) does nothing.
The season ends....
Summer [Aestas] -73, there are 3 Action Points per Leader.
Roman reinforcements in Roma (see scenario sheet). Glaber is sacked; his troops are split between the two new Leaders: Cossinius and Varinus.
Spartacus, based in Campania, has 5 combat units with him. The Scenario special rules require the Rebel player to place Oenomanos and Crixus on the map, in zones adjacent to Spartacus and to give them 2 units each. There remains thus 1 unit with Spartacus. The Rebel player chooses to place Crixus in Samnium and Oenomanos in Hirpina.
- Rebel player: Crixus (1/3) moves from Samnium to Corfinium.
- Roman player: Cossinius (1/3) moves from Roma to Etruria.
- Rebel player: Oenomanos (1/3) recruits. He scores 6 on the dice. He draws 2 Rebel units from the pool, which raises his army to 4 units. However, he is limited by his Strategic Rating (3), he thus returns to the pool the unit of his choice amidst the 4.
- Roman player: Varinus (1/3) moves from Roma to Latium.
- Rebel player: Spartacus (1/3) moves from Campania to Lucania.
- Roman player: Varinus (2/3) moves from Latium to Samnium.
- Rebel player: Crixus (2/3) recruits. He scores 5 on the dice. As the Rebel player possesses the FORTUNA card, he draws 2 Rebel units from the pool instead of the usual 1.
- Roman player: Varinus (3/3) moves from Samnium to Corfinium. This movement action causes combat....
Varinus attacks Crixus
The combat is a major battle because there are more than 3 units for each side.
Segment 0 Deployment: placement of units and markers; face down for the units of the Rebel player.
Segment 1 Tactical choice:
- Varinus: Screening. The Roman player makes this choice because he has units with blue swords. Furthermore, his enemy has one more re-roll, the combat risks going against him, he will then try to make a Retreat in good order.
- Crixus: Frontal Attack. The Rebel player has units with yellow swords and he hopes to strike hard!
Then the rebel counters are turned face up.
Segment 2 Battle Array: With phases 1 to 3, announce, before rolling the dice, to which unit they apply.
Legend: white dice = roll missed; coloured dice = roll succeeded (1 loss); red dice = critical hit (2 losses); crossed dice = no dice roll.
Phase 1 simultaneous: Shooting. Results: for the Roman player, of 4 shots, 3 losses inflicted on the Rebel player. For the Rebel player, of 2 shots, 0 loss.
Possible re-rolls and application of losses: The Rebel player uses one re-roll, the Milites rerolls his dice. He scores 5 and misses. The initial loss is thus reversed. The Rebel player must suffer 2 losses. He decides to inflict them on the Funditores who have no Melee Value. With 2 losses, the Funditores counter is eliminated and is placed in the Elysii Campi box. The Roman player does not attempt to Retreat in good order because for the moment, he has inflicted more losses than his opponent.
Phase 2 simultaneous: Melee. Certain units go into the front line and roll dice. During the Melee Phase, the players apply the effect of the tactical cards. The Roman player with his Screening tactical card positions the blue sword counters in the front line. The Rebel player with his Frontal Attack tactical card positions the yellow sword counters in the front line. Possible re-rolls and application of losses: The Rebel player uses one re-roll, the Cohortes must re-roll their dice. He scores 6 and misses. The critical hit of the initial die roll is thus cancelled. The Roman player does not attempt to Retreat in good order because for the moment, he has inflicted more losses than his opponent.
Phase 3 simultaneous: General Melee. Rolls of dice, possible re-rolls: The Roman player uses one re-roll. The Cohortes may re-roll his dice, he scores 2 and thus succeeds in his attack. It is also a critical hit, he inflicts 2 losses. Each side suffers 2 losses.
Application of losses: The Stratagems cards state for both players the units that must suffer the first two losses. They must be chosen from the yellow swords for the Rebel and blue for the Roman. The Rebel player eliminates the Daci. It is placed in the Elysii Campi box. The Roman player puts Out of Action his Milites and his Cohortes.
Segment 3 Determination of Victory: Varinus wins the Battle because he has inflicted more losses (4 Rebel losses against 2 Roman losses). Varinus wins 2 Plunder Points thanks to the 2 eliminated units of Crixus. He does not keep the booty and immediately returns to Ready for Combat his 2 Out of Action units. The Roman player takes the FORTUNA card. Crixus retreats to Picenum for 0 Action Points with his two remaining units.
At the end of the battle: The eliminated units are in the Elysii Campi box of the map. The other units are returned to the Army Sheets.
- Rebel player: Oenomanos (2/3) moves from Hirpina to Campania.
- Roman player: Cossinius (2/3) moves from Etruria to Sabinia.
- Rebel player: Crixus (3/3) moves from Picenum to Ravenna.
- Roman player: Cossinius (3/3) moves from Sabinia to Samnium.
- Rebel player: Oenomanos (3/3) ravages Campania. He scores 6 on the dice and gains 2 Plunder Points.
- Rebel player: Spartacus (2/3) moves from Lucania to Apulia.
- Rebel player: Spartacus (3/3) recruits. He scores 5 on the dice. No longer having the FORTUNA card in his possession, the player draws only 1 Rebel unit.
A Little Dog Latin
- Alea Jacta Est: The die is cast! Represents the number of re-rolls available to a leader during a battle or a siege. On the marker is a statue of a defeated Gaul, a statue of a defeated Roman did not exist......!
- Bellum Servile: The wars initiated by rebellious slaves. The title of the original game.
- Classis Piratarum and Classis Romana: Pirate and Roman fleet. The Mediterranean had always been infested by pirates. Only Rome can staunch this wound and assure prosperity and cohesion to their Empire.
- Consul: title given to the two leaders of the Roman State elected for a year. Only the consuls have the power to defeat the rebellious slaves.
- Elysii Campi: The Elysian Fields. The name for paradise for the Romans.
- Fortuna: Goddess of good fortune, of chance. A good general is always favoured by Fortune in the view of the ancients or by luck Napoléon. Caesar speaks frequently of Fortune to justify his defeats and his victories.
- Imperator: signifies a victorious Roman general, it was an honorific. In French, the nearest term would be marshal not emperor. Declaring Spartacus Imperator, was a provocation to the roman Military nobility who sought this honour above all others!
- Memento Mori: Remember that you must die.
- Prætor: The praetor, elected for one year, can recruit and lead an army in combat. He often replaces a consul who is busy elsewhere. Equipped with few resources, he was often beaten by more numerous rebel armies.
- Tempus Anni: The Seasons of a year (Ver: Spring, Aestas: Summer, Autumnus: Autumn, Hiems: Winter)