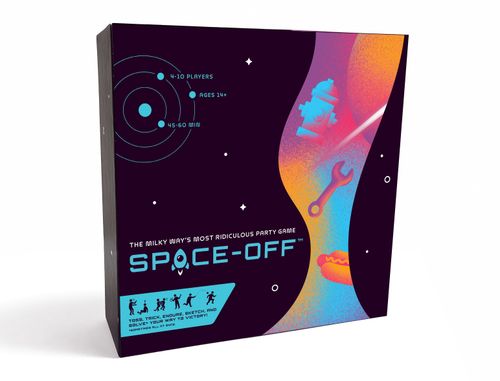
Space-Off
Space-Off Rulebook
Table of Contents
Table of Contents
The Big Idea
Fight for your lives against a rival crew of stranded astronauts! Space-Off is an absurd, alien gladiator match that's scored like a tug-of-war. Parts from your broken landers (your ticket home) are up for grabs.
How do you win? Have any 3 of the 5 Lander Parts in your team's Control Zone at the same time.
The main way to Tug a Lander Part towards your team's Control Zone is by succeeding in a Trial. The 5 trial categories will test your strength, sneakiness, willpower, wit, and competitive spirit!
Players: 4-10. Estimated game length: 45-60 minutes.
Not a big fan of reading? Watch the How to Play video after setup (see page 5 of the rulebook).
Game Piece Checklist
Celestial Square
- 1 Celestial Square
- 1 Do'er Die
- 1 Champion Die
- 5 Lander Parts
Team-specific
- 2 Team Boards
- 2 Gochya Stands
- 2 Lucky Dice
- 2 Paper Pads
- 10 Pencils
Shared
- 32 K'ubes
- 1 Lid of the Game Box
- 1 Turn Totem
- 1 Last Lander Part
- 1 Warp Speed Rules
- 30 Kurss Trial Cards
- 25 Tuff Trial Cards
- 25 Witz Trial Cards
- 25 Gochya Trial Cards
- 30 Grand Trial Cards
- 40 Earth Cards
- 40 Oopiter Cards
Setup
Divide players into 2 roughly equal teams that will sit across from each other. Shoot for an even mix of gameplay experience. Leave as much free space on the table as you can for gameplay.
A. Place each Lander Part in the center of the lane that matches its color.
B. Place the Do'er Die and Champion Die on the Celestial Square.
C. Place the shuffled Earth Deck and Oopiter Deck, as well as the 5 shuffled Trial Decks, face-down on their marked zones.
D. Make sure the K'ubes and Lid of the Game Box are nearby.
E. Each team gets a Team Board, a Lucky Die, a Gochya Stand, and Paper + Pencils.
F. Insert The Last Lander Part into the Kurss Trial Deck, putting 6 Kurss Cards on top of it. For a longer game, use 8 or 10 Kurss Cards (see the Last Lander Part section below).
G. Assign the Turn Totem to the team that rolls highest on their Lucky Die. They go first.
H. The other team rolls the Champion Die 1 time, earning 1 Tug in the resulting trial category.
Core Concepts
Turn Totem. The Turn Totem shows whose turn it is. It moves along the Team Board, tracking turn phases. During each End Phase, the Turn Totem gets passed to the other team. For timed trials, the team without the totem handles the timer.
Lander Parts and Scoring. Moving a Lander Part 1 zone closer to your team's Control Zone on the Celestial Square is called a Tug. Every trial success will earn your team a Tug. Control of the 5 Lander Parts will constantly shift until a team controls 3 at once. As soon as they do, they win the game!
Locking. 3 of the lanes on the Celestial Square have lock icons in their Control Zones. If a Lander Part moves into one of them, it becomes Locked and can't be tugged for the rest of the game. If you succeed in a Locked category, or one that your team already controls, you'll get to roll the Champion Die.
How Tugs Can Be Earned.
- Succeeding in trials: success in any of the 5 trial categories awards 1 Tug, by default.
- Card effects: some cards can grant or modify Tugs.
Dice.
- Do'er Die: This die is rolled during the Dice Phase. It decides which trial category a team will attempt: Tuff, Witz, or Gochya. A Choice result means you get to choose which deck you'll draw from!
- Champion Die: This die is rolled whenever a team earns a Tug in a trial category that's Locked, or one that they already control. It decides which Lander Part they'll apply their Tug to instead. A team keeps rolling until the result is 1 of the unlocked categories, or the Wrench icon, which lets you Tug any 1 Lander Part (of your choice) that's still unlocked!
- Lucky Die: Each team gets 1 of these familiar, six-sided dice. It's used in a few trials — as well as to settle things like deadlocked rule debates.
Trial Success: Gain a Tug in the matching trial category. Every Trial Success will earn you a Tug. Sometimes you'll have to roll the Champion Die for it.
Trial Failure: The Lander Part stays put.
How a Turn Works
The team with the Turn Totem performs the steps below, in order. Use the Totem to mark the current turn phase on your Team Board.
1. Kurss Phase
- The Totem Team draws a card from the Kurss trial deck and reads it out loud.
- Labels on the card will apply to all, or part of, their team. If your team has an odd player total, round up for Labels that apply to "half." A player can have more than 1 Label at a time.
- The new Kurss Card is placed face-up in the 1 Dot Kurss Zone on the Totem Team's side of the Celestial Square. Labeled players identify themselves and complete any setup or preparations.
- From the Dice Phase onward, Labeled players must follow their Label's instructions. They'll either succeed after 3 full turns (2 of their turns and 1 rivals' turn) or get caught meeting the "Fail If" condition. Failure immediately trashes the Kurss card without a replacement.
2. Dice Phase
- The Totem Team rolls the Do'er Die and draws a card from the matching trial deck (Tuff, Witz, Gochya, or Choice).
- They immediately read the card out loud and attempt the challenge described on it, unless it's a Gochya card, in which case they'll silently put it in their Gochya Stand. (If a team has 3 Gochya cards, they can draw a fourth card before deciding which 3 to keep — 1 gets trashed.)
3. Grand Phase
- The Totem Team draws a card from the Grand Trial deck and reads it out loud. Both teams attempt the trial at the same time, unless it says otherwise. Only 1 team can succeed. Their success does NOT count as a trial failure for their rivals.
4. End Phase
- The Totem Team advances any Kurss Cards on their side of the Celestial Square 1 zone towards their team. A card leaving the 2 Dot Kurss Zone means success in that Kurss Trial!
- You'll only advance your Kurss cards when you are the Totem Team. You still have to follow all your Label Instructions when your rivals have the Totem, though!
- During each End Phase, both teams get the option to Reassign Labels to different teammates! Newly Labeled players should follow their instructions before any previous assignees can stop.
- Pass the Totem to your rivals.
Space-Off is designed to get you moving and interacting with others. Above all, though, it's meant to be fun. You know yourself best. If a card comes up that makes you uncomfortable, please skip it and draw a replacement!
Understanding Trial Cards
Key terms
- Step: 1 typical walking stride for a player attempting the trial.
- Arm's length: Measured from the shoulder to the fingertips of a player attempting the trial.
- Alternate: When teams alternate for Grand Trials, the Totem Team goes first. When players on a team alternate, every trial participant should get 1 attempt before anybody gets 2.
- Equal teams: For teams with the same player total, this means "All." For uneven teams, it's every player from the smaller team and a matching number of their rivals.
Card anatomy
- A. Trial Name.
- B. Guidelines: Key symbols or instructions that set the ground rules for a trial.
- Players: The number of people that need to take part in the trial. If there's a "/" in the player count, it refers to the Totem Team first and their rivals second. Some trials call for half of a team to participate (round up).
- Time: Only appears on some trial cards. If time runs out before you achieve your Goal, you fail the trial. (The team without the turn totem keeps time, by default.) Some time limits have multiple sections. When the Setup step is timed, its time limit is a different color.
- Note: Make sure every participant is ready and understands the trial before you start the timer.
- Labels: Players attempting a Kurss Trial each get a Label. To succeed, they must follow its instructions for 3 full turns. You can have more than 1 Label at a time.
- C. Setup: Only appears on some trial cards. It spells out what needs to happen before the trial can get underway.
- D. Trial Description: What you're trying to achieve, usually summarized with a Goal. This part will also mention actions that aren't allowed — especially anything that would make you fail the trial.
- Bonus: A handful of trials offer bonus rewards, which you can earn on top of a Tug. Sometimes when you go for a bonus, you'll risk trial failure.
The Oo and Their Trials
Put your lives on the line for glory, survival, and alien amusement. Each trial you'll attempt is inspired by one of Oopiter's four tribes — except for Grand Trials, which were embarrassing dares from an anonymous submission box.
Kurss
The brainiac, psychic leaders of the Oo love strange, multi-turn Impairment Challenges that make everything about the game harder (or at least weirder) than it has to be.
Kurss Trials are unique because you play by their rules for 3 full turns (2 of your turns and 1 rivals' turn). The Kurss Lane on the Celestial Square is also 3 zones wide and can't be Locked.
- During the Kurss Phase, the Totem Team draws a new card from the Kurss Deck and reads it out loud.
- Every Kurss Card has at least 1 Label, which gets assigned to participating Players. If a Label affects "half" of your team, round up. Kurss Trials can also involve K'ubes, Oopiter Cards, Earth Cards, Lucky Dice, and even your rivals!
- Make sure each player with a Label identifies themselves and clearly understands what they're doing (or not doing).
- New Kurss Cards get placed on the Totem Team's side of the Kurss Track (the top of the Celestial Square), in the zone with 1 Dot.
- Each Kurss Trial has a Fail If condition. Your rivals will be the ultimate judges of whether you failed. A slip-up by even 1 Labeled Player immediately trashes the card. You don't get a replacement.
- During the End Phase of a turn when you are the Totem Team, your Kurss Trial Cards Move 1 zone closer to your team.
- When a card leaves the 2 Dot zone on your team's Kurss Track, that trial is a success! Trash it and earn a Tug.
- The End Phase is also when BOTH teams have the option to Reassign their Labels to different teammates! Newly Labeled players should follow their instructions before any previous assignees can stop.
- Some challenging Kurss Trials offer Bonus Rewards. If you succeed in one, you'll earn the bonus in addition to a Tug!
Note: Labeled players should attempt trials that call for ALL as well as trials that ask teams to "alternate players." Trials are about challenge and creativity, NOT sidelining team members.
Kurss Trial, Long Story Short During the Kurss Phase, draw a Kurss Trial Card. Prepare for your trial by applying any Labels on the card to the number of Players listed. This new Kurss Card goes on the 1 Dot zone of your team's Kurss Track. From the Dice Phase onward, gameplay continues normally, or as normally as it can for your Labeled players, who follow their new instructions for 3 full turns (2 of your team's turns and 1 rivals' turn). If your rivals catch a Labeled player on your team meeting a Kurss Card's "Fail If" condition, trash it right away without drawing a replacement. When you have the Turn Totem, Kurss Trial Cards will advance 1 zone towards you during the End Phase. After advancing twice, a trial card moves off the Kurss Track completely (trash it), earning you a Kurss Tug! During ANY End Phase, BOTH teams can Reassign their Kurss Labels. Finally, succeeding in a trial marked with a Bonus Reward earns you bonus rewards!
The Last Lander Part
The Last Lander Part is the final Game Setup step. Slide it into the Kurss Trial Deck, leaving 6 Kurss Cards on top of it. If after 6 full turns (3 per team) nobody has won the game, you'll draw The Last Lander Part instead of another Kurss Card and follow its instructions.
The Last Lander Part kicks off the Hotdog Series, a final, Grand Trial showdown that only uses cards marked with a hot dog icon. The Hotdog Series decides which team will win the game! Nothing can interrupt or override it, even something that would normally make a team win.
There's a small chance you'll go through all 10 hot dog Grand Trials before the Hotdog Series ends. If so, retrieve them from the Trash, shuffle them, and reuse them.
Note: You can place The Last Lander Part 8, 10, or even 30 cards down, if you prefer. Just leave an even number of Kurss Cards on top of it. (This may increase the length of the game.)
What's with the Hotdogs? You'll notice some Grand Trials have a hot dog icon in the lower right-hand corner. If you're playing with The Last Lander Part (see the Last Lander Part section), these will become the only usable trials during the game-deciding Hotdog Series.
Tuff
Generations of contact sports and hard labor have chiseled the Tuff Tribe into a shape that screams peak performance. Their Trials are cutthroat and often physically demanding.
Tuff Trials are a crowd favorite for their simplicity. Draw a card, do the thing on it, and hope you do it well.
- During the Dice Phase, the Totem Team rolls the Do'er Die. If Tuff or Witz comes up, they'll draw from the matching deck. If Choice comes up, they can choose a Tuff or Witz (or Gochya, see below) Trial voluntarily. Read Tuff or Witz Cards out loud for everyone.
- Every Tuff and Witz Trial specifies how many Players from either team will participate in it. Most of the time, only the Totem team participates. A player count with a "/" refers to the Totem team first and their rivals second.
- Some Tuff or Witz Trials involve Setup. Setup happens outside the trial's Time Limit. In the rare case that Setup is timed, you'll see a pink or orange number (separated by a "/") in front of the trial's time limit. Make sure all participating players understand their roles before starting any timers.
- Every Tuff and Witz Trial has a clear Goal. If the Goal is met within the given time or attempt limit, earn a Tug.
- Keep an eye out for Bonus Rewards — If you fulfill their requirements, you'll earn the stated bonus on top of a Tug.
Tuff and Witz Trials, Long Story Short During the Dice Phase, roll the Do'er Die. If Tuff or Witz comes up, draw from the indicated deck. Prepare for the trial by declaring which players will participate. Make sure that they understand what's happening, then complete any setup and attempt the trial. If your team accomplishes the stated Goal, earn a Tug in the matching trial category. Some Tuff or Witz Trials offer bonus rewards for doing something extra impressive.
Witz
As the old Oo adage goes, "One Witz, two opinions." When they aren't debating everything under the alien sun, Witz love putting their heads together for logic and language puzzles.
Test your brain with trials that include words, numbers, pictures, patterns, and memory tasks.
- During the Dice Phase, the Totem Team rolls the Do'er Die. If Witz comes up, they'll draw from the Witz Deck. If Choice comes up, they can choose a Witz Trial voluntarily. Read Witz Cards out loud for everyone.
- Every Witz Trial specifies how many Players from either team will participate in it. Most of the time, only the Totem team participates. A player count with a "/" refers to the Totem team first and their rivals second.
- Some Witz Trials involve Setup. Setup happens outside the trial's Time Limit. In the rare case that Setup is timed, you'll see an orange number (separated by a "/") in front of the trial's time limit. Make sure all participating players understand their roles before starting any timers.
- Every Witz Trial has a clear Goal. If the Goal is met within the given time or attempt limit, earn a Tug.
- Keep an eye out for Bonus Rewards — If you fulfill their requirements, you'll earn the stated bonus on top of a Tug.
Gochya
Infamous for espionage, riddles, and manipulation, Gochya make a living by getting their rivals to do their bidding.
Gochya Cards are the only cards that you read silently. You succeed in a Gochya Trial the instant you trick a rival into fulfilling its requirements. You have the whole game to make that happen!
- During the Dice Phase, the Totem Team rolls the Do'er Die. If Gochya comes up, they draw from the Gochya Deck. If Choice comes up, they can choose a Gochya Trial voluntarily.
- Every Gochya Trial involves manipulating your rivals. These are the only trial cards that you don't read out loud! That would defeat their whole purpose.
- Each Gochya Card is placed in the Gochya Stand of the team that drew it, facing them. If a team would ever have more than 3 Gochya Cards at a time, they must discard down to 3. They still have the option of drawing and considering a fourth Gochya Card before trashing 1.
- As soon as a Gochya Trial's goal is met the team of tricksters reveals their card and earns a Tug. This can interrupt any other trial or gameplay phase, except for the Last Lander Part's Hotdog Series (see the Last Lander Part section).
- If a team announces Gochya Trial success but their claim can't stand up to scrutiny, they fail the trial instead and the card gets trashed.
- Gochya success should be revealed immediately — within a minute, or roughly 1 gameplay phase, of its conditions being met. Gochya success that's slept on for longer than that will have to be repeated to count.
- Some of the slipperiest Gochya Trials offer Bonus Rewards. If you succeed in one, you'll earn the bonus in addition to a Tug!
Gochya Trials, Long Story Short During the Dice Phase, roll the Do'er Die. If Gochya comes up, draw from the Gochya Deck. SILENTLY read the trial card that you just drew and share it with your teammates! Start planning ways to fulfill your trial's Goal condition and place the card in your Gochya Stand. Proceed to the Grand Phase.
Your team can succeed in your Gochya Trial at any moment in the game, except during the Hotdog Series (see the Last Lander Part section). When you think you've succeeded, reveal your trial card right away and hear out any objections. If your success is hard to dispute, earn a Gochya Tug! Some Gochya Cards offer a chance to earn bonus rewards for doing something extra slimy.
Grand Trial
Even if your trial track record isn't perfect, you know your rivals would do worse in your shoes... well, it's time to level the playing field! Prepare for high stakes, chaos, and last-second success in Grand Trials!
Both teams will face off in a simultaneous challenge where only 1 team can succeed. Their rivals don't technically fail, they'll just miss the chance for a Tug.
- During the Grand Phase, the Totem Team draws a Grand Trial Card. Every Grand Trial specifies how many Players from each team should participate. Make sure you declare who's taking part before the trial begins. For Grand Trials that ask teams to alternate, the Totem Team always goes first.
- Some Grand Trials involve Setup. Setup is separate from the trial's Time Limit, unless the card says otherwise. If there's a Setup time limit, it will be Gray and separated from the trial time limit by a "/." Only start timing when all participating players confirm that they understand their roles. The team without the Turn Totem should keep time.
- The team that achieves the trial's stated Goal succeeds, but their opponents don't technically fail the trial. The only way a Grand Trial failure occurs is if the timer (or number of attempts) runs out and both teams still fell short of the Goal. It doesn't matter who failed worse. In case of a failure, the Grand Trial Lander Part stays where it is on the Celestial Square.
Grand Trial, Long Story Short During every turn's Grand Phase, the Totem Team draws 1 card from the Grand Trial Deck. The trial description is read out loud. Each team prepares by deciding which of their players will participate and then completing any required setup. Both teams will attempt the trial, usually at the same time, but only 1 can succeed. Whoever does so earns a Grand Tug. It's also possible that everyone fails.
Keep in Mind
- No physical interference. No physical interference from a rival team is allowed during ANY trial (taunting and trickery are fine). If this rule is broken, the harassed team instantly succeeds in the trial they were attempting.
- Your rivals are human. If they need to go to the bathroom or deal with an emergency, give them a break from their Kurss Labels.
- The Oo love a good debate. Throughout the Tournament, trials or card effects can interact in weird ways. When they do, make a case to your rivals on how things should play out. Creative readings and the invention of house rules are encouraged. As a last resort, settle things with a Lucky Die Roll.
Surprise?
To make things even less fair, the Oo have randomly stacked 4 of the Trial Decks with Surprise Cards. These surprises don't count as trials themselves.
Some Surprise Cards will sit by your Team Board until specific conditions are met. You'll usually need to draw at least 1 new card from the same category after drawing a Surprise.
Trashing
After a trial, trial cards and Earth Cards go in the Trash Zone on the Celestial Square. If any deck totally runs out, retrieve its cards from the Trash, shuffle them, and reuse them.
Trial Materials
Keep components without marked zones near the Celestial Square. If you need the Oopiter Cards or K'ubes for a trial and some are currently in use, only grab from what's freely available.
- Earth Cards. The Oo enjoy learning about (and making fun of) you so much that they worked Earth's culture into the game! Trash these cards after each use. Also, see Rule Variations (Luck Decides) for a way to make Earth Cards a bit more challenging.
- Oopiter Cards. On loan from an Oopiter casino, this 40-card deck has 4 "suits" (one per Oo Tribe). Some trials use the numbers or colors on Oopiter Cards. Others ask you to hold, toss, or stack them. Oopiter Cards get returned to the deck, shuffled, and kept face-down after each use. They never get trashed.
- K'ubes. A critical part of some trials that never gets trashed. They'll get flicked, stacked, launched, etc. Poor things.
- Paper & Pencils. Use these whenever a trial asks you to write or illustrate something. Usually all you'll need is a small paper strip.
- Lid of the Game Box. The empty top part.
Rule Variations
Modifications for experienced crews. The Oo challenge you to invent some of your own!
- Luck Decides. If you're tired of players picking the shortest word on the Earth Card... Whenever you need to pick a word from an Earth Card, roll the Lucky Die. A "1" means the first word on the card, a "2" means the second word, and so on.
- Zero-Sum. The stakes get astronomical when your loss is your rivals' gain! Whenever a team fails a trial, their rivals get 1 Tug in that trial category. Grand Trial failures are still ties (the Lander Part doesn't move).
- Late Lunch. Delay the "hard stop" mechanic and settle your Space-Off the old-fashioned (probably longer) way. During Setup, place 8, 10, or even all of the Kurss Cards on top of The Last Lander Part. Stick to an even number so that each team gets the same amount of turns!
- Bear It Alone. Put your willpower to the test. You can't reassign Kurss Labels during the End Phase.
- Feeling Generous. When it comes to Kurss Trials, nobody's perfect. During Setup, both teams put 2 K'ubes next to their Team Board. When any player with a Kurss Label meets their "Fail If" condition, they can spend one of their team's K'ubes to keep attempting their Kurss Trial as if nothing happened. (If you reach The Last Lander Part, return these K'ubes to the unused pile.)
- Pair-A-Noia. Gochya Cards abound. Trust sinks to an all-time low. Whenever a team draws from the Gochya Deck, they draw an extra Gochya Card. You can still only have 3 Gochya Cards, max.