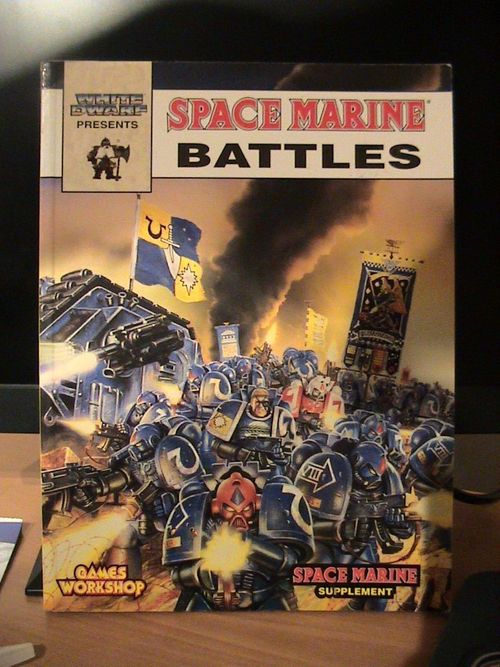
Space Marine Battles
Space Marine Battles Rulebook
Table of Contents
Table of Contents
- Daemon Engines of Tzeentch
- Epic Personalities
- Imperial Titan Weapons
- Imperial Titan Data Cards
- Reaver and Warhound Titan Damage Table
- Gargants
- Gargant Weapons
- Great Gargant Datacard
- Great Gargant Damage Tables
- Ork Gargant Special Cards
- Assault Scenarios
- Space Marine Fortification Cards
Daemon Engines of Tzeentch
Tzeentch is the dark Chaos god of Change. His twisted motives are often unfathomable and his weapons are many but warfare is a powerful instrument of change and the followers of Tzeentch are often at its forefront.
Sorcery also falls within the auspices of Tzeentch and many of the most potent psykers and mystics sacrifice to him. Welded together from the soul-stuff of daemons, the war engines of Tzeentch are arcane creations which fly above the battlefield on the unseen tides of the warp. Power draws power and the very presence of the daemon engines of Tzeentch strengthens the grip of Chaos on the material universe. To represent this extra flow of warp energy, a Chaos player who has daemon engines of Tzeentch in his force is allowed to draw additional Chaos cards at the beginning of the battle. For each minion card which consists of daemon engines of Tzeentch in the Chaos player's force, deal one extra Chaos card.
The Silver Towers of Tzeentch
The Silver Towers of Tzeentch form an outlandish sight on the battlefield. They appear as clusters of intricately carved and fluted towers resting upon a circular island and topped with slender minarets of gold or bronze. Each tower is a subtly different creation of disturbing beauty, with the snouts of weird, magically-powered weapons studding their walls. The most disturbing aspect of the Silver Towers is that they are not land-locked but drift through the skies above the battlefield. Each tower contains dozens of Tzeentchian Thrall-wizards who focus their powers to rain magical destruction on Tzeentch's foes. Most potent of all are the wardings woven about the towers, so that as they advance, a wall of magical energy springs into being between each tower and its neighbour.
Silver Towers are not given orders like other models. Because of their unique form of propulsion Silver Towers can move up to 20cm in any direction. Whilst moving, a Silver Tower counts as a skimmer so it ignores the terrain it passes over. This means difficult and impassable terrain aren't a barrier to its movement.
As long as Silver Towers of the same detachment are within 10cm of each other, a magical warding exists between them. The warding is like a wall which runs between the models and allows them to move further apart than the normal 6cm unit formation distance. Place the special warding template between the two models to show where the warding is. Any shooting by the enemy which passes through the warding template suffers a -1 modifier on its to hit rolls. This modifier even applies to indirect firing and other high trajectory attacks. However, the modifier does not apply to shots at the towers themselves.
A Silver Tower is an extremely stable firing platform, so it always fires in the first fire segment of the combat phase. However, unlike a skimmer, a Silver Tower can't gain or lose height very quickly so it can't make pop-up attacks. The cannon mounts on a Silver Tower are placed all over it so they can fire in any direction. The sorcerous Beam of Power attack can also be made in any direction.
A Silver Tower can only be pinned in close combat by another skimmer, otherwise it can simply drift over its opponent when it moves. Fighting a Silver Tower in close combat is dangerous because it always fires in the first fire segment. This means that the tower will get a chance to rake its opponents with gunfire before the combat is fought.
| Troop Type | Move | Saving Throw | CAF | Weapons | Range | Attack Dice | Roll to Hit | Target's Save Mod. | Notes |
|---|---|---|---|---|---|---|---|---|---|
| Silver Tower | 20cm max | 2+ All round | +3 | Cannon | 50cm | 4 | 5+ | -1 | See above for special rules |
| Beam of Power | 75cm | 1 | 3+ | -2 |
Doom Wing
Doom Wings are fast attack craft which streak across the skies on glittering metal wings. They are driven by three powerful engines and are armed with a deadly underslung flame-cannon for strafing ground targets and attacking airborne opponents. The tremendous speed of the Doom Wing makes it difficult to fight against, but also limits its manoeuvrability so that it has to make long straight attack runs against its targets.
Doom Wings must make a minimum move each turn, so a detachment of them can never be given first fire orders. When a Doom Wing moves it must travel at least 20cm during the movement phase and its entire move must be made in a straight line. A Doom Wing can turn by any amount at the beginning or end of its move. A Doom Wing ignores the terrain it passes over as it moves, so difficult and impassable terrain aren't a barrier to it. All firing at a Doom Wing suffers -1 to hit modifier because of its great speed.
At the end of its movement, you can leave a detachment of Doom Wings on their flying stands to represent them staying at low level so they can take advantage of cover such as buildings, woods and hills. Alternatively you can place them on top of cups or similar objects to show that the detachment is climbing high up in the air (you may want to make your own tall flying stands using brass rod or thick wire for this but up-ended plastic cups work just as well). When a Doom Wing is at high level, anybody shooting at it must add 25cm to the actual range between the two models. This represents the fact that the Doom Wing's height and the effects of gravity make it even harder to hit.
As long as a Doom Wing is at high level, it can see and be seen by everything on the table. If you choose to keep a Doom Wing at low level, it can see whatever you can see from the model's eye view, just like anything else in Space Marine. The flame-cannon on the Doom Wing is fixed so that it only fires forward, but the magically energised firebolt it unleashes decimates a broad area ahead of the war engine. The firebolt is represented by the flame template.
To fire the flame-cannon, place the template so that the pointed end is touching the Doom Wing's nose and the rest of the template projects straight ahead of it. Anything under the template will be hit on a roll of 4, 5 or 6 on a D6. Models hit suffer a -1 saving throw modifier.
A flame-cannon can also be used to destroy buildings. Any buildings that are hit by a flame-cannon and fail their saving throw collapse into flaming rubble. Unlike most weapons which use the flame template (Hellhound firethrowers and the Cauldron of Blood) the flame-cannon's shot does not ignore cover modifiers. The flame-cannon can only hit things at the same level so if it is at high level it can only hit other things at high level and if it is at low level, it can only hit things at low level.
A Doom Wing can never be pinned in close combat by another unit because it's just too fast. In close combat against skimmers or other flying units such as Thunderhawk gunships or Overlord armoured airships, the Doom Wing doubles its close assault factor from +3 to +6 because it's better in air-to-air combat. The Doom Wing can attack enemies such as the Overlord armoured airship at high level.
| Troop Type | Move | Saving Throw | CAF | Weapons | Range | Attack Dice | Roll to Hit | Target's Save Mod. | Notes |
|---|---|---|---|---|---|---|---|---|---|
| Doom Wing | 20-75cm | 4+ | +3 | Flame-cannon | Template | 4+ | -1 | See above for special rules |
Fire Lord
Fire Lord heavy assault bombers are a soul destroying sight as they rumble through the skies towards their targets. The jewel encrusted hulls of these mighty daemon engines are studded with swivelling lascannon. From their majestic wings two more flame-cannon jut forward like the pinions of some flying monster of legend, while beneath their span a deadly cargo of firestorm bombs cluster, ready to rain down a maelstrom of death on their helpless foes below.
A Fire Lord must make a minimum move each turn so it can never be given first fire orders. When a Fire Lord moves it must move at least 20cm during the movement phase and its entire move must be made in a straight line. The Fire Lord can turn by any amount at the beginning of its move but not at the end. A Fire Lord ignores the terrain it passes over as it moves, so difficult and impassable terrain aren't a barrier to it.
At the end of its movement you can leave a Fire Lord on its flying stand to represent it staying at low level in order to take advantage of cover such as buildings, woods and hills. Alternatively you can place it on top of a cup or similar object to show that it is climbing high up in the air. When a Fire Lord is at high level, any unit shooting at it must add 25cm to the actual range between the two models. This represents the fact that the Fire Lord's height and the effects of gravity make it even harder to hit. Any shooting by the Fire Lord is unmodified because it has height working for it rather than against it. As long as a Fire Lord is at high level, everything on the table can see a Fire Lord and the Fire Lord can see anything on the ground. If you choose to keep a Fire Lord at low level, it can see whatever you can see from the model's eye view just like anything else in Space Marine.
Like the cannon on the Doom Wing, the twin flame-cannon on the Fire Lord are fixed so that they only fire forward. The firebolt is represented by the flame template. To fire the flame-cannon, place the template so that the pointed end is touching one of the Fire Lord's flame-cannon and the rest of the template projects straight ahead of it. Anything under the template is within the area struck by the bolt and will be hit on a roll of 4, 5 or 6 on a D6. Repeat this process with the other cannon before resolving hits. Models hit suffer a -1 saving throw modifier. Buildings can also be destroyed by the flame-cannon. Any buildings which are hit and fail their saving throw collapse into flaming rubble. The flame-cannon can only hit things at the same level so if it is at high level it can only hit other things at high level, and if it is at low level it can only hit things at low level. The lascannon on the Fire Lord are mounted so that they can fire all round and can fire down at ground targets even from high level.
A Fire Lord can drop clusters of firestorm bombs as it moves. It can drop three barrage templates of bombs directly beneath itself as it moves. These must be in a straight line with each template touching at least one other. If the Fire Lord ends its move at high level, scatter the bomb templates D6 cm in a random direction. The templates are then left in place until the close combat phase and their effects are calculated then. This is so units on first fire orders have a chance to fire at the Fire Lord as it passes over them. If the Fire Lord is destroyed, take off all three bomb templates - the Fire Lord was shot down as it tried to make its attack run. If the Fire Lord survives, calculate the damage from the bombs. Each model touched by a bomb template suffers a hit on a roll of 3 or more on a D6. Models hit suffer a -3 saving throw modifier.
A Fire Lord can never be pinned in close combat by another unit because it's too big and fast. The Fire Lord can attack enemies such as the Overlord armoured airship at high level in close combat.
| Troop Type | Move | Saving Throw | CAF | Weapons | Range | Attack Dice | Roll to Hit | Target's Save Mod. | Notes |
|---|---|---|---|---|---|---|---|---|---|
| Fire Lord | 20-60cm | 2+ All round | +3 | Lascannon | 50cm | 4 | 5+ | -1 | See special rules |
| Flame-cannon | Template | 4+ | -1 | ||||||
Epic Personalities
Ragnar Blackmane, Njal Storm Caller and Ulrik the Slayer in Space Marine
By Jervis Johnson
Ragnar Blackmane, Njal Storm Caller and Ulrik the Slayer may be included in any Epic scale army that also includes one or more Great Companies of Space Wolves. The Special Cards and Epic scale banners for these characters are included in this article, along with a special wind blast template which only Njal Storm Caller may use. As Ragnar and Njal belong to the same Great Company, they must be bought together (both must be taken if you want to use them) but still only count as one Special Card. Ulrik can fight with any Great Company and so is represented by his own card.
The stands for Ragnar, Njal and Ulrik may be made up from normal Space Marine miniatures, with an officer to represent the main character himself - the remainder are his bodyguard. The appropriate banner should be attached to the character's Rhino to identify the stand on the tabletop.
Njal Storm Caller
Njal serves Lord Ragnar Blackmane, tempering the young Wolf Lord's impetuosity with wisdom and knowledge gleaned from the runes and the sagas. Through the purity of his spirit he learned how to protect himself and his battle brothers against psychic attack and how to resist the constant, whispered temptations of Chaos.
Njal is counted as a command unit and so never has to be given orders and never has to check morale. Note that although Njal and Ragnar are counted together as one special card he remains a separate unit and does not have to stay within 6cm of Ragnar during the battle.
Njal is allowed to make one special psychic attack in the combat phase in the same way as a normal Space Marine Librarian. The rules for Space Marine Librarians can be found on page 15 of Armies of the Imperium, and are summarised on Njal's special card. In addition to the three psychic attacks allowed to all Librarians, Njal has two additional abilities that only he may use.
Psyber Raven. 'Night Wing' is Njal's eyes and ears. Soaring high above the battlefield nothing can avoid Night Wing's piercing gaze and so Njal is well aware of everything that is happening around him. Because of this, Njal does not need a line of sight to a target in order to make a psychic attack, although the target must be within range of the psychic attack as normal. Night Wing's powers only apply to psychic attacks, so Njal must have a line of sight to use his bolt pistol.
Wind Blast. Njal can project a whirlwind of psychic energy that can pin enemy units to the ground and make it impossible for them to move or shoot. The area affected by the wind blast is represented by the special wind blast template printed below. The template may be placed anywhere within 25cm of Njal instead of making one of the other psychic attacks listed in Armies of the Imperium. Any stand or vehicle under the template that does not have a saving throw is pinned by the wind blast and is not allowed to move or shoot. It also has its close assault factor reduced by -2. Units that do have a saving throw are too powerful to be effected by the wind blast, and so may move and attack normally. The wind blast template remains in place until the start of the combat phase of the following turn and is then removed. Any stand or vehicle that would be affected by the wind blast may not move into or through the template while it is in play. Stands or vehicles trapped by the wind blast are given orders normally and are allowed to fire in the combat phase when the template is removed.
Njal is very tough and is protected by power armour and a conversion field. To represent this, Njal has an armour saving throw of 5 or 6 on a D6. Furthermore, because of the special nature of his conversion field, as well as the benefit of small size and agility, the save never drops below 5 or 6, so even a hit from a volcano cannon, tempest laser or other powerful weapon can be saved on 5 or more.
| Troop Type | Move | Saving Throw | CAF | Weapons | Range | Attack Dice | Roll to Hit | Target's Save Mod. | Notes |
|---|---|---|---|---|---|---|---|---|---|
| Njal Storm Caller | 10cm | Fixed 5+ | +7 | Bolt Pistol | 15cm | 1 | 4+ | 0 | See special rules |
The wind blast template is printed as a graphic in the original article. Its shape is not reproduced in this transcription; place it as described above.
Ragnar Blackmane
Ragnar is the youngest Wolf Lord in the long history of the Space Wolves. A brilliant if unorthodox commander, he leads from the front and has already had a highly successful and heroic career. The Great Wolf often chooses Ragnar's company to spearhead planetary assaults and spaceship boarding actions. Ragnar and his accompanying Rhino are counted as a separate command unit and so never have to be given orders or check morale. To represent Ragnar's superior leadership abilities, as long as he is still alive, you are allowed to add +1 to your score when you make the dice roll to see who has the initiative at the start of the turn.
Even for a Space Marine, Ragnar is incredibly agile and able to dodge out of the way of most attacks. To represent this, Ragnar has an armour saving throw of 4, 5 or 6 on a D6. Furthermore, because of the benefit of small size and agility, the save never drops below 4, 5 or 6, so even a hit from a volcano cannon, tempest laser or other powerful weapon can be saved on 4 or more.
Ragnar is famed for his ferocious battle cry, which inspires his men and strikes terror into the heart of his foes. Once per game, at the start of any movement phase, Ragnar can utter his blood-chilling howl. When he does so, any Space Wolf infantry units (not bikes or other vehicles) that have at least one stand within 35cm of Ragnar immediately have their orders changed to charge orders. Such is the speed and ferocity of this charge that the Space Wolves movement rate is tripled instead of being only doubled. Only Long Fangs have sufficient restraint to remain unaffected. They do not have to go on to charge orders unless you wish them to do so.
| Troop Type | Move | Saving Throw | CAF | Weapons | Range | Attack Dice | Roll to Hit | Target's Save Mod. | Notes |
|---|---|---|---|---|---|---|---|---|---|
| Ragnar Blackmane | 10cm | Fixed 4+ | +8 | Bolt Pistol | 15cm | 2 | 4+ | -1 | See special rules |
Ulrik the Slayer
Ulrik is the oldest surviving Space Wolf who doesn't dwell within a dreadnought. He has served the Chapter loyally over the centuries and is now a Wolf Priest, charged with the responsibility of recruiting new Space Wolves and turning them into true Space Marines. Now, over six hundred years old, this gnarled, dauntless, plain-speaking old man is the Chapter's longest serving Wolf-Priest.
Ulrik and his accompanying Rhino are counted as a separate command unit and so never have to be given orders or check morale. Ulrik is extraordinarily brave, even by Space Wolf standards, inspiring tremendous loyalty and fighting fury in the troops around him. Any Space Wolf stands within 15cm of Ulrik may add +1 to their close assault factor to represent this. In addition Ulrik is a highly skilled medic, and so any Space Wolf troop stand that is within 15cm of him may take a special saving throw if they are slain. Roll a D6: if the score is 5 or 6, Ulrik has managed to save some or all of the casualties and the troop stand fights on as normal. On a roll of less than 5, the stand is removed.
In battle Ulrik wears the fabled Wolf Helm. This ornate helmet is one of the Space Wolves' most ancient and revered artifacts and was said to have been worn by Leman Russ himself. As long as Ulrik is alive, any Space Wolves can re-roll failed morale checks. What is more, any Space Wolves who have a line of sight to Ulrik will automatically pass any morale checks that they are called to take.
Ulrik is very tough and is protected by power armour and a conversion field. To represent this, Ulrik has an armour saving throw of 5 or 6 on a D6. Furthermore, because of the special nature of his conversion field, as well as the benefit of small size and agility, the save never drops below 5 or 6, so even a hit from a volcano cannon, tempest laser or other powerful weapon can be saved on 5 or more.
| Troop Type | Move | Saving Throw | CAF | Weapons | Range | Attack Dice | Roll to Hit | Target's Save Mod. | Notes |
|---|---|---|---|---|---|---|---|---|---|
| Ulrik The Slayer | 10cm | Fixed 5+ | +7 | Combi-weapon | 15cm | 1 | 4+ | -2 | See special rules |
Commissar Yarrick and Warlord Ghazghkull Mag Uruk Thraka
By Jervis Johnson
The character biographies in this article are narrative background and are not reproduced. The rules sections and special cards follow.
Warlord Ghazghkull Mag Uruk Thraka, Mighty Ork Warlord and Leader of the Waaagh!
"He was an avalanche from an unexpected quarter. He was a thunderbolt from a clear sky." Commissar Yarrick, on Ghazghkull Thraka
Rules
Ghazghkull may be included in any epic scale Ork army by using the new special card printed below (a card version of which is provided at the back of the book). He should be represented in the same way as a Warboss or Warlord stand (see page 40 of the Space Marine rules). The banners opposite are for Warhammer 40,000 miniatures, but a reduced size photocopy will provide you with an excellent epic scale banner for your Ghazghkull stand.
Ghazghkull and his retinue are counted as a command unit and so never have to be given orders and never have to check morale, even if broken. Ghazghkull and his retinue can give orders to other Ork units that are within 10cm in the same way as any other Ork command unit. In addition, any Ork units within 25cm of Ghazghkull's stand may add +1 to any morale rolls they have to make.
Once per game Ghazghkull may invoke the power of the Waaagh! As soon as this is declared any broken Ork units immediately rally, and for the remainder of the turn Ghazghkull is immune to any damage and all Orks roll an extra dice in close combat. However, the Orks are far too excited to aim very carefully and so suffer a -1 to hit modifier with any ranged weapons. The effect lasts for one turn, and then fades away and all of the Orks return to normal.
Ghazghkull is very tough and is protected by an excellent suit of extra-special power armour. To represent this, Ghazghkull has an armour saving throw of 4, 5 or 6 on a D6. Furthermore, because of the special nature of his armour, as well as the benefit of small size and agility, the save never drops below 4, 5 or 6, so even a hit from a volcano cannon, tempest laser or other powerful weapon can be saved on 4 or more.
| Troop Type | Move | Saving Throw | CAF | Weapons | Range | Attack Dice | Roll to Hit | Target's Save Mod. | Notes |
|---|---|---|---|---|---|---|---|---|---|
| Ghazghkull Thraka | 10cm | 4+ | +8 | Kustom Kombi Weapon | 25cm | 2 | 4+ | -2 | May use the power of Waaagh! (see above) |
Commissar Yarrick, Defender of Hades Hive and Hero of the Imperium
"There will be no retreat from Hades Hive. We will fight to the end."
Rules
Yarrick may be included in any epic scale Imperial Guard army by using the new special card printed below. He should be represented in the same way as a Commissar stand (see page 57 of the Armies of the Imperium rules). An example of the banner used for the Warhammer 40,000 Yarrick miniature is included, and a reduced size photocopy will provide you with an excellent epic scale banner for your Yarrick stand.
Yarrick plus his attendant Rhino are counted as a command unit and so never have to be given orders and never have to check morale, even if broken. Yarrick can give move [sic, as printed] to within 6cm of any Imperial Guard unit and give them orders in the same way as any other Commissar. In addition, any Imperial Guard units that can see Yarrick's stand automatically pass any morale rolls that they are called to take, including broken units that are on fall back orders and that are attempting to rally.
Any Ork units that are attacked by Yarrick in close combat must take a morale test. If the Orks fail the test then they go onto fall back orders and suffer a -2 penalty to their close assault factor. See the main Space Marine rulebook for details of the fall back rule.
Yarrick is extremely tough, ignoring wounds that would have killed a lesser man. To represent this, Yarrick has an armour saving throw of 3, 4, 5 or 6 on a D6. Furthermore, because of the special nature of this saving roll, as well as the benefit of small size and agility, the save never drops below 3, 4, 5 or 6, so even a hit from a volcano cannon, tempest laser or other such powerful weapon can be saved on 3 or more.
| Troop Type | Move | Saving Throw | CAF | Weapons | Range | Attack Dice | Roll to Hit | Target's Save Mod. | Notes |
|---|---|---|---|---|---|---|---|---|---|
| Commissar Yarrick | 10cm | 3+ | +8 | Storm Bolter | 25cm | 2 | 4+ | 0 | See above |
The Commissar Yarrick personal back banner is a graphic and is not reproduced here.
Imperial Titan Weapons
Barrage Missile Launcher
The barrage missile launcher is a one-shot support weapon. It fires a salvo of plasma warheads which vapourises the target area in a roiling sea of incandescent plasma. It is very useful for depleting void shields but also has a devastating effect against unshielded targets.
The barrage missile launcher may only be used once per game. Place the burst template anywhere in the Titan's line of sight and fire arc and roll for scatter as for a normal barrage attack. Once the template is in place roll a D6 to determine the number of extra templates. These may be placed so that they are touching the original template or each other, forming a compact mass or line where the missiles strike home. Targets covered by the barrage are struck for 8 barrage points with a -2 armour save modifier.
Battle Claw
The battle claw is a crude but potent weapon similar in function to a power fist. If the Titan hits an enemy Titan in close combat it can choose to make a grab attack with its battle claw instead of rolling for damage as normal.
To represent a grab attack the attacker nominates which Titan location he is going to grab and both sides roll a D6. The attacking Titan then adds +1 to his total, and if his score is highest he has managed to grab the nominated location and rip it apart. The enemy Titan takes maximum damage (best result on the table). If the defender's total is highest he has slipped out of his attacker's grasp and no damage is caused. If the scores are equal the defender has slipped away but still sustains normal damage to the nominated location (D6 on the damage chart). If a Titan hits a building with a battle claw the building is destroyed unless it can roll its saving throw with a -4 modifier.
Carapace Landing Pad
The carapace landing pad is used in conjunction with a recon Land Speeder. This Land Speeder maintains a direct comm-link with its parent Titan and scouts for targets, directing the Titan's barrages from a safe distance.
A Titan carrying a carapace landing pad receives a free Land Speeder stand which counts as a command unit for the purposes of orders, movement, etc. When using barrage weapons the Titan may make the attack using the recon Land Speeder's line of sight, enabling the Titan to fire at targets which it can't see but which are visible to the Land Speeder. Barrages fired indirectly in this way will not scatter, and always land on target, just as if they had been fired directly.
Carapace Multi-lasers
Warlords fighting in built-up areas are sometimes fitted with multi-lasers on their rear banner mounting points to protect the Titan against infantry assault. A Titan can mount up to two multi-lasers (one on each banner mounting point). Carapace multi-lasers always fire in the First Fire phase and have a range of 15cm with 2 attack dice each. A 5+ is required to hit. Carapace multi-lasers are destroyed if the area of the carapace they are mounted on is damaged in any way.
Chaos Energy Whip
This close combat weapon is used by Chaos Titans. The triple whip lashes against the target causing light damage to Titans and scything through opposing infantry and vehicles. The whip also acts as a conductor for a massive electrical jolt intended to overload void shields and burn out circuitry in the opposing Titan.
The whip is used at the very start of the close combat segment, before any close combat is resolved. Roll a D6 for each enemy model in combat and on the score of a 4, 5 or 6 the model is hit by the whip - saving throws are at -1 where taken. An enemy Titan automatically loses 1D6 void shields if hit. If the Titan has fewer shields than the number indicated any excess is added to the close assault factor of the Titan using the whip.
Chaos Titan Tails
Chaos Titans have mutated into a hellish mixture of flesh and metal. Some of these monstrous creations carry weapons mounted on long, sinuous tails, and use them to crush and gouge their enemies. A Titan fitted with a tail may add +2 to its close assault factor.
Corvus Assault Pod
The Corvus assault pod was developed as an alternative arm mount for Titans, and allows the Titan to carry a detachment of Space Marine Terminators right up to a building and disgorge them directly into the defenders via a drop-down ramp.
The Corvus carries four stands of Terminators which are included in the Corvus for free. To manoeuvre the Corvus into position the Titan carrying it must end the movement phase touching the target building. The Terminators in the Corvus may then engage troops inside the building during the close combat segment of the combat phase. Terminators attacking a building in this manner add an extra D6 to their close assault factor that turn.
Damage to the Titan does not affect the Corvus or its occupants unless the arm mount itself is hit. If this happens treat the Corvus as a transport vehicle (saving throw 2+). If the Corvus is destroyed so are its occupants. If the Titan is destroyed the Corvus and all its occupants are destroyed too.
Deathstrike Cannon
A common Warlord variant is the replacement of the Titan's head with a 'Deathstrike' centreline cannon mount. The deathstrike cannon has a range of 200cm and fires a deadly barrage. Place the barrage counter as normal. It fires 10 barrage points with a -2 save modifier.
Carrying a deathstrike cannon reduces the Titan's move by half. On the hit location diagram the Titan's head will become a weapon mount, with a 2+ saving throw. The deathstrike has a very limited field of fire, and may only attack targets that are straight ahead of it (ie the weapon must be pointing straight at the target it is attacking).
Fire Control Centres
Fire control centres come in a variety of shapes and sizes. They are frequently combined with a centreline weapon mount but are also used in isolation. Fire control centres usually take the form of platforms or towers, packed with range-finding and targetting equipment.
A fire control centre occupies one carapace weapon mount and adds +1 to all hit dice the Titan rolls, including to hit rolls for barrages. Any hits on the weapon location where the control centre is mounted affect it, and it has a saving throw of 3+. Damage is rolled on the Head Location Damage Table.
Harpoon Missile
Like the vortex missile, the harpoon missile is a one shot weapon. If the missile hits a Titan its barbed head becomes lodged in the Titan's body. Electrical surges produced by the missile short out the Titan's electrical systems and control circuits, removing control from its crew and passing it to the Titan which launched the missile.
A harpoon missile will hit automatically. A vehicle or infantry model hit by the weapon must make its saving throw with a -2 modifier or be destroyed. A Titan with operational shields will lose only a single void shield to a harpoon attack, but a Titan with no shields is in deep trouble. Select a location and roll the hit location dice as normal. Make a saving throw with a -2 modifier for the location that has been hit. If the save is failed the harpoon has lodged itself in the target; if the save succeeds the harpoon has no effect.
A Titan that has been harpooned must roll 1D6 in each subsequent orders phase. On a 1 the missile falls out or ceases to function, on a 2-6 the Titan comes under the control of the player whose Titan fired the harpoon. Control is complete, so the controlling player can even make the Titan attack its own side.
Inferno Gun
The inferno gun fires a jet of super-heated fuel to devastating effect.
To use the inferno gun you will need to make a triangular flame template 25cm long and 6cm wide at the far end. The template is positioned with the pointed end touching the firing Titan and the other covering the target. Any unit (friend or foe) that is under the template is hit on a roll of 4+ and must make a saving throw to avoid destruction. Modifiers for cover are ignored when you roll to hit because the flame laps round any cover.
New Titan Heads
The head of a Titan is its control bridge, and in the event of catastrophic damage it can be ejected to carry the Titan's bridge crew to safety. A wide range of variant heads is used by different Titan Legions, some mounting heavier weapons or fitted with various devices, although the vast majority are purely decorative and require no special rules. The exceptions are listed below.
Close Combat. Many of the most common Titan head variants feature some form of fearsome close combat weapon such as steel-fanged jaws or a lashing tongue. A Titan carrying this type of head adds +3 to its close assault factor against close combat opponents. Unfortunately it also reduces the saving throw on the Titan's head by one point.
Weapon Head. Other Titan head variants emphasise extra firepower at the expense of protective armour. A Titan fitted with a weapon head reduces its saving throw by one point but gains an extra attack. This has a 25cm range, 5+ to hit, and -1 save.
Plasma Blastgun
The plasma blastgun was specifically designed for the Reaver and Warhound Titans, which are unable to use the larger plasma weapons carried by the Warlord because their reactors are simply not big enough to power up these weapons.
The plasma blastgun works by siphoning off small amounts of plasma and storing them in special cooling chambers. The weapon can store 2 attack dice worth of plasma, and starts the game fully charged up. When the weapon is fired the plasma is used up, and the weapon can only replenish one dice worth of energy at the end of each turn. The only exception is Titans that have first fire orders, which are allowed to replenish two dice worth of energy.
Power Ram
The power ram delivers a high velocity strike capable of punching through the thickest armour and inflicting major internal damage. More importantly, a single well placed blow with this powerful weapon can send an opposing Titan crashing to the ground.
In close combat against other Titans, a Titan using a power ram can knock its opponent over if it wins the close combat by six or more points. The Titan using the power ram can choose to knock the opposing Titan over so it falls over backwards. Any vehicles or infantry a Titan falls on are automatically destroyed, and buildings must make a saving throw with a -5 modifier. The Titan itself will be irreparably damaged by the fall and counts as destroyed. If the power ram is used against a building it hits automatically and the building must make a saving throw with a -5 modifier.
Power Saw
The power saw is a motorised saw blade capable of ripping apart the toughest close combat opponent. Titans which carry this weapon roll an extra D6 to resolve combat, add +2 to damage rolls against enemy Titans, and any building hit is destroyed unless it makes its saving throw.
Trident
The trident is a specialised weapon system employing a rocket-propelled grappling claw to seize its target, which is then dragged towards the Titan by an attached chain and power winch. Because the grappling claw is so massive and relatively low velocity void and power shields do not stop it.
The trident has a range of 25cm and hits on a 3+. If the trident is being used to attack another Titan, it goes straight through the target's shields. Choose a location for the hit and then roll the hit location dice as usual. The trident has no effect on infantry at all, though it can be used to attack vehicles.
As the trident closes on its target and the Titan which fired it takes up the slack both players roll 2D6, adding their close assault factor to the score. The player using the trident is allowed an extra D6 if he is on first fire orders to show that he is properly braced. If the Titan using the trident beats his opponent's dice roll it rips off the part it was gripping automatically. Vehicles are destroyed, while Titans take the maximum damage possible in the location hit.
If the scores are drawn the trident loses its grip and does no damage. If the Titan using the trident loses the tug of war his opponent breaks the chain attaching the power winch to the trident, rendering the weapon useless for the rest of the battle. Unless the trident's chain is broken it is quickly wound back into position by winch and is ready to be fired next turn.
Turbo-laser Destructor
The turbo-laser destructor is a highly effective anti-tank weapon. It has a range of 75cm and 2 attacks because it is rapid firing. It hits on a 3+ with -2 on the target's save.
Vulcan Mega-bolter
The vulcan is a short ranged but extremely deadly form of heavy machine gun that fires a hail of bolter shells at anyone foolish enough to stray too close. It is extremely effective at breaking up massed infantry assaults, and has been known to gun down entire formations of infantry in a single burst. It has a range of 25cm but a massive 8 attacks, hitting on a 4+.
Warp Missile
The warp missile is a one-shot missile sometimes carried by Titans for dealing with heavily armoured targets. It contains a miniature warp drive which 'skips' the missile in and out of warp space when it is launched, materialising inside the target's shields and armour before a melta warhead detonates to complete the act of destruction.
Like the vortex missile, the warp missile is a one shot weapon and can only be used once per game. A warp missile will hit a Titan or building automatically but smaller targets such as troop stands or vehicles will only be hit on a roll of 3+ on a D6. A vehicle, building or infantry model hit by a warp missile is automatically destroyed with no saving throw allowed.
If a Titan is struck by a warp missile, ignore its shields and go straight to selecting a location for the hit. To represent the likelihood of the missile disappearing into warp space or being deflected off-course roll the hit location dice twice. If a location is hit it receives no armour save, go straight to the damage table and roll for damage twice. This represents the cataclysmic damage caused as the missile materialises inside its target and detonates.
Wrecker
The wrecker is a large weighted ball swung at the end of a reinforced chain. Its primary purpose is to deliver crushing blows against buildings and fortifications, though its tremendous power and long reach also make it an effective, if inaccurate, close combat weapon.
Buildings struck with a wrecker suffer a -6 saving throw modifier. When fighting other Titans in close combat a Titan armed with a wrecker may make one free attack before close combat begins. The attacker chooses a hit location and rolls for deviation as normal. Once any shift in location has been established the hit location dice are rolled for the new location and the location adjusted a second time. The second roll is to represent the inaccuracy of the wrecker's wild swing. If a location on the enemy Titan is struck it is hit with a -6 saving throw modifier.
Against vehicles or infantry a Titan armed with a wrecker may automatically destroy one vehicle or infantry model in base to base contact before close combat commences. This represents it crushing some of its attackers with a hefty overarm swing.
Imperial Titan Weapon Data
| Weapon | Range | Attack Dice | To Hit Roll | Target's Save Mod. | Notes |
|---|---|---|---|---|---|
| Barrage Missile Launcher | Unlimited | 8 BP's | - | -2 | Place D6 extra barrage templates when fired. One shot weapon. |
| Battle Claw | Close combat weapon. Roll off against opponent - causes maximum damage | ||||
| Carapace Landing Pad | Used as platform for Recon Land Speeder | ||||
| Carapace Multi-lasers | 15cm | 2 | 5+ | 0 |
Imperial Titan Data Cards
To make your data cards, cut out or photocopy the cards on this page. Fold each card along the dotted line and glue the two halves together on the inside. You can then use these cards in your games of Space Marine.
Special Card: Reaver Titan
Points value 500.
The Reaver Titan is an extremely fast and manoeuvrable fighting machine. It fights like a single unit which cannot be broken and so does not need to take a morale check. Victory points are awarded to the opposing player once the Titan is destroyed.
Victory points 5. Victory points are awarded when the Titan is destroyed.
Special Card: 2 Warhound Scout Titans
Points value 500 for 2 Warhounds.
Warhound Scout Titans are the eyes and the ears of the Titan legions. Fast and agile, they perform dangerous reconnaissance missions and raids behind enemy lines. Each Titan fights as a single unit which cannot be broken and so does not need to take morale checks. Victory points are awarded to the opposing player as soon as one of the Titans is destroyed.
Victory points 5. Victory points are awarded once one Warhound has been destroyed.
Warhound Titan (Data Card)
| Move | Close Assault Factor |
|---|---|
| 25cm | +8 |
The Warhound Titan has two void shields and capacity to mount two weapons.
Note down the details of the weapons mounted on your Titan in the spaces given below.
A Warhound cannot mount either a Plasma Cannon or a Plasma Destructor as it is unable to provide enough power for these weapons.
Warhound Titans are very agile and unlike the Warlord or Reaver Titan they can make as many turns as they like when they move.
When a Warhound Titan is on charge orders opponents have a -1 to hit save modifier because the Warhound can dodge incoming shots.
Record shield loss using markers on the Warhound Titan's base.
| Weapon | Range | Attack Dice | To Hit Roll | Target's Save Modifier | Notes |
|---|---|---|---|---|---|
Permitted weapons: Inferno Gun, Plasma Blastgun, Rocket Launcher, Turbo Laser Destructor and Vulcan Mega-Bolter.
Hit location templates
Front: Weapon 2+ | Head 2+ | Weapon 2+; Legs 3+; Leg 2+ | Leg 2+.
Side: Weapon 2+ | Weapon 2+ | Weapon 2+; Leg 3+; Leg 2+.
Rear: Weapon 2+ | Plasma Reactor 4+ | Weapon 2+; Legs 3+; Leg 2+ | Leg 2+.
Reaver Titan (Data Card)
| Move | Close Assault Factor |
|---|---|
| 20cm | +12 |
The Reaver Titan has four void shields and capacity to mount three weapons.
Note down the details of the weapons mounted on your Titan in the spaces given below.
A Reaver Titan cannot mount either a Plasma Cannon or a Plasma Destructor as it is unable to provide enough power for these weapons.
Record shield loss using markers on the Reaver Titan's base.
| Weapon | Range | Attack Dice | To Hit Roll | Target's Save Modifier | Notes |
|---|---|---|---|---|---|
Permitted weapons: Barrage Missile Launcher, Battle Claw, Chain Fist, Combat Head, Gatling Blaster, Harpoon Missile, Inferno Gun, Laser Blaster, Laser Burner, Melta Cannon, Plasma Blastgun, Power Fist, Power Ram, Power Saw, Quake Cannon, Rocket Launcher, Trident, Turbo Laser Destructor, Volcano Cannon, Vortex Missile, Vulcan Mega-Bolter, Warp Missile, Weapon Head and Wrecker.
Hit location templates
Front: Weapon 2+ (top); Weapon 2+ | Head 1+ | Weapon 2+; Weapon 2+ | Legs 2+ | Weapon 2+; Leg 2+ (two on each side).
Side: Weapon 2+ | Weapon 2+ | Weapon 2+; Plasma Reactor 3+ | Weapon 2+ | Head 1+; Weapon 2+ | Weapon 2+; Leg 3+; Leg 2+.
Rear: Weapon 2+ (top); Weapon 2+ | Plasma Reactor 4+ | Weapon 2+; Weapon 2+ | Legs 2+ | Weapon 2+; Leg 2+ (two on each side).
Reaver and Warhound Titan Damage Table
Hit Location
Hit location/shooting. Roll to hit the Titan as normal. If you hit, refer to the location templates. Nominate the target area. Roll the pair of aim dice and move the location hit as indicated up, down, left or right. If the shot lands in a location area take any appropriate save. If the save fails refer to the appropriate damage table. If your shot lands on an empty square or outside the grid it has missed.
Close combat. If beaten in close combat the enemy chooses a location and damage is worked out from the appropriate damage table. Shields have no effect in close combat and saving throws are ignored.
Weapon Damage Table (Roll D6)
- 1-2: The weapon has been damaged by the attack, and may not be used again until it is repaired.
- 3-4: The weapon has been destroyed and may not be used again in this battle.
- 5: The weapon is blown clean off the Titan and scatters 2D6cm in a random direction. Any vehicles or stands underneath the point where it lands are destroyed.
- 6: The weapon is blown off the Titan as above, but there is also a flashback to Titan's hull. Roll a D6 to see what was affected by the flashback: 1-3 Reactor; 4-6 Head. Then roll the D6 again and refer to the appropriate Damage Table to find out what damage is caused.
Reactor Damage Table (Roll D6)
- 1-2: The Titan's plasma reactor has been breached and shuts down. The Titan grinds to a halt and may not move or fire until the damage is repaired. No other damage may be repaired until the plasma reactor comes back on line.
- 3-4: The Titan's plasma reactor has been breached and the crew desperately struggle to keep the damage under control. Attempt to repair the damage in the next repair phase. If you fail there is a reactor meltdown and the Titan is destroyed (see the next result for the effects of a meltdown). If you succeed the reactor comes back on line and the Titan may move and fire as normal.
- 5-6: The Titan's plasma reactor has been destroyed, and the Titan is vaporised in a spectacular meltdown. The Titan is removed from play (replace it with a model crater if you've got one). All units within 3D6 cms suffer an automatic hit, and must make an unmodified save to avoid damage.
Head Damage Table (Roll D6)
- 1-2: The Titan's mind impulse units have been damaged. Until the damage is repaired the Titan's CAF is halved, and it may only move or fire if you first roll a 4+ on 1D6 (roll the D6 just before you move or fire).
- 3: The shot punches through to the bridge, killing vital crew members. The Titan's CAF is halved for the rest of the game.
- 4: The shot rips through the head and causes an explosion in the crew compartment, injuring several of the crew. The Titan's CAF is halved for the rest of the game, and it may only move or fire if you first roll a 4+ on 1D6 (roll the D6 just before you move or fire).
- 5-6: The shot rips through the head and crew compartment, and triggers massive internal explosions within the Titan. The Titan crashes to the ground as a result of this spectacular KO! Decide randomly which way the Titan falls, and place it on its side lying in that direction. Any vehicles or stands units that are fallen on are destroyed.
Leg Damage Table (Roll D6)
- 1-2: The leg is damaged, forcing the Titan to walk with a pronounced limp. The Titan's move rates are halved and it may not enter difficult terrain.
- 3-4: The Titan's leg has suffered extensive damage, and it is very likely that it will give way if the Titan attempts to move. Roll a D6 in each ensuing repair phase, subtracting 2 from the roll if the Titan has charge orders, or 1 from the roll if it has advance orders. On a roll of 0 or less the leg snaps. If the leg snaps the Titan will crash to the ground and is destroyed. Decide randomly which way the Titan falls, and place it on its side lying in that direction. Any vehicles or stands fallen on are destroyed.
- 5: The Titan is completely crippled by the damage to its legs. It may not move or turn for the rest of the game.
- 6: The leg is blown apart and the Titan collapses to the ground. Decide randomly which way the Titan falls, and place it on its side lying in that direction. Any vehicles or stands fallen on are destroyed.
Gargants
By Andy Chambers
At the heart of the Ork expansion throughout the universe is the Waa-Ork. The Waa-Ork is a spontaneous happening which starts suddenly in obscurity and then gradually gathers momentum. More and more Ork tribes become part of the gathering strength of the Waa-Ork as the whole of Orkdom becomes agitated, disturbed and dynamic. Waa-Ork is a time of resurgence of Orkdom into the universe, a time of great migrations, wars and conquest. Orks everywhere take to the warpath and the relentless power of Ork civilisation is unleashed.
At the very core of the Waa-Ork lies the construction gigantic Titans known as Gargants. Each Gargant is a towering war machine with awesome destructive power. It is also a titanic, mechanical, fighting, fire-belching idol in the image of the Ork gods of war. Each Gargant the Orks build is an act of worship of the primal Ork gods; they are idols of the gods that stand for all that is Orky. Gork and Mork, the Ork gods epitomise the Orkish character on a vast scale. They are big, carefree, boisterous beings that leave a trail of destruction in their wake. War, conquest, migration, endless feuds, the din of weapons and the war cries of countless Orks are but the crude games and raucous laughter of these strong, carefree gods.
Gargants are miracles of mechanical ingenuity, packed with whirring cogs and gears, wheezing pipes and pistons, dials, levers, stopcocks, gauges and no end of other mechanical devices that seem to work purely through the faith of their Mekboy inventors. Gargants carry awesome firepower, heavy cannon and giant flamethrowers are mounted in turrets on the Gargant's shoulders and often more guns are carried on the head as well. Mounted low down in the Gargant's belly is the Gutbuster mega-cannon, a gigantic weapon of massive destructive power. Gargants are protected by banks of thrumming Power Field generators and thick armour. Their heavily armoured hull is made out of all kinds of different metal and bits of armour plate scavenged from wrecked vehicles and welded or hammered into place.
A vast Krew of Orks, Gretchin and Snotlings ride into battle aboard each Gargant. The Orks fire the guns and stoke the boilers under the stern eye of the Gargant Kaptin and his Nobz. Teams of Snotlings and Gretchin 'riggers' armed with spanners and oily rags are sent frantically crawling into the cramped workings of the Gargant to fix bits and fight fires as the Gargant suffers battle damage. Though no two Gargants are identical, Ork Mekboyz commonly build one of two distinct sorts of Gargant; the short, fast Slasher Gargant and the larger, more heavily-armed Great Gargant.
In Space Marine an individual Slasher Gargant or Great Gargant can be bought as the special card for any Ork clan. The immensely proud Warboss of that particular clan will be the Gargant's Kaptin and some of his Nobz will take up the posts of Furst Mate (who shouts at the Krew), Gunboss (who shouts at the gunners) and Flagboss (who's in charge of the signal flags Gargants use in battle - as well as shouting of course!). The talented Mekboy who built the Gargant is rewarded with the post of Boss-Mek and gets to order around all the other Mekboyz onboard and shout at the riggers. These individuals all work together surprisingly smoothly to keep the Gargant stomping around and blasting away at the enemy.
Because a Warboss is in command of the Gargant it can always be given orders even if there aren't any Nobz within 10cm of it. Any Orks within 10cm of a Gargant can be given orders by the Warboss.
Gargant Big Mobs
In the build-up to the Waa-Ork all Ork tribes are driven by the urge to build the idol-like Gargants in praise of their savage gods. Most Warbosses manage to get one or two Gargants built by industrious Mekboyz. Some of the powerful Ork Warlords can command enough resources to build many Gargants. Sometimes Ork Warbosses will join their tribes together to form an even more potent Waa-Ork. So it comes about that an Ork horde may be lucky enough to be led to war by a Gargant Big Mob.
Gargants' Big Mobs usually comprise three Gargants, either Slasher Gargants or Great Gargants or a mix of the two types. One Gargant is a frighteningly destructive creation, three is enough to send all but the bravest troops fleeing for cover. The massed firepower of a Gargant Big Mob has spelled the doom of many a battleforce under a thundering barrage of smoke and flame.
The best (in other words the biggest) Gargant in the mob is commanded by the Warlord and is known as the Boss-Gargant. The other Gargants are both commanded by the Warlords most trusted Nobz. In battle, all the Gargants in a Big Mob have to stick close together so the Nobz can see the signal flags being waved about on top of the Boss Gargant, these tell them what their orders are and where they're supposed to be going. Because of this the Gargants in a Big Mob have to be within 20cm of the Boss Gargant and able to see it in the Orders phase to be given any orders.
If one of the Boss Gargant is too far away or can't see the Boss Gargant, the Nob in command has to guess what he's supposed to do, so roll a D6 for him. On a roll of 1 or 2 he picks first fire orders, on a 3 or 4 he picks advance orders and on a 5 or 6 he picks charge orders. Naturally, Nobz in command of Gargants consider themselves well above the rest of the Nobz, so having a Nobz stand within 10cm doesn't allow you to give them an order like most Orks - they'll take orders from the Boss Gargant and nobody else.
Note that the Boss Gargant is not a command unit, it must be given orders like any other unit and it can be singled out by the enemy and shot at - the banners, trophy poles and graffitti which festoon the Boss Gargant make it unmistakable! If the Boss Gargant is destroyed, all the Gargants in the Big Mob will have to roll for their orders on the next turn. At the end of the turn the next biggest Gargant will take over as Boss.
The Great Gargant Datacard
A datacard for the Great Gargant is supplied at the end of this article. You should photocopy one of these for each Great Gargant in your army and fill it out as a permanent record of that particular Gargant. Note down the weapons fitted to the Gargant in the spaces provided along with their attack dice, to hit rolls and so on. You can also use the data card to keep a note of how many Titans the Gargant has killed and how many battles it's fought in.
The Slasher Gargant datacard and its damage tables are printed elsewhere in the Ork material of the compendium, outside the pages of this article, and are not transcribed here. The Great Gargant datacard and damage tables follow in this rulebook.
Power Fields
Gargants are protected by banks of power field generators. These project layers of invisible force around the Gargant which absorb the energy of shots that hit them. The Gargant has lots of power fields - one beneath the other, like the layers of an onion. When each power field absorbs a hit it is knocked down but the hit does no further damage.
Unlike Void shields power fields can't be repaired as the generators burn out when the field collapses. Gargant power fields are often unstable and flicker on and off unpredictably with accompanying showers of sparks. It's not unknown for shots to penetrate a Gargant's shields through weak points, particularly if the Gargant is under heavy fire at the time. To represent this, roll a D6 for each shot that hits a Gargant which still has its shields up - on a 1-5 the shot hits the shields and one power field collapses as usual, on a 6 the shot penetrates the shields without knocking down any power fields, work out hit location, saving throws and damage as normal.
When Gargants go into battle they often have less than their full complement of shields. This might be because some of the generators have broken down and burnt out before the Gargant got to the battle or the Mekboyz haven't got round to fixing them after the last one. You'll need to roll dice to find out how many power fields each Gargant has before the start of the game.
Great Gargants have many banks of generators so they get a D6 plus 6, giving them between 7 and 12 power fields. Keep a note of how many power fields each Gargant has remaining on its datacard. The Mekboyz always repair the power fields on the Warlord's Boss Gargant first (if they know what's good for them) so the Boss Gargant always has the maximum number of shields at the start of a game.
Battle Damage
Great Gargants are big and very solidly built so they can take a lot of punishment before they're destroyed. It's unlikely that a Gargant will be destroyed by a single hit, rather accumulated damage from numerous hits will gradually blow pieces off a Gargant until it's totally crippled. However, unlike Eldar and Imperial Titans, Gargants lack sophisticated auto-repair systems so they can't fix damage until after the battle.
As more and more shots slam into a Gargant its solidly welded plates start to buckle and cracks start to twist open the innards of the great metal monster. To represent the accumulated wear and tear a Gargant suffers from a sustained pounding a number of damage results add bonuses to future rolls against a particular location, increasing the chances of catastrophic damage occurring if the area is struck again. For example, on the weapon damage table a roll of 3 or more will destroy the weapon but a 1 or 2 gives a result of 'Add +1 to any future damage rolls against this location'. This means that if you hit the same weapon again and it fails its saving throw you add one to your damage roll, so this time the weapon will be destroyed on a roll of 2 or more.
It's important to keep a note of what areas have been damaged on a Gargant - the easiest way to do it is by marking the areas hit on the Gargant's datacard in pencil or using counters. It's worth noting here that, unlike weapon locations, damage bonuses accumulated against a Gargant's hull affect the whole hull and not just the particular square hit.
Fires
Lacking a dangerous plasma reactor to meltdown or vulnerable legs to cripple, a Great Gargant can survive almost any amount of punishment without being destroyed. When a Great Gargant finally blows it's almost always because fires have caught a hold throughout its gigantic structure and blazed out of control.
Some damage results will cause fires to break out. Teams of Gretchin and Snotlings dash through the Gargant and try to douse down fires before they become too fierce. Unfortunately, damaged areas can catch fire all too easily as explosions ignite ammunition or fuel and the fire fighters can find themselves fighting a losing battle. Keep track of the number of fires burning on a Great Gargant on its datacard. In the End phase of each turn, every Gargant which has any fires burning on it has to make a roll on the fire table, adding +1 to the dice for every fire burning in excess of one. Some particularly dangerous hits can send flames shooting through the Gargant and cause an immediate roll on the fire table.
Great Gargant Fire Arcs
Because Gargant weapons are mounted rather differently to those on Imperial or Eldar Titans they have different fire arcs, these are shown on the diagram below. The belly mount has a 90° arc of fire forward, the left and right arms have a 180° field of fire to the left and right respectively. The Gargant's head has a 360° field of fire.
The printed fire arc diagram labels: 90° fire arc (belly gun) forward; 180° fire arc to each side for the arms; 360° fire arc for the head.
Gargant Weapons
Da Gaze of Gork
Gork is one of the two great gods of the Orks. Gargants are gigantic representations of Gork and Mork so it is quite common for them to have specially made heads to make them look more life-like. Gargants with Gork heads are often fitted with a pair of heavy Traktor Kannon in place of their eyes so the Orks can terrify their foes with the mighty gaze of Gork.
The Traktor Kannon can fire all round because they are fitted in the head. When they shoot they fire a strong pulse of Traktor energy which slams into the target, and immobilises or crushes it.
The following special rules govern the use of Traktor Beams. Roll to hit your chosen target as with any other weapon - the gaze of Gork has 2 attack dice and a basic hit roll of 4 or more is required. If the target is hit it takes a saving throw with a -2 modifier. If the save is passed the target is unaffected. If the target fails its save it may be immobilised (in which case it cannot move, shoot or do anything else in its next turn), or squashed in which case it is destroyed.
Roll a D6 to determine the result and add +1 if the target has no saving throw and therefore are more likely to be squashed).
| D6 | Result |
|---|---|
| 1-4 | IMMOBILISED - May do nothing next turn. |
| 5+ | SQUASHED - Destroyed. |
An Imperial Titan's void shields do not protect it from a Traktor Beam, an Eldar Titan's holo-fields work as normal. Titans always count their highest saving throw out of all of their areas against Traktor Beams. This makes them very hard to hit effectively. If a Titan is immobilised its shields still operate but nothing else works, so they cannot repair damaged shields or locations. Other immobilised models can do nothing - they can't give orders or repair vehicles or heal wounded or use psychic powers for example. Immobilised models are exempt from formation rules until they can move again.
A Gork head also emphasises the idol-like nature of an Ork Gargant. Any Orks within 25cm of a Gargant with a Gork head are whipped into a religious frenzy and automatically pass their morale tests - no test is required for the unit. Unfortunately if the Gargant has its head blown off its very demoralising for any Orks nearby to see their Idol's head flying through the air, so all Ork units within 25cm have to take an immediate morale check.
Gutbuster Mega-cannon
The Gutbuster or belly gun is a huge cannon which protrudes from the Gargant's belly. The weapon can fire an array of ammunition. At the start of the game, the Gutbuster is loaded with one shot of the player's choice. After firing it takes a full turn to reload, and so the Gutbuster may not be fired in the next combat phase. Often gutbusters are also fitted with extra battle cannon which keep the chief gunner amused while the Boyz are sweating to reload the belly gun. The battle cannon have a range of 75cm, 3 attack dice, and hit on a 5+ with a -2 saving throw modifier. A Gargant can fire the battle cannon or the belly gun, it can't fire both in one turn. Gutbuster rounds comprise three types.
Ball rounds are like immense cannonballs. A special 3cm template is supplied for the ball round. Place the template over your target and then roll for scatter as normal. Anything under the template is hit and makes a saving throw with a -4 modifier. The ball will then roll another 4D6cm in a straight line along the line of fire. A template which represents the rolling ball is also supplied. Place the template so that its cupped end is around the ball and align it so that it's pointing directly away from the Gargant, then roll the dice to see how far along the template the ball rolls. Anything that is rolled over is hit automatically and must make a save with a -4 modifier, including any buildings. The ball will plough through any operating shields on a Titan that it hits, knocking them all down one after the other. Should it hit the leg of a Titan model the save is taken with a -4 save modifier.
Chainshot consists of two or more medium sized projectiles linked together by heavy chains. When it is fired the chainshot spreads out and spins like bolas. It is only used for entangling the legs of Imperial and Eldar Titans, and causes no damage to any other type of target! It will only work against Imperial Titans if they have no operating void shields at the time that it hits. When chainshot scores a hit against an eligible target it automatically causes damage to the target's legs. No hit location or saving rolls are needed, simply roll on the Leg Damage Table, adding +3 to the dice roll. For obvious reasons their must be a clear line of fire from the Gutbuster itself to the target's legs, any intervening terrain will block the shot.
High Explosive rounds are huge cannon shells packed with hundreds of pounds of explosive. They have a special 12cm diameter of effect, fully twice as large as a normal barrage attack! High Explosive is very effective against infantry and light vehicles, but not against armoured targets, so there is a +1 save. The +1 save modifier means just that - the opposing player adds +1 to the dice when he makes his armour saves.
Magnum Mega-cannon
The Magnum Mega-cannon is a monster gun which fits on the lower arm mount of the Gargant. The magnum can fire different rounds in the same way as the gutbuster, though its choice is limited to a solid armour-piercing shot or a large high explosive shell. Unlike the gutbuster the Magnum can fire every turn but you must pick which can of shell it's going to fire at the start of the turn during the orders phase.
Armour piercing shots (or Klangerz) roll one attack dice with a to hit roll of 3+ and a saving throw modifier of -3.
High Explosive shells (or Bangerz) fire a barrage template with 8 barrage points and a 0 saving throw modifier. Because Orks aren't the fiddly bits of indirect fire high explosive shells can only be fired at targets the Gargant can see. Because this is a direct shot there is no chance of the barrage template scattering.
Super Lifta-Droppa
The Lifta-Droppa is a Mekboy invention which uses Traktor beam technology in a radically different way to a Traktor Kannon. Instead of flattening a single target with a beam of energy, the super Lifta Droppa latches onto an area of ground and pulls the lot up into the air. The immensely powerful beam lifts up trees, rocks, earth and screaming victims all at the same time. The boom carrying the projector is swung upwards and its entrapped victims swing helplessly upwards too. Then, with a little bit of jiggling of the controls, the Meks controlling the beam drop the whole lot on some unfortunates nearby.
The super Lifta-Droppa has a range of 75cm and 'fires' a barrage template. Note that unlike most barrage weapons the Lifta-Droppa must be able to see its target in order to fire at it and can never fire indirectly. Place the barrage template anywhere in sight and within range of the super Lifta-Droppa. Anything even partially under the template is hit on a roll of 4, 5 or 6 on a D6. If a target is hit it has to make a saving throw with a -4 modifier, a failed save means the target is latched on to and lifted high up in the air. Anything which isn't latched on to or makes its armour save is lucky enough to avoid the beam and unaffected by the attack. Titans are too big to be picked up by the super Lifta Droppa as explained below.
After finding out what's caught in the beam the Ork player can designate where he wants to drop the contents of the beam within 6cm. Roll the scatter dice to see if the Mekboyz manage to get their helpless victims on target - a 'hit' indicates they're bang on target, an arrow means the template flys 2D6cm in the direction of the arrow before plummeting to the ground. The falling victims are automatically destroyed regardless of whether the Meks are on target or not. Any models underneath the template (wherever it ends up) are struck by falling debris on a roll of 4, 5 or 6 on a D6. Models hit by falling debris are automatically destroyed unless their saving throw is better than the saving throw of the biggest thing caught on the template - so for example, Land Raiders (Sv 2+) hit by debris from a template which included a Baneblade (Sv 1+) would be crushed. If a Baneblade was struck by debris from a Lifta Droppa template carrying Land Raiders it would survive.
Titans are too big and heavy to be picked up even by a super Lifta Droppa but can be hit by falling models. Titans will lose a shield if struck by a template, or suffer a hit if they have no shields left. Roll for location as normal, the location hit will suffer damage unless its saving throw is better than the biggest model on the hitting it. A building hit by a super Lifta Droppa beam or falling debris must make an unmodified saving throw and collapses into rubble if it fails.
The super Lifta-Droppa arm is cunningly constructed so that it also works as a monstrous grabber filled with whirling steel teeth. In close combat a Great Gargant armed with a super Lifta-Droppa arm can make a special grab attack if it wins. The grab attack only affects Titans and buildings. Against enemy Titans the Mekboy Gargant can grab any location shown on the hit location chart and try to tear it off. Both players roll a D6 and the Gargant adds +1. If the Gargant's score is higher than its opponents the location is torn off and suffers maximum damage as if a 6 had been rolled on the location damage chart. If the scores are equal the opponent pulls partially free of the Gargant's grasp, roll for damage normally. If the opponent rolls higher than the Gargant he wriggles completely out of the Gargant's grasp and no damage is done. A building hit by the grab attack suffers a hit with a -4 saving throw modifier.
Observation Turret
The Observation Turret is mounted on one of the upper arm positions on the Gargant. It is packed with all sorts of ranging equipment and has speaking tubes connected directly to the gunners. This enables the Gargant to add +1 to all to hit rolls against your target fired at each turn. This bonus only applies to weapons fired at that target by the Gargant.
Scorcher Turret
The Scorcher Turret is also mounted on one of the upper arm positions on the Gargant. The scorcher fires a long gout of flame. It has a range of 35cm, 2 attack dice, and hits on a 3+. The scorcher is especially effective at winkling out infantry that are in cover. To represent this ignore any modifiers for cover that would normally apply to the to hit roll.
Ork Gargant Weapon Data
| Weapon | Range | Attack Dice | To Hit Roll | Target's Save Mod. | Notes |
|---|---|---|---|---|---|
| Gork Head | Any Orks within 25cm ignore morale tests. | ||||
| Da Gaze of Gork | 50cm | 2 | 4+ | -2 | |
| Gutbuster: Ball | 100cm | Ball | 3cm Template | -4 | Ball template skids 4D6cm. |
| Gutbuster: Chain | 75cm | 1 | 3+ | - | Only affects Titans |
Great Gargant Datacard
Close assault factor: +15
Movement. A Great Gargant's move is determined by its orders:
| Orders | Effect | Fire |
|---|---|---|
| Charge | Must move between 11-15cm towards the nearest enemy formation | The Great Gargant may not fire |
| Advance | May move up to 10cm but this does not have to be towards the nearest enemy formation as in Charge | The Great Gargant may fire in the Advance Fire segment |
| First Fire | No move or turn | May fire in the First Fire segment |
Power fields. The Great Gargant is protected by 6+ (1D6) power fields.
| Weapon | Range | Attack Dice | To Hit Roll | Target's Save Modifier | Notes |
|---|---|---|---|---|---|
| Magnum Mega Cannon: Armour piercing | 100cm | 1 | 3+ | -3 | |
| Magnum Mega Cannon: High explosive | 75cm | 8 Barrage points | 0 | Fires barrage. May not fire indirect. | |
| Scorcher turret | 35cm | 2 | 3+ | 0 | Ignore to hit modifiers for cover |
| Observation turret | Adds +1 to any to hit rolls versus one target |
The card's Attack Dice column reads "Ball" and "Chain" on the Gutbuster Ball and Chain rows, as printed. The Ork Gargant Weapon Data table above gives the Chain entry as 1 attack die, 3+, with no save modifier. Both are transcribed as printed.
Hit location templates. Each row is listed from top to bottom of the printed grid, with the saving throw in each square.
Front:
- Weapon 2+ | Head 2+ | Weapon 2+
- Weapon Mount 2+ | Ammo 1+ | Hull 3+ | Ammo 1+ | Weapon Mount 2+
- Weapon 2+ | Hull 3+ | Hull 3+ | Hull 3+ | Weapon 2+
- Hull 3+ | Boiler 2+ | Hull 3+
- Foot 3+ | Hull 3+ | Belly Gun 3+ | Hull 3+ | Foot 3+
Side:
- Weapon 2+
- Hull 3+ | Weapon Mount 2+ | Hull 3+
- Hull 3+ | Weapon 3+ | Hull 3+
- Hull 3+ | Boiler 3+ | Hull 3+
- Hull 3+ | Foot 3+ | Belly Gun 2+ | Belly Gun 2+
Rear:
- Weapon 2+ | Head 2+ | Weapon 2+
- Weapon Mount 2+ | Ammo 1+ | Hull 3+ | Ammo 1+ | Weapon Mount 2+
- Weapon 2+ | Hull 3+ | Hull 3+ | Hull 3+ | Weapon 2+
- Hull 3+ | Boiler 3+ | Hull 3+
- Foot 3+ | Hull 3+ | Hull 3+ | Hull 3+ | Foot 3+
Great Gargant Damage Tables
Magazine Damage Table (Roll D6)
- 1-3: Some ammunition explodes starting a fire and sending flames shooting through the hull. Roll on the Fire Table immediately.
- 4-6: The magazine detonates spectacularly, starting 1D3 fires. Roll for damage against the weapon mount as well and apply any damage. After you have rolled for extra damage total up all the fires on the Gargant and make an immediate roll on the Fire Table.
Foot Damage Table (Roll D6)
- 1-3: The foot is damaged but carries on working normally. Add +1 to any future damage rolls against this foot.
- 4-5: The foot is destroyed. If one foot is destroyed the Great Gargant is only allowed to turn in place. If both feet are destroyed the Great Gargant may not move at all.
- 6: The foot is blown apart in a massive explosion that starts a fire. The Great Gargant may no longer move or turn, even if the other foot is undamaged.
Boiler Damage Table (Roll D6)
- 1-2: The boiler is damaged. Add +1 to any future rolls against the boiler.
- 3-4: The boiler is hit and starts to lose pressure. The Great Gargant's move rates are reduced by 50% from now on.
- 5-6: The boiler is destroyed. The Great Gargant can no longer move, and a fire is started.
Weapon Mount Damage Table (Roll D6)
- 1-2: The weapon mount is damaged but keeps on functioning. Add +1 to any future damage rolls against this weapon mount.
- 3-5: The weapon mount is badly damaged. Roll for both of the attached weapons on the Weapon Damage Table.
- 6: The weapon mount is blown off the Gargant starting a fire. The attached weapons land 2D6cm away in a random direction - any vehicles or infantry underneath it are destroyed.
Head Damage Table (Roll D6)
- 1-2: Several of the bridge crew are injured. Add +1 to any future damage rolls against the head.
- 3-4: The Kaptin is killed. The Great Gargant must follow the same orders next turn while the bridge crew 'elect' a new Kaptin.
- 5-6: The head is blown clean off the Great Gargant, starting a fire. The Great Gargant must follow the same orders next turn, and any weapons mounted in the head may not be used for the remainder of the battle. All Orks within 25cm must take a morale check.
After the next turn, roll a D6 before changing the Great Gargant's orders:
- 1-3: May not change orders.
- 4-6: May change orders normally.
Belly Gun Damage Table (Roll D6)
- 1-2: Some ammunition explodes but the Krew quickly douse it down. Add +1 to any future rolls on this location. The battle cannon is destroyed and may no longer be used.
- 3-5: The belly gun is destroyed and exploding ammunition starts a fire. The gun may not be used for the remainder of the battle.
- 6: The belly gun's magazine explodes starting 1D3 fires. The belly gun is destroyed and the explosion rips into the boiler, so roll for damage against the boiler as well. After your extra damage roll total up all the fires on the Gargant and make an immediate roll on the Fire Table.
Hull Damage Table (Roll D6)
- 1-5: The hull is weakened. Add +1 to any future rolls against the hull.
- 6: A massive explosion rips a hole in the hull and starts a fire.
Weapon Damage Table (Roll D6)
- 1-2: The weapon is damaged but keeps on functioning. Add +1 to any future damage rolls against this weapon.
- 3-4: The weapon is destroyed and may not be used for the rest of the game.
- 5-6: The weapon is blown off the Gargant starting a fire. The weapon lands 2D6cm away in a random direction. Any vehicles or infantry underneath it are destroyed unless they make their basic saving throw.
Fire Table (Roll D6)
Roll on this table as required by damage results and at the start of the end phase if any fires are burning on a Great Gargant. Add +1 to the roll for each fire burning on the Great Gargant in excess of one. Fire effects 4-7 last until the next roll is made on the Fire Table.
| Adjusted D6 Roll | Effect |
|---|---|
| 1-3 | A few scorched Gretchin manage to bring the fire under control and put it out. |
| 4-5 | The fire is getting out of control. The Great Gargant may not move, but may fire normally. |
| 6 | The fire is out of control! Add +1 to the number of fires already burning on the Great Gargant. The Gargant may not move or fire its belly gun. Any other weapons fired are on a -1 to hit modifier due to the clouds of smoke. |
| 7 | The fire reaches the magazines! Roll on the Magazine Damage Table for each intact magazine. The Great Gargant can't move or fire its belly gun and suffers -1 on firing as in 6 above. |
| 8 | Huge internal explosions wreck the Great Gargant, destroying it and leaving a smoking, blackened heap. Any units within 2D6cm are hit by flying debris and must make an unmodified save to avoid damage. |
| 9+ | A massive explosion rips the Great Gargant apart. Remove the model from the table and replace it with a crater if you've got one. Any units within 4D6cm are hit by flying debris and must make an unmodified save to avoid damage. |
Ork Gargant Special Cards
Special Card: Great Gargant
Points value 850.
A Great Gargant is a towering war machine of awesome destructive power. Shaped in the image of the Ork War Gods, it personifies the Waa-Ork.
A Great Gargant fights as a single unit which is commanded by a Warboss so it is not subject to the Ork command rule and can always be given orders. Because the Warboss is on board the Ork player can give orders to any Ork units within 10cm of the Gargant. The Great Gargant cannot be broken and always passes morale checks. Victory points are awarded to the opposing player once the Great Gargant is destroyed.
Victory points 9. Your opponent gains 9 VPs when the Great Gargant is destroyed.
The card carries a row of unit-type and weapon icons, which are not transcribed.
Special Card: Ork Gargant Big Mob
Points value 1700.
A Gargant Big Mob consists of one command unit - the Boss Gargant - and two other Gargants. The Gargants can be any mixture of Slasher Gargants or Great Gargants.
In the build-up to a great Waa-Ork Mekboyz throughout Ork space enter a frenzy of Gargant construction. As a result most Warbosses will have at least one mighty Gargant to fight in the Waa-Ork. Some of the most powerful Warlords might be lucky enough to have a whole Mob of Gargants to lead their clans to war - an awesome Gargant Big Mob.
The Boss Gargant is a command unit and always has the maximum number of power fields. The other two Gargants in the Big Mob may only be given an order if the Boss Gargant is within 20cm in the orders phase, otherwise roll a D6 for the Gargants' orders: 1-2 = first fire; 3-4 = advance; 5-6 = charge.
Gargants cannot be broken and so do not need to take morale checks. Victory points are awarded to the opposing player as each Gargant is destroyed - 9VPs for a Great Gargant and 6VPs for a Slasher Gargant.
Victory points 9 or 6. Your opponent gains 9 or 6 VPs as appropriate when each Gargant is destroyed.
The card carries a row of unit-type and weapon icons, which are not transcribed.
Assault Scenarios
Assault! New Rules for Attack and Defence Scenarios in Space Marine
By Jervis Johnson & Andy Chambers
In the 41st millennium wars smoulder and flare across a thousand worlds in the Imperium of mankind. The vast forces of the Imperial Guard and the Space Marines are in constant battle against Orks, Eldar, Chaos, rebellious humans and Squats.
Not all of these battles are fought between equally balanced forces. More often than not a battle will be fought between a vastly superior attacking force and a well dug-in but heavily outnumbered defender. The following rules allow you to fight these desperate assaults against trenches and bunkers, heavily defended by wire and mine fields. Assault scenarios provide you with a new and exciting set of tactical problems to face. Can the attacker overwhelm or out-manoeuvre the cunningly-laid defences of the beleaguered garrison, or will the defender be able to destroy enough of the advancing attackers to stand a chance of survival in the deadly hand-to-hand combat which follows?
When playing assault scenarios, one player is called the attacker and the other the defender. The two players have quite different forces and victory conditions. The attacker must seize a set of objectives that are hidden deep in the defender's half of the table without taking too many casualties in the process. The defender is heavily outnumbered and must make use of cover and field fortifications to protect his meagre forces, while inflicting as many casualties on the attacker as possible.
In order to play an assault scenario, first decide on a points value for the game and then set up the terrain as normal. Note that you do this before you know who will be the attacker and who will be the defender, which should encourage you to set up the terrain so that neither side has an advantage. After you have set up all the terrain both players roll a D6. Whoever scores higher gets the choice of attacking or defending. Both players can then choose their forces.
Assault scenarios introduce a new kind of epic battlecard - the fortification card. These cards allow players to purchase entrenchments, bunkers, razor wire, minefields and strongpoints to use in their games. Both players can purchase fortification cards, but in assault scenarios the following special rule applies:
All of the defender's cards, with the exception of fortification cards themselves, cost double points. This means that the defender will be outnumbered two to one or more - but he does receive a number of special advantages to even the odds in his favour!
After both players have chosen their armies, the defender chooses a table edge and sets up his forces up to half way in from his edge of the table. In an assault scenario only four objective counters are used, and they are all placed by the defender when he sets up his army, using the normal placement rules for objective counters. This means that all four objectives will be deep in his half of the table and heavily defended.
All defending units use the hidden set-up rules and count as dug-in (see below). After the defender has set up his army and objective counters, the attacker sets up his army anywhere within 15cm of the opposite edge of the table. Because the attacker and the defender set up one after the other there is no need for either player to make a map or to use a screen when setting up.
Assault Victory Points
The number of victory points each side needs to win is decided in the normal way. However, in an assault scenario the defender receives double VP's for breaking enemy units and the attacker receives double VP's for capturing objectives. This means that the defender must do his best to cause as many casualties to the attacker as possible, while the attacker must try his hardest to capture the objectives held by the defender.
You'll find a set of card hidden set-up counters and fortification cards for bunkers, minefields, razor wire, strongpoints and entrenchments at the back of this book. Later on in this article you will also find colour razor wire and minefield counters that you can back onto card and use in your games of Space Marine.
Note that fortification cards do not have a break point and do not give victory points to the attacker if they are destroyed.
Hidden Set Up
Defending forces invariably take great pains to conceal the disposition of their units as much as possible. Both physical camouflage and powerful sensor-scramblers are used to fool the enemy. This is done to prevent the attackers using heavy artillery barrages to disrupt the defenders. It also allows the defending commander to conceal the actual composition of his force until he can unleash them to the most devastating effect.
When you use hidden set-up your units are not set up directly on the table at the start of the game. Instead you take a hidden set-up counter for each unit and place this on the table roughly where you want the unit to go. Make a note of which unit the counter represents by recording the number on the counter and the name of the unit on a piece of scrap paper. Make sure that you keep this list secret from your opponent!
As long as the unit remains hidden none of the models are put on the table at the start of the game. Neither are they allowed to make attacks themselves. The only exception to this rule are Titans and Gargants which are far too large to be set up hidden.
Units can be hidden in any terrain, including in the open. Remember that the defender has had a long time to prepare his defences and will have carefully camouflaged all of his positions, which will make his troops very hard to spot. However, if an enemy unit is within 25cm of the hidden set-up counter when it finishes its move, it is close enough to spot the hidden positions and the whole unit is revealed at the start of the combat phase.
Hidden units count as being on first fire orders, and do not need to be given any order counters. If you want to give them charge or advance orders you must reveal the whole unit in the orders phase at the time that you give them the orders. Similarly, if you want to fire with any model in a unit that is hidden, you must reveal the whole unit at the start of the combat phase before you can fire. However, you can use the hidden set-up counter as an 'observer' for indirect barrage attacks without revealing the unit.
When the unit is revealed, one model (owning player's choice) is placed at the point occupied by the counter. The remaining models may be set up as you wish, provided normal formation rules are obeyed. You may even place the units straight into close combat if you want! The hidden set-up counter is flipped over onto its other side to show that the unit is 'dug-in'. Once revealed, a unit will be continually tracked by the commander of the attacking forces so it is impossible for a unit to become hidden again during the course of the game.
Dug-in Counters
Defending units will also spend time reinforcing and fortifying their positions as much as possible. This will comprise building proper bunkers and fortification if time permits, and also digging fox holes and weapon pits for individual troops and vehicles.
You will notice that the back of the hidden set-up counter says 'dug-in'. When the hidden unit is revealed, flip the counter over so that this side is showing. Having a dug-in counter means that the unit does not have to be given an order counter; they are treated in all ways as if they have first fire orders.
As long as the unit remains dug-in, all enemy attacks suffer a -1 to hit modifier. This modifier applies in addition to any other modifiers, so a model that is dug-in in a building or behind a fortification, for example, will be at -3 to be hit. (It may seem funny that a unit can be dug-in in a trench, but this simply represents the fact that it has spent time reinforcing its position, adding extra sandbags and so on.)
A unit can remain dug-in for as long as you like. However if you want to move any of the models in the unit you will have to give them advance or charge orders as normal, and these orders will replace the dug-in counter. Also, if the unit is forced to fall back, the fall back order counter replaces the dug-in counter. Once a dug-in counter has been removed for any reason it is assumed that the unit has moved out of its fortified positions. This means that the dug-in counter is lost and cannot be replaced during the game.
The two-page article "Attack and Defence Tactics in Space Marine" (printed pp.122-123, by Andy Chambers and Robin Dews) gives strategy advice on defence in depth, channelling and attacking fortified positions. It contains no rules and is not transcribed here.
Razor Wire and Minefield Counters
Carefully remove this page (or photocopy it if you don't want to cut up your copy of Space Marine Battles) and glue it onto stiff card. When the glue is dry you can cut out the razor wire and minefield sections and use them in your games of Space Marine. The pieces on these pages will provide you with sufficient sections for 150 points worth of minefields and 75 points of razor wire.
The razor wire and minefield sections are printed artwork counters and are not reproduced in this transcription.
Space Marine Fortification Cards
Each card below is a pre-printed fortification card. Each card's printed artwork is not reproduced; the card's name, deployment entitlement, points value and rules text are transcribed.
Fortification: Entrenchments
This card entitles you to place a set of entrenchments up to 50cm long anywhere in your set-up area.
Points value 150.
Entrenchments are battlefield fortifications designed to shield infantry from the worst effects of artillery or incoming fire. They range from hastily improvised foxholes and trenches to well prepared concrete fortifications protected by minefields and razor wire.
Entrenchments provide cover with a -2 to hit modifier against any incoming fire that traces a line of sight across the front of the entrenchment.
Infantry stands or models that are attacked either from the side or from behind the entrenchment do not benefit from this modifier.
Fortification: Bunkers
This card entitles you to place up to five bunkers anywhere in your set-up area.
Points value 150.
Each bunker can hold up to two stands. The bunker's thick walls confer a -2 to hit modifier and a saving throw of 4+ to any stands inside it. If the model already has a saving throw, use the better of the two.
While in a bunker both of the stands have their fire arc reduced to 180° through the front of the bunker, just like a vehicle. Bunkers can be destroyed in the same way as a building, and have a saving throw of 3+ on 2D6.
Fortification: Razor Wire
This card entitles you to place razor wire entanglements up to 100cm by 2.5cm wide anywhere in your set-up area.
Points value 150.
Razor wire can only be crossed by units that have advance orders. Units with charge orders may not cross razor wire entanglements.
The sole exception to this rule are models that clear a path through difficult terrain such as Gorgons or surfaced tunnellers. These may pass through the razor wire while on charge orders. Once these models have passed over the razor wire they leave a gap wide enough for a single infantry stand or model to pass through.
Skimmers, Titans and Gargants can pass directly over the wire and therefore ignore it.
Fortification: Stronghold
This card enables you to place a single Stronghold or Fortress, up to 15cm square, anywhere in your set-up area.
Points value 150.
The Stronghold is essentially a large building and all the normal building rules apply to it. The thick walls of a Stronghold confer a 4+ saving throw to any model completely inside it. In addition, any models inside a Stronghold receive the benefit of the -2 to hit modifier shown on the Terrain Effects Table for being inside a building.
Strongholds can be destroyed in the same way as a normal building and have a saving throw of 2+ on 2D6.
The points cost for a Stronghold includes one super heavy defence turret, which can be fitted with any weapon that can be attached to a Titan (with the exception of plasma weapons, which require the Titan's plasma reactor in order to be used). The turret may be attacked separately, in which case it should be treated as an armoured vehicle with a saving throw of +1.
Fortification: Minefields
This card entitles you to place four minefields, each 12.5cm long by 5cm wide, anywhere in your set-up area. The minefields are not secret and must be shown on the table. You must leave a gap of at least 5cm between each minefield.
Points value 150.
Any model that enters a minefield is immediately attacked and will be hit on a roll of 4+ with a -2 save modifier if hit. Units that start a turn in a minefield will be attacked as soon as they move. If they remain stationary they will be safe from further minefield attacks.
Minefields can attack any number of different models in a turn, but will only attack each model once. The mines spring into the air before they explode so they can hit skimmers and any location on a Titan. Mine attacks ignore power fields and void shields as they explode inside them. Choose the location on the Titan and roll the aiming dice as normal. The Titan is still allowed an armour saving roll on that location but with the -2 modifier.
Models that clear a path through difficult terrain such as Gorgons and surfaced tunnellers are still attacked by mines. If they survive the attack, they leave a gap through the mines wide enough for a single infantry stand or model to pass through.
The Modelling Workshop pages that follow (printed pp.126-134: "Epic Fortifications" by Robin Dews, Mark Watts and Richard Helliwell, and "Strongholds" by Robin Dews) are hobby guides to building fortification models and an entrenchment template to cut out. They contain no rules beyond restating the card rules above and are not transcribed here.