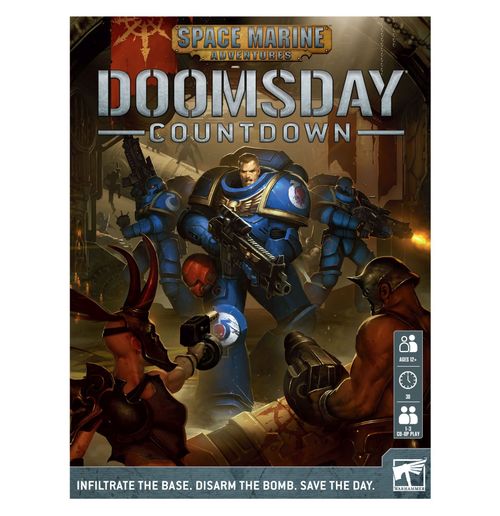
Space Marine Adventures: Doomsday Countdown
Space Marine Adventures: Doomsday Countdown Rulebook
Table of Contents
Table of Contents
Getting Started
Doomsday Countdown is a cooperative game for between one and three players, who fight as a team to save an Imperial hive city from a horde of Chaos Cultists. Each player controls a mighty Space Marine - a genetically enhanced warrior equipped with the best weapons and armour the Imperium can provide. The Chaos Cultists are controlled by a deck of cards that tell the players what each Chaos Cultist does when they activate. The players must lead the squad of Space Marines through the hive city, seal off the Chaos Cultists' escape routes, deactivate the Doomsday Device and then escape to claim victory. This will be no easy task - but if it were easy, they would not have sent the Emperor's Finest, the Space Marines, to see it done.
Object of the Game
In order to win, after a Space Marine activates, each surviving Space Marine must be on the Elevator tile, the deactivation codes token must be on the Doomsday Device tile, and each of the Tunnel tiles must have a sealed tunnel token on them. If all the Space Marines are slain, or the Countdown dice would reach 0, the players lose.
Contents
In addition to this rulebook, Doomsday Countdown contains the following components:
- 3 Space Marine datacards
- 3 Space Marines Citadel Miniatures: Brother-Sergeant Artellus, Brother Gallain, Brother Siceran
- 4 Chaos Cultist datacards
- 7 Chaos Cultist Citadel Miniatures: Heavy, Specialist, Champion, and 4 Initiates
- 12 Chaos Cultist action cards
- 14 Space Marine wargear cards
- 9 wound counters
- 1 deactivation codes token
- 3 Space Marine activation tokens
- 3 sealed tunnel tokens
- 32 Base tiles, including 3 Tunnel tiles, 2 Trapped tiles, 2 Pitfall tiles, 1 Entrance tile, 1 Elevator tile, 1 Control Panel tile and one Doomsday Device tile
- 3 six-sided dice
- 1 twenty-sided Countdown dice
Before You Play
Before you can play Doomsday Countdown, you'll need to assemble the Citadel Miniatures by following the instructions on pages 14-15 of this booklet. Then remove all of the cardboard tiles and tokens from the punchboards, and remove the cards from the plastic wrapping.
Set Up
Follow these steps to set up a game of Doomsday Countdown.
-
Find the four tiles that have blue backs and set them up as shown below. These tiles, and all other tiles touching those tiles, are referred to as 'the battlefield.' Each tile has walkways shown on it - these are paths which models can move along. Each walkway that does not connect to another tile is referred to as an 'open walkway'. The open walkways are marked with an 'x' in the diagram. (Diagram: the Entrance tile with three further blue-backed tiles around it, forming the starting cluster; nine open walkways are marked.)
-
Find the Doomsday Device tile, the Elevator tile and the Control Panel tile and set them aside, face-up on the table.
-
Take the remaining tiles, shuffle them together and then divide them into two approximately even face down stacks of tiles. Into the first stack, shuffle the Elevator tile, face down. Into the second stack, shuffle the Control Panel tile, face down. Then place the Doomsday Device tile face down at the bottom. Finally, place the first stack of tiles on top of the 2nd stack - this combined stack of tiles is called the 'base stack'.
-
Pick an open walkway on the battlefield and draw the top tile from the base stack. Place that tile so that one walkway on it connects to the open walkway that was picked. Other walkways on the tile that was just placed must be open walkways if possible.
-
Find the open walkway that is nearest to, and clockwise from, the tile that was just placed, but do not pick an open walkway - use the open walkway you just found to allow the next tile to be added to the battlefield. In the example, the players chose to start with the walkway marked 'A'. After this, they would place a tile so that it connects with walkway 'B', then walkway 'C' and so on, working clockwise around the battlefield.
-
Repeat steps 4 and 5 until every tile from the base stack has been added to the battlefield.
-
Place any one Chaos Cultist model on each Tunnels tile. Then pick an open walkway, and place one Chaos Cultist model on that walkway's tile. Then, moving clockwise around the edge of the battlefield, find the next open walkway whose tile does not contain three Chaos Cultists, and place one Chaos Cultist model on that tile. Continue until all the Chaos Cultist models have been placed in this way. This may result in multiple Chaos Cultist models being placed on the same tile, to a maximum of three Chaos Cultist models. If it is impossible to place all the Chaos Cultist models, place any remaining Chaos Cultist models to one side.
How to Play
A game of Doomsday Countdown is played over a series of rounds, each of which has four steps, as described below. First, the players will pick a Space Marine and activate them, then the Chaos Cultists will activate, then Chaos Cultist reinforcements will arrive, and finally the Doomsday Device will tick down. Once all four steps have been completed, a new round begins.
The Emperor's Finest
Where a rule can be resolved in multiple ways, the players choose how to resolve that rule.
For example, the Ambush Chaos Cultist Action card requires the furthest Chaos Cultist from any surviving Space Marine to be placed beside any surviving Space Marine. If there are multiple Chaos Cultists which fit the condition for the card, the players choose which of those Chaos Cultists is placed next to a Space Marine. They also choose which Space Marine that Chaos Cultist is placed next to.
Step 1 - Space Marine Activates
The three Space Marine models are referred to as 'Space Marines'. A Space Marine that has not been slain is referred to as a surviving Space Marine. In this step, the players pick and activate one surviving Space Marine that does not have an activation token (see below).
The Players
The player that controls a Space Marine is referred to as that Space Marine's player.
When a Space Marine activates, that Space Marine can make up to three actions. Each of these actions can be a Move action, an Attack action, a Seal action, a Gain Codes action or a Deactivate action, in any order or combination. For example, the Space Marine could make two Move actions and one Attack action, or two Attack actions and one Move action, or even no actions (though this will be rare) and so on.
Free Actions
Some cards and abilities allow a Space Marine to make a free action. These actions can be used by Space Marines even if they have an activation token, and are in addition to the three actions they make during their activation. The card or ability will explain when the free action can be made.
After you have finished making actions with a Space Marine, place an activation token next to them to remind you that they cannot be activated again until all surviving Space Marines have been activated. Once all the surviving Space Marines have an activation token, remove all of the activation tokens. This means that if there is only one surviving Space Marine, that Space Marine effectively never receives an activation token.
When the game begins, there will be three Space Marines on the Entrance tile. Apart from at the start of the game, no more than two Space Marines can be on the same tile, with the exception of the Elevator tile, which all three Space Marines can be on at the same time. This means that when the first Space Marine activates, they must make a Move action during their activation (see below).
Move Action
When a Space Marine makes a Move action, they move into an adjacent tile, as long as that Space Marine has line of sight to the tile (see Line of Sight), and the tile does not contain any Chaos Cultists.
Adjacent Tiles
Any tile that is touching another tile is said to be adjacent to it. In addition, if a model is in a tile that is touching other tiles, they are said to be adjacent to those other tiles.
In addition, if a Space Marine would finish a Move action on a tile that already contains two Space Marines, it must immediately make another Move action to move out of that tile. If this is not possible, then the original Move action cannot be made (another action must be chosen instead).
In the example, Brother Siceran can use his actions to move into the tiles marked A, B or C. He cannot end his activation in the tile that contains the other two Space Marines, and he cannot move into the tile containing the Chaos Cultist (tile D), or past it into the tile marked E.
Pitfall Tiles
The first time in a round a Space Marine makes a Move action whilst in a pitfall tile, that Move action has no effect. That Space Marine must make a second Move action in that round to move from the Pitfall tile.
Trapped Tiles
If, after a Move Action, a Space Marine is in a Trapped tile, that Space Marine's player must roll one six-sided dice. On a roll of 1, 2 or 3, that Space Marine is wounded.
Line of Sight
If an imaginary straight line can be drawn between the centre of one tile and the centre of another tile, and that line does not leave the walkways connecting those two tiles, any models in either tile are said to have line of sight to the other tile. Models always have line of sight to the tile they are in. Models do not block line of sight.
In the example, Brother Gallain has line of sight to all of the tiles apart from those marked with an 'x'.
Note that line of sight is not broken by models, so Gallain can see past the Chaos Cultist nearest to him to attack the one further away.
Attack Action
If a Space Marine has line of sight (see Line of Sight) to a tile that contains one or more Chaos Cultists, they can make an Attack action that targets the Chaos Cultists in that tile. When a Space Marine makes an Attack action, that Space Marine's player makes an attack roll by rolling one six-sided dice. If the score on the dice is equal to or higher than that Space Marine's attack value (found on their datacard), one Chaos Cultist on that tile is slain. Slain Chaos Cultists are removed from the battlefield and become hidden Chaos Cultists.
The Rule of 1 and 6
When making an attack roll for a Space Marine or a Chaos Cultist, a roll of 1 is always a failure, and a 6 is always a success, regardless of any subtractions or additions to the score of the roll.
If there are two or more Chaos Cultists on a tile, any Initiates in that tile must be slain first - you cannot pick a Specialist, Heavy or Champion until they are the only options in that tile.
Seal Action
If a Space Marine is on a Tunnel tile, that Space Marine can make the Seal action. If they do, place a sealed tunnel token on that Tunnel tile. It is no longer considered to be a Tunnel tile.
Gain Codes Action
If a Space Marine is on the Control Panel tile, and that tile has the deactivation codes token on it, that Space Marine can make the Gain Codes action. If they do, give that Space Marine the deactivation codes token by placing that token on that Space Marine's datacard.
Deactivate Action
If a Space Marine is on the Doomsday Device tile, and that Space Marine has the deactivation codes token (see below), that Space Marine can make the Deactivate action. If they do, place the deactivation codes token on the Doomsday Device tile.
The Deactivation Codes
If there are two Space Marines on the same tile, and one of those Space Marines has the deactivation codes token, the players can, at any time, change which Space Marine datacard the deactivation codes token is on.
If a Space Marine that has the deactivation codes token is slain, place the deactivation codes token on the tile in which they were slain. If a Space Marine is in a tile that has the deactivation codes token on it, that Space Marine's player may place the deactivation codes token on that Space Marine's datacard.
Note that Chaos Cultists cannot pick up or interact with the deactivation codes token, but they can enter the tile the deactivation codes token is on.
Step 2 - Chaos Cultists Activate
When the Chaos Cultists activate, one player draws the top card of the Chaos Cultist Action deck and follows the instructions on that card, often using the rules below to move and/or attack with those Chaos Cultists.
When multiple Chaos Cultists are required to activate, the players must pick one Chaos Cultist on the battlefield that has not made any actions this round and make all the actions required by the Chaos Cultist Action card with that Chaos Cultist. Then they continue to pick Chaos Cultists in this manner until each Chaos Cultist has been picked once. The players can pick the Chaos Cultists in any order.
Move Action
When a Chaos Cultist makes a Move action, that Chaos Cultist moves into an adjacent tile to which they have line of sight. The Move action must bring that Chaos Cultist closer to the nearest Space Marine, unless the action card specifies otherwise.
A Chaos Cultist cannot move into, or be placed in, a tile that contains one or more Space Marines - if it would, then that Chaos Cultist makes an Attack action against that tile instead (see Attack Action, below). In addition, a Chaos Cultist cannot move into, or be placed in, a tile that contains three Cultists - if it would, that Cultist does not make that Move action, or must be placed in a different tile.
In the example, the players drew the 'Closing In' Chaos Cultist Action card, so the Chaos Cultists each make a Move action.
Chaos Cultist A moves into the adjacent tile, moving towards the nearest Space Marine. Chaos Cultist B (the Champion) cannot move into the next tile because that tile contains a Space Marine, so it makes an Attack action instead, which targets the tile that contains that Space Marine.
The players want to keep the Heavy (C) as far away as possible, so they choose the Initiate (D) to move first. The Initiate enters the tile with Initiates E and F, after which it is the Heavy's turn to move. As the tile it would move into contains three Chaos Cultists, the Heavy does not move.
Chaos Cultists E and F cannot move into the next tile because it contains a Space Marine, so they each make an Attack action instead, which targets the tile that contains that Space Marine.
Attack Action
If a Chaos Cultist is required to make an Attack action, and that Chaos Cultist has line of sight to a tile that contains one or more Space Marines, that Chaos Cultist makes an Attack action that targets that tile following the rules below, otherwise that Chaos Cultist cannot make that Attack action.
If a Chaos Cultist could target more than one tile that contains one or more Space Marines, it targets the nearest of these tiles.
When a Chaos Cultist makes an Attack action, a player makes an attack roll by rolling one six-sided dice. If the score on the dice is equal to or higher than that Chaos Cultist's attack value (which is found on that Chaos Cultist's datacard), a Space Marine on the target tile is wounded. If there are two Space Marines on that tile, the players pick which Space Marine is wounded.
When a Space Marine is wounded, place a wound counter on their datacard. If a Space Marine has as many wound counters on their datacard as the Wounds value shown on their datacard, they are slain. Remove a slain Space Marine's model from the battlefield and place it on their datacard - they will take no further part in the game. The player of that Space Marine can still play wargear cards however, and they should be responsible for moving and attacking with any Chaos Cultists for the rest of the game.
Elite Chaos Cultists
These Chaos Cultists are armed with dangerous weapons or are fanatical leaders, and have additional rules on their datacards. Make sure to read these before activating these Chaos Cultists. (The Champion and the Specialist.)
Step 3 - Chaos Cultists Reinforce
If there are no hidden Chaos Cultists, skip this step. In the Chaos Cultist Reinforcements step, pick a Tunnel tile and place one hidden Chaos Cultist on that tile. Repeat this until each Tunnel tile has one Chaos Cultist on it, or there are no hidden Chaos Cultists remaining.
If there is one Chaos Cultist on each Tunnel tile, and there are still hidden Chaos Cultists remaining, pick a tile that does not have each of its walkways connected to another tile and place a Chaos Cultist in that tile.
Then, moving clockwise around the edge of the battlefield from the tile you just picked, find the next tile that has a walkway that does not connect to another tile, and place one hidden Chaos Cultist on that tile. Continue to do this until all hidden Chaos Cultists are placed (this may mean you place more than one Chaos Cultist on certain tiles, to a maximum of three Chaos Cultists per tile).
Chaos Cultists cannot be placed in, or enter, a tile that has three Chaos Cultists or any Space Marines in it.
Step 4 - Doomsday Countdown
In this step the player that last activated a Space Marine lowers the score on the Countdown dice by 1. If the score would be lowered to 0, the Doomsday Device activates and the players instantly lose.
Winning the Game
After a Space Marine has activated, all players win (including any whose Space Marines have been slain) if the following three criteria have been met:
- Each surviving Space Marine is on the Elevator tile.
- The Doomsday Device tile has the deactivation codes on it.
- Each Tunnel tile has a sealed tunnel token on it.
If the Space Marines are all slain, or the Doomsday Device activates (see above), the players all lose.
Rate Your Victory
After playing through your first game, you can measure the level of your victory using the table below, based on the number of Space Marines that survived the mission.
| Surviving Space Marines | Victory Result |
|---|---|
| 3 | Hero of the Chapter: The mission was executed with the skill, determination and courage expected of the Emperor's Finest. Congratulations, Space Marine, you are a credit to your Chapter. |
| 2 | Noble Warrior: Though your mission was not without cost, you have won a mighty victory this day. The honoured dead shall be remembered, and your name shall be celebrated. |
| 1 | Bloodied Survivor: Your squad suffered heavy casualties in the execution of your mission, though your efforts saved countless lives. Duty all too often comes at a high price. |
Campaign Game
A campaign game adds an extra level of difficulty for the players. The players must make their way through a much larger hive to find the Doomsday Device, and race to escape after achieving their mission, but will have more wargear cards to help them do it.
A campaign game has 3 stages - Breach, Doomsday Deactivation and Escape. Each of these is a game of Doomsday Countdown played in sequence. To start a campaign game, set up the Breach game following the instructions below.
Stage 1 - Breach
The Space Marines have located the Chaos Cultists' base at the heart of the hive. The squad must breach the main chambers and find the elevator so they can make their way down to the Doomsday Device before the alarm can be raised.
Set up a game following the rules on pages 4-5, with the following changes to set-up:
- Leave the Doomsday Device tile and Control Panel tile in the game box, and ignore any instructions regarding them.
- If there are three players, deal 1 additional wargear card to each player. If there are two players, deal two additional wargear cards to each player. If you are playing the game solo, deal three extra wargear cards in front of you.
Completing Stage 1
After a Space Marine has activated, the players complete Stage 1 if the following two criteria have been met:
- Each surviving Space Marine is on the Elevator tile.
- Each Tunnel tile has a sealed tunnel token on it.
If the Space Marines are all slain, or the Doomsday Device activates, the players all lose and must start the campaign again.
Preparing Stage 2
If the players complete stage 1, discard all wound counters from the Space Marines' datacards. Make a note of each Space Marine that was slain during this stage, and which wargear cards the players were dealt but did not use.
Stage 2 - Doomsday Deactivation
The Space Marines have reached the centre of the Chaos Cultists' lair, deep in the bowels of the hive city. They must now get the deactivation codes to the Doomsday Device and disable it before it is too late.
Set up a game following the rules on pages 4-5, with the following changes:
- Players retain control of the same Space Marines they controlled in the previous stage.
- When the Space Marines are placed on the Entrance tile, each Space Marine that was slain in Stage 1 is now wounded.
- Do not deal wargear cards to the players when setting up this stage - the players retain any unused wargear cards from the previous stage. If a player wishes, they may discard a wargear card during set up to remove a wound counter from any Space Marine.
Completing Stage 2
After a Space Marine has activated, the players complete Stage 2 if the following three criteria have been met:
- Each surviving Space Marine is on the Elevator tile.
- The Doomsday Device tile has the deactivation codes on it.
- Each Tunnel tile has a sealed tunnel token on it.
If the Space Marines are all slain, or the Doomsday Device activates, the players all lose and must start the campaign again.
Preparing Stage 3
If the players complete stage 2, follow the same rules as for Preparing Stage 2.
Stage 3 - Escape
The Space Marines have deactivated the Doomsday Device, but now the Chaos base has begun to fall apart around them. They must trap the remaining Chaos Cultists and fight their way to safety before the structure collapses on top of them!
Set up a game following the rules on pages 4-5, with the following changes:
- Leave the Doomsday Device tile and Control Panel tile in the game box, and ignore any instructions regarding them.
- Players retain control of the same Space Marines they controlled in the previous stage.
- When the Space Marines are placed on the Entrance tile, each Space Marine that was slain in Stage 2 is now wounded twice.
- Do not deal wargear cards to the players when setting up this stage. The players retain any unused wargear cards from the previous stage. If a player wishes, they may discard up to two wargear cards during set up. For each wargear card discarded in this way, remove one wound counter from any Space Marine.
Completing Stage 3
After a Space Marine has activated, if each surviving Space Marine is on the Elevator tile and each Tunnel tile has a sealed tunnel token on it, the players instantly win. Completing Stage 3 also means the players have completed the campaign and saved the planet from certain doom - congratulations! This was exceptionally difficult and your efforts are worthy of the highest praise and rewards the Imperium can offer.
Achievements
Once you've got the hang of Doomsday Countdown, you can track your achievements in the game below - make a note of who claimed each achievement first, and when they achieved it, below. Achievements and penances (see below) are not used in campaign games (pg 10-11) - playing through a campaign is already challenging enough!
| Achievement | Requirement |
|---|---|
| And They Shall Know No Fear | Win a game in which all three Space Marines survive. |
| Penitent Victory | Win a game with two or more Penances active (see below). |
| Superhuman Resilience | Win a game without any Space Marine being wounded. |
| Last Second Victory | Win a game while the Countdown dice is showing a value of 1. |
Penances
Players can also choose to test their mastery of the game by playing with one or more of the Penances below. Each Penance restricts a player's actions, or modifies the rules of the game to make it more challenging. Winning while one or more of these conditions is in place is considerably more tricky, and is a worthy achievement in itself.
| Penance | Requirement |
|---|---|
| Dark Imperium | Win a game without using Brother Sergeant Artellus' Heroic Bearing rule. |
| Chaos Wards | Win a game while subtracting 1 (to a minimum of 1) from all of your attack rolls. |
| Bloody Victors | Win a game where you began with 1 wound counter on each Space Marine's datacard. |
| Purity of Thought | Win a game without playing any wargear cards. |
| The Hour is Nigh | Win a game where you began with the Countdown dice set to '17'. |