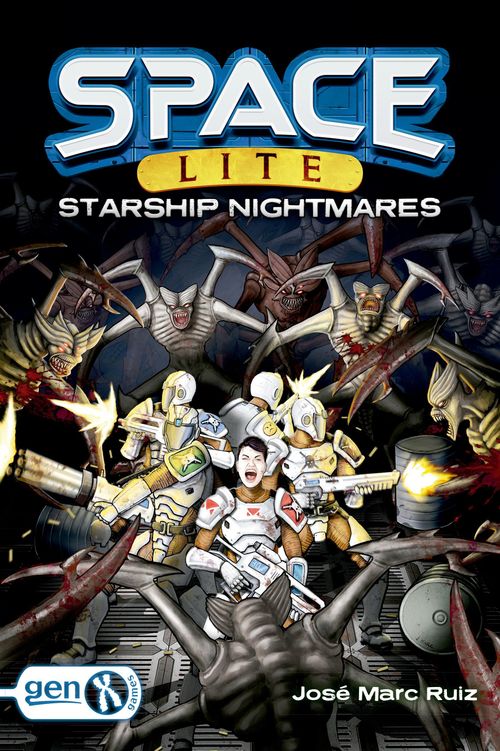
Space Lite: Starship Nightmares
Space Lite: Starship Nightmares Rulebook
Table of Contents
Table of Contents
Game Components
- 5 soldier cards
- 10 action cards
- 2 civilian cards
- 5 weapon cards
- 15 terrain cards
- 26 event cards
- 10 infected cards
- 15 supply cards
- 1 summary card and 1 enemy card
- 2 civilian figures
- 10 soldier figures
- 1 portable machine gun figure
- 32 enemy figures
- 5 level A and B locked door figures
- 10 damage tokens
- 5 equipped weapon tokens
- 1 fire token
- 5 weapon counter tokens
- 4 attack dice
- 5 activation tokens
- 3 grenade tokens
- 1 flamethrower token
- 12 ammunition tokens
- 10 standard magazine tokens
- 3 pistol magazine tokens
- 3 first aid kit tokens
- 1 level A card token
- 1 X serum token
Game Objective
- Survive while fulfilling the requirements of each mission.
- If time runs out or all soldiers die, the mission fails.
- At the end of the mission, you must pass an infection test: if you have been infected, the mission fails.
Setup
- Place the ENTRANCE terrain card face up.
- Prepare the other terrain cards in a deck according to the mission you have chosen. From this final deck, place new terrains face down at the exits of the "entrance" terrain.
- Place the 5 healthy soldier figures in the docking module of the "entrance."
- The number of soldiers in play is always 5, regardless of the number of players. The players (1 to 5) agree and distribute the 5 soldiers as they wish.
- Each player takes their soldier cards in their healthy version and their weapon counters. Set the ammunition tokens for all weapons to the maximum and place the equipped weapon token on the main weapon.
- Place the enemies from the "entrance" terrain in the deployment zone.
- Shuffle the event, supply, and action cards and place them face down.
- Place the infected, civilian, weapon, and enemy cards face up and separately.
Soldier Cards and Weapon Counter
Transcription note: the printed page for this section (page 5 of the source PDF) renders blank in the PDF viewer. The text below was recovered from the PDF's text layer and is transcribed in full; words lost in that layer were restored from context.
Soldier Cards
Each soldier has a card with their healthy/wounded version. It shows:
-
Character name and color: Each soldier is assigned a name and a color. This is used to resolve situations that depend on chance (such as events) or to clarify who the enemies are attacking.
-
Melee attack: number of dice rolled to attack enemies in your zone.
-
Health: number of wounds the character can withstand.
When a soldier receives 1 wound, flip their card over to their wounded variant, revealing an event as well as new attributes.
When a character receives a number of wounds equal to or greater than their health, they are eliminated. If all soldiers are eliminated, the game ends.
- Movement: number of zones the character can move.
Weapon Counter
Each soldier has their own weapon counter that indicates:
-
The weapons with which soldiers start the game: The top weapon is their primary weapon. The bottom weapon is their secondary weapon. To the right of each weapon is a space to place the equipped weapon token, which indicates which weapon is currently in their hands.
-
Ranged attack: number of dice rolled to attack enemies in a different zone from yours.
-
Ranged attack range: number of zones within firing range. The number in parentheses indicates the maximum distance that weapon can reach, although the number of attack dice is reduced by 1. You cannot shoot beyond this number.
-
Magazine. Each weapon only works with the magazine indicated: a) Standard magazine: only works with the main weapon. b) Pistol magazine: only works with the pistol.
Each time a weapon is shot, move the ammunition token to a lower number on the magazine chart. When it reaches zero, you cannot shoot. To return to maximum, you must reload.
Civilian Cards
There may be civilians hiding in some rooms on the ship. Your duty is to help them and escort them off the ship. Although this is not mandatory, it is useful for counting survivors in the infection test at the end of the game. If there are more infected cards than survivor cards (soldiers + civilians) in your action card deck, you lose the game.
There is one locked in the "room" and you can wake up another by interacting in the "hibernation room." When you rescue one, take their healthy card and place it in a common area on the table. During the player phase, any player can control the rescued civilians. Civilians have 2 action points to spend, just like soldiers, but they can only move.
Enemies at equal distance will attack civilians before soldiers.
If a civilian is eliminated, they are immediately transformed into a parasite. Flip their card to its infected variant and follow the instructions: Take 3 infected cards and replace their figure with a "pale guy." Leave the figure lying down. This enemy does not attack or deal infected cards in this round, nor does it engage in combat. In the next enemy phase, it gets up and acts normally.
Enemies Card and Types
Enemy initiative increases from left to right in this table.
Transcription note: the enemy reference table on this page is a low-resolution raster graphic in the source PDF and its individual figures cannot be read reliably. They are not transcribed here; consult the printed Summary card and Enemy card.
Parasites
When the parasite virus infects the host, it causes a series of mutations or phases until it reaches its final state. The following names are the terms soldiers use to refer to the parasites.
- "Pale Guy": phase 1 of infection in humans. Very fast, but not very strong.
- "Roach": phase 2 of infection. Less fast, but stronger.
- "Crab": phase 3 of infection. Slow, but very strong.
- "Alpha": final phase reached by some parasites, the dominant class. Huge and lethal. When moving, if these four parasites do not reach melee range after making a full movement, they move one more zone and do not attack.
- The "Blob": a jumble of viruses and bodies in the midst of mutation. It is very resistant, although vulnerable to fire: flamethrower attacks inflict double damage to it.
Parasites attack any human within their reach, whether a soldier, a civilian, or even other human enemies, although at equal distances they will attack soldiers first and then other human enemies (such as assault units or crew members).
When a parasite coincides in the same zone with one or more soldiers or civilians, 1 infected card is received.
When a parasite damages soldiers, you receive 1 infected card (3 infected cards if it is a civilian).
Humans
- Assault unit: soldiers from ANEMLOK corporation, sent to investigate alien contact. Their priority is to recover the virus for the biological weapons department, and they will not hesitate to eliminate witnesses. As soon as they have line of sight, they stop moving and attack from a distance if possible. They will attack parasites only if they are at risk of being attacked by them.
- Crew member: a survivor who has taken a weapon and an armored suit. They have locked themselves in and shoot at anything that approaches them. They have manipulated the defense system to attack humans. As soon as they have line of sight, they stop moving and attack from a distance if possible. They attack soldiers before parasites if they are both in the same range.
Robot
A multipurpose tool in the ship. It is used for cargo, cleaning, and even defense of the ship. It has been manipulated to attack soldiers.
It only attacks soldiers and civilians. It does not attack parasites nor is it attacked by them.
It moves toward the nearest soldier or civilian to the maximum of its movement attribute and attacks in melee or at a distance, depending on how far it is from the target of the attack.
Weapon Cards
Other weapons can be picked up, which are scattered throughout the ship. Place their cards next to the soldier's card. There is no limit to the number of weapons a character can carry.
When using them, place the equipped weapon token on the card and use its attributes.
If they don't have a magazine icon, discard them when you run out of ammo.
Supply Cards
Draw 1 random supply card when you use the "Search" action card. Follow its instructions and then place it in the supply card discard pile.
When there are no cards left, shuffle the discard pile and create a new supply card deck.
The Portable Machine Gun supply card reads: "Take 1 Portable Machine Gun card and its figure. The soldier carrying it has -1 movement. Spend 1 action point to deploy it or pick it up. It works automatically."
The Portable Machine Gun weapon card reads: "You may shoot twice."
Action Cards
Cards with actions that any soldier can use during their turn. Actions are valid for the soldier using them and their effect lasts once, unless the card indicates that it is valid for the entire phase.
In each event phase, you receive 5 random action cards. However, only a maximum of 2 can be used per player phase, which are divided among the 5 soldiers.
The cards have a color and name indicator, which is used to make decisions about events or combats in the enemy phase.
After rolling an event or before an enemy attack in which the target of said event or attack is not specified, reveal a random action card. The color/name indicator shown on the card refers to the soldier with that same color/name on their soldier card. That soldier is the affected soldier and must suffer the enemy event or attack. If it is not a valid card, continue revealing until you find a valid card.
The example card "GO GO GO!" reads: "Perform a move (extra action). You may move up to 3 times during this phase."
Infected Cards
In the heat of melee combat with the parasites, your team can become infected through scratches or blood splashes.
These cards are added to the action card deck every time there is new close-quarters contact with a parasite (whether the parasite or the human moves) and every time the parasites deal damage. You also receive 3 infected cards if a civilian dies.
From that point on, they become part of the action card deck.
These cards are useless and reduce the likelihood of drawing beneficial action cards in subsequent turns.
Furthermore, in the case you have to draw one more infected card and there are no cards left in the infected card deck, the infection becomes uncontainable and you lose the game.
To get rid of them, you can use the "anti-virus" action card by returning the infected card to the infected card deck. The removed infected card must be in your hand (i.e. among the 5 action cards received in the event phase) and does not count as one of the 2 action cards that can be used in the player phase.
The infected card reads: "If you cannot draw an infected card, you lose the game."
Infection Test
At the end of a mission, the infected cards in your action card deck are tallied. If the number of infected cards exceeds the number of survivors (soldiers + civilians), your team has been severely exposed and you take the infection with you. The mission fails.
To increase survivability, civilians can be rescued, as well as collecting SERUM X from the lab, which allows you to remove 3 infected cards from the final count.
Figures
They represent characters in the game.
Each soldier has two figures: their healthy variant and their wounded variant. When a soldier receives a wound, they flip their card to their wounded variant and swap the figure with their wounded variant, thus remembering their new attributes.
Dice
The hit icon result is a normal hit. The critical hit icon result is a critical hit and counts as 2 normal hits. Each hit inflicts one wound.
Terrain Cards
- ZONES: The terrain is divided into zones that serve to delimit movement. Zones have a maximum occupation limit of 8 figures.
If this occupation is reached, the zone is said to be fully occupied. If the zone is fully occupied, its adjacent zones are considered to be in melee combat with it, and combat is engaged in that zone until it is no longer fully occupied. If a figure ends its movement in a fully occupied zone, it must be placed in the previous, unoccupied zone. Fully occupied zones may be crossed if the movement ends in a zone that is not fully occupied.
- DEPLOYMENT ZONE: this zone shows:
- The name of the terrain.
- The enemies that spawn on the terrain when discovered, as well as enemies spawned due to event cards.
- Items that can be collected.
- Whether the terrain has a locked door, and the security level (A or B) of that door. If so, place a door figure of the appropriate level between the two terrains.
- Terrain interaction icons.
- EXITS: arrows indicate the terrain's exits. Terrains placed at exits are placed face down. To reveal a terrain, you must be in a zone with an arrow and use the Open Door action.
"STAIRWAY B" Terrain: This card is always set aside during mission setup. When the "Stairway A" terrain is revealed during the game, place the "Stairway B" terrain face up anywhere on the table. These two terrains are connected by the staircase, so you can move between them as if they were two connected terrains.
There is no line of sight from one floor to the other, so you cannot shoot between the two terrains. You cannot lock a door between the two stair terrains.
Game Phases
- Event phase
- Player phase
- Enemy phase
1) Event Phase
Follow these steps in this order:
- Remove any door figures locked by events or by the "hack" action card from the previous round (locked level A and B doors are not removed).
- Draw 1 event card and follow its instructions. When a card needs to be drawn from the event deck and there are none left, the mission fails. If the first event results in a FIRE or OUT OF NOWHERE card, return it to the deck, draw another card, and shuffle the deck.
- Shuffle all the action cards and draw 5 at random. Place them in a common space on the table, within reach of all players.
Event Cards
These are cards with instructions that must be resolved in the event phase.
They also mark the time to complete the mission. When a card must be drawn from the deck and there are none left, the parasites become unstoppable and the mission fails.
There are 2 types:
Event cards: that add modifiers to the game. These events affect a specific soldier, unless the card indicates otherwise. To find out which soldier the event affects, shuffle all your action cards, reveal one at random, and look at the card's color. The soldier whose color matches the color of the action card must suffer the event's effect. If the soldier is eliminated or is not a valid card, continue drawing action cards until you find a valid one.
Enemy Spawn Cards: shuffle all your action cards, reveal one at random, and note the color. Place enemies in the terrain deployment zone where the soldier whose color matches the action card is located. If the soldier is eliminated or is not a valid card, continue revealing action cards until you find a valid card. Enemies may also spawn in the entrance deployment zone.
If a parasite is indicated to spawn and all of that class are already in play, place another with a higher health attribute, or any available one if none exist.
The example event card WEAPON JAM reads: "Draw 1 action card. The affected soldier cannot shoot during this phase."
The example event card PALE GUY reads: "Draw 1 action card. Place 1 [pale guy figure] in the affected soldier's DEPLOYMENT ZONE."
Important: If an enemy needs to be spawned and there is a soldier in that deployment zone or it is fully occupied, place them in the nearest possible soldier-free zone, in the direction of the docking module. If that's not possible, place them in the nearest possible soldier-free zone. If there's no other option, place them in the soldier's zone and take one "Infected" card.
Important! Note that a parasite can be placed in a zone free of soldiers but containing civilians, in which case take one "infected" card.
If there are locked doors, place it in a zone without locked doors.
Enemies cannot spawn in the docking module.
If you're unsure where to place a parasite, choose the most logical, or most troublesome, option.
2) Player Phase
During each player phase, players agree and decide on the soldiers' initiative (i.e., the order in which they will take their turns).
Each soldier may spend up to 2 action points to perform the following actions (in any order). Each soldier must complete all of their actions or pass before another soldier's turn.
Activation token: Place it on the soldier's card with its green side before activation and flip it to its red side when activation ends.
ACTIONS:
Each action costs 1 action point, with the exception of action cards, which can be used for free.
- Move
- Attack
- Reload
- Switch weapon
- Heal wound
- Interact with objects
- Interact with terrains
- Open door
- Blow up a Level "B" door
- Use action card
1) Move
Maximum 2 times per turn, unless a card indicates otherwise. Spend 1 action point to move up to the maximum number of zones indicated by its movement attribute.
Example: You can move 1 or 2 zones with movement 2.
You must completely complete your movement before taking other actions, except for opening doors and picking up objects. During movement, you can open a door or pick up objects and then end your movement if it hasn't been completed.
Example: You can move one zone, open a door, and then advance or retreat to the previous zone.
A figure cannot move through a zone where there is an enemy. If you encounter an enemy in the same zone, movement stops and the figures are engaged until the combat is resolved (see "Engaged in Combat" in the melee attack section).
When a soldier or civilian encounters a parasite in a zone, they draw 1 "infected" card. It doesn't matter which figure moves: soldier, civilian, or parasite. Only one "infected" card is drawn the first time the same figure makes contact with the same parasite. Subsequently, if the same figures remain engaged in subsequent phases, no more infected cards are drawn.
Each time there is a new contact between a soldier or civilian and a parasite, another "infected" card is drawn.
2) Attack
Maximum 1 time per turn, unless a card indicates otherwise.
Spend 1 action point to make an attack. The attack can be melee or ranged. Announce which enemy you are attacking and roll the corresponding attack dice (melee or ranged).
The hit icon result is a normal hit. The critical hit icon result is a critical hit and counts as 2 normal hits.
Each hit inflicts one wound.
If an enemy receives wounds, place the corresponding damage tokens on the enemy figure.
If the enemy has as many wounds as its life attribute, the figure is eliminated. If more hits than necessary are obtained, these are ignored.
Damage token: Attack is the same for enemies, but in addition:
- When a parasite deals more damage or eliminates a soldier, take 1 "infected" card.
- When a parasite eliminates a civilian, take 3 "infected" cards.
Melee Attack
Maximum 1 time per turn.
Spend 1 action point to attack an enemy in your same zone. Roll the character's melee attack dice.
When an enemy is found in the same zone, the figures are engaged in combat until the combat is resolved.
If a zone is fully occupied (has 8 or more figures), the adjacent zone is considered melee for attack purposes. This means that a melee attack can be made from a zone adjacent to a fully occupied zone (and vice versa), and the figures are engaged until the zone is no longer fully occupied.
ENGAGED IN COMBAT: While engaged, you cannot move away from the enemy or take any other actions except melee attacks. You can also use the "flash grenade" or "combat knife" action cards. If soldiers shoot at a zone where you are engaged in combat, roll one less attack die.
Ranged Attack
Maximum of 1 time per turn, unless a card indicates otherwise.
Spend 1 action point to attack an enemy that is in a different zone than yours, within ranged attack range.
Lower the ammo counter on the magazine of the equipped weapon by one number and roll the ranged attack dice for that weapon. When the ammo counter reaches zero, you cannot shoot. To return to maximum, the weapon must be reloaded.
Ammo counter: Ranged Attack Range: Number of zones within firing range.
E.g.: Range 3 means you can shoot 1, 2, or 3 zones away from the soldier. The number in parentheses indicates the maximum distance that weapon can reach, subtracting 1 attack die. You cannot shoot beyond this number.
For example: If you shoot with a rifle (which has a range of 3) at range 4, you roll only one attack die, instead of the two ranged attack dice.
If soldiers shoot at a zone where you are engaged in combat, you roll one less attack die. This penalty does not affect enemies.
If the weapon has only one ranged attack die (like a pistol), you cannot shoot.
You must have LINE OF SIGHT to shoot.
LINE OF SIGHT: You have orthogonal line of sight, meaning you can see what the figure has in a straight vertical and horizontal line. For example, if you are in the "entrance" deployment zone, you can shoot in a straight line up, down, left, and right. If you are in the middle of the "entrance," you can only shoot up and down. You can shoot through other figures, and they do not block your line of sight. However, door figures do block said line of sight.
3) Reload
Spend 1 action point and discard an appropriate magazine token to reload your equipped weapon. Each weapon uses a magazine type, indicated in the magazine box. Place the ammo token on the maximum number of the equipped weapon's magazine.
To reload, you must first be completely empty of ammunition and have the weapon equipped.
There are 2 types of magazines:
Standard Magazine Token: The standard magazine token is valid for weapons with this icon on their magazine. Place it on the soldier card when you get it, and discard it to reload. Obtained through events, by using the Search action, or by picking it up from the ground.
Pistol Magazine Token: The pistol magazine is only valid for the pistol. Place it on the soldier card when you get it, and discard it to reload. Obtained by using the Search action.
4) Switch Weapon
Spend 1 action point to swap your equipped weapon for another. Place the equipped weapon token on the new weapon.
Equipped Weapon Token: Place the equipped weapon token on a weapon. That weapon is the one the soldier currently holds.
5) Heal Wound
Spend 1 action point and discard 1 first aid kit to heal a wound on a soldier in your zone or yourself. When healing a wound, flip over the soldier card and swap the wounded figure for its healthy variant.
First aid kit token: Place it on the soldier card when you gain it, and discard it to heal a wound on a soldier in your zone or yourself.
6) Interact with Objects
Spend 1 action point to give or take items to a teammate in the same zone, or pick up items in the zone. You must be in the zone to pick them up. If there are multiple items, they are all picked up with the same action point. If a soldier spends an action point to give an item (for example, a magazine), the receiver does not have to spend an action point to take it.
After picking up an item, you can continue moving (if it hasn't been completed).
Grenade Token: Obtained by using the Search action or by picking it up from the grounds. When you get it, place the grenade card next to the soldier card and discard the token.
Flamethrower Token: Obtained by collecting it from the terrain. Once you obtain it, place the Flamethrower card next to the Soldier card and discard the token.
7) Interact with Terrains
There are terrains where you can interact. To do so, go to the zone where this icon (a hand) appears and spend 1 action point.
- Command Bridge: Interact with the deployment zone to activate the ship's self-destruction (only in some missions).
- Hibernation Room: This room contains a civilian in hibernation. When you reveal this room, do not place its figure yet. Interact with the deployment zone to wake it up: Place a civilian figure in the deployment zone. Only one civilian can be woken up per game this way.
- Escape Pod: Interact with the pod to escape*.
- Entrance: Interact with the docking module to escape*.
*When you make an escape interaction, the escape pod or docking module immediately departs with any figures currently inside. Make sure to interact when all the figures you're interested in are on board.
8) Open Door
Place yourself on a zone with an exit and spend 1 action point to open the door and discover a new terrain. You can repeat this action as long as you have action points.
Turn the terrain card over and match its exit arrows. Place the indicated enemies and objects (if any) in the new terrain's deployment zone. Place additional terrains face down (if any). You can then continue your movement if you haven't already completed it. You are not required to enter the newly discovered terrain.
If the terrain has a locked door, place a locked door figure of the indicated level between the exits of both terrains. Do not place the enemies from the terrain until the door is opened.
Important!: If, upon discovering a terrain, it is impossible to continue the mission, or the terrain has exits whose new terrains overlap with other terrains, replace it with a valid one from the deck and shuffle. If there is no other option, the terrains are interpreted as being at different levels.
This is also done if a "target" terrain is revealed from the bottom deck before placing the number of terrains from the top deck (see mission setup).
Tip: If you can open more than one door in a zone, and when you reveal a terrain, it doesn't fit well (either because you don't have enough space on the board or because its exits overlap with other terrains), try swapping it with another undiscovered terrain.
Locked Doors
Some terrains include doors that cannot be opened by normal means. Place a locked door figure, of the indicated security level, between the exits of both terrains.
There are two types of locked doors. Both doors, once unlocked, remain unlocked until the end of the game. Remove the locked door figure.
-
LEVEL "B" LOCKED DOOR: has the letter "B" written on it and a blue light. It can only be opened by using the "Hack" action card in the door zone. Sometimes it takes several turns until the "Hack" card is revealed. This represents how difficult the door is to hack.
-
LEVEL "A" LOCKED DOOR: has the letter "A" written on it and a red light. It can only be opened by using the "Open Door" action in the door zone and having the "Level A Access Card."
Access Card Token "A": This card is required to open locked doors on Level A. This card can also be used to unlock any other door. It can be collected in the "room."
LOCK A DOOR: With the "Hack" action card, soldiers located in an exit zone can also lock a door for one round. Place a Level "B" locked door figure between the exits of both terrains. Enemies on the other side can move, but cannot pass through the door: they must wait for it to open or attack the figure in its line of sight. In the next event phase, this door is removed.
9) Blow Up a Level "B" Door
Once per game, spend 1 action point and remove 3 non-infected action cards from your hand to blow up a Level B door. A Level A door cannot be blown up. The door is destroyed, and that exit cannot be locked again during the game. After this action, no more action cards can be used in this phase.
This action is a desperate measure for when there are only a few rounds left and you urgently need to open a door. Action cards discarded in this way are removed from the game and are no longer used. Be careful, this increases the chance of getting more infected cards in your hand of action cards.
10) Use an Action Card
Execute the card's text, then flip the card over to indicate it has been used. This does not require spending any action points.
A maximum of two action cards may be used in total during the player phase, divided among the five soldiers. Players agree on how these two cards are distributed in each phase. A single soldier may use both cards during their turn, but then other soldiers may no longer use any more cards in that phase.
In the next event phase, all action cards are collected and shuffled.
3) Enemy Phase
- Each enemy moves the maximum of its movement attribute toward the nearest soldier or civilian and attacks if possible.
- If the enemy has a ranged attack, it attacks in melee or ranged combat, depending on how far it is from the target.
- Some enemies (such as crew members and assault units) stop their movement as soon as they have line of sight to attack from range.
- For each parasite that enters an area where there is at least one human (soldier or civilian), a single "infected" card is received (even if there is more than one human in the area). If one or more humans remain in melee combat with the same parasite for multiple rounds, no more "infected" cards are received.
- If the enemy is in the same area with one or more humans, they are engaged in combat and cannot separate until the combat is resolved. (See "Engaged in Combat" in the melee attack section.)
- The attack occurs as described in the player's turn.
- When a soldier receives a wound, they flip their soldier card to its wounded version: take 1 infected card and acquire new attributes.
- If the soldier receives as many wounds or more than their health level, they are eliminated: take 1 infected card and roll a die: If it comes up blank, replace their figure with a pale parasite and leave it prone during this phase. This enemy does not attack or distribute infected cards in this phase. They also do not engage in combat. In the enemy's next phase, they stand up and act normally.
- If the eliminated soldier does not transform, their weapons and items can be collected by interacting with their area. Leave the figure lying on the zone to identify its belongings.
- If they transform, they must be eliminated first, and then their weapons and items can be collected from the area where they were killed.
- When a parasite eliminates a civilian, flip its card to its infected variant: take 3 infected cards and it transforms directly into a "pale guy." Leave the figure lying on the zone during this phase.
Enemy Initiative
Follow these instructions in order to see which enemy activates first. In the event of a tie, move on to the next condition until the tie is resolved. If there is a doubt, the decision is made randomly.
Activates first:
-
- The enemy closest to the soldiers or civilians.
-
- The enemy with the most melee attack dice. Human and robot enemies have priority over parasites.
-
- The enemy in the largest group.
Enemy Attack Priority
If the enemy can attack multiple targets, follow these instructions in order to determine which figure attacks first. In the event of a tie, move on to the next condition until the tie is resolved.
The active enemy attacks first:
-
- The soldier or civilian not engaged in combat.
-
- The civilian before the soldier.
-
- The soldier with the lowest health.
-
- Draw a random action card*.
- The attack is directed at the soldier whose color matches the action card. If it is not a valid action card, continue revealing until you find a valid one among the tied soldiers.
Full Round Example
1) Event Phase
Draw the "Crab" event card. Place 1 in your deployment zone. To determine which soldier is affected by the event, draw an action card at random. A black card is drawn, referring to Private Allen (A). A "crab" would then be placed in the deployment zone of the terrain where Allen is located. However, since there is a soldier in the deployment zone, Sergeant Romero (B), it is placed in the next soldier-free zone, as close as possible, toward the docking module. In this case, Zone C.
Shuffle all the action cards and draw 5 at random. The event phase ends.
2) Player Phase
The players decide the order of the soldiers' turns. Evans (A) starts, spending 1 action point to open the door. The terrain is rotated, and the enemies and terrain objects are placed: a roach, a pale guy, and a magazine. He then spends his second action point to shoot the pale guy. He places the ammo token on a unit in the weapon's magazine and rolls the dice. He rolls 2 hits, eliminating the pale guy.
Johnson (B) then uses one action point to switch weapons from the pistol to the heavy machine gun and another action point to shoot the roach. He rolls 2 hits and eliminates it.
Smith (C) then spends one action point to move to area (D) and spends another action point to pick up the magazine. He uses the "Move It!" action card for free and spends the magazine he just picked up to reload his equipped weapon at no cost.
Allen (E) then takes his turn, spending one action point to shoot the crab. He rolls 2 hits, inflicting 2 wounds. He places a 2-damage token on him. He then spends the other action point and a magazine token to reload his weapon.
Finally, Romero (F) spends an action point to shoot the crab with his pistol. He misses and decides to use the "Swallow This" action card to make another attack. Still unlucky. The player's turn ends.
3) Enemy Phase
In this phase, the crab (A) would attack the closest possible soldier. Since it has two soldiers at the same distance and with the same health, a random action card is revealed to determine which soldier it attacks. A yellow action card is drawn, referring to Smith (B). Since it is not a valid card (he is not one of the tied soldiers), another is drawn. This time, a red card is drawn, corresponding to Romero (C). So the crab moves toward Romero, who receives an "infected" card for making contact. It then attacks him. The dice are rolled, and it rolls 3 hits, eliminating the soldier.
Another "infected" card is received for inflicting wounds, and a die is rolled to see if the victim becomes a parasite. The blank side is rolled, so Romero becomes a "pale guy" parasite. The figure is left lying on the zone during this phase to indicate that it does not attack, does not distribute infected cards, and does not engage in combat. The enemy's turn ends.
Adjust Difficulty
- If you find the game too hard for you, take one or more free extra magazines at the beginning of the game. Distribute them among your soldiers as you wish. The more magazines you take, the easier the game becomes.
- To increase the difficulty, you can add one or more infected cards to your action card deck. You can also reduce your event deck to reduce the mission time.
Ending
Check the following results to read the outcome of your adventure:
- If all soldiers die, read Ending 1.
- If time runs out, read Ending 2.
- If time runs out after activating the self-destruct (Mission 1), read Ending 3.
- If the infection check fails, read Ending 4.
- If the infection check is passed but not all soldiers survive, read Ending 5.
- If the infection check is passed and all soldiers survive, read Ending 6.
IMPORTANT: DO NOT READ UNTIL A MISSION IS COMPLETED.
Ending 1
The sergeant is dead. Evans and Smith fell in the ambush at Hallway C. Johnson and you are holding out in the laboratory, but the door won't hold much longer. Through the wall, you hear claw strikes and footsteps above in the vents and below in the crawlspaces. Even if you could escape, the wound in your leg doesn't look good. Ammo's almost gone. You nod when Johnson shows you two bullets he pulls from his pocket. You just regret not taking more roaches down with you. Damn bugs.
Ending 2
You and your team are overwhelmed. Ammo is running low and the bugs keep coming from everywhere. You can't reach the bridge to trigger the self-destruct, so you decide to abandon the ship and report back to your superiors. Eventually, ANEMLOK Corporation secured the salvage rights for scientific purposes. They used the mutagenic virus for experiments. As usually happens, a leak in one of their facilities on Earth led to an outbreak. Within weeks, a global pandemic spread. In a matter of weeks, Earth was overrun by the parasites.
Ending 3
You activate the self-destruct and run towards the docking module. The corridor ahead is packed with bugs. You double back, trying to reach the escape pods, but fires in the lower decks block the way. Options are few, ammo's low, and time's running out. In the end, you realize it's too late to escape. You open the door and keep fighting. 3... 2... 1...
Ending 4
Exhausted and battered, you reach the docking module. Completely drained, you close your eyes for a moment and doze off. When you wake up, you're back in your ship's docking area. Your teammates watch you, whispering to each other. Suddenly, you feel in danger. Your survival instinct warns you against them. They've changed. They want to kill you. You try to flee, adrenaline flooding your body. You see yourself fighting for your life. When you regain awareness, you have a teammate's neck in your jaws, their blood sliding down your throat. The rest lie bleeding out on the floor. It feels good. Something inside tells you this is what you were meant to do. You smell more hostile humans beyond the door, deeper inside the ship. You know you must hunt them down. You feel euphoric. You feel alive.
Ending 5
You manage to trigger the self-destruct and barely reach the escape pod. Behind you, a blinding light and the pod shudders violently. But not everyone made it. Smith was the first to fall in an ambush. Then Allen. What the rest of your team doesn't know is that Allen wasn't killed by a parasite as you claimed. He was wounded, and you couldn't carry him and run at the same time. Besides, after hearing the Astrid crewman's message, you weren't willing to wait for him to turn and deal with another monster. You wake up every night haunted by nightmares, hearing your teammate's cries as you leave him behind... but you're alive.
Ending 6
You did it. The entire team boards the docking module. As you approach your ship, a violent tremor and blinding light engulf everything. You carry the evidence recovered from the laboratory: a journal filled with complex formulas and annotations, clearly taken from mining complex JM3. You recognize the symbol on its cover: the icon of the "Hive", an ancient scientific cult, long extinct and branded as terrorists for their horrific crimes and unethical experiments. You open to a random page: "...the human being is not an individual entity, but a collective one, sharing the same mind, as if we were all one and the same. In this sense, humanity is immortal, for as long as a single representative of the species survives, the collective mind will live forever. But the genetic structure of each individual determines their behavior, their way of thinking, their personality. Their fear and survival instinct cause them to lose their collective nature and focus only on themselves, losing the benefit of immortality. Each individual must serve the Hive for the common good, which ultimately is their own good. We must eliminate these instincts, these fears, the structural weaknesses of humans, so that we can embrace our immortality and achieve great purposes for humanity..."
You flip to another page: "Phase 3 is ready. Results look promising. Soon we will test the virus on humans. Soon we will eliminate the weaknesses of humanity and act as one, for the good of the Hive."
Upon returning to the space station, a welcome committee awaits you. You're congratulated and tended to by a medical team. As you hand over the journal, the captain congratulates you. You feel like heroes. Maybe it's paranoia, stress, or exhaustion, but when the chief medical officer shakes your hand, you're sure you see a tattoo of the Hive's symbol on his arm.