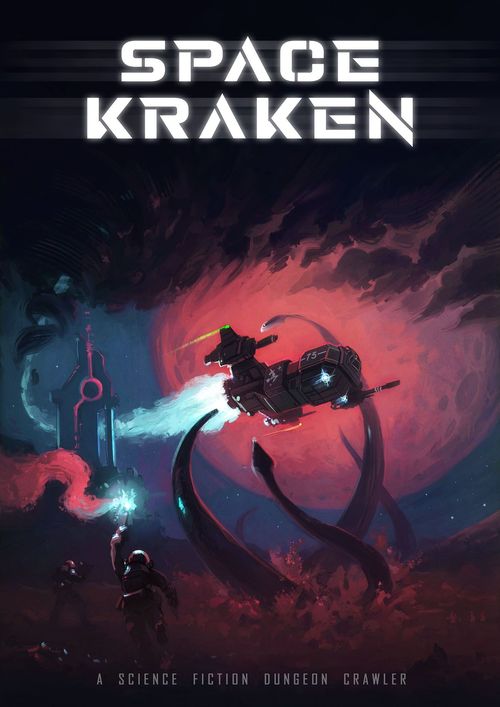
Space Kraken
Space Kraken Rulebook
Table of Contents
Table of Contents
- 1. WELCOME TO SPACE KRAKEN!
- 2. OVERVIEW
- 3. START A GAME
- 4. GENERAL RULES
- 5. GAME PHASES
- 6. Phase 1: ACTIVATE STORY LINES
- 7. Phase 2: SHIP CONSTRUCTION
- 8. Phase 3: FREE ACTION
- 9. INITIATE SPACE FLIGHT
- 10. SPACE COMBAT
- 11. YOUR SPACESHIP
- 12. CREATING A NEW LOCATION
- 13. DUNGEON EXPLORATION
- 14. GROUND COMBAT LOOP
- FLIGHT TABLE (core book p. 163)
1. WELCOME TO SPACE KRAKEN!
Space Kraken is a 1 to 4 player adventure set in a fictional futuristic galaxy. Manage a Crew of adventurers as you explore exotic worlds, hunt down alien fugitives, bring down tyrants, traverse storms and smuggle supplies, whilst earning Credits and experience with which to upgrade your Ship and its Crew.
The innovative Crypted Game Master System allows for the management and progression of multiple Story Lines at a time, bringing the galaxy to life as it develops around you, whether you choose to directly intervene or stand back and watch. This organic generation of narrative makes each campaign in Space Kraken a unique, highly replayable experience.
If you would like to watch a video explanation, just scan the provided QR-codes.
2. OVERVIEW
Below is an overview of the key concepts and mechanics in Space Kraken.
HOW TO PLAY
A game of Space Kraken consists of turns, each of which typically follows the following pattern:
Progress the story. The Crypted Game Master (CGM) will generate an emerging story, potentially revealing new opportunities and Locations for you to explore. The depths of space are often an unwelcoming place, and each journey will involve risks that require careful planning and preparation.
Explore Locations. You'll be facing a variety of environments, Enemies and obstacles that test your judgment and the Crew you develop. You'll face many dangers as you explore the stories and worlds of Space Kraken, but you'll also have access to a wide range of Equipment and Traits to help you make it out the other end!
Recover and adapt. Assess damage, allocate resources and cash in your bounties as you consider your next move. Crew Members can develop their Traits and you'll be able to enhance your Ship's capabilities to better serve you on future adventures.
Whether alone or with friends, Space Kraken is a game of adventure, calculated risks and deep space survival. Do whatever it takes to stay alive and avoid the many grim fates the worlds of the Space Kraken has in store for you.
HOW TO WIN
Your goal in Space Kraken will differ depending on the choices you make during each adventure, revealing itself as you advance through various Story Lines. Victory can be found in a variety of ways, from discovering some ancient technology to hunting down the elusive Space Kraken itself!
MULTIPLAYER MODE
In case surviving the solo mode is still not extreme enough for you…
Space Kraken has an asymmetric multiplayer mode. The first player always plays the game as usual; the others play special roles: A Mascot, a Broken AI, and a Mind Slug. To learn how to play the game we suggest that you start in single player mode.
The sheets explaining the rules for multiplayer setup and play come attached to this corebook as single sheets.
THE CGM (Crypted Game Master) SYSTEM
The CGM brings the realm of the Space Kraken to life, simulating a living universe that develops in ways not always immediately visible to the player. The story of each campaign is formed from Story Lines connected and directed by the CGM.
The CGM allows for multiple Story Lines to unfold, sometimes coalescing into each other or separating off into tangents. This System is designed to offer massive replayability and mystery through the adventures Space Kraken provides.
YOUR SHIP AND CREW
If you unfold the last pages of the book you'll find your Ship and its Systems, a place to record your available Credits and the storage space for your Ship. The Ship page can stay folded out during the game for easy viewing. On the left side of the Ship there's a note page you can use to note anything you like, such as the status of active Quests.
A list of Crew Members can be found on page 173. These Crew Members can be chosen at the start of a new game, or hired at a later point in your adventure. Active Crew Members are tracked by leaving their profile folded out of the book. On the inside pages to the left, Crew Member templates are provided along with their Equipment and Traits, but you can also create your own Crew Members.
ALIEN FACTIONS
Enemies in Space Kraken are represented by fold-out pages found in this rulebook. You can face up to four Enemies at once, facing multiple types of opponent and creating a diverse range of threats you'll have to take on.
Each Enemy will hail from one of the six species found within Space Kraken;
KRAKENS, which originated on Earth and have since spread to all reaches of space, adapting to their new environment through bioengineering and genetic manipulation.
GREYS, ancient and highly intelligent.
INSECTOIDS, armored creatures more closely resembling organic machines than sentient beings.
THE LOST, an assortment of individuals from many different species, driven by external forces into the Kraken's territory where they now fight for survival.
BEASTS, animals and plants of various designs typically found on planets. Many of these are predators, able to survive only through the threat they pose to competing lifeforms in this hostile part of the universe.
THE RENEGADES, a mysterious and elusive species that appear to have some connection to the Greys. The Renegades are considered one of many strange and evil things that lurk beyond the light of the stars.
GLOSSARY
For easier navigation a glossary can be found on page 149.
3. START A GAME
Overview:
- Check Achievements that you earned in previous campaigns.
- Select a backstory for your Crew.
- Select the difficulty of the new Campaign.
- Prepare the randomized Story Lines.
- Set up your Crew and Spaceship.
It's recommended that one player plays through solo mode until they are comfortable with the game's core rules. They can then assist other players to provide a smoother gameplay experience when playing with multiple players.
3.1 CHECK ACHIEVEMENTS
If you have played before, check page 11 for previously earned achievements and their bonuses.
During your adventures in Space Kraken you may unlock achievements by fulfilling their requirements. Track these on the Achievements page.
Each unlocked achievement grants a bonus during all future campaigns you play.
3.2 BACKSTORY AND DIFFICULTY
First select your CREW BACKSTORY from page 10, then select a difficulty:
JUST A SIMULATION: Maybe it's all just a bad dream? You can save and reload the game at the beginning of each turn or at any cloning station you encounter. Upon completing a campaign, your Campaign Score is halved. Recommended for new players.
ADVENTURER: Brave enough to play with the big kids? You can save and load your game at any clone station. Upon completing a campaign, your Campaign Score is not modified.
REAL LIFE: Cloning can reproduce soft tissues and organs, but a cloned mind knows only morbid emptiness... Clone stations may heal your Crew but there's no save-and-load function. Choose this mode for a fair, if at times brutal experience. Your Campaign Score is doubled upon completion.
HARDCORE: Oxygen for your blood, blood for your oxygen. A battle that takes no prisoners. Cloning Stations may heal your Crew but there's no save-and-load function. For the entirety of your campaign non-breathable environments are considered hell-conditions and breathable-conditions are considered as non-breathable. Upon completing a campaign your Campaign Score is tripled.
SAVING AND LOADING
To save your game you only need an image or record of the CGM LINE TRACKER, active Crew Member fold-out pages, your current spaceship and any notes you have. It is advised to take a photo, but you could also scan them or note the details with pen and paper.
To load a save, use the recorded information to restore these pages to their state at the point of saving. Note: Unlocked achievements are permanent and persist between saves and campaigns.
3.3. SET UP YOUR CREW
Carefully select your crew, they will be vital to your survival in the void of space.
It is recommended that new players use the Crew Member templates available on page 173. These Crew Member profiles are ready to play and will allow new players to avoid having to decide on Attribute and Trait allocations.
Choose 3 Crew Members if not otherwise stated by the CREW BACKSTORY, reading their stories and recording their names, Attributes, Equipment and Traits onto the fold-out sheets. All Crew Members start a new campaign at Level 1 (LV1). You may adjust your chosen Crew Members' Attributes, so long as each Crew Member’s total Attributes add up to exactly 16. You will not be able to revise your Attribute allocation after this point. Note that whilst you can hire additional Crew Members during your campaign, you may only ever command 4 Crew Members at any one time.
Your team cannot contain Crew Members that would cover each other's sheets in the book, i.e. you can't have Ray AND Lex in the same team/ game.
The first twelve Crew Members comes with their own unique story Events triggered by their names. These Crew Members are listed as; Quinn, Yuna, Jessica, Ray, Murphy, Mila, Paul, Lex, Ian, Brent, Herman and Liu.
If you wish to, instead of using the preset Crew Members you may create your own custom Crew Members.
3.4. ATTRIBUTES
The value limits for each Attribute is a minimum of 1 and a maximum of 8. This maximum may be exceeded by some rules and effects, but this will always be clarified in the relevant entries. For example, if you increase Strength during play that Crew Member's HP will be increased as well, as it would when creating a Crew Member.
Below is a list of Crew Member Attributes used in Space Kraken.
AGILITY: Defines how fast the Crew Member can react, dictating combat initiative.
STRENGTH: Defines the Crew Member's physical Strength.
-
Using Weapons sometimes requires that a Crew Member has a certain amount of Strength.
-
Carry Capacity: In addition to carrying with the left and right hand slots, each Crew Member can carry an extra Item / Weapon in their backpack for every 2 points they have in their Strength Attribute. Items, Weapons and Armor are all considered to weigh the same and occupy the same amount of space.
-
Determines Health Points (HP): A Crew Member’s HP maximum is equal to twice their Strength Attribute, up to a limit of 14 max HP. HP can be tracked on the Crew Member’s profile in this book using a pencil.
Note: When a Crew Member’s HP maximum increases, their current HP increases by the same amount.
- Extra Armor: Each Strength point above 8 that a Crew Member possesses will grant them an extra 0.5 Armor.
TECH: The Tech Attribute is used to unlock doors, disarm Mines and Laser barriers, build new Ship Systems, un-jam Weapons and other technology related challenges.
CHARISMA: Charisma allows your Crew Members to influence the minds of characters. It can also be used to avoid Enemy encounters.
RANGED: The Ranged Weapons Attribute is used to increase your Ranged Weapon’s damage or accuracy.
MELEE: The Melee combat Attribute is used to increase your Melee Weapon’s damage or accuracy.
3.5. CREW TRAITS
IMPORTANT: A Crew Member may not have more than 4 active Traits at any one time.
Crew Traits are listed on page 171. You may assign up to four Traits to each Crew Member when you create them. Each Trait has a point value. New Crew Members must always have a combined total Trait value of 0.
PSI TRAIT: No more than one of your Crew Members may have the PSI Trait at any time. When creating a new Crew Member you may not increase their PSI Trait Level above 1.
A simpler experience of playing Space Kraken is possible by ignoring all Traits in the game, Crew and Enemy. This won’t make the game less difficult, but it will make it simpler for beginners who might want that.
3.6. OXYGEN
Your Crew shares Oxygen, which is tracked on your spaceship sheet and can carry 25 units by default, which can be increased by equipping your Crew with Oxygen tanks. Oxygen is used for actions taken in non-breathable environments.
3.7. BUY STARTING EQUIPMENT
You start each Campaign with 100¢ (Intergalactic Credits), with which you must buy one of the available Spaceships found on pages 187 onwards. A Ship is first bought as a Hull, which is the first System listed on each Ship profile page which details its name, type and amount of structure points. Once you have bought the Hull, you may buy any of the other Systems available for that Ship.
You will probably also want to buy Items and Weapons for your Crew Members, so be wary of spending too many Credits on your initial Ship. You can track your available Credits on your Spaceship page. Whilst you are free to choose what Systems you buy for your first Ship, it is advised that you spend around 30¢ on fitting your Ship with Shields, Weapons and a Teleporter. A good example would be a 10¢ Teleporter, 10¢ Primary Shields and two Lasers for 5¢ each.
Each System you buy for your Ship can be recorded with an X next to the relevant System on the Ship's profile page.
Whether you use premade Crew Members or create your own, you will need to pay for their Weapons and Items, which are listed on their sheets starting at page 173. An explanation of the Weapons and Item values is provided in the WEAPONS and ITEMS DEFINITION on page 165 and 167. There’s no grade limit when buying your starting Equipment, so you could for example buy a grade 4 Railgun for 30¢ to start the game with. You can also place Equipment inside your spaceship’s storage. Weapons function and keywords are explained at page 145.
Unspent Credits you can keep.
3.8. SETUP THE LINES
DEFINE YOUR CGM LINE START COORDINATES by selecting a Set of Lines on page 13.
3.9. VICTORY CONDITIONS AND DEFEAT
A Story Line plot point will let you know if you have successfully completed your Campaign. All you must do is stay alive until that moment arrives!
If all of your Crew Members are dead or your spaceship is destroyed, you have lost the game. If your Crew Members involved in a Dungeon Exploration are all killed, as long as you still have one Crew Member alive on your Ship you can continue your campaign.
4. GENERAL RULES
Attribute Checks: Roll a d6 and add the indicated Attribute value for the Crew Member making the check. If the result is equal or above the value displayed in the check, it is a success. Otherwise the check is failed. Some checks may specify that they use different amounts / types of dice.
For example: To succeed in an Agility Check against 8+ you’d need your Agility + a d6 roll to be 8 or higher.
Always Round Up: When dividing odd numbers (1,3,5,7...) by 2, always round up to the next full number, for example 7 becomes 4, 15 becomes 8.
Campaign Score: When you successfully complete a campaign, you can claim a Score by adding all your surviving Crew Members’ Levels together. Then apply that campaign’s difficulty Score modifier (see below). Campaign Scores can be recorded on page 10.
Just a Simulation: Campaign Score is halved. Adventurer: Campaign Score unmodified. Real Life: Campaign Score is doubled. Hardcore: Campaign Score is tripled.
Capture Alien: You can capture aliens by lowering their HP to 0, -1 or -2 with an attack. If you reduce them to below -2 HP, they die (unless they have the Zombie Trait).
Captured aliens must be carried by a Crew Member to complete 'Capture' Quests. A Crew Member cannot attack whilst carrying an alien, but is otherwise unaffected.
Crew Member Inventory: Each Crew Member has 6 Inventory slots which can be used to carry Equipment like Weapons and Items. These slots are displayed on their profile page as two hand slots, left and right, and four backpack slots. These are presented in a way that allows you to easily track and move which Equipment is in their hands and which is in their backpack by labeling the slots with L, R, or 1-4 for their backpack.
Two Magazines of the same type can be stored in one Inventory slot, and an Inventory slot containing a Weapon can also hold one Magazine for that Weapon.
Overload: A Crew Member may carry one Equipment over their carry capacity, but will suffer a penalty of -1 to rolls for Ranged or Melee attacks they make during Ground Combat. They can also carry two pieces of Equipment over their capacity, but the penalty is then -2.
Removing a Crew Member: You can remove a Crew Member from your Crew at any time, for example if you wanted to make space for a new one. If you do so at a Shop you will get Credits for doing so. See Shops page 138.
Running Out Of Credits: In a situation where the game's rules demand that you pay an amount of Credits and you cannot, you pay all of your available Credits and suffer no further penalty unless otherwise stated. Be aware that there are some situations with penalties for not being able to pay.
Space Stations and In Space: Maps at these Location types never have a breathable Atmosphere Outside. If the Location was defined with a breathable Atmosphere Outside, it is instead considered 'non-breathable', unless it is considered Hell, in which case it remains unchanged (because of cosmic radiation and other cosmic effects, it is still possible that hell conditions will be present outside).
Unconscious and Killed Heroes: If a conscious Crew Member's health is reduced to 0, -1, -2 or -3 they become unconscious. If they are reduced to -4 HP or lower, they are instead killed.
Negative HP values aren’t tracked, they count as zero (just cross out their last health point on their life bar), and unconscious Crew Members don't take any further damage, even if other team members walk through Laser Barriers or if the team get attacked with Explosive Weapons during Ground Combat. You can still access their Inventory during Dungeon Exploration or by spending actions to share Items with them during Ground Combat.
If a Crew Member is killed during Ground Combat their Equipment can be collected by spending an action (or for free if you are not in Ground Combat). The dead Crew Member is removed from your team and erased. If they were a preset Crew Member (with a preset name), they cannot rejoin your team again during this campaign and you should make a note of this.
Healed unconscious Crew Members are active again, but cannot take any actions before the next Ground Combat turn.
Leader: When activating a CGM Story Line you must choose one of your brave Crew Members to be your 'Team Leader' for that Story Line. Some Events specifically refer to your ‘Leader’. In those Event texts the word 'you' refers to your Leader.
Let's Stick Together: During Dungeon Exploration your Crew Members move as a single unit. You cannot split them, moving forward or through a Laser barrier or Mine field without some of your Crew Members.
You can leave some of your Crew Members on your Ship during Dungeon Exploration, typically to complete System construction or Recover from previous Dungeon Explorations.
‘Lone Wolf’ Bonus: If you have only one active Crew Member in Ground Combat, they can focus entirely on the task at hand and can act faster as a result.
- They will win any Ground Combat initiative check, except if it’s an ambush.
- They will have two activations per Ground Combat turn. If they have PSI Powers they can also use their PSI Powers twice per Ground Combat turn.
- Once per Ground Combat turn, they can reroll a Melee or Ranged attack dice check.
Non compatible Items: The following Item restrictions apply to Crew Members.
-
No one Crew Member can benefit from more than one of the following at any one time: Tool set / German Tool set.
-
Only one Mobile transmitter may be carried by your entire team.
5. GAME PHASES
Each game turn you perform the following phases in order. Some phases allow for Recovery.
PHASE OVERVIEW
Phase 1. ACTIVATE STORY LINES (Page 122)
Using the Crypted Game Master, activate Story Lines to progress the narrative of your Space Kraken adventure!
Phase 2. SHIP CONSTRUCTION (Page 125)
If you have enough Credits available you may use them to purchase Ships or add new Systems to your current Ship.
Note: You can also buy Ships and Ship upgrades at a Shop during Dungeon Exploration.
Phase 3. FREE ACTION (Page 125)
Choose ONE of the following:
- Initiate Space Flight, see page 125.
- Start a Dungeon Exploration at an already discovered Location. See page 125.
- Select a Story Line to activate it again. See page 125.
- Visit a grade 5 Shop.
- Skip this phase.
Phase 4. SHORT VISIT
If your Ship has no Teleport capabilities, skip this phase.
Select a CLEARED Map from a Location noted on your Starmap Locations Log that has a Shop (indicated by a green S), Ammo dealer, Quest Master, a Gambler or a Modder in it.
If you can Teleport to it (see Teleport Conditions, page 134), your Crew Members can visit that trader and perform one of these actions:
- Visit a Shop, see page 138.
- Shop at an Ammo Dealer, see page 136.
- Visit a Quest Master, see page 138.
- Visit a Gambler, see page 137.
- Visit a Modder, see page 138.
Once the action is complete, your Crew Members return to your Ship.
Phase 5. QUEST TIMER
If your Notes/Quests section on your Ship page is empty you can skip this phase. Otherwise:
- For each Urgent Quest that was not activated this turn draw a tick in the Timer cell next to it.
- A Urgent Quest is failed if you draw the fourth tick next to it. In this case you must pay the penalty as indicated on the QUEST MASTER sheet and then erase the Quest. See page 160.
Phase R. RECOVERY PHASE
Check this at the end of phases 1, 3 and 5:
- If an Event in Phase 1 triggers a Dungeon Exploration or a Ground Combat you may also Recover after it.
- If you returned to your Ship after a Dungeon Exploration during Phase 3 you may Recover.
- If you did not trigger a Recovery phase during the entire turn, you are allowed to trigger it after the QUEST TIMER in Phase 5.
RECOVER:
- All of your Crew Members recover 3 HP.
- Check your Ship's Systems for additional Recovery effects.
- Unconscious Crew Members are set to 3 HP.
- Crew Oxygen is fully refilled.
- You may reorganize all Items between Crew Members and your Ship freely.
6. Phase 1: ACTIVATE STORY LINES
At the start of each of your game Turns you will activate each Story Line once and follow its path until it ends at a red marked cell in the CGM Sheets.
Skipping A Story Line: You may skip a single Story Line EACH turn, but only if you did not skip that Story Line on the previous turn.
The CGM Line Tracker records the progress of each Story Line, its variables, and a note in Story Line Slots.
Please take a moment to familiarize yourself with how the CGM Line Tracker page is set up on page 14. Right under CGM LINE TRACKER you will find the 6 Story Line Slots.
-
To the right side of LINE there are 7 blank cells where your current position on the Line is represented with a Coordinate (this will be explained below).
-
Each Story Line sits above cells labeled A-H. You will at times be instructed to record values in these cells.
-
In the middle you'll see the INTERLINK MEMORY, a row of cells labeled I-Z that similarly will be used to record values. This is used for global variables that allow Story Lines to influence each other.
-
Finally, the Starmap Locations Log can store up to 2 Locations. This log records all variables for a stored Location so that it can be chosen as the target destination for a future Space Flight if you wish. For a reminder of what each of these variables are see page 133.
The CGM Sheets each have a number and two sets of coordinates, horizontal and vertical. When activating a Story Line you encounter a code such as 3HC. This simply means that you look up CGM sheet number 3, H is the column and C is the row to find the field you should apply. In phase 1 of each turn you activate your Story Lines in order and then follow their path through the CGM sheets.
As you follow these paths you'll trigger Events, encounter alternate paths, be asked to make choices or alter variables. You progress with each Line until you reach a red Coordinate or the red mark for the end of a Line '/'. Then the Story Line stops progressing until the next turn begins. You do however have the option to activate a single Story Line by force in the
third phase of each turn.
When starting a new game your Story Lines will start in the first cell and you'll activate them each Phase 1: ACTIVATE STORY LINES, and then potentially again if you wish during Phase 3: FREE ACTION. The game handles multiple Story Lines simultaneously this way: In the first phase of each turn each Line is activated once, starting with Line number 1 at the top of the CGM LINE TRACKER. Your starting point is a CGM coordinate made of a CGM sheet number and two characters. You will follow the Line's path through the CGM sheets until you reach a red cell which stops the Line for this turn. These red Coordinates are also underlined to assist color blind readers. You note the red coordinate in your CGM Line Tracker of the corresponding Line and then you progress with the next Line. If a Line stops at a '/' cell it has reached its end; it will not be activated ever again and must be erased. Never erase an unresolved Story Line to make space for a new one.
If you reach a green cell while following a Story Line, a Command will be triggered. After that you must follow the blue field on its right side. Sometimes a Command will give you two different options to choose from; in this case you must select one of the two following blue cells on its right side and follow its coordinate.
Not every Line calls for a command each turn; sometimes time passes without commands, but it can also happen that a single Line triggers multiple commands in one turn. You should always be prepared for surprises.
Please note all 'zero' numbers used at Coordinates on the LINE LINE TRACKER and the CGM SHEETS are written with a 'line' inside '0'. Without a line it’s the letter 'O'. Also take care not to confuse the letter 'I' and the
number '1'. These are important distinctions, so please take care when noting these variables.
Example for following a Line: We start with the Story Line (No.1) on top:
Note: Example material for the CGM and Story Line System have been created specifically for examples and are not part of actual game material.
Before the first turn of the game, you must select and note down your Story Line sets on your CGM LINE TRACKER. Then, at the start of each Phase 1, check the last Coordinate of the actual line. It is a Coordinate pointing to a cell on the CGM Sheets. For example, if the last Coordinate is ' 2HA ' you must activate this Line by checking to see what is concealed on that Coordinate field inside the CGM sheet (the sheets with the dozens of entrances in Lines and columns). In this case check the CGM Sheet no. 2 and the value in field H stands for the column and field A for the row.
If the result is a red marked Coordinate like ' 4M ' you only need to note this new Coordinate into the next free field of your first Line on your LINE TRACKER SHEET. You are done processing Story Line 1. Sometimes lots of important Events occur, sometimes nothing of note happens.
If the empty slots of a Story Line run out you can start with its last coordinate back at the beginning, erasing the previous coordinates.
If you reach a COMMAND (green cell): Commands are easily visible because they use special symbols: >, <, =, +, -, !, % Each COMMAND has a special effect. Sometimes there are also characters shown: A-H are variables of the current Line. I-Z are interlink memory variables which can be used by multiple different Lines, which are shown below the Story Lines. If a variable is empty/not written it counts as a zero. Variables can also reach a negative value.
After each Command follow the next Coordinate (blue) on its right side, or the next but one Coordinate (blue as well) if the Command offers you a decision between two options and you decide to take the second option (B).
Compare: > < = Sample: 'A=1', 'A>4' The first value is compared to the second one. If it’s a character instead of a number, you must use the corresponding variable. If the result is true follow the Coordinate in the next right-side cell. If the result is false, use the next but one Coordinate on the right side.
Plus, Minus: + - Sample: 'A+3', 'D-2', 'D+A' The first variable is modified by the value or variable that follows it. For example: A+3 will add 3 to variable A. Or D+A will add variable A to variable D (in this case A is not changed). Note the new value of the first variable then follow the next Coordinate on the right-side cell.
Event: ! Sample: '!A4' Read the referenced text from the EVENTS, in this case you will find '!A4' on page 53. This may reveal more of the story, unique Weapons or Items, generate new Story Lines, present you with a decision or initiate a Ground Combat. The Event ID is made of two characters out of the range 0-9 and A-Z, like '!7X' and '!EZ'.
Attention: Only read the named Event, then follow the next cell’s Coordinate as usual, or if a decision is required you must choose between the Coordinate immediately to the right, or the Coordinate to the right of that one.
In some Events you will find Shops, Ammo dealers, Gamblers and Modders which offer you the same service as when you find them during Dungeon Exploration. See page 136.
Random: % Sample: '%12' This is a random switch: Roll a d20. If you roll the defined number or higher follow the first Coordinate to the right side of the COMMAND as usual. Otherwise follow the next but one Coordinate on the right side.
End of the Line: / Through fortune or fortitude, a fragment of time has been hammered into history. You have completed this Story Line. Erase it to indicate this.
Standby Events: Some Event Commands will have the 'STANDBY' feature listed. You may choose to delay the activation of such Events, instead activating them at any later point you wish, with either your Story Line activation in phase 3, or when you progress a Story Line at the start of a new turn. You never have to activate a 'STANDBY' Event and can ignore them permanently if you wish.
If you reach such an Event, you write 'STANDBY' as a note after its Event Coordinate on its Story Line tracker if you do not want to activate it immediately. Until it is activated, such an Event remains in standby status and nothing happens no matter how many turns go by.
If a Dungeon Exploration or combat loop is triggered by an Event, it is handled the same way as when you landed on a Location after a Space Flight or if you visited a previously discovered Location again.
All the commands are also listed on the CGM COMMANDS page on page 15.
COMMAND example: For example if you are pointed to the green marked field on ' 2BC ' you will execute the ' !A7 ' COMMAND which is an EVENT.
In this case it’s an EVENT which maybe tells you a story and would be found under ' A7 ' on the Event Sheets. Then you jump to the next field where the right-side Coordinate directs you to the next position inside the CGM Sheets. In this case you will check ' 3TT ' next.
Note ' 3TT ' on your CGM LINE TRACKER to remember your actual position; then progress forward and check what’s written on ' 3TT '. In case ' 3TT ' contains a red Coordinate you note this and the Line stops advancing this turn. But in our case there is another COMMAND ' B8 ' you must process that as well. It’s also possible that a EVENT or COMMAND offers you two different options; A or B:
First read the Event Text which would be in ' B8 , it will tell you a story and ask you if you choose option A or B. To choose the path of option A you must follow the Coordinate on the right side of the command as usual which is ' 3FR '. To choose option B you follow the next field but one on the right side which is ' 4BB '. Then keep on following the LINE, until you become linked to a red marked Coordinate or to a point where the entire Line ends with a ' / '. This System means that LINES can trigger multiple different Events in a single
turn. In case you land on a ' A>4 ' command the decision is made by a logic operation; compare value A of your current Line with 4. If it’s true, you must follow the first option, or if it’s false you must instead follow the second option.
Don´t forget that you must define which of your Crew Members is the Leader (who will lead your Crew from the front) before entering any Event. It might be best not to ponder too much what might come of whoever is at the front of your team.
7. Phase 2: SHIP CONSTRUCTION
You can buy Ships and Ship Systems at a Shop during Dungeon Exploration, but your Crew is also able to build a Ship independently. Any Ship or System you buy at a Shop is immediately delivered / installed.
Your damaged Ship’s Systems are automatically fully repaired in this phase. Destroyed Systems should be erased if you have not done so at this point. They are not repaired.
To build a new Ship or System, assign between 1 and 3 of your Crew Members to the construction and choose whether to build it in 1 or 2 turns. The assigned Crew will be unavailable during this, but a faster build will cost you more.
Follow these steps:
-
Decide the task and assign the Crew Members (minimum 1).
-
Find the price of the Equipment on the Item or Weapon list, which in this case will be used as the ‘cost’ of this Construction.
-
Decide on the duration, 1 or 2 turns. A 2 turn construction will grant a bigger discount to the cost.
-
Roll a d6 for each assigned Crew Member and add their Tech Attribute to the result.
-
Double this amount if you chose the 2 turn construction duration. The final value is your discount, reducing the cost of the construction.
-
Pay the cost (in Credits) on the Ship construction phase your Crew is done building, making sure to reduce the cost by your discount. If you cannot pay the build, the build fails.
Limitations:
-
You cannot add, remove or swap Crew assigned to the construction and you cannot change what is being constructed.
-
Crew assigned to a construction still count towards the 4 Crew limit.
-
You can cancel construction with no refund.
-
Crew assigned to a construction do not join Dungeon Exploration or Ground Combat, though they are still involved in Events and Space Combat.
8. Phase 3: FREE ACTION
You may take one of the following 4 options, or simply skip this phase:
- Initiate a space flight to potentially discover and land at a new Location.
- Land at an already discovered Location recorded on your STARMAP.
- Activate a Story Line.
- Visit a Grade 5 shop.
Explore a new Location: Rules: see 'INITIATE SPACE FLIGHT' (Chapter 9) page 125. Your space flight may trigger a space battle, which is handled with the rules for 'SPACE COMBAT' (Chapter 10) page 127. If you discover a new Location, you will generate it using the rules for 'CREATING A NEW LOCATION' (Chapter 12) page 132.
Finally, after successfully landing (or teleporting) your Crew to a Location, you start 'DUNGEON EXPLORATION' (Chapter 13) page 134 and explore the new Location and its multiple Maps on the ground with your Crew until you decide to leave the Location and return to your spaceship.
If you have an Enemy encounter during this ground trip you will go into a 'COMBAT LOOP' (Chapter 14) page 141 which repeats until this combat is resolved by defeating your Enemies or escaping. Following successful combat, you may continue exploring on the ground until you leave the Location.
Visit a recorded Location: This initiates a Dungeon Exploration at the recorded Location. There’s no space flight initiation or Space Combat when visiting an already-known Location again.
Activate a Story Line again: Progress a single Story Line of your choice. This is conducted exactly as it would be in phase 1, however only for a single Story Line.
9. INITIATE SPACE FLIGHT
The rules for initiating a space flight are also found at the INITIATE SPACE FLIGHT PAGE on page 163.
9.1 SELECT A LOCATION DIFFICULTY
Choose a value between 1 and 5. This will determine the Difficulty of the target Location, which impacts how dangerous both the Location and the flight to get there will be. A high Location Difficulty will grant greater Treasures but also involve much stronger Enemies.
9.2 SELECT FLIGHT OPTIONS
If you wish you may select one or two of the Flight Options as listed below. Your Flight Difficulty matches your chosen Location Difficulty for your destination, however this may be modified by any Flight Options you choose to apply. These will not impact the Location Difficulty of your destination.
You may not choose a single option more than once for a single flight, and regardless of what you choose a Flight’s Difficulty can never be below 1.
Risky Shortcut: Shave off some flight time by flying through a hazardous part of space and you'll have some time to scout the Location on arrival. Flight Difficulty +1. Grants you 2 dice modifications during Location generation. You cannot combine this with ‘Dangerous Shortcut’.
Dangerous Shortcut: You cannot combine this with ‘Risky Shortcut’. By risking outlaw territory and asteroid fields you can reach your destination notably sooner, enabling a more thorough scouting. Flight Difficulty +2. Grants you 3 dice modifications during Location generation.
Smuggle Goods: Another vessel approaches you with a very shifty offer. You know it's probably not as legit as they tell you, but you've got more guts than you have Credits right now, so you accept. Flight Difficulty +2. If the flight is a success, you get 15¢. You cannot combine this with ‘Pay a Smuggler’.
Pay a Smuggler: "Times are hard and I can tell you're hungry for a break" comes a voice both slimy and honest. "Cover my costs and I'll guide you along my 'special' route." Flight Difficulty -1. Pay 5¢ to cover the Smuggler's costs. You cannot combine this with ‘Smuggle goods’.
Safe and Sound: Avoid any Space Combat. Grants you 2 dice modifications, but you fly so slow and carefully that you haven't enough time for a Dungeon Exploration on the newfound Location this turn. If you want to land there you must wait until the next game turn. You cannot combine this with any other Flight Option.
9.3 CHECK TO AVOID SPACE COMBAT
Space Flight will trigger a Space Combat, however you may attempt to avoid this if you wish.
To do so, roll a d6 and compare the result to the Flight Difficulty. If it is equal or higher, the attempt succeeds and you can proceed to generating a new Location. If you fail you must conduct Space Combat. Rolling 1 here is automatically a failure.
You still may escape from a Space Combat if avoiding failed but then you must wait until the next game turn to land at the new Location, and as a result you will lose all dice modifications during the Location Generation,
including Long range sensor effects and the smuggling goods bonus.
9.4 INITIATE SPACE COMBAT IF TRIGGERED
If you were unable to avoid Space Combat in the previous phase, or chose not to, you must now prepare for Space Combat.
Determine the Space Flight’s number by doubling your Space Flight Difficulty and then adding a d3 (d6/2). Cap the maximum to 19. Check this number on the flight table.
Insert the Space Combat parameters (Location Difficulty, Flight Difficulty, Flight options and Flight number) on the left side of the SPACE COMBAT page. Transfer your Ship's parameters and Weapons to the SPACE COMBAT page as well as your Crew Member names.
Also transfer the values defined on the FLIGHT TABLE (page 163) to the SPACE COMBAT page on the left side. At the start of the 1st turn of combat all your Weapons have full Ammo and Shields are fully charged. The Enemy's Shields are fully charged as well.
For example, if your flight has the number 4 'Accident': Note the light purple TIMELINE definition from the FLIGHT TABLE which is '-, -, -, -, T' (5 values are defined) in the same order inside your SPACE COMBAT page on the very top under TIMELINE into the first 4 cells. Sometimes you need to transfer more values, sometimes if everything is blank you leave your SPACE COMBAT page blank as well.
Then you transfer the next values from the FLIGHT TABLE the OBJECTIVES marked in light blue, in this case T7, T7, T7 and T9. Write them in the 4 available OBJECTIVE cells within your SPACE COMBAT SHEET in the same order.
After that you transfer the Enemies from the FLIGHT TABLE to your SPACE COMBAT page. Check the first light red definition of ENEMY 1 which is 'Mine 3-0, 5, 0-0'.
Above the 4 Enemy definitions you can see the explanation for these values which is:
SP - CREW, WEAPON DAMAGE, SHIELD- SHIELD RECHARGE
In the above example the Enemy is a Mine, with 3 structure points, zero Crew, 5 Weapon damage, and zero Shield and zero Shield recharge.
On your SPACE COMBAT page you see 4 Enemies shown as red triangles with numbers, the very left is number 1. On the very top above it, under the dashed line beyond OBJECTIVES the definition of this first Enemy starts with 'ENEMY TYPE'. In this white box you write 'Mine', then fill out the other boxes as in the picture below.
The first Enemy has now been defined for your Space Combat. Repeat the same with the other Enemies. In this example there is one more Enemy with the same values, so just note the same values for Enemy number 2.
Below the blue triangle which is a symbol for your own Ship you now transfer your Ship’s parameters onto the SPACE COMBAT page. Copy your total Ship's SP(Structure Points) including hull and any hull expansion SP's to the first cell under SP. The following blank cells are used to log the current SP during Space Combat. As the Enemy damages your ship, and you repair it, note the current SP value. When all cells are full, simply erase all existing values in the cells to record more SP adjustments. As with the other details, note your Ship’s Shield capacity under Shield and your Shield recharge under Shield recharge.
For both you and your Enemy, the Ammo of all Weapons and Weapon Ammo Magazines are full at the start of combat, and all Shields are fully charged. Ammo is noted on your SPACESHIP page on the corresponding Weapon Systems.
After the last dashed line you note your Crew Members’ names. The white boxes shown for different tasks under your Crew you leave blank. These are checkboxes used to mark when you used a Crew Member for a specific action during each Space Combat turn.
You are now ready to begin Space Combat.
10. SPACE COMBAT
It's like a battle on the high seas, with sailors, bursting Bulkheads, and dead everywhere. But you can only hear your own crew die...
Space Combat is a loop of the following sub-phases until combat has been resolved: 1) Manage the timeline 2) Solve objectives and repair 3) Define targets and fire 4) Enemy fire 5) Boarding Enemy Ships 6) Attempt to escape 7) Recharge
GENERAL SPACE COMBAT RULES
During Space Combat the word ENEMY is used for hostile forces which may be Enemy spaceships, space stations or other objects relevant for Space Combat.
Using Crew Members: Each Crew Member can be used only once during each Space Combat turn. Mark them as soon you use them regardless of the result of their usage and erase those marks at the end of each turn. At the bottom of the SPACE COMBAT page your Crew is listed by their names and there you mark them as used which also can record how you used them.
Enemies with a Crew value of zero in their definition are unmanned and cannot be boarded.
SPACE COMBAT PHASES
1) MANAGE THE TIMELINE
Some Space Combats have a timeline, some do not. Activate the actual (leftmost) timeline command. Then cross it out. If the timeline is empty the space battle is handled without using timed Events.
If it's empty nothing special happens. If the timeline command contains a letter, the corresponding action will happen instantly:
Attack: The Enemy Ships attack immediately. See phase 4 - ENEMY FIRE. Then continue with phase 2. The Enemy will also make its regular attack again if phase 4 is reached, so it attacks twice this turn.
Backup: All destroyed Enemy Ships will be replaced with new ones. Damaged Ships are not replaced.
Combat: If you have 3 or less Shield energy Level, any Enemy Ship with at least 4 Crew Members will initiate a Boarding Combat, one Enemy Ship after another. You can choose which Ship starts Boarding Combat first if there are multiple Ships boarding. They always leave 2 Crew Members on board their own Ship: the rest board your Ship. Regardless of whether it is you or the Enemy that initiates Boarding Combat, it is resolved the same way. See phase 5 – BOARDING ENEMY SHIPS.
Evading: Enemies are evading your fire, the roll required to hit the Enemy this turn is increased by 1. For example instead of needing to roll a 4+ you’d need to roll a 5+ to hit.
Game over: Your Ship will be completely destroyed if you are not able to destroy all Enemies or solve all objectives by the end of this turn.
Idle: The Enemy Ships are doing something else instead of attacking you. Skip phase 4 – ENEMY FIRE during this SPACE COMBAT turn.
Shields: The energy Shields of all Enemy Ships are down this turn and will also not recharge. On the next turn they are back with the charge they had before losing Shields.
Time: If you are not able to destroy all Enemies or solve all objectives during this turn, you have lost too much time and must retreat at the end of the turn. The combat then ends (you survive) and you can create a new Location but without dice modifications or smuggle bonus, and you are not allowed to land there this turn.
Victory: At the end of this turn the Enemies retreat and you automatically win.
2) SOLVE OBJECTIVES AND REPAIR
If there are defined objectives, you must solve them all exactly in the order given from left to right in order to win. You can combine your Crew Member's Attributes, or separate them, and try to solve more objectives after the first if you still have unused Crew Members available.
Unsolved objectives can be solved in subsequent turns. If all of them are solved, the Space Combat will be over at turn’s end even if Enemies are left in play. Defeating all Enemies does not end the combat if unsolved objectives are still present. If there are no defined objectives your goal is simply to defeat all Enemies.
Mark all Crew Members who participate, add their corresponding Attribute such as TECH together and add a single d6 dice roll result to their Attribute total. If the result is equal to or higher than the difficulty of the objective, you have successfully solved it. If you roll a '1' you have always failed no matter the total result.
In case of an Attack check you can use your Ranged or Melee Attributes, and even mix both if you use multiple Crew Members to solve the objective.
The letter of the objective shows which Attribute will be used to solve it; the number which follows shows the difficulty.
T8 is a Tech check against 8.
- A: Attack check
- T: Tech check
- C: Charisma check
- ?: Choose freely whether you prefer to use your Attack, Tech or Charisma Attributes, but all participating Crew Members must use the same kind of Attribute (mixing Melee and Ranged as attack Attribute is still allowed).
Repair: Available Crew Members may then be used to repair a single damaged Ship System or 3 structure points with a T9 tech check. If you have multiple unused Crew Members you can start multiple repair actions. You don’t have to pay Credits for a repair, but need to mark the participating Crew Members as used.
Example: You try to solve the first objective which is a T9 Tech check. You use one Crew Member with a TECH Attribute of 5, roll a 3 with a d6, so the total is 8 which is just one point short of succeeding a T9 check. The attempt failed. Once used, whether successful or not they cannot be used again this turn.
But you have 3 more Crew Members, so you try it again with two of them with Tech Levels 4 and 3, and you roll a 3 with your d6. The result is 10 which is at least 9, so you have solved the T9 objective.
Both Crew Members are now marked as used. The next following objective is a C10 check, and because you don't have an unused Crew Member with a high charisma Attribute you spend your fourth Crew Member’s action to attempt to repair a System. He has a TECH Attribute of 4, you roll a 5, and the result of 9 is good enough to repair the System immediately. In this example you have used all of your Crew Members already in this single phase, and therefore they cannot participate again during this turn.
3) DEFINE TARGETS AND FIRE
Designate up to 4 Weapons you intend to fire and choose one or multiple targets if you have a 'Target System'. You cannot adjust your targets once selected and must choose all targets before moving to resolve the attacks.
Then resolve the attacks in any order you wish by processing the following list:
-
Spend Ammo: Lower the 'A'mmo by one if the Weapon has a defined Ammo variable. If it does not, assume its Ammo is unlimited.
-
Hit check: Roll a single d6 per Weapon fired: if the result is a 4 or higher you hit your target. If you have a 'Combat bridge' a 3 or higher is required. You may activate an available (so far unused) Crew Member to reroll the d6
once. After rerolling once you can’t spend another Crew Member to reroll the same Weapon again in this turn.
- Dealing damage: If you registered a hit, first reduce the target's Shield by the damage of the Weapon fired. Then reduce the SP (Structure points) by the attack’s remaining damage, if there is any. If a Ship’s SP reaches zero, that Ship is destroyed. As you apply the damage to the target, you must also apply the special effect that may be listed on the corresponding Weapon, as below:
EMP: These Weapons lower Shields by their damage value. But they cannot deal damage to the target’s SP.
HE: High Explosive Ammo cannot penetrate or even weaken Shields but often deals a great amount of damage to the target’s structure (SP) if it has no Shields. If the target has Shields active, the HE Ammo causes no damage. If the target has no Shields apply damage as normal. If you roll a '6' with the hit check the SP damage is doubled.
OC: Overclocked Weapons can be used to fire multiple shots in a ‘burst mode’. When confirming that you will fire this Weapon you may decide to consume 2 extra Ammo. If you do so this Weapon’s damage value will be doubled for that attack.
- Destroy Enemies: If an Enemy loses its last structure point it is destroyed. That target can no longer return fire and is eliminated.
4) ENEMY FIRE
All undefeated Enemies will attack you one after another in the order they are noted (from number 1 to 4). They always have enough Ammo to attack.
- Hit check: Roll a single d6. If the result is a 4 or higher, the Enemy has hit you. A result of 6 will deal you 3 additional damage points. You may try once per Space Combat turn to evade the Enemy's fire. See below.
1a) Evade: If you have Maneuver engines installed in your ship, once per Space Combat turn you may try to evade the Enemy's fire. After a successful Enemy hit, you may assign up to two unused Crew Members to pilot your Ship. Refer to their combined TECH Attribute, divide the total by 2, and add a d6 roll. If the result is 8+ you have avoided all damage. Note: If a single pilot is assigned, you still divide their TECH Attribute by 2. If the die shows a 1 during this evasion, the attempt will always fail. Mark Crew Members assigned to this task as used.
- Taking damage: First, reduce the incoming damage by the amount of Shields that you have, remembering to apply all Weapon effects as usual (EMP, HE, OC). Reduce your Shield's energy as they absorb damage. If your Ship is equipped with Armor, deduct the Armor rating from the damage after the Shield's effect was applied. Any remaining damage will hit and lower your Ship’s structure points (SP). If in this process you end up losing any SP,
it’s possible that one of your Ship Systems has been damaged. Roll a d6 to check:
Roll a d6:
1-2: No Ship System gets damaged.
3-4: One of the standard Systems (light gray-colored) gets damaged. Roll a d20 and count through all existing Systems until you reach the die result's number.
5: One of your Weapons (orange-colored) gets damaged. Roll a d20 and count through all existing Weapons until you reach the die result's number.
6: One of your energy Shield Systems (blue-colored) gets damaged, choose which.
If you count through all kinds of Systems / Weapons etc. always count the damaged Systems as well. Mark a damaged System, it is deactivated and can’t be used until you repair it. If it gets damaged a second time, it is destroyed (erase it in this case), except if it was just damaged this turn, in that case it will stay just damaged. If the d6 roll states a System class such as 'Weapons' but you have no Weapon systems (either damaged or undamaged) then no System gets damaged.
5) BOARDING ENEMY SHIPS
You may now board a single Enemy Ship if it has 3 or less Shield energy. You can´t board multiple Enemy Ships in a single Space Combat turn. It is also impossible to board Enemy Ships which have no Crew (zero Crew value). Send as many unused Crew Members as you like, marking them as used. No one is required to remain on board your own Ship, the autopilot will maintain control during your short absence. You are then ready to battle against the Enemy's Crew!
Loop through the following steps until either;
- one party is defeated,
- you decide to retreat,
- the third turn of Boarding Combat is over.
The combat rules are the same when Enemies are boarding your Ship, however in that case you can’t retreat, and the Enemy force doesn’t retreat until the third combat round is over.
It’s also possible that a Ship System may affect the defense of your Ship but may not support you if you are on board an Enemy vessel and vice versa.
To prepare for boarding or defending against a boarding attack, first add the participating Crew Members’ highest battle Attribute (Ranged or Melee) together. If you use multiple Crew Members you can use different Attributes (for example you can use the Ranged Attribute of the first Crew Member and the Melee Attribute of the second ). For each 6 points you will then get a single d6 for your attack pool to be used in the following Boarding Combat cycle. Thus, if you have a total of 10 points you will get a single die. The Enemies get a single d6 for their attack pool for every 2 Crew Members they have, so if they send 5 Crew Members to board your Ship, they will get 2 dice.
Boarding Combat Loop:
-
Roll the dice: Roll all your pooled dice on the left side, and your Enemies’ pooled dice on the right side. Each die showing 4 or 5 counts as a hit, 6 counts as two hits. Check if you own a ship system that allows you to reroll as many of your attack dice as you like once in each Boarding combat turn.
-
Negate damage: You may now cancel out Enemy hits by spending your own hits in a 1:1 ratio. So, each of your hits may cancel a single hit of the Enemy forces. You also have the option not to use your hits to negate damage.
-
Take damage: Each hit rolled by the Enemy causes one of your participating Crew Members to lose 4 HP (Shields and Armor have no effect), you can choose who. If a Crew Member loses consciousness that way you will lose a single d6 from your attack pool.
-
Deal damage: For every two hits you produce, you removing a single die from their pool. If you have only one hit left, you may decide to give everything by performing a sacrifice attack. Remove 3 health points from one of your Crew Members to remove a single die from the Enemies pool.
-
Return dice: Return all dice back into the pool for the next turn, except the dice which are lost because of unconscious Crew Members or defeated Enemy Crew Members. In case you have no more dice left, but not all of your Crew Members (in this Boarding Combat) are unconscious, you will receive a single d6 for your pool for the next turn.
-
Loop: If both parties still have dice remaining, and less than 3 turns have been played, proceed with the next Boarding Combat loop. If only one party is left or if this was already the third combat turn the Boarding Combat ends and the attackers retreat to their Ship. If you are boarding an Enemy Ship you can also decide to retreat right now without a dice check.
After Boarding Combat: If your spaceship was boarded by the Enemy, and you lose all your dice, you lose the game. If you are able to defeat all Enemy dice while boarding them, their Ship is destroyed. Otherwise lower the Crew strength of the Enemy Ship relative to their dice lost during combat. Each lost die causes them to lose 2 Crew Members.
Decide for each of your unconscious Crew Members whether you want to try to heal them in a hurry. If so, you roll a d6. A result of 2-6 will recover your Crew Member to 2 HP and they will be available on the following Space Combat turn. If you roll 1 they die immediately (You can keep their Equipment and rearrange it if you like). If you do not try to heal them, they remain unconscious without a risk of dying.
6) ATTEMPT TO ESCAPE
You may want to try to escape: Roll a d20 and add all TECH Attributes for your unused Crew Members. A result of 20 or more grants a successful escape, but the battle counts as a loss. In this case you can generate a new Location, but you will lose any dice modifications during Location generation including Long range sensor effects and you must wait until the next game turn to land at the new Location. If you have already tried to escape previously IN THIS COMBAT but failed, a result of 15 will grant a success.
7) RECHARGE
Recharge your Shields and each Shield of the Enemy Ships as the charge value specifies, but not above their maximum Level. Then mark all Crew Members as unused so they can be used again during the next turn.
LOOP
If you’ve lost your last Crew Member or SP you lose the game. If you solved the last objective or if there are no objectives and you defeated all Enemies the Space Combat is over. The timeline is also able to end the Space Combat with different results such as victory, lost space flight or even complete ‘game over’. Otherwise, you start a new Space Combat loop turn.
AFTER SPACE COMBAT
Repair: Repair all damaged Systems and restore all your spaceship’s structure points automatically.
Reload: Refill your Ship Weapon Ammo for free.
Experience points and resources: If the space flight was a success, you gain the Experience Points as stated under XP in the flight’s description and the same amount in Credits.
Create a new Location: If the Mission was a success, or you escaped, generate a new Location, see page 132.
11. YOUR SPACESHIP
She's ugly, covered by bumps and scratches, but we love her. She’s the mother who keeps us all alive.
Your Ship has different upgradable slots which can be filled with Systems bought with Credits.
The Spaceship sheet shows all available Ship Systems and which ones you already own. You can also sell your Ship and / or Ship Systems for half- price at any Shop. It is also possible to move Ship Systems from your old Ship to a new Ship. You may not transfer Systems to a Ship which doesn’t have that type of System (if this System is not listed in its blueprints).
With the exception of Ship Weapons compatible with your Ship and Ship Ammo, no Ship System can be written in blank slots. Weapons count as compatible if they are printed at least once on your spaceship's sheet.
The effect of all of your Shield Systems combines, and the same is true of Armor and hull Systems which combine the amount of Structure Points they grant your Ship.
You may have multiple Weapon Systems, but you may only activate at most 4 Weapon Systems during any one Space Combat turn.
Your Ship’s Ammo recharges at no cost after each Space Combat.
You can also buy extra Ammo Magazines and place them into empty Weapon slots to support specific Weapon types with more Ammo. You may only store a single Magazine in each slot (not two as in Hero Inventory slots). The price of a Weapon’s Magazine is half the Weapon’s purchase price. Simply note AMMO and the Weapon type in a blank box for Ship Weapon Systems. If you have multiple Weapon Systems of the same type, the Ammo Magazine can be used for all of them, using one Ammo for each fired Weapon. An empty Magazine as a spaceship System will not be deleted and is refilled automatically after every SPACE COMBAT.
Ship Systems can be destroyed or damaged during combat.
Destroyed Systems are removed from the Ship Sheet.
After Space Combat, damaged Ship Systems and all Structure Points are fully repaired for free.
SHIP SYSTEMS EXPLANATION
STANDARD SYSTEMS
Advanced Med Bay: 20 Credits. Heal Crew +3 HP. Same functionality as a standard Med Bay Ship System to further increase the capacity for regeneration during the Recovery Phase.
Boarding Armory: 15 Credits. Reroll dice in Boarding Combat if you attack Enemy vessels. Only applied if you are boarding an Enemy Ship during Space Combat. If your own Ship is boarded, there is no benefit. Once per Boarding Combat turn you can re-roll any amount of your attack dice a single time.
Boarding Shields: 50 Credits. Enemies cannot board your Ship. As long as this System is undamaged, Enemy ground forces cannot board your Ship during Space Combat.
Combat Bridge: 20 Credits. Space Combat hit on 3+. If you fire your Ship Weapons during Space Combat, the roll you require for a successful hit is reduced by 1.
Drone Bay: 25 Credits. 2 extra die modifications during Location Generation. Helps you to find the Location of your choice.
HyperNavMemory: 15 Credits. +4 Location slots (MAP3-6). The 4 extra slots labeled with MAP 3-6 can be used to save Locations.
Long-range sensors: 15 Credits. 2 extra die modifications during Location Generation. Helps you to find the Location of your choice.
Maneuver Engines: 30 Credits. Allows attempts to evade Enemy attacks.
Med Bay: 10 Credits. Heal Crew +3 HP. Offers additional healing of each Crew Member during the Recovery Phase.
Nano Skin: 40 Credits. You may avoid any Space Combat. You can use it or deactivate it. You will get no experience points or Credits for your flight and Smuggle Goods flight option if chosen, but you will be able to discover a new Location as usual.
Onboard defense: 20 Credits. Reroll dice in Boarding Combat if attacked. Only applied if your Ship is boarded during Space Combat by Enemy ground forces. If you attack an Enemy spaceship, there is no benefit. Once per Boarding Combat turn you can re-roll any amount of your attack dice a single time.
Repair Drones: 20 Credits. Repair 1 System or 3 SP per turn. In each SPACE COMBAT RECOVER PHASE you can repair a single damaged Ship System or 3 structure points.
Stealth Skin: 30 Credits. Lowers the flight's difficulty by 3. You may apply this effect as you wish.
Storage Expansion: 10 Credits. Unlock Ships storage expansion. The extra storage space is labeled as EXPANSION on your spaceship page. If this System is destroyed, you will lose all Equipment which was stored inside this extra storage.
Target System: 15 Credits. Unlock multiple targeting. Now you can aim at multiple Ships during Space Combat.
Teleporter: 10 Credits. Teleport Crew. Allows escaping from a Dungeon Exploration or entering a later Map at a Location. Rules see page 134.
HULL, ARMOR, AND STRUCTURE
Armor: 10 Credits. Lower any SP damage you take by 1. If your Ship takes damage after resolving the effects of its Shields, reduce the damage to the Ship by one point. If you are hit multiple times by Enemies, this effect is applied each time. The effect of multiple Armor Systems will stack / combine together, including between Armor and Heavy Armor.
Heavy Armor: 40 Credits. Lower any SP damage you take by 2. If your Ship takes damage after resolving the effects of its Shields, reduce the damage to the Ship by two points. If you are hit multiple times by Enemies, this effect is applied each time.
Hull: Every Ship has a basic hull which grants your spaceship Structure Points (SP). The stated price refers to the price of the empty Ship bought without any Systems. When selling the Ship you receive half this amount.
Hull expansion: 15 Credits. +X Structure Points (SP). Extend your spaceship’s maximum Structure Points by a further X points. The SP value varies depending on your Spaceship.
SHIELDS
Primary Shields: 10 Credits. +5 Shield capacity, +2 Shield recharge. The effect of Shields will combine together.
Secondary Shields: 15 Credits. +4 Shield capacity, +2 Shield recharge. The effect of Shields will combine together.
Dynamic Shields: 30 Credits. +4 Shield capacity, +2 Shield recharge. The effect of Shields will combine together.
WEAPONS
Autocannon: 25 Credits. 8 Damage, OC, Ammo 4. Highly effective but with limited Ammo. Deals much more damage than the Heavy Laser, especially when using the overclocked mode.
EMP missile: 10 Credits. 10 EMP Damage, Ammo 2. Use EMP warheads to damage Shields. Uses an EMP warhead to intensively disrupt Enemy Shields. Limited Ammo. Only damages Shields.
Gauss cannon: 30 Credits. 12 Damage, Ammo 3. Fires heavy projectiles with extreme velocity. A deadly Weapon but requires a lot of ultra-heavy projectiles as Ammo.
Heavy laser: 15 Credits. 5 Damage. A powerful laser for combat. Has unlimited Ammo.
Ion cannon: 5 Credits. 4 EMP Damage. A cheap shield disruptor. Uses an EMP shockwave to disrupt Enemy Shields. Only damages Shields.
Ion blaster: 10 Credits. 8 EMP Damage. An effective shield disruptor. Like an ion cannon but more powerful. Only damages Shields.
Laser: 5 Credits. 3 Damage. The cheapest of all Weapon Systems. For its price, the best Weapon you can get, and it has unlimited Ammo.
Missile: 10 Credits. 6 HE Damage, Ammo 2. Highly effective against targets without Shields. It deals great damage, but its effect is negated if the target has an active energy Shield. It holds two missiles and shoots one missile each turn.
Railgun: 30 Credits. 10 Damage. Deals great damage and no Ammo required. Much more powerful than the Heavy laser.
Swarm: 40 Credits. 10 Damage, OC , Ammo 3. Can fire a huge salvo of deadly missiles. Reloading these missile launchers takes hours.
Torpedo: 15 Credits. 18 HE Damage, Ammo 1. Only 1 Ammo but extremely explosive. Torpedoes deal great damage, but are useless against Shields.
Twin missile: 15 Credits. 6 HE Damage, OC, Ammo 3. Highly effective against targets without Shields. It has the same functionality as the standard missile, but can be fired in overclocked mode.
12. CREATING A NEW LOCATION
After discovering a new Location through a Space Flight, you use the LOCATION GENERATOR on page 14 to generate the Location. Roll a dice on each table found on the LOCATION GENERATOR. Based on flight options and Ship Systems (such as long-range sensors), you may be granted an amount of dice modifications during this process. Dice modifications allow you to re-roll a dice, or alter its result by +1 or -1. There is no limit to the amount of modifications you can apply to a single dice, and you may modify any value for the Location, except the Map number and the Location Difficulty.
After you have defined the first value determining the Location type you must decide whether you want to modify it, then you progress with the next value and so on. You can’t go back and change values already defined before, such as changing the depth of a Location at the moment you roll the dice for the Location’s species. The teleport range definition can be modified by changing a single die result per modification. Unused dice modifications are lost after the Location generation is finished.
New Locations are noted on your CGM LINE TRACKER page, under STARMAP LOCATIONS LOG. The Location’s difficulty is always defined in advance during the INITIATE SPACE FLIGHT phase.
Due to the complex multidimensional nature of coordinates in the Space Kraken universe, you are limited to storing 2 Locations at a time on your STARMAP LOCATIONS LOG. Ship computer upgrades are available to increase this limit. You can erase previous stored Locations if you need to save new Locations. When a Story Line reveals a Location, you note its parameters and Map IDs on your LOCATIONS LOG as usual, but fixed values cannot be altered.
As soon as you enter a Location, open the Map section to the correct Location Type page (such as 'Mining Station') and then find the Map corresponding to the first Map ID on the LOCATIONS LOG (page 154-159).
If the same Map ID´s occur twice at a Location, these Maps count as different Maps, just with the same blueprint/ground layout. Both can be cleared separately.
If a Location is defined by an Event its definition is written like this in short:
Space Station / Dif.: 2 / AO: No / AI: YES / Depth: 7 / Telep.: 4 / One-way / Kraken. If no Map ID follows, they are generated randomly; otherwise simply copy the given numbers.
Explanation of the Location Parameters:
Location Type: This impacts which set of Maps is used for the Location and includes environments such as Core Planets and Space Stations.
Location Difficulty: This value impacts the power of Enemies and Traps at the Location, as well as the quality of Treasure found there.
Atmosphere: Atmosphere is defined as Outside areas (AO) and Inside areas (AI). The conditions are: YES: Yes, it’s breathable, everything is fine. NO: None: You need to spend 1 Oxygen for each action. Hell: It’s extremely difficult to heal somebody in a spacesuit if the environment is toxic and hot as a furnace! If the Atmosphere is extremely hot, cold or toxic. All healing attempts heal only the half amount of HP (except healing with PSI Powers). You also need to spend two Oxygen for each action during Dungeon Exploration but as usual, only one Oxygen per Combat turn.
Depth: This value indicates how many Maps the Location involves, with a minimum of 4 and a maximum of 9. Each Map is unique and has its own Map-ID.
Map-IDs: On the second row of each Location’s definition, you will find the numbers 1-9 which store the Map-IDs. You have two options to define these numbers: roll a d20 immediately, to define as many Maps as the depth number of the Map defines or define the Map-ID individually each time you enter a new Map during Dungeon Exploration and then note it. In no situation should you check what a Map looks like before you reach / enter them. The row below can be used for MAP notes.
Teleport: This value indicates the deepest Map in a Location's Map sequence that you can teleport to when entering the Location by teleportation, and teleport from when leaving the Location using your Ship's Teleporter. A value of zero indicates that you cannot teleport to the Location at all, but you can still land there normally on the first Map in the Location’s Map sequence.
Special condition, which can be: One-way: After moving to the next Map in a Location, you can no longer return to the previous Map during the same Dungeon Exploration. This condition does not prevent you from using your Ship's Teleporter, or Exit Tiles found on the Map.
Self-destruction: We call them weak, yet humans eventually destroy almost everything that they touch. After you leave this Location, it is erased from your Ship's Location memory.
Species: This value indicates the name of the most common Enemy Species found at this Location.
13. DUNGEON EXPLORATION
The exploration of new worlds is almost as exhilarating as making it out of them alive.
Deployment: When first arriving at the Location, choose an entrance Tile (indicated by the ‘>‘ symbol) on the Location's first Map and start there. Then choose which of your Crew Members you will deploy for this exploration.
If you cleared any of the Maps at this Location (see CLEARING MAPS page 140) during a previous exploration your Ship's Teleporter (page 134) may allow you to skip some of those Maps if you wish. In that case you will enter a Map after a cleared Map, which is still in teleporter range. If you have no teleporter you must always enter the Location at the entrance of the first Map.
Moving Forward: Once deployed, you'll be able to advance to deeper Maps at this Location by moving onto an Exit Tile ‘EX‘, which moves your team to an Entrance Tile of your choice on the next Map in that Location’s Map sequence.
When entering a Map, you must immediately make a single Move action (which does not cost Oxygen). Be aware that on some Maps this forces you to enter combat or other specific Tiles.
You may also leave the entire Location at an 'Exit Location Tile' indicated by a ‘/‘ symbol.
You may also return to the previous Map through an Entrance Tile on your current Map, moving to an Exit Tile on the previous Map. Once you do this you cannot use Exit Tiles to move forward through Maps again during this exploration attempt. This has no effect on future visits to this Location.
Leaving a Location: There are 5 ways to leave a Location:
-
At an Entrance Tile ‘>‘ at the first of the Location's Maps.
-
Entering the Exit Tile ‘EX‘ at the last of the Location's Maps.
-
If your Ship has a Teleport System, you can use it to Teleport back to your Ship if the Map’s number is within its Teleporter range. This is not possible if the current Map has an active Disruptor.
-
At any Exit Location Tile ‘/‘ no matter in which Map of the Location.
-
You have no living Crew Members remaining at the Location (if all your Crew Members are dead, you have failed your campaign, otherwise the Dungeon Exploration is over and you continue the game with the rest of the Crew Members on your ship)
Tiles and areas: During Dungeon Exploration your deployed Crew Members will move between Tiles and Areas together and are referred to as 'the team'. Areas count as a single space for the sake of movement rules.
Example Area: The big gray zone in this example is an 'Area'. The small squares are Tiles 'L, M, G, SB'. Even when an Area surrounds Tiles, those Tiles are not considered part of that Area. The small grey area on the bottom right side is not connected with the big grey area. The red colored Boss 'B2' stays in the big area and will attack you if you enter it.
Atmospheric conditions:
For each way to survive on a planet, there are a thousand ways to die there. Every Tile or area which touches the outer edges of the full Map counts as having Outside Atmosphere conditions. Everything further Inside counts as having Inside Atmosphere conditions as long as it is completely separated with a border from the outside.
When you move onto a Tile which separates two Atmospheres like a Bulkhead, this Tile counts as having the same Atmosphere as the area you entered it from.
Example:
These Map examples indicate outdoor areas (marked in purple). Depending upon from where you entered a Tile like the green marked Bulkhead 'B4', this Tile counts as having the same Atmosphere as the Tile/area where you were coming from.
Note: Though Outside Atmospheres are typically worse than those found
indoors, this is not always the case and you should always check the Map / Location details. Certain internal spaces serve as the lair for ice-blooded space dragons or toxic creatures that breathe a miasma of acid that will eat through a human's lungs.
Using Oxygen for actions: To explore the Location, you will need to take actions to move and activate Tiles. A move and activate Tile action requires an expenditure of 1 Oxygen unless you are in an environment with a breathable Atmosphere. Take care to leave the Location before you pass out if you are in an Atmosphere that you can’t breathe! If you are in 'hell' Atmosphere conditions you will have to spend 2 Oxygen for each action. If there is a breathable Atmosphere, you do not have to spend any Oxygen and therefore your actions will have no innate cost.
Your party has 25 units of Oxygen - no matter how many Crew Members are in the team. Oxygen tanks carried by Crew Members can be used to increase your Oxygen Level.
Your Oxygen is refilled when you enter an Oxygen Station (page 138) found on the Map. You cannot refill your Oxygen directly from a breathable Atmosphere (unless stated otherwise), since Oxygen requires compression to be stored in tanks.
If you run out of Oxygen, for each action you make that costs Oxygen you must choose an active Crew Member to become unconscious. If you then have no conscious deployed Crew Members at this Location, all of them are lost to the whims of the environment, perhaps being adopted by hairy tree-climbing creatures or thrown into a volcano by superstitious natives.
Move and activate action: Few places in this universe are ideal for lingering. Keep moving forward, be wary of hidden hazards and look for any opportunities among the many strange things you're going to encounter. A key part of Dungeon Exploration is moving between Tiles, Areas and Maps. During Map exploration you always must spend an action to Move and Activate a Tile, or spend an action to Activate your current Tile without moving.
You may move your team up / down / left / right to an adjacent Tile or Area for a single action (diagonal movement is not possible). If you are in a non-breathable Atmosphere, each action costs one Oxygen. For movement, areas are considered adjacent to any Tiles or other Areas they are directly connected to.
Example: The player spends an action and one Oxygen to move from an outside Area to a Bulkhead Tile, activating it by attempting a Tech Check, which they fail. On their next turn, they spend an action and one Oxygen without moving to attempt the Tech Check again, this time succeeding.
Whilst many Tiles you enter can be activated by choice, Tiles like Enemies and Mines activate automatically. You cannot enter them without activating them, unless another rule or effect allows you to do so.
Using Items: Using Items during Dungeon Exploration does not cost actions, though some Items have a limited number of uses.
Triggering Tiles: Enemies, Bosses or Mines activate when you enter their Tile or Area. A Tile with a black border or a background color other than the area surrounding it, is isolated and only activates if you enter it. Tiles which are directly connected to an Area and have no black border or different background color, belong to that area and will be activated when you enter it. If this triggers multiple Tiles, resolve all Mines first, before resolving any Enemies and Bosses in an order of your choice. These Ground Combats do not combine forces, but are instead resolved separately, one at a time.
This example shows an Enemy 'E' which won't attack immediately after you enter the Map by the '>' as it is a colored Tile Enemy. It will only activate if you move onto its Tile. The Enemy 'E1' on the bottom will be triggered if you move through the 'B2' Bulkhead and enter the purple-colored area.
MAP ELEMENTS
Note: You will find a legend of all Map Tiles on page 152.
'?' Random Numbers: Some Map elements use an unknown value, for example an Enemy might be presented as 'E?' . If you attempt to resolve effects involving a random value, roll a d6 and half the result (round fractions up). You will record this value, so you’ll only need to do this once per unknown value during each Dungeon Exploration. Important: It is only the element value that is randomized, not the total value for Checks. A spawned Enemy would still add the Location Difficulty to its Level. You are not allowed to determine the random number before entering the combat.
Example: You enter a combat with 'E?' Enemy in a Location with a difficulty Level of 2. You roll a 6 with the 6-sided dice. The Enemy will have a LV of (6/2)+2=5 in this case.
If you enter a Shop 'S?' its determined Level will be the same if you return during the same Dungeon Exploration. If you return to it during a different Dungeon Exploration you will determine its Level again, or if you return to it for a short visit.
Ammo dealer: They sell only Ammo up to the same grade as the Location’s difficulty
+1 and you will always get two Magazines for a price defined by the Weapon's grade number. So, two Magazines for a grade 3 Weapon cost 3 Credits. You can't pay half of the stated price to buy a single Magazine. You can also sell Equipment here, like in any shop.
Automatic Doors: Resistance and hostility I can trust, but a door that opens itself? Can only be entered from their forward face, indicated by arrows. Don’t be deceived by the name, this still costs an action!
Area: Purple it has an Outside Atmosphere. No further effects.
Doors: Don't bother knocking. It rarely ends well.
Divides Atmospheres but allows the Crew Members to move in and out in any direction.
Bulkhead: When activated, a Crew Member on this Tile makes a Tech Check: 2d6 + TECH against 10+ to pass through the Bulkhead, with the B# value on the Map being an increase to the test goal.
For example: An attempt to open a B4 Bulkhead with a Tech 4 Crew Member would roll 2d6 +4, aiming for 14+ (10+4) to succeed.
If you pass, you can consider that Bulkhead an unlocked door that requires no Check to pass through for the rest of this exploration.
If you fail to enter a Bulkhead 3 times, it 'locks' and you can make no further attempts during this exploration. Note: Each attempt will cost a unit of Oxygen if made in a non-breathable environment.
You may crack open a Bulkhead even if it's 'locked', by using a Weapon. It doesn´t matter if it’s a Melee or Ranged Weapon, but you must spend a fully loaded Weapon’s Ammo and the Weapon's grade must be similar or higher than the Bulkhead's Level defined as number '#'.
Example: You can open a B3 Bulkhead by spending one entire Ammo Magazine of a grade 3 Weapon.
Clone station: Here you can Save Your Game if you are playing your campaign at the 'Just a Simulation' or 'Adventurer' difficulty Levels. In any difficulty Level it is also able to heal each Crew Member 4 HP a single time per Clone Station and per Dungeon Exploration.
Enemy: This Tile activates when you enter it, or a connected Area if it is not separated by background color, border or obstacle. They are displayed as an E with a number next to it. An Enemy created by that Tile will have a Level equal to the Location Difficulty + the E# value displayed on the Tile. For example: Entering an E4 Tile in a Location Difficulty 2 will lead to an encounter with a Level 6 Enemy. If the area around an 'E' Enemy with a grey background is connected to you without going through an obstacle or colored Tile it will attack you. A single colored Tile 'E' Enemy will only attack you if you enter its Tile. Defeated Enemy and Boss Tiles will not activate again during this exploration, but will activate if you return to this Location on a future Turn if the Map was not cleared.
Boss: Handled the same as 'E' Enemies, but you cannot avoid a Boss combat. You are only allowed to attempt to escape during Ground Combat. In addition, you must eliminate a Boss in order to open all Safety Bulkheads on the current Map. Bosses never escape (including their Minions) and they always spawn at least one Minion. Boss battles grant double XP.
Entrance: Entrance to this Map. Can be used as an exit if you are going backwards.
Event: Refers to a Story Line Event or can be the objective of a Quest. Otherwise, it is not used.
Exit Location: Activate this to exit the entire Location, returning all Crew Members to your Ship and ending this Dungeon Exploration.
Exit: It does not matter which of these Exit Tiles you use when leaving the Map. You will then progress to the next Map or leave the Location if you are already at the Location’s final Map.
Gambler: Spend an action here to sell Equipment, or to discard an Item or Weapon carried by a Crew Member on this Tile and roll a d6. The Weapon or Item must have at least grade 2. If it's an Item with a non-full usage count or a Weapon which has a non-fully loaded Magazine the Gambler counts it as one grade lower as it actually is. Then check the results chart:
1-2: You gain a random Weapon or Item one grade lower than the one you discarded.
3-5: You gain a random Weapon or Item of the same grade as the one you discarded.
6: You gain a random Weapon or Item one grade higher than the one you discarded, unless it was grade 6 in which case what you receive will also be grade 6.
Define the Item / Weapon you receive using the Treasure Table (page 167).
Gamblers have no grade limits, so even a Gambler at a Location with difficulty 2 could possibly return a grade 6 Weapon as reward.
Gamblers don't accept Items or Weapons they gave you during this turn (it’s bad for business).
Hull Breach: Areas connected to any un-repaired Hull Breach Tiles have an Outside Atmosphere. All Hull Breach Tiles begin exploration as un-repaired and the effect of a Hull Breach ends immediately when it is repaired.
When in a Hull Breach Tile you can attempt to repair it using a welding device carried by one of your Crew Members. Hull breaches that are repaired will remain closed until you end the Dungeon Exploration. When leaving a Hull Breach, you must move into the same Tile you entered it from. You can also undo the repairs using this same process.
Laser barrier: Each time you enter a Laser barrier it will activate, dealing damage to all Crew Members on that Tile.
The damage is equal to Location Difficulty + the Laser barrier grade (If the Laser has a stated grade number) and it ignores Energy and Flash Shields, though Armor bonuses still apply. Unconscious Crew Members are never damaged by Laser barriers.
Laser barriers can be disarmed with a successful Tech Check with two d6 performed as an action on the Tile, with a success being a score of 10 + Laser Level. For example: A L4 laser would require a score of 14+.
If you pass the check, the barrier is disabled until you exit this Map. If you fail the check, you take damage as you would when entering the Laser Barrier.
Story Line Trigger 'LT': If you step on this Tile, and if you have at least one free Story Line slot on your CGM Line Tracker page, a new Map-based Story Line will be started.
Roll a d20, note its start coordinate and activate it immediately. Then continue your Dungeon Exploration. The start coordinates defined by your dice roll are: 1:1AA, 2:1AB, 3:1AC, 4:1AD, 5:1AE, 6:1AF, 7:1AG, 8:1AH, 9:1AI, 10:1AJ, 11:1AK, 12:1AL, 13:1AM, 14:1AN, 15:1AO, 16:1AP, 17:1AQ, 18:1AR, 19:1AS, 20:1AT If you have no free Story Line slots nothing will happen.
Med-Station: When activating this Tile, heal one Crew Member on it for up to 4HP. Each Med-Station can be activated no more than 3 times in a single exploration.
Mines: When entering a Tile containing Mines, a Crew Member may first make one attempt to disarm the Mines. To do so, roll 2d6 and add the Crew Member's Tech Attribute. If this is equal to or greater than 10+ the Mine Level (if the Mine has a stated grade number), the Mines are disarmed: ignore them for the remainder of this exploration.
If you fail or don't attempt to disarm the Mines, each Crew Member makes a d6 Agility Check to attempt to avoid the explosion, succeeding on a 8+. The Crew Member making the disarm attempt automatically fails this check and also suffers an extra 2 damage as a result.
Each Crew Member that fails takes damage equal to Location Difficulty + the Mine grade. This damage ignores Energy and Flash Shields, though it is reduced by Armor as normal.
After resolving this check these Mines are then ignored for the remainder of this exploration.
If both Mines and Enemy / Boss elements have been triggered, Mines are resolved first.
Unconscious Crew Members are never damaged by Mines.
Modder: When entering a Tile containing this Map element, any amount of unmodified Weapons your Crew Members are carrying can be modified by paying their Grade's price for each one you modify. Example: Pay 30 Credits to mod a grade 4 Weapon. Every Modder is able to mod any grade of Weapon as long as you pay. Only Weapons listed on Page 165 can be modded.
Modified Weapons should be marked with a * and the modification allows you to either increase its Ammo capacity by +50% (rounding fractions up) or increase its damage by 1. For example a 3x3 damage dealing Laser gatling will deal 3x4 damage with a damage mod.
When modding a Weapon, you can choose to apply both the Ammo and damage modifications by paying three times the Weapon’s price / value.
You can also sell Equipment here, like in any Shop.
Note: Being Modded does not increase a Weapon's price when selling it. "My friend buy cool gun once, modified side arm, very expensive, yes. He pull trigger and bubbles come out. He no more live now."
Obstacles: Obstacles are not airtight, but they separate areas. It costs an action to move onto a obstacle Tile. Obstacles cannot be removed.
Oxygen Station: Upon entering a Oxygen Station you may replenish your entire Oxygen storage, including any extra tanks you possess.
Quest Master: Enter a Quest Master and activate it to accept a Quest. Each Quest Master may only be activated once per exploration. A detailed explanation of how you accept, generate and complete Quests is shown on the 'QUEST MASTER' sheet on page 160.
Safety Bulkhead: These elements function as normal doors if there are no Bosses present. Otherwise they are completely impassable. They are airtight in either case.
Disruptor: You cannot use your Ship's Teleporter to leave this Location whilst this element is active. You can disable it by entering it, and it will remain disabled until you leave the Location. On Cleared Maps a disruptor has no effect. Teleportals are not affected by Disruptors.
Shops: The first time you enter a Shop during a Dungeon Exploration you may receive Credits for selling useless trash you are carrying with you. The amount is specified by your most charismatic Crew Member's Charisma Attribute -2 in Credits. So, a Crew Member with Charisma 6 will gather 6-2=4 Credits for your team.
If you visit the same shop again either via a Dungeon Exploration or a short visit, you won't receive this bonus a second time.
Then you can purchase Items, Weapons, and Ammo of a grade equal to or lower than the Shop grade + Location Difficulty. For example, a Shop in a Location of Difficulty 3 presented as 'S2' sells Equipment up to grade 3+2=5. And a Weapon of grade 3 costs 12 Credits. The price of Ammo is equal to the grade of the Weapon it is bought for, providing 1 Magazine of ammunition. Example: Ammo for a Weapon of Grade 3 costs 3 Credits, Grade 6 Ammo costs 6 Credits. You must note down which Weapon the Ammo is for when you purchase it. Weapons can only use their own Ammo. Note: Inventory slots can hold 1 or 2 Ammo (if it’s the same kind). You may also sell Items, Weapons and Ammo of any grade at a Shop, though they only sell for half their Credit value. U/Use Items that do not have their full amount of uses cannot be sold.
Note: A Weapon’s value does not change because it has been modded.
Rare Equipment can also be bought at Shops, which is Equipment with one grade above the Shop's Level. But the price gets doubled.
You can buy a new Crew Member of a Level up to the Shop's grade. The cost of the Crew Member is 10 Credits for each Level they have and they are created in the same way you would during 'Setup Your Crew' on page 119. They can immediately Level Up to the purchased Level.
You can also sell Crew Members for 5 x Level in Credits.
Reminder: You can never have more than 4 Crew Members in play.
You can buy new Ships and Ship Systems here as well.
Weapons and Items which cannot be found on the Weapons and Items page count as 'unique' and can be sold but not bought at any Shop. Ammo for unique Weapons can be bought at Shops as though they were normal Weapons.
Tip: You can use a Shop to heal your Crew Members by buying chocolate and directly using it.
Solid wall: This is a solid airtight wall which can never be entered or moved through.
Teleportal: Rumors about this technology spread after a partially vaporized passenger was knocked out of a Teleportal during an impact, despite having also arrived at their destination without injury. Some say they hear screaming as the passenger is vaporized, but the individual that arrived doesn't remember feeling anything...
-
If you enter a teleportal Tile you are teleported instantly to another teleportal Tile with the same number.
-
If there is no portal Tile with the same number, the target portal is selected randomly using a d6 dice roll: the result identifies the corresponding target portal number. If you roll the same number as the portal you are standing on, you will land back at the same position. If the number you roll is not present, re-roll until you find a target portal which matches your die roll.
-
Each teleportation costs you one action, even if you land on the original portal again. The first teleportation is included as usual with your free action after moving onto the portal.
-
These Map-based teleportals are hard-wired and are not affected by Disruptor Tiles or Location-defined teleportation depth limits.
Treasure: Gain Treasure the first time you enter this Tile / Area during an exploration. The Treasure's grade is equal to Location Difficulty + T value. For example, entering a Tile with T2 in a Location with Difficulty 2 will grant grade 4 Treasure. To determine the Treasure received, see Treasure Drops on page 148.
Void: A feature such as a deep abyss or cliff. Movement onto these Tiles is prohibited. They are not airtight unless they have a black line bordering them.
AVOIDING A GROUND COMBAT
When triggering an Enemy (not Boss) during Dungeon Exploration you may attempt to avoid it using one of the options below. If successful the Ground Combat is not triggered on this occasion, but the Enemy element is not disarmed. If you succeed you can skip the combat and keep on moving ahead. You can’t avoid a Boss encounter.
Choose one of the following options:
Run: Roll a d6 and add the lowest and highest Agility Attribute among your active Crew Members. If the result is equal to or higher than the Enemy Level +9, this is a success.
Camouflage: Do a Tech Check with all of your Crew Members against the Enemy Level +2. Every Crew Member needs to be successful otherwise this counts as failed.
Charisma: Roll a d6 and add all Charisma Attributes of your entire Crew. If the result is equal to or higher than (Enemy Level x 3) +5, this is a success. Before making this roll you may pay an amount of Credits (¢) to increase your roll result by that amount as well.
Intimidate: Skip any combat without a dice check if the Enemy Level is lower than the second lowest Crew Member Level. This will automatically succeed.
CLEARING MAPS
"They tell you to watch your back, but it's what lies ahead that truly worries me." A Map is marked as 'cleared' as soon as you leave it by any means. Underline the LV’s Map ID if you cleared a Map at your Locations list on the CGM LINE TRACKER (page 14). If you did not activate any Treasure (T) on that Map, you may choose to leave it uncleared.
CLEARED MAPS:
- Enemies, Bosses, Treasures and Disruptors are not considered to be present and have no effect on anything.
- Safety Bulkheads are open.
- Cannot be returned to an uncleared state.
SOLVING A LOCATION
If you solve an entire Location by leaving it at the exit Tile of its last Map you will receive a reward of four Treasures with the Treasure grade of the Location's difficulty +1, or two Treasures with the grade of the Location's difficulty +2. You can solve a Location only once, but you can enter it again.
You also gain XP equal to the Location's Maps-count multiplied by the Location’s difficulty times 2 in Experience Points.
For example, if you solve a Location of difficulty 3 with 6 Maps, you will receive 36 (3x6x2) XP in addition to 4 Treasures of grade 4 or 2 Treasures of grade 5.
EMERGENCY RELEASE
On One-Way Maps, if a Bulkhead locks because you fail 3 attempts at opening it and you also cannot use your Ship's Teleporter to leave, or use another path to leave, the Bulkhead will automatically open.
EXAMPLE OF A DUNGEON EXPLORATION
You enter a Location with difficulty 2, type 'Overland' on the first Map which was given the MAP ID '8'. It has a breathable Atmosphere Inside and a non-breathable Atmosphere Outside, defined during the 'CREATING A NEW LOCATION' process. You enter at the upper '>' entrance. Immediately after that you must make one free move action, forcing you to move onto the big purple area and trigger the Mine (M) there.
First you try a single time to disarm the Mine. Your Crew Member with the best Tech Attribute rolls a d6 and adds his Tech Level. The result is 4+4, which is lower than 10 so you fail to disarm the it. The Mine explodes and the Crew Member who tried to disarm the Mine will take damage +2 without the chance of avoiding it, so they will take 4 damage (2 Location Difficulty + 0 Mine grade + 2 for failing a disarm). Shields can’t reduce this damage, but Armor does.
Your other Crew Members can attempt to avoid Mine damage. Each Crew Member rolls a d6, adds their Agility Attribute and aims for 8 or more to avoid the blast. They roll a 2+3 Agility=5, 4+5 Agility=9 and 5+5 Agility=10. The last two reach 8 or higher and avoid getting hit. The first Crew Member fails and suffers 2 damage, reduced by their Armor but not by their energy or flash Shields.
Then you attempt to open the Bulkhead 'B2' at the top to enter the area with the Quest Master. The Crew Member with the best Tech Attribute tries to open it. You must spend one Oxygen for this action because you are still in an area with an Outside Atmosphere in this entire Location, which means it’s not breathable and this action lets you move onto the B2 Bulkhead.
You roll 2d6 and add the Tech Attribute of the Crew Member. The result is 3+3+5 Tech=11. You need to roll 10 plus the number written near the 'B', 2 in this case, for a goal of 12 or more. In this case, you have failed. You spend another Oxygen and try again. You roll 6+3+5 Tech=14 and now succeed in opening the Bulkhead.
Now you spend another action to move into the gray area inside, but you do not need to spend any Oxygen because you are now inside an area with Inside Atmosphere conditions defined as 'breathable' for this Location. By entering the area, you trigger a single combat with the E2 Enemy; the other E3 Enemy stays on his own Tile, so it will not attack you if you do not enter his Tile.
The Enemy’s LV is the Location Difficulty (2) plus the number next to the 'E' (2). The result is a combat against an LV4 Enemy. If you have defeated the Enemy, you may walk onto the Quest Tile to get a new Quest to solve.
The next two actions, moving back to the area and then to the B2 Bulkhead, do not cost you Oxygen because you are still Inside, with a breathable Atmosphere. Opening the B2 Bulkhead again doesn’t require another check because you already unlocked it when you passed through it the first time. The E2 Enemy will not be triggered again because you already defeated it once. Only if you reenter the Map later on and the Map wasn´t marked as CLEARED, will the Enemy trigger again.
Next, spend one Oxygen to move inside the area where the Mines were before. Spending another Oxygen to move to the B1 Bulkhead, you open it by solving a test against 2d6+Tech against 11+ with the first attempt rolling a 5 + 4 + 5 = 14.
A further two Oxygen are then spent to enter the area behind and move
to one of the obstacles shown as 'X'. One more action to move into the right-side area, and a final action to move to the exit Tile 'Ex'.
You decide to mark the Map as 'cleared' by underlining its ID '8' on the Locations Log. Then you will enter the next Map of the Location at an entrance Tile '>'.
14. GROUND COMBAT LOOP
A COMBAT QUICK SHEET is available on page 77 which can be folded out to readily offer information on the basic functions of combat.
SPAWN ENEMIES
And in that vast dark cavern they found a singular lonesome light, and approached it. More appeared, more and more until they were surrounded by an ocean. Then the lights started moving.
Enemies do not just appear instantaneously when the combat starts; you may have the chance to react to the first Enemy before others come into play. There will be one or two Primary Enemies and up to two Minions. Minions' Levels are reduced by 1 and do not contribute to Treasure drops after combat.
-
Determine the Primary Enemy's Level by adding the Location’s Difficulty to the E# value shown on the Map. For example, if the Location’s Difficulty is 1 and the Enemy is E3 the Primary Enemy's LV is 1 + 3 = 4. So the Primary Enemies will be LV 4 creatures and their Minions will be one Level below at LV 3.
-
Reveal the first Primary Enemy by folding its sheet out of the book, using one with the defined Level (a LV4 Enemy in our example) and species type specified for the Location. There are always two profiles for each Enemy on the page and it doesn’t matter which one you unfold.
In the case of a LV6+ Boss battle, roll a d6. If a 6 is rolled then instead spawn a random CREATURE FROM HELL.
- Next check for a reaction by rolling a d6. If your combat has the AMBUSH effect, you fail this check automatically.
On a 4+ you pass the check and may perform a bonus combat action (it cannot be a Flank action) with one Crew Member or activate one of their PSI Powers if they have any. This bonus action doesn’t affect how they function once the combat starts.
If you fail the check you get no reaction and the spawning continues.
-
Determine whether a second Primary Enemy is generated by rolling a d6. If you do not roll at least as high as the current Map number, a second Primary Enemy is generated. Thus on Maps 7, 8 and 9 a second Primary Enemy is always generated. The second Primary has the same LV as the first one, but the species will be determined by rolling a d6 and checking the result on this list: 1: Kraken, 2: Grey, 3: Insectoids, 4: Lost, 5: Beasts, 6: Renegades
-
Minion Spawning Minions are a Level lower than Enemies and do not contribute to Treasure drop after Ground Combat. At Enemy encounters of LV 1, no Minions are spawned.
Roll a d6 and add the Map number to the result, then check the amount of Minions to be spawned: 2-5: No Minions
6-10: One Minion
11+: Two Minions
Determine the species of Minions by rolling a d6 for each of them and then folding their sheets out of the book: 1: Kraken, 2: Grey, 3: Insectoids, 4: Lost, 5: Beasts, 6: Renegades
Boss encounters (B) always include at least one Minion. All other combat conditions are similar to a combat against normal Enemies (E). The Minions are generated all at once, then you begin the combat by determining the initiative (see below).
In case of LV7 Enemies: Spawn a LV6 Enemy and add 1 damage point to all Enemy attack damage values inflicted on you. This is also applied for Minions of LV7. In this case it may happen that you must use multiple fold- out Enemy sheets above each other and may have to reroll the species selection, since you may have no more than 2 Enemies from the same Faction.
In case of LV8 Enemies: Spawn a LV6 Enemy and add 2 damage points to all Enemy attack damages and increase their hit chance by 1. This effect is applied to all LV8 Enemies. In this case it may happen that you must use multiple fold-out Enemy sheets above each other and may have to reroll the species selection, since you may have no more than 2 Enemies from the same Faction. The maximum Enemy Level is 8. Experience and Treasure provided by defeating LV7 and LV8 Enemies are the same as they would be for LV6 Enemies.
You can trigger an Enemy or Boss Ground Combat a second time after
once escaping from a combat if you wish. In that case it is handled like spawning them a first time, including the possibility that they will spawn different amounts or types of Minions.
COMBAT INITIATIVE
When you enter on the first turn, you must check which party has the initiative unless your combat is defined as an 'AMBUSH' (in an Event explanation).
Use the lowest Agility Attribute out of all Crew Members and add the result of a d6 die roll. You may skip (and protect) the slowest Crew Members by setting them in COVER mode on the first turn; in this case use the next lowest Agility Crew Member to determine initiative.
In an ambush the Enemy always acts first during the entire combat and there’s no need to determine the initiative by rolling a die.
NOTE: If a Crew Member has the AGGRESSIVE Trait, they cannot be set to cover mode unless they have no functional Weapons in their hands.
The Enemy’s initiative is defined the same way: the lowest Agility Attribute of all present Enemy types plus a d6. Then the party with the highest initiative takes action. In case of a draw, the player acts first. You may choose in which order to activate your Crew Members. Enemies are always activated from top to bottom.
After both parties have finished activating each unit once, begin the next combat turn; simply use the same initiative order again without re-defining it.
COMBAT LOOP OVERVIEW
(If the Enemy gets the initiative at the start of combat, the second and third steps are reversed for the entire Ground Combat.)
-
Oxygen usage: If the Atmosphere is non-breathable or Hell-like, you must spend one Oxygen (see page 135 for Oxygen).
-
Activate Crew Members: Activate each Crew Member once and choose which combat action they take. If you have a Crew Member with the PSI Trait they may use one PSI Power in addition to taking an action.
-
Activate Enemies: Enemies take actions from top to bottom. They also activate their special Traits.
-
Recharge Shields: Recharge your Crew Members' Shields using their Shields recharge Attribute and attached Shield chargers, not exceeding their Shield's maximum Level.
Repeat this process until you or the Enemy have either escaped or have been defeated.
COMBAT ACTIONS
During combat you can activate each Crew Member once, in any order you like. Crew Members who were set in COVER mode during the COMBAT INITIATIVE CHECK will stay in COVER instead of taking a combat action. For
all others choose ONE of the following actions:
Attack:
-
Select a Weapon held in the Crew Member's hand to Attack with. They may hold two Weapons at the same time, but can only attack with one Weapon (unless a Trait says otherwise).
-
Choose an Enemy as a target.
-
Boost the attack with either the Melee or Ranged Attribute depending on the Weapon being used (see Combat Rules, which are explained next).
-
Roll a d6. If you roll the hit value of your Weapon or higher, you hit your target. If you roll a 1, it’s always a miss and your Weapon jams. Thematically, Melee Weapons also have this issue; you can imagine the blade is loosened, the entire Weapon is dropped and falls to the ground, a crack develops in the Weapon, and so on. If a Weapon jams it will waste no Ammo. (see special rules for explosive and multiple hit Weapons at page 145) A Weapon which doesn’t jam will consume Ammo even if it does not hit any target.
If you roll a 6 the target will suffer 1 additional damage from this Attack.
- Apply Damage: Reduce the target’s Shield and your Attack damage by the same amount until either reaches zero, then if there is remaining Attack damage reduce that by your target’s Armor. Then if Attack damage still remains, apply the Weakness and Resistance modifier to it, and finally the HP of the target will be reduced by the Attack damage (Don’t forget to make a note '|' when applicable to record expenditure of one round of Ammo).
- Flash Shields defined as 'A' class Shields are only applied against Ranged attacks.
- Energy Shields defined as 'B' class Shields apply against Ranged and Melee attacks.
If a Crew Member has no Weapon, they can attack with bare fists in Melee and hit on 4+, dealing 1 point damage, but this damage result can also be improved by using your Melee Trait. Bare fists can never jam.
Crew Members with the Trait aggressive must attack if they can and can’t perform any other action in this case. Only if their Weapon is empty or jammed or they have no Weapon in hand can they choose another action. They will also never participate in an attempt to escape!
Berserk: When the situation calls for it, we are reminded of where we began. Angry and scared, smashing rocks and sticks into heads. This action allows for a modified Attack action in which you may increase the Melee damage your Crew Member causes by pushing their body further. It converts up to 3 health points of the attacking Crew Member into additional damage points.
You will lose health points expended in this way even if the attack fails, and you must announce it before the hit check! Example: You Attack with a Whip Weapon which deals 3 times 2 damage points. You use Berserk and spend 2 HP before making your hit roll. All the three rolls are successful and you apply 4 damage once, and 2 damage twice, the first attack causing 4 damage having been enhanced
by the Berserk action.
Cover: A Crew Member who takes cover will gain +1 Armor, and Enemies’ hit checks against them will be by 1 point more difficult. Against explosive attacks Cover will grant +3 Armor. This effect lasts until their next activation, and they can’t do any other combat action during this turn.
Flank: If you have more than 1 active Crew Member, one Crew Member can make one attempt at a Flank action this turn. This will cost 1 Oxygen in a non- breathable or Hell-like Atmosphere. To attempt this, the Crew Member makes an Agility Check against 8+. If they pass this grants their Ranged or Melee attack +3 damage. If they fail there is no bonus. A '1' counts as a fail.You cannot make another Flank attempt during this combat turn.
Reload Weapon: You may use a Magazine in one of your Crew Member’s Item slots to reload their Weapon. Any Ammo currently in the Weapon is lost.
Unjam Weapon: Perform a Tech Check (Tech Attribute + d6) against 8+. But only apply Item effects giving a bonus for unjamming checks. Items which increase your Tech Attribute only are not applied. If it’s a success, your Crew Member has cleared the jam. If you fail on this first attempt, unjamming will be easier during the next Unjam action attempt, rolling against 6+ instead of 8+. But if failed at the second attempt the Weapon gets damaged.
A third action can be spent for a third attempt against 6+ to repair and unjam, but if you fail the Weapon will break and you must erase it from your Inventory. If it has left over Ammo, you can give the Ammo to any of your Crew Members who have the same Weapon, if that Weapon does not have a fully loaded Magazine.
When you return to Dungeon Exploration all jammed Weapons are unjammed, but damaged Weapons are not repaired. You can try to repair them with a dice check as you would during combat. If you are back at your spaceship all Weapons, no matter if jammed or damaged, will be repaired and ready to use again instantly.
Use Item: Use a single Item (for example a med kit) . The Item can be in the Crew’s backpack or hands. Items that heal can also be applied to another Crew Member.
Rearrange and exchange: As much as you wish, the acting Crew Member may Exchange Items and Weapons with another Crew Member. Both involved Crew Members may also rearrange their Inventory and hand slots during this action.
Escape: No one left behind. More specifically, no one useful should be left behind. Choose which Crew Members will join the Escape attempt and which will not. Only Crew Members which weren´t activated during this turn can participate in an Escape attempt. Crew Members which were already activated must be sacrificed. Crew Members who can participate in an
Escape attempt can be sacrificed as well if you decide so.
Roll a d6 and add the lowest Agility Attribute among Crew Members involved in the Escape attempt, excluding sacrificed Crew Members. Then add 3 for each Crew Member who was sacrificed and add 2 more for each previous attempt to escape during this Ground Combat.
If the total value is then equal to or greater than the highest Enemy Agility Attribute, the attempt is a success.
If you succeed: The combat ends and you continue with exploration. No combat rewards or experience are earned. Place your team on the Map in the position they were in before they triggered combat.
Any sacrificed Crew Members are abandoned and you must erase their profiles, along with all Equipment they carry. You can imagine the gruesome sound of their merciless demise.
If the combat was triggered immediately upon entering a new Map, return to the exit point of the previous Map, or return to your Ship if you are in the first Map of a Location. Restrictions to moving backwards such as in One-Way Locations do not prevent this movement.
If you fail: Any sacrificed Crew Members will lose 2 HP because you left them behind for a while, but you return after your escape attempt failed. And your turn is over.
PSI POWERS
One cost of immense power is the terror of knowing how powerful it can be.
During Ground Combat after taking their regular action, Crew Members with the PSI Trait may activate a single PSI Power from the PSI Power List. You may never have more than one Crew Member with the PSI Trait. If you have made a mistake and broken this rule, erase all PSI Traits from all but one of your Crew Members.
Each PSI Power is presented as NAME (difficulty). When attempting a PSI Power, roll a d6 + the Crew Member's PSI Attribute. If the result is equal to or greater than the (difficulty), apply the PSI Power's effect.
If the Crew Member fails this check they lose 1 HP and their PSI Trait is exhausted (it cannot be used at all in this state. The PSI Trait remains exhausted until the Crew Member Meditates to recover. See below). If they fail on a roll of 1 they lose 1 extra HP. Armor and Shields do not prevent any of this damage.
Example: You want a Crew Member with PSI 2 to use the Power PSI SHOCK (6). You roll a d6 and get 3. You add the Crew Member's PSI Trait value of 2 for a total of 5. Since the difficulty of PSI SHOCK is 6, the Crew Member loses 1 HP, their PSI attempt fails and their PSI Power is exhausted. Had they rolled a 6, their total would be 8 which would be a success and they’d apply the Power’s effect.
If a Crew Member has PSI Items in their Inventory these will offer a bonus to their PSI attempt rolls. A Crew Member may only apply one PSI Item bonus during each attempt, even if they have multiple PSI Items.
There are different kinds of PSI Powers; Ground Combat Powers and Dungeon Exploration Powers which can only be used in their appropriate game phase.
Meditate: To recover an exhausted PSI Trait you need to meditate. There are 3 ways doing so:
Meditate during Ground Combat situation: Spend one regular action, then do a dice check (d6) against 3+, increasing the required result by the Crew Member’s missing / damaged HP. No other effect or rule can modify the result of this roll.
If the check is passed, the exhausted status is removed, and the Hero can use their PSI Trait again.
If they fail they lose 1HP, or 2HP if they fail by rolling a '1'.
Example: Your PSI-exhausted Crew Member has 4 Strength granting a maximum of 8HP, but they lost 3HP during the adventure. If they try to meditate now during combat they need to roll a 6+ (3+3) on a single d6 to remove the exhausted status from their PSI Trait. That means you should probably try to heal this Crew Member before attempting to meditate during combat if possible. If you fail the meditation they will lose even more health.
Meditate during Dungeon Exploration: Same as during Ground Combat with a dice check against 3+ plus the Crew Members lost HP. Instead of an action you must spend Oxygen. Zero Oxygen in a breathable Atmosphere, one Oxygen in a non-breathable Atmosphere and two Oxygen in a Hell-like environment.
Meditate on Spaceship: If you are back on board of your spaceship your PSI Trait will recover from exhaustion automatically (without the need of a dice check).
GROUND COMBAT – PSI ATTACKS
PSI ATTACK (5): 2 damage IS IA.
PSI SHOCK (6): To all Enemies: 2 damage IS IA.
PSI BLAST (7): 4 damage IS IA.
PSI LIGHTNING (8): To all Enemies: 3 damage IS IA.
GROUND COMBAT – PSI SUPPORT
PSI CONCENTRATE (5): Increase a Crew Member's Ranged or Melee Attribute by 2 until the end of their next activation.
PSI CURE (5): A single Crew Member recovers 2HP. +1 difficulty if the PSI user is targeting themself.
PSI TAUNT (5): Choose a Crew Member, on the next Enemy turn, all Enemies will only target that Hero.
PSI TELEKINESIS (5): Move one piece of Equipment from one Crew Member to another.
PSI CONFUSE (6): Select an Enemy and increase its difficulty to hit with Melee or Ranged attacks by one point. E.g. If it would normally hit with a 4+, a confused Enemy would hit with 5+. The effect remains until this Enemy’s next activation. Can only be applied once per Enemy.
PSI FLASH (6): +3 to escape check. This PSI Power always works even if the PSI check fails! In the Event of a failed check the PSI Crew Member will suffer the normal consequences of failing a PSI check.
PSI CURE II (8): A single Crew Member recovers 5HP. +1 difficulty if the PSI user is targeting themself.
PSI CURE ALL (8): Restore 2HP to all Crew Members.
PSI MOTIVATION (8): One other Crew Member of your choice gets an extra activation.
PSI SHIELD (8): Prevent all HP damage taken by a Crew Member from a single Enemy's attack. Does not prevent Shield damage. Can be used instantly as long as a PSI action was not performed during the PSI Hero's previous activation, and as long as their PSI Power is not exhausted.
DUNGEON EXPLORATION – PSI SUPPORT
PSI SURPRISE (3): +2 to initiative roll.
PSI DIVINATION (4): +3/-3 to d20 loot roll. Used prior to performing the loot roll.
PSI MIDAS TOUCH (5): +3 extra Credits if Ground Combat is won.
PSI OXYGEN CREATION (8): Refill 2 Oxygen.
A 'Talisman (Grade 4 Item)' does not allow PSI rerolls. It only allows you to reroll your Melee or Ranged attacks during Ground Combat.
GROUND COMBAT RULES
Choosing targets: A Crew Member's Melee attacks can be separately assigned to different targets. Ranged attacks must all be applied to a single target (unless they are made by a Crew Member with the 'Independent Targeting' Trait).
Boost attack using your Melee or Ranged Attribute: When Attacking, for every 2 Melee Attribute points you can either give your Melee Weapon +1 damage, OR decrease the success requirement of its 'to hit' rolls by 1. Boosting Ranged Weapons works in the same way using the Ranged Attribute.
Each bonus is applied to all hits made by an explosive Weapon.
Attacks granted by the 'Chain Attack' Trait or by 'Multiple Attacks Weapons' are each considered as separate instance of Attacks. Allocated boost from using your Melee or Ranged Attribute only apply to the first attack of those Attack Chains.
For example: Your Crew Member makes a ranged attack and has a ranged Attribute of 5. They can allocate 2 points for +1 damage and 2 points to reduce the required roll to hit by 1. They could also allocate 4 points for +2 damage, or 4 points to reduce the required roll to hit by 2 instead. The remaining single point cannot be used to boost the attack.
Shields: If a target has A or B class Energy Shields, these will absorb damage first before their HP.
Type A (Flash Shields) only absorb damage from Ranged Attacks. Type B Shields will absorb damage from Melee and Ranged Attacks.
After Energy Shields have depleted, remaining damage is reduced by the target's Armor value. The remaining damage is then modified based on Weaknesses and Resistances before being deducted from the target's HP.
Critical: A roll of '6' to hit deals one additional damage point to the target. This also applies if an Enemy attacks and hits your Heroes with a '6'!
WEAPONS DEFINITION
Sample of a Weapon’s definition: Rifle (3) 4+, 3 A5. Type RG. This is a Rifle, requires a minimum Strength of (3) to use, hits on a minimum roll of 4+ (if you roll 4, 5 or 6 with a d6), does 3 damage points and has 5 Ammo. If you hit with a '6' it deals 3+1=4 damage points because of the critical combat rule. It is a Ranged Weapon (RG).
Multiple attacks: Some Enemy attacks, as well as Melee and Ranged Weapons, have a multiplier in their definition (such as '2x3') which means they attack twice and deal 3 damage with each attack. This only consumes one unit of Ammo.
Melee attacks can be split between multiple Enemies, Ranged attacks can only be split if you have the specific Trait to do so.
Melee or Ranged Attribute bonuses which improve hit chance or damage of your Weapon only apply to the first of these grouped attacks.
Roll one die at a time to hit with each attack. If you miss, you can continue with the next attack if there is one. If you roll a '1' and get a jam you must stop your attack. If you rolled anything other than '1', 1 Ammo is consumed.
Each damage result is handled separately and is not added for the purpose of overwhelming the Enemy Trait ‘ZOMBIE’. A target’s Armor is applied against each single hit. Enemies executing multiple attacks will end their attack if they roll a '1'.
A: Stands for Ammo. You mark used Ammo with lines, for example: A8:||| indicates that you’ve already fired 3 of 8 shots . If there is no Ammo listed, Ammo for this Weapon is unlimited. Ammo price corresponds to the Ammo grade (not the grade’s price); for example, Ammo for a Weapon of the 3rd Grade costs 3 Credits at a Shop . Ammo is sold in Magazines. The Magazines hold the same load capacity as the Weapon itself. Up to two Magazines of the same type can be stored in a single Equipment slot. An Inventory slot containing a Weapon can hold one spare Magazine for it.
EMP: Electro-magnetic Pulse attacks only reduce Shields (energy and flash Shields) and cause no further damage to anything else.
EX: Explosive Weapons which hit all opposing targets. Roll a hit die for each Crew Member or Enemy which may be hit. If you increased the hit chance or the damage value by using your Melee or Ranged Attribute, this effect is applied to each of these dice rolls. See combat rules. Hit rolls for explosive Weapons that roll a '1' with at the first die will jam your Weapon, but you still roll a die for each following target to define whether it is hit. Rolling a '1' after the first die roll does not jam your Weapon. One Ammo is consumed in all cases, unless the only results you roll are 1s.
T2: There are Weapons which must be charged, which takes Time. After firing a 'T2' Weapon, before using it again, you must recharge it. Recharging it takes one action. If you decide to use another Weapon in your next turn instead of spending an action to recharge the charge-depleted Weapon, the depleted Weapon will not be recharged. Weapons in the 'T2' category cannot be fired twice in one turn even if you have the specific Trait that allows repeat fire on a single turn.
RG: Ranged attack.
ML: Melee attack.
AP: Armor Piercing: Damage from this Weapon is only reduced by half of the target's Armor.
IA: Ignore Armor: The target’s Armor provides no benefit against this Attack.
IS: Ignore Shields: The target’s Energy / Flash Shields provide no benefit against this Attack.
WEAKEN X: If any damage from this Weapon exceeds the target's Shields, after resolving the Attack the target's Armor is reduced by X points until the
end of the Ground Combat. This effect does not stack.
ITEMS DEFINITION
U / Use up: This Item is expended upon being used once and is then erased. Some Items can be used multiple times if a specific number is noted after the U (for example, a U2 can be used twice; A U4 can be used 4 times) . Used-up Items can’t be reloaded. Erase them if they are used up.
Shield charger: A Shield charger restores a specific amount of Shield energy at the beginning of each combat turn. Each Hero can only activate one energy Shield charger per combat turn, but more than one can be carried at one time. They can be kept anywhere in the Inventory including in your hands and they can charge a flash or an energy Shield.
Shield class A / B: Type A energy Shields only protect against Ranged attacks. Type B Shields protect against every kind of attack. You can carry multiple flash and energy Shields, but cannot employ the effect of more than a single flash or energy Shield at the same time. An active Shield can be carried anywhere in the Inventory or in a Crew Member’s arms.
The first number defines the Shield's Power, the second the recharge per turn. If a combat begins, Shields begin fully charged. Even if your Shields have their own recharge ability, you may support them by using a single Shield recharger as well.
Armor: You can carry multiple Armor Items, but may only actively use one jacket Armor, one helmet and one physical Shield together at the same time. Physical Shields like an Anti-Terror Shield must be carried in one hand.
Armor Items like jackets or helmets may be switched during combat. You may also arrange your Items and Weapons available in your Inventory before the combat begins, and if so desired, exchange Items with your teammates. Exchanging Items during combat is also possible but costs you an action (see exchange combat action). The effect of Armor is applied after Shield effects. Then after Armor reduction, the damage will be modified by any Weaknesses or Resistances of the target (see next section). The maximum Armor Level of a Hero is 8.
WEAKNESS AND RESISTANCE
There are several types of damage in Space Kraken: Fire, Ice, Toxic, Ranged (RG) and Melee (ML). Some sources of damage will involve multiple types. After reducing damage due to Shields and Armor, check the damage types of the Attacks against the Weaknesses and Resistances of the target on the following chart. For each matched Weakness, one Resistance is ignored and vice versa.
2 or more Weaknesses applied: damage x3 1 Weakness applied: damage x2 No effects applied: damage x1 1 Resistance applied: damage x0.5 2 Resistances applied: no damage
For example: You Attack an Enemy with a Weapon that has the damage types Ice, Toxic and Melee. The target has Toxic and Melee Weakness, but also has Ice Resistance. Thus damage dealt to them is multiplied by 2.
ENEMIES TAKE ACTION
Determine Enemy action: Process each Enemy from top to bottom. Below the Enemy portrait and stats there is a table which defines the actions the Enemy may perform. Roll a d6 and trigger the defined action of the Enemy listed in that table. If the Enemy has the Trait to execute 2 actions, carry out this procedure (with die roll) two times. The second result can be the same, or different from the previous one. Enemy Weapons never jam.
Enemy Attack Priority: Enemies will attack your Crew Members according to the following priority ranking. Within each ranking you are allowed to choose which Crew Member will be attacked for each Enemy action. This includes each individual action of an Enemy with two actions. If a single action is an attack with two hits such as a RG 4+, 2x3 it will always hit a single target. Enemies do not consider unconscious Crew as targets.
Priority Classes:
-
Crew Members who attacked in Melee during their last activation.
-
Crew Members who attacked with Ranged Weapons.
-
All other Crew Members.
When multiple Crew Members qualify, you must designate which Crew Member will be targeted before making rolls to hit. Note: For determining Enemy target priority, it doesn't matter if Melee / Ranged attacks missed or hit or dealt damage etc.
Idle: The Enemy does nothing (a thematic explanation may be presented in brackets. It has no impact on gameplay).
Enemies Escape: If an Enemy's HP is at or below its escape value it will try to escape as its action. Roll a d6, and on a 4+ the Enemy escapes. If an Enemy has no escape value it can never attempt to escape. If they fail to escape they will still be activated this turn. If they escape they leave the combat without taking their action for this turn. Note: Enemies that escape grant XP, but not Treasure.
Special Traits: After their regular action an Enemy applies their Trait effects (for example Regen) . Some of these are instead passive effects which are continually active. Enemy Traits are explained on page 170.
AFTER GROUND COMBAT PHASE
Treasure drops: Once all Enemies have been defeated, captured or escaped, you can reap the spoils of war. You gain 1 Treasure drop for each Primary Enemy that was defeated in the combat (the Treasure grade corresponds to the Enemy's Treasure value), or one drop per Treasure "T" you found during Dungeon Exploration.
Minions and escaped Enemies don't provide Treasure.
The maximum Treasure grade is 6, with anything that would be higher being reduced to this grade. First choose whether you will take a free Stimpack or gain Credits equal to the Treasure Grade. Then roll a d20 and check the result for your Location on the TREASURE TABLE on page 167 to determine what you gain for each drop, as below.
Example: If you win a fight against a Primary Enemy with Treasure grade 4 and two Minions, you gain either 4¢ (matching the Treasure grade) or a Stimpack; the Minions don’t give any Treasure. Then you open the TREASURE TABLE and roll a d20. If you are in an underground Location, and the result is a 14 you will find a Weapon of grade 4. Roll a d6 and check the line where you can select the left- or right-side Weapon.
Extra Cash drop: Roll a d6 and check the outcome on the following chart:
1-5: Gain Credits equal to half the Treasure grade’s value.
6: Gain Credits equal to the Treasure grade’s value.
Example: The Treasure grade is 4 and you roll a 5. Then you will get 50% of 30 = 15 Credits.
Item drop: On the Items page check the appropriate Item Grade and roll a d6. Check this result against the numbers in the middle of the tables. This will indicate two Items, from which you can choose one to gain.
Weapon drop: On the Weapons page check the appropriate Weapon Grade and roll a d6. Check this result against the numbers in the middle of the tables. This will indicate two Weapons, from which you can choose one to gain. Weapons are obtained with full Ammo.
Ammo drops: You can choose between:
- Gain one Ammo for a Weapon of a grade matching the Treasure grade.
- Gain two Ammo across Weapons of any grade lower than the Treasure grade.
If you have no free slots for Ammo you may load dropped Ammo directly into the Weapon. A Weapon can store one additional Magazine in its own Inventory slot. Note: Using a Magazine always entirely fills a Weapon's Ammo reserve when used.
Prototype drops: Prototype drops are Weapons or Items with a special effect, which have both a positive and a negative impact. First, reroll a d20 until you roll an Item or Weapon as described above. Roll a d6 and choose either the left- or right-hand Equipment. Then see the prototype Equipment page and apply the corresponding prototype effect to it, see page 168.
If it´s a Weapon and the effect doesn’t fit (such as an integrated Magazine for a non-ammo-based Melee Weapon) you will gain the Weapon without any prototype effect.
If it’s an Item, check the dice result corresponding to the kind of Item. For example, for all 'Armor' Items there is a dice result table with the corresponding effect. If it’s a Oxygen tank type of Item, there’s another dice result table shown.
If the Item doesn’t fit in a category (for example, a flash grenade) you will gain the Item without a prototype effect.
Note the effect by recording the corresponding effect selection number / dice number in front of the Item name.
Gain XP: Under XP on the Enemy sheets, you will see how many Experience points you earn for defeating these Enemies, whether they were a Primary or Minion. You also gain this experience if they escape from combat.
If you escape, you do not gain any experience. In case of a Boss combat double the received XP.
You may spend the Experience points immediately when the opportunity arises, but you may also store Experience points; there is a box on your spaceship display to record your current amount of XP. Unspent XP does not belong to a specific Crew Member; they are collected for the entire team and can be used for any available Crew Member.
Level Up: You can increase a Crew Member's Level by 1 at any time by spending XP. The XP cost to Level up is equal to the next Level multiplied by itself. For example, leveling up from Level 2 to 3 requires you to pay 9 XP (3x3) . That amount is then deducted from your XP total.
Each time a Crew Member gains a Level you may allocate 1 extra point to one of the Crew Member's Attributes, not exceeding the Attribute maximum of 8 for any single Attribute.
You may instead allocate 2 Level ups to gain a positive Trait for the Crew Member (see page 171).
When leveling up a single Level you may give a Crew Member two new Traits, one positive and one negative, so long as they do not exceed the maximum of 4 Traits per Crew Member. Note: These upgrades will be permanent, so choose wisely!
If you give a Crew Member the PSI Trait, this is then considered both a Trait and an Attribute. It begins at Level 1 and can be increased as an Attribute when leveling up, up to a max Level of 8.
Jams: After any combat, all Weapon jams are cleared automatically without the risk of damaging the Weapon.
Damaged Weapons can be repaired with Tech Checks, that may repair or ruin the Weapon as explained under ‘Unjam Weapon’ see page 143.
Reload Weapon (Outside of Combat): You may use Magazines in your Crew Members' Inventories to reload your Weapons. Any Ammo currently in the Weapon is lost.
Arranging Items: You may rearrange / re-allocate Items after combat and during Dungeon Exploration among your Crew Members.
GLOSSARY
A / Ammo: Short for ammunition, needed for some Weapons. Notation: A{capacity}:{spent}. You mark used Ammo with lines, for example: A8:||| means you've already spent 3 of 8 shots . If there is no 'A' Ammo listed, the Ammo supply for that Weapon is unlimited. A Magazine refills a Weapon back to its maximum Ammo capacity. See Weapons list See page 165.
Airtight: Airtight Map elements create a barrier between Atmospheres, typically separating breathable and non-breathable Atmospheres illustrated with a black border.
A Shields: Also called Flash Shields, only protect against Ranged attacks. See page 142.
Ambush: In case of an ambush the Enemy will always act first during a Ground Combat. See page 141.
Ammo (for Crew Weapon): The Ammo price for a specific Weapon corresponds to that Weapon's grade (the grade number, not the grade's price). For example, Ammo for a Weapon of the 3rd Grade cost 3 Credits . The Magazines hold the same load capacity as the Weapon itself. Up to two Magazines for the same Weapon can be stored in a single Equipment slot or one together with the corresponding Weapon. Magazines for differing Weapons require separate Equipment slots.
Ammo (for spaceship Weapons): Reloading is free and you may also buy extra slots to store more ammunition. See page 130.
AO / AI: Atmosphere Outside and Atmosphere Inside conditions. See page 135.
AP / Armor Piercing: Only half of the target's Armor applies to damage they receive. See page 146.
Area: Every Map is made of different areas which may have doors, Bulkheads, walls etc. to separate and define them. See page 134.
Armor: You can carry multiple Armor Items, but may only actively use one jacket, one helmet, one physical Shield in a hand at the same time.
B Shields: Also called Energy Shields, these protect against Ranged and Melee attacks. See page 142.
Boss encounter: Like normal Enemy encounters, but with a few special rules. See page 136.
CGM Line Tracker: A page which saves the current position of each Story Line and its variables, and also the global variables. See page 14.
CGM: Stands for Crypted Game Master and consists of a CGM Line Tracker, CGM Sheets and Event sheets. See page 122.
Commands: Orders inside the CGM. They can trigger an Event, change variables and much more. See page 124.
Coordinate: A Coordinate like '2AB' which will forward you to a position inside the CGM SHEETS where you will find further Coordinates, commands, and Events. See page 122.
Credits / ¢: Intergalactic Credits, the universal crypto-based currency among the worlds of Space Kraken.
Critical: A roll of '6' to hit deals one additional damage point to Ground Combat attacks. This also applies for Enemies attacks! See page 145.
EMP: Electro-magnetic Pulses damage Shields (all types), but nothing else.
Energy Shields: See B Shields.
Equipment: Can be an Item or a Weapon. These are stored in the Crew Member's Equipment or inside your spaceship storage.
EX / Explosive: Explosive Weapons/attacks hit all targets or all Crew Members. See page 146.
Flash Shields: See A Shields.
Gambler: You can try to exchange Weapons and Items and may get back better Equipment, or worse. See page 137.
Grade: Used for Item, Weapons and Treasure Grades. There are 6 different grades, from cheap and common Items to rare and expensive ones. See Weapons and Items on page 165 and 167.
HE: High explosive. See page 129.
Hell: This Atmosphere is extremely hot, cold or toxic. See page 135.
Crew Member / Crew Members: 1-4 characters controlled by the player. In multiplayer games, the other players have different roles and do not usually control the Crew Members. During Dungeon Exploration Crew Members may be referred to as 'your team' as they stick together whilst moving around Maps.
HP: Health Points of your Crew Members and Enemies. See page 118.
IA / Ignore Armor: IA is a Weapon effect. The target’s Armor provides no defensive benefit at all against this attack. See page 146.
Interlink Memory: Variables for global usage numbered with I-Z. These variables can be shared by multiple Story Lines. See page 14, 122.
IS / Ignore Shields: Damage of this kind ignores any type of Energy and Flash Shields.
Item: In-game useful objects. These Items can be dropped by Enemies, bought or found during your adventure. Each Item has a grade and description of how to use it, see page 167. Items can be sold for Credits. See page 138.
Level / LV: Used to show the difficulty of Enemies from 1-6 and above, as well as the Level of the Crew Members.
Line: A Story Line defined by a continuous Line of commands and coordinates. Most times multiple Lines are active simultaneously. See page 122.
Location: A Location defined with parameters such as Species and atmospheric conditions, with up to 9 Maps which you can traverse in sequence during Dungeon Exploration.
Location Difficulty: This is a value you choose before traveling to a Location that impacts the difficulty of the challenges you will face there, and the grade of Treasure you may find.
Locations List / Starmap Locations Log: Your hyperspace coordinate memory of previously discovered Locations.
On your CGM Line Tracker you note these coordinates with all relevant parameters. See page 14.
Magazine: Ammo for your Crew Member’s Weapons is sold in Magazines. A Magazine holds the same amount of Ammo as the Weapon itself. See Ammo.
Map Number / Map No.: The numerical position of a Map within a Location, for example Map number 3 would be the third Map you access as you move through that Location . See page 154.
Map: A floor plan presenting Tiles and Areas that the player moves between during Dungeon Exploration. Maps contain Map Elements that have a variety of effects. See page 154.
Melee / ML: Melee attacks. See page 146.
Modder: A Map Element that allows you to upgrade the Ammo capacity or damage output of your Crew Members' Weapons. See page 138.
OC / Overclocked: Overclocked Weapons are spaceship Weapons which can be used to fire multiple shots in burst mode which costs more Ammo. See page 129.
Power Points: Used as a currency in Multiplayer mode to gain and use Skills.
Prototype Weapons and Items: A rare Item with special good and bad effects. Prototype Items can be found as Treasure. See Treasure. See page 168.
Quest / Quest Master: You can accept a Quest if you find a Quest Master Tile during your Dungeon Exploration. If you solve a Quest you will get a reward. See page 160.
Ranged / RG: Ranged attack. See page 146.
Space Combat: A Combat in deep space between your Spaceship and Enemies which can be triggered during a Space Flight, or by a Story Event. See page 146.
Space Flight: A spaceship flight, usually initiated by choice. You can choose your target and may provoke a Space Combat before discovering a new Location. See page 125, 162.
Structure Points / SP: Structural integrity points of your spaceship and Enemy vessels in space. If a Ship loses all structure points the Ship is lost. If your own Ship loses all structure points you lost the game. See page 130.
Shop: See page 138.
GLOSSARY (continued, core book p. 151)
T2: T2 is a Weapon effect: Weapons with 'T2' characteristics need time to recharge after firing. Before using this Weapon again, you must recharge it, which takes one action. See page 146.
Tile: A single Tile on a Map, for example a Door or a Shop you can activate. See page 136, 152.
Urgent Quest: Some Quests have a turn limit to their completion, granting greater rewards for success, but a penalty for failure. See page 160.
U / Use up: A 'U' value indicates that an Item has a limited amount of uses, after which it is erased. Uses of an Item cannot be 'reloaded'. See page 146.
Unconscious: If a Crew Member's HP gets lowered to between 0 and -3. See page 118.
Variables: Variables are saved(written) in cells in the 'CGM LINE TRACKER' on page 14. These number values have no range limits and can even be negative. The letters A-H hold the 'local' Line variables. The letters I-Z hold the 'interlink' variables.
Weaken X: Weaken is a Weapon effect. If you hit the Enemy with this Weapon and the damage is not completely absorbed by it's Shields, the Enemy's Armor will be reduced by X points until the end of the Ground Combat. See page 146. This effect can only be applied once to a single target, replacing a previous Weaken effect if it has a greater effect.
Weapons: Weapons can be found or bought. Each Weapon has a grade and parameters. See page 145, 165. They can be sold for Credits.
XP / Experience Points: Enemies defeated during combat grant experience points which you can use to Level up your Crew Members, improving their abilities. It is stored as a communal resource shared by all of your Crew Members on the spaceship sheet. See page 187.
FLIGHT TABLE (core book p. 163)
Enemy entries read: SP-CREW, WEAPON DAMAGE, SHIELD-SHIELD RECHARGE. Timeline letters: Attack, Backup, Combat, Evading, Game over, Idle, Shields, Time, Victory. Objectives: A = Attack check (Ranged/Melee), C = Charisma check, T = Tech check, ? = choose Attribute (see Space Combat, phase 2). The Flight number is determined as described in 9.4 (starts at 3).
| No | Name | Timeline 1-8 | Objectives 1-4 | Enemy 1 | Enemy 2 | Enemy 3 | Enemy 4 | XP |
|---|---|---|---|---|---|---|---|---|
| 3 | Space mines | -, -, V | Mine 3-0, 5, 0-0 | Mine 3-0, 5, 0-0 | 5 | |||
| 4 | Accident | -, -, -, -, T | T7, T7, T7, T9 | Mine 3-0, 5, 0-0 | Mine 3-0, 5, 0-0 | 8 | ||
| 5 | Scout | E, -, -, -, T |