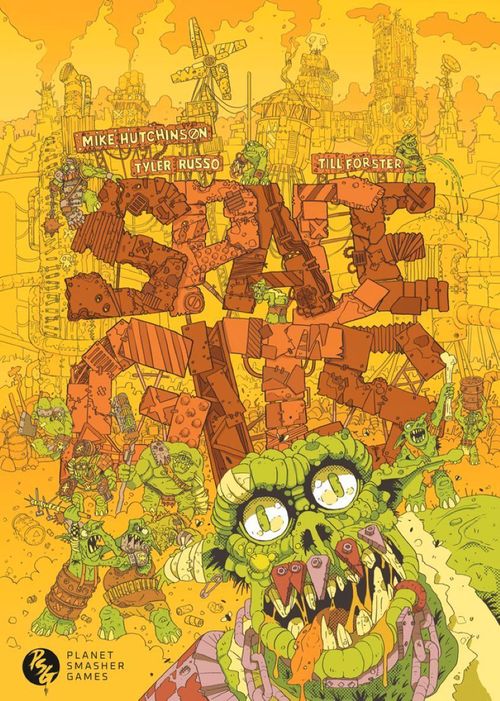
Space Gits
Space Gits Rulebook
Table of Contents
Table of Contents
- What You Need
- Quick Start
- Gits
- ID Cards
- The Game
- 30-Minute Timer
- The Flow
- The Tower
- Falling Over
- Activation
- Damage
- Boot
- Measuring
- Scooting
- Fighting
- Shooting
- Explode (x)
- Time, Gentlemen
- Terrain
- Gather Your Gits
- Weapons
- Fancy Gear
- Vehicles
- Vehicle Mods
- Campaigns
- Factions
- Rules Summary
- Quick Reference Tables
What You Need
To play, you'll need 3-5 space orc miniatures each, and a smallish area of tabletop (the size really doesn't matter but let's say between 2 and 3-foot square, because otherwise you'll ask). Fill it up with terrain, including six or so exploding barrels because they are great.
You'll need some dice including a buttload of D6s and at least one set of funny shaped RPG dice for some of the guns. You'll need two dozen or so bottle caps (or random tokens, coins or empty 25mm or 32mm bases).
You'll need a tape measure because it's a miniatures game. I actually prefer using a short wooden school ruler, because I can lay it down on the table and have both hands available to scoot my models around. You could get one of those laser-line doodads if you want to get fancy. You can pre-measure at any time, but it won't fucking help you.
Quick Start
These Quick Start Rules give you the basic rules and the broad sweep of the game, enough to play your first game, but they skip over some of the details and ignore all of the fancy options. Vehicles are a thing in Space Gits, but not in these Quick Start Rules. If anything in these Quick Start Rules doesn't make sense, check the full rules later in this book and hopefully that will clear it up.
Getting Started
Gather your Gits: For your first game, everyone gets 3 orcs, armed with either a pistol and a regular hand-to-hand weapon, or a rifle. Orcs are toughness 3 and throw 3D6 as their move dice.
Setting Up: Clear a play area roughly 2'x2' and set up plenty of terrain. Each of you drops 6 bottle caps onto the table from a decent height. Put one more cap in the middle. Whoever last finished a drink is the big boss.
Deploying: Starting with the big boss, take turns to place one orc at a time anywhere in play, at least 4" from all bottle caps and enemy orcs.
Start the Clock: Once all the gits are down, start a timer for 30 minutes and get cracking with the game. The big boss activates the first orc.
The Tower
In Space Gits each model has to drag around their own personal tottering tower of dice. When an orc takes damage, and when they activate, you add six-sided dice to this tower, popping them on top of the other dice they are lugging about. The tower has to touch the model at all times. When you move an orc, you have to move their tower with them.
If any of the dice fall off an orc's tower at any point, they fall over and discard all the tower dice. Knock the model over on its ass and end its activation. A fallen orc can't be picked to activate until they're booted back onto their feet again. Fallen orcs don't have towers.
Activating Models
You activate an orc then I activate an orc. When you activate an orc, they do one or two different actions out of shoot, scoot and boot (in any order). If they end up touching one of my (standing) orcs, a fight breaks out, and continues until the gits are separated. When your orc has done their business, they take a swig: add a D6 to the top of their tower.
Scoot: To scoot an orc, roll 3D6 into the play area as move dice. One dice at a time (in any order), move your orc directly towards that dice a number of inches equal to the value of that dice and then discard it. Move the full distance if you can. You have to use all your move dice.
As you move the orc, make sure the little tower of dice is touching them at all times. If any of the dice fall, so does the orc.
Shooting
To shoot, roll your bullet dice into the play area. Each bullet travels from the shooting model in a straight line directly towards one of the bullet dice a number of inches equal to the gun's range, hitting the first thing in its path (ignoring dice and fallen orcs).
If the thing that is hit is a model, compare the value of the bullet dice to the toughness of that model. If the rolled value meets or beats the toughness, the unlucky model suffers big damage from the gun. If the value is lower than the model's toughness, they suffer weak damage.
Fighting
When two models fight, their bosses count 3, 2, 1… and then throw thump (closed fist), shove (flat hand) or pinch (sticky-out fingers) with their hands.
- Thump the other model, unless the other boss throws shove. To thump: roll all your fighting weapons' thump dice. Do big damage with each dice that equals or beats the other model's toughness, and weak damage with the others.
- Shove the other git back 3", unless the other boss throws pinch. The shoved git is moved by its boss, along with their tower. Move them directly away from their opponent. If they are shoved into some terrain, they suffer 1 damage.
- Pinch 1 bottle cap from the other model's boss, unless the other boss throws thump.
Once the throw is resolved, if the two models are still in contact (and both are still standing) they fight again until they are separated or one falls.
Other Actions
Looting: If you bump into a bottle cap while moving, you stop and pick it up. Looted caps go into your stash.
Put the Boot In: If a git is in contact with a fallen enemy git, they can put the boot in to take 1 cap from the fallen git's boss.
Boot Up The Arse: If a git is in contact with a fallen friendly git, they can boot them up the arse to get them to stand up.
Damage: When an orc takes damage, for each point of damage received, your opponent gives you a D6 to add to your damaged model's tower.
Time, Gentlemen
Leg It: When it is your turn to activate, you can leg it instead, and you have to leg it if you have nothing left that you can activate. Any of your orcs that are within 6" of a standing enemy orc are replaced with a bottle cap from your stash, then remove the rest of your gits and you are out.
Times Up: When you hear the siren on the 30 minute timer, you cannot boot any more. That means that fallen gits stay down (and you can't rob them anymore).
Game End: The game ends when only one boss is still playing. At the end of the game, the last remaining boss scoops up any in-play bottle caps. The winner is the boss that walked away with the most new caps this game.
Gits
Your beautiful gits cannot be defined by a set of numbers, but we nevertheless assign them some.
| Git | Cost | Move | Headbutt | Toughness | Special |
|---|---|---|---|---|---|
| Orc | 5 | 3D6 | 1D6 | 3 | Yes |
| Bullorc | 7 | 3D6 | 1D8 | 4 | Strong |
| Goblin | 4 | 3D6 | 1D4 | 2 | Lightweight, Downtrodden |
| Gnawball | 4 | D6, D8, D10 | 1D10 | 3 | Animal, Rigged, Big Mouth (1D10, 2/3) |
The meaning of these statistics are:
- Cost: The cost to add this git to your gang.
- Move: The dice you roll for this git when they scoot.
- Headbutt: The dice you roll when they headbutt something.
- Toughness: A general rating of this git's fortitude, constitution, stamina, resilience and ability to hold their booze. This is the number an opponent has to roll to successfully do big damage to this chap.
- Special: All gits are special, but some have additional rules.
Gits should be mounted on bases, else they'll fall over during play. Bases come in a variety of shapes and sizes and you should choose one. Round bases with beveled sides provide the maximum tower instability during play. I use those, but I guess the optimum base choice for Space giT$ is probably a 3mm thick MDF hexagon?
Git Special Rules
Orcs (5 caps): Your regular, honest citizen of Gnork. Each orc costs 5 caps, and is blessedly free of special rules.
Bullorcs (7 caps): Some orcs are just bigger, stronger and tougher than others. If you want a particularly beefy orc in your gang, a bullorc costs 7 caps and has one special rule:
- Strong: Can hold 2-handed weapons in one hand.
Goblins (4 caps): One of these little scrots will cost you 4 caps. They have these rules:
- Lightweight: When this git takes a swig, you add 2 dice to their tower, not 1.
- Downtrodden: You can't buy this git any weapon or gear that costs more than 1 cap.
- Numerous: The first git you deploy with this rule doesn't count against your 5 maximum models.
Gnawballs (4 caps): One of these semi-domesticated eating-machines costs you 4 caps. They are also known as gobdogs, mawswine and good boys. They have the following special rules:
- Animal: You cannot give this git any weapons or gear.
- Big Mouth: This gnawball gets a free fighting weapon with 1D10 thump dice and 2/3 damage.
- Rigged: If this gnawball has explosives modelled onto them, they are rigged and if they fall over, they explode (7). (The rules for explosions come a little later.) Remove them from play afterwards, obviously.
Runts (3 caps): Smaller than goblins, one of these tiny green menaces costs you 3 caps. They have these rubbish special rules:
- Puny: When you add a dice to this git's tower for any reason, add 2 dice instead.
- Animal: You cannot give this git any weapons or gear.
- Eager Helper: After a friendly git resolves a move dice that lies within 6" of this git, this git may also move using that move dice before it is discarded.
- Numerous: The first git you deploy with this rule doesn't count against your 5 maximum models.
Klankbots (10 caps): Whether one of the lifta-loada suits they use in the space port docks, a mechanical warframe for a goblin, or a fully autonomous construction robot, Klankbots cost 10 caps and have this mess of special rules.
- Hefty: This git should be mounted on a 50-80mm base.
- Strong: This git can hold 2-handed weapons in one hand.
- Klanking: After activating this model, put a klank token on its ID card or beside the model. When you activate a model with a klank token on it, discard the klank token and end its activation. (In effect, you only get to do anything every other activation. You could use a steel nut or a coin as a klank token.)
- Hunk of Metal: This git cannot be booted up the arse.
- Reboot Button: When this git is fallen, it may still be selected to activate, but can only take a reboot action. Roll any number of D6. If you roll at least two 5+ and no 1s, this Klankbot stands up. Either way, its activation ends after the reboot action, but it doesn't gain a klank token. You can't reboot after the timer is up.
ID Cards
The rioting gits in this game are a disorganised rabble, but that's not the natural state of the orcs of Crunge. Orcs can be weirdly bureaucratic; bureaucracy provides them with ample fresh opportunities to be gits to each other. Each of your orcs is issued with an official City of Gnork Identity Card, which they are supposed to keep on their person at all times. This gives you a handy reference for their weapons and such.
There's a page of blank ID cards in the book. Print some off and scratch your gits' details onto them, or just draw your own. Give your lil' guys names and record their starting stats. You can fill in their weapons' stats for quick reference and note any fancy gear or injuries.
Tot up the chap's total cost. An orc is worth 5 caps. Other types of git have different costs. Each git can buy up to two weapons and as much gear as they like. Add the cost of those weapons and gear to the git's cost on their ID card if you want to make sure you've done your sums right.
Note: Cost is a stat that is only used during initial list-building. Once you have a campaign underway, your gits' attitude stats (summed up as the gang's reputation) is the thing that drives the underdog bonus.
The Game
You are the boss. You need a gang. Check out the gather the lads section later to learn how to build your gang.
Set up plenty of terrain. Then each of you drop 6 fresh bottle caps from the general supply onto the middle of the table from a decent height. Wherever they land is where they are. If they bounce off the table, they are gone. Put one more cap in the middle.
Whoever last finished a drink is the big boss.
Starting with the big boss, take turns to place one model at a time anywhere in play. Gits have to be placed at least 4" from all bottle caps and enemy models, vehicles at least 8" away. You can deploy a maximum of 5 models; if your gang has more, the rest have to sit out of this game.
Once all the gits are down, start a timer for 30 minutes and get cracking with the game. The big boss activates the first model.
Optional Rule: If you finish a bottle of anything during the game, you can drop its cap into play from a foot up, anywhere you like. Fresh loot!
30-Minute Timer
After the models are deployed, start a 30 minute timer. Use your phone or a Casio watch. If your phone has a police siren sound effect, even better.
You have 30 minutes of uninterrupted looting and mayhem before the fuzz arrive in serious numbers to break this shit up.
The game doesn't end when the 30 minutes are up. When you hear the 30 minute alarm, you cannot boot any more. That means fallen gits stay down (and you can't rob them anymore). The game ends when all but one of the gangs have legged it.
The Flow
You activate a model then I activate a model. After you activate your git, it takes a swig (and if using the advanced rules: so do you). The more a git has activated, the more likely he is to fall down drunk while moving.
Movement is somewhat random, depending on your skill at dice chucking. Shooting is similarly dependent on tossing dice into the play area and fighting is a dumbass macho bluffing game.
Ideally, you are grabbing loot, but you'll be forgiven for losing track of that complex objective in the heat of the moment.
You can't really kill each other, but you can knock a git off their feet. Their mates can boot them back upright, so you'll have to separate the bastards and pull them down quickly, or just yoink the loot and leg it.
Legal Notice: Gits and vehicles are both models. If a rule refers to a model, it means both gits and vehicles. If a rule refers specifically to gits, it doesn't apply to vehicles, and vice versa. While a git is in a vehicle, they are not a separate model. Terrain is never a model.
The Tower
Each model has to drag around their own personal tottering tower of dice. When a model takes damage, and when they activate, you add a six-sided die to this tower, making a single tottering tower of stacked dice.
The tower has to touch the model at all times. When you move the model, you have to move its tower with it.
Tumbling Dice
If any of the dice fall off a git's tower at any point, for any reason, that tower has fallen, and the dice from the tower are discarded.
If a boss causes one of their own towers to fall: that git falls over. Knock the model over on its ass. If that happens during a git's activation, their activation is over.
If a boss causes anyone else's tower to fall, through clumsiness or deliberate sabotage, that model suffers a moment of lucid clarity and sobers up: their tower dice are all discarded, but they remain standing. (Basically: don't knock other players' towers over.)
Stray Dice
If a rolled die causes a tower to fall, the boss that rolled that die has knocked that tower over. If a stray die from a tumbling tower causes another tower to fall, the boss that caused the initial cascade is the one that knocked that other tower over.
Falling Over
When a git falls over, knock the git over on their ass. If that happens during a git's activation, their activation is over. A fallen git cannot be picked to activate until he's on their feet again. A fallen git doesn't have a tower, and can't be given any new tower dice until they are back on their feet.
Vehicles don't fall over, they wipe out, as we'll get to in the vehicle section.
Dice Type: This game uses all the funny shaped dice, from D4 to D20. The different sizes of dice are called "dice types". If you are asked to use "one dice type higher", swap your D6 for a D8 or whatever.
Activation
Pick one of your models. Not a fallen git. They do one or two different actions out of scoot, shoot, or boot, and then take a swig: add a D6 to the top of their tower.
There are no game rounds, we just keep activating models until one of us has had enough and the game ends. You don't have to activate your models in rounds, if you want to keep rambo'ing the same meathead turn after turn: go for it. He'll get pretty drunk pretty quickly.
When it's not your turn to activate something: keep your hands out of the play area.
Take a Swig
After a git has done their business, they take a swig. Add a D6 to their tower, on top of any other dice they are carting around already.
Damage
When one of your models gets damaged, for each point of damage received, your opponent gives you a D6 to add to your damaged model's tower, making it harder to move the model without it falling over.
You read that right: your opponent chooses the D6 that you add to your dice tower when you take damage. Be nice. (Or don't).
Boot
When a model takes a Boot Action, the effect depends on what they are in contact with.
Put the Boot In: If a git is in contact with a fallen enemy git, they can put the boot in. Take 1 bottle cap from the fallen model's boss. No fight breaks out, as the other model is on the ground.
Boot Up the Arse: If a git is in contact with a friendly fallen git, they can boot them up the arse to get them to stand up. Put the git anywhere at least touching the area where they were just lying. If you place them into contact with an enemy, the current activation ends and a fight breaks out.
Measuring
When measuring and checking lines between dice and miniatures, you can measure from anywhere on the miniatures' bases to anywhere on the dice. If it grazes either, it is in. If you are using a vehicle without a base, measure from the hull. You can premeasure stuff during your activation.
I like using a short wooden ruler or measuring widget for this game, as you can lay it down in the play area, and scoot your git and their teetering dice tower around with both hands.
Scooting
To scoot, roll your move dice into the play area (for most gits, that's 3D6). Roll them properly, don't just plop them down, and roll them all at once.
One move dice at a time (in any order), move the git directly towards that dice a number of inches equal to the value of that dice and then remove that dice from play.
You have to move the full distance if you can: you can't stop short. Once you start moving a git towards a dice you can't take that movement back, you gotta commit. You have to use all your move dice, even if that would cause the git to stagger about drunkenly (which is very much the point). Finish your scoot before doing anything else, you can't shoot or boot in the middle of a scoot.
Make sure the little tower of dice is touching the git at all times. If any of the dice fall off, the git falls over, and the dice from their tower are discarded.
Bumping Into Things
If you bump into anything (including your move dice), you stop and discard your current move dice. You move again if you have more move dice to resolve. If you bump into a bottle cap, you loot it. If you bump into a standing enemy model your activation ends and a fight breaks out.
Looting
If a model bumps into a bottle cap at any point, they stop and pick it up. Add the cap to your stash (the boss gets it, not the model). If you were in the middle of scooting, that move dice is finished, but you can move again if you have more move dice to resolve. If you were being shoved, the shove ends there.
The Table Edge
Due to the way move dice are resolved, it's not actually possible for a git to move off a table edge, so no rule is needed to cover that eventuality.
Any dice lost over the edge of the world are gone. (There's probably a gamey exploit there, just don't make it look intentional, alright?)
Fighting
If a git moves into contact with a standing enemy model, its activation ends and a fight breaks out.
When two models fight, their bosses count 3, 2, 1… and then throw thump (closed fist), shove (flat hand) or pinch (sticky-out fingers) with their hands.
- Thump the other model, unless the other boss throws shove. To thump: roll all your fighting weapons' thump dice. Do big damage with each dice that equals or beats the other model's toughness, and weak damage with the others.
- Shove the other git back 3", unless the other boss throws pinch. The shoved git is moved by its boss, along with their tower. Move them directly away from their opponent. This can trigger a new fight if they are shoved into another enemy. If they are shoved into some terrain, they suffer 1 damage.
- Pinch 1 bottle cap from the stash of the other model's boss, unless the other boss throws thump.
The active model resolves their effect first, then the passive model does. If it isn't clear who the active model is, it is the model whose movement (or whose standing up) caused the fight to break out.
Once the fight is resolved, if the two models are still in contact (and both are still standing) they fight again!
Helpful tip: If you are having trouble remembering the relationships between the throws, just think: the flat hand of shove beats the closed fist of thump (just as paper wraps rock); the sticky-out fingers of pinch beat the flat hand of shove (just as scissors cut paper); and the closed fist of thump beats the sticky-out fingers of pinch (just as rock blunts scissors). Easy!
Shooting
To shoot, choose which of your guns you are firing and roll all their bullet dice into the play area. Roll them properly, don't just plop them on the table, and roll them all at once.
Each bullet travels from the shooting model in a straight line of fire directly towards one of the bullet dice a number of inches equal to the gun's range, hitting the first thing in its path (ignoring low objects). Low objects are dice, fallen gits, and terrain that is 2" or less tall.
If the thing that is hit is a model, compare the value of the bullet dice to the toughness of that model. If the rolled value meets or beats the toughness, the unlucky model suffers big damage from the gun. If the rolled value is lower than the model's toughness, it suffers weak damage instead. After resolving a bullet, remove that bullet dice from play.
Jams
If any bullet dice rolls a natural 1, it is discarded without being resolved, the gun having temporarily jammed.
Cover
If the line of fire crosses one or more pieces of low terrain on its way to the thing that is hit, the model that is hit counts as benefiting from cover, and counts their toughness as 1 higher.
If an exploding barrel would trigger the cover rule, it counts as being the thing that is hit instead, and explodes!
Explode (x)
When something explodes (x), the active player gathers xD6 and divides them as equally as possible among all the players, with the active player choosing who gets any odd dice. These explosion dice work much like bullet dice.
Starting with the active player and going clockwise, each player rolls their explosion dice into the play area as a bullet dice. Each 'bullet' travels from the exploding object in a straight line directly towards one of the bullet dice a number of inches equal to the rolled value of that bullet dice, hitting the first thing in its path (ignoring dice and fallen gits).
The damage of an explosion dice is always 1/3. I.e. if the rolled value equals or beats the struck model's toughness, it suffers big damage of 3, else it suffers weak damage of 1.
Time, Gentlemen
When you hear the siren on the 30 minute timer (that you totally remembered to set at the start of the game), you cannot boot any more. That means fallen gits stay down (and you can't rob them anymore).
Leg It!
When it is your turn to activate, you can leg it instead, and you have to leg it if you have nothing left that can activate. Any of your models that are within 6" of a standing enemy model are replaced with a bottle cap from your stash, then you remove the rest of your models from play and are out of the game.
Game End
The game ends when only one boss is still playing. At the end of the game, the last remaining boss scoops up any in-play bottle caps.
Winning
The winner of the game is the boss that walked away with the most new caps in this game (e.g. ignoring what was in their stash at the start of the game) or whatever the scenario says.
Terrain
Exploding Barrels: When shot, driven into, or damaged by an explosion, the barrel explodes (6). If an exploding barrel would trigger the cover rule, it counts as being the thing that is hit instead.
Oil Slick: You cannot stop moving on an oil slick: you keep travelling in a straight line until you exit the oil slick or bump into something. Vehicles that touch an Oil Slick also gain D6 damage as they struggle to keep control.
Toxic Waste: Move dice that are used to move through Toxic Waste do 1/0 damage to you (e.g. they do 1 damage to you if the move die's value is under your toughness).
Food Stall: A git in contact can boot it to grab a snack: discard D6 dice from your tower.
Bar: A git in contact can boot the bar to grab a strong drink. Your thumps deal +1/+1 damage until you fall over.
Rubble: Scrap piles, rubble, you know the sort of thing. No special rules apply, but given you have to move your git's tower with them through this mess, you'll find traversing rubble is a job best left to the sober.
Slot Machine: While in contact, you can boot and discard one cap to play. Roll all your tower dice. Group your dice into groups of "three of a kind" and/or "4 dice runs" to win 1 cap for each group. Then rebuild your tower.
Test Your Strength Machine: A git in contact can boot it and discard one cap to headbutt the machine. It has a toughness of 5. If you do any damage to it, you win 2 caps. Ding!
Arcade Machine: A git in contact can boot it and discard one cap to play. You now have 10 seconds to make a new tower of dice. If this tower falls, it's GAME OVER. At the end of the 10 seconds, you win one cap for every 3 dice in your tower.
Teleportaloo: A git in contact can boot it to flush the loo. Flip a coin (or bottle cap or empty base or token or whatever) into the play area. Do it properly: it must travel up first, then down to the board. Place this model in contact with the coin, remove the coin, then rebuild their tower next to them. (The tower is safe during this teleport, and cannot fall down as a result of being moved and rebuilt in this way.) If the token leaves play, flip again.
Vending Machine: A git in contact can boot it to vend a random item. Roll D6:
- First Aid Kit: Roll your dice tower, discard any 5-6s, then rebuild it.
- SupaAmmo: +1/+1 damage to this git's shooting weapons for their next two shoot actions. (Give them 2 coins to track this.)
- Head-Sized Cooking Pot: Immune to shooting and explosion damage until they fall over. (Give them a coin to track this.)
- Energy Drink: Roll 6D6 move dice for their next two activations.
- Can of Spinach: Deals double damage in fights until they fall over.
- 777: Win 3 bottle caps.
Gather Your Gits
You are the boss. You need a gang.
Your gang can have any number of models in it, but you can only field a maximum of 5 in each game (although the little guys can break this rule), so you probably want to start with a gang of five models or fewer.
There are 3 ways to build a gang:
- a la carte
- Chef's recommendation
- Chaos mode
A la carte gives you full control, Chef's recommendation adds some randomness and Chaos mode puts things in the hands of the gods. The choice is yours.
Secret fourth option: There's actually a secret fourth gang-building option called "do what the fuck you want". If you have a goblin with a peg-leg and a power fist holding a sausage, just stat him up: all the options exist in this book. "Do what thy will" and all that.
A La Carte
When you build a gang a la carte, you get 25 caps in your stash. You buy your models from the menu and kit them out with weapons and gear by spending bottle caps from your stash. Classic list-building stuff. You might kitbash your models first and build your list to match your minis, or build a list that looks fun and then kitbash your models to fit that list.
Each git can buy up to two weapons, plus some fancy gear; costs are listed in the tables below (and some are free). A git can have a pair of identical weapons, but they can only have each bit of fancy gear once. You can buy a git a vehicle, and they become its driver (you can't buy a vehicle without anyone to drive it).
Anything you don't spend stays in your stash, to be spent between games using the campaign rules (given at the back of this book).
Pick a faction to get its special rule.
Bigger games: Listen, I have exclusively playtested this game at 25 caps, but if you want to gather a dirty great mob of gits together and have a proper punch up, don't let me stop you, particularly if you want to play with a few tricked out vehicles or klankbots. Try gangs of 40 or 50 caps, but set the timer for 60 minutes and prepare for a longer drinking session game.
Chef's Recommendation
When you build a gang to the chef's recommendation, you first select a set of basic gits, and then make some dice rolls to find out what they have. This method does not create perfectly balanced gangs, but it does create fun hobby challenges.
Buy 25 caps worth of naked gits, but don't buy them weapons or fancy gear: those are rolled up randomly using the loot tables found in the back of the book. You can buy vehicles for your gits. Don't roll for loot or injuries for gnawballs and runts, they arrive naked as the day they were spawned.
Each git makes two loot rolls (see page XX) and then automatically fails an injury roll, requiring them to make diagnosis and treatment rolls (see page XX). When making the treatment roll, you can either roll a D6 or a D10. If you roll a D6 (which pretty much guarantees a negative result) then you can make a third loot roll for that git. If you roll "Dead", re-roll.
Gits in vehicles don't make these loot and diagnosis rolls. Instead, each driver rolls twice on the vehicle weapon loot table (see page XX) and then automatically fails an inspection roll, requiring them to make location and repair rolls (see page XX). When making the repair roll, you can either roll a D6 or a D10. If you roll a D6, then you can make a third vehicle loot roll. If you roll "Write-off", re-roll.
The stuff you roll up for one git can't be swapped to another git. You can swap what they get for 0-cost weapons if you'd prefer, and if they don't roll two weapons, you can fill up their remaining allowance with 0-cost weapons.
Once you have rolled up your gang, it's time to get kitbashing. You start with zero bottle caps in your stash. Pick a faction to get its special rule.
Chaos Mode
If you want to totally randomly generate your gang, use the random git table to generate your naked gits. After each randomly rolled git, tot up their cost: when you have 21 caps or more of naked gits, stop rolling for new gits. Once you have your naked gits, follow the chef's recommendation rules above to kit them all out.
Random Git Table (roll 2D6):
| 2D6 | Random Git | Cost |
|---|---|---|
| 2 | Runt | 3 |
| 3-4 | Gnawball | 4 |
| 5 | Goblin | 4 |
| 6-8 | Orc | 5 |
| 9 | Bullorc | 7 |
| 10 | Klankbot | 10 |
| 11 | Orc Driver (roll for vehicle) | 5+... |
| 12 | Goblin Driver (roll for vehicle) | 4+... |
Random Vehicle Table (if you rolled a Driver on the random git table, roll on this table to see what they are driving. Add the cost of the vehicle to your running total before rolling for your next git.):
| 2D6 | Random Vehicle | Cost |
|---|---|---|
| 2 | Buzzcopter | 12 |
| 3 | Truck | 10 |
| 4 | Bike with sidecar | 6 |
| 5-6 | Bike | 5 |
| 7-8 | Buggy | 7 |
| 9 | Half-track | 6 |
| 10 | Jeep | 8 |
| 11 | Drag Racer | 8 |
| 12 | Scrap Tank |
Both chaos mode and chef's recommendation exist to get you set up with the minimum of thinking and/or generate a hobby challenge and/or give you a random gang to try and master. I'd recommend you and your chums all rolling up random gangs together, going away for a week to kitbash and paint models to match the results, and then coming back together to play some games linked with the campaign system. Games are short, so you can play a couple in one session.
Weapons
Here are the guns and knives. If the git is modelled with a bit of kit that looks like one of these weapons, it may be given that weapon in the game.
Weapon stats:
- Cost: nothing in life is free (except for pistols, rifles and regular hand-to-hand weapons).
- Hands: the number of free hands required to operate this particular implement of violence.
- Range: the maximum distance over which this particular implement can project violence.
- Bullet/Thump Dice: the number of bullet or thump dice you roll.
- Weak/Big Damage: the amount of damage your victim suffers, depending on how well you roll versus their toughness.
- Special: any special rules the weapon has.
Shooting Weapons
| Shooting Weapon | Cost | Hands | Range | Bullet Dice | Damage Weak/Big | Special |
|---|---|---|---|---|---|---|
| Pistol | 0 | 1 | 8" | 2D6 | 1/2 | |
| Rifle | 0 | 2 | 12" | 1D8 | 1/3 | |
| Shotgun | 1 | 2 | 6" | 3D6 | 2/4 | |
| SMG | 1 | 1 |
Fighting Weapons
| Fighting Weapon | Cost | Hands | Range | Thump Dice | Damage Weak/Big | Special |
|---|---|---|---|---|---|---|
| Headbutt | * | 0 | Fight | 1D6 | 0/2 | |
| Regular H2H Weapon | 0 | 1 | Fight | 1D6 | 1/2 | |
| Massive H2H Weapon | 1 | 1 | Fight | 1D8 | 2/3 | |
| Pointed Stick | 1 | 1 |
Hands: Some weapons need just one hand. A git can use two of these in the same fight, or shoot action, rolling the bullet or thump dice for both.
Some weapons need two hands. If you shoot or thump with a two-handed weapon, you roll only that weapon's bullet or thump dice during that action. You can still have a second weapon about your person, you can't use it at the same time.
Headbutt: Every git can headbutt to thump in a fight if they aren't using another fighting weapon. It doesn't require any hands or count as one of their two weapons.
Weapon Special Rules
Buzzcut: If you cause big damage to your opponent in a fight, you can thump again with this weapon, counting the target's toughness as +1 (and this can repeat, with the target's toughness increasing by +1 each time).
Fire: If you cause big damage to a model with this weapon, it is set on fire and stays on fire until it falls over or wipes out. A model that is on fire suffers an extra D3 damage when it takes a swig.
Gout: Each bullet from this weapon travels from the shooting model in a straight line directly towards one of the bullet dice a number of inches equal to the gun's range, but hits everything in its path, not just the first thing.
Grappling Hook: If a bullet dice from this weapon hits a cap, you loot it. If it hits a model (or terrain*): check the toughness of the two models. If your toughness is lower than theirs, you treat them as a move dice and scoot. If your toughness is higher than theirs, they treat your model as a move dice and immediately scoot. If your toughness is the same, you choose which model scoots. *Terrain counts as toughness 100.
Jolt: If you cause big damage to a git with this weapon, they are pushed 3" directly away from the attacker.
Lob: When resolving a bullet dice from this weapon, ignore the line of fire. Instead, if the bullet dice is within the weapon's range, it explodes (x) where x is equal to the result on the bullet dice. If it is out of range, it is discarded. If the bullet dice is a 1, a jam, place it exactly 1" away from the git that lobbed it along the line of fire. It explodes (x) there instead, where x is the highest result the bullet dice could have rolled (depending on its dice type).
Poke: When using this weapon, your thump is not cancelled out by a shove: both results are applied.
Portal: Roll the two bullet dice separately. Before rolling, choose one to be the orange entrance dice, and one to be the blue exit dice (or, you know, just use an orange dice and a blue dice). The first model, barrel or cap to be hit by the orange entrance dice is teleported. Its owner places it in contact with the blue exit dice and rebuilds its dice tower next to it (the tower is safe and cannot fall down as a result of being moved in this way). Barrels teleported in this way immediately explode. Caps teleported into contact with a model are immediately looted by that model.
Slow To Reload: After shooting with this weapon, put a reload token on their ID card or by the model. While a model has a reload token, it cannot shoot any weapons that are slow to reload. At the end of this model's activation, discard any reload tokens it started its activation with.
Fancy Gear
Gits may be purchased snazzier gear when you initially build your gang, or between games. To give a git a bit of fancy gear, the thing has to be modelled onto the miniature or you can't have it. A git can only have each bit of fancy gear once; they can't carry duplicate gear.
These bits of fancy gear aren't for vehicles; they get their own list of mods. A git that is currently a driver or passenger can't use their fancy gear while on board the vehicle.
Ammo Box (1 cap): If this git is modelled to be carrying some kind of crate or is bestrewn with ammunition belts, friendly models within 6" of this model may re-roll any of their shooting dice once per activation.
Banner Ad (1 cap): If this git is modelled with a banner, when the 30 minute timer goes off, if this git is upright, you immediately gain D3-1 caps from the general supply in advertising revenue.
Bayonet (1 cap): If this git's gun is modelled with a nasty-looking blade attached, it counts as a standard H2H weapon as well.
Beast Mount/Pogo Stick (2 caps): If this git is modelled to be riding some kind of wild animal or pogo stick, when they scoot, they roll D6, D8 & D10 as their move dice. However, after you roll your move dice, the player to your left also throws 2D6 into the play area. You use the three highest dice of the five as your move dice, and discard the other two. (If tied, you pick which dice to keep.)
Big Pockets (1 cap): If this git is modelled with a big rucksack or overcoat or something they could stash a shotgun in, this git may carry a third weapon (but still only wield what will fit in their hands).
Big Hat (1 cap): If this git is modelled with impressive headgear, after this model activates, a friendly git within 6" may take a swig to immediately activate. That second git can't trigger a third model to activate.
Bionic Arm (2 caps): If this git is modelled with a mechanical arm of some sort, this git can count one of their 2-handed weapons as needing only 1 hand.
Bionic Leg(s) (1 cap): If this git is modelled with a robotic leg or legs of some sort, when you scoot, you may treat any move dice as a '3'.
Bully Boots (3 caps): If this git is modelled with big boots, when this git puts the boot in, they nick D3 caps.
Cans (1 cap): If this git is modelled to be wearing headphones or carrying a boombox, when they scoot, they add 1 to their move dice, as they strut to the beat.
Chunky Armour (3 caps): If this git is modelled with heavy-duty looking armour, they increase their toughness by +1.
Extra Arm (1 cap): If this git is modelled with an extra arm of any sort, whether robotic or a mutation, they count as having an extra hand, and can attack with more weapons as a result.
Fuel Can (1 cap): If this git is modelled to be carrying some kind of fuel can, bucket or bottle, while within 6" of this model, friendly vehicles or Klankbots may re-roll any of their move dice once per activation. Once per game, you can discard this upgrade to toss it onto a model within 3" that is on fire: that model immediately suffers 3D6 damage.
Handcuffs (1 cap): If this git is modelled to be carrying rope or cuffs, enemy gits within 1" of this model cannot stand up.
Hook Hand (0 caps): If this git is modelled with a hook for a hand, they have one fewer hands but when they shove, they can move themselves (instead of your opponent) in any direction.
Improvised Shield (1 cap): If this git is modelled with an improvised shield, this model's boss can ask for a re-throw once per fight. The current throw is ignored, and you both throw again.
Jetpack (3 caps): If this git is modelled with a jetpack, when it scoots, it can blast off instead of moving normally. Roll a single D6 move dice anywhere in play. Multiply the move dice roll by 5", pick the git up and place them that far away in the direction of that move dice, ignoring intervening models, dice and terrain. Push their tower back into contact with them (along whatever route is needed) without it falling. If they fall during this move, they explode (6).
Kitbashed Weapon (1 cap): If this git is modelled with some kind of kludged-together double-gun, this model may choose two weapons to combine and hold in a single hand. You have to pay for both, plus the extra 1 cap for this upgrade. These two weapons together only count as one of their two weapons. Both can be fired at the same time. If the two guns have different special rules, make it clear which dice are from which before you roll your bullet dice.
Massive Spanner (1 cap): If this git is modelled to be carrying some kind of hefty tool (fnar), this git can take an action to bonk a vehicle or Klankbot within 1": remove D6 dice from the bonked model's tower.
Medical Equipment (1 cap): If this git is modelled to be carrying some kind of doctor's kit or big syringe, they may take an action to experiment on a git within 1". Roll on the Vending Machine table and apply the result to the target. If a "6" is rolled, the target suffers D6 damage instead of gaining caps.
Megaphone (1 cap): If this git is modelled with a megaphone or loudhailer, they can take an action to bark orders down it: select a friendly git within 3D6", they immediately take one action.
Mono-Wheel (1 cap): If this git is modelled with a wheel instead of legs, when you scoot, you can take a swig to discard one of your move dice and move its value in any direction.
Musical Instrument (1 cap): If this git is modelled to be carrying some kind of musical instrument, this git may take an action to toot. If they do, every friendly git within 2D6" rolls D3 and discards that many dice from their tower.
Overly Long Gun Barrel (1 cap): If this git is modelled with some kind of long-ass gun barrel they add +8" to the range stat of that gun.
Oversized Gun (1 cap): If this git is modelled with some kind of ludicrously oversized shooter they add +1 to the big damage stat of that gun.
Skull Cap (1 cap): If this git is modelled with a metal head of some sort, their headbutts roll 1D8 thump dice and do 2/3 damage.
Spikey Bits (1 cap): When fighting, if your thump is cancelled out by a shove, you still get to thump, but only using your headbutt thump die.
Steel Jaw (1 cap): If this git is modelled with a metal jaw or face, they get +1 Toughness when thumped in a fight.
Strong Booze (1 cap): If this git is carrying a bottle of strong liquor, once per game, after activating, they may take D6 damage to immediately activate again.
Tasty Snack (1 cap): If this git is carrying some nutritious foodstuff, once per game, if this git has fallen, they may gain 2D6 damage to boot themselves up the arse.
Tracks (1 cap): If this git is modelled with tracks instead of legs, when resolving a move dice, you may discard another of your move dice to add its value to this one.
Vehicles
Here's a bunch of rules to let you use vehicles in your games. Planet Smasher Games does not condone drink-driving, except in post-apocalyptic fantasy settings.
Vehicles use some different rules to gits, and increase the complexity of the game. I recommend you play a game or two without vehicles before you introduce them.
An orc, goblin or bullorc can have their self-esteem raised by buying them a vehicle to ride in. They become the driver. If the vehicle has more than one seat, you can put some other of your gits in the vehicle too as passengers (no, not Klankbots, you fromager).
While a git is in a vehicle, use the vehicle's toughness, instead of their own. A git in a vehicle is not a separate model and doesn't get a separate activation. When measuring, if you are using a vehicle without a base, measure from the hull.
Deploying Vehicles: At the start of the game, vehicles must be deployed at least 8" from all bottle caps and enemy models because of all the noises they are making.
Vehicle Registration Cards: By law, you are required to fill out a City of Gnork Vehicle Registration Card for each vehicle you own, and keep it on your person whenever you are with the vehicle. It has spaces to record your vehicle's toughness, handling, seats as well as any equipment and repairs.
Riot Trolleys (Vehicle Stats)
| Vehicle | Cost | Engine | Toughness | Handling | Seats | Special |
|---|---|---|---|---|---|---|
| Bike | 5 | D12 | 3 | 10 | 1 | |
| Bike with sidecar | 6 | D12 | 4 | 8 | 2 | |
| Buggy | 7 | D12 | 5 | 10 | 2 | |
| Half-track | 6 | D8 |
The vehicle stats mean:
- Engine: the maximum size of move dice this vehicle can roll during a scoot action.
- Handling: the fastest this vehicle can safely move. If a move dice roll is greater than your handling, you suffer 1 damage.
- Seats: the number of gits that can ride in this vehicle. The first git on board is always the driver, the rest are passengers. Only orcs, bullorcs and goblins can be the driver.
Vehicle Special Rules
Klanking: After activating this model, put a klank token on its ID card or beside the model. (You could use a steel nut or a coin as a klank token.) When you activate a model with a klank token on it, discard all klank tokens from this model and end its activation.
Fly: To resolve a move dice: pivot as normal, then pick up the model and place it the rolled number of inches away, ignoring intervening terrain or models. Loot any bottle caps you pass over. Finally, push the tower back into contact with the model (along whatever route is needed) without it falling.
Bolting Guns to Your Ride: A vehicle can have as many guns as it has seats. The first weapon you buy for each vehicle is discounted by 2 caps, to a minimum of 0 caps. You can ignore how many hands they need. You can't bolt fighting weapons onto your vehicle (well, you can, but there aren't any rules for using them).
Weapons that are mounted on vehicles are either fixed or pintle-mounted. The driver fires the fixed weapons, and the passengers fire the pintle-mounted ones. When you fit a weapon to a vehicle, you have to note how it is mounted.
Activating Vehicles
When it is your turn to activate a model, you can pick one of your vehicles. You can't pick drivers or passengers to activate. A vehicle can scoot and shoot and then the driver has to take a swig at the end of the activation and add those dice to the vehicle's tower. They can't take boot actions but can start fights. They can loot caps, and caps don't halt their movement.
Dice Towers
Each vehicle has a tower. Vehicles stack dice in two towers, which must remain in contact with some part of the vehicle at all times. If you stack them with the two towers touching, they will be a little more stable and resistant to wobbles. Nothing dictates you have to build the dice tower on the tabletop; you could balance it on a stable surface on the vehicle itself.
The gits on board the vehicle don't have their own towers while on board. When a git boards a vehicle, their personal tower is discarded.
If a vehicle's tower tumbles, the driver has lost control and the vehicle suffers a wipeout. See Wipeout below.
Vehicle Arcs
Unlike pedestrians, who can move and look freely in all directions, vehicles have some arcs of sight that are used during movement and shooting, and can only pivot at specific points during their movement. This gives the vehicles inertia and helps them feel more lumbering.
Front & Rear Arcs: Draw an imaginary line across the middle of the vehicle to divide it (or its base) into a 180° front arc and a 180° rear arc.
Front Corridor: Draw an imaginary corridor directly forward from the front of the vehicle, as wide as its base or hull: this is its front corridor.
When measuring and checking these arcs, be lenient. If a move dice or a target model looks to be grazed by these arcs, apply the Rule of Carnage.
Moving a Vehicle
When you scoot with a vehicle, you can roll three move dice of any size, as long as none are bigger than your vehicle's engine stat. So, if your engine stat is D12, you could roll 3D12, or D12 + 2D10, or 3D6 or whatever.
Roll your move dice, and then resolve them one at a time. You have to resolve all your move dice. How you resolve a move dice depends on which arc that move dice currently lies in. After resolving each move dice, if its rolled value was greater than your vehicle's handling stat, the vehicle suffers 1 damage to represent the driver struggling to keep control.
Front Arc: If the move dice lies in the vehicle's front arc, you pivot the vehicle about its centre until that dice lies within the vehicle's front corridor, then move directly forwards the rolled number of inches. Discard the move dice once resolved.
Rear Arc: If the move dice lies in the vehicle's rear arc, you move directly forward the rolled number of inches (without pivoting first), then suffer 1 damage. Discard that move dice.
Handling: After resolving each move dice, if its rolled value was greater than the vehicle's handling stat, the vehicle suffers 1 damage.
Current Speed: While resolving a move dice to move, the vehicle's current speed is equal to the rolled value of that move dice. (This will matter for collisions, explained in a moment.) Outside of its activation, a vehicle's current speed is zero.
Movement Example: (1) In this example, our red car has two move dice left to resolve. The ringed die lies in the vehicle's front arc, the other currently lies in its rear arc. (2) Not wanting to be forced forward or take damage, we pick the die in our front arc. We pivot, then move forward 2" (as the dice rolled a 2). After moving, the other dice now lies in our vehicle's front arc, and so can be resolved in the same way, with a pivot and a move.
Collisions
While moving a vehicle, you might bump into something. What happens when you bump into something depends on the something that you bump into.
Bump into a Bottle Cap: If you bump into a bottle cap, pause, pick up the cap, and then continue your movement.
Bump into a Move Dice: If you bump into a move dice, stop, suffer 1 damage and remove that dice from play.
Bump into a Fallen Git: If you bump into a fallen git (friend or foe), pause, move them the minimum distance needed to clear the path of your movement, steal 1 cap from them, and then continue your movement.
Bump into a Standing Git: If you bump into a standing git, pause your movement. If the git is friendly, move them the minimum distance needed to clear the path of your movement, and then continue your movement. If the git is an enemy, a fight breaks out, but the activation doesn't end. During this fight, if you would thump, you smash instead. If your opponent falls down during the fight, move them the minimum distance needed to clear the path of your movement. Once the fight is concluded, you continue your movement.
Smash: When a vehicle smashes something, you roll a number of D6 equal to the vehicle's toughness plus its current speed. These are smash dice and cause 0/1 damage. Each smash dice that rolls equal or over the target's toughness causes big damage of 1, else they cause weak damage of 0.
Bump into Terrain: If you bump into a piece of terrain, stop and smash yourself. I.e. you roll a number of D6 equal to your vehicle's toughness plus its current speed and each smash dice that rolls equal or over your vehicle's toughness causes you 1 damage.
Bump into Another Vehicle: If you bump into another vehicle, you stop and then both vehicles roll a smash against the other.
- Head-On: If the two vehicles are touching on their front edges or front corners then the collision is head-on. In a head-on collision the damage of each smash dice is increased by +1/+1. This normally means your smash dice do 1/2, but stuff like rams can increase this further.
- Simultaneous Damage: These smashes are intended to be effectively simultaneous, so resolve both smashes then stack the damage on both vehicles. Essentially, if one or both vehicles wipe out as a result of a smash, it doesn't prevent the other smash from getting resolved as well.
Wipeout
If your vehicle's dice tower tumbles, the driver has lost control and your vehicle suffers a wipeout. The vehicle doesn't fall down, instead, you do the following things, in this order:
- Clear up the dice tower (discarding all the dice from play).
- Drop D3 caps (within 1" of the vehicle, but not touching it).
- Roll wipeout dice (chosen and rolled by the boss to the left).
- Flip! (move forward according to the highest wipeout dice).
- Spin! (pivot to face the lowest wipeout dice).
- Crunch! (take damage from the remaining wipeout dice).
1. Drop D3 Caps: As the vehicle spins out of control, stuff falls off. Take D3 caps from your stash and place them within 1" of the vehicle, not touching the vehicle, terrain or other caps. If you can put them in contact with another of your models, great! They can immediately loot them, deftly catching them as they fly off the vehicle.
2. Roll Wipeout Dice: The boss to your left chooses any three dice, as long as none of them are bigger than the vehicle's engine stat, and rolls them into the play area. These are your wipeout dice.
3. Flip Through the Air! Look at the highest wipeout dice (if there's a tie, you just pick one of the tied dice). Move your vehicle directly forward a number of inches equal to that dice's value, ignoring terrain, caps and other models as you do, then discard that wipeout dice. This is the flip. You can't end this flip overlapping another model or bit of terrain. If you can't clear an object with the flip, move the minimum distance directly forward to clear it.
4. Spin! Look at the lowest wipeout dice (if there's a tie, you just pick one of the tied dice). Pivot your vehicle about its centre until that wipeout dice is within your vehicle's front corridor, ignoring terrain, caps and other models as you do, then discard that wipeout dice. This is the spin. As with the flip, you can't end the spin overlapping another model or bit of terrain. If something is blocking you completing the spin, just pivot as much as you can to get as close to facing the wipeout dice as you can.
5. Crunch! Look at the value of the remaining wipeout dice. The vehicle suffers that much damage, then discards that wipeout dice. The wipeout is resolved!
Getting Wrecked
If a vehicle wipes out after the timer has sounded, it gets wrecked:
- Resolve a wipeout.
- Place passengers within 1".
- Vehicle explodes (x), where x is twice its toughness.
- Wrecked for the rest of the game.
Resolve all of the steps of the wipeout first. Then any gits that are riding as passengers may get off: put them within 1" of the vehicle and give each of them D6 dice for their tower. The driver cannot get off, he's trapped in the mangled wreckage, poor lad.
The vehicle then explodes (x), where x is equal to twice its toughness. After it explodes, it is wrecked and cannot be activated again in this game. Leave it in play as a piece of terrain.
Vehicle Shooting
When a vehicle takes a shoot action, each of the gits on board get a chance to take a shoot action, either with their own weapons or those mounted on the vehicle. During shooting, you count the whole vehicle as "the model" when checking lines of fire for bullet dice.
Fixed Weapons: The driver can shoot with one of their 1-handed weapons or fire one fixed weapon mounted on the vehicle. When firing a fixed weapon, you can only hit things that lie within the vehicle's front corridor. If the first thing the bullet strikes is outside of the vehicle's front corridor, it misses.
Pintle-Mounted Weapons: Passengers can shoot with one of their own weapons, or fire one pintle-mounted weapon mounted on the vehicle. When firing a pintle-mounted weapon, you can only hit things that lie within the vehicle's front arc. If the first thing the bullet strikes is outside of the vehicle's front arc, it misses.
Other Guns: When a git shoots with one of their own weapons, rather than a vehicle-mounted weapon, they hit things regardless of where they lie relative to the vehicle's arcs. They can essentially shoot in all directions.
Getting On & Off
At the end of a git's activation, if they are touching a vehicle with empty seats, they can hop on board as a passenger. Discard their tower; they are now only at risk of ruining the upholstery. Ideally, balance or place the miniature on the vehicle to show that it is riding there.
When you activate a vehicle, before it moves, any gits that are riding as passengers may get off. Put them anywhere within 1" of the vehicle and then give them D6 dice for their tower (motion sickness, I guess).
When a vehicle gets wrecked, any passengers may get off: put them within 1" of the vehicle. The driver cannot get off; they go down with the ship, so to speak.
Fighting a Vehicle
If a git starts a fight with a vehicle, resolve the fight as normal except that:
- If the vehicle would thump, it smashes instead.
- The vehicle cannot be shoved, and automatically cancels any shove thrown against it.
If the git is touching the front edge or front corner of the vehicle when it smashes, the damage of each smash dice is increased by +1/+1.
Vehicle Mods
Here's some snazzy modifications and upgrades for your vehicles. You can't put the same mod on a vehicle more than once, but you can stack different mods to gain the same benefit several times.
Buzzblades (1 cap): If this vehicle is modelled with some vicious-looking sawblades, when you roll your smash dice, you count the target's toughness as 1 lower.
Electric Motor (1 cap): At the start of the game, this vehicle may be deployed within 4" of caps and enemy models. When this vehicle bumps into a git, that enemy boss doesn't throw in the first round of the fight.
Electroshock Collision Warning System (1 cap): If a move dice would cause you to bump into terrain, you can take a swig twice to re-roll that move dice as the steering wheel electrocutes the driver to alert them to the oncoming hazard.
Experimental Teleporter (3 caps): Instead of scooting, you can teleport. Roll a D6: if you roll a 1, you wipe out; otherwise, you flip a coin (or token or whatever) into the play area. It must travel up first, then down to the board. Place this model in contact with the coin, remove the coin, and rebuild its tower (the tower can't fall down as a result of this teleport).
Explosive Ram (1 cap): If this vehicle is modelled with a dangerously unstable-looking ram, the first time in a game you smash, your smash dice do +2/+4 damage.
Extra Seats (1 cap): The vehicle gains +2 Seats.
Flame Gouts (1 cap): If you cause big damage to a model with your smash dice, it is set on fire and stays on fire until it falls over or wipes out. A model that is on fire suffers D3 damage when selected to activate.
Force Field (1 cap): When you receive a damage dice, roll it. If it rolls a 6, you can discard it, as it is reflected by the force field.
Full-Stocked Minibar (1 cap): After getting off this vehicle, a git's thumps deal +1/+1 damage until they fall over.
Fuzzy Dice (1 cap): Once per activation, may take a swig to re-roll any one dice.
Git Launcher (1 cap): Also known as a "Git-a-pult". Once per activation, when the vehicle shoots, one passenger may leave the vehicle, moving as if they had a jetpack.
Gory Trophy Rack (1 cap): After a game in which this vehicle removed a fallen enemy git from play by running them over, if you model a new head onto its trophy rack, you gain 3 caps into your stash.
Honking Great Shaker Scoop (1 cap): If this vehicle has one modelled on, one of the move dice you roll each activation can be one dice size higher than your engine stat.
Hover-jets (2 caps): If this vehicle is modelled with some anti-grav boosters or fans or something, it rolls 4 move dice when it scoots.
Huge Spoiler (1 cap): If this vehicle has one modelled on, it gains +2 handling.
Huge Wheels (1 cap): If this vehicle has some modelled on, it gains +2 handling.
Insanely Loud Sound System (2 caps): As an action, this vehicle can drop the bass: all gits within 6" are pushed directly away until they are no longer within 6". If they cannot, because of terrain or other models, they are shoved as far as possible and then suffer D3 damage.
Jet Engine (1 cap): If this vehicle has a ludicrous engine modelled on, any of your move dice that roll 12 or more gain +6".
Loads of Spikes (1 cap): If this vehicle is all spikey-looking, you roll +2 smash dice.
Massive Exhausts (2 caps): If this vehicle is modelled with honking great exhaust pipes, all its move dice count as a minimum of 4, even if they roll lower.
Massive Ram (1 cap): If this vehicle is modelled with a dirty big ram, your smash dice do +1/+1 damage.
Mega-magnet (2 caps): This mod counts as a pintle-mounted grappling gun, but rolls 1D12 as its bullet dice.
Megaphone (1 cap): If this vehicle is modelled with a megaphone or loudhailer, they can bark orders down it. As an action, they can hoot: select a friendly git within 3D6", they immediately take one action.
Mine Dropper (1 cap): You start the game with 3 mines. Make little tokens or miniatures on 25mm bases. Before any move dice, you can place one of these tokens in contact with the back of your vehicle. If another model moves within 2" of this mine, it explodes (8).
Mountains of Ammo (1 cap): This vehicle may re-roll each of their shooting dice once.
Mystical Bumper Stickers (1 cap): If this vehicle has visible bumper stickers, once per activation it may take a swig to re-roll any one dice.
Nitro Booster (1 cap): When you scoot, you can boost instead: you only roll one move dice, but you add +10" to it.
Oil Slick Dropper (2 caps): You start the game with 3 Oil Slicks. Make little tokens or use 25mm bases. Before any move dice, you can place one of these tokens in contact with the back of your vehicle. The area 3" around this token counts as Oil Slick terrain (starting at the end of your activation).
Racing Stripes (1 cap): If this model has an appropriately snazzy paint job, its move dice gain +2".
Ramshackle Armour (2 caps): When you take damage, roll a dice. Even, the damage is negated. Odd, the damage is negated, but the armour falls off and cannot be used again in this game.
Sidesaws (1 cap): If this vehicle is modelled with suitably unpleasant looking lateral-mounted close-combat weapons, you can re-roll your smash dice once per fight.
Smoke Belcher (1 cap): When shot at, treat this vehicle's toughness as 1 higher.
Spiked Roller (1 cap): If this vehicle is modelled with a massive death roller up front, when you cause big damage to your opponent with a smash, you can roll your smash again, counting the target's toughness as +1 (and this can repeat, with the target's toughness increasing by +1 each time).
Sponson (0 caps): Note one of this vehicle's pintle-mounted weapons. That weapon may use a side 180° arc of fire, rather than the normal front arc.
Wrecking Ball (2 caps): Counts as a pintle-mounted weapon. When used, the vehicle explodes (12). It isn't damaged itself, this explosion represents the flailing steel ball.
Campaigns
You might like to play more than one game with your little gits, watching them grow and learn and make new friends along the way.
The Afterparty
After each game, you run through these steps. They can technically be done in any order, but here's the suggested order:
- Check Your Sums
- Criminal Records
- Accident & Emergency
- Krankshaft's Auto Repairs
- Pop to the Shops
1. Check Your Sums
Quick Maths: Roll a D6 for each cap in your stash, up to a maximum of 6D6: for each '6' you roll, gain an extra cap.
Rich Pickings: Check which gang had the highest reputation in this game. For each point of reputation they have more than your gang, you gain 1 bonus cap into your stash.
2. Criminal Records
On the back of each git's ID card, you will find a section for their criminal record. During the game, if a git does one of these things, tick the box on their ID card for that offense. Each offense can only be ticked once.
- Assault: If this git damaged an enemy model with a thump, check this offense.
- Dangerous Driving: If this git was the driver of a vehicle that damaged or removed an enemy model, check this offense.
- Looting: If this git looted a cap from the tabletop, either on foot or as a driver, check this offense.
- Mugging: If this git took a cap from an enemy, either using pinch or boot, check this offense.
- Discharging a Firearm in a Public Place: If this git took a shoot action, check this offense.
- Evading Arrest: If this git was standing when their gang legged it, check this offense.
Runts and Gnawballs cannot be charged with offenses. The City of Gnork statutes define them as lacking the legal capacity to understand or commit criminal acts.
Attitude
The more attitude a git has, the more belligerent they are.
Getting an Attitude: All gits start with an attitude of 1. During the afterparty, check each git's criminal record. They can erase any of their offenses to roll that many D6. For each 6 they roll, they increase their attitude by 1.
Bollocks to It: When an opponent gives you some dice to add to your tower, you can roll them before stacking them. If any dice rolls under your attitude, you can say bollocks to it and discard it. This also works if you are the driver of a vehicle that takes damage.
Bad Attitude: Once a git has an attitude of 4+, they start acting like a right prick. Before each game, roll a number of D6 equal to their attitude. If they roll any ones, they can't even be arsed to turn up to the game and skip it. Once things get to that point, you can fire them if you want, removing them from your gang permanently. (They take all their stuff with them, the sod.)
Reputation: Your gang's reputation is the sum of your models' Attitude stats.
3. Accident & Emergency
Make an injury roll for every injured git. A git is injured if they were fallen when they were removed from play during this game.
To make an injury roll: roll a D6. If the result is equal to or under the model's toughness, they make a full recovery. If the roll is over their toughness, they are seriously injured, and have to be rushed to A&E.
To find out what happens to your seriously injured git at A&E, you make a couple of further rolls: first a diagnosis roll and then a treatment roll. The full rules and tables for these diagnosis and treatment rolls are given in a moment.
4. Krankshaft's Auto Repairs
Make an inspection roll for each of your vehicles that was wrecked during this game.
To make an inspection roll: roll a D10. If the result is equal to or under the vehicle's toughness, the vehicle has suffered only cosmetic damage, and doesn't require any meaningful repairs, at least nothing your boys can't handle themselves. If the roll is over the vehicle's toughness, it has broken down, and will need trusty old Krankshaft to take a closer look to get it back on the road.
To find out what happens to your broken down vehicle when you take it to Krankshaft's Auto Repairs, you need to make some more dice rolls. The full rules and tables for location and repair rolls are given in a moment.
5. Pop to the Shops
Using the caps in your stash, you can buy your boys new weapons, vehicles or fancy gear. You can visit either or both of Grandpa Gunnock's Guns & Gear or Trucknuts' Used Motors and you might pick up a stray.
Unfortunately, everything costs double the price you'd pay when first creating your gang. All this rioting is driving the cost of living up; nothing I can do about it.
Note: Don't worry about tracking the increased value of your gits after they buy stuff. The "cost" of gits isn't ever used, outside of initial list building.
Grandpa Gunnock's Guns & Gear
"What can I say? Supply has been a bit hit and miss these past weeks. Ignore those empty shelves, bud, take a peek at what Grandpa's got under the counter here…"
Make 3 loot rolls: that's what Grandpa currently has in their shop, and that's all you have to choose from. Everything costs double the listed price, and you can buy some, all or none of them. To be clear: each player makes separate rolls, Gramp's stock tends to turn over pretty fast.
Gunnock also has an unlimited supply of any weapon or bit of gear that is listed with a price of zero, and you can "buy" those at no cost. (I guess we can assume they just trade in some used electric goods they happen to have about their person, Grandpa is very accommodating in that way.)
Rolling a D100: If you don't know how to roll a D100: roll two D10s, the first is your "tens", and the second is your "units". So a roll of 4 then 6 is "46". A "0" on the tens dice counts as zero, so a roll of 0 then 5 is "05".
Trucknuts' Used Motors
"The thing about riots… certainly makes it easy to acquire second-hand vehicles for resale on the secondary market. We got anything your little green heart desires, just don't expect pristine paintwork."
Make 2 rolls on the Random Vehicle Table (see page XX). Those are the vehicles Trucknut's has for sale. Everything costs double the listed cost.
Trucknuts also sells a limited range of gubbins for your vehicles. Make 2 vehicle loot rolls, and that's what you have to choose from. Again, everything costs double the listed cost.
Pick Up a Stray
After each game, you can roll on the random git table to see who you bump into. If you like, you can add them to your gang, paying double their listed cost.
Random Git Table (roll 2D6, as in Chaos Mode):
| 2D6 | Random Git | Cost |
|---|---|---|
| 2 | Runt | 3 |
| 3-4 | Gnawball | 4 |
| 5 | Goblin | 4 |
| 6-8 | Orc | 5 |
| 9 | Bullorc | 7 |
| 10 | Klankbot | 10 |
| 11 | Orc Driver (roll for vehicle) | 5+... |
| 12 | Goblin Driver (roll for vehicle) | 4+... |
If, due to violence, reckless driving or negligence, your gang is worth less than 20 caps, and you've fewer than 5 caps in your stash, you can add this random git to your gang for free.
Loot Tables
Loot Roll: When you make a loot roll, roll D100 on the loot table.
| D100 | Loot | D100 | Loot |
|---|---|---|---|
| 01-05 | Ammo Box (1 cap) | 41 | Jetpack (3 caps) |
| 06-07 | Bayonet (1 cap) | 42 | Pointed Stick (1 cap) |
| 08-09 | Big Coat (1 cap) | 43 | Massive H2H Weapon (1 cap) |
| 10-11 | Banner Ad (1 cap) | 44-46 | Electric Gitstick (1 cap) |
| 12-13 | Megaphone (1 cap) | 47-49 | Buzzsaw (2 caps) |
| 14-15 | Improvised Shield (1 cap) | 50-52 | Massive Buzzsaw (2 caps) |
Vehicle Loot Roll: When you make a vehicle loot roll, roll D100 on the vehicle loot table.
| D100 | Vehicle Loot | D100 | Vehicle Loot |
|---|---|---|---|
| 01-02 | Buzzblades (1 cap) | 35-36 | Mega-magnet (2 caps) |
| 03-04 | Death Roller (1 cap) | 37-38 | Megaphone (1 cap) |
| 05 | Electroshock Collision Warning System (1 cap) | 39-41 | Mine Dropper (1 cap) |
| 06 | Experimental Teleporter (3 caps) | 42-43 | Insanely Loud Sound System (2 caps) |
| 07-08 | Explosive Ram (1 cap) | 44-45 | Mystical Bumper Stickers (1 cap) |
| 09-10 | Extra Seats (1 cap) | 46-48 | Oil Slick Dropper (2 caps) |
Vehicle Weapon Loot Roll: Sometimes you'll need to make a vehicle weapon loot roll. If you do, here is the table for that. Roll a D20.
| 1D20 | Vehicle Weapon Loot | Price |
|---|---|---|
| 1 | Explosive Ram | 1 |
| 2 | Flamethrower | 2 |
| 3 | Grappling Gun | 1 |
| 4-8 | Machine Gun | 2 |
| 9-11 | Massive Ram | 1 |
| 12-14 | Rattle Cannon | 3 |
| 15-16 | Mega Blaster | 3 |
| 17 | Mine Dropper | 1 |
| 18 | Oil Slick Dropper |
Prices are listed for convenience. When your git acquires a new bit of kit, increase the cost on their ID card by this price. Remember that when you are down the shops, everything costs double this listed price.
Injuries
Make an injury roll for every injured git. A git is injured if they were fallen when they were removed from play during this game.
- Injury roll: roll a D6, if over their toughness they are seriously injured and make diagnosis and treatment rolls.
- Diagnosis roll: roll a D8 to find the location of the injury.
- Choose a health plan: pay to go private, else go public.
- Treatment roll: roll a D10 to see how the doc patches the unfortunate git up. If private, roll twice and pick one.
Injury Roll: Roll a D6. If the result is equal to or under the model's toughness, they make a full recovery. If the roll is over their toughness, they are seriously injured, and have to be rushed to A&E. To find out what happens to them at A&E, make a diagnosis roll.
Diagnosis Roll: If a git is seriously injured, roll a D8 to tell the doctor where it hurts:
| D8 | Diagnosis | Public | Private |
|---|---|---|---|
| 1 | Head | 0 | 3 |
| 2 | Left Arm | 0 | 2 |
| 3 | Right Arm | 0 | 2 |
| 4 | Left Leg | 0 | 2 |
| 5 | Right Leg | 0 | 2 |
| 6-8 | Body | 0 | 2 |
Go Private? Next, decide if you will pay for private health care, or leave them in the care of the (very capable, if overstretched) public health service of Gnork. The cost of each route is listed above. Public healthcare is always free at the point of access. If you go private, you roll your treatment roll twice and choose which to apply.
Treatment Roll: Once you have a diagnosis, roll on the appropriate table to see what treatment the poor git receives. If you paid to go private, you can get a second opinion: roll twice and choose which roll to apply.
When a git receives a treatment, I expect you to modify your miniature or replace it with a more appropriately modelled git, but honestly that's up to you. I have no idea where you live and can't make you do shit.
You can't refuse a treatment. I'm not telling you what your options are, I'm telling you what you find when you pick your boy up from the hospital.
Arms & Legs: If you roll an arm or leg treatment on a location that already had a treatment, the new treatment fully replaces the previous one, for better or worse. A git can have different treatments for their right and left arms, and right and left legs. Other locations can gather multiple treatments and stack their effects. This may lead to some jank.
Dead Gits: If a git dies on the operating table, all their weapons and gear are lost. Roll up their ID card and ignite it with a sulphur preparation.
Head Treatments
If you rolled a 1 on the diagnosis roll, roll on this table.
| D10 | Head Treatment |
|---|---|
| 1 | Dead. This git is sadly departed, gone to join the choir invisible. Pour one out. They cannot be used again. |
| 2 | Gnawbrain Xenotransplant: This git cannot use weapons anymore. Any weapons they possessed when they showed up at A&E have been lost somewhere during the treatment. |
| 3 | Steam-Powered Calculating Engine: After activating this model, put a klank token on its ID card or beside the model. When you activate a model with a klank token on it, discard all klank tokens from this model and end its activation. |
| 4 | Rusty Tin Brain: When you move, boss to the left rolls one extra dice. You have to use the three highest. |
| 5 | Mechanical Respirator: This git makes sinister noises when it breathes. Gain 1 Attitude. |
| 6 | Bionic Eye: If this git is modelled with a bionic eye then they may re-roll all their shooting dice once per activation. |
| 7 |
Arm Treatments
If you rolled a 2 or 3 on the diagnosis roll, roll on this table.
| D10 | Arm Treatment |
|---|---|
| 1 | Stump: This git now has one fewer hands. |
| 2 | Wooden Hand: This arm still counts as having a hand (maybe they just gaffer tape a weapon to it), but they now steal 0 caps when they throw pinch in a fight. |
| 3 | Rubbish Robotic Arm: This hand can only be used to shoot guns, not use fighting weapons. |
| 4 | Hook Hand: If this git is modelled with a hook for a hand they have one fewer hand, but when they shove, they can move themselves (instead of your opponent) in any direction. |
| 5 | Chopper Arm: This git is now armed with a Massive H2H Weapon permanently held in this hand, and loses any other weapon they were holding in that hand. |
| 6 | Gun Arm: Make a loot roll to find out what gun the doc has attached. This git is stuck with that weapon on that arm, and can't hold anything else in it. (If the attached weapon needs 2 hands, he'll still need to use his other arm to fire it.) |
| 7 |
Leg Treatments
If you rolled a 4 or 5 on the diagnosis roll, roll on this table.
| D10 | Leg Treatment |
|---|---|
| 1 | Wheeled Cart: This git changes its Move Dice stat to 1D10. |
| 2 | Peg Leg: This git counts all its move dice values as one lower, to a minimum of 1". |
| 3 | Kneeless Servo Leg: This git changes its Move Dice stat to 2D6. |
| 4 | Lead Leg: This model cannot be booted up the arse. This git may receive this treatment only once. |
| 5 | Rusty Metal Leg: Reduce any of this git's move dice that roll 5+ by 1". This git may receive this treatment twice. |
| 6 | Power-Knees: All this git's move dice count as 1 higher. This git may receive this treatment twice. |
| 7 | Bionic Legs: If this git is modelled with a robotic leg or legs of some sort, when you scoot, you may treat any move dice as a '3'. Re-roll diagnosis rolls of 4 and 5 for this git. |
Body Treatments
If you rolled a 6-8 on the diagnosis roll, roll on this table.
| D10 | Body Treatment |
|---|---|
| 1 | Dead. I'm terribly sorry. We did what we could, but I'm afraid his poor heart gave out on the operating table. They cannot be used again. |
| 2 | Incredibly Unstable Mechanical Heart: If this model falls over it explodes (X), where X is its toughness, and is removed from play. |
| 3 | Glued Back Together: When this model adds a dice to its tower, it adds 2 dice instead. |
| 4 | Exposed Pipework: This git suffers -1 toughness. |
| 5 | Gnawball Liver Xenotransplant: When this git takes a swig, you add 2 dice to their tower, not 1. |
| 6 | Hunk of Metal: This model cannot be booted up the arse. |
| 7 | Spikey Bits: If this git is modelled with you-guessed-it, when fighting, if your thump is cancelled out by a shove, you still get to thump, but only using your headbutt thump die. |
Vehicle Damage
Make an inspection roll for each of your vehicles that was wrecked during the game. If you fail that roll, you'll need to make some more rolls to find out what the damage is and how well old Krankshaft fixes her up.
- Inspection Roll: roll a D10. If over its toughness it has broken down and you must make location and repair rolls.
- Location Roll: roll a D6 to find out where the fault is.
- Get A Quote: decide if you will pay for a proper job, or settle for a bodge job.
- Repair Roll: roll a D10 to see how Kranky gets on with their repairs. If a proper job, roll twice and pick one.
Inspection Roll: To make an inspection roll: roll a D10. If the result is equal to or under the vehicle's toughness, the vehicle has just suffered cosmetic damage, and doesn't require any meaningful repairs, at least nothing your boys can't handle themselves. If the roll is over the vehicle's toughness, it has broken down, and will need trusty old Krankshaft to take a closer look to get it back on the road.
Location Roll: To find out what happens to your broken down vehicle, you take it to Krankshaft's Auto Repairs and make a location roll. Roll a D6:
| D6 | Location | Bodge Job | Proper Job |
|---|---|---|---|
| 1 | Handling | 0 | 3 |
| 2 | Guts | 0 | 2 |
| 3 | Snazz | 0 | 2 |
| 4-5 | Hull | 0 | 3 |
| 6 | Weapons | 0 | 2 |
Get a Quote: Once you know the location of the damage, you can choose to pay Kranky the listed price in caps to do a proper job, or just leave them to do whatever bodge job he can with the scrap lying around their shop (he'll likely hand the job off to one of their eager but ham-fisted apprentices). A bodge job is always free, but rarely worth the money.
Repair Roll: Once you have agreed on a quote, roll on the appropriate repair table to see how well old Krankshaft fixes her up. If you paid for a proper job, you roll twice and choose which roll to apply.
Whatever you roll is what you find has happened to your precious machine when you go to pick her up.
If a cost in caps is listed, you don't pay those caps, but you do increase the cost on its vehicle registration card by that cost.
Handling Repair Table
If you rolled a 1 on the location roll, roll on this table.
| D10 | Handling Repair |
|---|---|
| 1 | Write-off: This vehicle is a write-off. Nothing to do but sell it for scrap. You lose the vehicle, but gain D3 caps. |
| 2 | Dodgy Brakes: Have to roll at least one of your highest possible dice type when moving. |
| 3 | Misaligned Wheels: This vehicle suffers -1 Handling permanently. |
| 4 | Can't Turn Left: Move dice on the left side of the vehicle can only be used to move forward, you can't pivot with them. |
| 5 | Bent Axle: When you suffer damage due to your move dice being over your handling, you suffer 1 additional damage. |
| 6 | Grinding Noise: Your move dice now all do 1/0 damage to you (e.g. 1 if you roll under your toughness). |
| 7 | Twitchy Accelerator Pedal: Once per move dice, if you bump into one of your move dice, roll it again as a new move dice. |
Guts Repair Table
If you rolled a 2 on the location roll, roll on this table.
| D10 | Guts Repair |
|---|---|
| 1 | Write-off: This vehicle is a write-off. Nothing to do but sell it for scrap. You lose the vehicle, but gain D3 caps. |
| 2 | Worn gasket: Worsen engine stat by one dice rank. |
| 3 | Rusty Gearbox: When you roll your move dice, they have to all be the same rank of dice. |
| 4 | Leaking fuel-line: Everyone on board is constantly breathing fumes. When the driver takes a swig, they take D3 dice. |
| 5 | Sluggish Accelerator: Roll one fewer move dice. |
| 6 | Overpressurized Fuel Lines: In order to fix a partially blocked fuel line, Krankshaft cranks up the pressure to dangerous levels. If this vehicle gets wrecked it explodes (10). |
| 7 | Honking Great Shaker Scoop: If this vehicle has one modelled on, one of the move dice you roll each activation can be one dice type higher than your engine stat. |
Snazz Repair Table
If you rolled a 3 on the location roll, roll on this table.
| D10 | Snazz Repair |
|---|---|
| 1 | Offensive repaint: You have to repaint your model in a different colour. |
| 2 | Really bright headlamps: Gits roll D6 when dodging this vehicle. |
| 3 | Snazzy Underlighting: Enemy bullet dice that land within 6" of this vehicle can be re-rolled by their shooter. |
| 4 | Booming Exhausts: This vehicle is so loud it has to deploy 12" from caps and enemy models (even if it has the Electric Motor mod). |
| 5 | Stone Wheels: You ignore the effects of Oil Slicks. |
| 6 | Mysterious Red Button: Once per game, at the start of your activation, you can press the button: roll a D6. On a 1, you wipeout. On a 2-5, you count as equipped with a Jet Engine, mod for the rest of the activation. On a 6, you count as equipped with an Experimental Teleporter mod for the rest of the activation. |
| 7 | Huge Spoiler: If this vehicle has one modelled on, it gains +2 handling. |
Hull Repair Table
If you rolled a 4 or 5 on the location roll, roll on this table.
| D10 | Hull Repair |
|---|---|
| 1 | Write-off: This vehicle is a write-off. Nothing to do but sell it for scrap. You lose the vehicle, but gain D3 caps. |
| 2 | Buckled Pillars: This vehicle suffers -1 Toughness permanently. |
| 3 | Crushed Roof: This vehicle suffers -1 Toughness permanently. |
| 4 | Mangled Chassis: This vehicle suffers -1 Seat permanently. |
| 5 | Heavy-ass armour: This vehicle gains +1 Toughness, but reduces its Engine stat by one dice rank. |
| 6 | Armour made of old doors: They have a load of handles. +2 Seats |
| 7 | Sidesaws: You can re-roll your smash dice once per fight. |
| 8 |
Weapons Repair Table
If you rolled a 6 on the location roll, roll on this table.
| D10 | Weapons Repair |
|---|---|
| 1 | Wrecked Weapon: This vehicle loses a randomly selected weapon permanently. |
| 2 | Ill-considered Weapon Venting: When you shoot, you take one damage for each 6+ you roll. |
| 3 | Damaged Weapon Mounts: This vehicle's bullet dice suffer -1 to their rolls. |
| 4 | Weak Frame: You roll 2 fewer smash dice when you smash. |
| 5 | Overheating Ammo Belts: Your vehicle treats bullet dice of both 1 and 2 as jams. |
| 6 | Smoke Belcher: When shot at, treat this vehicle's toughness as 1 higher. |
| 7 | Auto-Gunner: The driver can fire all the vehicle's weapons at once. |
| 8 |
Factions
When you build your crew, you may choose a single faction for them. All the models in your mob get the special rule for that faction.
Grill Cooks
"Rat on a stick, fungus burger, bark pudding? Cheese with that? Fried shredded boot leather? My hot sauce recipe? … Light taper and stand well back."
Tasty Smells: After each activation, each other friendly model within 2D6" discards a dice from their tower.
Conversion ideas: Sweaty vest-wearing orcs with chefs hats peddling dubious meat products.
City Boys
"Listen, boy. There ain't no such thing as dirty money. You gotta grab them greenbacks with both hands. Ooh, check that bin… Jackpot!"
Grabbing Hands: If this git ends a move dice within 3" of a cap, they may push directly toward it up to 3".
Conversion ideas: half-toffs, half-winos. Top hats, monocles, wine bottles and suit jackets.
Riot Mimes
"Oi, who's dis fancy lad? Out me way, weirdo. Ouch! Who put a bollocking wall here!?"
Invisible Walls: An enemy git that starts a movement dice move outside of 3" of this model must halt at 3" away. They can move closer with their next move dice.
Conversion ideas: 'Mad lad' dancing poses. Mime/clown face paint. Hands held flat or grasping air. Striped shirts. Bowler hats.
The Fuzz
"You have the right to run away wiv' that telly, mate, but if you do, then I have the right to run you down and smash you over the head wiv' it until you remain silent. Go on, I'll give you a head-start."
Handcuffs: After you shove an enemy, you may roll a D6 as a move dice and move using it, if it would bring you into contact with an enemy model.
Conversion ideas: Improvised riot shield. Truncheon. Ruddy big helmet. Badge made of scrap.
Mushroom Psycho Barbarian Vikings
"Rrraaaaaaaaaaaaaaaaaaaaaaaaaaaaaaaaaaaaaaaaaaaaaaaaaaaaaaaaaaaargh!!!!!"
Berserk: If this git ends its movement within 3" of an enemy model, it may move into contact with that git (if it can do so in a straight line).
Conversion ideas: Hairy demented psycho drugged-up barbarian cosplayers.
Old Boys
"Diz medal? Hmph. Crunge 88th Mechanized Infantry. Made me the ghob I am today. Pass that oil can, lad… And that bottle."
PTSD: If this git has fallen, they may gain 2D6 damage to boot themselves up the arse. If they roll a double, they are out and removed from play.
Conversion ideas: Cyborg body parts, tracks, eye patch, booze.
Agitators
"The warmongers are gone! Now, my fellow groos and grots, is the time! Comrades! Smash this military-industrial complex. Remake Crunge for the ordinary working ghob!"
Encouraging Chants: When a friendly git within 6" rolls their move dice, this git may take a swig to let the other git re-roll any/all of their move dice.
Conversion ideas: Loud-hailers, pamphlets, banners.
The Green Wing
"I ain't looting, I'm opposing a tyrannical government."
Special Rule: When a friendly git within 6" makes a shooting attack, this git may take a swig to let the other git re-roll one of their shooting dice.
Conversion ideas: Cowboy hats. Rifles. Jerry cans. Moonshine.
Bad Docs
"Right this way… Good prices, acceptable results. That arm looks a little weedy, I daresay we can improve it a shade. Oh, him? Ignore him, he was like that when he came in… Cry-baby."
Pulling Teeth: This git loots D3 caps when it puts the boot in.
Conversion ideas: Mad Doks and Backstreet Surgeons.
Rules Summary
Timer: Don't forget to set the 30-minute timer. When time's up, can't boot.
Activation: Do one or two different actions: scoot, boot (boot up friend / steal 1 cap from foe) or shoot. If you touch an enemy model, your activation ends and a fight breaks out. After activation: take a swig.
Fight: Shove (3") cancels Thump (roll thump dice) cancels Pinch (steal 1 cap) cancel Shove. Fight until separated.
Scoot: Roll move dice. Resolve all dice. Move toward each dice that many inches. Stop if you bump into a dice, terrain, a cap or another model.
Shoot: Pick a 2-handed gun, or up to two 1-handed guns. Roll their bullet dice and draw a line of fire from the shooter to each bullet dice. The bullet travels up to the gun's range, hitting the first thing in its path.
Damage: If the thump/bullet dice equals or beats the target's toughness, do big damage, else do weak damage. For each point of damage, stack a dice on the tower.
Quick Reference Tables
The printed quick reference pages at the back of the book repeat the Gits, Vehicles, Shooting Weapons and Fighting Weapons tables, the Random Git and Random Vehicle tables, and the Loot Roll and Vehicle Loot Roll tables given in the sections above. They are not reproduced again. The reprinted copies match the originals except for these differences in the printed beta, which are transcribed as printed in the sections above:
- Vehicle Loot Roll, 31: the main Vehicle Loot table lists Massive Exhausts at (2 caps); the quick reference page lists it at (1 cap). The Massive Exhausts mod itself is listed at 2 caps.
- Vehicle Loot Roll, 60-61: the main Vehicle Loot table lists Nitro Booster (1 cap); the quick reference page lists Turbo Booster (1 cap). The Nitro Booster mod is the one printed in the Mods section.
- Vehicle Loot Roll, 51-52: printed as "Ramshackle Extra Armour (2 caps)"; the mod itself is printed as "Ramshackle Armour (2 caps)".
- Vehicle Loot Roll, 03-04: "Death Roller (1 cap)" appears in the loot table with no matching mod entry; the mod printed in the Mods section is "Spiked Roller (1 cap)".
- Vehicle Loot Roll, 16-17: "Gory Trophy Rack (0 caps)" in the loot table; the mod is printed at 1 cap.
- Loot Roll, 08-09 and 20-21: "Big Coat (1 cap)" and "Improvised Bombs (1 cap)" appear in the loot table, but the printed Fancy Gear section has no entry for either.
- Loot Roll, 41: the quick reference page shows a stray "41 Jetpack (3 caps)" line below the table; this is a layout artifact of the same entry printed in the main table.