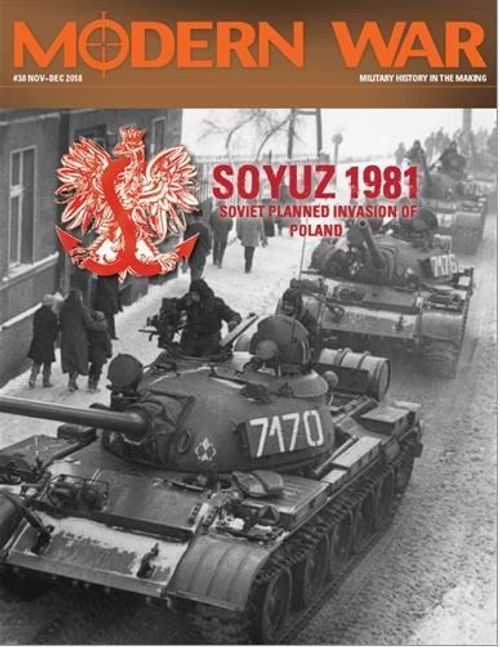
Soyuz '81: Soviet Planned Invasion of Poland
Soyuz '81: Soviet Planned Invasion of Poland Rulebook
Table of Contents
Table of Contents
- 1.0 Introduction
- 2.0 Components
- 2.1 The Game Map
- 2.2 Terrain & Hexes
- 2.3 Seating
- 2.4 Counters
- 2.5 Sample Combat Unit
- 2.6 Soviet & Warsaw Pact Unit Color Schemes
- 2.7 Polish Unit Color Schemes
- 2.8 Historic Identifications & Abbreviations
- 2.9 Unit Sizes
- 2.10 Unit Types
- 2.11 Attack Factors & Defense Factors
- 2.12 Movement Allowance (MA)
- 3.0 Set Up & Hex Control
- 4.0 How to Win
- 5.0 Sequence of Play
- 6.0 Stacking & Fog of War
- 7.0 Soviet Airpower & Air Mobility
- 8.0 Movement
- 9.0 Combat
- 10.0 Optional Rules
1.0 Introduction
1.1 Scale
Each hex represents 16 miles (26 km) from side to opposite side. Each turn represents one tenth of a month (approximately three days). Each unit of maneuver is a division.
1.2 Sides & Nationalities
The Soviet player commands all Russian, East German and Czechoslovakian units in the counter-mix. If a rule is said to apply to all Soviet Units, it applies to the units of all three of those nationalities. If a rule is said to apply only to Warsaw Pact (a.k.a. WP) units, it applies only to East German and Czechoslovakian units. The Soviet player's opponent, the Polish player, commands all that nation's regular army and static militia units in the counter-mix.
Exception: The Terrain Effects Chart, International Boundary line states that there is no effect for Warsaw Pact units. In this single case, Russian forces are included in the term Warsaw Pact.
Important: In a few cases a river line may show terrain that could exist on both sides of the river. A unit occupying the hex is on the side of the river showing the largest amount of terrain. A unit entering hex 1527 from hex 1627 would pay the MP penalty for the river crossing.
1.3 Non-Linear Turn Sequence
The sequence of phases within each turn is variable. It is therefore impossible for these rules to be organized in a strictly linear way, matching the order in which activities take place during the turns: there is no one such order. Therefore, you might find yourself having to skip around the various rules sections, especially during your first reading of them.
1.4 Markers & Chits
Markers or chits are interchangeable terms used to describe the counters in the game that don't represent actual combat units, but that are instead used as memory aids. All chits are markers, and all markers are chits.
2.0 Components
The components to a complete game of Soyuz 81 include these rules, a 34 x 22 inch map sheet and a sheet of 176 die-cut counters (also referred to as units and/or unit-counters). Players must provide themselves with a standard (six-sided) die to resolve combat and other probabilistic game events.
2.1 The Game Map
The map illustrates the militarily significant terrain found in and around Poland in 1981-82 when viewed at these time and space scales. A hexagonal (hex) grid is printed over the map to regulate the placement and movement of units across it, much like in chess and checkers. A unit is in only one hex at any one time.
2.2 Terrain & Hexes
Each hex contains natural and/or manmade terrain and/or water features that can affect the movement of units and combat between opposing units.
- The various terrain and water features on the map have had their exact real-world configurations altered slightly to make them coincide with the hex-grid. The relationships among them from hex to hex are accurate to the degree necessary to present players with the same space/time dilemmas faced by their historic counterparts in the real campaign.
- Every hex on the map has a unique four-digit identification number printed in it. These are provided to help find exact locations more quickly and to allow for the recording of unit positions if a match should be taken down before it can be completed.
Example: The city of Krakow is in hex 3531.
Important: In a few cases a river line may show terrain that could exist on both sides of the river. A unit occupying the hex is on the side of the river showing the largest amount of terrain. A unit entering hex 1527 from hex 1627 would pay the MP penalty for the river crossing.
2.3 Seating
The Polish player should sit off the map's north edge, facing south; the Soviet player should sit opposite him on the south map edge, facing north.
2.4 Counters
There are 176 unit-counters in the game, most of which represent combat formations. Others are provided as informational markers and memory aids. After reading these rules at least once, carefully punch out the counters. Trimming off the "dog ears" from their corners with a fingernail clipper will facilitate easier handling and stacking during play and enhances their appearance.
2.5 Sample Combat Unit
Each combat unit-counter displays several types of information: nationality (and therefore the side it is on), specific historic identification, its type and organizational size, its attack and defense strengths, its step strength, and its higher-level organizational affiliation.
[Sample counter diagram labelled Unit Size, Organization, Setup Hex, Unit Identification, Unit Type, Attack Factor and Defense Factor; not reproduced.]
2.6 Soviet & Warsaw Pact Unit Color Schemes
- Baltic Military District: Black on orange
- Belorussian Military District: Black on sky blue
- Central Group of Forces: Black on yellow
- Carpathian Military District: Black on tan
- Czechoslovakian: Black on green
- East German: Black on gray
- Northern Group of Forces: Black on red
2.7 Polish Unit Color Schemes
- Pomeranian Military District: Blue on white
- Silesian Military District: Green on white
- Warsaw Military District: Red on white
- Militia: Red on white
2.8 Historic Identifications & Abbreviations
All units bear their specific historic identification numbers and/or names to the right of their unit-type boxes.
- BA: Soviet Baltic Military District
- BE: Soviet Belorussian Military District
- CA: Soviet Carpathian Military District
- CE: Soviet Central Group of Forces
- CZ: Czechoslovakian
- EG: East German
- G: Guards
- NO: Soviet Northern Group of Forces
- P: Polish Pomeranian Military District
- S: Polish Silesian Military District
- SP: Spetsnaz
- W: Polish Warsaw Military District
2.9 Unit Sizes
Except for one, all the units-of-maneuver in the counter-mix are divisions (XX). The lone exception is the Soviet 8th Spetsnaz Brigade (X). The units of the Polish militia are ad hoc formations of variable sizes, and they therefore are not printed with a unit size symbol.
Counter Errata: The NO-CA, 8SP unit (8th Spetsnaz Brigade) was incorrectly printed as a division. This has no effect on game play.
2.10 Unit Types
[Counter type illustrations (Motorized Rifle, Tank, Air Assault (Heliborne), Artillery (Rocket), Militia, Amphibious Assault) not reproduced.]
Note: Polish Militia units are static, they cannot move.
2.11 Attack Factors & Defense Factors
Attack and defense factors are the measures of a unit's ability to conduct offensive and defensive combat operations. Their uses are explained in section 9.0.
2.12 Movement Allowance (MA)
A unit's MA is the measure of each unit's ability to move across the hex-grid printed over the map.
- Units pay varied movement costs to enter different hexes, depending on the terrain in each and any water barriers along the hexsides around them.
- Unlike most wargames, the movement allowances of the units are not printed on their counters (5.2.1 & 8.0).
Important: There are no zones of control in the game, thus there is no cost in movement points to move adjacent to or away from enemy units.
2.13 Step Strength
All ground units in the game have one or two strength steps (also called steps). Steps is the term used to express the ability of a unit to absorb a certain amount of combat losses before ceasing to be an effective formation (a measure of its robustness in current US Army jargon).
- Units with combat factors on only one side of their counter are one-step units.
- Units with combat factors on both sides of their counter are two-step units.
- All East German and Czechoslovakian units in the game have only one step each.
- If a two-step unit suffers a one-step loss, it's flipped over to its reduced side (the one with the lower combat factors).
- If a one-step unit, or a two-step unit that has already been reduced, suffers a step loss, it's removed from the map (eliminated) and placed into the dead pile (9.0).
- Units that start play set up on the map do so at full strength.
- All units that enter the map as reinforcements after play has begun also do so at full strength.
- The Polish militia units are back printed with different strengths; however, they are all one step units. The numbers printed on the front and back are there to allow variable strength militia units to be placed as noted in 3.1.1.
[Step-strength illustration: Front (Full Strength) and Back (Reduced Strength) of a two-step counter; not reproduced.]
Important: The back of this counter does not constitute the unit's reduced side.
[Polish militia counter illustration not reproduced.]
Designer's Note: Soviet and Warsaw Pact units suffer a severe penalty when reduced, this was intentional. Those units while initially possessing a strong attack capability would be significantly reduced in power (morale and willingness to continue attacking) in the face of significant losses in combat.
2.14 Markers
The uses of the following markers are explained at appropriate points throughout the rest of the rules.
- Turn Marker (5.0)
- Phase Indicator Marker (5.2.3)
- Hex Control Marker (3.5 & 3.6)
- Soviet Airpower Marker (7.0)
- Soviet Strategic Advantage Point Marker (4.1)
- Soviet MP/AP Marker (5.2)
[Marker illustrations not reproduced.]
3.0 Set Up & Hex Control
After deciding who will control which side, both players should sort and place their units on and around the map in the sequence given below.
3.1 Polish Set Up
Every Polish division has a four-digit hex number printed in the upper-right of its full-strength side.
Example: The 8th Motorized Rifle Division has the number 1134 printed there. It is therefore set up in that correspondingly numbered hex on the map.
Once all the Polish divisions have been set up, place a six-point militia formation in each of the 11 city hexes on the map. That completes the Polish set up. There are no Polish reinforcements.
3.1.1 Alternate Polish Set Up
Set up the regular Polish army units as outlined in 3.1.
- Once all the Polish regulars have been set up, place a six-point militia formation in Gdansk (1327).
- The Polish player then rolls one die for each remaining city hex on the map.
- The result is the strength of the militia garrison (one through six) assigned to each city hex. There are no Polish reinforcements.
3.2 Soviet Set Up
Step 1: The Soviet player should begin his side's set up by taking the five units from his Northern Group of Forces (NO) that constitute the initial "Soyuz '81 field exercise force." Those units have large dots in the upper-right corners of their full-strength sides:
-
Russian 6th Guards Tank
-
Russian 20th Tank Division
-
East German 1st Motorized Rifle Division
-
Czechoslovakian 2nd Motorized Rifle Division
-
Czechoslovakian 3rd Motorized Rifle Division
-
He places these units in any five hexes in Poland that are not occupied by a Polish army or militia units.
-
No more than one unit may be placed per hex.
-
The units must be placed so that all units are in hexes no more than two hexes distant from all other units within the group. In other words, they will be clustered in the hexes surrounding a hex you pick to be the center of gravity for the exercise deployment.
Example: The below diagram shows one possible "legal" set up for the Soviet Northern Group of Forces.
[Set-up diagram not reproduced.]
Designer's Note: The three Warsaw Pact divisions listed above actually appear twice in the counter-mix, once in their native colors and one-step-strength versions, and once as pseudo-Soviet-Russian units within NO. We provided them both ways to allow for other initial-start variants that you might care to come up with on your own. (In regular play, set aside those three duplicated Warsaw Pact divisions from their own nations' orders of battle; they will not be used.) We know for certain the Soviet high command planned to include one East German and two Czechoslovakian divisions in the field exercise's initial order of battle. That was because it was those two satellite countries' regime leaders who were pushing hard for a military solution in Poland, fearing theirs would be the next countries to tip into social disorder if something decisive wasn't accomplished quickly in Poland. Those in the Kremlin in turn demanded of them they 'put some skin in the game' if they were going to take such a hard line. Similarly, the pseudo-Soviet-Russian versions of those three divisions all get two steps in place of the one step assigned to all other East German and Czechoslovakian divisions, because that added strength increment represents the Red Army 'minder' sub-units that would've inevitably been assigned within them for the duration of the operation.
Important: The 1st East German, 2nd Czech, and the 3rd Czech Divisions are set aside and not used.
[East German and Czech unit counter illustrations not reproduced.]
Step 2: The Soviet player then places all remaining units labeled "NO" into a cup and randomly draws 13 units.
Important: Do not pay the SAP cost for these units.
Step 3: Next the Soviet player deliberately selects from the BA, BE, CA, and CE units the 13 units that correspond with the drawn "NO" units (same unit designation).
- Permanently set aside each one of the BA, BE, CA and CE units; those versions of the units are out of play for the rest of the game.
Optional: If both players agree prior to the start of play. Withhold the two Soviet artillery divisions (26 and 81 divisions) and the 8SP brigade from the draw procedure above. These three units are automatically placed as below. If using this option only draw 10 units from the NO cup.
- He then sets up the drawn units around the perimeter of Poland in the "gold row." He places each one (6.0 stacking rules apply) in any hexes within the gold row that correspond to its donating military district.
[Drawn Unit and Set Aside counter illustrations not reproduced.]
- Polish units may not move, attack, retreat, or advance after combat into any gold row hex.
- Soviet/WP reinforcement will enter play through those hexes. They may move, attack, retreat, and advance in and out of them as desired by that player.
- All gold row hexes are considered clear terrain that contain no water barriers.
Example: If the Soviet Belorussian Military District's 3rd Guard Armor Division had been drawn, its "NO-BE" version could be set up in any gold row hex from 3117 to 4223, inclusive. The BE version would be set aside.
Designer's Note: The Soviet high command's planning for this only got as far as deciding the military districts neighboring Poland would contribute a total of 13 more divisions to the Northern Group of Forces for the purposes of executing the operation. In that way, the dual-unit representations allow for unique initial force mixes and deployments to generate operational uncertainty and replay value. At the same time, there's no participation by any units from the infamous G-SoF-G (Group of Soviet Forces Germany) because those running the Kremlin decided that force had to stay undisturbed and fully in place to serve as discouragement for, and a shield against, any possible NATO perfidy.
3.3 Soviet & Warsaw Reinforcement Units
After step 3 has been completed, the Soviet player places all remaining NO units back into their storage containers. They will not have any further role in that play of this match.
- The Soviet/WP side's reinforcements will come from (and be committed as) the East German and Czechoslovakian armies and the Soviet units remaining within their original military districts (5.3).
- Place the SAP marker in the "100" block on the Soviet Strategic Advantage Point Track.
- When that's been done, the game's set up is complete.
Important: Czechoslovakian reinforcements are placed in the Central Group of Forces Area.
3.4 Gold Row
The gold row, running around the entire land perimeter of Poland on the map, is there to represent the fact the Soviet/WP side is the one enjoying strategic depth.
[Gold row map illustration (Baltic MD (BA) and Belorussian MD (BE) hexes) not reproduced.]
3.5 Hex Control
Hex control is the term used to describe which side is in control of (owns) important hexes at different times during play. In this game hex control is important when reckoning victory (4.0).
- The control status of a hex changes the instant a unit of the other side enters the hex.
- The control status of each hex may change any number of times during a game as units of the two sides enter and reenter various parts of the map.
Important: Eliminating enemy units in a hex does not in and of itself constitute gaining control of the defender's hex. The attacking force must physically move into the hex (either advance after combat, or movement during a later action segment).
3.6 Control Markers
Control markers (2.14) have been provided in the counter-mix.
- Use them as memory aids in helping you keep track of the hexes that are Soviet controlled in situations where the positions of both sides' units do not make that obvious.
- Keep unused markers in a pile within easy reach of both players off to the side of the map until they're needed.
4.0 How to Win
4.1 Soviet Strategic Advantage Points (SAP)
Victory in the game is based on the Soviet player's success or failure in completing his mission (i.e. bringing Poland completely to heel) without sacrificing the Kremlin's hegemonic socio-political situation across the region. Though not perfect by any means, for game purposes we'll define that initial Soviet position as being "100" on a scale that runs down to total dissolution and defeat at "1."
- Certain Soviet operations will cause deductions to the Soviet SAP and, once gone, no SAP can ever be regained. The total number of SAP only goes in one direction: down.
- Keep an open record of the number of SAP remaining using the table printed on the map. Adjust the SAP total immediately as they occur throughout the turns.
4.2 Sudden Death Victory
At the end of any action the game may come to an end and one side or the other is declared the winner.
- If the Soviet player has eliminated all Polish units (including garrisons), he is immediately declared the winner. This is determined the moment that no Polish units are on the map, prior to any SAP deductions.
- If the level of SAP reaches one prior to the end of Turn 10, no matter what the situation on the map, play ends at that instant in a Polish victory.
4.3 Turn 10 Victory
At the end of Turn 10, the Soviet player must control all city hexes on the map and still have at least one SAP remaining. Any other situation than that is a Polish victory.
4.4 SAP Deductions
Deduct SAP as follows:
- -1 SAP: For each Soviet division mobilized into play as a reinforcement from any military district other than the Central Group of Forces (CE). Mobilizing East German and/or Czechoslovakian divisions into play has no SAP cost.
- -2 SAP: For each Soviet division mobilized into play as a reinforcement from the Central Group of Forces (CE).
Designer's Note: This is another region bordering directly on NATO territory, so the risks here are higher and, as well, it was only a little more than a decade prior that the Czechoslovakians had shown themselves to be of suspect loyalty.
- -1 SAP: For each Soviet or East German or Czechoslovakian division eliminated in combat, on either offense or defense, anywhere on the map.
- -2 SAP: For each Soviet-controlled city hex that's retaken by the Poles. This may potentially occur any number of times in the same hex each time control switches.
- -1 SAP: For each Polish attack conducted into any non-city hex that results in a Polish advance after combat into the defender's hex (9.19).
- -1 to -8 SAP: For each Soviet high intensity attack (9.14).
- -1 to -10 SAP: At the end of every turn, deduct the number of SAP corresponding to the ending turn's number. Double the number deducted if, at the time of the deduction, there is not at least one unblocked (by Polish units) rail line running from the BE or CA gold row across Poland and exiting into East Germany (EG). The rail line may be of any length and follow any rail line across Poland. The total SAP to be deducted for this requirement in one game turn cannot exceed 10.
Example: At the end of Turn 1, The Soviet player cannot trace at least one unblocked rail line; "two" SAP are deducted. At the end of Turn 6 if, the Soviet player cannot trace a rail line, the deduction would normally be 12, however the maximum deduction for this situation is 10. The Soviet player would only deduct "10" SAP from his total.
Designer's Note: The rail lines shown on the map don't represent all the Polish transport net. Rather, only those lines are shown that were used by the Soviets to maintain G-SoF-G in supply. That is a critical part of the Soviet mission during this operation.
5.0 Sequence of Play
5.1 Game Turns
There are 10 game turns in Soyuz 81. Each game turn is divided into two Phases; an Action Phase and a Soviet Reinforcement Phase.
- Each Action Phase is divided into 11 segments called Actions.
- Each full sequence of actions makes up one Action Phase.
- Once a player has finished an activity, he may not go back to perform some forgotten action or redo a poorly executed one unless his opponent graciously permits it.
5.2 Action Phase
The exact order of execution of each Action Phase's 11 segments are never fully known ahead of time. After determining movement allowance and Soviet Airpower, the sequence is determined by a random chit draws.
Exception: Turn one always begins with the Soviet NO Action Segment. Do not place this chit in the pool on the first game turn. Place it in the first box of the Actions Phase Sequence Track printed on the map. These units may move and fight.
5.2.1 Movement Points (MP) Segment
On the first turn of the game, the MP of all units is 12.
- At the start of Turns 2 through 10, prior to the first action chit pull, the Soviet player rolls two dice and adds the two die rolls together.
- No matter the total, the minimum MP (and the Soviet airpower strength) received is four.
Example: The total of the two dice is three. The MP of all mobile units would be four. If the total die roll was five, mobile units would have an MP of five.
- The result (4 through 12) is the MP of all mobile units of both sides throughout that turn. This total will be used again in 5.2.2.
Designer's Note: The variable MP each game turn is a design mechanism to simulate the command issues both sides would have encountered.
5.2.4 Action Chits
Every military district (or force grouping) has a corresponding chit (2.6 & 2.7).
- When an action chit is pulled, and placed onto the Action Sequence Track, the player who commands that formation announces whether he will move or attack with the units belonging to that formation.
- He must choose "move" or "fight," he can't do both or mix the two activities in a single action. In that way, each grouping will move once or fight once per turn, not both.
Exception: On the action of turn one, the Soviet player, conducts an action with his Northern Group of Forces (NO). In this one case, the NO group may move and fight during this single action.
Example: The Polish Pomeranian Military District has its "P" chit. The Soviet Baltic Military District has its "BA" chit.
5.2.2 Soviet Airpower Strength Segment
Only the Soviet side gets airpower during play.
- On the first turn of the game, the Soviet player does not have any airpower available, as his planes are busy neutralizing the Polish Air Force.
- On Turns 2 through 10, the die roll used when determining MP (minimum of four) is also his airpower strength (expressed in terms of the number of aircraft units available to him that turn).
- Optionally: Players may decide prior to beginning the game to make a separate dice roll for airpower each game turn. The Soviet player does not receive air power on the first game turn.
Designer's Note: The two rules above represent the extremely chaotic combination of severe winter weather, the inescapable vagaries inherent in logistics during this kind of internecine struggle, and the command control problems involved in this kind of massive but unrehearsed operation for militaries built on rigid, top-down Soviet lines. They are, in effect, the game's "supply rules."
5.2.3 Action Segments
Prior to starting the play of Turn 1, take the action markers labeled with P, S, and W and place them into a large-mouth opaque container (such as a cereal bowl or coffee mug), which is then referred to as a pool. The remaining markers are set aside until game turn 2.
Important: Do not place the NO marker in the pool on Turn 1.
- Either player blindly chooses one of the chits and then looks at it while also revealing it to his opponent.
- Place the drawn chit into the next box in the numerical sequence of Action Segments on the Actions Sequence Track printed on the map (from left to right).
- The player, whose chit was drawn, then conducts an Action Segment per 5.2.4.
- When that player has completed that action, the Action Segment is complete. Another chit is drawn with the appropriate player conducting another Action Segment.
- This continues until all the chits have come out of the pool.
- Play then proceeds to the Soviet Reinforcement Phase.
- When the Soviet Reinforcement Phase is complete, that turn is complete. Put all the chits back into the pool and start a new turn.
5.2.5 Empty Chit Pulls
It is possible, especially on Turn 1 that chits will come out of the pool for which there are no units on the map. When that occurs, place the chit in the appropriate box on the track and pull another chit. This occurs as many times as necessary to end the turn or pick a chit that represents units on the map.
[Turn-sequence and action-track illustrations not reproduced.]
5.3 Soviet Reinforcement Phase
After all actions are complete, the Soviet Reinforcement Phase occurs.
- During each Reinforcement Phase (turn one through turn nine) the Soviet player decides whether he wants to call on the Kremlin for reinforcements.
- He may call in any number of reinforcements per turn (if any are available). The SAP cost for each unit is listed in 4.4.
Important:
- East German and Czechoslovakian armies are available at no SAP cost; however, their one-step strength makes them particularly vulnerable to elimination, and that does have a SAP cost. They and all other drawn reinforcement units are eligible to enter the game at the start of game turn 2.
- Soviet reinforcements do not become part of the NO group; rather, they retain their original military district affiliation and are brought into play by being immediately placed in the corresponding hexes of their district.
Design Note: The common reaction of players new to the game is to immediately call for all available reinforcements. Keep in mind, though, once a reinforcement unit is in, that SAP expenditure is irretrievably lost.
6.0 Stacking & Fog of War
Stacking is the word used to describe the piling of more than one friendly unit into a single hex at the same time.
- A maximum of five friendly units may stack in the same hex at the same time.
- Opposing units may never stack together. Soviet and Warsaw Pact units may stack together.
6.1 Stacking & Movement
Stacking rules are always in effect throughout the turn in every hex on the map.
Example: The WP player could not move the 9th and 13th CZ Divisions as a stack into or through hex 2231 because there are already four division in that hex and that hex would immediately be overstacked. He could move one of the two divisions into or through hex 2231 or could first move one of the divisions out of hex 2231 that would then allow both the 9th and 13th to move into the hex and not be overstacked.
[Stacking example diagram not reproduced.]
Important: Players should therefore pay attention to the order they move their units in crowded areas of the board; otherwise, moves made carelessly early in the turn may block your ability to move units later.
- There are no limits on the number of units that may enter and pass through a given hex over the course of a phase or turn, if the stacking limits are met on a hex-by-hex and instant-by-instant basis.
- If any hex containing stacked units of either side is found to be over stacked (exceed the stacking limits given above) at the start or end of any phase or action, the opposing player is immediately allowed to eliminate his choice of the minimum number of involved enemy units necessary to bring the violating stacks back into limits.
- Units beginning a phase stacked together need not remain together because of that fact; they may be moved off individually and/or in partial stacks. See section 8.0 for further details.
Designer's Note: The idea in the rule above is that stacking violations should be noted and stopped before they can take place as the game progresses. If some violation is not seen until a phase or action ends or is discovered when a new phase/action is just beginning, the transgressing player then suffers the penalty of unit elimination rather than just chastisement.
6.2 Unit Stacking Value
All ground units in the game, both static and mobile, count as one unit for stacking purposes, no matter their combat or step strengths.
6.3 Marker Stacking Value
Soviet hex control and airpower markers (2.14) have no stacking value. They may be added to any stacks in accordance with the rules governing their uses (7.0 & 8.3).
6.4 Fog of War
Both players are always free to look through their opponent's stacked units anywhere on the map.
7.0 Soviet Airpower & Air Mobility
7.1 Soviet Air Superiority
On turn two through turn ten, after the turn's MA has been determined (5.2.1 & 5.2.2) but prior to the first action chit pull, the Soviet player places all available airpower markers atop any (mobile or static) Polish unit(s).
- The markers remain on the map until the end of the current game turn, unless all Polish units in a hex with an airpower marker are eliminated.
- The maximum number of airpower markers that may be placed in any one hex is equal to the number of Polish units in the hex.
- A Polish unit or stack that has at least one airpower marker in the same hex, is "interdicted."
Important: The Soviet player cannot place more air units in a hex than the number of Polish ground units.
7.2 Interdiction Movement Effect
Each airpower marker subtracts one from the MA of the interdicted mobile unit and the units stacked with it, if it is moved during that turn.
- As an interdicted unit or stack moves, keep all aircraft markers with it.
- If a moving stack separates, the Soviet player may assign his airpower marker(s) to the sub-stacks as he sees fit.
- If a sub-stack or unit is thereby left without any aircraft to interdict it, that force does not get back the previously debited MA (which always takes place at the start of a move), however that unit does not suffer the effects of 7.3.
Example: In diagram 1, the Soviet player has placed two Soviet Airpower Markers. It is turn two, and all units have a movement factor of six. If the stack remained together all three units would have a movement factor of four. If the units moved separately (Diagram 2) all of the units would still have a movement factor of four, however if the 16th Tank Division is attacked in the next WP phase, it would not suffer the column shift explained in 7.3.
[Diagram 1 and Diagram 2 airpower illustrations not reproduced.]
- Moving into a hex that contains a Polish unit with an airpower marker does not affect the moving unit.
Exception: Unless it remains in the hex and is attacked during a Soviet action that game turn.
- A player may only change the position of an already moved unit or stack if his opponent agrees to allow it.
- If a unit does not have all the called for MP needed to enter a given hex, you may not make that move.
7.3 Interdiction Combat Effect
Each airpower marker in a hex, causes a one column odds shift in favor of the Soviet side throughout that turn, on both attack and defense, for all combat in and out of the interdicted hex.
7.4 Aircraft Retrieval
The Soviet player retrieves all his aircraft units from the map as his last activity in every turn.
7.5 Soviet 8th Spetsnaz Brigade
This unit moves with the following unique advantages:
[8th Spetsnaz Brigade counter illustration (CA, 8SP, 4 4) not reproduced.]
- It pays only one MP per hex entered, and it never pays any river or lake hexside costs.
- It may cross all-sea hexes and hexsides and may even move over enemy units. It may not end its move in any of the above hexes.
- Optional: If the 8th Spetsnaz Brigade conducts an attack against a city hex (with or without other units), award the Soviet player a one-column right shift.
8.0 Movement
Every ground unit in the game has a movement allowance (MA) as determined in 5.2.1.
- MA is the number of movement points (MP) available to the unit to use to move across the hex grid during its movement in each phase.
- Units move from hex to adjacent hex. The unit may not skip hexes.
- A unit pays varied costs to do so depending on the terrain in, and water barriers along the sides of the hexes being entered.
- The movement of each player's ground units takes place only during his own side's action phases; no enemy movement takes place during your own action phases.
- As described in 5.0, all movement in the game takes place one military district or "group of forces" at a time.
8.1 Limits
MP may not be accumulated from turn to turn or phase to phase, nor may they be loaned or given from one unit or stack to another.
- A player may potentially move all, some or none of his mobile units in each of his action phases throughout the game.
- Static units never move once they've been placed on the map (except to be lifted off it and put into the dead pile).
- Units are not required to expend all their MP before stopping.
- The movement of each unit or stack must be completed before that of another is begun.
8.2 Stack Movement
To move together as a stack, units must begin their action phase already stacked together in the same hex. Units are not, however, required to move together simply because they started their action phase in the same hex; such units might be moved together, individually or in smaller sub-stacks.
8.3 Splitting Stacks
When moving a stack, you may halt it temporarily to allow a unit or sub-stack to split off and move away on a separate course.
- The units left behind in the original (or parent) stack may then resume their own movement, even splitting off other units if desired.
- Once you begin moving an entirely different parent stack, or an individual unit that began in a different hex than the currently moving parent stack, you may no longer resume the movement of the earlier stack without your opponent's permission.
8.4 Terrain & Movement
All terrain features on the map are classified into two broad categories: natural and manmade.
- Both those categories are further divided into different types (see below).
- There is never more than one type of natural terrain in any one hex, but more than one type of manmade terrain may exist in the same hex.
8.5 Natural Terrain & Water Barriers
There are five types of natural terrain and hydrographic features on the map:
- Clear
- Forest
- Mountain
- River/lake hexsides
- All-sea hexsides
The effects those various features have on the movement of ground units are described below and are summarized on the Terrain Effects Chart (TEC) printed on the map for quick reference during play.
8.6 Clear Terrain
Clear terrain is the base terrain of the game; it is devoid of any natural features that would enhance defense or slow movement at this level of operations.
- Each clear hex costs all ground units one MP to enter.
- All city hexes are considered clear terrain.
8.7 Forest & Mountains
Each forest or mountain hex costs units two MP to enter.
8.8 River/Lake Hexsides
Rivers and lakes run between hexes (along the hexsides) rather than existing in-hex. All river hexsides may be crossed by paying one extra MP for the crossing. "Extra" means in addition to whatever movement cost is involved for the hex being moved into.
8.9 Manmade Terrain & Movement
Manmade terrain exists in three types:
-
Cities
-
Railroads
-
International boundaries
-
The movement cost for entering railroad hexes is determined by the other terrain in those hexes and any water barriers along their hexsides. Rail lines do not affect movement in any way, there is no "rail" movement in the game.
-
The cost for entering a city hex is one MP for all units.
-
The effect of the international boundary running around the perimeter of Polish national territory is described in 3.4.
8.10 Cumulative Costs
The total MP cost for entering any hex is always the sum of all the applicable terrain and water barrier costs involved.
Example: A unit crossing a river hexside into a forest hex would pay a total of three MP to do so. That is, two MP to enter the forest hex and one extra MP to cross the river hexside.
[Example diagram (3MP) not reproduced.]
9.0 Combat
Attacks take place between adjacent opposing units during an Action Segment when the fight (combat) option is declared.
- Attacking is always voluntary; the mere fact of enemy unit adjacency does not necessitate your units' launch attacks against those adjacent enemy units.
- Both players are always free to attack or not, as each chooses on a case by case basis, in each turn throughout the game.
- The player who is conducting the action is considered the attacker, and the other player is considered the defender, no matter the general situation across the map.
- Just as with movement, combat is conducted on a military district or group of forces basis (based on the chit drawn) one at a time, throughout the turn.
Important: As explained in 5.2, it is impossible for a unit of the same military district or group of forces to both attack and move during the same turn (see 5.2.4 for exception).
Note: Advance-after-combat is not considered normal movement (9.19).
9.1 Multiple Defenders in One Hex
If there are two or more enemy units in a hex being attacked by your units, you may only attack that stack as if it were one combined defending unit.
9.2 Multi-Hex Attacks
An enemy occupied hex may be attacked in one battle by as many of your units as you can bring to bear from one, some or all the surrounding hexes; however, no more than one hex may ever be the object of any one attack.
Example: A Polish unit cannot attack into both enemy occupied hexes in one attack. But the two Soviet units may attack the Polish unit.
9.3 Indivisibility of Units
[Indivisibility example diagram (NO-BA and 6G units and Polish 1523 unit) not reproduced.]
- No single attacking unit may have its attack factor divided and applied to more than one battle.
- No defending unit may have part of its defense factor attacked by one or a few attackers while another part is attacked by others.
- An attacking unit may not attack more than once per combat action phase.
- No defending unit may be attacked more than once per combat action phase.
Important: Over the course of a full turn's action phases, any given hex or unit may potentially be attacked once in each enemy combat action phase.
9.4 Attack Sequencing
There's no artificial limit on the number of attacks each player may resolve when conducting a combat action within an Action Segment.
- The attacker need not declare all his attacks beforehand.
- He may resolve them in any order he wishes.
- The resolution of one must be completed before that of the next is begun.
- The units of one attacking military district or group of forces are not limited to attacking the units of just one opposing military district or group of forces. Any one district's or group of force's attacks may be apportioned throughout the opposing side's units as proximity permits and the attacking player chooses.
9.5 Stacks Attacking
It's not necessary for all the units you have stacked in each hex to participate in the same attack.
- Some of the units in a stack might attack into one hex while others attack into some other hex or simply do not attack at all.
- A defending unit cannot refuse combat; all units in an attacked hex must participate in its defense.
Example: Each Polish unit in the stack may attack one of the two adjacent Soviet units.
9.6 Combat Procedure
[Combat procedure diagram (1134 and NO, NO-BA and IG units) not reproduced.]
Normally the attacking player should strive to have several times more attack factors involved in a battle than the defender has defense factors. Such battles are called "high odds" attacks. To resolve such fights, the attacking player begins by calculating his "odds" by following the below procedure.
- Add together the attack factors of all the attacking units involved in the battle.
- Add up the defense factors of the enemy units defending in the battle.
- Divide the defender-total into the attacker-total and round down any remainder and set the "1" on the right side of that result.
Example: If 26 attack factors attack 7 defense factors, the situation yields an odds ratio of 3:1 ("three to one"). That is, 27÷7=3.71, which rounds down to 3. To turn that "3" into a ratio, you must set a "1" next to it on the right. Thus "3" becomes "3:1," which corresponds to a column-heading on the Combat Results Table (CRT) printed on the map sheet.
9.7 Poor Odds Attacks
Battles in which the attacking force has fewer combat factors than the defender are called "poor odds attacks." Procedures in such situations are modified as follows:
- Add together the attack factors of all the attacking units involved in the battle.
- Add up the defense factors of the enemy units defending in the battle.
- Divide the defender's total by the attacker's, round up all remainders, and set the "1" on the left side of that result.
Example: If a force with 5 attack factors is attacking a force with 11 defense factors, it is a poor odds attack. In that case, divide 11 by 5 (11÷5=2.2), and round up (2.2 becomes 3); then set a "1" on the left of that "3," yielding odds of 1:3 ("one to three").
9.8 CRT Odds Limits
The column headings on the CRT range from 1:3 to 7:1. Final odds greater than 7:1 always receive automatic "0/6" results. Odds less than 1:3 always receive automatic "2/0" results.
9.9 Column Shifts
Combat odds may be modified by the terrain in the defender's hex and around its perimeter, as well as by other factors described below. All applicable column shifts are cumulative in their effects. That is, in every battle, all applicable shifts are applied to get one final left or right shift. Leftward shifts favor the defender; rightward shifts favor the attacker.
Example: In the below diagram the WP player receives the concentric attack shift 1R, and the Polish player would receive the river bonus 1L. Since all shifts are cumulative, there would not be any shifts awarded for this combat. would not receive any combat shifts. Thus, the attack would be conducted on the 1:1 column.
[Column shift diagram not reproduced.]
9.10 Clear Terrain
Units defending in clear terrain hexes devoid of all other terrain features derive no benefit to their defense.
[Clear terrain diagram (Narew river, BA and 1134 units) not reproduced.]
9.11 Mountains
Shift the odds one column left (1L) if the defender(s) are in a mountain hex.
Important: Though mountains and forests have the same movement cost, the latter have no combat effect.
9.12 River & Lake Hexsides
Shift the odds one column left (1L) if all attackers are coming across river and/or lake hexsides. This shift is in addition to all in-hex terrain effects.
Example: If both WP units conduct an attack against the 8th Polish Division, the WP player would not receive the 1L penalty since both units are not attacking across the river.
9.13 Cities
- If the defenders are in a city hex shift the odds two columns leftward (2L).
[City combat diagram (BA, 1134 and 3G units) not reproduced.]
TEC Errata: City Line should read: Shift Odds 2 Left. No concentric bonus is possible.
- The concentric attack bonus (9.15) cannot be used when attacking into a city.
9.14 High Intensity Attack
Whenever the Soviet player attacks into a city hex, he may, provided there is at least one tank or artillery division in his attacking force, declare a "high intensity attack."
- Each such attack increases the defender's losses by one step.
- After determination of the defender's step losses, the Soviet player must make a SAP deduction equal to the total of Polish step losses the Polish side suffered.
Example: A high intensity attack achieves a result of 0/3, but the Polish player only has one step in the defending hex. The Soviet player would only deduct 1 SAP.
9.15 Concentric Attack
If a defending hex (not a city hex) is attacked by units in opposite hexes, or by units from three surrounding hexes with one hex between each attacker-occupied hex, or by units from more than three hexes, that attack receives the "concentric attack" right odds shift (1R).
Example: All three of the illustrations are examples of concentric attacks. The concentric bonus is always one right (1R).
[Three concentric attack diagrams not reproduced.]
9.16 Final Combat Resolution
After the Combat Results Table odds column, has been determined and all applicable odds shifts have been applied, the attacker rolls a die and cross-indexes that result within that odds ratio column to get a "combat result."
| Odds> | 1:3 | 1:2 | 1:1 | 2:1 | 3:1 | 4:1 | 5:1 |
|---|---|---|---|---|---|---|---|
| 1 | 1/1 | 1/1 | 0/2 | 0/3 | 0/4 | 0/5 | 0/6 |
| 2 | 2/0 | 1/1 | 1/1 | 0/2 | 0/3 | 0/4 | 0/5 |
| 3 | 2/0 | 2/1 | 2/1 | 1/1 | 0/2 | 0/3 | 0/4 |
[The Combat Results Table is reproduced as printed in the rules insert. The insert's table shows odds columns 1:3 through 5:1; 9.8 refers to a range to 7:1 and the map's CRT was not checked.]
Example: A result of "6" rolled for an attack made at 3:1 odds yields a combat result of "2/1."
9.17 Combat Results
Combat results are given in terms of steps lost by the involved units of one or both sides.
- The number printed to the left of each result's slash applies to the involved attacking units.
- The number printed to the right of the slash applies to the involved defending units.
Example: A combat result of "1/2" would mean the involved attacking force must lose a total of one step, while the involved defending force must lose a total of two steps. Notice the numbers in a combat result represent the grand total of step losses that must be suffered by the involved units of each side; they do not represent the number of steps every involved unit must suffer. In each battle, the defender must always completely absorb his combat result before the attacker absorbs his. There is never any carry over of a combat result from one battle into any other battle or phase. Any combat losses more than the step strength of the units involved are ignored.
9.18 Apportioning Step Losses
Both players are free to apportion his own side's step losses among his involved attacking or defending units as he sees fit.
9.19 Advance-After-Combat
At the end of every attack, if the defender's hex is empty of all units, the victorious attacking units may advance-after-combat into that hex.
- Stacking limitations must be observed.
- Advances are not part of normal movement; they do not cost MP.
- Advancing units must observe normal terrain prohibitions.
- Advance after combat is an option; it's never mandatory.
- The decision to advance must be made immediately after the battle is resolved and before that of another is begun.
- It is not necessary for advancing attackers to stack-full the newly won hex; the victorious player may send just one or a few units.
- There is never any defender advance-after-combat; victorious defenders and static units simply hold in place.
9.20 Polish Militia
Polish militia never attacks; it only defends.
10.0 Optional Rules
The below rules are optional and may be used by agreement of both players.
10.1 Additional Combat Shifts
To show the additional effects of defending in forest hexes, shift 1 column left when the defender is in a forest hex.
10.2 Soviet Air Superiority & Forest Hexes
On turn two through turn ten, after the turn's MA has been determined (5.2.1 & 5.2.2) but prior to the first action chit pull, the Soviet player places all available airpower markers atop any (mobile or static) Polish unit(s).
- The markers remain on the map until the end of the current game turn, unless all Polish units in the same hex are eliminated.
- The maximum number of airpower markers that may be placed in any one hex is equal to the number of Polish units in the hex.
- A Polish unit or stack that has at least one airpower marker in the same hex, is "interdicted."
- When placing airpower markers in forest hexes, each airpower marker is equal to one-half (i.e., it takes two airpower markers to equal one marker).
Important: If Polish units move out of the forest hex, the amount of MP deducted is still based on two Soviet airpower markers counting as one, however if the Soviet Player attacks those units in his next action, the Soviet airpower markers are totaled normally if those Polish units are not in a forest hex.