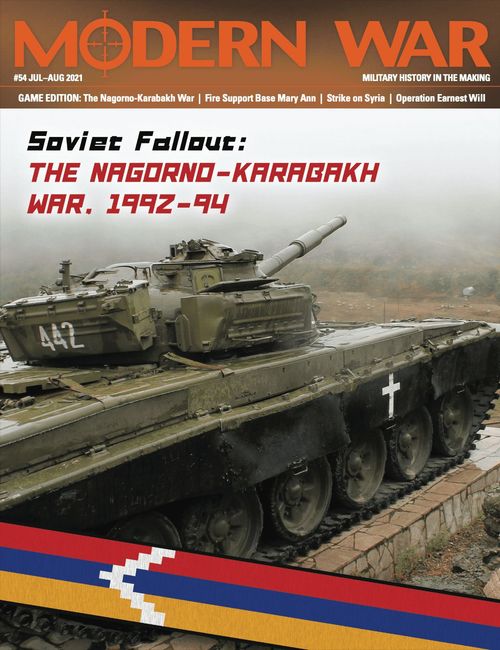
Soviet Fallout: The Nagorno-Karabakh War – 1992-1994
Soviet Fallout: The Nagorno-Karabakh War – 1992-1994 Rulebook
Table of Contents
Table of Contents
1.0 Introduction
The Nagorno-Karabakh War: 1992–1994 is a simulation of the war between Azerbaijan and the breakaway province (oblast) of Nagorno-Karabakh, inhabited by an Armenian majority. After the first ethnic clashes between Armenians and Azeri, during the death throes of the Soviet Union, Nagorno-Karabakh declared independence from Azerbaijan. The Azeri launched an ethnic cleansing campaign. Faced with annihilation, the Armenians resisted and fought back, conquering a large portion of Nagorno-Karabakh and parts of eastern Azerbaijan, a situation which has lasted until 2019.
The Nagorno-Karabakh War is a two-player game between the Armenian (AR) player and the Azeri (AZ) player. The AR player must fight a numerically superior foe, but he has the advantage of interior lines and a unified command, whereas the AZ player has a greater supply of former Red Army weapons and ammunition but must fight not only the Armenians but also political infighting and low morale. In this game, the enemy population is not the victim of collateral damage: the enemy population is the target, so conquering towns and villages and practicing ethnic cleansing is a key aspect of the game.
Designer's Note: This game does not condone nor endorse the concept of ethnic cleansing. The rules are designed to demonstrate the affect of racially motivated warfare and its unpardonable consequences to the civilian population.
1.1 Scale
Each hexagon encompasses about 10 kilometers (6.2 miles). Units of maneuver are battalions. There is a total of nine game turns (GT) each representing three months.
2.0 Components
The components to a complete game include these rules, one 22"× 34" map and one counter sheet containing 176 5⁄8-inch counters. Players will need to provide themselves with one six-sided die (1d6) to resolve combat and other probabilistic events during play.
2.1 Map
The game map illustrates the militarily significant terrain found in and around the Nagorno-Karabakh Oblast. Printed over the map is a hexagonal (hex) grid used to regulate the placement and movement of units across it. A unit is always in only one hex at any one time. Every hex on the map has a unique four-digit identification number printed within it. They help find exact locations and allow for the recording of unit positions if players take a game down before complete.
Errata: The Azeri Political Table, first sentence should read resolving, not solving.
Important: Towns are color-coded to signify the majority population of that town.
Example: Getashen (0622) has an Armenian majority population.
Note: The map shows towns with the town names that each faction (Armenian versus Azeri) used. This has no effect on play.
2.2 Unit Counters
Most of the counters represent combat formations. Others are provided as informational markers and memory aids. Each combat unit counter displays several pieces of information: nationality, specific historic identification, unit type, combat strength, and reinforcement or other special status.
The counter diagram labels are: Unit Type Symbol, Unit Size Symbol, Unit ID, Parent Unit ID, Steps, Reinforcement Indicator, Attack Factor, Defense Factor, and Movement Allowance.
2.3 Unit Size
Unit sizes indicate the approximate functional size of combat units.
- II: Battalion
- II: Battalion-sized Battle Group
- III: Regiment
2.4 Nationality
Armenian and Nagorno-Karabakh Units: Unless otherwise noted, whenever the game refers to Armenian units, this includes both Armenian and People's Army of Artsakh (aka Nagorno-Karabakh) units.
- People's Army of Artsakh (Nagorno-Karabakh units): Light Brown.
- Regular Armenian Army: Dark Brown.
Azeri Units: Unless otherwise noted, whenever the game refers to Azeri units, this includes both Azeri regulars and Afghan mercenaries and territorial/militia units.
- Azeri Territorial Battalions (Militia): Light Green.
- Regular Azerbaijan Army & Afghan mercenaries (MU): Dark Green.
Other Units:
- Former Soviet Units: Red.
2.4.1 Unit Abbreviations
The unit identifications are in the upper left-hand corner of each game piece. This information has no bearing on game play and is for historical interest purposes:
Armenian and Nagorno Karabakh Units
- Arabo: Nom de guerre of Arakel Avedisian (1863–1893) historical 19th century Armenian leader, killed in combat against Kurdish forces.
- Ashot: Name of medieval Armenian king, Ashot I (9th century CE).
- ASOR: Askeranskii Defensive Region.
- Davits: Davit or David of Sassoun, the main hero of Armenia's national epic, Daredevils of Sassoun, who drove Arab invaders out of Armenia.
- SDF: Self Defense Force.
- SOR: Shusha Defensive Region.
- Shusha: Name of town where personnel originated.
- Tigran: Tigran the Great, king of Armenia (140–55 BC).
Azeri Units
- DR: Dzhebrailskii Regiment.
- MU: Mujahedin (Afghan mercenaries).
- OMOH: Police forces.
Post-Soviet Units
- MVD: Interior Ministry Troops.
2.5 Unit Types
- Militia
- Infantry
- Mechanized
- Police/Border Guards
2.6 Markers
Support Markers
Refugee Markers (there are two Azeri and two Armenian)
Replacement Point Marker (one for each side)
Game Turn Marker (reverse printed with opposing side)
Other Markers
- Ethnic Cleansing (reverse side: Resettlement)
- No Azerbaijan Attacks Marker
- Independent Talish-Mugan Republic Marker
3.0 Set-Up & Hex Control
Deploy all at start AR and AZ units as per 3.2. All other units enter play as reinforcements during later game turns.
3.1 Hex Control
Keeping track of who controls each hex is important to trace supply and other game functions.
Important: Majority population does not affect control.
- Azeri units cannot enter the Republic of Armenia hexes under any circumstances (12.0). They may only operate in Azerbaijan and Nagorno-Karabakh territory.
- The side that begins the game with a unit in a town and/or village within the Nagorno-Karabakh Oblast controls that town until occupied by an enemy unit or ethnic cleansing has taken place (10.1). Neither side controls the towns and villages that begin the game with no units from either side present in the hex.
- The side that last had a unit in a cleansed hex (10.1) controls that hex.
3.2 Set Up
Important: Stacking limits apply in all the below cases.
Post-Soviet Chaos Units: Place all Soviet ground units and support markers into one opaque container. This is the Soviet Chaos Pool (6.0).
Azeri Player: The Azeri player sets up first.
-
Place all Azeri militia units in an opaque container. Randomly pick 12 units, one unit at a time, and place them in any Azeri majority village hex (see Terrain Key) in the Nagorno-Karabakh Oblast (stacking limits apply (5.0)). The AZ player must declare the village hex he is placing the unit in prior to picking the unit.
-
Deploy all Azeri regular army units not marked with a "R" or the three Afghan mercenary battalions (MU in upper left corner of counter).
- Deploy units in or adjacent to the following towns or villages: Ganja (0222), Goranboy (0419), Agdam (1218), Kodjali (1219), Shushi (1520), Lachin (1621).
Important: If any of the locations listed above are adjacent to an Armenian village or town hex, Azeri units cannot be set up in that adjacent hex.
Example: An Azeri unit could not set up adjacent to Kodjali (1219) in hex Khachen (1220).
-
Place the following support markers in the Azeri Support Markers Available Display: Artillery: 2; Armor: 2.
-
Set aside all units and support markers marked with an "R", the three Afghan mercenary units (MU), and all remaining Azeri militia units. The player may recruit these units as reinforcements during later GTs.
Armenian Player: The Armenian player sets up second.
-
Deploy all Nagorno-Karabakh units (light brown) not marked with an "R" in any Armenian village in the Nagorno-Karabakh Oblast, and/or in Stepanakert (1419), Martuni (1416), or Hadrut (1817).
-
Place all Armenian regular units in an opaque container and randomly pick six units. Deploy these units to any hexes in Armenia, up to the stacking limits (5.0). Place units not picked in the Armenian Recruit Display.
-
Place the following Armenian regular support markers in the Armenian Support Markers Available Display: Artillery: 1; Armor: 1; Air: 1.
-
Place the following Nagorno-Karabakh support markers in the Armenian Support Markers Available Display: Artillery: 1.
-
Set aside all Nagorno-Karabakh units and support markers and the one Armenian regular support marker marked with an "R". The player can recruit these units as reinforcements during later GTs.
Markers & Support Counters
- Place the game turn marker on the GTRT in the GT 1 Display.
- Place the AR RPs on the General Data Track (GDT) in the 2 Display.
- Place the AZ RPs on the General Data Track (GDT) in the 4 Display.
- Place the AR refugees ×1 and ×10 markers on the General Data Track (GDT) in the 0 Display.
- Place the AZ refugees ×1 and ×10 markers on the General Data Track (GDT) in the 0 Display.
- Set aside all remaining markers for later use.
4.0 Sequence of Play
Each turn is composed of two player turns (Armenian (AR) and Azeri (AZ)). Each player turn consists of phases. Follow the sequence in the order given below.
I. Joint Resource & Random Event Phase
- Soviet Chaos: AZ & AR GT 1–3 only (6.0)
- Random Event (AZ) (7.0)
- Replacement Determination (8.0) a) Resettlement (10.4)
II. AR Player Turn
- Reinforcement Phase (9.2)
- Movement Phase (12.0) a) Check for supply (14.0) b) Ethnic Cleansing (10.1)
- Combat Phase (13.0) a) Check for supply (14.0) b) Ethnic Cleansing (10.1) c) Support markers (13.1) d) Check AR regulars (13.4)
III. AZ Player Turn
- Reinforcement Phase (9.3)
- Movement Phase (12.0)
- Combat Phase (13.0) a) Check for Political Infighting (13.3) b) Check 709th Brigade participation (13.2)
IV. End of Turn Phase
- Withdrawal of Soviet ground & CS units
- AZ checks for military reforms (GT 5–7) (8.2.1)
- AZ checks for automatic victory (15.2)
- Last GT: determine winner (15.0)
- Return both sides used support markers (to the Support Markers Available Displays)
5.0 Stacking
Having more than one friendly unit in a hex at the same time is stacking. Friendly units are those units that belong to the same side or nationality (2.4).
Exception: Either side can hire Former Soviet units. They may stack with all units of the side that hired them.
- Stacking limits vary by terrain type and are listed on the TEC.
- A hex is overstacked if the hex contains more units than allowed for the hex's terrain as listed on the TEC.
- Stacking limits are in terms of units, not unit size. All combat units in the game count as one unit.
- Stacking limits apply for all units of both sides at the end of each Reinforcement, Movement, and Combat Phase.
- A friendly unit or stack may never enter a hex containing an enemy unit or stack.
- Friendly units may move through hexes occupied by other friendly units at no additional movement point (MP) cost.
- There is no limit on the number of friendly units that may pass through a single hex or cross a single hexside in one Movement Phase.
- If, however, at the end of any friendly or enemy Reinforcement, Movement, or Combat Phase, a hex is overstacked, the owning player must eliminate excess units.
5.1 Free Stacking Units
All markers including all support markers do not have a stacking value. Players may add markers to any hex if within the rules for their use.
5.2 Stack Movement
To move as a stack, units must begin their movement already stacked. There is no requirement for units to move together because they started the Movement Phase in the same hex; in such situations, those units may move together, individually, or in smaller sub-stacks.
5.3 Splitting Stacks
A moving stack may halt temporarily to allow a unit or sub-stack to split off and move away on a separate course. The units left behind in the original stack may then resume their own movement, even splitting off other units and sub-stacks. Once a unit or stack starts moving, the player must complete the unit/stack's movement prior to beginning the move of another unit/stack.
5.4 Different Movement Allowances in a Stack
If units with different movement allowances (MA) are traveling together in a stack, the stack must use the MA of the slowest unit in the stack. Players may drop off slower units.
5.5 Fog of War
Players may not look beneath the top unit of enemy stacks at any time. Players only reveal units when computing combat odds ratios. After both players reveal their units, the attacking player may not call off an attack.
6.0 Soviet Chaos
These units represent cash-starved former Soviet forces still in Armenia, Azerbaijan, and neighboring areas that were available for hire by the combatants to support their fledging militias.
- During the Soviet Chaos Segment, each player consults the Post-Soviet Chaos Table. The AZ player and then the AR player each roll 1d6 to determine the number of Soviet ground and support markers they receive for the current GT.
Important: Only use this segment on GT 1 through GT 3.
- Randomly pick support and ground units from a pool. The AZ player picks one counter, then the AR player picks one counter. Both players continue to alternate picking one counter until receiving the number of counters allowed, or the pool is empty.
- The AZ player, then the AR player deploys the units picked. a) Deploy Soviet units in any hex containing friendly ground units. Stacking limits apply. If a player cannot place Soviet units due to stacking limitations, return those units to the pool. b) Place support markers in the Support Available Display. If the units received are support units (be it armor, helo, or air), these are placed in the respective support Displays.
Example: It is the Soviet Chaos Segment of GT 2. Both sides consult the Post-Soviet Chaos Table.
- The AZ player rolls 1d6. The DR result is 4, so the AZ player gets two Former Soviet units.
- Then the AR player rolls 1d6. The DR result is 5, so the AR player gets three Former Soviet units.
- The AZ and AR players then alternate randomly picking Former Soviet units from the Former Soviet Units' Pool (e.g., the AZ player pulls one, then the AR pulls one, then the AZ pulls one, then the AR player pulls his two last units).
- The AZ player deploys the two Former Soviet units received in any hex containing friendly units.
- The AR player then deploys the three Former Soviet units received in any hex containing friendly units.
Post-Soviet Chaos Table (turns 1–3)
| DR | Former Soviet units |
|---|---|
| 1 | – |
| 2 | 1 |
| 3 | 1 |
| 4 | 2 |
| 5 | 3 |
| 6 | 3 |
1, 2, 3: Number of former Soviet support/ground units that are picked at random from the Former Soviet Support Units' Pool.
- If both players have Soviet units involved in a combat, each player rolls 1d6. a) The DR takes place after all support markers have been committed. b) The player with the lower DR removes all his Soviet units and Soviet support markers involved in the combat from the map. Return them to the Soviet Pool. c) The player with the higher total may continue to use friendly Soviet units and support markers as previously allocated. d) If the DR is a tie, reroll.
- At the end of GT 1 and 2, return all Soviet ground units and support markers to the Soviet Pool.
- At the end of GT 3, remove all Soviet ground units and support markers from the game.
6.1 Restrictions & Use
Former Soviet units cannot operate alone. They must always stack with the forces hiring them (Armenian or Azeri).
Important: After an attack or defense, if Soviet units are the only units in the hex, return those units to the Former Soviet Unit Pool.
- Soviet support units cannot bombard towns or villages. They can normally support any attack or defense consisting of at least one Soviet ground unit.
- Soviet ground units cannot attack alone; however, if stacked with other units, may participate in any attack normally. If a player designates units in a stack to attack different defending hexes, at least one non-Soviet ground unit must be allocated to that attack.
7.0 Random Events
During the Random Events Segment of each GT, the AZ player consults the Random Events Table (on the map) and rolls 1d6. Implement the result immediately. If a No Event is the result, no event occurs. Do not reroll this GT.
Exception: Skip this segment on GT 1.
- Incident in Nakhichevan: Clashes in the southern Azeri enclave of Nakhichevan.
- Effects: The AZ player selects (his choice) any two regular Armenian units and removes them from the map. Place the units on the GTRT in the next GT Display. The units are available for recruitment that GT.
- Frequency: This can occur multiple times in each game.
- Independent Talish-Mugan Republic: Col. Gumbatov proclaims an independent Talish-Mugan Republic in Southern Azerbaijan.
- Effects: The AR player selects any five Azeri regular units (any type) from the map and one armor support marker from the available pool. If there are not enough units/markers, ignore any remaining picks. Place the units on the GTRT in the next GT Display. The units are available for recruitment that GT.
- Frequency: This event may only happen once per game. Place the "Indep. T-H. Repl." marker on the GTRT in the current GT Display. If rolled again, reroll until obtaining a different result.
- Turkish Support: The Azeri forces get support from their Turkish cousins.
- Effects: Add +1 RP to the Azeri RP total.
- Frequency: This can occur multiple times in each game.
- Armenian Diaspora: The Armenian diaspora in Europe and the United States sends funds and volunteers.
- Effects: Add +1 RP to the Armenian total for the current GT.
- Frequency: This can occur multiple times in each game.
- Azerbaijan Coup: The AR player rolls 1d6. If the AZ refugee level (10.2) is 9 or more, add one to the DR. On a DR of 5 or greater, there is a military coup in Baku.
8.0 Replacement Points
Both sides receive replacement points (RP) during the Replacement Determination Segment. Players use RP to purchase ground units, rebuild reduced ground units, and purchase support markers. Each side determines the number of RP available as outlined below. Players may accumulate RPs from turn to turn.
Important: Players may not purchase more units than those available in the counter sheet.
8.1 Armenian Replacement Points
The player may use AR RP to purchase new units or replenish any Armenia regular army units and Nagorno-Karabakh (NK) units, unless specifically restricted by the below rules.
- Beginning GT 2, the AR player receives three RP per GT, plus any RP garnered from a random event this GT.
- The AR player can spend no more than one-half (round down) of the available RP to rebuild/replenish NK units unless Stepanakert (1419) is AR controlled and can trace supply to any town in the Republic of Armenia.
- Expend one RP for each step of AR/NK ground unit purchased or replenished and one RP for each support marker purchased.
8.1.1 Unit Upgrades
The player may remove and upgrade any Nagorno-Karabakh militia and infantry battalions on the map or that are in the Recruit Display to NK mechanized battalions.
Important: Instead of upgrading units, the player may purchase and bring in mechanized units as reinforcements; however, at the normal RP cost.
- The player may upgrade a maximum of three units each GT.
- Do not expend RP for this conversion.
- Upgrades take place at the beginning of the AR Reinforcement Phase, prior to deploying any units to the map. a) The AR player may select an NK unit from the Recruit Display or from any hex on the map (the unit may be in an enemy zone of control). Permanently remove the selected units. b) Units selected from the map must be in supply. c) For each unit removed, the AR player may select one NK mechanized battalion and place it on the GTRT in the next GT Display. d) During that GT's Replacement Determination Segment, place the unit in the Recruit Display, the player may then deploy it on the map during the AR Reinforcement Phase.
Example: It is the AR Reinforcement Phase of GT 3. The AR player picks two SDF militia units and one battalion (Tigran) on map and removes them from play. At the same time, the AR player picks 1, 2, and 3 mechanized infantry battalions from the AR Recruit Display and places them in the GT 4 Display on the GTRT. These upgrades cost no RPs. (The player may upgrade a maximum of three units each GT.) The three mech battalions can deploy on the map during the AR Reinforcement Phase of GT 4.
The AR player can spend RPs to purchase additional units available in the Armenian Recruit Display. The AR player uses three RPs to recruit two more mech infantry battalions and one artillery support marker during the AR Reinforcement Phase of GT 3.
8.2 Azeri Replacement Points
AZ RP are used to purchase new or replenish any Azeri Territorial (Militia), Regular Azerbaijan Army and Afghan mercenary (MU) units.
- Beginning GT 2, the AZ player receives five RP per GT, plus any RPs garnered from a random event this GT. Military reforms in Azerbaijan may determine the arrival of extra RPs.
- The cost in RP to purchase a unit varies depending on the unit type purchased.
Azeri Militia: Expend 0.5 RP per unit. The player purchases units in groups of two (ergo, the AZ player must pay one RP). If there is only one militia unit remaining in the pool, the unit would cost one RP. When purchasing Azeri militia, randomly pick the unit. When eliminated, return the militia unit to the draw pool.
Afghan Mercenaries (MU): These are elite units recruited in Afghanistan. The player may purchase or replenish them by expending two RP per step.
Azeri Regular Battalions: Players can purchase or replenish them by expending one RP per step.
Azeri Support Markers: Players can purchase them by expending one RP.
8.2.1 Azeri Military Reforms
After the repeated defeats in the first years of the war (1991–1992), the Azeri military implemented a series of reforms and called a general mobilization. These were partially successful and resulted in a series of counteroffensives that regained a part of the ground lost to the Armenians. However, the recruits sent to the front were poorly motivated and trained.
- During the End of Turn Phase on GT 5 through 7 the AZ player checks to determine if military reforms take place.
- The AZ player rolls 1d6. Apply the below modifiers: +1: If the AZ refugee level is 15 or more. +1: If one or more of the following towns: Agdam (1218), Varanda (1616) or Shushi (1520), are under AR control.
- If the result is 4–6: reforms occur. Reforms only occur once. When they have occurred do not check for reforms again.
- The effect of reforms is as follows: a) The AZ player receives four additional RPs. They are available for use during the next GT. b) The AZ player receives a +3 DRM on the Azeri Political Table during the next GT. c) The AZ player receives one Afghan mercenary unit at no cost. If there are no Afghan mercenary units available to purchase, the AZ player receives an additional two RP. Place the unit in the Recruit Display. The RP would be available the next GT.
Important: The above effects only occur one time.
9.0 Reinforcements
Reinforcements are units purchased and brought into the game after GT 1.
Important: Players can only place reinforcements on the map in a hex that would allow them to be in supply. Reduced units rebuilt on the map must be in supply when rebuilt.
- Deploy reinforcements during the Reinforcement Phase of each player's turn.
- Units having an "R" to the right of the counter are set up in their respective pools at the beginning of the game. Beginning with GT 2, players can recruit reinforcements and eliminated units by spending RP (8.0).
- Players may purchase two-step units at their reduced level (i.e., one step).
9.1 Rebuilding Eliminated Units
Eliminated AR and AZ units may return to play (rebuilt).
- Players may purchase eliminated units in the same manner as new units (9.0). There is no functional difference.
- Players may restore reduced in-supply two-step units on the map to full-strength status by expending the number of RP listed in 8.0, paying the cost for one step.
9.2 Armenian Reinforcements
Regular Armenia Army: The player may place reinforcements in any town in Armenia. They may move into Nagorno-Karabakh and Azerbaijan territory.
Nagorno-Karabakh Units: The player may place reinforcements in any town or village controlled by the AR player in the Nagorno-Karabakh Oblasts (3.1). They may move into Armenia and Azerbaijan territory.
Support Units (all): The player places support units in the Support Available Display.
9.3 Azeri Reinforcements
Regular Azerbaijan Army & Afghan Mercenaries: The player may place reinforcements in any Azeri-controlled town or village in Azerbaijan.
Important: Do not place them in Nagorno-Karabakh Oblast hexes.
Azeri Territorial Battalions (Militia): The player may place these units in any Azeri-controlled town or village in the Nagorno-Karabakh Oblast.
10.0 Armenian & Azeri Civilians
In this game, the enemy population is not only the victim of collateral damage; the enemy population is the objective. Killing or forcing them to flee allows for an easier conquest and control of the territory and makes sure that units operate in a friendly environment. It can also destabilize the enemy country's political and economic situation. Players reduce populations by bombardment or simply by forcing them to flee after physically occupying the hex. All villages and towns on the map have either an AZ or AR majority.
- a) AR majority villages have a red village symbol. AR majority towns have their name printed in red.
- b) AZ majority villages have a green village symbol. AZ majority towns have their name printed in black.
Example: Martuni (hex 1416) is an AR majority town, whereas Agdam (hex 1218) is an AZ majority town.
10.1 Ethnic Cleansing
Conduct ethnic cleansing during the Movement Phase and during the Combat Phase when a unit advances after combat.
Important: Units using march movement may not conduct ethnic cleansing (12.2).
- If a unit from one side enters a town or village hex that has a majority population favoring the other side and the hex does not already have a cleansing marker on it, the entering player may pay 4 MP to ethnically cleanse the village or town (10.0). If the player does not expend the required MP, ethnic cleansing does not take place.
Example: A village with a green symbol has an Azeri majority population.
- Any time that a unit advances after combat into a town or village hex that has a majority favoring the other side and the hex does not have an ethnic cleansing marker on it, that hex automatically suffers ethnic cleansing if the advancing unit ends its advance in that hex.
- When ethnic cleansing occurs, the active player places an appropriate ethnic cleansing marker in the hex (if it is an AZ majority hex, place a green marker; if it is AR, place a brown marker); and, a) If the hex contains a village, add one to the opposing side's refugee level. b) If the hex contains a town, add two to the opposing side's refugee level.
Example: The Azeri 4/709 mechanized infantry battalion (Movement Allowance 14) begins its Movement Phase at hex 0421. The unit spends 3 MFs and moves to hex 0622, which contains an Armenian village. Practicing ethnic cleansing costs an additional 4 MFs, for a total of 7. The 4/709 keeps moving and enters hex 0621, which contains another Armenian village, thus spending 2 MF (rough terrain), and +4 (ethnic cleansing). 4/709 has spent so far 7+6= 13 MFs.
10.2 Destabilization
The number of refugees (refugee level) each side has may destabilize both countries. Players track the current refugee level on the General Data Track.
- During the Replacement Determination Segment, if a cleansed town or village has been resettled, the controlling player conducts the following: a) Reduce that side's refugee level by one. b) Flip the ethnic cleansing marker to the resettled side.
- The AR refugee level may destabilize their mother country by causing an Azeri sudden death victory (15.2).
- Each side can only conduct two resettlements each GT.
- The AZ refugee level may help provoke a military coup in Azerbaijan (7.0).
- Resettled hexes can be ethnically cleansed again if they meet the requirements in 10.1, however only add one refugee point to either side's refugee level for both towns and villages.
Example: AZ units enter hex 1521 (Lisagor) which is a majority Armenian village (red dot) and conducts ethnic cleansing, placing a brown AR ethnic cleansing marker in that village. It is a village, so increase the AR refugee level by one.
In a later GT, AR units re-enter hex 1521. If the unit is still in the hex during the next Replacement Determination Segment, the village is resettled. The AR ethnic cleansing marker is flipped to the "resettlement" side. The AR refugee level is reduced by one. (10.4)
10.3 Bombardment
Players may bombard towns and villages that have not suffered ethnic cleansing and have at least one unit from the side that has the majority population present in the town or village hex.
- Conduct bombardment during a friendly Combat Phase after all units have conducted ground combat.
Important: A unit that advanced after combat may conduct bombardment after advancing-after-combat into a hex adjacent to the village or town.
- To conduct a bombardment, the bombarding side must have at least one friendly unit adjacent to the town or village and have at least 2 RP available. He then follows the below procedure.
- The unit claiming adjacency status must be in supply when declaring the bombardment.
Important: Bombardment does not affect ground units.
-
The bombarding player:
- Must have an available artillery or air support marker. Expend the marker (move it to the Support Used Display).
Important: Players may not use Russian support units to bombard enemy population hexes.
- Consult the Bombardment Table (on the map) and roll 1d6.
- Cross reference the DR with the results. a) Add the given number to the other side's refugee level. Do not place an ethnic cleansing marker. b) Expends the number of RP indicated.
Example: During the AZ player turn, the AZ player decides to use one artillery support unit to bombard the AR village of Taghavard (1619). There are AZ units in hex 1620. The AZ player selects one artillery marker and rolls on the Bombardment Table, scoring a five. The AR player adds one to his refugee level, and the AZ player deducts two RPs from his total.
10.4 Resettlement of Refugees
Players may resettle a cleansed town or village hex occupied by a unit friendly to the side with the majority population.
10.5 Other Ethnic Cleansed Effects
- Players may conduct ethnic cleansing and resettlement in each hex any number of times.
- Armenian units may trace supply through an ethnically cleansed Azeri majority village or town and does not require the presence of an Armenian unit.
- Azeri units may trace supply through an ethnically cleansed Armenian majority village or town and does not require the presence of an Azeri unit.
11.0 Zones of Control (ZOC)
The ZOC of a unit and/or a stack is the six hexes surrounding the hex occupied by that unit.
- All non-militia ground units exert a ZOC. Support units do not exert ZOC.
- A ground unit that enters a hex in an enemy zone of control (EZOC) must stop its movement for that Movement Phase.
- A ground unit that begins the Movement Phase in an EZOC may exit the hex by expending one additional MP. The cost is in addition to the cost of entering the next hex.
- A unit cannot move from one hex in an EZOC directly into another hex in an EZOC; however, it could exit an EZOC by moving into a hex not in an EZOC and then later during its movement enter an EZOC.
12.0 Movement
Each unit has a movement allowance (MA) printed on it. The MA of a unit is the number of movement points (MP) that unit may expend in any one given Movement Phase.
Important: Prior to moving each unit or stack, the owning player must determine the supply status of the unit. Units found to be out of supply halve their MA (round down but never below one).
- Players move units tracing a path of contiguous hexes through the hex grid until expending all MPs or the player decides to cease moving the unit.
- As each unit enters a hex it pays one or more MP from its MA. Consult the Terrain Effects Chart (TEC) for further details.
- Players may only move units during a friendly Movement Phase or due to a combat result during the Combat Phase.
- Players may not accumulate unused MP from turn to turn, nor may they be in any way transferred from one unit to another.
- All AR and NK units are free to enter all hexes of the map.
- Azeri units may not enter Armenian territory. They may only operate in Azerbaijan and Nagorno-Karabakh territory.
- All units may move at least one hex per Movement Phase of their side. However, units may never enter prohibited hexes.
- See 11.0 for the effects of EZOC on movement.
12.1 Terrain Effects
To enter any given hex a unit must spend the number of MP designated by the TEC for the kind of terrain in it.
Multiple Terrain: If there is more than one terrain type in a hex, use the highest single movement cost from among all the terrain involved.
Exception: If there is a road or bridge, use the road or bridge movement rate regardless of any other terrain in that hex, as described below.
- Roads: A unit that moves from one road directly into an adjacent road hex through a hex side traversed by that road expends one MP per hex entered.
- River Hexsides: Units pay one additional MP to cross a river hexside. That cost is in addition to the cost of entering the next hex.
- Bridges: A river hexside crossed by a road or railroad line is a bridge hex. Bridges negate the effects of rivers and lakes on movement for units crossing such hexsides.
12.2 March Movement
If a unit begins its Movement Phase not adjacent to an enemy unit and does not enter a hex adjacent to an enemy unit during its movement, it may triple its MA. Units using march movement may also use road movement (12.1). They may not conduct ethnic cleansing.
Important: The adjacent unit does not have to be a unit with a ZOC (11.0).
12.3 Winter Turns
Double the cost of entering a non-pass mountain hex during winter GTs (January–March).
Exception: Former Soviet unit support markers (helicopters, artillery, or armor) may only provide support against enemy stacks that do not contain former Soviet ground units.
13.0 Combat
Combat takes place between opposing adjacent units during the Combat Phase of both player's turns. There is no attack requirement for a unit adjacent to an enemy unit.
Important: Armor support markers affect combat by adding combat factors to the side they support, while other support markers cause combat column shifts for attacks/defense.
- A player may attack an enemy occupied hex using any/all units in adjacent hexes.
- No more than one hex may be the object of a single attack.
- No single attacking unit may have its attack factor divided and used in more than one battle.
- No defending unit may have part of its defense factor attacked while another force attacks another part of that defense factor.
- No attacking unit may attack more than once per Combat Phase.
- A player may only attack an enemy unit once per Combat Phase.
- No defending unit may decline combat.
- There is no limit on the number of attacks each player may make during his Combat Phases.
- He need not declare all his attacks beforehand, and he may resolve them in any order he wishes. The player must resolve one combat prior to beginning the next.
- Stacked units need not participate in the same attack. Units might attack into one hex, while others attack other hexes, or do not attack at all.
13.1 Support Markers
The AZ and AR players may use air, tank, helicopter, and artillery support counters to support their forces in combat.
- Players may only use each support unit marker once per GT.
- Players move used support units to their respective Support Used Display.
Exception: Return Soviet support units to the Soviet pool.
- Players move support markers in the Support Used Display to the Support Available Display during a friendly Reinforcement Phase.
- Each player may allocate a maximum of two support markers to each combat (attack or defense).
- Immediately after declaring an attack, but before revealing ground units, each player declares the type and number (0, 1 or 2) of support markers that will participate in the current combat. The defender declares first, then the attacker.
- Armor support units allocated to support an attack provide three combat factors to the attacking force.
- Armor support units allocated to support a defense provide two combat factors to the defending force.
Important: In both the two above cases, the total armor combat factors allocated cannot exceed the total number of friendly ground combat factors. Players may not use excess armor combat factors.
-
For each artillery, air, or helo support marker allocated the owning player must roll 1d6. a) If the result is 1–3: The support unit provides one favorable shift for the owning side. Place it in the Support Used Display after resolving the combat.
Important: A favorable shift to the attacking side is one shift to the right, a favorable shift for the defender is one shift to the left.
b) If the result is 4–6: The support marker is immediately moved to the Support Used Display and has no effect on the current combat.
-
Support markers can provide support to any units that are from the same side as the ground units involved.
13.2 Azeri 709th Brigade
The units of the 709th Brigade were better equipped formations of the Azeri army, and therefore a valuable political asset whose commander was extremely reluctant to commit to battle.
- Before determining the odds of each attack or defense, but after all support markers have been allocated, the Azeri player follows the below procedure.
- Whenever any unit of the 709th Brigade participates in an attack, the Azeri player rolls 1d6.
- If the result is a 5–6: remove the unit from the map.
- The unit returns as a reinforcement the next GT on any map edge hex between 1414 to 1915 (inclusive) at no cost in RPs. They may overstack but must meet stacking limitations at the end of the Movement Phase.
13.3 Azeri Political Infighting
Historically, the Azeri commanders were often more interested in political backstabbing and power plays in Baku than in fighting the Armenians. This changed towards the end of the war, but it was too little, too late.
- Before determining the odds of each attack or defense, but after all support markers have been allocated, the Azeri player must determine the current political situation for the Azeri army.
- Consult the Azeri Political Table and roll 1d6.
- Apply the DRM modifiers listed at the bottom of the table and cross reference the modified DR result with the Effect.
a) If the result is Panic:
- If the Azeri player is the attacker, cancel the attack. Move all support markers allocated by the Azeri player to the Support Used Display. Place opposing support markers back in the Support Available Display.
- If the Azeri player is the defender, return all Azeri support markers to the Support Used Display, they have no effect on the combat. Azeri ground units halve their total defense strength (round up). b) If the result shows left and right shifts: Apply the shift on the left of the slash if Azeri units are attacking and shifts to the right of the slash if Azeri units are defending. c) If the result is normal combat: Make no adjustments. The combat resolution continues normally. d) If the result is For the Motherland: The Azeri side receives three shifts in their favor in either the attack or defense.
13.4 Armenia Regulars
The Republic of Armenia army historically held terrain to free the Nagorno-Karabakh units for offensive operations. To simulate this defensive stance, the AR player must determine if Armenian regular units will participate in an attack.
- Each time Armenian regular ground units participate in an attack and after all support has been allocated, the AR player rolls 1d6.
- If the result is 1–3: All Armenian units can attack, so proceed with the combat normally.
- If the result is 4–5: Halve the combat strength of all Armenian units, then resolve the combat normally.
- If the result is a 6: No Armenian regular units can participate in the combat. The player must resolve the attack without the participation of the regular Armenian units.
Important: Armenian regular units defend normally, no DR required.
13.5 Combat Modifiers
The initial odds column (13.6) may shift due to terrain (12.1), support markers (13.1), Azeri political effects, (13.3) and concentric attacks.
- The attacking player receives a one right-column shift if he is making a concentric attack. To gain the shift, there must be a minimum of two attacking stacks, and at least two of the stacks must be attacking into the defending hex from hexes directly opposite each other.
- For the defender to receive the one shift left for a river all attacking units must be attacking across a river hexside.
- Circumstances may require the modification of combat factors.
- In every case, all combat modifiers are cumulative in their effects. That is, in every battle, determine all applicable modifiers and calculate their effects before rolling the die to obtain the combat result.
Important: Units with printed combat factors of "1" and higher can never have those factors reduced to less than one for any reason. However, whenever a stacked or multi-unit/multi-hex situation arises wherein combat factor reductions take place, total up all the units' factors liable to a common reduction and then make one grand reduction.
Example: Three 1 strength units attacking while out of supply would attack with a strength of 3/2 = (1.5 rounded up) = 2, not 3 (1 strength each).
13.6 Combat Procedure
Conduct each combat using the below procedures.
- Determine participating attacking units and designate the hex under attack. If AR regular units are participating in the attack, use the procedures in 13.4 to determine if they can attack.
- Determine the supply status of all attacking and defending units.
- Determine support (defender first, attacker second).
- Add up the attack factors of the attacking units and armor support (if used).
- Add up the defense factors of defending units and armor support (if used).
- Calculate the odds ratio by dividing attacking factors by defensive factors (round down). Check Azeri Politics (13.3).
Example: 8 attacking factors versus 4 defending factors. 8/4=2, which means a 2:1 odds ratio.
- Apply shifts for terrain, support, concentric attacks, Afghan/Russian participation, and Azeri political infighting. All shifts are cumulative. If both sides have shifts, subtract the number of shifts of the side with the lower total shifts from the side with the higher total shifts. The result is the number of shifts to the right if the attacker had the greater number of shifts and to the left if the defender had the higher total shifts.
- Roll 1d6 and apply any die roll modifiers.
- Cross-reference the result with the final corresponding column ratio on the Combat Results Table (CRT).
- Apply results.
13.7 The Combat Result Table
The number to the left of the slash is the attacker's combat result; the number to the right is the defender's combat result.
Example: At 1/2 odds, on a DR of 6, the combat result is 2/1. That is 2 for the attacker, 1 for the defender.
- The numbers signify the number of steps each side must eliminate from their forces involved in that battle. Always remove attacker losses before defender losses in each battle.
Important: Combat does not affect support units. Players may not take them as losses.
- Distribute losses among all types of ground units as the owning player sees fit.
13.8 Retreat After Combat
The attacking or defending player may choose to retreat rather than accept step losses.
- The owning player must inflict one step loss prior to a retreat.
- Retreat does not use MP; count each hex as one hex of retreat.
- The player may then retreat all participating units the number of hexes up to the number of remaining step losses inflicted in the result.
- The retreat must halt in the first hex entered occupied by a friendly unit. If this creates an overstack situation the player must eliminate all excess units.
- Retreats cannot enter a hex in an EZOC unless a friendly unit occupies that hex (in which case the retreating units must halt their retreat).
- Retreats cannot enter prohibited hexes nor cross prohibited hexsides.
- Retreating units cannot enter the same hex more than once. If attacking units are retreating from multiple hexes each stack may enter each hex one time.
- If for any reason retreating units do not retreat the required number of hexes, the owning player must take the remaining step losses. In the case of multiple stacks of attackers, treat each stack separately.
- A player may not attack retreated units again in the same Combat Phase. If after a retreat, the retreating units stack with units that have not yet attacked, ignore the retreated units when determining odds ratio. If result calls for more step losses than the non-retreated units can meet, the previously retreated units must then take any remaining step losses or must retreat.
13.9 Advance after Combat
After the defender has resolved all step losses and retreats, if there are no defending units in the defending hex, attacking units up to the stacking limit may advance into the defending hex. EZOC have no effect on advance after combat. This movement does not cost any movement points.
14.0 Supply
Units need to trace supply to a valid supply source to operate at full strength. Check supply status at the below times.
- When a unit or stack of units begins its movement during a Movement Phase.
- When declaring an attack, check the supply status of both attackers and defenders before calculating combat odds.
- When declaring a bombardment.
- Players must place reinforcements on the map in hexes where they would be in supply.
- One-step units rebuilt back to the full-strength status on the map must be in supply.
Exception: Soviet unit participation (6.0).
14.1 Supply Lines
A supply line is a path of hexes of any length traced from the unit to its supply source. Players cannot:
- Trace a supply line through an enemy occupied hex.
- Trace a supply line through a hex prohibited to the unit tracing supply.
- Trace a supply line through an EZOC; however, a player may trace a supply line into an EZOC.
Important: For supply purposes negate an EZOC if a friendly unit occupies the hex.
- Trace a supply line through a hex containing a town or village with a majority population of the opposing side unless that hex is: a) Occupied by a friendly unit; or, b) Has been ethnically cleansed (currently has an ethnic cleansing marker in the hex).
14.2 Nagorno-Karabakh Units
Nagorno-Karabakh units are automatically in supply anywhere within the Nagorno-Karabakh Oblast. Outside of Nagorno-Karabakh, they are in supply if they can trace a line of hexes of any length to any town or village in Armenia or to hex 1419 (Stepanakert).
14.3 Armenian Units
Armenian units are in supply if they can trace a line of hexes of any length to any town or village in Armenia.
14.4 Azeri Supply
Azeri units are in supply if they can trace a line of hexes of any length to any town or village in Azerbaijan.
Azeri units are in supply for defensive purposes only if they are in any town hex in Nagorno-Karabakh.
14.5 Out of Supply Effects
Out of supply units have their movement, defense and attack factors halved (round down) but never below one.
15.0 How to Win
At the end of GT 9, if the AZ player has not won automatically as per 15.2, tally the number of objectives achieved by the AR player. If the AR player has gained 12 or more VPs, he is the winner. Any other result is an Azeri victory.
15.1 AR Victory Points
Award victory points to the AR player for controlling the below hexes (3.1).
- +1: Kodjali (1219)
- +2: Sarsang Reservoir (0921)
- +1: Qarvadhar (1224)
- +2: Stepanakert (1419)
- +1: Martuni (1416)
- +2: Shushi (1520)
- +1: Varanda (1616)
- +1: Amuri Pass (0723)
- +1: Horadiz (1915)
- +1: Martakert (0919)
- +1: Jrakan (1917)
- +1: Agdam (1218)
15.2 Azeri Automatic Victory
At the end of any GT, during the End of Game Turn Phase, if the Armenian refugee level (10.2) is 16 or greater the AZ player may have won an automatic victory.
- The AZ player rolls 1d6.
- If the result is a 5–6: The AZ player gets an automatic victory. Play ends and the AZ player is the winner. Otherwise play continues and the DR may occur the next GT.
Note: The Azeri Political Table (13.3), Combat Results Table (13.7), Bombardment Table (10.3) and Terrain Effects Chart (12.1) are printed on the game map and are not reproduced in this rules text. The Azeri Political Table's DRM values and effect entries therefore are not transcribed here.