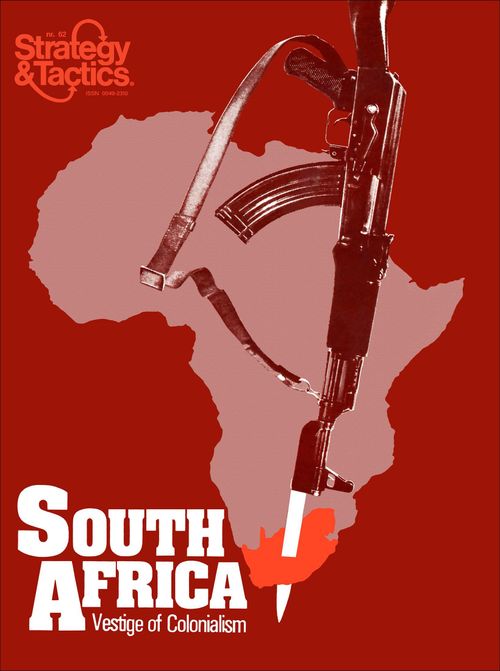
South Africa: The Death of Colonialism
South Africa: The Death of Colonialism Rulebook
Table of Contents
Table of Contents
- 1.0 Introduction
- 2.0 General Course of Play
- 3.0 Game Equipment
- 4.0 Sequence of Play
- 5.0 Movement
- 6.0 Stacking
- 7.0 Zones of Control
- 8.0 Combat
- 9.0 B.N. Guerrilla and R.S.A. Police Units
- 10.0 Supply
- 11.0 Mobilization and Demobilization
- 12.0 How to Set Up and Play the Game
- 13.0 Varying the Standard Scenario
- Charts and Tables
1.0 Introduction
1.1 The Subject of the Game
South Africa is an operational level simulation of a possible revolt of that nation's Black majority against the White South African government and of the government's reactions to such a revolt.
1.2 How the Game Is Organized
The rules to South Africa are divided into Major Sections, which are generally arranged in the order in which they are used in a complete Turn of the game. Each Major Section is numbered with a whole number (e.g., 1.0, 2.0, 3.0, and so forth). Many of the Major Sections begin by explaining the General Rule, which is a simple statement of what that section covers, and then go on to give more details in the Cases. These Cases are numbered decimally as subdivisions of the number of the Major Section. (For example, Cases 5.1, 5.2 and 5.3 are all parts of Major Section 5.0). In some instances, the Cases themselves are subdivided into secondary Cases. (For example, 5.11, 5.12, and 5.13 are all subdivisions of Case 5.1). Players new to conflict simulations should familiarize themselves with the main components of the game before reading any further in the rules. First examine the charts and tables, the playing pieces, and the map. Then skim through the rules paying particular attention to the Sequence of Play and the General Rules to all the Major Sections. Next break apart the counters and place them on the map according to the Scenario directions. Finally with the game set up in front of you read all the rules carefully.
2.0 General Course of Play
South Africa is basically a two-Player game: one Player assumes the role of the Black Nationalists (B.N.)—primarily a coalition of the disenfranchised Black population—and the other Player assumes the role of the Republic of South Africa (R.S.A.) Government. Each Player moves his units and executes attacks on Enemy units in turn attempting to fulfill the Victory Conditions. To move from one hex to another, each unit expends a portion of its Movement Allowance. Combat is resolved by comparing the total Strength Points of stacked opposing units and expressing the comparison as a simplified probability ratio (odds). A die is rolled and the outcome indicated on the Combat Results Table is applied to the units involved.
3.0 Game Equipment
3.1 The Game Map
The 22" x 34" mapsheet depicts the area of South Africa. A numbered hexagonal grid is superimposed on the terrain features on the mapsheet in order to regulate the movement and positioning of the playing pieces. To make the map lie flat, fold it against the direction of the creases. Small pieces of masking tape may be used at the corners of the map to keep it taut. Explanations of the terrain features will be found on the Terrain Effects Chart (TEC).
3.2 Game Charts and Tables
Various visual aids are provided for the Players in order to simplify and illustrate certain game functions. These are the Combat Results Table (CRT), the Terrain Effects Chart (TEC), the Contact Table, the R.S.A. Dislocation Table, the Unit Mobilization Charts, the B.N. Resource Availability Schedule, the Resource Pools, the R.S.A. Manpower and Taxation Record, and the Turn Record Track; they are explained where presented in the appropriate rules section.
3.3 The Playing Pieces
3.31
The playing pieces represent actual military units that could fight in the event of a South Africa war. The numbers and symbols on the playing pieces represent the strength and type of unit simulated by the particular playing piece. The playing pieces will henceforth be referred to as "units."
Sample Units (ground unit): the counter shows its Unit Designation (e.g., "P.A.G."), its Unit Type (the symbol), its Contact/Evasion Rating (top right), its Attack Strength (left), its Defense Strength (bottom middle) and its Movement Allowance (right).
Sample Units (air unit): the counter shows its Attack Strength (left), its Contact/Evasion Rating (top right), its Defense Strength (bottom left) and its Range Allowance (bottom right).
3.32 Explanation of Abbreviated R.S.A. Unit Designations
Infantry Battalions:
- Transvaal: Transvaal Scottish
- D.o.E.R.: Duke of Edinburgh Rifles
- S.A.I.: South Africa Irish
- P.A.G.: Prince Alfred Guard
- Capetown: Capetown Highlanders
- Durban: Durban Light Infantry
- S.W.D.: South West District
- R.L.I.: Rand Light Infantry
- C.P.R.: Cape Peninsula Rifles
- W.R.: Witwatersrand Rifles
- W.P.: Western Province
Reconnaissance Battalions:
- R.N.C.: Royal Natal Carbineers
- I.L.H.: Imperial Light Horse
- D.M.R.: District Mounted Rifles
- U.M.R.: Umvoti Mounted Rifles
3.4 Definition of Terms
- Attack Strength is the relative strength of a unit when attacking, expressed in terms of Strength Points.
- Defense Strength is the relative strength of a unit when defending.
- Contact/Evasion Rating is a numerical expression which reflects a given unit's ability to control a hex (or conversely) to evade an Enemy Zone of Control.
- Movement Allowance: The basic movement ability of a unit expressed in Movement Points. Usually a unit expends one Movement Point of its total Movement Allowance for each hex entered.
- Range Allowance: The basic movement ability of air and airborne units is expressed in Range Allowance. An air or airborne unit may move within its Range Allowance, regardless of terrain, within certain restrictions which will be outlined later. This range number is shown on the unit.
3.5 Game Scale
Each hexagon on the mapsheet represents 60 kilometers of real terrain from side to side. Each Game-Turn is the equivalent of one week of real time. The units represent actual military forces that could participate in such a campaign.
3.6 Parts Inventory
A complete game of South Africa should include the following parts:
- One Game Map (22" x 34")
- One Sheet of Die-Cut Counters (200 pieces)
- One Rules Folder
- One Plastic Die (not included with subscription edition)
- One Game Box (not included with subscription edition)
If any parts are missing or damaged, contact SPI's Customer Service. Questions regarding the rules of the game will be answered if accompanied by a stamped, self-addressed envelope and if phrased to be answered by a simple one-word answer. Send rules questions to the publisher's address and mark the envelope "Rules Question: South Africa."
Summary of Unit Types
Each counter is listed as its full-strength side (front) and its cadre side (back), giving the printed values: Contact/Evasion Rating, then Attack-Defense-Movement (Ground units) or Attack-Defense-Range (Air units). Small corner numerals printed on the counters are not part of the rules and are not listed.
R.S.A. Units
| Unit | Full Strength (front) | Cadre (back) |
|---|---|---|
| Infantry Battalion | 4 / 5-5-5 | 1 / 1-3-5 |
| Reconnaissance Battalion | 4 / 4-4-5 | 0 / 2-1-5 |
| Commando | 5 / 3-3-1 | (no cadre side) |
| Reinforced Police Battalion | (6) / 3-2-3 | 0 / 1-1-3 |
| Reinforced Artillery Battalion | 1 / 20-10-3 | 0 / 10-5-3 |
| Engineer Battalion | 1 / 2-1-3 | 0 / 0-1-3 |
| Heavy Strike Air Group | 1 / 15-9-15 | 0 / 0-1-15 |
| Helicopter Transport Group | 5 / 5-5-10 | 0 / 0-1-10 |
Markers (R.S.A.): Game-Turn Marker; Strategic-Turn Marker; R.S.A. Resource Point Level Markers (×1, ×10, ×100); R.S.A. Manpower Level Markers (×1, ×10, ×100); R.S.A. Tax Rate Marker.
B.N. Units
| Unit | Full Strength (front) | Cadre (back) |
|---|---|---|
| Infantry Battalion | 2 / 5-3-4 | (blank) |
| Infantry Division | 0 / 80-50-3 | (blank) |
| Infantry Company | 4 / 1-1-5 | (blank) |
| Guerrilla Unit | (7) / (5)-3-1 | (blank) |
| Air Strike Group | 4 / 8-8-4 | 1 / 0-1-4 |
| Armored Battalion | 1 / 10-5-5 | (blank) |
| Artillery Battalion | 0 / 20-10-1 | (blank) |
| Air Defense (Flak) Battalion | 0 / 1-10-1 | (blank) |
4.0 Sequence of Play
4.1 The Game-Turn
South Africa is played in sequential turns called Game-Turns. Each Game-Turn is composed of two Player-Turns. The Player whose Player-Turn is in progress is called the Phasing Player. Each Game-Turn proceeds as follows:
4.2 Game-Turn Sequence Outline
A. B.N. Player-Turn
- Organization Phase: The Black Nationalist Player may deploy any available Dummy units in any hex occupied by a real B.N. unit; he may reorganize real B.N. units into smaller sized formations and he may invert (flip face-down) any B.N. unit(s) which is not in an Enemy Zone of Control.
- Ground Unit Movement Phase: The B.N. Player may move any or all of his ground units in any direction, to the limit of their Movement Allowances, within the restrictions outlined in the Rules of Movement and Zones of Control.
- Combat Preparation Phase: The B.N. Player may invert (flip face-up) any of his unit(s) in an Enemy Zone of Control and deploy B.N. air units in any Friendly Zone of Control within their Range Allowance.
- R.S.A. Response Phase: The R.S.A. Player may attempt to withdraw any R.S.A. unit in an Enemy Zone of Control via Evasion and deploy R.S.A. air units in any Friendly Zone of Control within their Range Allowance.
- Combat Phase: The B.N. Player must attack all R.S.A. units in Friendly Zones of Control according to the rules governing Combat.
- Air-to-Base Phase: Both Players return their air units to their appropriate base(s).
B. R.S.A. Player-Turn
- Ground Unit Movement Phase: The R.S.A. Player may move any or all R.S.A. ground units in any direction, to the limit of their Movement Allowances, within the restrictions outlined in the rules of Movement and Zones of Control.
- Combat Preparation Phase: The R.S.A. Player may deploy his air units in any Friendly Zone of Control within their Range Allowance and he may attempt to contact B.N. units in Friendly Zones of Control.
- Black Response Phase: The B.N. Player may attempt to invert (flip face-down) any of his unit(s) in Enemy Zones of Control via Evasion and he may deploy B.N. air units in any Friendly Zone of Control within their Range Allowance.
- Combat Phase: The R.S.A. Player must attack all face-up B.N. units in Friendly Zones of Control according to the rules governing Combat.
- Air-to-Base Phase: Both Players return their air units to their appropriate base(s).
C. Game-Turn Indication
After both Players have completed their respective Player-Turns, the Game-Turn Marker is advanced on the Game-Turn Record Track, signalling the start of a new Game-Turn.
4.3 The Strategic Turn
Once each season (i.e., after each group of thirteen consecutive Game-Turns), the Game-Turn Sequence Outline is temporarily interrupted by the occurrence of a Strategic Turn which proceeds as follows:
4.4 Strategic Turn Sequence Outline
(The phases are lettered as printed in the source; there is no Phase E or Phase I.)
- A. R.S.A. Manpower Phase: The R.S.A. Player increases the R.S.A. Manpower Pool by eight (8) Points by adjusting the markers on the R.S.A. Manpower Track.
- B. R.S.A. Taxation Phase: The R.S.A. Player selects a Taxation Rate ranging from five to twenty-five percent which will determine the increase in Resource Points each Player will receive during the Resource Augmentation Phase.
- C. R.S.A. Dislocation Phase: The R.S.A. Player rolls the die and consults the R.S.A. Dislocation Table to determine if his selected Taxation Rate causes a reduction of his Manpower pool. If the indicated result is a "D," the R.S.A. Manpower Pool is immediately reduced by thirty (30) Points.
- D. B.N. Guerrilla Phase: The B.N. Player rolls the die and consults the R.S.A. Dislocation Table to determine if the selected Taxation Rate causes a revolt among the Black South African population. If the indicated result is a "D," the B.N. Player may immediately deploy one B.N. Guerrilla unit in any City or Native Reserve hex in the Republic of South Africa.
- F. Resource Augmentation Phase: Both Players increase the number of Resource Points in their respective Resource Point Pools. The R.S.A. Player multiplies his Manpower Point total by his previously selected Taxation Rate and increases his Resource Point total by the product of this multiplication. The B.N. Player increases his Resource Point total by consulting the B.N. Resource Availability Schedule which is printed on the game map.
- G. Supply/Maintenance Phase: Both Players determine the Supply status for all of the units currently on the map and reduce (or eliminate) unsupplied units according to the restrictions of the Supply rules. The R.S.A. Player (only) must then expend the required number of Resource Points to maintain all of the supplied R.S.A. units which are currently deployed on the map. The B.N. Player is not required to maintain his forces in this manner.
- H. Mobilization/Demobilization Phase: Both Players may now begin mobilizing new units and rebuilding (or demobilizing) existing units by expending the required number of Resource Points indicated on the Unit Mobilization Chart (see Cases 11.27 and 11.28) and following the procedures outlined in the Mobilization and Demobilization rules.
5.0 Movement
General Rule
During the Movement Phase, the Phasing Player may move as many or as few of his units as he wishes subject to Zone of Control restrictions. During the appropriate Movement Phase, each unit may be moved as many or as few hexes as the Phasing Player desires as long as its Movement Allowance is not exceeded in a single Movement Phase. Unused Movement Points may not be accumulated from Phase to Phase or transferred from unit to unit.
Procedure
Move each unit individually, tracing the path of its movement through the hexagonal grid. Once a unit has been moved and the Player's hand withdrawn, the unit may not be moved again nor may the path be retraced and/or changed during that Movement Phase.
Cases
5.1 How to Move Ground Units
5.11 During a Movement Phase, only the Phasing Player's ground units are moved; all, some, or none of these units may be moved. No other units may be moved, and no combat may occur during this phase (Exception: see Case 7.4).
5.12 Movement is calculated in terms of Movement Points. Basically each unit expends one Movement Point of its total Movement Allowance for each hex it enters, although some terrain costs more than one Movement Point to enter. The costs to enter various types of terrain are summarized on the Terrain Effects Chart.
5.13 If, during a Friendly Movement Phase, a unit would be restricted from moving due to the lack of available Movement Points, that unit may move one hex, regardless of the number of Movement Points it must expend—even to move directly from one Enemy-controlled hex to another. Of course, this movement is subject to the normal Zone of Control restrictions.
5.14 No regular Combat may take place during a Movement Phase although B.N. units may attempt to execute an Ambush during the R.S.A. Player's Ground Unit Movement Phase.
5.15 Units may freely enter or move through hexes containing other Friendly units during the Friendly Movement Phase (within the restrictions outlined in the Zone of Control rules). There is no additional Movement Point penalty for stacking or unstacking with other Friendly units.
5.2 Movement Inhibitions and Prohibitions
5.21 A unit may never enter a hex unless it has sufficient Movement Points to pay the appropriate Movement Point costs implied by terrain in the hex (Exception: see Case 5.13).
5.22 Units may enter and/or leave Enemy-occupied hexes during the Friendly Movement Phase within the restrictions outlined in the Zone of Control rules. A face-up unit may only leave an Enemy-controlled hex via Evasion (see Case 7.3).
5.23 A unit may never enter an all-Sea hex or cross an all-Sea or Blocked hexside, except via Air Movement.
5.24 Units may not be moved off the map except by specific direction of a rule (see Section 11.0).
5.3 Terrain Effects on Movement
5.31 The cost in Movement Points to enter a given hex will vary according to the type of terrain in the hex and the type of unit which is entering the hex (see the Terrain Effects Chart on the Game Map).
5.32 Terrain Effects Chart (see map).
5.4 Rail Movement
5.41 During the Friendly Ground Unit Movement Phase, any number of Friendly ground units may move through any number of Friendly Rail hexes through Rail hexsides at a cost of one Movement Point (per moving unit).
5.42 B.N. units may never use Rail Movement in the Republic of South Africa. R.S.A. units may never use Rail Movement outside of the Republic of South Africa.
5.43 Units may combine Rail and non-Rail Movement during the same Movement Phase.
5.44 A unit may never enter or leave an Enemy-controlled hex via Rail Movement.
5.5 Road and Trail Movement
5.51 During the Friendly Ground Unit Movement Phase, a Friendly unit which enters a Road or Trail hex (anywhere on the map) through a connecting Road or Trail hexside pays the special Movement Point cost indicated on the Terrain Effects Chart, regardless of the other terrain in the hex.
5.52 When a Friendly unit enters an Enemy-controlled Road or Trail hex, it pays the Movement Point cost dictated by the terrain in that hex, ignoring the presence of the Road or Trail.
5.6 Air Unit Movement
5.61 During the Combat Preparation Phase, the Phasing Player may deploy any of his air units in any Friendly Zone of Control within its Range Allowance.
5.62 During the Response Phase, the Phasing Player may deploy any of his air units in any Friendly Zone of Control within its Range Allowance.
5.63 During the Air-to-Base Phase, both Players return their air units to their appropriate base(s).
5.64 The R.S.A. Player may base his air units on any City hex in the Republic of South Africa unless it is an Enemy-controlled hex (i.e., air units may not be based in an Enemy Zone of Control). The B.N. Player may only base his air units in a hex occupied by a B.N. Base Unit.
5.65 Air units do not possess a Movement Allowance and may never be moved during a Ground Unit Movement Phase. During the Combat Preparation or Response Phase, an air unit is simply removed from its base hex and placed in any hex within its Range Allowance. The Range Allowance of an air unit indicates the maximum number of hexes it may be deployed away from its base hex. During the Air-to-Base Phase, an air unit is simply returned to any appropriate base hex within its Range Allowance. If an air unit cannot be returned to a base hex during the Air-to-Base Phase due to the presence of Enemy Zones of Control, it is automatically eliminated.
5.66 Terrain has no effect on the movement of Air units.
5.67 An Air unit is never effected by Enemy Zones of Control except it may not be based in an Enemy Zone of Control.
5.68 An Air unit is always deployed face-up on the map.
5.69 An Air unit is never required to retreat as a result of Combat. If an Air unit receives a retreat result, it is immediately returned to an appropriate base.
5.7 Airborne Unit Movement
5.71 Only the R.S.A. Player has airborne units. Airborne units may be moved either as ground units or air units.
5.72 During the R.S.A. Ground Unit Movement Phase, the R.S.A. airborne units may be moved like any other ground unit, using the Movement Allowance printed on the unit counter.
5.73 During the Combat Preparation, Response, and Air-to-Base Phase, each airborne unit stacked in the same hex as an R.S.A. helicopter transport unit may accompany that unit if it utilizes Air Movement. Each airborne unit requires a separate helicopter transport unit to enable it to use Air Movement.
5.74 Except for their additional Air Movement capability, airborne units function in all respects as all other ground units.
5.8 Concealment
5.81 All B.N. ground units which are not in Enemy Zones of Control may be concealed (flipped face-down) during the B.N. Organization Phase.
5.82 A face-up B.N. unit which executes a successful Evasion is immediately flipped face-down (see Case 7.3).
5.83 Face-down units retain their printed Movement Allowance and are subject to all of the restrictions of the Movement and Zones of Control rules.
5.84 A face-down unit never exerts a Zone of Control.
5.85 A face-down unit may never participate in Combat and is never affected by any Combat which occurs within the hex it occupies.
5.86 R.S.A. units and all air units may never be concealed.
5.9 Dummy Units
The B.N. Player is permitted to maneuver a limited number of Dummy units which represent small forces incapable of combat or simply phantom formations whose existence is perceived through faulty R.S.A. intelligence.
5.91 During the B.N. Organization Phase, the B.N. Player may deploy any available Dummy units in any hex occupied by a real B.N. unit.
5.92 Dummy units are always deployed and maneuvered as concealed (face-down) units. At the instant a Dummy unit is revealed, it is immediately removed from the map and may not be redeployed until the next B.N. Organization Phase.
5.93 All Dummy units are treated as B.N. ground units which possess a Movement Allowance of five (5) Movement Points.
5.94 Dummy units do not exert a Zone of Control and may never participate in Combat.
6.0 Stacking
General Rule
Stacking is the placement of more than one unit in a hex. Any number of Friendly and/or Enemy units may be stacked in the same hex simultaneously.
Cases
6.1 Effect of Stacking on Movement
6.11 Units may not be moved in stacks. Each unit must be moved individually.
6.12 There is no additional Movement Point penalty for stacking or unstacking with other Friendly units.
6.13 Units may enter and/or leave Enemy-occupied hexes during the Friendly Movement Phase within the restrictions of the Zones of Control rules (see Section 7.0).
6.2 Effect on Combat
6.21 All Friendly face-up units in a given hex must participate in Combat by combining their appropriate Combat Strengths into a single total Strength.
6.22 Combat among units which are not stacked in the same hex is prohibited.
7.0 Zones of Control
General Rule
A face-up unit exerts a Zone of Control within the hex it actually occupies. A hex upon which a unit exerts a Zone of Control is called a controlled hex and it inhibits the movement of Enemy units. A face-down unit never exerts a Zone of Control. Note: Unlike many other games, a unit's Zone of Control never extends into any hex adjacent to the hex the unit occupies.
Cases
7.1 Effects on Movement
7.11 All face-up units exert a Zone of Control throughout the Game-Turn, regardless of the Phase or Player-Turn. The presence of Zones of Control is never negated by terrain or units, either Enemy or Friendly.
7.12 Units do not pay any additional Movement Points to enter or leave an Enemy-controlled hex.
7.13 During the Movement Phase, whenever a face-down unit attempts to leave an Enemy-controlled hex, the non-Phasing Player may attempt to Contact the moving unit (see Case 7.3).
7.14 During the Movement Phase, a face-up unit may leave an Enemy-controlled hex only via Evasion (see Case 7.3).
7.15 During the Movement Phase, whenever an R.S.A. unit enters a hex occupied by a face-down B.N. unit, the B.N. unit(s) in that hex may immediately be turned face-up in order to execute an Ambush (see Case 7.4).
7.2 Effect on Combat
During the Combat Phase, all face-up units in an Enemy Zone of Control must participate in Combat (see Case 8.1).
7.3 Contact and Evasion
7.31 Every unit has a single numerical rating which reflects its ability to control a hex or, conversely, to evade an Enemy Zone of Control.
7.32 During the B.N. Movement Phase, whenever a face-down unit attempts to leave an Enemy-controlled hex, the R.S.A. (non-Phasing) Player may attempt to Contact the moving unit. If the Contact attempt succeeds, the moving unit is immediately flipped face-up. If the Contact attempt fails, the moving unit remains face-down. If a successful Contact reveals a Dummy unit, it is immediately removed from the map.
7.33 During the R.S.A. Combat Preparation Phase, the R.S.A. Player may attempt to Contact face-down Black units in Friendly Zones of Control. If the Contact attempt succeeds, all B.N. units in the hex are immediately flipped face-up. If the Contact attempt fails, face-down B.N. units remain face-down and face-up B.N. units remain face-up. Any time a Dummy unit is revealed by Contact, it is immediately removed from the map.
Contact Procedure: Total the Contact Ratings of all R.S.A. units in the hex in which the Contact is attempted. Next, determine the terrain in this hex and locate this terrain type on the Contact Table (7.34). Now, the R.S.A. Player rolls the die. If the die roll is equal to or greater than the number obtained by cross-referencing the Total Contact Rating and the terrain type, the Contact is successful and the contacted B.N. unit(s) are immediately flipped face-up.
7.34 Contact Table (see map).
7.35 During the Movement Phase, a face-up unit may leave an Enemy-controlled hex only via Evasion. If a B.N. unit executes a successful Evasion, it may immediately be flipped face-down and may freely exit the Enemy Zone of Control. If an R.S.A. unit executes a successful Evasion, it may freely exit the Enemy Zone of Control, retaining its face-up mode. If a unit attempts Evasion and fails, it must remain face-up, in place, for the remainder of the Movement Phase.
7.36 During the Response Phase, a face-up unit may evade an Enemy Zone of Control via Evasion. If a B.N. unit executes a successful Evasion, it is immediately flipped face-down, remaining in the same hex. If an R.S.A. unit executes a successful Evasion, it may immediately be moved into any adjacent hex, retaining its face-up mode. A Dummy unit may never attempt Evasion (Dummy units are immediately removed from the map at the instant they are revealed).
Evasion Procedure:
- Determine the Evasion Rating of the unit attempting Evasion (this is the same number as the unit's Contact Rating). Note: units attempt Evasion individually.
- Modify the unit's Evasion Rating by subtracting one for each face-up Enemy unit in the same hex which possesses a Contact Rating that exceeds the Evasion Rating of the evading unit.
- The resulting number is now modified according to the terrain type in the hex according to the Evasion Value listed on the Terrain Effects Chart (see Case 5.32).
- After modifying for terrain, the Evading Player rolls the die. If the die roll is equal to or less than the fully modified Evasion Rating, the unit successfully evades the Enemy Zone of Control. If the die roll exceeds the modified Evasion Rating, the Evasion attempt fails.
Evasion Example: Suppose a B.N. unit with an Evasion Rating of four is attempting to evade in a Desert hex occupied by two R.S.A. units each of which possess a Contact Rating of three. As neither R.S.A. unit's Contact Rating exceeds the B.N. unit's Evasion Rating, no modification is made during Step #2 of the Evasion Procedure. However, because the Evasion Value of the Desert terrain hex is listed as (-1), one is subtracted from the B.N. unit's Evasion Rating yielding a modified Evasion Rating of three. Thus, the B.N. Player must roll a three or less in order to execute a successful Evasion.
7.4 Ambush
7.41 During the Movement Phase, whenever an R.S.A. unit enters a hex occupied by a face-down B.N. unit, the B.N. unit(s) in that hex may immediately be turned face-up in order to execute an Ambush. If the B.N. Player initiates an Ambush, the R.S.A. unit which is being moved may attempt to escape the Ambush via Evasion (assuming it has sufficient remaining Movement Points to enter an adjacent hex via the Evasion Procedure). If the R.S.A. unit's Evasion attempt is successful, it may freely exit the Enemy Zone of Control thus escaping the Ambush. If the R.S.A. Player does not attempt Evasion, or if the Evasion attempt fails, the B.N. Player must immediately attack the R.S.A. unit in accordance with the normal Combat rules.
7.42 When an R.S.A. unit enters a hex containing both face-up and face-down B.N. units, any or all of the face-down B.N. units may be flipped face-up to execute an Ambush.
7.43 When an R.S.A. unit enters a hex containing solely face-up B.N. units, no Ambush is permitted.
8.0 Combat
General Rule
During the Combat Phase, the Phasing Player must attack all face-up Enemy units in each hex occupied by a face-up Friendly unit. Each and every face-up unit within a given hex is required to participate in Combat during the Combat Phase. Face-down units may not participate in Combat nor are they affected by any Combat which occurs in the hex which they occupy. Each hex containing face-up opposing units must be resolved as a separate Combat. Units in different hexes may never jointly participate in Combat. The Phasing Player is the attacker, the non-Phasing Player is the defender, regardless of the overall strategic situation.
Procedure
Total the Attack Strengths of all face-up attacking units within the same hex and compare it to the total Defense Strength of all face-up defending units within that same hex. Round off the resulting ratio in favor of the defender to conform to the simplified odds found on the Combat Results Table. The Attacking Player then rolls the die and locates the number rolled under the Terrain heading which describes the type of terrain contained in the combat hex. This number is then cross-referenced with the appropriate Combat Odds column to yield a Combat Result which is explained in Case 8.7. Apply the result immediately, before resolving any other attacks required during the current Combat Phase.
Cases
8.1 Which Units Must Participate in Combat
8.11 Every face-up Friendly unit which occupies a hex containing a face-up Enemy unit is required to participate in Combat during the Combat Phase. Face-up units controlled by the Phasing Player must attack; Face-up units controlled by the non-Phasing Player must defend.
8.12 No unit may attack more than once per Combat Phase and no Enemy unit may be attacked more than once per Combat Phase.
8.13 Face-down units are neither required nor permitted to participate in Combat nor are they affected by any Combat which occurs within the hex they occupy.
8.2 Multiple Unit and Multi-Hex Combat
8.21 All Friendly face-up units in a given hex must participate in Combat by combining their appropriate Combat Strength (Attack Strengths of all face-up units controlled by the Phasing Player; Defense Strengths of all face-up units controlled by the non-Phasing Player).
8.22 Combat is prohibited among units which are not stacked in the same hex.
8.3 Effects of Terrain on Combat
8.31 The effect of terrain (on Combat) has been integrated into the Combat Results Table. The Attacker simply rolls the die and locates the number rolled under the Terrain heading contained in the combat hex as explained in the Combat Procedure (see Section 8.0, Procedure).
8.4 Combat Resolution
8.41 All Combat is resolved via the Combat Results Table. Each Combat situation is completely resolved before going on to the next situation. The Phasing Player may resolve Combat situations in any order he chooses.
8.42 Combat odds are always rounded off in favor of the Defender. For example, an attack with a combined Attack Strength of 26 against a combined Defense Strength of 9 (26 to 9) would round off to the next lowest odds column on the CRT, "2 to 1." That column would be used for resolving the attack.
8.5 Combat Restrictions According to Unit Type
8.51 A unit which has a parenthesized Attack Strength may participate in an Attack only in conjunction with a Friendly ground unit.
8.52 A unit which has an Attack Strength of zero may only defend; it may not attack even if it occupies an Enemy Zone of Control during the Friendly Combat Phase.
8.6 Combat Results Table
(see map)
8.7 Explanation of Combat Results
De = Defending units eliminated. All of the defending units are reduced and then immediately retreated into an adjacent hex by the Attacking Player. Full-strength R.S.A. units are reduced to cadres (see Case 11.4). R.S.A. cadres are eliminated. B.N. units are reduced by replacing them with weaker formations. A B.N. division-sized unit is replaced by a regiment-sized unit. A B.N. regiment-sized unit is replaced by a battalion-sized unit. A B.N. battalion-sized unit is replaced by a company-sized unit. A B.N. company-sized unit is eliminated. Surviving face-up defending units are then immediately retreated into an adjacent hex by the Attacker within the restrictions outlined for a "Dr" Combat Result.
Ae = Attacking units eliminated. All of the attacking units are reduced and then immediately retreated into an adjacent hex by the Defending Player.
Ex = Exchange Loss. All of the Defending units are reduced and then immediately retreated into an adjacent hex by the Attacker. The Attacker must then reduce or eliminate a number of units whose total Attack Strength is at least equal to the Defense Strength loss suffered by the Defender.
Dr = Defending units retreat. All Defending Friendly units are immediately retreated into an adjacent hex by the Attacker (Enemy). If possible this must be a hex vacant of Enemy units. If no such hex exists the Defending Player may then select the hex to which his units must retreat. Such Friendly units must immediately attempt Evasion (see Case 7.35). If Evasion succeeds, follow the normal Evasion procedure. If Evasion fails, the retreating units are automatically eliminated.
Ar = Attacking units retreat. All of the Attacking units are immediately retreated into an adjacent hex by the Defender.
9.0 B.N. Guerrilla and R.S.A. Police Units
General Rule
B.N. Guerrilla and R.S.A. Police units are special unit types which are subject to the following restrictions in addition to all of the standard rules.
Cases
9.1 Deployment
9.11 B.N. Guerrilla units may be deployed on the map only in either of the following circumstances.
- A. One B.N. Guerrilla unit may be deployed in any one Town or Native Reserve hex in South Africa if the B.N. Player obtains a "D" result on the R.S.A. Dislocation Table during the B.N. Guerrilla Phase of the Strategic Turn.
- B. One B.N. Guerrilla unit may be deployed in each City, Town, or Native Reserve hex in the Republic of South Africa if a B.N. Combat unit exerts a Zone of Control in that hex during the Black Organization Phase.
9.12 R.S.A. Police units are created and deployed through the standard Mobilization process.
9.13 B.N. Guerrilla units are always initially deployed face-down on the map.
9.2 Contact and Evasion Capabilities
9.21 An R.S.A. Police unit may use its parenthesized Contact/Evasion Rating inside the Republic of South Africa (only). Anywhere else on the map, an R.S.A. Police unit is considered to have a Contact/Evasion Rating of zero.
(The source illustrates a B.N. Guerrilla Unit counter at this point, showing "(7)" and "(5)-3-1".)
9.22 A B.N. Guerrilla unit may use its parenthesized Contact/Evasion Rating in either a City or Native Reserve hex inside the Republic of South Africa (only). Anywhere else on the map, a B.N. Guerrilla unit is considered to have a Contact/Evasion Rating of zero.
10.0 Supply
General Rule
During the Supply/Maintenance Phase of the Strategic-Turn, every unsupplied unit is reduced in size or strength as a result of Attrition.
Cases
10.1 Supply Effects
10.11 A full-strength R.S.A. unit is reduced by inverting it to reveal its weaker status which is called a cadre. An unsupplied R.S.A. cadre is eliminated during the Supply/Maintenance Phase. After all unsupplied R.S.A. units are reduced, the R.S.A. Player must expend Resource Points to maintain each and every supplied R.S.A. unit which is currently on the map. These maintenance costs are displayed on the Unit Mobilization Chart (see map).
10.12 Unsupplied B.N. units are reduced by replacing the unit with a smaller-size unit (as far as the countermix permits). An unsupplied division-size unit is replaced by a regiment-size unit. An unsupplied regiment-size unit is replaced by a battalion-size unit. An unsupplied battalion-size unit is replaced by a company-size unit. An unsupplied company-size unit is eliminated. An unsupplied unit may only be replaced by a smaller-size unit of the same type. Note: If a specific-size B.N. unit is unavailable when required to replace an unsupplied larger formation, the B.N. Player must use the largest appropriate B.N. replacement unit which is available among the counters which are not currently deployed on the map. An unsupplied B.N. unit is always replaced from among the counters which are not currently deployed on the map.
10.13 If a unit is not considered unsupplied during the Supply/Maintenance Phase, it is automatically considered supplied. Supplied units are not subject to attrition. The R.S.A. Player must expend Resource Points to maintain each of his units during the Supply/Maintenance Phase. If his resources are insufficient to maintain every supplied unit, he may choose which units he wishes to maintain. The remaining (unmaintained) units are then considered unsupplied and are subject to attrition. Note: B.N. units do not require maintenance.
10.14 Supply has no effect other than attrition of unsupplied units during the Supply/Maintenance Phase.
10.2 Tracing a Supply Path
10.21 A unit is considered unsupplied during the Supply/Maintenance Phase if it is unable to trace a Supply Path free of Enemy Zones of Control from the hex it occupies to a Friendly Supply Source which is within five Movement Points distance from that hex. Note: When tracing a unit's Supply Path, determine its length in Movement Points as though the unit requiring supply were actually moving from the hex it occupies to the hex occupied by its Supply Source (although the unit itself remains stationary). All terrain effects, including the effects of roads, trails, and rail lines may and should be utilized in determining the length of the unit's Supply Path.
10.22 A unit's Supply Path may never be traced into or through an Enemy Zone of Control, even when a Friendly unit exerts a Zone of Control within the same hex.
10.23 The Supply Source for B.N. units may be either a B.N. Base, Port/Town outside the RSA/Namibia, or any hex on the north edge of the map. The supply source for the RSA units may be any City or Town in the Republic of South Africa. A given Supply Source may supply any number of units during the same Supply/Maintenance Phase. A Supply Source loses its supply capability while it is in an Enemy Zone of Control.
11.0 Mobilization and Demobilization
General Rule
There is no regular reinforcement schedule in South Africa. However, the Mobilization and Demobilization rules allow both Players to create new Combat units and/or rebuild existing Cadres back into full strength units by expending their available resources during the Mobilization and Demobilization Phase of the Strategic-Turn. In addition, the R.S.A. Player (only), may reallocate his existing manpower by demobilizing R.S.A. Combat units and returning the derived personnel back into his Manpower Pool. Within the restrictions of the following rules, and the physical limits of the counter mix provided, each Player may develop his Combat force in accordance with his own preference and requirements.
Cases
11.1 Resource Availability
11.11 Each Player maintains a record of his available resources on the appropriate Track printed on the game map. The B.N. Player maintains a record of his total available Resource Points (RP) on the Black Nationalist Resource Pool. The R.S.A. Player maintains a record of his total available Manpower (MP) on the R.S.A. Manpower Pool, and he similarly maintains a record of his total available Resource Points on the R.S.A. Resource Pool. Whenever a Player receives or expends Resource Points he must immediately adjust the markers on the appropriate track to indicate the new total number of Points available in that Pool. Note: Because B.N. manpower is virtually unlimited (in comparison to the White opposition), no record of B.N. manpower is maintained, and the B.N. Player creates and rebuilds units solely through the expenditure of B.N. Resource Points. The R.S.A. Player, in contrast, must withdraw manpower from his limited Pool in order to mobilize or rebuild Combat units.
11.12 The R.S.A. Manpower Pool may only be increased in two ways:
- A. During the R.S.A. Manpower Phase of each Strategic-Turn, the R.S.A. Player adds eight (8) Manpower Points to his Manpower Pool.
- B. At the end of any Mobilization and Demobilization Phase, the R.S.A. Player may demobilize any R.S.A. unit which occupies a City hex in the Republic of South Africa which is not in an Enemy Zone of Control. When he demobilizes a unit, he removes that unit from the map. If a full-strength unit is demobilized, the R.S.A. Player immediately adds the number of Manpower Points which he expended to initially mobilize that unit back into his Manpower Pool. If a Cadre (inverted) R.S.A. unit is demobilized, the number of Manpower Points gained is equal to the Initial Mobilization Manpower Expenditure minus the Manpower Expenditure required to rebuild that specific unit. Note: The Manpower Expenditure costs are printed on the R.S.A. Unit Mobilization Chart (see Case 11.28).
Example: The R.S.A. Player chooses to demobilize the Cadre of an infantry battalion. He thus subtracts the Manpower Expenditure required to rebuild that Cadre (1) from the Manpower Expenditure required to initially mobilize the unit (2) and therefore adds the result (1) to the R.S.A. Manpower Pool.
11.13 The R.S.A. Manpower Pool total may be decreased whenever the R.S.A. Player allocates Manpower Points to mobilize or rebuild R.S.A. Combat units. In addition, the R.S.A. Manpower Pool is automatically decreased by 30 Points if the R.S.A. Player obtains a "D" result from the R.S.A. Dislocation Table during the R.S.A. Dislocation Phase, which is a mandatory function the R.S.A. Player must execute during each Strategic-Turn. The R.S.A. Player simply rolls the die and cross-references the result with his selected Taxation Rate to determine if Dislocation occurs.
11.14 R.S.A. Dislocation Table (see map).
11.15 B.N. Resource Availability Schedule (see map).
11.16 During the Resource Augmentation Phase of the Strategic-Turn, both Players increase the number of Resource Points available in their respective Resource Point Pools, according to the Taxation Rate selected by the R.S.A. Player during the preceding R.S.A. Taxation Phase. The R.S.A. Player multiplies his current total Manpower Points by his selected Taxation Rate, increasing his Resource Point pool accordingly. The B.N. Player increases his Resource Point total by consulting the B.N. Resource Availability Schedule.
Example of R.S.A. Resource Augmentation Procedure: Suppose there is a total of 300 Points in the R.S.A. Manpower Pool and the R.S.A. Player has selected a Taxation Rate of ten percent. This would yield 30 Resource Points which would be added to the current total in the R.S.A. Resource Pool.
11.2 How to Mobilize New Units
11.21 During the Mobilization and Demobilization Phase of each Strategic Turn, both Players may mobilize (or create) new units. Each Player is provided with a Unit Mobilization Chart which indicates what types of units each Player may mobilize and the time and cost required to mobilize a given type of unit.
11.22 To mobilize any type of unit a Player is required to expend the indicated Resource Expenditure during the Mobilization Phase in which a unit's mobilization is initiated. The mobilization of R.S.A. units generally requires the expenditure of both Manpower and Resource Points. The mobilization of B.N. units requires the expenditure of Resource Points (only). When a given unit's mobilization is initiated, the Player should immediately subtract the Resource Expenditure from the appropriate Resource Pool.
Example: To mobilize an R.S.A. infantry battalion, the R.S.A. Player consults the R.S.A. Unit Mobilization Chart and determines that the required Resource Expenditure is two Manpower Points and four Resource Points which he immediately subtracts from the appropriate R.S.A. Resource Pools.
11.23 In addition to the required Resource Expenditure, the Unit Mobilization Chart indicates the Time Expenditure required to mobilize a given type of unit. This Time Expenditure indicates the number of Strategic-Turns required to complete the mobilization of a given type of unit. The Time Expenditure varies from zero to three. Once a Player initiates the mobilization of a given unit by expending the appropriate Resource Expenditure, the actual mobilized unit is selected from the counters which are not presently on the map and is immediately deployed according to the following criteria:
- A. A unit which requires a Time Expenditure of zero may be mobilized and deployed on the map during the same Mobilization Phase in accordance with Cases 11.24, 11.25 and/or 11.26.
- B. A unit which requires a Time Expenditure of one or more Strategic-Turns is deployed on the Strategic-Turn Record Track in the Strategic-Turn Box which corresponds to that unit's required Time Expenditure. For example, if a unit's mobilization is initiated during the Spring Strategic Turn, and the required Time Expenditure for the complete mobilization of that type of unit is three Strategic-Turns, the unit would be deployed in the Winter Strategic-Turn Box on the Strategic Turn Record Track. During the Mobilization Phase of the following Winter Strategic-Turn, a unit may be deployed on the map in accordance with Cases 11.24, 11.25, and/or 11.26.
11.24 During the Mobilization and Demobilization Phase, fully mobilized units may be deployed on the map in any Friendly Supply Source hex which is not in an Enemy Zone of Control.
11.25 In deploying newly mobilized units, the R.S.A. Player must distribute his deployment as evenly as possible among the available R.S.A. Supply Source hexes so that no hex receives two units before all eligible hexes have received one unit.
11.26 The B.N. Player should deploy newly mobilized Base units before deploying his eligible Combat units. Newly mobilized B.N. Base units may be deployed in any hex occupied by a supplied B.N. Combat unit. B.N. Combat units may be freely deployed in any B.N. Supply Source hex(es).
11.27 B.N. Unit Mobilization Chart (see map).
11.28 R.S.A. Unit Mobilization Chart (see map).
11.3 Progressive Mobilization
B.N. infantry battalions, regiments, and divisions are created through a special procedure called progressive mobilization. Progressive mobilization is executed exactly like regular mobilization except the Resource Expenditure requires the use of an existing B.N. infantry unit to initiate the mobilization of a larger B.N. infantry unit.
11.31 During the Mobilization and Demobilization Phase of the Strategic-Turn, the B.N. Player removes a B.N. infantry company, battalion, or regiment from the map and exchanges this unit for the larger sized infantry unit he wishes to mobilize. After expending the indicated cost in Resource Points, the larger B.N. infantry unit is placed on the Strategic-Turn Record Track in accordance with the required Time Expenditure necessary to complete the mobilization of the larger sized unit.
Example: During the Mobilization Phase, the B.N. Player removes a B.N. infantry battalion from the map and subtracts ten Resource Points from his B.N. Resource Pool. He then exchanges the battalion-sized unit for a regiment-sized unit and places this regiment on the Strategic-Turn Record Track Box representing the second Strategic-Turn which will occur after the completion of the current Strategic-Turn.
11.32 The progressive mobilization of a B.N. infantry unit is also allowed without removing an existing unit from the map if a B.N. unit required to mobilize a larger unit is presently on the Strategic-Turn Record Track. For example, if at the start of the Mobilization Phase, there is a B.N. infantry battalion in the current Strategic-Turn Box (now available to be deployed on the map), the B.N. Player may simply remove the battalion from the Strategic-Turn Record Track, expend ten Resource Points, and place a B.N. regiment on the Strategic-Turn Record Track in the box representing the second Strategic-Turn which will occur after the completion of the current Strategic Turn.
(Case 11.33 is not printed in the source.)
11.34 B.N. units which are removed from the map for the purpose of progressive mobilization may only be removed from a B.N. Supply Source hex which is not in an Enemy Zone of Control (see Case 10.23).
11.35 The B.N. Player may only build larger sized infantry units via progressive mobilization. The B.N. Player may break down his large infantry units into smaller sized units during the B.N. Organization Phase of any regular Game-Turn. A B.N. infantry division may be exchanged for three B.N. infantry regiments. A B.N. infantry regiment may be exchanged for three B.N. infantry battalions. A B.N. infantry battalion may be exchanged for three B.N. infantry companies. Note that although a given large B.N. infantry unit may be broken into smaller-sized units during the B.N. Organization Phase, smaller-sized units may not be recombined to form a larger B.N. unit, even if stacked in the same hex during the B.N. Organization Phase.
11.36 The R.S.A. Player cannot create larger units via progressive mobilization.
11.37 Note: By mutual agreement of both Players, mobilizing B.N. units may be deployed face-down on the Strategic Turn Record Track and may be placed in a Strategic-Turn box beyond that required by the Time Expenditure indicated for that type of unit.
11.4 How Cadres Are Formed and Rebuilt
11.41 A Cadre represents the remnants of a full-strength unit which has been reduced by Combat or Attrition. Cadres are printed on the back of all R.S.A. units (except Commando units) and B.N. Air units. B.N. Ground units cannot form Cadres.
11.42 Cadres cannot be mobilized or voluntarily created. Cadres are only formed in accordance with the Combat and Supply rules (see Case 8.7 and Section 10.0).
11.43 Once a Cadre exists, it may be rebuilt back into a full-strength unit during the Mobilization and Demobilization Phase of any Strategic-Turn.
11.44 During the Mobilization Phase, a Player may remove a Cadre from any Friendly Supply Source hex which is not in an Enemy Zone of Control. He then consults the Unit Mobilization Chart to determine the Resource and Time Expenditure required to rebuild that type of unit from a Cadre back into a full-strength unit (this cost is indicated in parentheses on the Unit Mobilization Chart). After expending the indicated cost, he inverts the Cadre to its full-strength status and places the unit on the Strategic-Turn Record Track in accordance with the Time Expenditure required to complete the rebuilding process.
Example: During the Mobilization Phase of the Spring Strategic-Turn, the R.S.A. Player removes an R.S.A. infantry battalion Cadre from a City hex in the Republic of South Africa which is not in a B.N. unit's Zone of Control. The R.S.A. Player then subtracts the Resource Expenditure required to rebuild a full-strength infantry battalion (one Manpower Point and three Resource Points) from his Resource Pools. He then exchanges and places it on the Summer Strategic-Turn Box on the Strategic-Turn Record Track because the Unit Mobilization Chart indicates that one Strategic-Turn is required to rebuild the Cadre back into a full-strength unit.
11.5 B.N. Base Relocation
The B.N. Player may relocate one existing Base each Strategic Turn within restriction of Case 11.26.
12.0 How to Set Up and Play the Game
General Rule
The basic design of South Africa postulates an extended guerrilla conflict in which neither of the opposing forces would achieve decisive military results in a short period of time. Thus, the game is presented as a single Campaign Scenario which simulates the strategic course of the war based upon the military and economic decisions made by the opposing Players.
Procedure
By mutual agreement, the Players choose who will control the R.S.A. forces and the opposing B.N. forces. Each Player then deploys his initial forces on the map in accordance with Case 12.1. When the initial deployment is completed, play is initiated according to Case 4.2. Victory is determined in accordance with Case 12.3.
Cases
12.1 Deployment of Initial Forces
12.11 The following R.S.A. units may be deployed anywhere in Southwest Africa and/or the Republic of South Africa. R.S.A. units must be deployed on the R.S.A. City hexes. All units are at full-strength (no cadres).
Ground Units:
- 1 Armor battalion
- 1 Mechanized battalion
- 4 Infantry battalions
- 2 Airborne battalions
- 2 Artillery battalions
- 2 Reconnaissance battalions
- 1 Engineer battalion
- 4 Police battalions
Air Units:
- 2 Transport Helicopter
- 1 Attack Helicopter
- 2 Light Strike Air Units
- 2 Heavy Strike Air Units
12.12 The following B.N. units may be deployed (either face-up or face-down) anywhere within the indicated country. Air units must be deployed on top of B.N. Bases.
Angola
- Ground Units: 1 Armor battalion; 4 Infantry battalions; 1 Artillery battalion; 1 Flak battalion; 2 Base Units
- Air Units: 1 Light Strike Air Unit
Mozambique
- Ground Units (only): 2 Infantry battalions; 2 Base Units
Rhodesia
- Ground Units (only): 1 Infantry battalion; 1 Flak battalion; 1 Base Unit
12.2 Initial Resources
12.21 At the start of the game, there are 250 Manpower Points in the R.S.A. Manpower Pool, and 30 Resource Points in the R.S.A. Resource Pool.
12.22 At the start of the game, there are 10 Resource Points in the B.N. Resource Pool.
12.23 At the start of the game, the R.S.A. Tax Rate is considered 10%.
12.24 The Game-Turn Marker should be placed in the first box on the Game-Turn Record at the start of the game.
12.25 The Strategic-Turn Marker should be placed in the Spring Box on the Strategic-Turn Record at the start of the game.
12.3 Game Length and Victory Determination
Despite their initial military superiority, the strategic situation confronting the White South African forces is grim. Assuming sufficient internal determination and external support and material aid, a Black Nationalist victory is probably inevitable in the event of a protracted conflict. The major question is how long could the White regime sustain political and economic control of South Africa. The Campaign game of South Africa focuses solely on this question and the objective of the R.S.A. Player is simply to delay the B.N. Player from achieving victory for as long as possible.
12.31 The Campaign game is unlimited in length and victory is determined according to the following criteria:
- A. The game results in a B.N. Victory if seven or more Town hexes and one City hex within the Republic of South Africa are occupied by face-up B.N. units at the start of any Strategic-Turn.
- B. The game may be ended as a draw at any time by the mutual agreement of both Players.
12.32 Because of the unlimited length of the Campaign game, Players may find it desirable to skip through any number of Game-Turns during which neither Player wishes to take any significant military action. This is permitted by prior mutual agreement of both Players. Each Strategic Turn, however, must be played in accordance with Case 4.4.
12.33 Because no R.S.A. victory is possible, Players may evaluate their performance by playing two consecutive games and comparing the total number of Game-Turns each Player requires to fulfill the B.N. requirements, including the number of Game-Turns skipped in accordance with Case 12.32.
13.0 Varying the Standard Scenario
The standard scenario postulates that eventually the Republic of South Africa will collapse. The question is how long it will exist. Certainly many games will be terminated by the Players before any decision is reached or even foreseeable in the finite future. If the R.S.A. Player can prolong the game and exhaust the patience of the Black Player he has "won" the game since he has not lost.... yet.
Procedure
During the course of Play, either Player may be awarded Victory Points on the basis of criteria in Variant Table. Thereafter, at the beginning of each Strategic Turn, the Player possessing more Victory Points (and only he) may choose to roll the die and consult the Variant Table which will describe how the conditions of Play are henceforth altered. Or the Player may refuse to vary the scenario. If a Player opts to vary the scenario the existing Victory Point totals of both Players are reduced to zero.
Award of Victory Points
To the R.S.A. Player:
- 1 point for each Internal Guerilla unit destroyed.
- 1 point for each Black company destroyed.
- 1 point for each Black base destroyed.
To the B.N. Player:
- 1 point for each R.S.A. ground combat Strength Point lost including the difference between full-strength and a cadre unit. Point loss will vary depending on whether unit was attacking or defending.
- 1 point for each R.S.A. city or native reserve occupied by a B.N. unit (either face up or face down at the conclusion of the R.S.A. Player-Turn.)
Quick Victory
If the R.S.A. Player can show a ratio of 3-1 or better in Victory Points for any three successive Strategic Turns, he wins the game. If on the other hand the B.N. Player has a 3-1 or better ratio of Victory Points on any Strategic Turn he wins the game.
Variant Table
| Die Roll | Event |
|---|---|
| 1 | UN establishes independent Namibia. The South African Player must withdraw all forces from Namibia by the next Strategic Cycle. Thereafter Namibia will be treated as a Black nation a la Angola, etc. If the South African Player refuses to withdraw from Namibia the effect of any economic dislocation is doubled (lose 60 people from economy per dislocation.) |
| 2 | Soviet Bloc increases technical aid. The Black Player may mobilize aircraft and flak units (within counter mix limits) at no cost in resource points or time on this and all following Strategic Turns. |
| 3 | Botswana Government collapses. The Black Player may deploy bases in Botswana henceforth. |
| 4 | Nigerians Intervene. The Black Player may mobilize one infantry division at any existing base in Angola or Namibia at no cost in resource points on this Strategic Turn or any following Strategic Turn at his option. |
| 5 | U.S. Navy intervenes. All RSA air and helicopter units are eliminated, none may henceforth be mobilized. |
| 6 | 3rd World War erupts. The Black Player is henceforth awarded resource points solely on the basis of the RSA taxation rate. |
Note: If the die roll indicates a variation already in force due to a previous Variance there is no effect except for Variant number 4 (Nigerian Intervention) which permits the B.N. Player to deploy another division.
Variants Rationale
- The RSA occupies and administers Namibia under a League of Nations Mandate whose legitimacy is disputed. It is not unreasonable to posit a UN resolution supported by the US and USSR tying economic sanctions to a demand that the RSA withdraw from Namibia. While defiance of such a resolution would offer military benefits and security to the western portion of the RSA, the loss of foreign trade would result in severe economic dislocations.
- The standard scenario posits a military and political threat to the RSA in a Black Nationalist coalition front, demanding a "one man, one vote" democracy in the RSA. It is not hard to visualize a future where the BN is viewed as the "good guys." If the US President viewed the situation thus, he might find difficulty in opposing increased subrosa aid by the Communist bloc in support of a war of national liberation. Such aid in equipment, pilots, etc. would quickly benefit the BN.
- The Black government of Botswana is trying to maintain a stable neutral regime, but Botswana gendarmes have been unable to prevent Blacks from operating against Rhodesia from bases near Francistown. The Botswana civil authority may collapse a la Lebanon in the face of black refugee and guerrilla presence, depriving the RSA of a convenient client buffer state. Such collapse would require RSA troop deployment into Botswana to prevent the establishment of BN base camps.
- While Nigeria is now an expanding nation of tremendous promise and problems, its economic development has been uneven, and there are still serious tribal and religious differences. As, perhaps, a natural leader to Black Africa, a Nigerian expeditionary force might—under the right conditions—fight for the freedom of South African blacks on the Angola/Namibia front. Their infantry, armor, artillery, and air would be a serious threat to the RSA.
- The US has the ability to intervene directly and decisively in South Africa. A multi-carrier Task Force operating off the coast of South Africa could eliminate the South African Air Force (and Navy) in a couple of weeks of sustained combat. Bereft of air support, the RSA army would be a much less formidable force against the BN.
- Any occurrence in the world situation that would deprive the BN of outside aid would leave the RSA to deal with insurgency as a strictly local problem, allowing them to institute social order (apartheid, etc.) as they view necessary and right. A Third World War precipitating a nuclear holocaust in the Northern Hemisphere would fit the bill nicely—as would Northern climate adversely affecting agriculture. The RSA would be one of the few "civilized" nations left, and it would be a question of "When in Rome...."
The source's "Design Credits" block at the end of the rulebook is attribution and is not transcribed.
Charts and Tables
The charts are printed on the game map; they are transcribed here from the printed values. The Combat Results Table rows are printed without die-roll numbers; the die-roll numbers appear in the terrain columns.
[5.32] Terrain Effects Chart
| Terrain Type | Evasion Value | Movement Point Cost: Non-Motorized | Movement Point Cost: Motorized and Armor |
|---|---|---|---|
| Clear | 0 | 1 | 1 |
| City | -2 | 1 | 1 |
| Desert | -1 | 2 | 1 |
| Karoo | 0 | 2 | 1 |
| Bush | +1 | 2 | 1 |
| Rough | +2 | 3 | 4 |
| Woods | +3 |
Key: • = No effect (other Terrain in hex determines Evasion Value). * = Armored types prohibited except on Road or Trail. P** = Armored and Motorized prohibited unless Engineer unit present in hex. S = See Case 5.4.
[8.6] Combat Results Table
Die-roll when Defender is in: City, Mtn, Woods, Swamp | Bush, Rough | Desert, Clear, Karoo. Columns are the Ratio of Attacking/Defending Strength.
| City / Mtn / Woods / Swamp | Bush / Rough | Desert / Clear / Karoo | 1-2 | 1-1 | 2-1 | 3-1 | 4-1 | 5-1 | 6-1 | 7-1 (9-1, 8-1, 7-1) | 10-1 |
|---|---|---|---|---|---|---|---|---|---|---|---|
| – | – | 1 | Dr | Dr | Dr | De | De | De | De | De | De |
| – | 1 | 2 | Ar | Ar | Dr | Dr |
The Combat Results Table columns are headed 1-2, 1-1, 2-1, 3-1, 4-1, 5-1, 6-1, 9-1 / 8-1 / 7-1 (shown together as a single column at 7-1), and 10-1 as printed. Result codes are explained in Case 8.7.
[7.34] Contact Table
| Terrain | 1 | 2 | 3 | 4 | 5 | 6 | 7 | 8 | 9 | 10+ |
|---|---|---|---|---|---|---|---|---|---|---|
| Mountain | • | • | • | • | • | 6 | 5 | 4 | 3 | 2 |
| Woods/Swamp | • | • | • | • | 6 | 5 | 4 | 3 | 2 |
Columns are Total Contact Rating in Hex.
Key: To Contact, die-roll must be equal to or greater than the indicated number obtained by cross-referencing the Total Contact Rating and Terrain type in hex. • = Contact impossible. C = Contact automatic (if desired).
[11.14] R.S.A. Dislocation Table
| Die Roll | 5% | 10% | 15% | 20% | 25% |
|---|---|---|---|---|---|
| 1 | D | D | D | D | D |
| 2 | • | D | D | D | D |
| 3 | • | • | D | D | D |
| 4 | • | • | • | D | D |
| 5 | • |
Columns are the Selected R.S.A. Taxation Rate. Key: • = No Effect. D = Dislocation/B.N. Guerrilla (see the Strategic-Turn Sequence Outline in Case 4.4 and refer to Phases C and D).
[11.15] B.N. Resource Availability Schedule
During the Resource Augmentation Phase of each Strategic Turn, the B.N. Resource Pool total is increased according to the following Schedule:
- B.N. Resource Points are derived from the selected R.S.A. Taxation Rate as follows:
| Taxation Rate | Derived B.N. Resource Points |
|---|---|
| 5% | 1 |
| 10% | 2 |
| 15% | 4 |
| 20% | 8 |
| 25% | 16 |
- Ten (10) B.N. Resource Points are awarded for each Diamond Coast, Native Reserve, and/or City hex within the RSA or Southwest Africa which is occupied by a face-up B.N. unit during the Resource Augmentation Phase.
- One hundred (100) B.N. Resource Points are awarded for each Metropolitan City hex within the Republic of South Africa which is occupied by a face-up B.N. unit during the Resource Augmentation Phase, even if the hex is also occupied by R.S.A. units.
- Thirty (30) B.N. Resource Points are immediately awarded during any Player-Turn in which any R.S.A. unit enters any hex outside of the territory encompassed by the Republic of South Africa and Southwest Africa.
[11.27] B.N. Unit Mobilization Chart
| Unit Type | Resource Points | Strategic Turns |
|---|---|---|
| Infantry | 1 | 0 |
| Base (x2) | 10 | 0 |
| Armor | 8 | 1 |
| Flak Bn. | 6 | 2 |
| Artillery Bn. | 10 | 2 |
| Light Strike Air Unit | 10 (8) | 3 (1) |
Progressive Mobilization
| Unit Type | Resource Points | Strategic Turns |
|---|---|---|
| Infantry Bn. (from Inf. Co.) | 5 | 1 |
| Infantry Rgt. (from Inf. Bn.) | 10 | 2 |
| Infantry Div. (from Inf. Rgt.) | 40 | 3 |
Unparenthesized figures are used when a unit is initially mobilized. Parenthesized figures are used when a unit is being rebuilt from its cadre.
[11.28] R.S.A. Unit Mobilization / Maintenance Chart
| Unit Type | Manpower / Resource Points | Strategic Turns | Maintenance (RP's) |
|---|---|---|---|
| Infantry | 2M/4RP (1M/3RP) | 1 (1) | 1 |
| Reconnaissance | 2M/5RP (1M/4RP) | 1 (1) | 1 |
| Armor | 2M/8RP (1M/5RP) | 2 (1) | 1 |
| Mechanized | 2M/7RP (1M/4RP) | 1 (1) | 1 |
| Airborne | 3M/6RP (2M/4RP) | 2 (1) | 1 |
| Engineer | 3M/6RP (1M/4RP) | 3 (1) | 2 |
Unparenthesized figures are used when a unit is initially mobilized. Parenthesized figures are used when a unit is being rebuilt from its cadre.
Tracks and Records
The game map also carries the Black Nationalist Resource Pool track (0–9), the R.S.A. Resource Pool and R.S.A. Manpower Pool tracks (0–9), the R.S.A. Taxation Record (5%, 10%, 15%, 20%, 25%), and the Game-Turn and Strategic-Turn Record Tracks (the Strategic-Turn Record Track shows the seasons Spring, Summer, Autumn and Winter). The printed map sheet is not transcribed beyond these chart labels.