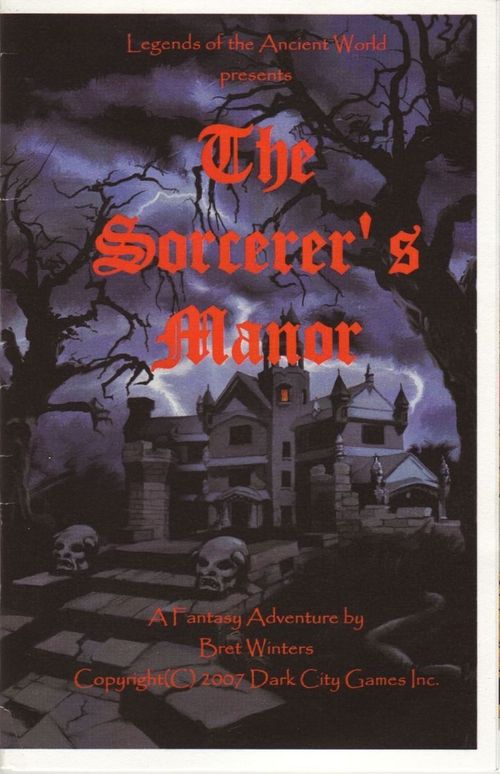
Legends of the Ancient World: The Sorcerer's Manor
Legends of the Ancient World: The Sorcerer's Manor Rulebook
Table of Contents
Table of Contents
- Rules
- The Adventure
- Begin
- Entries
- Appendix A: Skills
- Appendix B: Weapons/Armor
- Appendix C: Magic
- Appendix D: Races
Rules
Players play one or more characters who go adventuring. One player reads the entries aloud, and tracks progress.
Entries
The adventure contains numbered entries. Each entry contains options. Upon choosing an option, turn to the corresponding numbered entry and continue from there.
Plot Words
If you choose an option with an upper-case word in parentheses, record this as a plot word. If you already have a plot word shown in brackets, turn to the corresponding entry.
Battles
When you fight, place your characters on the board as instructed by the entry. Your characters move first.
Player Turn
The active player moves his characters one at a time. When his characters have moved, the next player begins.
Character Turn
In his turn, a character moves, and then executes ONE action. An action can be an attack, casting a spell, or using an item.
Characters and Action
Create a character with three attributes--Strength (ST), Dexterity (DX), and IQ (IQ). Allocate 32 points, with a minimum 8 points per attribute. A character begins with 4 skill points (max 2 per skill). (Appendix A)
Passing a Check
A character must pass 3/DX to hit a foe. Roll three six-sided dice (3d6). If the total is the character's DX or less, he hits and rolls damage (Weapons / Armor / Damage).
Winning an Action
You and your foe each roll any number of dice (d6). The higher roll total wins. A total exceeding a character's attribute fails.
Weapons / Armor / Damage
Weapons
When you hit, roll a number of dice (d6) equal to your weapon's damage rating. The roll total is the damage inflicted on the foe. Heft is the ST required to use the weapon. (Appendix B)
Armor
Reduce incoming damage by the character's armor protection rating. Reduce the character's DX by the armor burden.
Damage
A character suffering his ST in damage is incapacitated. He can do nothing. After battle, unless healed to 1ST, he dies. Living characters recover between adventures.
Fatigue
A character suffering (damage + fatigue) equal to his ST is incapacitated. Fatigue recovers with sleep.
Movement
Movement
A character can move a number of spaces equal to half his DX, rounded down. After moving, he can execute one action.
Space
Unless grappling, only one character occupies a space.
Attack
After moving, an attacker can attack ONE foe, using one of the following actions:
Strike
An attacker hits an adjacent foe by passing 3/DX. If the attacker hits, roll damage.
Shoot/Throw
An attacker with a missile weapon hits an unobstructed foe by passing 3/DX. A shooter cannot move, but a thrower can. Targets behind cover are 4/DX to hit.
Grapple
An attacker attempts grappling by entering a foe's space. On winning DX, the attacker rolls damage. Otherwise, the weaker fighter exits, and the two are not grappling.
Grappling Options
Grapplers only fight each other. The fighter winning ST can: (1) Roll damage; (2) Exit or eject a weaker foe; or (3) Drag his foe one space. Unarmed damage is d2. Stronger fighters do +1 damage. No armor/grappling.
React
A defender can dodge, counterattack, or grapple one foe, but he cedes his next turn.
Dodge
A defender dodges a strike by passing 3/DX. If he has no space to retreat, he cannot dodge. The defender can view the attacker's hit roll, but not damage roll, before deciding to dodge.
Counterattack
A character surviving an attack can strike or shoot his attacker by passing 3/DX.
Grapple
A defender surviving a strike can attempt grappling by entering the foe's space. On winning DX, the defender rolls damage. Otherwise, the weaker fighter exits, and the two are not grappling.
First Attack
A grappling target who has not reacted this turn can strike or shoot his foe before grappling. The target hits by passing 3/DX. If he hits, he rolls an extra die of damage.
Zone of Control
If an attacker, next to a defender, moves to another adjacent space without attacking, the defender can counterattack or grapple the attacker.
Magic / Psionics
A mage casts a spell by passing 3/IQ. Some spells require the mage to win IQ against his target (Appendix C).
Requirements
A mage can only use spells his IQ or less. He can cast into any unobstructed space. He cannot move in the turn he casts, and he cannot cast while grappling.
Fatigue (F)
"F" is the fatigue the mage suffers when casting succeeds. A staff, wand, or psionic crystal absorbs fatigue for the mage. Staffs, wands, and crystals recharge overnight. Staffs/wands do d6 damage as a weapon.
Character Development
A character earns one experience point (XP) per fight he wins, or plot word he acquires.
Advancement
Characters increase attributes by spending XP = 3/2 x current attribute, rounded down. A character learns one point of a skill/spell by spending 10XP. Only mages learn spells, but they learn no skills.
Karma/Wish
A character passes a failed roll by using a karma point. A character spends a wish to fully revive, even if he just died. Karma, Wishes, & XP roll over to other adventures.
Curse
A curse reduces ST/DX/IQ by one point. A character lifts the curse by expending one wish, or permanently reducing his highest attribute one point. Curses are cumulative.
Sample Characters
Ajax ST14 DX10 IQ8 (Warrior) Skills: Acrobat+2, Sword+2 Weapons: Great Sword 3d6-1/14 Armor: Cloth 1/0
Magus ST9 DX10 IQ13 (mage) Spells:
- Fireball: 3d6 IQ12 F3
- Invisibility: Target is 5/DX to hit. IQ12 F4
- Shatter Weapon IQ12 F3
- Sorcerer's Tongue Weapons: Staff d6/8 F13 Armor: mage's Cloak 2/0
The Adventure
Enemy Tactics
Foes fight their closest enemy. They do not dodge, and flee on taking 1/2ST damage.
Checking at Locations
When the party must pass a check, one character checks once for the entire party.
Fantasy Economics
10 Copper (c) = 1 Silver (s). 100s = 1 Gold (g). 1c is a day of unskilled labor.
Begin
Characters
All characters are fully provisioned with food and water. Normal characters begin with a weapon, armor up to Chainmail, and either a shield or an additional weapon. Magic characters start with a staff of capacity equal to the character's IQ. Each character begins with 10s (silver shillings).
Time
Since the adventure takes place over the span of one day, there is no opportunity for wound recovery.
Special Notes
The six grey circles on the board denote columns. These spaces are completely off-limits. The columns block all movement, sight and missile weapons fire. Unless otherwise noted, these columns are always in play. Conversely, the stairway in the middle of the board is non-existent unless otherwise noted.
The battle board is the map on the last page of the PDF. It is a picture with no text layer and is not reproduced here; the entries refer to its lettered edges (A, B, C, D), its six grey column circles, and its X and Y markers.
Begin
Go to (000) and begin.
Entries
000
The pre-dawn cold chills you to your bones. The eastern glow brightens to reveal the time-ravaged manor, an intricate house of gothic splendor. The weight and scars of time have only accented the dark grandeur. You cross the courtyard, coming upon a small porch. Before the fractured doors, flies buzz over the putrid body of a Tigran; she has been eviscerated. Weapons and spells ready, you push aside the remains of a once stout portal, and enter the sorcerer's manor through the North door (001).
001
This is the entrance hall to the sorcerer's manor. Light-beams, stabbing through rotted holes in the walls, reveal a once-regal room decayed by time and violence. In the middle of the room lie many bodies: a dwarf, two humans, three Orcs, and five unidentifiable. You can tell these are victims of different combats, given the range of decomposition. Reddened rats scurry away as you enter.
You can go down hallways leading east (020) or west (045). To the south a hallway extends beyond a pair of open doors (011). If this is not your first time here, you can leave the manor through the north door (049). On passing 3/IQ, you may search the room (018).
002
There are several bodies cocooned here. Now drained husks, they have long ago been looted. As you look up, you see a backpack webbed to the ceiling. There seem to be enough handholds in the decayed wall to reach it.
You may leave down the stairs (011), go north (025) or you may try and retrieve the pack by passing 3/ST+CLIMBING (016). However, each failure results in the character taking 1D6 damage, no armor.
003
"The Worm God hungers, my loves," one of them states. "We are the Dwargs. You people call us 'sewer dwarves.' We will fight for our rightful place in the world--and you must know what that is. Softening the Earth with blood, for its return. Surely you recognize our might, and see your destiny as worm food." The Dwargs attack with initiative (014).
004
There is a gas canister behind the panel that activates the secret door. Now that you have found it, it is an easy task to disarm it.
You may head south, down the short hallway beyond the secret door (010), or leave to the east (040) or west (001).
005
At one time, this was probably an opulent bedroom. Now it is burned, but not by fire. An alchemist will recognize acidic action on the ancient furniture and the walls. Holes eaten through the paneling let light pour in. But at the center of the room lies a pool of shadow. As you enter the room, two slimy worms, each over a meter in length, crawl out of this darkness and flail toward you.
You are at B on the board; two worms are adjacent to "column" Y, which is the pool of shadow. A is north. Every five turns, if the worms live, two more sewer-worms emerge from the pool. If you survive, on passing 3/IQ, you may search the room (008) or depart to the east (025).
- Sewer-worms (2): ST6 DX11 IQ3; Acidic Bite 2 damage (no armor); Hide 1/0. Missile weapons are -2 to hit these writhing worms.
006
"And jusst what would we have to ssay?" He hisses in the common tongue. "Ssoon, you will be dead. All peopless. Praisse Set." You wonder if these creatures account for some of the sightings and violence in the Maul. He pauses as if ready to strike, then speaks. "Thiss iss older than your race. You are innocent of original ssin, but you musst sstill pay." The serpent attacks with initiative (SERPENT) (017).
007
This is the diary of the elven wizard Myseere. Evidently, he came with a companion to search the manor for spell books, twelve years ago according to last entries. You read the final lines, written with the precise elven characters but by a frail hand.
"Jubal is dead, and I bleed beyond hope in this hall. Such is the fate of Myseere. To whoever finds this journal, deliver it to my family in the Everbleak marshes. As a reward for the task, I have hidden a spell under a loose floor stone in the kitchen."
There is no more. The bodies on the floor are obviously more recent than Myseere's death.
You leave the room (001) (MYSEERE).
008
You find a small metal case that has survived the acid of the worms. There is nothing inside, but this is a durable container! It is big enough to contain several documents. In the ruins of the bed, you find a blue metallic torch. There is no obvious way to light it (005).
009
Before you can effectively strike, a small lightning bolt 1D6 zaps the attacking characters. "Please be careful my friends, there is no point in violence here." The apparition pauses and says "Now, what may I do for you?" (025).
010
You find yourselves in a bizarre antechamber, with a host of horrific artwork arranged about a bench. These paintings and sculptures depict a variety of tortures and perversions. The scenes are uncannily graphic. You are repulsed--but there is a hideous, hypnotic power here. From a painting at the opposite end of the room, a shadow emerges and drifts toward you.
Each character must win an IQ check against IQ11 to resist a Mind Control spell. If they fail, they are initially helpless during the upcoming fight, until hit in combat the first time, when they regain their senses. You are at A on the room board; the shadow is at C. The stair in the middle of the room is actually a bench; it cannot be moved through, though you may fire missile weapons or spells over it. The shadow has initiative. If you survive, you may leave to the north (020), or on passing 3/IQ, you may search (023).
- Shadow: ST12 DX9 IQNA; Unholy Touch 1D6 (no armor); Shadow Form 3/0.
011
This dim area stinks of decayed flesh, and you hear low noises. You come to a large room with a staircase in the center, leading upward. Your eyes momentarily water as you step into the room. When your eyes adjust, you see madness. Two gore-spattered, degenerate dwarves are hunched over a gasping, vivisected humanoid, feasting. The humanoid quivers in its death throes. The dwarves look up at your entrance, and emerge from red pools and clumps.
You may talk to them (003), or attack with initiative (014).
012
It is difficult to tell whether the tunnel is roughly-hewn or crumbling with age. There are caged fire-bugs in sconces along both walls. It goes on for 100 meters or so before you come to a room reeking of mud and venom. It appears empty at first, but then you make out a form slithering upright. "Vissitorss," it says. "Good."
You may flee back down the tunnel (040), attack the serpent-man (017), or try to talk with him (006).
013
You have shown the small, strange idol to several sages, but none are able to ascertain anything about its origins. On a tip, you visit a wise woman among the Shod, a local human ethnic group that still maintains a sense of identity. She is cold and uninterested until you display the idol.
"By Thanatos' grim scythe! That is a representation of Bosk, an ancient hero." She touches it with trembling fingers. "So much of what we were as a people is gone, first through enslavement and then assimilation." A few tears run down her age-seamed face. "Obviously, we are poor and I cannot pay you for this. But I will instead give you a half-dozen vials of Mashu (a concoction made by the Shod, healing 3 hits per vial), and I will sing your praises to your people."
You may accept or decline (049).
014
They yell and charge you, with froth, blood, and curses flying from their lips.
You are at A on the room board; the enemies are at C. A is north; the stairwell in the middle of the board is a solid obstacle for this fight. The Dwargs fight to the death. If you survive, you may leave to the north (001), take the staircase to the upper level (030), or on passing 3/IQ, you may search (021).
- Sewer-dwarves (Dwargs) (2): ST11 DX12(9) IQ8; axes D6+2; Chainmail 3/3, Small Shield 1/0.
015
You discover an odd parchment in a corner of the room. It depicts a strange door, and pictographically elaborates on how to open it. You investigate the tunnel leaving this chamber, long enough to know that it stretches on for many miles -- too many to explore now. You decide to leave (040).
If you run through the Sewers of Redpoint, you may use these instructions to open a certain door. If you find yourself at instruction (10) during the course of that adventure, you have the option of going to instruction (82) and continuing from there.
016
In the backpack you find a stone flask, a bag of 40 silvers, and an odd blue gem that glows faintly.
Pass 3/IQ against SCHOLAR or ALCHEMIST to determine what the stone is (022). Pass 3/IQ ALCHEMIST, HERBALIST or MEDIC to identify the potion (019). You may leave by the hallway to the north (025) or down the stairs (049).
017
You are at C on the room board; the serpent man is at A; A is north. The serpent-man has initiative. The first turn, he successfully casts the Stone Flesh spell. If you survive, you may depart (040), or search the room (015).
- Serpent-man: ST14(10) DX11 IQ13; Broad Sword 2D6; Hide 1/0, Stone Flesh 4/0.
018
On one of the bodies, you find a purse with 20 silver pieces. Under a pile of wood and plaster, against a wall, you find a small book. You can read it if you are literate in Elvish (007) or you move on from the room (001).
019
This is drang, a powerful but vile concoction of some forgotten culture. By drinking it and passing 3/ST, a character is healed of all poison and disease, and eight hits of damage. There is enough here for two doses (016).
020
This was a dining hall. The once-elegant table is fractured and decayed, and rotted tapestries still cover parts of the walls. A long table, still standing after these years, divides the foul-smelling room. On the floor, you make out more bodies. There are two fairly recent corpses, and a dozen or so skeletal forms. As you watch in the dim light, some of them stir and begin to rise: two skeletons wielding axes and shields. Their jaws are clacking, as if they are taunting, as they advance upon you!
You are at D on the room board; the skeletons are at B. A is north; the stairway in the center is the table (it cannot be moved through, though you may fire missiles and spells over it). If you survive, you may head down the eastern (040) or western (001) hallways, or on passing 3/IQ, you may search the room (024).
- Skeletons (2): ST14 DX9 IQ9; Axe D6+2; Shield 1/0; Skeletal Body 2/0 against piercing weapons, or 0/0 against swinging weapons.
021
On one of the Dwargs' bodies, you find a cameo, with a miniature painting inside, of a beautiful woman (CAMEO). There is nothing else of note in the room, aside from the precisely dissected body (014).
022
This is a power stone. Each day it allows the wielding mage an extra three fatigue, in the same manner as a staff (016).
023
You find the body of an adventurer in the corner, stuffed under a hollow pedestal. There are two stone vials in a pouch at his belt, and nothing else of value.
If you pass 3/IQ ALCHEMIST, MEDIC, or HERBALIST, you identify the potion in the stone vial as Mashu, a concoction made by the Shod, a local ethnic group here in Redpoint. It heals 3 hits per vial. Otherwise, you deem it a bad idea to sample it now, and save it for later. You now leave the room and head north (020).
024
There are a half-dozen more skeletons strewn about the floor, but none are moving. Among the debris, you find a pair of silver candlesticks that should fetch a nice sum at any market (200S). In the middle of the south wall, you find the outline of a door in the stones.
If you pass a 3/IQ+TRAPS, go to (004). Otherwise, as you find the panel that activates the door, a jet of dark gas sprays from the wall. Everyone who fails a 3/ST check takes 2 hits of internal damage as their lungs are burned! When able to continue, you may head south, down the short hallway beyond the secret door (010), or leave to the east (040) or west (001).
025
You come into a room lit by series of small gems set into the ceiling, and at several desks spaced out about the room. Every possible available measure of space along the walls has been covered by shelves, stacks of books and scrolls. There are a trio of recent bodies on the ground, and several skeletons as well. A luminous being appears before you, not quite substantial. "Yes?"
You may attack (009), reach for one of the manuscripts (038), speak with the being (029), leave to the south (030), the west (005) or the east (042).
026
"That is indeed her likeness," Honest Alzander says through his gap-toothed grin. "And I heard of who it was that took her. Maybe even where she is--an old church, converted to a warehouse." 20S later you have purchased a map from him of the late Gothic period of Redpoint's architectural history. With Alzander's commentary, you pinpoint several possibilities.
That night you get to work, and the first one you investigate, belonging to the Drake shipping family, is empty. Save for a single prisoner. As you approach the bound woman, there is movement in the darkness about you.
You are within three hexes of X on the room board; two Dwargs are at A and two cultists are at C. A is north. If you survive, you have rescued fair Saelia! You return her to her father -- who is now under house arrest, being held for ransom. Nonetheless, he gives you 500S, and she gives you a kiss (049).
- Sewer-dwarves (Dwargs) (2): ST11 DX12(9) IQ8; Axe D6+2; Chainmail 3/3, Small Shield 1/0.
- Cultists (2): ST12 DX12(10) IQ8; Broad Sword 2D6; Cloth 1/1, Large Shield 2/1.
027
You find a sloppily-concealed trapdoor in one corner of the room. It is well-oiled; the serpent-men must travel this way. You carefully lift it and see a short drop to a tunnel running south. Foul vapors drift toward you.
You may investigate the tunnel (012) or leave to the west (020).
028
The first wound Ximon takes, he curses you and teleports on his next action. You cannot trace him. You have made a powerful enemy (XIMON) (035).
029
It is talkative. "I am the sorcerer's librarian. Very important, you know. Though he hasn't asked for my assistance in a while. May I help you find a spell?"
A magical character may receive a scroll with any single spell he has the IQ to cast; after the adventure, he may study it and gain that spell, without having to pay experience points. You have the plot word (LIBRARY) (025).
030
The stairs from the first floor meet this dank, moldy room. The ceiling is lost in blackness; there is an archway to the north, and a hallway beyond. The room is empty. As you cautiously pass through, there is movement from above. Spiders... big spiders...
You are at C on the room board; the spiders are at A; A is north. The stairway in the middle of the board is a solid obstacle for this fight. If you survive, you may exit either to the north (025), down the stairs (011), or on passing 3/IQ, you can search (002).
- Spiders (2): ST6 DX12 IQ5; Bite 1D6-1; Special -- poison: On an attack that penetrates armor, if the defender fails 3/ST, he takes an additional 1d6-1 poison damage (armor does not protect against this poison damage).
031
You place the torches in the appropriate brackets. They suddenly flare to life, and the wall between them becomes dark and then opaque, as if you are looking through a membrane. You realize this is a mystic gate.
You may step through (035) or leave to the west (025).
032
You find the loose stone. Underneath you find a scroll case. On the scroll is the Rope spell. After the adventure, you may learn the spell, provided you have sufficient IQ (040).
033
"This does match the description of jewelry she wore. Where did you find this?" The sergeant seems earnest about his work. You describe the fight with the Dwargs--including the body, but without the vile feasting.
"I see. Well, as long as she has been missing, it is unlikely they would have just killed her, so that probably wasn't her body. Dwargs? There have been reports in certain areas of the city, of strange dwarves living in the sewers. But I always thought that Gomar had this lassie kidnapped. Huh."
With no more information, if you pass 3/IQ+STREETWISE you can gather more information from street contacts (026), or you can look for further employment (049).
034
The serpent-man's words about the dark god Set resurface in your mind. You make inquires and learn of a sage named Moffitt. "Interesting...though it may be a hoax. A few of those are going around." He glances at your sword. "Nothing personal." He looks at the map you recovered. "This appears authentic. Some of these hieroglyphs I recognize. Hmm... Maybe you could scout one of these locations for me?"
Yes (044) or no (049).
035
You experience a sudden nausea, but it passes and you find yourself in a cold chamber of black stone, the gate to your back. In the center of the room is a large, blood-drawn pentagram. Within it, dark forces swirl and seem to be coalescing. On the opposite side of the pentagram from you, a man in black robes chants and gestures, his concentration being on the events in the pentagram. Beside him are two skeletons. As soon as you enter the chamber, they come to life and advance upon you. He looks up, startled at your entry, and he stops his chant. The power that was being concentrated in the pentagram disperses, but a dark tension remains in the room, wanting to integrate.
"How did you get in here!" He thunders. His distinct baritone deepens as his black eyes shine from under the hood. "No matter. Once you are dead, an avatar of my lord, the Worm God, will writhe forth. I am Ximon, and you have angered me greatly."
You are at C on the room board; X and the six adjacent hexes constitute the pentagram. The six grey circles represent solid columns; characters may neither move into or fire through those spaces. The wizard is directly across the pentagram from you. A skeleton stands at B and at D. Any character stepping into the pentagram is sucked into a demonic world and is considered killed. The mage will cast 2F Fireball spells (2D6-1), until he is hit for the first time, whereupon he reacts unexpectedly (028). If you survive, you can look around (047) or step back through the gate (042).
- Ximon: ST14 DX12(10) IQ15; Staff 1D6; Leather Armor 2/2; Spells: Fireball; Teleport.
- Skeletons (2): ST14 DX9 IQ9; Axe D6+2; Shield 1/0; Skeletal Body 2/0 against piercing weapons only.
036
The stairs are ill defined and worn, as if made and used for serpent bodies. You go down slowly, and at that pace you have little difficulty. Your torch occasionally wavers, indicating that there is some air flow. You eventually come to a landing. Several tunnels join here, forming a kind of crossroads chamber. There is a strong odor of scales and venom. You can make out distant sibilant sounds, though you cannot tell from which tunnel they drift. As you look about, four serpent-men, two with blades and two with bows, wind into the chamber.
"Humanss are bold," says one. "But it ssavess uss having to hunt for food."
You are at D on the room board; the serpent-men are at B. A is north. The stairway in the middle of the board is a solid obstacle. If you survive, you search (048).
- Serpent-men (4): ST10 DX11 IQ11; Bow 1D, or Cutlass 2D6-2; Hide 1/0, Small Shield 1/0.
037
You look around the room but find no treasure. You realize you have come to a dead end. As you are about to leave, you look at the wall that the cultists were standing by expectantly. About five meters apart from each other are two torch brackets, one red and one blue.
If you have found two torches in your adventure through the manor and you wish to place them in the brackets, go to (031). Otherwise, you leave to the west (025).
038
A small lightning bolt 1D6 leaps out from the book before you touch it, hitting you on a 12 or less. "Next time, the bolt will be substantially more powerful, if what I have seen previously is indicative of what is about to transpire." The being seems to grow in stature a bit. "Now, what may I do for you?" (025).
039
You find a silver dagger in the hand of one of the statues; it is easily removable, and fit for use. You also find a torch of red metal, though there is no apparent way to light it. You do not find the bell you heard. Return to the east (001).
040
At one time, this was used as a kitchen. Old utensils still hang above splintered counters. As your eyes adjust to the new gloom, you see sinuous movement. "Hu-manssss," a voice hisses from the dark. "Alwayss curious. Makess you vulnerable, for our return. Praisse be to Set." Two serpent-men rise and quickly slither toward you!
You are at D on the room board; the serpent-men are at B. A is north; the circles are impassable columns. If you survive, you may leave to the west (020), or search (027). If you have the plot word MYSEERE (032).
- Serpent-men (2): ST10 DX11 IQ11; Bow 1D, or Cutlass 2D6-2; Hide 1/0, Small Shield 1/0.
041
A week later, after you have healed, you look to sell the cameo. There are a few reputable jewelers in the Commons, and the one you take the cameo to, a dwarf, recognizes the woman in the picture. "That is the daughter of the Demetrian ambassador. I can't touch this; there will be too many questions for one such as myself. You can sell it to someone in the street for 50S (049) or take it to the constable (033); I don't care. Nice shoes."
042
Once this was a fantastic laboratory, with glass and metal tubes, and beakers, and tools. Now these are all smashed, and this is apparently a rough barracks of some kind. Two armed men in robes, who appear to be waiting for something, yell at your arrival and draw weapons. You can tell negotiation will not work here, as they charge you!
You are at A on the room board; the cultists are at C; B is north. If you survive, you look around (037).
- Cultists (2): ST12 DX12(10) IQ8; Broad Sword 2D6; Cloth 1/1, Large Shield 2/1.
043
When your character wishes to spend XP to acquire a spell, he may do so from the librarian here at the manor, up to three times. On the fourth time, the sorcerer has returned--but that is another tale (049).
044
All work, no reward...why were you doing this again? You scout several of the locations Moffitt gives you, but they have all so far turned up empty or non-existent. Maybe the map was a decoy, or perhaps a plan of what is to be rather than what is. Or maybe it marks time-lost locations?
You look at the last spot he gave you, an old municipal building. For the last century or so it has been deserted and used as a refuge by the homeless. You are somewhat surprised to find a hollow space behind a crumbled wall. You see a sinuous rune, nearly faded by time, on the panel facing you. You push it open, and foul air wafts up from descending stairs.
You may continue (036) or leave (049).
045
This large room is a hall of statues. A half-dozen are spaced about in the gloom, of varied warriors and monsters, all poised for battle. There is the hollow sound of a distant bell, and then one of the marble figures creaks to life! It is the statue of a large, muscled wrestler. It comes toward you with surprising agility!
You are at B on the room board; the living statue is at Y; A is north. The statue grapples the closest character. If you survive, you may leave to the east (001), or on passing 3/IQ search (039).
- Living Statue: ST15 DX10 IQNA; Grapple 1D6+3; Stone Skin 4/0.
046
The Everbleak marshes are far to the southwest of Redpoint, and they are home to Myseere's elvin tribe. Retain this plot word for use in The Dark Vale (049).
047
There is seemingly little of value in this dark room. If you pass 3/IQ against JEWELER, you retrieve a perfect opal (300S). If you pass 3/IQ against SCHOLAR, you find a small, curious idol among others of little worth (IDOL). When ready to leave, you step back through the gate (042).
048
You find nothing around the room that seems significant, but on one of the serpent-men, you find an amulet that makes you shudder. Though repulsed, you take it with you to show Moffitt. When you return, you describe to him the deep crossroads and he is frightened. But when you produce the amulet, his eyes bulge.
"These are no mere Set-worshipping serpents. This amulet is known to me as a Venom-mark. As I understand it, only those who have sworn their lives to killing all for Set, essentially becoming a berserker, are given these by the vile priests. "It seems we have enemies below our very feet." He gives you 40S, and says that he will pursue his studies, and will try to communicate his findings to those in Gomar's court that would be willing to listen. He may contact you for further aid in the future (049).
049
You have survived! Congratulations. This is worth an extra XP on its own merits. Likewise, if you encountered Ximon and earned his enmity, that is worth another XP. You have put a few more coins in your purse, and have a tale to tell.
You may have acquired some plot words. You may rest up to your full strength, and then investigate them: CAMEO (041); MYSEERE (046); LIBRARY (043); SERPENT (034); IDOL (013).
Appendix A: Skills
Skills allow or assist an action. Swimming allows a character to swim. HTH assists a character in grappling or unarmed combat. Additional levels increment benefits.
Athletic
- Acrobat: +1DX dodge; -1 damage.
- Riding
- Swimming
Combat Skills
Each level gives +1DX and +1 damage.
- HTH: +1ST/DX Hand-to-Hand/Unarmed.
- Ax: +1 with Ax, Mace, or Club.
- Bow: +1 with Bow, or Crossbow.
- Knife: +1 with Dagger.
- Pole Arms: +1 with Spear or Halberd.
- Sword: +1 with Sword.
Social Skills
- Charisma 3/IQ: Control neutral NPC.
- Leadership: +1 to all friends' attributes.
- Language: Dwarvish, Elvish, Orcish
Survival Skills
- Naturalist: +1 healing herbs daily.
- Navigation: Move extra instruction/day.
- Stalker/Stealth: Free unopposed turn.
- Survival: Find one daily ration per level.
- Tracker: Identify, follow, erase tracks.
Trade Skills
- Alchemist: 1XP/(level) healing potion.
- Animal Handler 3/IQ: Stop animal attack. Tame one beast to serve you.
- Bard/Storyteller: One karma per friend daily, to be used in current day only.
- Craftsman: Earn skilled labor rate.
- Medic 3/IQ: Heal one damage/level, for damage sustained in current combat only.
- Merchant 3/IQ: Purchase/sell goods at 10% discount/profit per merchant level.
- Sailor: Handle boats and ships.
- Scholar: Read 1 instruction ahead/day.
- Thief 3/DX: Pick lock/disarm trap. Steal item from store or NPC. On failing 3/DX, 2x guards ST10 DX10 IQ10 arrest thief.
Appendix B: Weapons/Armor
Weapons ratings are for damage/heft. Armor ratings are for protection/burden.
Hand Weapons
- Dagger d6 (d6+2 grappling)
- Club d6/8 (can be thrown)
- Cutlass d6+2/10
- Short Sword 2d6-1/11
- Broad Sword 2d6/12
- Great Sword 3d6-1/14 (2 hands)
- Morning Star 2d6+1/13
- Battle Ax 3d6/15 (2 hands)
Pole Arms
Pole arm strike first, even in foe's turn!
- Lance d6+2/10 (can be thrown)
- Spear 2d6-1/11 (can be thrown)
- Halberd 2d6/12 (2 hands)
Missile Weapons
- Bow d6/9 (2 hands)
- Long Bow d6+2/11 (2 hands)
- Cross Bow 2d6/12 (2 hands--1 turn/reload)
Armor & Shields
- Cloth 1/0
- Leather 2/1
- Chain Mail 3/2
- Plate 5/3
- Shield 2/1
- Large Shield 3/2
Appendix C: Magic
Direct Spells
A mage throws a direct spell by winning IQ against the target.
Dynamic and Static Spells
Dynamic spells are a single action. Static spells remain for the duration of the battle. Static spells cannot be stacked.
Multi-Space Spells (marked by an *)
Mages can throw a multi-space spell on contiguous spaces. Each space costs F.
Staffs/Wands
A staff/wand max capacity = mage's IQ. Increase capacity by expending 2XP/point. Staffs/wants recharge overnight.
Creation Spells (Static)
- Fire IQ9-F2*: Burns 2 damage (no armor) on anyone in or passing through the space. Animals will not enter.
- Rope IQ11-F2*: Binding/climbing. Target escapes by winning /IQ against mage.
- Wall IQ11-F2*: Creates a 1-space solid wall. Cannot cast on occupied space.
Enchanting Spells (Static)
- Confusion IQ10-F4 (direct spell): Target is 4/DX or 4/IQ for all actions.
- Slippery Floor IQ10-F1: Character in spell space fights at 4/DX.
- Reverse Missiles IQ11-F3: All missiles attack shooter instead.
- Freeze IQ12-F4 (direct spell): Freezes target. Target breaks spell by winning IQ. Target unfrozen if attacked.
- Invisibility IQ12-F4: Target is 5/DX to hit.
- Flight IQ13-F4: Target flies with MA12.
- Stone Flesh IQ13-F4: 4/0 armor.
- Dispel Magic IQ14-F4: Kill static spell.
- Death IQ16-Fx (direct spell): Deliver 1 damage for each F spent.
Illusion Spells (Static)
Illusions persist until disbelieved or killed. Winning IQ against the mage kills the spell.
- Illusion IQ11-F2*: Create one-space object.
- Sleep IQ11-F3* (direct spell): Target falls asleep. Wakes if attacked/shaken.
- Mind Control IQ13-F5 (direct spell): Control target. No suicide. Target recovers by winning IQ vs mage.
Kinetic Spells (Dynamic)
-
Magic Fist IQ8-F2: 2d6 damage
-
Drop Weapon IQ8-F1
-
Shatter Weapon IQ12-F3
-
Fireball IQ12-F3: 3d6 damage. Starts fire.
-
Lightning IQ14-F4: 4d6 damage
Morphing Spells (Static)
Mage assumes the DX, shape and abilities of creature, but retains IQ. Mage returns to human form when willed or unconscious. Mage cannot cast spells in guest form.
- Werewolf IQ11-F2: STx1 DX12, move 8, Bite d6+1; Skin 1/0.
- Werebear IQ13-F4: STx3 DX11, Bite 3d6; Skin 2/0. Damage reduced 1/3 in human form.
- Weregoyle IQ15-F4: STx2 DX11; Claws 2d6, Skin 4/0, flight 16 spaces. Damage reduced 1/2 in human form.
Seeing Spells (Dynamic)
- Reveal Magic IQ9-F2: Detect magic
- See Future IQ14-F3: Read one instruction ahead.
Summoning Spells (Static)
Mage summons one being only. Being appears adjacent, and moves the following turn. Being vanishes if mage incapacitated.
- Summon Wolf IQ9-F3: ST11 DX12 IQ6 MA8; Bite d6+1; Skin 1/0.
- Summon Warrior IQ10-F3: ST12 DX12 IQ8; Sword 2d6, Shield 2/1.
- Summon Bear IQ11-F5: ST30 DX11 IQ5; Attack 3d6; Fur 2/0.
- Summon Gargoyle IQ13-F5: ST20 DX11 IQ8 MA16/fly; Claws 2d6, Skin 4/0.
- Summon Giant IQ14-F5: ST45 DX10 IQ8; Club 3d6+3; Shield 3/0.
- Teleport IQ15-F1: Move one character to any open space.
Appendix D: Races
Humans comprise a multitude of sub-races, a few native to the Stormreach peninsula, plus a dozen waves of immigrants and slaves. Thus a Redpoint native human may be of any skin hue.
Dwarves were dominant here a millennium ago, but were displaced by human invaders. There are now only several minor, isolated kingdoms in the mountainous spines to the peninsula.
The Tigrans originate from the grasslands along the eastern coast of the peninsula. They are numerous, and Gomar has allied with them rather than attack them.
Elves are rare in this part of the world, though there are two established communities on the Stormreach. One is to the southwest in the Everbleak marshes; the other is far upland, in a wooded vale to the southeast.
Orcs were long ago driven to the marshes along the western coast. Over 50 years ago, hordes swept across the reach, but they were eventually destroyed, and the war was then carried deep into the marshes. The Orcs have yet to recover, and are rare outside of their dank homelands.
Ursans are bear-men. They live in tribal nations in the uplands. Gomar has exploited natural rivalries to become a power among them.
Gnomes dwell in hills far away from settled areas. They are generally reclusive, but some young gnomes get wanderlust before they retire to their burrows.
Caprians, or goatmen, were believed to be extinct for the last millennia or so; recently, they have been encountered in the hills and marshes and western shores.