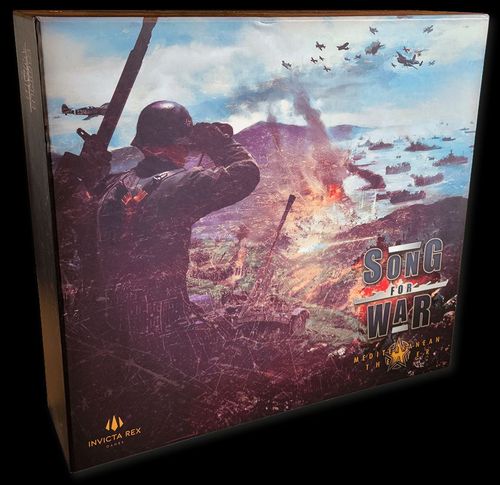
Song for War: Mediterranean Theater
Song for War: Mediterranean Theater Rulebook
Table of Contents
Table of Contents
- Components
- Units
- Order of Play
- Phase 1: Tactical
- Hidden Fleets (HF)
- Defensive Lines
- Mines & Bridges
- Declaring Battles
- Resolving Battles
- Air Drops, Amphibious Assaults, and Landing Defense
- Phase 2: Victory
- Phase 3: National Support (NS)
- Phase 4: Resupply
- Shipping Lanes
- Scenarios & Set Up
- Short-Play Scenarios
- Optional Rules
- 6-Player Commander Game
Components
Applies to Mediterranean Theater scenarios only and applies to Mediterranean Operations scenarios only are marked where they apply in this rulebook. All other rules apply to all scenarios.
Mediterranean Operations components:
- Double-sided standard unit tiles and unit trays
- Nation player aids (4)
- Hidden Fleet dials (4) (assemble using rivets)
- Double-sided game board
- Hidden unit box tokens (8)
- National control tokens (16)
- Battle dice (12)
- Fortification tokens (8)
- Mine/defensive line tokens (24)
- Blown bridge tokens (12)
- Battle declaration markers (12)
- Stage & movement step tracker (1)
- Victory point tracker (1)
Mediterranean Theater includes all components from Mediterranean Operations and adds the following:
- Additional double-sided standard unit tiles
- Objective & airfield tiles (23)
- Unique unit tiles (21)
- National support cards (64)
- 12 additional battle dice (24 total)
- National support tokens (16)
- 6-player commander game player aids (6)
- Expanded double-sided game board
Units
Standard Units
There are 3 Types of Standard Units: Air, Sea, and Land. Standard Units are common to all nations and shown on the Nation Player Aid. Each Standard Unit has 5 core attributes: Move, Armor, Firepower, Cost, and Abilities. The number of Standard Units available in the game is limited to the number of Standard Unit Tiles in the Unit Tray.
Move
» The maximum number of spaces on the board a Standard Unit can move on each of its Movement Steps. A Fighter, for example, can move up to 4 spaces on Movement Steps 1, 2, and 6. The space on which the unit is located before it moves does not count toward the limit. Land Units move on land, mountain, road, and desert spaces. Sea Units move on sea spaces. Air Units move on all terrain types. See Movement Steps and Terrain for more.
Armor
» Armor color (White, Gray, or Black) represents the minimum level of Firepower an enemy must have to destroy the unit. Armor is in effect whether the unit is acting as an attacker or defender (including all bonus rolls). Units with stronger Armor require hits by enemies with stronger Firepower, thereby making them harder to destroy. For example, an Air Transport has White Armor. To destroy it requires a successful attack or defense roll by an enemy with at least a White Firepower and permitted to hit Air Units, such as a Fighter or Anti-Air Unit. Or, for example, Cruisers have Gray Armor. To destroy one requires a successful attack or defense roll by an enemy with at least a Gray Firepower and permitted to hit Sea Units, such as Light Bombers, Heavy Bombers, Artillery, and other heavy Sea Units.
Cost
» The cost to purchase and place 1 new Standard Unit during Phase 4: Resupply. For example, it costs 12 resupply to purchase and place 1 new Standard Battleship during the Resupply Phase.
Firepower
» Firepower represents the unit's ability to hit and destroy an enemy. It is in effect whether the unit is acting as an attacker or defender (including all bonus rolls). There are several important rules for Firepower:
- Unit Type: Not every unit can attack and defend against every other unit. The icons for Air, Sea, and Land in the Firepower Box indicate which Type(s) of enemies a unit is permitted to hit. For example, an Artillery Unit can only attack and defend against enemy Land and Sea Units, but not Air Units. When there are no enemy Land or Sea Units involved in the battle and in range, the Artillery Unit receives no attack or defense roll (it can, however, be taken as a casualty when hit by the enemy). Or, for example, an Anti-Air Unit can roll for attack or defense against enemy Air Units, but nothing else. During battle, this makes using combined forces important. Note: Hitting an enemy in battle vs. declaring a battle are two very different and important mechanics. See Declaring Battles for more.
- Color: Firepower color (White, Gray, or Black) represents the highest level of Armor the unit can destroy on a successful attack or defense roll. During a battle, a unit's Firepower color is matched up against the Armor color of the enemy. For example, a Submarine has White Firepower and is permitted to hit enemy Sea Units. When a Submarine rolls a successful attack or defense roll, the enemy must remove a Sea Unit with White Armor as a casualty, such as a Destroyer or Sea Transport. If there is no enemy Sea Unit with White Armor involved in the battle, the hit has no effect.
- Battle Dice: Attack and defense rolls are made using the colored Battle Dice, which correspond to the Firepower and Armor colors of White, Gray, and Black.
- Number: Hits and misses are determined by the Firepower Number, which is the minimum number needed for a unit to score a successful hit when it is attacking or defending. For example, a Standard Infantry Unit has a White Firepower, rolls a White Battle Die, and must roll a 9 or higher to hit and destroy an enemy Land Unit with White Armor, such as a Land Transport or an opposing Infantry.
- 1 Attack, 1 Defense Limit: A unit can attack once and defend once in each of the Movement Steps 1-5 (the final Movement Step (6) is just for Air Unit return and no battles are declared). Thus, a unit can take part in up to 2 battles per Movement Step, once as an attacker and once as a defender. It is not required for the unit to be located on a battle-activated space with a Battle Declaration Marker in it for this rule to apply. When a unit provides supporting fire to an active battle in a nearby space, it also counts toward the unit's 1 attack, 1 defense limit. Exceptions to this rule include bonus rolls given for: 1) Built-in Anti-Air ability of Cruisers and Aircraft Carriers; 2) Bridge crossings; 3) Push through; 4) Landing defense; 5) NS Card Unit Upgrades and Unique Units; 6) Full disengage; and 7) Full retreat.
Armor and Firepower Levels
There are 3 basic levels of Armor and Firepower: White (light), Gray (medium), and Black (heavy). By playing NS Cards, the Armor and Firepower of Standard Units can be upgraded and Unique Units introduced with Purple (ultra-heavy) Armor.
Firepower Rules for Bombers
- The "not permitted to attack" icon indicates that the unit is not permitted to attack the Unit Type shown in the Firepower Box. For example, when on the attacking side (the side moving, declaring battles, then resolving the battles), Standard Light and Heavy Bombers receive no roll vs. enemy Air Units. They can only roll for attack vs. enemy Land or Sea Units involved in the battle.
- When on the defending side, Standard Light Bomber Units receive a weak defense roll @10 or higher against enemy Air Units involved in the battle. However, when defending against multiple Unit Types in battle, a Light Bomber must declare whether it will roll to defend against an enemy Air Unit (White Firepower @10 or higher) or against an enemy Land or Sea Unit (Gray Firepower @8 or higher) in the battle. A Light Bomber has 1 roll and therefore cannot defend against both.
- The "not permitted to defend" icon indicates that the unit is not permitted to defend against the Unit Type shown in the Firepower Box. For example, when on the defending side, Standard Heavy Bombers receive no roll vs. enemy Land or Sea Units. They can only defend against enemy Air Units, and with a weak White Firepower @11 or higher to hit. Inherently offensive, Heavy Bombers are at their best when attacking dropping bombs and their 5 Gray rolls @9 or higher to hit vs. enemy Land and Sea Units come into play.
Abilities
Each Standard Unit has abilities that can impact movement and battle.
- Anti-Air bonus roll(s): Unit receives a bonus roll in battle for each icon shown on its Unit Tile. The bonus does not count toward the unit's 1 attack, 1 defense limit. The Firepower is the same as a Standard Anti-Air Unit. Roll on Battle Step 1. Airfields with this icon on the game board also receive this bonus.
- Control-capable unit: Land Units able to take control of an Objective or Airfield. Infantry and Artillery Units carried aboard Land Transports are still control capable. Infantry Units aboard Air Transports lose their control capability until unloaded and back on the ground. See Phase 2: Victory for more.
- Disengage: During Movement Steps 4 and 5, whenever a Land Unit moves out of a contested space, it is considered a disengage. The disengaging nation must declare which form of disengage it will use: 1) Staged disengage, which requires leaving behind at least 1, control-capable unit of that nation or its teammate in the contested space (in effect, providing cover); or 2) Full disengage, leaving no friendly control-capable units behind. When performing a full disengage, enemy Land Units (only) on the space receive an immediate bonus attack roll, and casualties from the disengaging units (only) are removed. Enemy units in nearby spaces do not receive this bonus roll and may not provide supporting fire from range. Fully disengaging units receive no roll and no help from friendly supporting fire. Units that survive complete the full disengage move.
- Extra shot: For each 12 rolled in battle, the unit receives 1 bonus roll. This happens successively until a normal hit or miss occurs.
- Level up: For each 12 rolled in battle, the Firepower of the hit increases 1 level. This allows units with weaker Firepower to hit enemies with superior Armor. For example, when a Cruiser with a Gray Firepower rolls a 12, that hit levels up to a Black Firepower, making it able to destroy a Battleship with Black Armor.
- Precise hit: For each 12 rolled in battle, the nation that rolled the 12 selects which unit the enemy must remove as a casualty. All Firepower rules still apply. For example, a Fighter that rolls a 12 facing a Light Bomber and a Heavy Bomber chooses which bomber must be taken as a casualty.
Performing a Land Bridge
A Sea Transport can act as a land bridge connecting 2 land spaces (only) separated by a single sea space, with the following conditions:
- The Sea Transport must be empty of units.
- The land bridge functions on the Movement Step of the Land Unit(s) moving over the bridge, not the Movement Step of the Transport. For example, a Standard Tank can use a bridge on Movement Steps 4 and 5.
- The sea space where the Sea Transport is located counts toward the move limit of the Land Units moving over it. Note: This means that Infantry Units must be aboard Land Transports to use a land bridge.
- Land Units using the land bridge cannot be loaded onto the Sea Transport acting as a bridge, or end their move on the sea space.
- When the sea space is contested, the land bridge cannot function. The space must contain only friendly units.
- A nation can use its Sea Transport to act as a land bridge for units of a teammate nation.
Unique Units
Unique Units are specialized to each nation in the Mediterranean Theater scenarios. Nations introduce them during Phase 3: National Support by playing NS Cards. Unique Units are purchased and placed on the board during Phase 4: Resupply. The number of Unique Units available in the game is limited to the number of Unique Unit Tiles in the nation's unit tray. Refer to the Unique Unit's NS Card for its attributes. When not stated on the NS Card, a Unique Unit functions the same as its Standard Unit counterpart.
Order of Play
Stages
Song for War is played in Stages. Each scenario has its own number of Stages below, which are also displayed on the game board:
Mediterranean Theater Scenarios
- November 1942 up to 6 Stages are played
- April 1943 up to 4 Stages are played
For November 1942, place the Stage & Movement Step Tracker above Stage 1 to start the game. The flags indicate the Allies are first to act throughout Stage 1.
For April 1943, place the Stage & Movement Step Tracker above Stage 3 to start the game. The flags indicate the Allies are first to act throughout Stage 3.
Mediterranean Operations Scenarios
- Italy up to 4 Stages are played
- North Africa up to 5 Stages are played
For Italy, place the Stage & Movement Step Tracker to the right of Stage 1 to start the game. The flags indicate the Allies are first to act throughout Stage 1.
For North Africa, place the Stage & Movement Step Tracker below Stage 1 to start the game. The flags indicate the Axis nations are first to act throughout Stage 1.
Stage & Movement Step Tracker
This is a multi-purpose tool when playing Song for War. Use it to indicate the current Stage of the game, the current Movement Step (by spinning it), and which side (Allies or Axis) is currently active for that Movement Step (by flipping it). When the Stage is complete, move the tracker to the next Stage and spin it back to Movement Step 1 for the side that acts first, indicated by the flags. See Which Side Acts First below and Movement Steps for more.
Which Side Acts First
- The nation flags next to the Stages on the game board indicate which side acts first throughout the Stage and all of its Phases, followed by the opposing side.
- For example, in the November 1942 scenario: The Allies of Great Britain and the US are first to act in Stages 1, 3, and 5, followed by the Axis nations of Germany and Italy who act second. This means the Allies are first in Phase 1: Tactical to attack (move units, declare battles, then resolve the battles) in each Movement Step, followed by the Axis who then do the same in each step (for an example of this mechanic in action, see Movement Steps). In Phase 2: Victory, the Allies are first to tally VPs and check for victory followed by the Axis. In Phase 3: National Support, the Allies are first to spend NS Tokens and play NS Cards followed by the Axis. And in Phase 4: Resupply, the Allies are first to check shipping lanes and purchase and place new units, followed by the Axis. In Stages 2, 4, and 6 the order is reversed - the Axis nations act first throughout the Stage and each of its Phases, followed by the Allies who act second.
- Note: When both sides agree, it is permitted for the sides to act simultaneously during the Victory Phase, National Support Phase, and Resupply Phase (one phase, more than one, or all) to accelerate the game.
Phases
For each Stage, play up to 4 Phases for the Mediterranean Theater scenarios or up to 3 Phases for the Mediterranean Operations scenarios, shown below.
Phase 1: Tactical - Each side has the opportunity to attack (move units, declare battles, then resolve the battles) while the other side defends. See Movement Steps for an example of this mechanic in action. Control of Objectives and Airfields is maintained, won, or lost. There is a Tactical Phase in every Stage.
Phase 2: Victory - Confirm which nation controls each Objective and Airfield. Tally the VP for the Allied and Axis sides and check for victory based on the scenario victory conditions. In the North Africa scenario, the Victory Phase is skipped until Stage 3. In Stages 1-2, proceed right from the Tactical Phase to the Resupply Phase.
Phase 3: National Support - Nations spend NS Tokens and play NS Cards. There is no National Support Phase in Stage 6 of the Mediterranean Theater scenarios as the game ends after Phase 2: Victory. N/A: There is no National Support Phase in the Mediterranean Operations scenarios.
Phase 4: Resupply - Nations purchase and place new units on the board based on the Objectives they control. After Resupply, the Stage is over. There is no Resupply Phase in Stage 6 of the Mediterranean Theater scenarios, Stage 5 of the North Africa scenario, or Stage 4 of the Italy scenario as the game ends after Phase 2: Victory. In the Mediterranean Theater scenarios, nations check shipping lanes and apply impacts to the resupply values of Objectives before purchasing and placing new units.
Phase 1: Tactical
In the Tactical Phase, each side receives the opportunity to attack by moving units, declaring battles, then resolving the battles while the other side defends. Control of Objectives and Airfields is maintained, won, or lost.
In each Tactical Phase, go through Movement Steps 1-6 in order.
Movement Steps
The Tactical Phase consists of 6 Movement Steps. Lighter, faster units (e.g., Fighters) have more opportunities to move than heavier, slower units (e.g., Cruisers). On Movement Steps 1-5, both the Allied and Axis sides receive the opportunity to attack by moving units, declaring battles, then resolving the battles, while the other side defends. In Song for War, Allied and Axis teammates do not take turns sequentially nation by nation - they act together. See Movement Step Example: North Africa below for how this mechanic works. On Movement Step 6, Air Units return to friendly locations. When all 6 Movement Steps are complete, the Tactical Phase is over.
- The black icons are the Standard Units active in the step. In Movement Step 1, Fighters and Submarines are the only Standard Units permitted to move and declare battles. No other Standard Units can move or declare.
- Colored icons are Upgraded Standard Units (by playing NS Cards) which are also active for the Movement Step.
- In Movement Step 2, Standard Fighters are active again along with Standard Destroyers, Sea Transports, Light Bombers, Heavy Bombers, and Air Transports. Destroyers can also use their mine layer ability.
- Hidden Fleets can move and declare battles, along with all other Standard Sea Units.
- Land Units are active on Movement Steps 4 and 5, allowing for blitzkrieg actions. Infantry can also use their engineer ability.
- Air Units must return to an Objective or an Airfield controlled by the same nation or a friendly teammate nation. An Objective must also have the Airfield symbol for units to be able to return there. Fighters and Light Bombers also can return to Aircraft Carriers of the same nation that have capacity.
- No battles are declared.
- Hidden Fleets or hidden German units (Italy scenario) cannot be revealed or detected.
- Push through rule applies.
- No units can be loaded on to or unloaded from Air Transports. Keep the units below the Air Transport Unit Tile to indicate they are still aboard.
- Air Units unable to return are removed as casualties. Any units carried aboard lost Air Transports are also removed as casualties.
- After Movement Step 6, the Tactical Phase is over.
Each Unit Tile indicates which Movement Steps that unit is active on.
After Movement Step 6, the Tactical Phase is over.
Movement Step Example: North Africa Scenario
On Stage 1, Movement Step 1, the Axis nations are first to attack. Germany and Italy simultaneously:
- Move Fighters and Submarines, the only active units in Movement Step 1.
- Declare battles with Fighters and Submarines by placing Battle Declaration Markers.
- Once all battles are declared, resolve them in the order chosen by the Axis, while the Allies defend.
The Allies are second to act and attack next. Great Britain XXX Corps/Australia and Great Britain XIII Corps simultaneously:
- Move Fighters and Submarines, the only active units in Movement Step 1.
- Declare battles with Fighters and Submarines by placing Battle Declaration Markers.
- Once all battles are declared, resolve them in the order chosen by the Allies, while the Axis defends.
Once both sides have moved their Fighters and Submarines, declared battles, and resolved, Movement Step 1 is over. Go to Movement Step 2 and repeat the order for active units in that step.
Moving Units
- Unit movement takes place using the 6 Movement Steps during Phase 1: Tactical. See Movement Steps for more.
- The attacking side moves units, declares battles, then resolves battles while the other side defends (only).
- When a side is attacking, units on the move are considered to be moving simultaneously. Therefore, it is not permitted to move a few units into a space to "contest" it, declare a battle, then move additional units into the same space to avoid penalties, such as landing defense. See Amphibious Assault Landing Defense Example for how this works. This is also important for any actions that are resolved during movement. For example, it is not permitted to move a handful of units to trigger an outcome in a space (e.g., detonate a mine, cross a bridge, full retreat or disengage, resolve a push through or a resolve a defensive line), then move additional units into the same space after resolving. Identify all moving units into a space, then resolve.
- A unit's move is the maximum number of spaces a Standard Unit can move on each of its Movement Steps. A Standard Tank, for example, can move up to 3 spaces on Movement Step 4 and on Movement Step 5. The space where a unit is located before it moves does not count toward the limit.
- Land Units move on land, mountain, road, and desert spaces. Sea Units move on sea spaces. Air Units move on all terrain types.
- Air Units are considered always "in the air." When an Aircraft Carrier carrying Fighters or Light Bombers is destroyed, Air Units aboard are not removed as casualties and can continue to take part in the battle as normal. They can, however, be taken as casualties on their own and must find a new friendly location to return to on Movement Step 6.
- Units are not permitted to make diagonal moves that "jump" over the corners of spaces.
- Units are not required to move.
- Some NS Cards impact unit movement when played.
Terrain
All scenarios
- Land space: No effect on unit movement.
- Sea space: No effect on unit movement.
- Impassable space: Land Units may not enter. Only Air Units may do so.
- Mountain space:
- Impassable to Tanks.
- When a Land Unit enters it must end its move for the Movement Step. When moving out, the unit can move normally.
- Air and Sea Transports may not load units from, or unload units to, mountains. Only Land Transports can.
- Infantry Unit Firepower increases to Gray when defending from mountains due to the unit's high ground ability.
- Artillery Unit range increases to 2 when it is attacking or defending from mountains due to the unit's long range ability.
Mediterranean Theater scenarios
- Axis shipping lane sea space: No effect on unit movement.
- Allied shipping lane sea space: No effect on unit movement.
North Africa scenario
- Road space: Special rules for movement. See Supply Lines for more.
- Desert space: Special rules for movement. See Supply Lines for more.
Italy scenario
- Bridge: Special rules for movement. See Bridges for more.
Transporting Units
Loading, Moving, and Unloading
- Refer to the Player Aid and Standard Unit Abilities for the Type and number of units a Transport can carry.
- A nation can only transport its own units and not those of a teammate.
All Transports
- Loading, moving, and unloading are performed on the Movement Step(s) of the Transport, not the unit(s) being carried. For example, a Sea Transport can load, move, and unload units on Movement Steps 2 and 3. See Transporting Units example below.
- Units aboard Transports do not move on their Movement Step. They move with the Transport until they are unloaded.
- The loading of units must be complete before the Transport moves. Stack the units beneath the Transport Unit Tile to indicate they are aboard.
- It is permitted to load units, move the Transport, then unload the units during a single Movement Step. See Transporting Units example below.
- Units cannot unload while the Transport is moving. As soon as units unload, the Transport's move is ended for the Movement Step. The same is true for units aboard. When they unload, they may not move - they are only being transported.
- It is not required to unload units. Keep the units stacked below the Transport Unit Tile to indicate they are still aboard.
Transport Unit Type Specific Rules
- Land and Air Transports load and unload units from/to the same space where the Transport is located.
- Sea Transports load and unload units from/to a land space that is adjacent to the sea space where the Sea Transport is located. It is permitted to load or unload Land Units located on different land spaces from/to a single Sea Transport as long as the sea space where the Sea Transport is located is adjacent to both land spaces (Note: spaces connected only at the corners are not considered adjacent).
- Land Transports must be empty of units to be loaded aboard Sea Transports. There is no "nesting" of units.
- Air and Sea Transports cannot load units from, or unload units to, mountain spaces. Only Land Transports can.
- On Movement Step 6, no units can be loaded to, or unloaded from, Air Transports. They must stay aboard until the Air Transport's next Movement Step.
Transporting Units Example
It is permitted to load units, move the Transport, then unload the units on the same Movement Step. The example below all takes place on Movement Step 2. (1) Load the units. (2) Move the Transport. (3) Unload the units.
Transports in Battle
- Standard Transports have no Firepower and receive no attack or defense rolls. They can, however, be removed as casualties in battle (White Armor).
- Empty Transports with no units aboard cannot enter spaces that are contested or contain only enemy units of any Unit Type(s), and they cannot declare a battle. Transports with units aboard are not subject to this limitation and can perform these actions.
- Units attempting to unload from Air and Sea Transports into battle-activated spaces do not take part in Battle Steps 1-6 and receive no rolls. They finally unload on Battle Step 7B and may be subject to landing defense on Battle Step 7C. See Air Drops, Amphibious Assaults, and Landing Defense for more.
- When an Air or Sea Transport is destroyed while carrying units, the units aboard are also removed as casualties. When a Land Transport is involved in battle, the units aboard are considered unloaded immediately due to the Land Transport's mobile ability. The unloaded units can take part in the battle as normal and be removed as casualties on their own. See Removing Casualties and Standard Unit Abilities (Mobile) for more.
Push Through
- During movement, units cannot move freely into then out of a space that has enemy units located there. Instead, they must attempt to "push through" the space and the enemies in it. Push through is required when the space is contested or contains only enemy units of any Unit Type(s). A push through attempt must be announced before the advancing units move.
- Push through is resolved during movement, and before resolving declared battles. Recall that when the attacking side is moving units, the units are considered to be moving simultaneously. It is not permitted to attempt to move a handful of units through a space, resolve a push through, then move different units through that same space and resolve a second push through. Identify all of the moving units attempting to push through a space, then resolve.
- To resolve a push through, enemy units receive a bonus defense roll against the units attempting to push through (only) and casualties are removed. This bonus roll includes enemy units in nearby spaces that can provide supporting fire from range. The units attempting to push through receive no roll and cannot receive help from nearby supporting fire. Units that survive complete the push through move.
- When an Air or Sea Transport carrying units is taken as a casualty during push through, all the units aboard are also destroyed. When a Land Transport carrying units is taken as a casualty during push through, unload the units in the same space as the now destroyed Transport using the Land Transport's mobile ability. By rule, a battle must be declared since the units ended their movement in a space that contains enemies. The battle is later resolved along with other declared battles.
- A Hidden Fleet is not subject to push through when moving as a single, concealed force on Movement Step 3. When on the defending side, a nation may choose to reveal its Hidden Fleet during Movement Steps 1-5 to force a surprise push through by enemies moving through its space, thereby catching an enemy in a trap.
Push Through Example
- Two German Fighters attempt to push through a contested desert space that contains 1 enemy British Anti-Air Unit, 1 British Light Bomber, and 1 friendly German Infantry.
- Both the British Light Bomber and Anti-Air have the Firepower to defend against Air Units, so both receive bonus defense rolls for the push through, scoring 1 White hit.
- Germany removes 1 Fighter as a casualty (White Armor). Its remaining Fighter completes the push through and moves to its intended space at Bir Hakeim.
Hidden Fleets (HF)
Incorporating and Limits
- Each nation can only have 1 Hidden Fleet.
- Only units of the same nation can be part of a Hidden Fleet.
- A Hidden Fleet must have at least 3 Sea Units but no more than 10. It cannot exist only of Sea Transports.
- All of the units in a Hidden Fleet must be located on the same sea space in order to stay incorporated and hidden, and move together.
- A Hidden Fleet can be incorporated before or after moving Sea Units on Movement Step 3.
- It is permitted to incorporate a Hidden Fleet when units of a teammate nation are in the same space as the intended fleet or an adjacent space (any terrain).
- It is not permitted to incorporate a Hidden Fleet when enemy units are in the same space as the intended fleet or an adjacent space (any terrain).
- Once incorporated, remove the Hidden Fleet units from the board and place them in the nation's Hidden Fleet Box. Secretly record the sea space location on the nation's Hidden Fleet Dial and place it face down next to the nation's Hidden Fleet Box. When the nation has no Hidden Fleet Box (based on the board), place the dial and units in a separate and clear location near the game board.
Moving and Staying Hidden
- A Hidden Fleet is a group of Sea Units that moves as a single, concealed force on Movement Step 3. This includes Air Units on hidden Aircraft Carriers and Land Units aboard hidden Sea Transports.
- When individual units in the fleet move on their own Movement Step, it may reveal the fleet. See Revealing a Hidden Fleet and Moving Units Into and Out of a Hidden Fleet for more.
- A Hidden Fleet moves as far as the slowest ship in the fleet.
- After moving the Hidden Fleet, secretly record the sea space location on the nation's Hidden Fleet Dial and place it face down next to the nation's Hidden Fleet Box. When the nation has no Hidden Fleet Box, place the dial and units in a separate and clear location near the game board.
- A Hidden Fleet can occupy the same sea space with enemy units as long as it remains hidden. It can also share a space with friendly visible units.
- A Hidden Fleet is not subject to push through when moving as a single, concealed force on Movement Step 3. When on the defending side, a nation may choose to reveal its Hidden Fleet during Movement Steps 1-5 to force a surprise push through by enemies moving through its space, thereby catching an enemy in a trap.
Revealing a Hidden Fleet
- Whether acting as the attacker or the defender, a nation may choose to reveal its Hidden Fleet at any time during Movement Steps 1-5. To reveal, move the units from the nation's Hidden Fleet Box to the corresponding sea space on the board noted on the nation's Hidden Fleet Dial. When choosing to reveal in a sea space that is contested or contains only enemies of any Unit Type(s), a Battle Declaration Marker is placed and a battle must be resolved along with other declared battles. A Hidden Fleet cannot be revealed on Movement Step 6.
- A Hidden Fleet is also revealed and immediately placed on the board on its sea space when:
- Fleet limit and incorporation rules are not followed.
- Detected by an enemy unit using the search ability during Movement Steps 1-5. The nation that detected the Hidden Fleet has the option to declare a battle. It is not required to do so.
- A unit (including Air Units on Aircraft Carriers) moves out of the Hidden Fleet to a space that is contested or contains only enemies of any Unit Type(s).
- A unit in the Hidden Fleet (including Air Units on Aircraft Carriers) declares or takes part in a battle, or provides supporting fire to a nearby battle.
- Moving units into, or out of, a Hidden Fleet when there is an enemy unit in the same space as the Hidden Fleet or in an adjacent space (any terrain). This includes Air Units that move on to, or off of, hidden Aircraft Carriers.
- The Hidden Fleet moves into a sea space with an enemy mine. It is revealed, placed on the board, and the mine detonates. The fleet is subject to normal movement and battle declaration rules. This rule applies even when a fleet is accompanied by units that are not hidden.
Moving Units Into and Out of a Hidden Fleet
- Units moving into a Hidden Fleet are placed in the nation's Hidden Fleet Box. Units moving out of a Hidden Fleet are placed on the board.
- Land Units can be loaded to and unloaded from hidden Sea Transports without revealing the fleet as long as there are no enemy units in the same space or an adjacent space (any terrain) as the transport.
- Sea Units can move into, or out of, an existing Hidden Fleet without having to reveal the fleet as long as:
- There are no enemy units in the same space as the Hidden Fleet or in an adjacent space (any terrain).
- Sea Units moving out of the Hidden Fleet do not move into a space that is contested or contains only enemies of any Unit Type(s), and do not declare any battles.
- Incorporation and fleet limit rules are followed.
- Air Units can move on to, or off of, a hidden Aircraft Carrier without having to reveal the fleet as long as:
- There are no enemy units in the same space as the Hidden Fleet or in an adjacent space (any terrain).
- Air Units moving out of the Hidden Fleet do not move into a space that is contested or contains only enemies of any Unit Type(s), and do not declare any battles.
- Capacity limits for Aircraft Carriers are followed. Air Units exceeding capacity are placed on the board.
- During Phase 4: Resupply, new Sea Units may be placed into an existing Hidden Fleet when the fleet is in a sea space adjacent to the Objective, there are no enemy units in the space or an adjacent space (any terrain), and the rules for fleet incorporation and limits are followed.
Defensive Lines
Placement
- Each nation has 6 tokens with a defensive line on one side and a mine on the other. The tokens can be split up into any combination of defensive lines or mines. Once all 6 tokens are placed on the board, there are no more available until one is destroyed in battle and returned to the nation's reserve.
- Only Infantry can place defensive lines using the engineer ability, and the Infantry must be on the attacking side (the side moving units, declaring battles, then resolving battles). On Movement Step 4, an Infantry Unit can do 1 of the following: Blow 1 bridge (Italy scenario only), place 1 defensive line, or place 1 mine. These can be performed before or after the Infantry moves but must be done before any battles are resolved. More than 1 Infantry can perform 1 of these actions.
- To place a defensive line, the Infantry must be in 1 of the 2 spaces on either side of where the defensive line will be located. Both spaces must be empty or contain only friendly units. Place a Defensive Line Token on the border between the 2 spaces and point the arrow on the token toward the adjacent space it is defending against. The defensive line is defending against enemy units moving in from this space (only) and cannot point in different directions. See Defensive Line Example for more.
- Only 1 defensive line per border is allowed. Multiple lines may not be stacked on one border to face a single adjacent space.
- Once a defensive line is placed, it cannot be removed or changed. It must be destroyed in battle in order to be returned to a nation's reserve.
Firepower and Combat
- Defensive lines are not units. They cannot move or declare battles, have no range, and receive no attack rolls. They only defend. They cannot be taken as casualties.
- When Land Units or Air Units move into a space with an enemy defensive line facing the border, roll for the line during movement, and before resolving declared battles. Recall that when the attacking side is moving units, the units are considered to be moving simultaneously. It is not permitted to move a handful of units to penetrate a defensive line, resolve (roll for) the line, then move different units into the line again and resolve a second time. Identify all of the units moving into the space, then resolve the line.
- To resolve, roll for the defensive line and remove casualties from the units attempting to enter (only). A defensive line's Firepower is: 2 White rolls at @9 or higher vs. Land Units, 1 Gray roll @8 or higher vs. Land Units, and 1 White roll @9 or higher vs. Air Units. When it rolls a 12 against Land Units, it has the level up ability effect. When it rolls a 12 against Air Units, it has the precise shot ability effect. A defensive line may not receive help from friendly units in the space it is protecting or from units nearby able to provide supporting fire from range. Units attempting to penetrate the line receive no roll and no help from friendly supporting fire. Units that survive the defensive line rolls complete the move.
- Sea wall: When a defensive line is located on a border facing a sea space and the enemy attempts an amphibious assault from that sea space, the line's rolls vs. the unloading Land Units take place on Battle Step 7B before units unload.
- Push through: When units attempt to push through a space that is defended by an enemy defensive line pointing toward the border, roll for the defensive line first and remove casualties. If any invading units survived the defensive line, roll for the push through attempt and remove casualties again.
- When several defensive lines are on the borders of adjacent spaces to form a single, contiguous line facing outward, the owning nation(s) may stack the rolls when enemies attempt to penetrate just 1 line in the chain. When enemies attempt to move into multiple spaces defended by a contiguous line, the owning nation(s) may distribute the stacked rolls as it chooses across the defended spaces where enemy units are attempting to penetrate. Defensive lines of friendly teammate nations can be part of the linked line and contribute to the stacked rolls. See Defensive Line Example for more.
- Units with range may declare battles or fire "over" a defensive line to an adjacent space when attacking, defending, or providing supporting fire.
Destroying a Defensive Line
- A defensive line is destroyed when the space the line is defending (the space "behind" the line) has no friendly control-capable Land Units left in it (a contested space does not destroy the line). Remove the Defensive Line Token from the board and place it back in the nation's reserve.
Mines & Bridges
Mines
Placement
- Each nation has 6 tokens with a defensive line on one side and a mine on the other. The tokens can be split up into any combination of defensive lines or mines. Once all 6 tokens are placed on the board, there are no more available until one is destroyed in battle and returned to the nation's reserve.
- Mines can only be placed by the side that is attacking (moving units, declaring battles, then resolving the battles). The space where the mine will be placed must be empty or contain only friendly units. Up to 6 mines can be placed in a single space (any terrain), and can be a mix from teammate nations.
- Mines can be placed in 2 ways:
- On Movement Step 2 by a Destroyer Unit using its mine layer ability. A Destroyer can place up to 2 mines in the sea space where it is located.
- On Movement Step 4 by an Infantry Unit using its engineer ability. An Infantry can do 1 of the following: Blow 1 bridge (Italy scenario only), place 1 defensive line, or place 1 mine.
- More than 1 Destroyer or 1 Infantry can perform 1 of these actions.
- A mine can be placed before or after the Destroyer or Infantry Unit moves. However, it must be placed before any battles are resolved.
Detonation
- Mines are not units. They cannot move or declare battles, have no range, and receive no attack rolls. They only defend. They cannot be taken as casualties.
- When Land Units or Sea Units move into a space with an enemy mine, it detonates. Roll for the mine(s) during movement, and before resolving declared battles. Recall that when the attacking side is moving units, the units are considered to be moving simultaneously. It is not permitted to move a handful of units into a space, detonate mines, then move different units into the same space after mines have detonated. Identify all of the units moving into the space, then resolve. Air Units moving into a space with a mine do not trigger detonation.
- To resolve, roll for the mine(s) and remove casualties from the invading units (only) until either: 1) all mines have detonated and been removed from the board or 2) all the units moving in are destroyed. When all incoming units are destroyed, any undetonated mines remain on the board. Each mine has a Firepower of 1 Gray roll @6 or higher vs. Land or Sea Units. When a mine rolls a 12, it has the level up ability effect. Mines may not receive help from friendly units in the space or from units nearby able to provide supporting fire from range. Units moving into the space receive no roll and no help from friendly supporting fire. Units that survive mine detonation complete the move.
- Push through: When units attempt to push through a space that has an enemy mine, roll for the mine, remove casualties, and remove detonated mines from the board. If any invading units survived the mine, roll for the push through attempt and remove casualties again.
- When a Hidden Fleet moves into a sea space with an enemy mine, it is revealed, placed on the board, and the mine detonates. The fleet is subject to normal movement and battle declaration rules. This rule applies even when a fleet is accompanied by units that are not hidden.
- During Phase 4: Resupply, when a nation attempts to place new Sea Units in a sea space with an enemy mine, place the units then roll for the detonated mine and remove casualties.
Destroying Mines
- Once a mine detonates, it is destroyed. Return its token to the nation's reserve.
- Once a mine is placed it cannot be removed or changed.
Bridges
Blowing a Bridge
- Bridges can only be blown on Movement Step 4 by the side that is attacking (moving units, declaring battles, then resolving battles). On Movement Step 4, an Infantry Unit can do 1 of the following: Blow 1 bridge (Italy scenario only), place 1 defensive line, or place 1 mine. These can be performed before or after the Infantry moves but must be done before any battles are resolved. More than 1 Infantry can perform 1 of these actions.
- To blow a bridge, the Infantry Unit must be in 1 of the 2 spaces on either side of the bridge. The spaces on both sides must either be empty or contain only friendly units.
- Once blown, place a Blown Bridge Token on the board over the bridge to indicate it is no longer intact. Once all tokens are on the board, no more bridges can be blown.
- A blown bridge cannot be repaired.
Moving Over a Bridge and Combat
- Bridges impact the movement of Land Units only.
- For Land Units attempting to move over an intact bridge:
- When the space they intend to move into (on the other side of the bridge) is empty, contains only friendly units, or is contested, there is no penalty and normal rules for movement and battle declaration apply.
- When the space they intend to move into (on the other side of the bridge) contains only enemies of any Unit Type(s), the enemy units in the destination space receive a bonus defense roll during movement against the units attempting to cross (only) and casualties are removed. This bonus roll includes enemies in nearby spaces that can provide supporting fire from range. Units attempting to cross receive no roll and no help from friendly supporting fire. Units that survive complete the crossing.
- When the space they intend to move into (on the other side of the bridge) contains only enemies of any Unit Type(s) and has an enemy mine and/or defensive line on the border facing the units attempting to cross, resolve (during movement) the defensive line first, then the bridge crossing, and finally the mine, removing casualties after each set of rolls.
- Push through rules also apply and rolls are added to the above when a push through attempt is made.
- For Land Units attempting to move over a blown bridge:
- When the space they intend to move into (on the other side of the bridge) is empty, contains only friendly units, or is contested, the Land Units must immediately end their movement after crossing. Normal rules for battle declaration apply.
- When the space they intend to move into (on the other side of the bridge) contains only enemy units of any Unit Type(s), they cannot cross until all the control-capable enemy Land Units in the destination space are destroyed or no longer in the space.
Supply Lines
Supply Hubs
- Running along the coast of North Africa are 5 Major Objectives: Tripoli Italy, Tripoli Germany, Tobruk, Alexandria Great Britain XIII Corps, and Alexandria Great Britain XXX Corps / Australia. These 5 Major Objectives also function as Major Supply Hubs. There are also 7 Minor Objectives: Mersa Brega, Benghazi, Gazala, Tobruk West, Tobruk East, Sollum, and El Alamein. These 7 Minor Objectives function as Minor Supply Hubs. Airfields cannot function as supply hubs.
- Land Transports can also function as Mobile Supply Hubs. To create a Mobile Supply Hub:
- Flip the Land Transport Unit Tile during its Movement Step(s) to indicate it will act as a Mobile Supply Hub. It can be flipped before or after the Land Transport moves, but before resolving any battles. When flipped, units carried aboard the Land Transport are unloaded immediately and placed on the space. On a future Movement Step, it is permitted to flip the tile back over to a Land Transport, re-load units and move the Land Transport as long as it is in supply after being flipped. Tip: When striking out into the desert, bring more than 1 Land Transport to set up Mobile Supply Hubs along the way and keep Land Units in supply so they can continue moving.
- The space must be empty or contain only friendly units. Once created, the Mobile Supply Hub continues to function even when the space becomes contested later. It only ceases to function when it is flipped back to a Land Transport Unit or when the unit is destroyed in battle.
- Mobile Supply Hubs cannot move or declare battles, have no range, and receive no attack or defense rolls. They can, however, be taken as casualties (White Armor).
Keeping Land Units in Supply
- Supply line rules apply only to Land Units. A Land Unit that is "in supply" can move its full movement as normal. It is possible for units to be in and out of supply more than once during a single Movement Step.
- To keep Land Units in supply, a nation must build a connected supply line that chains back to 1 of the 5 Major Supply Hubs controlled by that nation or its teammate nation. The links in the chain can be created using any combination of other Major Supply Hubs, Minor Supply Hubs, and Mobile Supply Hubs. The links along the way must be within 3 spaces of one another for a successful, connected supply line to be established. In this way, several Minor and Mobile Supply Hubs can form long chains back to a Major Supply Hub, or back to more than one.
- A Land Unit is considered in supply when it is located on:
- A Major Supply Hub controlled by the same nation or a teammate nation.
- A Minor Supply Hub controlled by the same nation or a teammate nation that is part of a connected chain back to a friendly-controlled Major Supply Hub.
- A Mobile Supply Hub controlled by the same nation or a teammate nation that is part of a connected chain back to a friendly-controlled Major Supply Hub.
- A road space located between 2 friendly-controlled hubs of any kind that are part of a connected chain back to a friendly-controlled Major Supply Hub. Note: Mersa Matruh Airfield is also considered a road space for supply line purposes.
Land Units Out of Supply
- A Land Unit is "out of supply" when the chain is broken and it does not meet one of the in-supply conditions. For example, a Tank Unit located on a desert space without a friendly Mobile Supply Hub to accompany it, or located on a road space not situated between two friendly-controlled hubs is out of supply. Note: Bir Hakeim Airfield is considered a desert space for supply line purposes.
- A unit out of supply cannot move. However, it can declare and take part in a battle, provide supporting fire, be taken as a casualty, etc.
Supply Line Example
- On Movement Step 4, the Axis charges east and takes control of the Minor Supply Hub of Mersa Brega 3 spaces away. A successful supply line is created because it chains back to Major Supply Hubs at Tripoli, both controlled by the Axis. Either Major Supply Hub is sufficient as the supply line origin.
- On Movement Step 5, Italy moves its in-supply units 3 spaces from Mersa Brega into the desert and flips the Land Transport Tile to create a Mobile Supply Hub, thus keeping its Tank Unit in supply.
- The Italian Tank later advances and takes control of Bir Hakeim Airfield. However, the Tank is now out of supply and cannot move until an Axis nation creates a Mobile Supply Hub on the Airfield.
- Back at Mersa Brega, the German Tank is still in supply. On its Movement Step 5, the Tank advances north 3 spaces and takes control of Benghazi, another Minor Supply Hub, successfully extending the supply line. However, if the Allies take back control of Mersa Brega, both the German Tank and all of the advancing Italian units in the desert above would be out of supply because the chain back to the Major Supply Hubs of Tripoli would be broken. The Axis is taking a risk by leaving Mersa Brega undefended.
Declaring Battles
- Only the units active in the current Movement Step can move and declare battles.
- Battles are declared by placing Battle Declaration Markers in spaces on the board. When a marker is placed, a space is activated and a battle must be resolved there.
- Once a space is activated, all of the units located in the space - regardless of nation or Unit Type - are able to take part in the battle (Firepower rules still apply). In this way, a space and all the units in it can be battle activated on successive Movement Steps to keep the battle going with combined forces.
- A space can only contain 1 Battle Declaration Marker. Two battles cannot take place simultaneously in the same space.
- Units located in a battle-activated space with a marker in it must take part in the battle they are in (e.g., Battle A, B, etc.). They cannot be split up to take part in 2 battles or provide supporting fire to other nearby battles.
- It is permitted to have more activated battles on the board than the number of available markers. The attacking nation(s) must notify the defending enemies of all declared battles.
- A unit cannot declare a battle and then move. A battle can only be declared after the unit's movement is complete.
- When the attacking side is moving units, the units are considered to be moving simultaneously. Therefore, a space that contained only enemies before the attacking side begins moving units cannot be contested "mid move." In other words, it is not permitted to move a few units into a space to "contest" it, declare a battle, then move additional units into the same space to avoid penalties, such as landing defense. See Amphibious Assault Landing Defense Example for how this works.
- It is not required to move to declare a battle. A unit can declare one without moving as long as enemies are in range.
- A unit can declare a battle against enemy units in range even when its Firepower does not allow the unit to hit the enemy in the ensuing battle. For example, on Movement Step 1, an Italian Fighter may choose to declare a battle against a US Infantry and activate the space. While the Fighter's Firepower does not allow the Fighter to hit the enemy Infantry, there may be friendly units also in the space or units with range in a nearby space that can hit the Infantry by using supporting fire. This allows nations to put the power of combined forces to work.
Battle Declaration Markers: A, B, C, D, E, F
Nations MUST declare a battle when:
- A unit moves at least 1 space and ends its move in a space that is contested or contains only enemy units of any Unit Type(s).*
- A unit is unloaded from an Air or Sea Transport to a space that is contested or contains only enemy units of any Unit Type(s).*
- A Land Transport carrying units is taken as a casualty as part of a push through attempt. Units aboard are immediately unloaded and placed in the space.*
- A nation chooses to reveal its Hidden Fleet in a sea space that is contested or contains only enemy units of any Unit Type(s).*
*Applies regardless of the Firepower and Armor of the units involved. The acts of moving, revealing, etc. are sufficient to trigger the battle declaration.
Nations have the OPTION to declare a battle when:
- An enemy Hidden Fleet is detected. The nation that detected the fleet has the option to declare a battle.
Activated Spaces for Battle
Any space that contains a Battle Declaration Marker is considered battle activated and a battle must be resolved there. Units located on battle-activated spaces must take part in the active battle they are in. For example, when an Artillery Unit is on a space activated by Battle Declaration Marker "A", it must take part in battle "A" and cannot take part in nearby battle "B", including providing supporting fire from range.
Remember! When Declaring Battles...
A unit may declare a battle against enemy units in range even when its Firepower does not allow the unit to hit the enemy in the ensuing battle. Other units involved in the battle may have the Firepower needed. This allows nations to put the power of combined forces to work.
Resolving Battles
After the attacking side has moved units and declared all battles using Battle Declaration Markers, the battles are resolved in the order chosen by the attackers using the Battle Steps 1-7 below.
Taking Part in a Battle
Units located on battle-activated spaces must take part in the active battle they are in. For example, when a Cruiser is on a space activated by Battle Declaration Marker "C", it must take part in battle "C" and cannot take part in nearby battle "D", including providing supporting fire from range.
Battle Steps
For each battle declared, go through Battle Steps 1-7 in order, removing casualties after each step:
The battle steps are shown on the Battle Steps chart as follows:
- Battle Step 1: Anti-Air icon. Only Anti-Air Units roll on Battle Step 1. When a nation does not have an Anti-Air Unit involved in the battle, or when there are no enemy Air Units available for the Anti-Air to hit (per the Anti-Air Unit's Firepower), no roll is received.
- Battle Step 2: Fighter and Submarine icons, with an Upgrade icon for upgraded Standard Units.
- Battle Step 3: Light Bomber and Heavy Bomber icons, with an Upgrade icon for upgraded Standard Units.
- Battle Step 4: Destroyer and Submarine icons, with a Unique Unit icon for Unique Units.
- Battle Step 5: Aircraft Carrier, Cruiser, Battleship and Artillery icons, with an NS Card icon for NS Card Unit Upgrades and Unique Units. Battleships, Aircraft Carriers, Cruisers, and Artillery roll on Battle Step 5. These units can also use their range ability to provide supporting fire to battles in nearby activated spaces.
- Retreat: Units with the retreat ability can perform a staged or full retreat between Battle Steps 5 and 6.
- Battle Step 6: Infantry, Tank and Land Transport icons, with an Upgrade icon for upgraded Standard Units.
- Battle Step 7: Three sub-steps, shown as A, B and C on the chart:
- 7A Combined Fire: Units using combined fire must wait until Battle Step 7A to make their attack roll.
- 7B Transports Unload: Units aboard Air and Sea Transports attempting to unload to spaces that are contested or contain only enemy units of any Unit Type(s) must wait until Step 7B to unload, and may be subject to landing defense on Step 7C. See Air Drops, Amphibious Assaults, and Landing Defense for more.
After Step 7 the battle is over. Units that survive remain in the space, which may be contested. Remove Battle Declaration Markers and return them to the reserve. A new battle can be declared in a future Movement Step to keep the fight going.
Note: the step contents above are transcribed from the printed Battle Steps chart by icon; the chart's exact wording for each step is not printed as text, so these labels are a judgment call and the original chart should be checked.
Resolving a Battle Example
- On Movement Step 4, the Allies launch a coordinated attack on Axis forces in control of Taranto. The US and Great Britain move 3 Tanks and 1 Land Transport carrying 1 Infantry and 1 Anti-Air Unit into Taranto and place Battle Declaration Marker "A". Also west of Taranto are 1 British Artillery and 1 Battleship that will use range to support the ground attack. It's time to resolve the battle using the Battle Steps.
- The British Anti-Air Unit misses the Italian Light Bomber (its only target based on the Anti-Air's Firepower). The Italian Anti-Air receives no roll because there are no Allied Air Units in the battle to hit (also due to Firepower).
- There are no Fighter Units involved in the battle. Therefore, Battle Step 2 is skipped.
- Italy's Light Bomber hits with a Gray Firepower vs. Land Units. The Allies confer and remove 1 US Tank (Gray Armor) as a casualty. No Heavy Bombers are in the fight so Battle Step 3 is over.
- There are no Submarine or Destroyer Units involved in the battle. Therefore Battle Step 4 is skipped.
- The Allies receive supporting fire from the nearby British Artillery and Battleship in range. The Artillery misses. The Battleship scores 1 hit with its Black Firepower roll vs. Land Units. The Axis confers and removes 1 Italian Tank (Gray Armor), 1 German Infantry (White Armor) and 1 Italian Anti-Air (White Armor) as casualties to equal the Black hit.
- Tank and Infantry Units from both sides roll and remove casualties simultaneously. One of the 2 remaining Allied Tanks hits with Gray Firepower vs. Land Units, as does the British Infantry with White Firepower vs. Land Units. The Axis removes 1 German Tank (Gray Armor) and 1 German Infantry (White Armor) as casualties. However, the German Tank and 1 of its Infantry Units also hit. The Allies remove 1 US Tank (Gray Armor) and 1 British Land Transport (White Armor) as casualties.
- There are no units combining fire (7A), no Air or Sea Transports unloading units (7B), and no landing defense required (7C), therefore this step is skipped. The battle is over. Taranto remains in Axis control thanks to the lone control-capable German Infantry that survived, but it is contested by the Allies. The British may choose to press the attack on Movement Step 5 by declaring a battle with the remaining Tank and Infantry, and may again elect to receive supporting fire from its nearby units in range.
Removing Casualties
- Casualties are removed at the end of each Battle Step after all nations roll for their units in the step and hits for both sides are tallied.
- Casualties are removed from battle-activated spaces with Battle Declaration Markers only. Units providing supporting fire from range cannot be removed as casualties. Tip: Declare battles strategically to maximize supporting fire while keeping the supporting units out of battle-activated spaces so they cannot be removed as casualties.
- The Unit Icon(s) in the Firepower Box indicates which Types of enemy units must be taken as casualties on a successful hit. For example, a Standard Tank has a Land icon in its Firepower Box, which means a Tank can only hit/destroy enemy Land Units as casualties.
- The Firepower Color indicates the power of the hit and is matched up against enemy Armor Color using the Order of Casualties table on the Player Aid (also see right). For example, a Standard Tank has a Gray Firepower vs. Land Units. On a successful hit, the enemy must remove either 1 Land Unit with Gray Armor or 2 Land Units with White Armor as casualties.
- Nations choose their own casualties. For example, 1 US Tank with a Gray Firepower vs. Land Units is in a battle against 1 German Tank and 1 Artillery, both with Gray Armor. On a normal successful US hit, Germany has the option to remove its Tank or Artillery as a casualty.
- When teammate nations are involved in the same battle, they confer and decide how to divide up and remove casualties.
Order of Casualties
| Hit | Casualties taken |
|---|---|
| Purple (ultra-heavy) hit | 1 Purple Armor unit OR 2 Black Armor units OR 3 Gray Armor units OR 4 White Armor units |
| Black hit | 1 Black Armor unit OR 2 Gray Armor units OR 3 White Armor units |
| Gray hit | 1 Gray Armor unit OR 2 White Armor units |
| White hit | 1 White Armor unit |
The Order of Casualties table is transcribed from the printed graphic on the Player Aid layout; the alternative counts are read from the chart.
Units on Transports and Aircraft Carriers
- When an Air or Sea Transport carrying units is destroyed, the units aboard are also removed as casualties. See Transports in Battle for more.
- When a Land Transport carrying units is destroyed, the units aboard are not removed as casualties due to the unit's mobile ability. See Standard Unit Abilities for more.
- When an Aircraft Carrier carrying units is destroyed, the Air Units aboard are not removed as casualties because they are considered to be always "in the air". They can, however, be taken as casualties on their own.
Supporting Fire
- Units with range can provide supporting fire to nearby spaces activated for battle with declaration markers.
- Supporting fire can be provided when acting as the attacker or the defender, and can be provided by a friendly teammate nation.
- A unit can provide supporting fire to a nearby battle in each of the Movement Steps 1-5. For example, it is possible for an Artillery to provide supporting fire in Movement Steps 1, 2, 3, 4 and 5 as long as there is a battle-activated space in range and targets to hit.
- Units providing supporting fire roll for attack or defense on their normal Battle Step (step 5 for Standard Artillery, Battleships, and Cruisers).
- When there are multiple battles in range that can be supported, a unit that has only 1 roll for attack or defense (e.g., an Artillery) must declare which battle it will support. Units with multiple rolls for attack or defense may split the rolls when providing supporting fire. See the Supporting Fire Example below.
- When a unit provides supporting fire to a nearby battle-activated space, it counts toward the unit's 1 attack, 1 defense limit. Certain bonus rolls for supporting fire are exceptions to this rule. See Applying Supporting Fire (right) for these exceptions.
- Units located on battle-activated spaces with declaration markers must take part in the battles they are involved in and may not provide supporting fire elsewhere. However, once the battle is resolved, and the Battle Declaration Marker is removed, when a unit did not roll during the battle (due to Firepower limitations or the battle resolved before reaching the unit's Battle Step), the unit is permitted to provide supporting fire to a nearby battle since it did not reach its 1 attack, 1 defense limit for the Movement Step. Tip: Think ahead on the order in which battles are resolved.
- Units providing supporting fire cannot be taken as casualties. Only units in battle-activated spaces can be taken.
Supporting Fire Example
- On Movement Step 5, Germany declares 2 battles (A and B) and places Battle Declaration Markers to activate both land spaces.
- But the Allies have help nearby. In a land space adjacent to battle A is a British Artillery Unit (range of 1) that decides to provide supporting fire against the attacking German Infantry.
- Also in range of both battles is a US Battleship. The US player decides to split the 2 rolls of its Battleship for supporting fire, 1 shot to support Battle A and 1 to support Battle B.
Applying Supporting Fire
Bridge Crossing: When units attempt to cross an intact bridge and the space on the other side of the bridge contains only enemies of any Unit Type(s), the enemy units in the destination space receive a bonus defense roll during movement against the units attempting to cross (only) and casualties are removed. This bonus roll includes enemies in nearby spaces that can provide supporting fire from range. Units attempting to cross receive no roll and no help from friendly supporting fire.
Defensive Line: When Land Units or Air Units move into a space with an enemy defensive line facing the border, roll for the defensive line during movement and remove casualties from the units attempting to enter (only). A defensive line may not receive help from friendly units in the space it is protecting or from units nearby able to provide supporting fire from range. Units attempting to penetrate the line receive no roll and no help from friendly supporting fire.
Full Disengage: When performing a full disengage from a contested space, enemy Land Units (only) on the space receive an immediate bonus attack roll and casualties from the disengaging units (only) are removed. Enemy units in nearby spaces do not receive this bonus roll and may not provide supporting fire from range. Fully disengaging units receive no roll and no help from friendly supporting fire.
Full Retreat: When performing a full retreat from a battle, enemy units in the battle-activated space receive an immediate bonus attack roll and casualties from the fully retreating units (only) are removed. Enemy units in nearby spaces do not receive this bonus roll and may not provide supporting fire from range. Fully retreating units receive no roll and no help from friendly supporting fire.
Landing Defense: When units attempt to unload from an Air or Sea Transport to a space that contains only enemies of any Unit Type(s), the unloading units are subject to landing defense on Battle Step 7C. Enemy units receive a bonus defense roll and casualties from the unloading units (only) are removed. This bonus roll includes enemy units in nearby spaces that can provide supporting fire from range. Units attempting to unload receive no roll and no help from friendly supporting fire.
Mines: When units move into a space with an enemy mine, roll for each mine during movement and casualties from the invading units (only) are removed. Mines may not receive help from friendly units in the space or from units nearby able to provide supporting fire from range. Units moving into the space receive no roll and no help from friendly supporting fire.
Push Through: During movement, when units attempt to push through a space that is contested or contains only enemies of any Unit Type(s), enemy units receive a bonus defense roll against the units attempting to push through (only) and casualties are removed. This bonus roll includes enemy units in nearby spaces that can provide supporting fire from range. The units attempting to push through receive no roll and cannot receive help from friendly supporting fire.
Combined Fire
- Combined fire allows 2 or more units with a weaker Firepower to combine successful attack rolls to destroy enemies with superior Armor.
- Units combining fire:
- Must be attacking. Units that are defending cannot combine fire.
- Must have a minimum of 2 units taking part. They can be a mix of friendly units from teammate nations. They can also be a mix of Unit Types with different Firepower Colors (White, Gray, or Black).
- Units providing supporting fire from range can take part in a combined fire attack.
- Units with 2 attack rolls taking part in combined fire must use both rolls toward the combined fire.
- When using combined fire:
- The attacker(s) must declare which units are combining fire before the battle begins. Set the units aside for tracking purposes.
- Units combining fire do not roll on their normal Battle Step. Instead, their attack rolls are delayed until Battle Step 7A.
- A unit removed as a casualty before Battle Step 7A cannot take part in combined fire. When only 1 unit declaring combined fire remains on Battle Step 7A, the attempt fails and that remaining unit receives no attack roll(s).
- On Battle Step 7A, roll for the units combining fire. Use the chart to combine successful hits:
- Every 2 White Firepower hits = 1 Gray hit
- Every 2 Gray Firepower hits = 1 Black hit
- Every 2 Black Firepower hits = 1 Purple hit
- The attacker(s) decides how many hits to combine and may stack combinations in any order. For example, 4 White hits = 2 Gray or 1 Black; or, for example, 4 Gray hits = 2 Black or 1 Purple; and so on.
- Units with the level up ability can use a successful leveled up hit as part of combined fire.
Combined Fire Example
- On Movement Step 3, two German Destroyers move in and declare Battle "A" vs. 1 US Battleship and 1 US Cruiser. The Axis confers and declares that it will use combined fire for both Destroyers along with the Italian Light Bomber and nearby Cruiser using supporting fire. All of the Axis units must delay their attack rolls until Battle Step 7A.
- On Battle Step 5, the US Battleship misses, but the US Cruiser hits with its White Firepower roll vs. Sea Units. Germany must take 1 Destroyer (White Armor) as a casualty.
- On Battle Step 7A, the Axis rolls for combined fire. The Italian Cruiser and Light Bomber (both Gray Firepower vs. Sea Units) and the remaining German Destroyer (White Firepower vs. Sea Units) all take part. The Destroyer misses, but the Cruiser and Light Bomber both hit. The 2 successful Gray hits combine into 1 Black hit, and the US Battleship (Black Armor) must be taken as a casualty. The US Cruiser is unharmed.
Air Drops, Amphibious Assaults, and Landing Defense
Using Air and Sea Transports to drop troops into enemy territory or perform amphibious assaults on beaches bristling with defenses are some of the most difficult tasks players can undertake. Use the rules below when unloading units to spaces where enemies are present.
When attempting to unload units to a space that is contested or contains only enemy units of any Unit Type(s):
- Air Transports: A Battle Declaration Marker is placed in the land space to indicate the space is activated for battle.
- Sea Transports: It is treated like a ranged attack and paired Battle Declaration Markers are used (A-to-A). Place the first "A" marker in the sea space where the Sea Transport is located (where the units are being unloaded from), and the second "A" marker in the land space where the units are unloading to (where the enemy is located). Both the sea space and the land space are activated for battle "A".
- Both Air and Sea Transports: Units aboard must wait until Battle Step 7B to unload. They do not take part in Battle Steps 1-6 and receive no rolls. When a Transport is taken as a casualty before Battle Step 7B, the units aboard are also destroyed. When unloading units to a space that is contested, unload the units and the battle is over. When unloading to a space that contains only enemy units, go to Step 7C: landing defense.
- Additionally, when the space contains only enemy units of any Unit Type(s): On Battle Step 7C, units attempting to unload also face landing defense by the enemy. Enemy units receive a bonus defense roll and casualties from the unloading units (only) are removed. This bonus roll includes enemy units in nearby spaces that can provide supporting fire from range. Units attempting to unload receive no roll and no help from friendly supporting fire. Units that survive landing defense unload to the space, thereby making the space contested. The battle is over.
Amphibious Assault Landing Defense Example
1a. On Movement Step 2, the Axis teams up to launch an amphibious assault on Tobruk. Italy loads 2 Tanks on to an Italian Sea Transport, and Germany loads 1 Artillery and 1 Infantry on to a German Sea Transport.
1b. The loaded Axis Transports move and declare a battle on Tobruk using paired Battle Declaration Markers (A-to-A). The first "A" marker is placed in E5 where the Transports are located (from) and the second "A" marker is in Tobruk where the units are attempting to unload (to). Both sea space E5 and Tobruk are activated for battle "A". Germany also moves a Light Bomber (also active on Movement Step 2) into Tobruk for additional help. Another declaration marker is not permitted since Tobruk is already activated by battle "A" from the amphibious assault. Note: Recall that when the attacking side is moving units, the units are considered to be moving simultaneously. Tobruk contained only enemy Allied units before the Axis units moved, therefore the paired markers are used and Battle Step 7C landing defense applies. Germany is not permitted to move its Light Bomber in first to "contest" Tobruk and then move the transports to avoid the landing defense penalty.
-
Proceed through Battle Steps 1-6 below, removing casualties after each step. The German Light Bomber misses (Step 3). The US Artillery also misses from range (Step 5), thus the Axis units still aboard the loaded Sea Transports are safe. The US Tank receives no roll on Battle Step 6 because the only enemy Land targets are still on board the transports and have not yet unloaded.
-
On Battle Step 7B above, both Axis Transports unload. Landing defense on Step 7C applies because Tobruk contains only enemy Allied units. The US has 1 Tank on Tobruk and 1 Artillery. Both receive a bonus landing defense roll and both roll successful hits with Gray Firepower vs. Land Units. The Axis confers and Germany removes its Artillery (Gray Armor) and Italy removes its Tank (Gray Armor) as casualties.
-
One Italian Tank and 1 German Infantry have survived landing defense and unload successfully. They receive no roll and no help from friendly supporting fire. They only unload. The battle is over and Tobruk is now contested. If the Allies have yet to move, declare and resolve for Movement Step 2, they can choose to keep the battle going, or can choose to wait. Either side may declare another battle in Tobruk in a future Movement Step.
Phase 2: Victory
Confirm which nation controls each Objective and Airfield. Tally the VP for the Allied and Axis sides and check for victory based on the scenario victory conditions.
Objective and Airfield Control
- Objectives are the brightly colored red, yellow, blue, and green land spaces on the board, such as Rome or Tobruk. Airfields are the dark gray spaces, such as Foggia or Derna. At the start of the game, 1 nation has control of each Objective and Airfield and places units there during setup.
- Objectives and Airfields are the only spaces on the board that are always in the control of one nation or another. While it is possible for control to change hands several times during a game, or even a single Tactical Phase, only 1 nation will have control of each Objective or Airfield at all times.
- By controlling an Objective or Airfield, a nation gains several benefits:
- VP for the Objective or Airfield awarded to that nation's side during Phase 2: Victory.
- For Objectives with the Airfield symbol, the nation or its teammate can return Air Units there on Movement Step 6 of the Tactical Phase.
- The nation but not its teammate can place new units on the Objective as part of Phase 4: Resupply. Airfields have no resupply value.
- Each Airfield has a built in Anti-Air ability that provides a bonus Anti-Air roll on Battle Step 1. See Standard Units: Abilities for more.
Tobruk Objective: North Africa Scenario
- 4 VP awarded to the side that controls it.
- Controlled by the British XIII Corps at game start.
- Resupply values for Sea, Air, and Land.
- Air Units can return there on Movement Step 6.
Tracking Victory Points
Running along the top and bottom of the Mediterranean Theater game board are Victory Point (VP) trackers for the Allies and the Axis. On the trackers are the VP required for victory for the April 1943 scenario (yellow bar showing 50.5 Axis and 48.5 Allies), and the November 1942 scenario (blue bar showing 62 Axis and 44 Allies). Objective and Airfield Tiles are set side by side along the tracker to help tally points. Smaller Airfield tiles are tucked under larger tiles, as shown below.
Contested vs. Controlled
A land or sea space is contested whenever it has both Allied and Axis units located on it. It does not matter which Unit Type(s) they are, or their Firepower. Note: Recall that when the attacking side is moving units, the units are considered to be moving simultaneously. Therefore, a space that contained only enemies before the attacking side begins moving units cannot be contested "mid move." In other words, it is not permitted to move a few units into a space to "contest" it, declare a battle, then move additional units into the same space. It is all considered to be happening at once.
Objectives and Airfields are the only spaces subject to control. They are always in the control of one nation or another. An Objective or Airfield can be contested without a nation losing control of it. An enemy must take control forcibly using control-capable Land Units with the orange flag.
Maintaining Control and Taking It Away
- Control of an Objective or Airfield is maintained by 1 nation until forcibly taken away by an enemy nation. A nation may not willingly give control to another nation, including a teammate. It is not required to keep units on an Objective or Airfield to maintain control - the space may be empty. It is possible for control of an Objective or Airfield to change hands several times.
- To take control of an Objective or Airfield, an enemy must:
- Destroy or displace all of the controlling nation's control-capable Land Units on the space. For example, when Italy controls Tripoli, and at the end of the Tactical Phase only 1 Italian Infantry Unit remains there along with 5 US Tanks and 1 US Anti-Air Unit, Tripoli is contested but Italy still maintains control.
- Have at least 1 control-capable Land Unit on the space. Returning to the example above, if the lone Italian Infantry in Tripoli is destroyed (leaving Italy with no units there) and any of the US Tanks remain at the end of the Tactical Phase, the US takes control. If, however, the only remaining US unit is the Anti-Air, Italy still maintains control since the US Anti-Air Unit is not control-capable. Italy may have no units in Tripoli but it maintains control, albeit barely.
- Infantry and Artillery Units aboard Land Transports are still control capable. Infantry aboard Air Transports lose their control capability until unloaded.
- In some cases, following a battle, teammate nations may both have control-capable units in a newly captured Objective or Airfield. When this happens, the nation with the most control-capable units is given control. When teammate nations have the same number of control-capable units on the space, they confer to decide which nation will take control and notify the opposing side.
- In the Mediterranean Theater scenarios: When control is taken away during battle, nations immediately exchange the associated Objective or Airfield Tile and place it on the Axis or Allied VP tracker along the board.
- In the Mediterranean Operations scenarios: When control is taken away during battle, National Control Markers are placed on the Objective or Airfield on the board to indicate which nation has taken control.
Victory Conditions
After Tallying VP for each side, check for victory using the following conditions of the scenario.
Mediterranean Theater Scenario Victory Points
- April 1943 (Allies 48.5, Axis 50.5):
- Automatic Victory: Stages 3-6: If the Allies have 48.5 VP at the end of Phase 2: Victory, they win. If the Axis has 50.5 VP, they win.*
- Standard Victory: Stage 6 only: If the Allies do not have 48.5 VP at the end of Phase 2: Victory, the Axis wins.
- *The April 1943 scenario game starts on Stage 3.
- November 1942 (Allies 44, Axis 62):
- Automatic Victory: Stages 1-6: If the Allies have 44 VP at the end of Phase 2: Victory, they win. If the Axis has 62 VP, they win.
- Standard Victory: Stage 6 only: If the Allies do not have 44 VP at the end of Phase 2: Victory, the Axis wins.
Mediterranean Operations Scenario Victory Points
- North Africa (Allies 28, Axis 28):
- Automatic Victory: Stages 3-5: If the Allies have 28 VP at the end of Phase 2: Victory, they win. If the Axis has 28 VP, they win.*
- Standard Victory: Stage 5 only: The side that has the most VP at the end of Phase 2: Victory wins. If VP are tied, the side that controls Tobruk wins.
- *In the North Africa scenario, the Victory Phase is skipped until Stage 3.
- Italy (Allies 30, Axis N/A):
- Automatic Victory: Stages 1-4: If the Allies have 30 VP at the end of Phase 2: Victory, they win.
- Standard Victory: Stage 4 only: If the Allies do not have 30 VP at the end of Phase 2: Victory, the Axis wins.
Phase 3: National Support (NS)
In the Mediterranean Theater scenarios, nations spend NS Tokens to play NS Cards and gain advantages on the battlefield, upgrade Standard Units, introduce Unique Units, and trigger historical events.
NS Cards
There are 4 kinds of NS cards:
- Strategy: Provides tactical or economic benefits to a nation or side.
- Unit Upgrade: Upgrades 1 form of Standard Unit, such as Infantry. As soon as the card is played, all the nation's Infantry units on the board now, as well as all future Infantry units produced during the Resupply Phase are considered upgraded. A Standard Unit can only be upgraded once per game. Upgraded unit abilities are listed on the NS Cards. Otherwise, they function the same as Standard Units.
- Unique Unit: Allows nations to produce powerful units during Phase 4: Resupply for the remainder of the game. Unique Unit abilities are listed on the NS Card. Otherwise, they function the same as Standard Units.
- Event: Recreates historical events to provide a boost or hamper an enemy.
Spending Tokens and Playing Cards
In each NS Phase:
- Give each nation 2 NS Tokens at the start of the phase.
- Each nation then draws the top 2 NS Cards from its NS Deck.
- Each nation may spend its NS Tokens to play NS Cards. Refer to each card for its benefits and the NS Token cost to play it.
- Teammates may confer on which cards to play for their respective nations. However, teammate nations may not combine NS Decks or share NS Tokens.
- It is not required to spend NS Tokens. They may be saved for a future NS Phase.
- The side that is first to act for the Stage announces which NS Cards their respective nations will play first, followed by the opposing side.
- NS Cards with the discard symbol are discarded immediately after being played.
- NS Cards that were drawn but not played remain in the hand of the nation and may be played in a future NS Phase.
- When a conflict between an NS Card and a core rule arises during game play, the NS Card is followed.
- Once both sides have revealed their played NS Cards, the NS Phase is over.
Phase 4: Resupply
Nations purchase and place new units on the board based on the Objectives they control. In the Mediterranean Theater scenarios, shipping lanes are checked for resupply impacts before new units are purchased and placed.
Resupply Values of Objectives
Objectives have resupply values for Air, Sea, and Land. The values represent how much the controlling nation can spend when purchasing and placing new units during Phase 4: Resupply. Resupply values can be impacted in the following ways, which can stack:
- At the start of Resupply, when an Objective is contested or contains only enemy units of any Unit Type(s), the resupply values for Air, Sea, and Land for the Objective are halved, rounding down.
- When placing new Sea Units on a sea space that contains only enemy Sea Units (except enemy Sea Transports), the resupply value for Sea is halved, rounding down.
- When all sea spaces adjacent to an Objective contain only enemy Sea Units (except enemy Sea Transports), a blockade is formed. The resupply value for Sea is zero. Note: Spaces connected to the Objective only at the corners are not considered adjacent.
- In the Mediterranean Theater scenarios: Enemy Sea Units (except enemy Sea Transports) in shipping lanes can impact resupply values. See Shipping Lanes for more.
- The targeted bombing ability of Heavy Bombers.
- Playing NS Cards.
Messina Resupply Value: Italy Scenario
- Sea resupply value: Spend up to 7 on any combination of new Sea Units.
- Air resupply value: Spend up to 9 on any combination of new Air Units.
- Land resupply value: Spend up to 10 on any combination of new Land Units.
Purchasing and Placing Units
In each Phase 4: Resupply:
- Adjust the resupply values of Objectives based on the impacts of any of the effects above.
- Each nation selects 1 Air, 1 Sea, and 1 Land resupply from across the Objectives it controls. A nation can use its 1 Air, 1 Sea, and 1 Land resupply at a single Objective or spread across 2-3 Objectives. For example, if the US controls Naples, Taranto, and Messina, it can choose to resupply Air at Naples, Sea at Taranto, and Land at Messina, or any combination such as Sea and Land at Messina, and Air at Naples.
- Each nation then purchases new units up to the adjusted resupply value of the Objectives chosen. For example, the nation that controls Messina in the Italy Scenario can spend up to 10 to purchase and place new Land Units there. Any combination of Land Units can be purchased as long as the total cost of the units does not exceed the resupply value of 10. Any unused resupply value is lost.
- New Land and Air Units are placed directly on the Objective space. The Air Units are considered to be "in the air." New Sea Units can be placed in any sea space adjacent to the Objective. Note: Spaces connected to the Objective only at the corners are not considered adjacent.
- When placing new Sea Units on a sea space that contains an enemy mine, place the units then roll for the detonated mine and remove casualties.
- New Sea Units may be placed into an existing Hidden Fleet when the fleet is in a sea space adjacent to the Objective, there are no enemy units in the space or an adjacent space (any terrain), and the rules for fleet incorporation and limits are followed.
US Fleet Resupply at Sea
In the Mediterranean Theater scenarios: The US has the option of resupplying its Hidden Fleet at sea like it would a normal Objective. In the US Hidden Fleet Box are resupply values of 9 Air, 9 Sea, and 9 Land. Rules are as follows:
- All rules for fleet incorporation and limits must be followed.
- The Hidden Fleet may not be resupplied when located on a sea space that is contested or when there are enemy units on an adjacent space (any terrain).
- New units are placed directly in the US Hidden Fleet Box.
- When placing new Land Units, there must be capacity on an existing Sea Transport already in the fleet, or new Sea Transports must also be purchased and placed to create capacity.
- For Air Units: To place Fighters and Light Bombers, there must be capacity on an existing Aircraft Carrier already in the Hidden Fleet, or a new Aircraft Carrier must also be purchased and placed to create capacity. Other Air Units are placed directly on the board in the sea space where the fleet is located and are considered "in the air" - but placing them may tip off the enemy.
- Resupply values of the fleet cannot be impacted by targeted bombing, blockades, or mines.
German Resupply at Sea
In the North Africa scenario: Germany can resupply at sea. In the top-left corner of the board are 4 red-shaded sea spaces (A1, A2, A9, and B1) connected to a German resupply point with the values of 6 Air, 10 Sea, and 10 Land. These represent reinforcements coming to North Africa from southern Europe. Germany can place new units here during Phase 4: Resupply under the following conditions:
- All new units must be placed on 1 of the 4 red-shaded sea spaces.
- When placing new Land Units, there must be capacity on an existing Sea Transport already in the destination sea space, or new Sea Transports must also be purchased to create capacity.
- New Air Units are placed directly on the board in the destination sea space and are considered to be "in the air."
- Sea Units can be placed as a Hidden Fleet as long as Germany has no Hidden Fleet already on the board, there are no enemy units in the space or an adjacent space, and the rules for fleet incorporation and limits are followed. Fighters and Light Bombers can also come in hidden as long as there is capacity on an existing Aircraft Carrier already in the sea space. If not, a new Aircraft Carrier must also be purchased and placed to create capacity. Place all hidden units in the German Hidden Fleet Box and secretly record the location on Germany's Hidden Fleet Dial.
- The resupply values of the red-shaded sea spaces cannot be impacted by targeted bombing. However, they can be impacted by the presence of enemy Sea Units (except enemy Sea Transports), blockades, and mines. See Resupply Values of Objectives and Purchasing and Placing New Units for more.
Shipping Lanes
In the Mediterranean Theater scenarios, there are 5 shipping lanes on the board. Each lane connects a set of Objectives.
- Lane 1: Gibraltar <> Algiers <> Bizerte
- Lane 2: Tunis <> Cagliari <> Messina <> Naples <> Rome
- Lane 3: Naples <> Taranto <> Athens <> Thessaloniki
- Lane 4: Tripoli <> Benghazi
- Lane 5: Alexandria <> Tobruk <> Malta
By moving Sea Units (except Sea Transports) into shipping lane sea spaces, nations can protect the resupply values of friendly-controlled Objectives in the lane and decrease the values of enemy-controlled ones.
Checking for Resupply Impacts
In each Resupply Phase, shipping lanes are checked for resupply impacts before nations purchase and place new units. For each shipping lane:
- Tally the number sea spaces that contain only Allied Sea Units, and those that contain only Axis Sea Units. When a space is contested, it is excluded. Only unopposed Submarines, Destroyers, Cruisers, Aircraft Carriers and Battleships (not Sea Transports) can award a shipping lane sea space.
- Calculate the net difference of spaces in the lane awarded to the Allies vs. those awarded to the Axis. For example, if the Axis were awarded 3 sea spaces in a shipping lane and the Allies 1 space, the net difference is +2 for the Axis.
- The winning side then applies the net difference to reduce all of the Unit Type resupply values of 1, enemy-controlled Objective in the shipping lane. This reduction applies equally to the Air, Sea, and Land resupply values of the Objective. For example, if the Axis were awarded a net of +2 sea spaces in the Gibraltar <> Algiers <> Bizerte shipping lane, it could reduce the Air, Sea, and Land resupply values of US-controlled Algiers by -2 each. This penalty applies to the current Resupply Phase only. On the next Resupply Phase, the shipping lanes reset and are checked again for impacts.
Scenarios & Set Up
Mediterranean Theater Scenarios
April 1943
Spring 1943. The Allied invasion Operation Torch is underway. US forces are fighting their way into Tunisia while Great Britain charges west across North Africa. A hidden Allied fleet is ready to pounce, but where will they land the assault? Will the Allies use deception to throw the Axis off the scent, and where will entrenched Axis forces decide to counter-punch?
- Play time: Open-ended: 3-5 hours. Tournament: 3 hours, 28 mins.
- Players: 2-4
- Great Britain and United States vs. Germany and Italy
November 1942
Turn back the clock to late 1942. The Axis nations have a firm grip on the theater, with Great Britain and the US maintaining a fragile hold on the island of Malta and the Objectives of Gibraltar, Alexandria, and Algiers. But the Allies are on the move, launching a massive invasion, Operation Torch. Will the Allies reclaim the theater, or will the Axis throw them back into the sea?
- Play time: Open-ended: 4-7 hours. Tournament: 5 hours, 12 mins.
- Players: 2-4
- Great Britain and United States vs. Germany and Italy
Mediterranean Theater Setup
- Distribute the Player Aids and Unit Trays. In both the April 1943 and November 1942 scenarios, the Axis powers of Germany (red) and Italy (yellow) are matched up against the Allies of Great Britain (blue) and the US (green). For a 3-player game, player 1 plays both Allied nations vs. Germany (player 2) and Italy (player 3). For a 2-player game, player 1 plays both Allied nations vs. player 2 who plays both Axis nations.
- Place each nation's starting Standard Units in the spaces shown on the back of each nation's Player Aid, based on the starting scenario. The brightly colored Objective spaces (red, yellow, blue, and green) indicate which nations control them at game start. Airfields are dark gray and also controlled by different nations at game start. Note: The board colors reflect the April 1943 scenario start. The November 1942 scenario turns back the clock to the beginning of Operation Torch, therefore several blue and green-colored Objectives across North Africa have not yet fallen to the Allies and remain in Axis control at game start.
- In the April 1943 scenario, the US and Germany begin the game with a Hidden Fleet. In the November 1942 scenario, the US begins the game with a Hidden Fleet. Place the units in respective nation's Hidden Fleet Box near the corners of the board. Next, choose the starting location for each Hidden Fleet selecting from the sea space options shown on the nation's Player Aid. Teammate nations may confer when deciding. Secretly record the sea space location on the nation's Hidden Fleet Dial and place it face down next to the units in the nation's Hidden Fleet Box.
- Distribute the Objective and Airfield Tiles to each nation. To begin the April 1943 scenario, the Allies control the 8 Objectives of Algiers, Bizerte, Gibraltar, Malta, Tripoli, Benghazi, Tobruk, and Alexandria, and the 2 Airfields of Bone and Derna for a total of 38 VP. On the other side, the Axis also controls 8 Objectives: Tunis, Messina, Naples, Athens, Thessaloniki, Rome, Cagliari, and Taranto, and the 5 Airfields of Larissa, Maleme, Heraklion, Catania, and Ajaccio for a starting total of 40 VP. To begin the November 1942 scenario, the Allies control the 4 Objectives of Algiers, Gibraltar, Malta, and Alexandria and no Airfields for a starting total of 26 VP. The Axis controls all of the remaining 12 Objectives and all 7 Airfields for a starting total of 52 VP. Place the Tiles side-by-side on the Allied and Axis Victory Point (VP) trackers running along the top and bottom of the board. When placed side-by-side, the tiles along the tracker will show the total starting VP for the Allies and Axis.
- In the April 1943 scenario (only), remove the Rommel Arrives (Germany) and Subversive Warfare (Great Britain) National Support (NS) Cards from their respective NS Decks. Next, shuffle the four NS Decks and place each deck face down near the nation's Player Aid.
Mediterranean Operations Scenarios
North Africa
Aiming to break the back-and-forth deadlock across North Africa, in February 1941 Adolf Hitler sends rising star Field Marshal Erwin Rommel to mobilize battle-tested German and Italian forces against the British advance nearing Tripoli. But supply lines are fragile, with control of North Africa at stake. Who will win out?
- Play time: Open-ended: 1.5-3 hours. Tournament: 2 hours, 30 mins.
- Players: 2-4
- Great Britain XXX Corps / Australia, Great Britain XIII Corps vs. Germany and Italy
Italy
Following the successful capture of Sicily, the US and Great Britain launch a full invasion of Italy in an attempt to open up a new front in southern Europe. Entrenched, battle-hardened German forces lie in wait on the Italian peninsula, but where? And where will the hidden Allied fleets land their amphibious assaults?
- Play time: Open-ended: 2-4 hours. Tournament: 2 hours, 56 mins.
- Players: 2-4
- Great Britain and United States vs. Germany 14th Army and Germany 10th Army
Mediterranean Operations Setup
- Distribute the Player Aids and Unit Trays. For the North Africa scenario, Germany (red) and Italy (yellow) are matched up against Great Britain XXX Corps/Australia (blue) and Great Britain XIII Corps (green). For the Italy scenario, Germany 14th Army (red) and Germany 10th Army (yellow) battle Great Britain (blue) and the US (green). For a 3-player game, player 1 plays both Allied nations vs. the Axis nations (players 2 and 3). For a 2-player game, player 1 plays both Allied nations vs. player 2 who plays both Axis nations.
- Place each nation's starting Standard Units in the spaces shown on the back of each nation's Player Aid, based on the starting scenario. The brightly colored Objective spaces (red, yellow, blue, and green) indicate which nations control them to start the game. Airfields are dark gray and also controlled by different nations at game start.
- In the North Africa scenario, Germany has a Hidden Fleet to begin the game. In the Italy scenario, the US and Great Britain start the game with Hidden Fleets. Place the units in the respective nation's Hidden Fleet Box near the corner of the board. Next, choose the starting location for each Hidden Fleet selecting from the sea space options shown on the nation's Player Aid. Teammate nations may confer when deciding. Secretly record the sea space location on the nation's Hidden Fleet Dial and place it face down next to the units in the nation's Hidden Fleet Box.
- In the Italy scenario, place the hidden Standard Units for both German players. First, place the 8 Hidden Unit Box Tokens number side down in the red and yellow Hidden Unit Boxes in the top right corner of the board, 1 in each box (3 red numbered tokens for the German 14th Army and 5 yellow numbered tokens for the German 10th Army). These tokens correspond to 8 spaces on the board with matching numbered red and yellow circles. Next, the German players confer and secretly assign their respective hidden units shown on the Player Aid to the numbered spaces. Do not place the units on the board as the Allies cannot know! Units can be assigned to any of the player's available spaces - in 1 space, several, or spread across all. After the units are assigned, place them in the red and yellow Hidden Unit Boxes with the numbered token that corresponds to each space on the board. Be sure to keep all of the Hidden Unit Box Tokens number face down in the boxes so the Allies cannot see where the hidden units are located. Remove any unused tokens (where no hidden units were placed) and return them face down to each nation's reserve.
- Place the Victory Point (VP) Tracker along the board. In the North Africa scenario, the Allies begin with 29 VP and the Axis begins with 11 VP. In the Italy scenario, the Allies begin with 12 VP and the Axis begins with 31 VP.
Short-Play Scenarios
Scenarios & Players
- Song for War includes 5 short-play scenarios: 2 played on the Mediterranean Theater game board, and 3 on the Mediterranean Operations game board.
- The short-play scenarios are best suited for 2 players. However, they can also be played as a single player in a simulated game (no solo bot included). Players also have the option to expand most of the scenarios below for a 3-4 player game.
Game Play
- In the short-play scenarios, Phase 3: National Support and Phase 4: Resupply are skipped. Only Phase 1: Tactical and Phase 2: Victory are played, and each Stage ends after the Victory Phase. See each scenario below for set up instructions and victory conditions to win the game.
- No additional mines or defensive lines may be placed on the board as part of an Infantry Unit's engineer ability or a Destroyer Unit's mine layer ability.
- For the Axis Siege of Tobruk (1941) scenario, Supply Line rules are suspended.
- Other game rules remain the same. However, players can further adapt rules when all players agree.
Note: the Unit Setup diagrams for each short-play scenario are graphics in the printed rulebook and are not reproduced here; set up each scenario from the diagram in the printed rulebook.
Axis Siege of Tobruk (1941)
Locked in a back-and-forth contest for North Africa, Axis forces besiege the port city of Tobruk. The battle-ready Allies are dug in, including Australia's famous Rats of Tobruk, but can they withstand the coming onslaught?
- Players & Time: 1-4 | 30-45 minutes
- Game Board: Operations: North Africa
- Stages Played: 2
- First to Act on Stage 1: Axis
- First to Act on Stage 2: Allies
Victory Conditions
- Automatic victory: In Stages 1-2, if the Axis controls Tobruk at the end of Phase 2: Victory, they win.
- Standard victory: In Stage 2 only, if the Axis does not control Tobruk at the end of Phase 2: Victory, the Allies win.
Axis Invasion of Crete (1941)
Emboldened by success in Greece, the Axis launches Operation Mercury to invade Crete and pursue the retreating Allies. German paratroopers lead history's first large-scale airborne invasion, but will the risk pay off?
- Players & Time: 1-2 | 20-45 minutes
- Game Board: Theater
- Stages Played: 2
- First to Act on Stage 1: Axis
- First to Act on Stage 2: Allies
Victory Conditions
- Automatic victory: In Stages 1-2, if the Axis controls the Airfields of Maleme and Heraklion at the end of Phase 2: Victory, they win.
- Standard victory: In Stage 2 only, if the Axis does not control Maleme and Heraklion at the end of Phase 2: Victory, the Allies win.
Allied Invasion of Sicily (1943)
With North Africa in Allied hands, the US and Great Britain team up for Operation Husky to wrest Sicily from Axis control. Will the daring campaign succeed, or will the fragile Allied momentum stall?
- Players & Time: 1-4 | 30-45 minutes
- Game Board: Theater
- Stages Played: 2
- First to Act on Stage 1: Allies
- First to Act on Stage 2: Axis
Victory Conditions
- Automatic victory: In Stages 1-2, if the Allies control Messina and Catania at the end of Phase 2: Victory, they win.
- Standard victory: In Stage 2 only, if the Allies do not control Messina and Catania at the end of Phase 2: Victory, the Axis wins.
Allied Landing at Salerno (1943)
Eager to capitalize on the successful invasion of Sicily, the Allies launch Operation Avalanche to gain a beachhead in Axis-held Italy. Will they unseat the entrenched Germans, or will the Allied hopes for southern Europe be dashed?
- Players & Time: 1-4 | 30-60 minutes
- Game Board: Operations: Italy
- Stages Played: 2
- First to Act on Stage 1: Allies
- First to Act on Stage 2: Axis
Victory Conditions
- Automatic victory: In Stages 1-2, if the Allies control Salerno at the end of Phase 2: Victory, they win.
- Standard victory: In Stage 2 only, if the Allies do not control Salerno at the end of Phase 2: Victory, the Axis wins.
Battle of Monte Cassino (1944)
Retreating German forces set up bristling defensive lines across central Italy to repel the northern advance of the Allies. The road to Rome hangs in the balance, but will the battle-weary Allies punch through?
- Players & Time: 1-4 | 30-75 minutes
- Game Board: Operations: Italy
- Stages Played: 2
- First to Act on Stage 1: Allies
- First to Act on Stage 2: Axis
Victory Conditions
- Automatic victory: In Stages 1-2, if the Allies control Cassino at the end of Phase 2: Victory, they win.
- Standard victory: In Stage 2 only, if the Allies do not control Cassino at the end of Phase 2: Victory, the Axis wins.
Optional Rules
Tournament Time
Scenario times
Under tournament time rules, each scenario has a time limit and players are on the clock. Suggested time limits by scenario are shown here. However, experienced players can choose to customize the limits to allow for more or less game time.
| Scenario | Total game time | Total time per side (Allies, Axis) | # of Stages | Time each side has per Stage (set timers) |
|---|---|---|---|---|
| Mediterranean Theater April 1943 | 208 mins | 104 mins | 4 | 26 mins |
| Mediterranean Theater November 1942 | 312 mins | 156 mins | 6 | 26 mins |
| North Africa | 150 mins | 75 mins | 5 | 15 mins |
| Italy | 176 mins | 88 mins | 4 | 22 mins |
Game Play
- After game setup, each side sets a timer (e.g., using a mobile phone) to the time indicated in the chart above. For example, when playing the Italy scenario, each side sets a timer for 22 minutes for Stage 1.
- During Stage 1, start the timer whenever that side is active, i.e.:
- Attacking during Phase 1: Tactical (the side moving units, declaring battles, and resolving).
- Receiving NS Tokens, and playing and revealing NS cards during Phase 3: National Support.
- Checking shipping lane sea spaces and purchasing and placing new units during Phase 4: Resupply.
- As soon as a side completes one of the actions above, stop its timer. The other side then starts its timer and is on the clock to perform the same action for its nations. Either the Allied or Axis timer will be running during the Tactical, National Support and Resupply Phases - but never both timers.
- Stop BOTH the Allied and Axis timers:
- During the Victory Phase. Neither side's timer should be running while confirming control of Objectives and Airfields, tallying VP, and checking for victory.
- Following the Resupply Phase at the end of a Stage. Stop both timers and allow each side to reset their timers for the next Stage, adding in any unused time (see below). This is also an opportunity to take a short break.
- At the start of a new Stage, reset each side's timer. Any unused time from the prior Stage can be added on top of the time for the next Stage. For example, if the Allies had 3 minutes and 15 seconds left over at the end of Stage 1 of the Italy scenario, they would set their Stage 2 timer for 25 minutes 15 seconds. This time can stack over Stages and be banked up for future use during the game.
- When a timer hits 00:00, that side is out of play time for that Stage and may take no more actions. When still in Phase 1: Tactical, battles are stopped for the side and Battle Declaration Markers removed with the spaces left as contested. Air Units cannot return on Movement Step 6 and are lost as casualties. When still in Phase 3: National Support, activities are stopped and no NS Cards activated. And when a timer hits 0:00 during Phase 4: Resupply, any units not yet on the board are returned to the nation's reserve. The opposing side may continue to act when it has time remaining.
Ending the Game
The game ends when 1 of the following occurs:
- One side achieves an automatic victory during Phase 2: Victory of any Stage.
- One side achieves a standard victory during Phase 2: Victory of the final Stage.
- Both side's timers hit 00:00 during the Tactical Phase of the final Stage of the game. Perform the Phase 2: Victory check for an automatic or standard victory, and declare a winner.
Tournament Time Tips
- Make good use of time while off the clock. It is permitted for teammate nations to confer and plan ahead while the opposing side is on the clock, thus saving valuable time.
- In the Mediterranean Theater scenarios, Stage 6 has no National Support Phase or Resupply Phase as the game ends after Phase 2: Victory. In the Mediterranean Operations scenarios, Stage 5 of North Africa and Stage 4 of Italy have no Resupply Phase. This frees up time for teammates to work together on the key, final Tactical Phase of the game. Plan ahead to put this time to best use.
6-Player Commander Game
Set Up
- For the 6-Player Commander Game, it is recommended to play one of the Mediterranean Theater scenarios.
- Follow the same set up procedures, except for the following:
- Remove the NS Cards and NS Tokens from the game. They are not used in the 6-Player Commander Game.
- Divide the players into 2 teams of 3. Team 1 represents the Axis and team 2 represents the Allies. Each player chooses command of 1 Unit Type for its side: Axis Air, Sea (Navy), and Land (Army) acting as team 1 vs. Allied Air, Sea (Navy), and Land (Army) acting as team 2. This creates a 3-player vs. 3-player game.
- In place of the usual Player Aids, distribute the 6-Player Game Player Aids to their respective Allied and Axis commanders of Air, Sea, and Land.
- Each commander then selects which special ability to activate for the game, detailed on the Player Aids, and notifies the opponent. Teammates may confer when deciding.
Game Play
- In the 6-player Commander Game, Phase 3: National Support is skipped in each Stage. Only Phase 1: Tactical, Phase 2: Victory, and Phase 4: Resupply are played.
- The 6-player format is a game of intense collaboration. Each player commands only 1 Unit Type (Air, Sea, or Land) for its respective Axis or Allied side. For example, the Axis Land (Army) commander controls all German (red) and Italian (yellow) Land Units. Or, on the Allied side, for example, the Allied Air commander controls all British (blue) and US (green) Air Units. During battle, Air, Sea, and Land commanders roll for their respective Axis and Allied units involved in the battle and confer to remove casualties.
- Teammates must collaborate to move units, declare and conduct battles, remove casualties, perform resupply, and other actions. For example, an Axis Sea (Navy) commander looking to perform an amphibious assault must confer with the Land (Army) commander before loading Land Units onto Sea Transports. Or, for example, the Allied Air commander must confer with the Sea (Navy) commander before landing Fighters and Light Bombers onto a friendly Aircraft Carrier.
- During Phase 4: Resupply, each commander selects 2 Objectives to resupply for the respective forces under their command: Air, Sea, and Land. For example, in each Resupply Phase, the Allied Air commander chooses 2 Allied-controlled Objectives to receive an Air resupply (1 for Great Britain blue, and 1 for US green), then resupplies both up to the resupply value of the Objectives selected. Or, for example, in each Resupply Phase, the Axis Land (Army) commander selects 2 Axis-controlled Objectives to receive a Land (Army) resupply (1 for Germany red, and 1 for Italy yellow).
- In the 6-Player Commander Game:
- It is permitted to transport Land Units aboard Air, Sea, and Land Transports of a friendly nation. For example, a British Air Transport can transport US Infantry, or an Italian Sea Transport can transport German Land Units.
- Units from friendly nations can be combined as part of Hidden Fleets. This includes Fighters and Light Bombers on hidden Aircraft Carriers. Reminder: Each Sea Commander has 2 Hidden Fleets to deploy, one for each Allied or Axis nation.
- On Movement Step 6, Fighters and Light Bombers can return to Aircraft Carriers of a friendly nation. For example, an Italian Light Bomber can return to a German Aircraft Carrier.
Defensive Line Example
A US Tank and Artillery attempt to move in and declare a battle on a space defended by 2 contiguous German defensive lines: the first on the border facing the invading US units, and a second line facing south toward a different adjacent space.
The lines are contiguous, thus Germany stacks the defense rolls of both lines to repel the invading US forces. Germany receives 4 White rolls at @9 or higher and 2 Gray rolls @8 or higher vs. Land Units (it does not receive its 2 Anti-Air rolls because there are no enemy Air Units involved). The rolls are made during movement and US casualties are removed. If the US units survive, they move into the space and Battle Declaration Marker "A" is placed. If the German Infantry and Tank are both destroyed in the ensuing battle, both defensive lines are destroyed since the Axis would have no control-capable units left in the space.
Revealing Hidden German Units: Italy Scenario
Shortly after the Allied landing at Salerno during the invasion of Italy, German forces counter attacked with reserve units from key locations. The Italy Scenario recreates history by giving both the German 14th Army and German 10th Army players hidden units to deploy at game set up. See Scenarios & Set Up for more.
Either German player may reveal its hidden units at any time during Movement Steps 1-5, whether acting as the attacker or defender. To reveal, flip the Hidden Unit Box Token over to show the numbered space where the units are located, then move the units from the Hidden Unit Box to the corresponding numbered space on the board. When revealing, all hidden units in the box must be revealed and placed. The units can immediately take part in battle as normal, force a surprise push through, use range to provide supporting fire to a nearby battle, and other actions. Hidden units cannot be revealed on Movement Step 6.