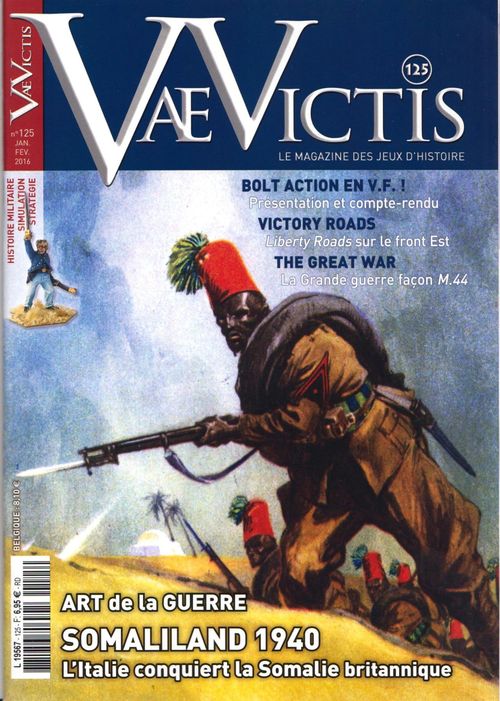
Somaliland 1940
Somaliland 1940 Rulebook
Table of Contents
Table of Contents
1 - Overview
1.1 Map
The map depicts the part of British Somaliland where the harshest combats took place. Each hex is about 10 km across (6.2 miles).
1.2 Scale
Each game turn represents two days. The ground unit counters principally represent battalions, armored companies and artillery batteries.
2 Units
The units represent the military formations that participated in the campaign.
British units are beige. Italian units are green.
There are four types of units: Ground units, HQ (only Italian), Ships (only British) and Air units (represented by Air Points). The units are principally battalions (size II) or companies (size I or just a vehicle symbol).
2.1 Ground Units
Ground units are combat units (all the units with a Combat Factor, usually Infantry), support units (usually Tank/Armored) and artillery units.
The combat units are either European (white combat factor) or indigenous (black combat factor).
2.11 Combat Factor
The combat factor represents the unit's ability to attack and defend.
2.12 Movement Factor
Units have a movement factor that allows them to move from hex to hex by paying the cost of each type of terrain.
The different types of movement are:
- foot (unit with no symbol)
- motorized (wheel symbol)
- armored (track symbol)
- camelback (camel symbol)
2.13 Support Factors
The Tank/Armored units and some infantry units have a support factor instead of or in addition to a combat factor. This number may be used as a die roll modifier (DRM) in combat, in attack or defense.
2.14 Bombardment value
Artillery units and ships have a bombardment value (white number in a red circle).
2.15 Headquarters (HQ)
The Italian HQ value on the counter represents both its Command and supply range and the movement allowance. This command range is given in hexes.
2.16 Air units and Ships
The rules for these units are explained in 10 and 9.4.
2.2 Hits
There are two types of hits: Bombardment hits (CH) in red and Combat Hits (BH) in gray. Their effects differ and are explained in 11 and 12.
Transcription note: the printed text reads "Bombardment hits (CH)" and "Combat Hits (BH)". The abbreviations are reversed relative to sections 11 and 12, which use BH for bombardment hits and CH for combat hits. The printed abbreviations are kept here as they appear.
3 SEQUENCE OF PLAY
A game of Somaliland 1940 is divided into several Game Turns.
Each Game Turn is divided into a Mutual Administrative Phase, an Activation Phase and an End of Turn Phase. All of the Phases are further divided into a series of segments. Every action taken by a player must be carried out in its appropriate phase or segment.
3.1 Sequence of Play
A) ADMINISTRATIVE Phase
-
The Italian player adds new supply points (3.3)
-
The Italian may purchase other supply points (3.4)
-
Aircraft Repair and Reinforcement Phase.
-
The British player rolls a die to determine Churchill's "Will".
-
Both players check their units to determine if a supply line exists. If no supply line can be traced, mark the unit with an Out of Supply marker and the unit is turned 180 degrees.
B) ACTIVATION phase
The Italian player selects one of his HQ and activates it. When the activation is complete, the British player activates his units.
The Activation phases continue until the Italian player passes or all units on the map have been activated.
An HQ can be activated as many times as the player wishes in a game turn, but the units can be activated only once per turn (rotate them 90 degrees to indicate their activation).
C) End of Turn phase
-
Out of Supply (OOS) units roll for attrition and then move.
-
The British player may declare the evacuation of the colony.
3a) The British player receives 1 VP for Berbera if he has not declared evacuation.
3b) The British player rolls for the destruction of materiel if evacuation was declared.
- All the Bombardment Hits (BH) on the map are removed.
3.2 ACTIONS
The actions in each segment are always performed in sequence (where necessary), the Italian player first and then the British player.
3.3 SUPPLY POINTS
In segment I of the Mutual administrative phase, the Italian player receives a Supply Point (SP) for each village occupied (up to a maximum of 4). The Italian player keeps track of his number of SP with the "Appro" (Supply) marker.
Note: He cannot receive more than 4 SP.
Villages are controlled by the player whose units were the last to occupy or pass through the hex. All the villages are under British control at the start of the game.
3.4 PURCHASE OF SP
For each victory point (VP) spent, the Italian player rolls a die (one at a time, he is not required to declare how many SP he wants to spend and therefore how many dice he will roll) and receives a number of SP equal to the die roll result.
There is no limit to the number of VP the Italian can spend in a turn.
4 ACTIVATION
Starting with the Italian player, the two players alternate their activation segments.
4.1 Types of Activation
4.1.1 Italian
The Italian player selects one of his HQ, pays 1 SP and rolls 1d6: the result is the number of Operation Points (OP) the HQ can use to activate his units.
4.1.2 British
When the Italian HQ ends its activation, the British player rolls 1d6 and receives that number of OP (the British player does not need SP) to use to activate his units on the map.
4.2 Activation of HQ and Units
4.2.1
An activated HQ can move without paying OP, but can only move once per turn and after moving can no longer be activated. (Turn the counter face down).
4.2.2
An Out of Supply unit cannot be activated.
4.2.3
The Italian player may only activate units that are in Command range of the activated HQ. The range is calculated in terms of hex, not movement points.
4.3 End of the Activation Phase
If at the beginning of an activation phase, the Italian player cannot or does not want to activate an HQ, the phase ends and the players move on to phase C.
Note: The Italian player may not pass during the first Activation phase.
4.4 Operation Points (OP)
The players must spend OP to move their units and combat. An "OP" marker keeps track of OP expenditures.
4.4.1 Cost
The activation of an Artillery, Native (9.1), Dubat, Ship, SCC or Tank/Armored costs 1/3 of OP.
All units of an Italian colonial brigade (regardless of the number of battalions that compose it) that are in the same hex may be activated at a cost of 1 OP.
Note: A color code allows for easy identification of various units of the same brigade.
All other units cost 1 OP.
A player may spend all or part of his OP. Fractions of OP that are not used are lost.
5 Zones of Control (ZoC)
All units with a combat value of at least 1 exert a Zone of Control on the 6 hexes adjacent to the unit.
ZoCs do not extend into hexes with enemy units, into sea hexes or into impassable hexes.
5.1 Types of ZoC
There are two types of ZoC: Battalions have a Hard ZoC (see also 8.3); all other units with ZoC have a Soft ZoC.
It costs +1 Movement Point (MP) to enter any type of ZoC.
Note: Artillery doesn't pay the +1 if there are already friendly units in the hex.
A unit must stop when it enters a hard ZoC. It is never possible to go from an enemy hard ZoC directly into another enemy hard ZoC.
A unit doesn't have to stop when entering an enemy Soft ZoC. The unit may move from enemy Soft ZoC to enemy Soft ZoC as long as it has enough movement points.
6 Movement
The Movement Allowance of a unit is printed on the counter (MP).
Exception: the unit SCC MG moves at the speed of the SCC unit with which it is stacked. It cannot move alone nor with a unit other than the SCC.
The terrain costs are indicated on the Terrain Effect Table (TET).
Remember: A unit can be activated (and then move) only once per game turn. Turn the counter 90° as a reminder that the unit has moved.
6.1 Minimum movement
A unit may move only one hex during its Activation Phase by spending all its MP even if the movement cost to enter that hex exceeds the unit's movement capacity. This does not allow units to enter hexes that are otherwise prohibited, or to move from one Hard enemy ZOC to another (5.1).
6.2 Off-map boxes
There are 3 off-map boxes (Agin, Dobo and Zeila). Moving from an off-map box to an adjacent off-map box costs all of the unit's MP.
It is possible move between hex 0501 and Zeila and vice versa, but costs all the MP (see also 6.4.2).
6.2.1 Combats
A combat ensues when a unit enters a box containing enemy units. Use the combat rules taking into consideration all the units that are present.
Note: There is no stacking limit in the boxes.
6.3 British trucks
All British units with an infantry movement capacity that move on a road can use the terrain cost of the motorized movement if they choose, at any moment of their movement.
Note: The British had some transport trucks and this rule avoids the necessity of representing them.
6.4 Special movement
6.4.1 Tug Argan Bypass
When a Italian unit wants to enter hex 0906, it must first roll 1d6. On 1-3 it stops its movement, 4-5 it may enter the hex, 6 it is placed in hex 1005. In any case, it concludes the movement for the current turn.
Historical note: The Italian command attempted to bypass Tug Argan, but because of incorrect maps, the unit ended up much farther north than planned.
6.4.2 Colonna Costiera (Coastal Column)
When the Italian player conquers Dobo he must create the Colonna Costiera or lose 1 VP.
If created, the Column is composed of Passerone HQ (placed in the Dobo box) and 3 units of the Colonna di Sinistra (left column) of which at least two must be European.
On the following turn the column must be activated. The Italian player rolls 1d6 and halves the result (rounded up). The result is the number of game turns after which the units of the column are placed in hex 0204 during the A3 phase (Repair and Reinforcements Phase).
The Italian receives 1 SP less each turn until the column appears in hex 0204.
7 Stacking
There cannot be more than 3 units stacked in the same hex. HQ, artillery, tanks, motorized vehicles and ships do not count in the stacking limit.
Exceptions:
a) One Italian colonial brigade per hex (regardless of the number of battalions that compose it) can be counted as one unit.
b) All the units of the SCC in the same hex count as one unit.
c) In the off-map boxes there is no stacking limit.
7.1 Fog of war
Players may never look through an enemy stack (but see 9.1.1 and 10.1), but they can always look at the combat unit on top of the stack.
During combat players must reveal their stack.
8 Supply
A unit must be in supply to be activated. Only combat units require supply. Fortifications, Native (9.1), Ships and aircrafts never need supply.
8.1 Italian supply
To be in supply, an Italian unit must be within 5 MP of its HQ and the HQ must be within a number of MP less than or equal to its supply range from an entry hex or from a road or path that leads to an entry hex. The MP costs are tallied in the movement mode of the HQ.
8.1.1
Italian units may use the starter hexes like an HQ for supply.
8.1.2
An HQ in an off-map box supplies only the units in this box.
8.2 British supply
To be supplied, British units must be within 5 movement points in Motorized mode of a road or path that leads to Zeila (if not controlled by the Italians) - hex 0501 - or Berbera.
8.3 Out of Supply effect
Out of Supply units cannot be activated. They defend normally but cannot use their support or bombardment value. All OOS units have a soft ZoC.
Note: Indicate the OOS units by turning them 180 degrees.
8.3.1
When calculating the MP for supply, count the starting hex (the road/path or the HQ), but not the hex containing the unit. The supply line and the road/path may not cross enemy units or enemy ZoC unless the hex is occupied by a friendly unit.
8.4 Attrition
During the End of turn phase (C1), OOS units roll 1d6 for attrition.
The unit consults the Attrition column on the TET and rolls 1d6. If the result is less than or equal to the number indicated, the unit receives 1 Combat Hit (CH).
HQ, Artillery and armored or motorized units never roll for attrition.
Units that are completely surrounded by enemy units or enemy ZoC (reminder: friendly units negate the enemy ZoC) roll 2d6 for attrition. European units have +1 die roll modifier (DRM); the units with Camel movement allowance -1 DRM.
8.4.1 Movement of OOS units
After the attrition roll, the OOS units may move (without using AP).
Units in Motorized mode have their movement allowance halved. Units in armored mode cannot move.
Transcription note: "without using AP" is printed as is. The rules otherwise use OP for activation cost; AP is presumed to mean OP.
9 Special units
Some units benefit from special rules.
9.1 Native
Native units are Illalos, Bande, Police and Abyssinians. They have an asterisk next to their combat value. They can never attack. They have a soft ZoC.
If a enemy non-native unit or stack becomes adjacent or enters the same off-map box as a native unit, the latter (even if it is stacked with a friendly unit) must roll 1d6.
- 0 : the Illalos unit (only) switches camps,
- 1-5 : the unit is removed from the game,
- 6 : the unit remains in place and in the following combat phase must be attacked.
The Illalos have -1 DRM for this roll if the Italians control Zeila.
Bande, Police and Abyssinians are unaffected by the control of Zeila.
9.1.1
During his activation a player can always examine an enemy stack that is within the Movement allowances of his Illalos or Bande units.
9.1.2
Illalos and Bande are never OOS.
9.2 Armored and motorized units
Tanks, armored cars and armored trucks can only use their support factors in attack and only if the attacked hex is in clear or hill terrain.
9.3 Anti-tank
Units with bombardment capacity or an AT on their counter have an anti-tank capacity; these units negate the support value of the armored or motorized enemy units in their hex.
9.4 Ships
Ships must be activated as the other units to be able to move or bombard. Ships can move only in the sea hexes and mixed sea/land hexes and have an unlimited movement allowance.
Ships can only bombard in adjacent coastal hexes.
Ships do not count in stacking limits.
9.5 Anti-air (AA)
The 23RHK unit and the ships have an AA capacity (see 10.4 for the effects).
The AA capacity only applies in the hexes of these units.
Note: the unit 23RHK also has an AT capacity.
9.6 British Fortifications
Fortifications have a value that ranges from 0 (only in scenario 2) to 2.
In combat, the value of the fortification indicates the number of BH and CH that the units in the fortification ignore in the case of bombardment or combat.
Example: The Italian player gets a 3 on the 3/1 column against a British unit in a fortification with a value of 2. The result is 2/3 which becomes 2/1).
10 Air units
In Somaliland 1940, the air war is treated abstractly. Air points (ArP) represent the air assets for air missions.
10.1 Air Points (ArP)
Each player starts the game with the number of ArP listed in the scenario. This is the number of ArP the players can use each turn. Each ArP can lead one mission per turn.
Players can lose or gain ArP during the game.
10.1.1 Markers
There are four air markers (two per player) to track the available and used ArP.
Use the Air Points ("Points Air") markers to show the maximum number of ArP you may have.
Use the Used ("Utilisé") markers to show how many ArP you have used. As you use ArP to fly missions during the turn, move these markers on the counter to show how many ArP have been used.
10.1.2 Activation of ArP
ArP are activated normally by spending one AP per ArP). The Italian player can activate his air units during the activation of any HQ.
Transcription note: the printed text has an unbalanced parenthesis here and says "AP" where the rest of the rules say OP.
10.1.3 Purchase of ArP
During the A3 Phase, the Italian player can increase his ArP by spending 1 VP for every ArP added.
If the Churchill Will marker (CW, see rule 14) has not yet dropped to 0, the British player may also increase his number of ArP by spending 1 VP per ArP on any turn during the A3 Phase.
10.2 Air efficiency
In the A3 Phase, the British player rolls 1d6. The Italian player rolls as many dice as he wants, one at a time (and is not required to state ahead of time how many dice he'll roll), but each die he rolls costs 1 SP.
The result of the die is the number of used ArP that are available this turn (reduce the used marker accordingly).
Examples: The British player has his Air Points marker in box 4 of the counter and the Used marker in box 3. During the A3 phase, he rolls 1d6 and gets a "2". The Used marker is placed in box 1. The Italian player has his Air Points marker in box 7. During the A3 phase, he rolls 1d6 and gets a "3". The Used marker is placed in box 4. The Italian player decides to spend another SP and re-rolls a die. This time the result is "6", the Used marker is moved to box 0. (It is not possible to have a negative result).
10.3 Air missions
You can use your ArP to engage in bombardment missions on any hex on the map.
Each used ArP has a bombardment value of 1.
You can fly as many missions as you wish each turn, within the limits of your available ArP.
10.3.1 Air Bombardment mission
Spending 1 AP for each ArP, the active player can engage a bombing mission with one or more ArP on a hex where there are enemy units.
Note: a maximum of three ArP can participate in the same bombardment mission.
It is possible to attack more than once the same hex in an activation, but each mission must be resolved separately.
10.3.2 Air coordination & attrition
Before each bombing mission, after spending the AP, the player must roll a die on the Air Coordination & Attrition Table.
The final modified number is the maximum number of ArP available for the bombardment.
Once the bombardment value of the mission is established, it is resolved as a normal bombing on the Bombardment Table (see 11).
After the bombardment, apply any ArP losses.
10.4 Anti-Air (AA) Fire
Some units have an AA value indicated on the counter (white number in a blue square).
The AA value of a hex is equal to the sum of all the AA values present in the hex.
All hexes with at least 1 battalion present have an intrinsic AA value of 1, even if there are no AA units.
Note: In this case, the AA value is 1 regardless of the number of battalions present in the hex.
10.5 Air losses
The "Air losses" ("Pertes air") markers of both players start on the 0 box on the Track. Whenever an ArP takes a loss for 10.3.2, 10.4 or 10.6.1, the marker moves forward one space per loss. For every two losses, the Air losses marker moves back one space.
Note: Air losses markers are also used for the calculation of victory points (see 15).
10.6 Airfields
At the start of the game the British player has some Gladiator units on Somaliland airfields. These units allow him to escort his Bleinheim. He can decide to abandon these airfields and give up the escort (see Air Attrition Table).
Transcription note: "Bleinheim" and "Air Attrition Table" are printed as is; the table referred to is the Air Coordination & Attrition Table.
10.6.1 Attack of airfields
If the British player has not abandoned the airfields in Somaliland (10.6.2), the Italian player may launch one and only one attack per turn on the airfields.
Each BH obtained immediately becomes an Air loss for the British.
The airfields have an AA value of 1.
10.6.2 Abandonment of airfields
The British player may decide to abandon the airfields in Somaliland after an airfield attack has resulted in at least 1 BH, or if "Churchill Will" is at 0.
10.7 Bombardment of Ships
The Italian player may bombard British ships with its aircrafts.
Every two BH (odd BH are lost) damage a ship, and the counter is turned over. Any further damage sinks the ship.
Note: The Italian player wins 2 VP for each ship counter that is turned over (and 4 VP if the ship is sunk).
10.8 Reconnaissance
The Italian player has an air reconnaissance unit. During the activation of any HQ, the HQ may spend 1 OP to activate the reconnaissance air unit.
The player designates a hex and must obtain with 1d6 a result less than or equal to the number indicated in the Air Reconnaissance column on the TET. If successful, the Italian player may look at the enemy stack.
Reconnaissance is not subject to the Air coordination & attrition table.
11 Bombardment
It is possible to bombard the same hex several times with different artillery units or ArP in the same activation.
The attacker units must be activated to bomb.
When the player bombards, he rolls a number of d6 equal to the bombardment value of the unit, subtracts any modifiers caused by terrain (see the TET) and checks the result on the Bombardment Table.
The result is the number of BH inflicted on the enemy. This result is inflicted on all the units in the bombarded hex.
11.1 Effects of BH
The BH received by a unit act as a negative modifier on the combat die. If several units with BH are in the same hex, apply the most unfavorable modifier.
Moreover, each BH received reduces a unit's movement capacity by one MP (but see 6.1).
11.1.1 Removal of BH
During an Activation Phase, a commanded unit may remove 1 BH by spending 1 OP. A unit may not remove more than 1 BH per Phase.
A unit that removes a BH is not considered activated but cannot move or attack in the same Phase.
Units may also remove BH for 13.1 and during the End of Turn phase (C4).
11.2 Artillery
All artillery units have a range of one hex. For the defender, this range must reach the hex under attack (not the attacker's hex). If the attack comes from several hexes, the player must specify which hex he is bombarding.
The artillery units are considered activated when they bombard.
Artillery units stacked in the same hex can add their bombardment values to a single bombardment.
An artillery unit alone in a hex and that is attacked in combat by a unit with a combat factor is immediately destroyed.
11.2.1 Defensive Bombardment
The defender can bombard a hex under attack with units that are able to do so. Any BH affect all the attacking enemy units of the same hex.
The defender does not need AP to bombard but the unit that bombards must not already have been activated during the turn. Modifiers due to terrain are not taken into account.
After the defensive bombardment is carried out, the unit is considered activated (turn it 90 degrees).
12 Combat
The in-phase player's units may attack adjacent enemy units at the end of his activation phase.
Combat is not mandatory. Units in the same stack can attack different hexes and all the units of a stack are not required to attack.
All the units of the same hex must be attacked together.
Each combat is completely resolved before the next combat may take place.
Units may only attack hexes into which they are able to move.
Each unit can attack only once per turn, but it may be attacked any number of times in the same turn but not more than once per activation phase.
It is not permitted to make attacks with odds less than 1:2.
Support factors
In combat, units with a support factor modify the die roll in their favor by the value of their support factor (but see 9.2).
In a combat every player can use the support factors of one and only one unit.
A unit of this type that is attacked alone in a hex by a unit with a combat factor is immediately destroyed.
Coordinated attacks
The Italian player can attack a hex from more than one adjacent hex only if the activated units that attack have not moved during this turn.
Terrain
DRM due to terrain are not cumulative. Always use the terrain that is most favorable to the defender.
12.1 Combat resolution
Total the combat values of all the attacking units then do the same for the defender's units in the attacked hex. Compare the total attack and defense strengths to get a ratio and round down.
Roll a die and apply any die roll modifiers (don't forget 11.1), then determine the result on the Combat Result Table (CRT).
12.1.1 CRT
On the CRT, the result is given in the form a/d with a = the attacker's result and d = the defender's result.
The result is the number of CH (combat hits) the owning player must allocate among his units that participated in the combat.
12.2 Losses in Combat
A unit may suffer as many CH as its combat value.
The CH are allocated one at a time beginning with the camp that received the greater number. In the case of a tie, start with the attacker.
Example: the result of the combat was 3/2. The attacker takes a CH, then, since the attacker and defender now have the same number of CH, the attacker takes a second, then the defender takes its first CH and so on.
A unit's combat value is equal to its initial combat value minus the CH it received. If a unit receives a number of CH equal to its combat value it is immediately destroyed and removed from the game.
HQ, Tank, Armored, and Artillery (including AA and AT) cannot be used to absorb CH. These units are eliminated if all the units stacked with them are destroyed.
They are also destroyed if they are attacked by units with a combat factor while they are alone in a hex.
12.2.1
Losses can be distributed among the Combat units as the owning player sees fit.
12.3 Retreat
The defender (only) may decide at any time during the allocation of losses to retreat instead of suffering CH. If he decides to retreat, all the CH not yet allocated are converted into hexes of retreat. Stop allocating CH when the defender decides to retreat or when one side is completely eliminated.
Each unit can withdraw at the most the number of hexes equal to its movement allowance; any additional CH have to be taken.
12.3.1 Retreat into enemy ZoC
A stack of units that retreats to Soft enemy ZOC receives one additional CH. A stack of units that retreats to a Hard enemy ZoC receives an additional 1d6 CH.
12.3.2 Retreat to an off-map box
Units in an off-map box can retreat to an adjacent off-map box. Units in Zeila may retreat to 0501, and vice versa.
It is considered that the unit retreats a number of hexes equal to its movement allowance.
12.3.3 Advance after combat
If the defender retreats or is eliminated, then one ground combat unit may advance into the vacated hex.
The Natives have to roll (as in 9.1) if an enemy unit becomes adjacent as a result of advance after combat.
Note: Natives do not test if an enemy unit becomes adjacent following a retreat.
13 Replacements and Reinforcements
13.1 Replacements
Activated combat units that are not in enemy ZoC may remove 1 CH and all their BH if they do not move. The unit can no longer be activated this turn.
13.2 Reinforcements
The reinforcements arrive in the phase A3.
13.2.1 Italian reinforcements
The Italian reinforcements (2 units of heavy artillery) are available from the turn following that in which the first Italian unit enters the ZoC of a British fortification with a value greater than 0.
These two units are placed in a hex adjacent to Hargheisa (hex 0312) and can be activated by De Simone HQ even if they are out of the Command range of this HQ.
13.2.2 British reinforcements
The British reinforcements arrive in Berbera (hex 1501) in the turns indicated in the scenario. If the British player declares the evacuation of Somaliland, the reinforcements that have not yet arrived are lost (exception: 13.3).
13.2.3 Colonna Centrale
Once he has conquered Zeila, the Italian player can activate the Bertoldi HQ to assign one colonial brigade to the Colonna Centrale. This brigade arrives after 1d6 turns adjacent to De Simone HQ, outside of an enemy ZoC. It is considered to be part of the Colonna Centrale for the rest of the game.
13.3 CL Hobart
If the CL Hobart (ship counter Hobart/Carlisle) is in Berbera, the British player may place the 3PDR counter in Berbera. This counter remains in the game even if the Hobart counter leaves Berbera.
13.4 Companies
During the A3 reinforcements phase, the British player may replace an indigenous company with his companies. The number of companies created is equal to the battalion's combat value (its combat factor less any losses).
Once this operation is carried out, it is not possible to reform the original battalion. But for victory conditions, the battalion is considered destroyed if all the companies are destroyed.
14 Churchill
The Churchill Will (CW) marker ("Volonté de Churchill") begins the game in box 8 on the track.
Each time a Somaliland village is occupied by the Italians, the marker moves down one box.
During phase A4, the British player rolls 1d6, with a result of 1-5 the CW moves down one.
When the CW is at 0 it is possible to abandon the airfields (10.6.2) and evacuate the colony.
14.1 Evacuation
During the End of Turn phase C2, if the CW marker is at 0, the British player may declare the evacuation of Somaliland.
14.1.1 Materiel
During each turn of evacuation, the British player rolls 1d6 in phase A3 for the destruction of materiel. A result of 1-4 reduces the value of the materiel by 1, a result of 5-6 reduces the value by 2.
14.2 Berbera
Each turn after the evacuation has been declared, the British player can evacuate 2 ground units of the "foot" movement class by the port of Berbera; only one if the port is damaged.
14.2.1
The Italian player can bombard the port of Berbera. Any two BH reduce the capacity of the port (odd BH are lost). The first time, place the "Port damaged" counter ("Port endommagé") on Berbera; the second time, turn it over to its "Destroyed" side. The port becomes unusable for the rest of the game.
Berbera has an intrinsic AA value of 1.
14.2.2
When Berbera is in a hard ZoC of a supplied Italian combat unit, the city surrenders and all the British units still in Somaliland are considered eliminated for victory conditions.
15 Victory conditions
The game ends at the end of the activation (not the turn) in which an Italian combat unit enters Berbera.
The side with more VP wins the game.
The players receive:
- 1 VP per enemy battalion completely eliminated (see also 14.2)
- 1 VP per CH received by a European unit.
- 1 VP per any 2 Air losses suffered by the enemy.
The Italian player receives:
- 1 VP at the end of game for any turn still to be played.
- 1 VP for each point of materiel that the British did not destroy.
Important: Remember that the Italian player can gain or lose VP for 3.4, 6.4.2, 9.4.1, 10.1.3 and 10.7.
Note: section 9.4.1 is cited here but is not printed in the rules; section 9.4 is the Ships section.
15.1 VP Marker
Use the VP marker to record the VP during the game.
16 Set-up
There are 2 scenarios in Somaliland 1940, a historical scenario and the Free set-up scenario.
In both scenarios place the game turn on 1 of the Game turn track.
Place the VP, Italian and British air loss and Used ArP markers in box 0; the British ArP on box 4, Italian ArP on box 9; Italian "Appro" on box 8 and Materiel on box 9 of the Track.
The two ships can be placed in any sea hexes or mixed sea/land hexes.
British Reinforcements: The 2/BW arrives on turn 3 and the 23RHK arrives on turn 6.
16.1 Historical scenario
16.1.1 British set-up
One SSC company in Jerato Pass (1208), Hargheisa (0312), Burao (2112) and Adadleh (1109). The SSC MG unit places itself with any of these units.
One Illalos at Oadueina (1613), one Illalos at Dobo (off-map box) and the others within 1 hex of any SCC Company (only one Illalos per hex).
The Abyssinians at Zeila (off-map box). The Police unit in Bulhan (0702).
The 1/2 P at the Sheikh Pass (1708). 3/15P, 1NR/KAR, 2/2KAR and 1EAlb within 2 hexes of Laferug (1206).
Arm. Truck in Berbera (1501).
One Fortress 2 in Argan Pass (1007), one fortress 1 in hex 1006.
16.1.2 Italian set-up
A common color code on the bottom of the units and HQ allows for easy indication of the units and their HQ.
Colonna di Sinistra (Left Column): HQ Bertoldi to Agin (off-map box) with the unit 1AS and 2 x G. Dubat.
Colonna Centrale (Central Column): HQ De Simone enters in 0114 with the colonial brigades II, XIII, XIV, and XV, the artillery 100/17, the motorcyclist company Pai, units L3/35, M11/39 and FIAT 611.
Colonna di Destra (Right Column): HQ Bertello enters in 1114 with the colonial brigades XVII and LXX, the two battalions of black shirts XIII and XIV and the unit MG/GdS.
16.2 Free set-up scenario
16.2.1 British set-up
All the initial combat units position themselves in any village, Hill, or Mountain hex or in the two off-map boxes. If the British units have a flag on their verso, place them face down to hide their value.
The British player places the 5 fortresses in a cup. He randomly draws three of them and places them face down where he wants on the map.
16.2.2 Italian set up
The Italian player positions his three HQ in three of the four starter hexes (0114, 1114, 1914 or Agin). He places the units he wants with these HQ.
The units may start in excess of stacking limits.
The Italian player may create at any moment a new Colonna composed of Passerone HQ and at least 3 ground units.
Charts
The following charts are printed on the publisher's "Charts in English" sheet and are referenced by the rules above.
Combat Results Table
| Dice | 1/2 | 1/1 | 3/2 | 2/1 | 3/1 | 4/1 | 5/1 |
|---|---|---|---|---|---|---|---|
| 1- | 3/0 | 4/2 | 2/1 | 2/1 | 1/1 | 2/2 | 1/4 |
| 2 | 3/1 | 3/1 | 3/1 | 1/1 | 2/2 | 2/3 | 0/4 |
| 3 | 2/1 | 2/1 | 1/1 | 2/2 | 2/3 | 1/3 | 0/4 |
a/d = number of CH for the attacker/defender
DRM: Support Value, number of BH, Terrain.
Terrain Effect Table
| Terrain | Foot | Mot. | Tanks | Camel | DRM | Attrition | Air Reco |
|---|---|---|---|---|---|---|---|
| Clear | 1 | 2 | 2 | 1 | – | 4 | 6 |
| Hill | 2 | 4 | 5 | 1 | 1 | 5 | 5 |
| Mountain | 4 | Forbi. | Forbi. | 3 | 2 | 6 | 4 |
OT : other terrain ; * : -1 (minimum PM) ; ** : -1 on dice
Italian entry hexes are treated like passes hexes.
Transcription notes: the chart's first column is headed "Carte" (map) on the printed sheet, with the terrain names beside it; the terrain names are kept as printed, with "Montain" corrected to "Mountain" here. "Forbi." is printed as is and means forbidden movement. The "Air Reco" column is used for the reconnaissance roll in 10.8.
Air Coordination & Attrition Table
| Dice | 1 | 2 | 3 | 4 | 5 | 6 | 7 | 8 |
|---|---|---|---|---|---|---|---|---|
| ArP max. | 3 | 3 | 3 | 2 | 2 | 1 | 1 | 0 |
Results of 0 or 1 (shown in red on the printed chart): loss of one ArP.
DRM: AA: + AA value in hex.
The British has not abandoned the airfields in Somaliland: +1 (Italian only)
The British has abandoned the airfields in Somaliland: +1 (British only)
Transcription note: the printed chart says "Somalia" in the two airfield lines; these are read as Somaliland.
Bombardment Table
| Bombardment | 1-3 | 4-6 | 7-9 | 10-12 | 13+ |
|---|---|---|---|---|---|
| Number of BH | 0 | 1 | 2 | 3 | 4 |
Counters Description
The printed counter key labels these features (translated from the French labels on the sheet):
- Infantry, recto: Name; Combat Factor; European unit.
- Infantry, verso: Size of unit and color of brigade; Movement capacity; "The unit lost strength".
- HQ, recto: Name; Movement Mode; Command Value.
- HQ, verso: "Indicates that the HQ has been activated"; Colonne Color.
- Other kind of troops: Indigenous troops; Bombardment Value; AT Capacity; AA Capacity; Support factor.
- "* : Native unit (9.1)"