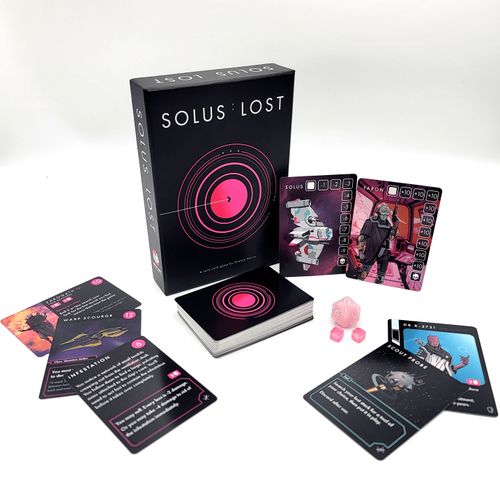
Solus: Lost
Solus: Lost Rulebook
Table of Contents
Table of Contents
Setting up the game
- Locate the four artifact cards, your ship and pilot cards, and the damage scale. Set the four artifacts face up and to the side, then place your pilot, ship, and damage scale in front of you.
- Take the two pink cubes and place one on your pilot, and the other on your ship in the solid white squares at the top of each card.
- Place the D20 and damage tokens in an easy-to-reach place.
- Shuffle the remaining cards well and place them face down in front of you.
- Draw two cards face down and place them next to each other. You are now ready to play.
Example layout of setting up to play: the artifacts are laid out in a row above the Lost Stack and Graveyard; the Deck and the Decision Area sit in the middle; along the bottom are the Damage Scale, your Pilot and Ship cards, and the Recruit and Tools areas.
Your life meters
In this game, there are two metrics you need to keep track of:
- Your pilot's age: Certain events in the game cause your pilot to age at an accelerated rate in multiples of 10 years.
- Your ship's damage: Your ship takes damage from situational cards and battles.
If either of these meters reach the Skull, you lose.
Special abilities: Your pilot and ship each have a special ability that unlocks when their respective life meters reach a certain threshold.
- Pilot card (Faron, Solarian) — Planar Drift: If you are aged 70 or more years: At the end of a battle, you may look at the top 3 cards of your deck and place them back in any order.
- Ship card (Solus) — Crisis Retrofit: If your ship's damage is -7 or worse: After a battle, you may search the lost stack for a tool card.
Tracking cubes
With the game comes two translucent pink cubes. Use the two cubes to keep track of damage and aging. When starting the game, your cubes should be placed on the white square at the top of the meter.
Healing your pilot and ship
Some cards allow you to repair your ship or reverse your pilot's aging. These aren't common, making damage management and risk mitigation essential for survival.
Gameplay
The game is played in a series of "decisions". A "decision" is the act of choosing one of the two face down cards and flipping it over. Once you've made a decision, you then have two options:
- Resolve the chosen card
- Push your luck
Resolving a card
Solus Lost features multiple card types; some offer advantages, but most test your luck and strategic thinking. Resolving a card simply means following its instructions and dealing with the consequences.
There are seven categories of cards:
- Situational cards - Perform an action according to the card
- Encounter cards - Hostile ships that you must fight or flee from
- Tool cards - Attach to your ship and give you upgrades
- Recruit cards - Provide helpful abilities
- Overlords - Powerful enemies that guard the artifact cards
- Homelinks - Half of the key to finding your way home. Each homelink has an instant one time activated ability.
- Artifacts - Cards required to activate their associated homelink. Artifacts are protected by overlords. Each artifact has a permanent special ability to help you along your journey.
Pushing your luck
If you regret your decision, you have a chance to push your luck. To do so, follow these steps:
- Place the first decision card face down in the Lost Stack.
- Flip over the second decision card.
IMPORTANT: If you push your luck, you MUST resolve the second card. There is no turning back.
What to do after resolving a card
Once a card has been resolved, place the card in its appropriate stack. Then refill the decision area back to two face down cards.
There are two discard piles in the game
The Lost Stack is a separate pile of cards that will be shuffled back into your main deck under specific conditions.
- Cards belonging in the Lost Stack are marked with a compass arrow symbol (the Lost Stack symbol) in the bottom right corner of the card.
- DO NOT place Lost Stack cards in your graveyard.
- Always place cards into the Lost Stack face down.
Example: the Tool card "Heavy Shield" carries the Lost Stack symbol and reads: "You may deflect damage to your heavy shield. Place in lost stack once destroyed."
The Graveyard is a separate discard pile for cards marked with a coffin symbol (the Graveyard symbol) in the lower right corner.
- Always place cards into the graveyard face up.
Example: the Encounter card "Class: Exo Hive Fighters" carries the Graveyard symbol.
*NOTE! There are instances when a graveyard card will be placed in the lost stack, e.g. when pushing your luck, fleeing from an enemy, or if the card instructs you to do so.
Battling
When a decision leads you to an encounter (enemy ship, or an overlord), you have two choices:
- Engage in battle
- Flee from battle
Engaging in battle
If you decide to engage in battle you will need to set up the battlefield. Begin by placing the damage tokens on your enemy in accordance to their health. The enemy's health represents the number of successful hit points you will need to land to destroy them. Be mindful of the enemy's special ability.
Example: the encounter "Interdiction" shows a health of 14 on its top right number. Each encounter will have a "health box". According to the card on the left, you will place 6 damage tokens on the ship to begin.
There are two other numbers you need to pay attention to on your enemy's card. The large number on the top right, and the smaller number to the left of your enemy's health box. These numbers will be explained in the next section.
Rolling and assessing damage
Once your battlefield is set up, it's time to roll your D20. In this game each roll represents both you and your enemy attacking each other.
Assessing damage
Once you roll, look at your result:
- If the number you rolled is equal to or greater than the number on the top right of your enemy's card, then you have scored a clean hit on your enemy and your ship takes no damage!
- If you rolled a number that is equal to or lower than the smaller sized number, then your enemy has scored a clean hit on you and your enemy takes no damage.
- If you roll a number that falls in between, then both you and your enemy take exactly 1 hit point of damage.
Example (Void Hunter, large number 13, smaller number 9):
- Roll 13 or higher, your enemy alone takes damage.
- Roll a 9 or lower, your ship alone takes damage.
- Roll 10-12, both you and your enemy take 1 hit point of damage.
NOTE! When evaluating your roll number, remember to add in any power-ups you receive from tools/special abilities.
Calculating total damage of a roll
Once you've determined who is taking damage, reference your damage scale to assess exactly HOW MUCH damage is being dealt. Depending on your roll, you may deal 1-4 hit points of damage. Inversely you may take 1-3 hit points of damage.
When your roll damages both you and your enemy, you both will always take a single point of damage.
The damage scale gives the amount of damage dealt for each roll:
| Roll | 1 | 2 | 3 | 4 | 5 | 6 | 7 | 8 | 9 | 10 |
|---|---|---|---|---|---|---|---|---|---|---|
| Damage | 3 | 2 | 1 | 1 | 1 | 1 | 1 | 1 | 1 | 1 |
| Roll | 11 | 12 | 13 | 14 | 15 | 16 | 17 | 18 | 19 | 20 |
|---|---|---|---|---|---|---|---|---|---|---|
| Damage | 1 | 1 | 1 | 1 | 2 | 2 | 2 | 3 | 3 | 4 |
Winning and fleeing battles
Winning a battle
After each damage assessment, remove the appropriate number of damage tokens from the enemy and/or move your ship's damage cube down on its health meter. Continue this process until you have dealt the needed number of hit points to destroy your enemy, then place them in the graveyard.
Fleeing battle
In most cases, you have the option to flee battle at any time, but not without consequence. If you choose to flee, you must activate your warp drive. Doing so causes your pilot to age 10 years.
To flee battle, place your enemy facedown in the lost stack. DO NOT place them in the graveyard. Then age your pilot +10 years.
Battling overlords
There are four overlords you must defeat in order to obtain all the artifacts necessary to activate the Homelinks. Each overlord has a special symbol next to their name. This symbol represents which artifact they possess. Their artifact will have a matching symbol on its card.
Battling overlords is identical to battling any other enemy. However, overlords have a roll-based special ability that activates if you roll a particularly low number.
NOTE! Activating overlord special abilities is UNAVOIDABLE. Their ability is activated regardless of any power-ups you may posess.
Example: the overlord Zarogath (Void Devourer) has a large number of 10 and a "Devourer's Maw" ability: Roll 2 or less: search your deck for the first recruit you find and remove them from the game. The artifact Singularity Node reads: "Search your deck and remove black hole and event horizon from the game."
Defeating an overlord
Upon defeating an overlord, you will gain access to their associated artifact. These artifacts are required to activate the homelinks you find in your deck. All artifacts unlock a permanent special ability/advantage you can use to make your journey a little easier.
Once the artifact is earned, remove it from the artifact area and set it alongside your tool card slots.
Unique battles
There are a few cards that will have unique battle situations. These are treated the same as any other battle, but the cards will have special conditions. Below are a few examples.
- Astral Predators (Star Fleet, large number 12): Win 2 of 3 rolls to escape. Otherwise, take -3 damage, and place Astral Predators in the lost stack. Flavour: "The Astral Predators strike not from rage, but strategy, testing your defenses."
- Time Eater (large number 10, skull value 3): Every miss: place the top card of your deck in the lost stack and age +10 years. If this happens 3 times, place Time Eater back into the deck and shuffle.
- Infestation (large number 6, skull value 2): You notice a network of small tendrils creeping out from the ventilation shaft. You follow them to find a large, pulsating mass attached to the ship's core. You'll need to act fast to contain the infestation before it takes over completely. Roll. Every loss deals -2 damage to your ship. OR you may rid of the infestation immediately and take -4 damage to your ship.
Astral Predators
The Astral Predators card does not attack on each roll. Instead you must test your luck and hope to win 2/3 rolls. If not, you will take damage and the Astral Predator card goes to the lost stack.
Time Eater
Instead of dealing damage to your ship, Time Eater will age your pilot and discard cards from the top of your deck into the lost stack, pushing potentially helpful cards further out of reach. Treat this battle as you would any other, but account for your aging. If Time Eater is not defeated in 3 rolls, shuffle it back into your deck.
Infestation
This card does not die. It simply retreats for awhile. After defeating Infestation, it does NOT go into the graveyard, but back in to the lost stack.
Situational cards
Outside of battling hostile ships and overlords, your decisions will lead you to different situations. Each card has a unique situation that you must navigate. Some have automatic benefits/consequences, and others you must roll for the outcome.
Examples:
- Benevolent Being (Lost Stack symbol): An alien life form materializes before you, emanating an aura of serenity and well-being. It offers a gift of rejuvenation, a cosmic elixir that reverses the effects of aging. You feel an otherworldly energy suffusing every cell of your body. Reduce aging by up to -30 years OR heal your recruit up to -3 damage.
- Worm Hole (large number 15, Graveyard symbol): You fear for the worst, but this may be the key to your salvation. With a deep breath, you engage your engines and plunge headlong into the unknown, ready to face whatever challenges lie ahead. Roll. If you win, search your deck for a homelink card, then shuffle your deck. If you lose, shuffle your graveyard back into your deck.
NOTE! Be sure to pay attention to the symbols in the bottom right of situational cards. Some will go into your graveyard, while others will go into the lost stack.
Rolling in situations
Certain situations will require rolling to determine the outcome. Just like on enemy ships and overlords, you will see the same large number on the upper right of the card. Again, that number is the minimum you need to roll in order to "win" the situation.
Example: the situational card Solar Flair (large number 7) opens with the flavour text "A nearby star has unleashed a powerful storm of radiation, its fiery tendrils reaching out to engulf everything in its" and then continues.
Transcriber's note (source defect): the Solar Flair card's text is cut off at the bottom edge of the printed page in the source PDF itself (the card artwork ends mid-sentence, and the rest of the card's flavour text and its instructions are not visible anywhere in the document). The remainder of the Solar Flair card is therefore not transcribed here and should be checked against a complete copy of the rulebook.
Homelinks
You need to locate and activate all four homelinks in order to win the game. Unlike artifacts, the homelinks are not guarded, and coming across them as you make your decisions means you acquire them at no cost to you. Each homelink has a ONE-TIME special ability that is resolved immediately after acquiring the homelink. When you locate a homelink, place it face up next to your tool slot area.
The four homelinks are:
- Homelink (pink, matching the Zarogath / Singularity Node symbol): Shuffle lost stack back into deck. Reduce aging by up to 50 years.
- Homelink (green): You may search the lost stack for a card of your choice, then resolve. Then, shuffle lost stack back into deck.
- Homelink (yellow): Shuffle lost stack back into deck. Repair damage to your ship by up to +5.
- Homelink (blue): Shuffle lost stack back into deck. You may search the graveyard for a recruit to put into play.
Activating a homelink
In order for a homelink to be considered "activated", you must possess both the homelink card and its associated artifact. Just like on the overlord and artifact cards, the homelinks will have a matching symbol.
NOTE! There will absolutely be times where you may possess artifacts without their homelinks, or vice versa.
Example: the overlord Zarogath, the artifact Singularity Node and the pink homelink share the same symbol, so that homelink is activated only when you possess both the Singularity Node artifact and the homelink.
Artifacts
Artifact cards are not only keys to activating the homelinks, they also provide you with substantial, permanent upgrades to you and/or your ship. As you obtain artifacts, your journey will become easier.
The four artifacts are:
- Singularity Node (pink symbol): Search your deck and remove black hole and event horizon from the game.
- Phase Shifter (blue symbol): Before a battle, you may roll for 15+. If so, you can flee from it without aging.
- Hypernova Core (yellow symbol): Permanently gain +2 on rolls during battle.
- Destabilizer (green symbol): After every battle, you may repair your ship up to +2, or heal aging -20 years.
Obtaining artifacts
As mentioned before, each artifact is guarded by a powerful overlord. In order to obtain an artifact, the overlord with that artifact's matching symbol must first be located and defeated.
Once an artifact is earned, its special ability is immediately and permanently available to you.
Recruits
Recruits are valuable assets to you and your ship. Each recruit has two special abilities:
- Inherent ability
- Activated ability
When locating a recruit on your journey, they can simply be added to your ship and ride along with you. You are only allowed one recruit on board at a time.
Using a recruit's special abilities
Inherent ability: Each recruit has an inherent ability that can be used repeatedly. Typically before or after a battle or decision.
Activated ability: You may use this ability ONE TIME while the recruit is on your ship.
Example: the recruit Grunch (Astro Machinist, health 3) has an inherent ability, "Before each battle, repair 1 damage," which allows you to repair your ship by 1 damage before each battle. Grunch's activated ability, "Once per recruitment, repair up to 5 damage," allows you to repair your ship up to 5 damage.
NOTE! Activated abilities can be used at ANY POINT in the game. Even in the middle of battle.
Recruit health
You will notice that your recruits have a health box just like your enemies. In times of desperation, you may deflect damage during a battle from your ship to your recruit. This damage is permanent, and does not refill after a battle. Once their health has reached zero, your recruit is placed in the graveyard.
NOTE! Be sure to add damage tokens to your recruit when you first onboard them.
Onboarding a recruit
When you come across a recruit, you have the choice of adding them to your ship or not. If you choose not to add them, place them face down in the lost stack.
Swapping out recruits
You only have room for one recruit on your ship. As you make decisions, you will occasionally reveal another recruit while you currently have one on board. In the event this happens, you have two options:
- Do not replace your current recruit
- Replace your current recruit. But at a cost to you...
Do not replace your current recruit: If you want to keep who is currently on board with you, then simply place the unwanted recruit in the lost stack.
Replace your current recruit: You may replace your current recruit, but it will cost you. Jettison the recruit on board and place them in the graveyard. In addition to killing your recruit, the mental anguish and guilt is so heavy, you must age your pilot 10 years.
Tool cards
Tool cards are your best chance of surviving this relentless onslaught. Your ship may have up to two tool cards at any given time. There are two distinct types of tool cards:
- One-time use
- Permanent
One time use
These tools are held on to until you decide to use them. Once used, they are placed into the lost stack. Just like your recruit's activated ability, your one time use tool cards can be used at ANY TIME.
Permanent
Permanent tool cards stay with you until you decide to switch them out, or they have been destroyed in battle.
The permanent tools are:
- Repair Drones: During battle, if you roll 15 or higher: Repair your ship +1 OR repair a shield for +1.
- Heavy Shield (health 5): You may deflect damage to your heavy shield. Place in lost stack once destroyed.
- Distress Beacon: Search your deck OR lost stack for a recruit of your choice and put them in to play. If chosen from your deck, shuffle the deck. Place in lost stack after use.
NOTE! ALL tool cards go into the lost stack. DO NOT place them in the graveyard.
Swapping out tool cards
Just like recruits, you only have so much room on your ship for tools. If you find yourself coming across a tool, but both of your tool slots are filled, you have a few options:
- Do not swap. Place the newly uncovered tool in the lost stack.
- Swap out a tool for the new one. Place the old tool in the lost stack.
- If a tool you have on board is one time use, you may use it, THEN add the new tool in the now open tool slot.
Unlike recruits, there is no consequence for swapping out tools, other than the possible regret from ridding yourself of something beneficial later on.
Power-ups and stacking abilities
Certain cards will give you power-ups on your dice. Meaning your rolls will count for more if you have these tools equipped.
Example (Weapons Upgrade): Weapons Upgrade gives you "+1 on all rolls during battle." Take your original roll number and add +1. So if you roll a 12, you are now rolling a 13.
Stacking power-ups
At some point you will likely have multiple power-ups at the same time. When this happens, you add the power-ups together, then add that value to your original roll.
Example: When you have Lt. Grawshire on board, rolling a 10+ in battle gives you a +1. If you ALSO have the Weapons Upgrade tool, which also gives you +1 on your rolls during battle, you can have up to a +2 added to your roll.
NOTE! Power-ups that say "... on rolls during battle" DO NOT work against cards without a "health box".
Recruit card example: Lt. Grawshire (Weapons Specialist, health 4). Inherent: If you roll 10+ during battle, add +1 to your roll. Activated: Once per recruitment, destroy an enemy that is not an overlord.
Winning the game
The game is won when you have successfully defeated all four overlords, taken possession of their guarded artifacts, and located all four homelinks.
Other information
If your main deck runs out
In rare occasions, your main deck may run out. If this happens, shuffle your lost stack and place it where your main deck was.
Tips and strategies
When to push your luck
Pushing your luck is more advantageous when your ship and pilot are in good condition, or when you're desperate for specific resources (e.g., tools or homelinks). However, if your ship is heavily damaged or your pilot is close to aging out, it's likely safer to resolve the first card.
Combat strategy
Battles are risky but often necessary to progress.
Assess the enemy's stats (health and attack thresholds) before engaging. Use buffs from artifacts, tools, and recruits to improve your odds. If the odds aren't in your favor, fleeing battle may be your best option to avoid damage. However, it ages your pilot.
Fleeing is best saved for when the battle is too risky or when your pilot's age is of less concern than your ship's damage. Remember, however, fleeing battle ages your pilot, and the enemy you ran from will likely be encountered again since the lost stack shuffles back into your deck often.