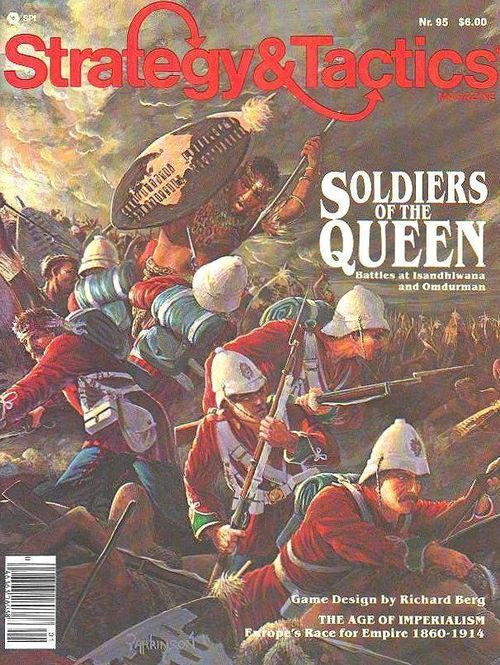
Soldiers of the Queen: Battles at Isandhlwana and Omdurman
Soldiers of the Queen: Battles at Isandhlwana and Omdurman Rulebook
Table of Contents
Table of Contents
- Game Parts
- Glossary of Game Terms
- Part 3: How to Set Up
- Part 4: Sequence of Play
- Part 5: How to Win
- Part 6: Movement
- Part 7: Unit Facing
- Part 8: Zones of Control
- Part 9: Stacking
- Part 10: Fire Combat
- Part 11: Ammunition (Isandhlwana Game only)
- Part 12: Melee Combat
- Part 13: Leaders
- Part 14: Exiting the Game-Map
- Part 15: Unit Arrivals and Reinforcements
- Orders of Battle
- Notes on the Participants
- Counter Section (Page 16 of the Scan)
- Charts and Tables Not Included in This Transcription
Game Parts
A. PARTS LIST.
- One 16-page rules booklet
- 16" x 22" map sheet, printed on both sides
- One sheet of 200 die-cut cardboard playing pieces
- Charts and tables
- Two dice (not included in magazine edition)
- One game box assembly (not included in magazine edition)
B. THE RULES BOOKLET: All the information needed to play the game is explained in these rules. Read the rules carefully, without trying to memorize them. Set up the game according to PART 3 and play the game by following the Steps in PART 4. Refer to the rules to clarify anything you do not understand.
The rules sections have been written so that the rules and procedures that apply to both games appear first in each section. Special rules that apply to only one of the two games follow the general rules in each section. Wherever there is a difference between a general rule and a special rule, the special rule is used for the game in which it applies.
C. THE GAME MAP: The map is printed on both sides and shows the areas where the two battles were fought. A hex grid is superimposed on the map to control movement of the playing pieces. The Isandhlwana game is played on one side of the map and the Omdurman game is played on the other side. The map for the Isandhlwana Game shows six square miles of Zululand about 160 miles inland from the southeast coast of Africa. The map scale is 150 yards per hex. The Omdurman Game map represents nine square miles of the Sudan on the west bank of the Upper Nile, just north of Omdurman and the ruins of Khartoum. The map scale is 220 yards per hex.
D. PLAYING PIECES: Playing pieces are of two types, units and markers. Both sides of each piece are used in play. One side of each piece shows a unit or marker used in the Isandhlwana Game, while the other side of the piece is a unit or marker used in the Omdurman Game. The units represent combat units, leaders, and ammunition wagons that took part in the battle. The markers are informational pieces used to record unit status and various game functions.
Isandhlwana Game: Each melee strength point represents approximately 25 men. Each 7-pounder gun unit represents one gun without gun crew. The Rocket Battery artillery unit represents a battery of Hale's Rockets and the Rocket Battery crew.
Omdurman Game: Each Dervish unit represents approximately 800 men, while each British unit represents approximately 500 men. Each artillery unit is a battery. Each gunboat unit represents one river gunboat.
The sample unit diagrams (British unit for each game, Zulu unit, Dervish unit) and the "Summary of Unit Types" chart for the Isandhlwana and Omdurman games are graphic panels on the printed page. Their numeric values (Fire Strength, Morale, Melee Strength, Movement) are not reproduced in this text; see the Counter Section note at the end.
Abbreviations. Some units contain abbreviations of actual unit names. All unit names other than those in the abbreviations lists are printed in full.
British abbreviations, Isandhlwana Game: 1/24 = 1st Battalion, 24th Regiment of Foot; 2/24 = 2nd Battalion, 24th Regiment of Foot; NNP = Natal Native Pioneers; RA = Royal Artillery; NMP = Natal Mounted Police; RNC = Royal Natal Carbineers; NMR = Newcastle Mounted Rifles; BBG = Buffalo Border Guards; NNC = Natal Native Contingent; baTlkw = baTlakwa Basuto Horse.
British abbreviations, Omdurman Game: Warwck = Warwickshires; CamHlr = Cameron Highlanders; SeaHlr = Seaforth Highlanders; Lincln = Lincolnshires; 2 Co/RE = 2nd company, Royal Engineers; RB = Rifle Brigade; LncFs = Lancashire Fusiliers; NorFs = Northumberland Fusiliers; GrGd = Grenadier Guards; 21 Lancr = 21st Lancers; F.A. = Field Artillery; CamelCps = The Camel Corps; Sud = Sudanese units; Egy, Eg, Egypt = Egyptian units.
Zulu abbreviations: uKhitshn = uKhulutshane; iGbmkhsi = imGobamakhosi; uMbnmbi = uMbonambi.
Dervish abbreviations: Mulazmin = Mulazemin tribe; Hadendow = Hadendowah tribe.
Glossary of Game Terms
British: Refers to anything controlled by the British Player. There are two types of British units: regular units (units of the Royal Army and Royal Artillery) and colonial units (units of South African, black African, Egyptian, or Sudanese troops in British service).
Command Radius: A number printed on certain British and Dervish leaders (used in the Omdurman Game) that represents the maximum distance in hexes that a mounted cavalry unit can be away from its leader and still make a cavalry charge.
Dervish: Historically, one of the followers of Abdullahi, the Khalifa, the successor of the Mahdi. In the Omdurman Game, the word refers to anything controlled by the Dervish Player.
Donga: An African term for a stream that contains water only during the rainy season. The dongas at Isandhlwana were dry at the time of the battle.
Fire Strength: A quantification of a unit's firepower in terms of weapons available and training with such weapons.
Foot: An infantry unit.
Friendly: Refers to anything controlled by or belonging to one player. Units controlled by the same player are Friendly to each other. Units controlled by the opposing player are Enemy units.
Horse: A horse cavalry unit.
Impi: A regiment of Zulu warriors.
Maxim: An early-model machine gun used by British forces at the battle of Omdurman.
Melee Strength: The quantification of a unit's effectiveness in terms of hand-to-hand combat.
Morale: Letter valuation of a unit's ability to stand and fight.
Movement Allowance: A unit's ability to move, expressed in Movement Points. Movement Allowances are not printed on the pieces; the Movement Allowance of each type of piece is printed in the game rules.
Stack: Refers to all Friendly units located in a single hex.
Zulu: Historically, one of the most formidable African warrior tribes. In the Isandhlwana Game, the word refers to anything controlled by the Zulu Player.
Zulu/Dervish: Used to distinguish a rule or procedure that applies both to the Zulu Player in the Isandhlwana Game and the Dervish Player in the Omdurman Game.
Part 3: How to Set Up
-
Choose which game to play, and decide which army each player will control.
-
Punch out and sort the pieces according to type.
-
Fold the map back against the creases and lay it out on a flat surface.
-
The British Player places his units on the map. Units assigned to specific hexes are set up in those hexes. The British Player can choose where to set up some units (the ones listed as "within 4 hexes of 1829", etc.) In setting up such units, the British Player cannot set them up in violation of stacking limits (see PART 9) or in any hex that the unit could not normally enter (see the Terrain Effects Chart for each game).
Isandhlwana Game
| Location | Unit |
|---|---|
| Hex 0328 | Company A/2/3 NNC |
| Within 1 hex of 0628 | Company A, 1/24 (place both pieces in different hexes) |
| Hex 1930 | Supply Wagon |
| Hex 1607 | Company D, 1/1 NNC; the Rocket Battery (Limbered) |
| Within 4 hexes of 1829 | Lt. Col. Pulleine, Capt. Degacher; all remaining units of the Royal Artillery; all remaining 1/24 and 2/24 regular infantry units; C and E, 1/1 NNC; all units of the 1/3 NNC; remaining units of the 2/3 NNC; one unit of the NMP (dismounted); NNP |
In addition to the above, the British Player places the RNC, NMP, NMR, and BBG units anywhere on the map, within the following restrictions: not within 3 hexes of the edge of the map nor within 5 hexes of each other; only two can be placed on Nqutu Plateau; all units must be east of any hex ending in 21 (xx21), inclusive.
No Zulu units are placed on the map. See PART 15 for the entry of Zulu units and British reinforcements.
Omdurman Game
All British units start on the game-map.
| Location | Unit |
|---|---|
| Hex 2626 | 2nd Rifle Brigade, unit "a"; Maxim battery "A" |
| Hex 2625 | 2nd Rifle Brigade, unit "b" |
| Hex 2525 | Lancashire Fusiliers, units "a" and "b" |
| Hex 2424 | Northumberland Fusiliers, units "a" and "b" |
| Hex 2324 | Grenadier Guards, units "a" and "b"; Maxim battery "B" |
| Any hex adjacent to the above hexes | Brigadier General Lyttleton |
| Hex 2223 | Warwickshires, units "a" and "b" |
| Hex 2123 | Cameron Highlanders, units "a" and "b" |
| Hex 2022 | Seaforth Highlanders, units "a" and "b" |
| Hex 2021 | Lincolnshires, units "a" and "b"; Royal Engineers; Maxim battery "C" |
| Within one hex of the above units |
No Dervish units start the game on the map. They enter the map during the course of play. See PART 15 for the arrival of Dervish units.
- If you are playing the Isandhlwana Game, begin play with the British Movement Phase of Game Turn 1. If you are playing the Omdurman Game, begin play with the Dervish Movement Phase of Game Turn 1. (The British Player Turn is skipped on Game Turn 1.)
Part 4: Sequence of Play
The game is played in Game Turns, each of which consists of a British Player Turn followed by a Zulu/Dervish Player Turn. Each Player Turn is divided into Phases. Each Phase is divided into Steps indicating the actions that must be performed by the Player. Once all Steps are completed in order, play proceeds to the next Phase. The player whose Player Turn is in progress is called the Phasing Player. When two Player Turns have been completed, play proceeds to the next Game Turn.
The following Sequence of Play is used for both the Isandhlwana Game and the Omdurman Game. However, certain Phases are unique to each game. If a particular Phase is not used in the game being played, that Phase is skipped and the players go to the next Phase.
British Player Turn
(NOTE: The British Player Turn is skipped on Game Turn 1 of the Omdurman Game.)
A. British Movement Phase
-
The British Player can move his units as he sees fit, within the restrictions of the movement rules in PART 6.
-
Any British reinforcements enter this turn, moving in accordance with the rules and restrictions of PART 6 and PART 15.
B. Dervish Defensive Fire Phase (Omdurman Game only)
Dervish units that are not pinned or routed can fire at British units in range and Line of Sight, in accordance with the rules and restrictions of Fire Combat.
C. Zulu/Dervish Pin Removal Phase
The Zulu/Dervish Player removes Pin Markers from all of his Pinned units.
D. British Offensive Fire Phase
British units that are not pinned or routed can fire at Enemy units within range and Line of Sight, in accordance with the rules and restrictions of Fire Combat.
E. British Melee Phase (Omdurman Game only)
British units that are not Pinned or Routed can melee with Dervish units, according to the rules and restrictions of Melee Combat.
F. British Ammunition Supply Phase (Isandhlwana Game only)
Any British unit that has used at least one-half its ammunition can attempt to get more by rolling a die. Distance from the Supply wagon unit will affect the die roll.
G. British Rally Phase
The British Player can attempt to rally Routed units.
Zulu/Dervish Player Turn
A. British Maxim Defensive Fire Phase (Omdurman Game only)
Any British unit equipped with Maxim guns can fire the Maxim guns at any Dervish unit in range and line of sight, according to the rules and restrictions of Fire Combat.
B. Zulu/Dervish Movement Phase
-
The Zulu/Dervish Player can move his units as he sees fit, within the restrictions of the movement rules in PART 6.
-
Any Zulu/Dervish reinforcements enter this turn, moving normally.
C. Dervish Offensive Fire Phase (Omdurman Game only)
Dervish units that have firearms and are not pinned or routed can fire at British units in range and line of sight, according to the rules of Fire Combat.
D. British Defensive Fire Phase
British units that are not pinned or routed can fire at Enemy units within range and Line of Sight, in accordance with the rules and restrictions of Fire Combat.
E. British Pin Removal Phase (Omdurman Game only)
The British Player removes Pinned markers from all his pinned units.
F. Zulu/Dervish Melee Phase
Zulu/Dervish units that are neither Pinned nor Routed can Melee any British units to which they are adjacent, according to the rules of Melee Combat.
G. Zulu/Dervish Rally Phase
The Zulu/Dervish Player can attempt to rally his Routed units.
Part 5: How to Win
A. Ending the Game
There are no set number of Game Turns in the Isandhlwana Game. The game ends immediately when one player achieves his Victory Conditions, even if the Game Turn is not complete when the Victory Conditions are achieved.
The Omdurman Game ends immediately if the British Player achieves an Automatic Victory, even if the Game Turn is not complete when the Victory Condition is achieved. If the British Player does not achieve an Automatic Victory, the Omdurman Game ends on Game Turn 21 when the British Player Turn is complete. There is no Dervish Player Turn on Game Turn 21.
B. Victory Conditions
Isandhlwana Game
The Zulu player wins if he eliminates all British regular red and blue combat units before he loses 14 of his own combat units. British officers do not count as units for victory purposes.
The British Player wins if he eliminates at least 14 Zulu combat units before losing all British regular units. Zulu leaders and the uKhulutshane impi do not count as units for victory purposes.
Omdurman Game
The game ends immediately if the British Player achieves the conditions for an Automatic Victory. If the game does not end with an Automatic Victory for the British Player, the players add up their Victory Points (and the British Player counts his exited units) at the end of the game. The British Player wins if he exits at least 32 British units and has a higher Victory Point total. The Dervish Player wins if he prevents the British Player from exiting 32 units, or if his Victory Point total is higher at the end of the game (assuming that the British have exited 32 units).
Exiting British Units: In order to win the Omdurman Game, the British Player must exit 32 unrouted, unpinned combat units off the map, through the exit hexes of the south map edge. This requirement is in addition to the other requirements for victory. Leaders and gunboats do not count as exited units for victory purposes, and the British Player is not required to exit leaders and gunboats to win.
Automatic Victory: The British Player wins an Automatic Victory if he exits all combat units that have not been eliminated (minimum 32 units) through the exit hexes at the south end of the map. A unit can exit the map in the British Movement Phase in accordance with the normal rules of movement. A unit can exit the map only through the designated map hexes; and the act of exiting costs the unit 1 Movement Point, in addition to the normal cost for entering the exit hex. A unit that Routs or Withdraws off the map through an exit hex is not counted for victory purposes.
Victory Points: If the British Player does not win an Automatic Victory, use the Victory Point Schedule to calculate the number of Victory Points gained by each player at the end of the game.
Victory Point Schedule
| Side | Action | Victory Points |
|---|---|---|
| British | Killing the Khalifa | 7 |
| British | Eliminating a Dervish combat unit | 1 |
| Dervish | Eliminating a British combat unit (varies according to Game Turn of elimination) | 4 (Game Turns 1-8); 3 (Game Turns 9-16); 2 (Game Turns 17-21) |
| Dervish | Each Game Turn, beginning with Turn 12, that the British Player does not exit a combat unit from the map | 3 |
Part 6: Movement
During the Movement Phase, the Phasing Player can move as many or as few units as he wishes. They can be moved in any direction or combination of directions, limited only by their Movement Allowance and the terrain restrictions. Movement Allowances for each type of unit are not printed on the piece; they are listed in section B.
A. How to Move
Units are moved one at a time, or in stacks, in any order the Phasing Player wishes. Each unit traces a path of contiguous hexes through the hex grid, and as a unit enters a given hex it must pay the cost to enter that hex and/or cross that particular hexside. Once a player begins moving a particular unit(s) he must complete its movement before moving any other unit. Terrain costs are listed in the Terrain Effects Chart for each game.
B. Unit Movement Allowance
Isandhlwana Game
| Unit Type | Movement Allowance |
|---|---|
| Zulu Infantry | 5 |
| Regular Infantry (Foot) | 3 |
| Colonial Infantry | 4 |
| Horse (Mounted) | 6 |
| Horse (Dismounted) | 3 |
| Artillery (Limbered) | 6 |
| Supply Wagon | 1 |
| Zulu Leaders | 5 |
| Pulleine, Degacher | 4 |
| Durnford | 6 |
Omdurman Game
| Unit Type | Movement Allowance |
|---|---|
| Infantry (Foot) | 5 |
| Camel | 8 |
| Horse | 9 |
| Dervish Leader | 10 |
| British Officer (Foot Unit) | 6 |
| British Officer (Cavalry Unit) | 10 |
| Field Artillery (includes Maxims) | 6 |
| Horse Artillery | 8 |
| Gunboats | 20 |
C. Movement Restrictions
The number of Movement Points expended by a unit during a single Movement Phase can never exceed its total Movement Allowance. A unit can expend any portion of its Movement Allowance, but unused Movement Points cannot be accumulated from one phase to the next, nor can they be transferred to other units.
A unit must stop immediately upon entering an enemy-controlled hex (see PART 8, section C) and can move no further during that Movement Phase. However, a unit can leave an enemy-controlled hex at the beginning of its Movement Phase as long as it does not directly enter an enemy Zone of Control when so moving. Moreover, units that leave an enemy ZOC at the beginning of the movement phase can move only one hex, regardless of the number of Movement Points available to that unit.
A unit can never enter a hex occupied by an enemy combat unit.
A unit that moves in its Friendly Movement Phase cannot fire in the Friendly Offensive Fire Phase of the Game Turn in which it moves (EXCEPTION: see the SPECIAL ARTILLERY RULES, Gunboats.)
Certain units cannot enter or cross certain hexes/hexsides, regardless of the number of movement points available. The Terrain Effects on Movement Chart for each game lists all terrain costs and restrictions that apply to that game.
If two or more elevations are within a single hex, the hex consists entirely of the lowest elevation found in the hex. A unit pays no additional cost for changing elevation unless it crosses a Ridge hexside. No piece can ever cross a Crest hexside.
Pinned and Routed units cannot move in the Movement Phase.
Special Movement Restrictions
Isandhlwana Game
Pinned and Routed Zulus: Zulu units cannot move into or through hexes occupied by Pinned or Routed Zulu units. This restriction applies at all times.
The Trail: Artillery and the wagons gain increased movement if they use the trail (merely a rutted track). This increased rate is available only if moving directly from one trail hex to another through a trail hexside. The trail does not negate the cost of crossing the streambeds (called dongas), except where the trail crosses the Big Donga.
Elevated Bank: The terrain effects referring to the "Big Donga" apply only to those hexsides of the Donga along which the "Elevated Bank" runs. Otherwise, the remainder of the donga is treated like any other donga.
Elevations: Changes in height have no effect on movement, except where the change in elevation forms a ridge or crest.
Special Crests: Hexes 1730 and 1731 are entirely surrounded by Crest hexsides. These hexes cannot be entered by any unit.
Omdurman Game
Pinned or Routed Units: Units cannot move into or through hexes occupied by Pinned or Routed Friendly units. This restriction applies at all times.
Elevations: All terrain in Omdurman at Level "2" and higher is considered to be "rough."
The Zariba: Before the battle of Omdurman, the British built a defensive perimeter, consisting of a trench and a thorn hedge around their position. The area enclosed by this perimeter is the Zariba. There are additional costs to enter a trench hex, unless a unit is moving from one trench hex into another (along the trench, as it were). It also costs additional points to cross the wall of thorns. No British unit that is inside the Zariba at the start can leave the Zariba until Turn 3.
The Nile: Only gunboats can move on the Nile. No other unit can cross an all-Nile hexside under any conditions, nor can any unit melee across an all-Nile hexside.
Ruins and Villages: These terrain features have no effect on movement. A unit moving through a ruins or village hex pays the cost of the other terrain in the hex.
D. Cavalry Movement
Cavalry consists of horse and camel units. Horse units can be in either of two formations: mounted or dismounted. Camel units always operate in mounted formation. A cavalry unit's formation affects facing (see PART 7, section A) and combat (see PART 10, section F, and PART 12, section C) as well as movement. Dismounted cavalry are considered infantry units for movement purposes.
Markers are used to indicate a cavalry unit's formation. In the Isandhlwana Game cavalry units are assumed to be dismounted unless they have a Mounted Marker placed on them. In the Omdurman Game, cavalry units are assumed to be mounted unless a Dismount Marker is placed on them. It is important that players keep this distinction in mind.
A horse unit can change formation at any point in its movement, provided it has sufficient Movement Points remaining to change formation. The Movement Points required for a horse unit to change formation are taken from the Movement Allowance of the unit before the change of formation. A mounted unit that dismounts can spend its remaining Movement Points in dismounted movement. A dismounted unit that mounts must wait until the following Movement Phase to move.
A cavalry unit that changes formation in the Friendly Movement Phase cannot fire in the Friendly Offensive Fire Phase of the Game Turn in which it changes formation.
Special Cavalry Rules
Isandhlwana Game
Changing Formation: It costs 3 Movement Points for a mounted unit to change formation.
Cavalry Charge: Cavalry cannot charge.
Omdurman Game
Formation Restrictions: Dervish horse units and the British 21st Lancers must always operate in mounted formation. They are not allowed to dismount.
Changing Formation: It costs a horse unit 4 Movement Points to change formation.
Cavalry Charges: See PART 12, section C.
E. Artillery Movement
The following units qualify as artillery (weapon types in parentheses): field guns (S and G), horse guns (G), the Rocket Battery (R), Maxim gun units (M) and gunboats (G or G/M). All British artillery are regular units. In general, artillery units that move in the Friendly Movement Phase cannot fire in the Friendly Offensive Fire Phase, but artillery is handled somewhat differently in each game.
Special Artillery Rules
Isandhlwana Game
Artillery Formations: The British artillery consists of three units: two 7-pounder field guns and the Rocket Battery. Artillery units can be in either of two formations: limbered or unlimbered. Limbered units can move but cannot fire. Unlimbered units can fire but cannot move. An artillery unit is unlimbered unless it has a Limbered marker on top of it. It costs 4 Movement Points for an artillery unit to change formation (limber or unlimber).
Gun Crews: A 7-pounder gun unit cannot move or change formation unless an unpinned, unrouted Royal Artillery foot unit is stacked with the gun unit at the start of the Movement Phase. Movement Point costs to change formation are paid by the gun unit, not the RA foot unit. One RA foot unit can man both guns, if both guns and the RA foot unit are stacked in the same hex. The Rocket Battery unit has its crew "built into" the unit. The Rocket Battery unit does not need to be stacked with a RA foot unit to move or change formation.
Omdurman Game
Artillery Formation: The limbered/unlimbered distinction does not exist in the Omdurman Game. An artillery unit that moves in the Friendly Movement Phase cannot fire in the Friendly Offensive Fire Phase of the Game Turn in which it moves. (EXCEPTION: gunboat units).
Gunboats: Gunboats are the only units that move on the Nile. A gunboat unit that has two weapon types on its counter can fire both weapons in the Friendly Offensive Fire Phase. A gunboat unit that moves in the Friendly Movement Phase can fire in the Friendly Offensive Fire Phase.
Part 7: Unit Facing
All units have a facing, which affects the unit's ability to engage in fire or melee combat.
A. Frontal Hexes and Frontal Hexsides
Each unit must be oriented so that the top of the piece is facing towards a specific hexside and is not situated between two adjacent hexsides. For facing purposes, the top of the piece is the front of the unit. The hexside adjacent to the front of the unit is the center hexside of three frontal hexsides. Frontal hexsides are part of the frontal hexes of the unit, as shown in the diagram.
A mounted cavalry unit has no rear hexes. All hexes adjacent to the unit are frontal hexes.
All units in a single hex must have the same facing.
Facing/ZOC diagram (printed on page 7): Infantry and Dismounted Cavalry are shown with the three frontal hexes marked ZOC; Mounted Cavalry (Mounted marker omitted) has ZOC in every adjacent hex. Key: ZOC = Zone of Control. All frontal hexes are ZOC hexes.
B. Facing Effects on Movement
Facing has no specific effect on movement. A unit can move into any adjacent hex regardless of its facing prior to its movement.
A unit can change facing at any time during a Friendly Movement Phase — and only then. There is no Movement Point cost to change facing. A change of facing is not considered movement.
A unit which is forced to Withdraw as a result of melee can change facing after completing that withdrawal.
C. Effects of Facing on Fire Combat
A unit can fire only through its frontal hexsides at the enemy.
A firing unit receives no special "bonus" for firing through a target unit's rear hexsides. A fire attack through a unit's rear hexside is treated as a normal attack.
A unit can fire through only one of its frontal hexsides in a given fire phase.
D. Effects of Facing on Melee Combat
A Friendly unit can melee only those units adjacent to its frontal hexsides. A unit cannot melee Enemy units to its rear.
The attacker receives no special attack benefit for attacking the rear of an Enemy unit.
Part 8: Zones of Control
The three hexes adjacent to a unit's frontal hexsides are the unit's Zone of Control (ZOC). ZOC's are also called controlled hexes or frontal hexes. Zones of Control affect movement, melee combat, withdrawal and retreat after combat, and British supply.
A. Units That Have Zones of Control
All combat units normally have Zones of Control. The ZOC of a mounted horse unit extends into all hexes adjacent to the unit's hex.
The following types of pieces do not have ZOC's:
- Pinned or routed combat units
- Leaders and Officers
- The Supply Wagon (Isandhlwana Game only)
- Informational markers
B. Limitations of ZOC's
A unit's ZOC is in effect at all times during the turn.
ZOC's do not extend through crest hexsides.
A unit without a Fire Strength does not exert a ZOC through any ridge hexside, whether up or down. A unit with a Fire Strength does exert a ZOC downhill through a ridge hexside (from high to low), but it does not exert a ZOC up through a ridge hexside (low to high).
Special ZOC Limitation
Isandhlwana Game
Big Donga: Zulu units do not exert a ZOC across the "elevated bank" hexsides of the Big Donga. British units do exert a ZOC across "elevated bank" hexsides. The remainder of the Big Donga, and all other dongas, have no effect on ZOC's.
C. Effects of ZOC's on Movement
A unit that enters an enemy ZOC must stop moving and cannot move any further during that Movement Phase.
A unit that begins its Movement Phase in an Enemy ZOC can leave that ZOC. However, the moving unit can move only one hex and cannot enter any enemy ZOC while moving. Friendly units do not negate enemy ZOC's for movement purposes.
D. Effects of ZOC's on Combat
A Friendly unit that has Enemy units in its ZOC is not required to fire. However, it is required to fire upon one of the units in its ZOC if it chooses to fire. A Friendly unit cannot fire at an Enemy unit not in its ZOC if there is an Enemy unit in its ZOC.
A Friendly unit in the ZOC of a Enemy unit is not required to make a melee attack against the Enemy unit. However, if the Friendly unit chooses to attack, it must melee with all Enemy units in its ZOC, unless some of the Enemy units are being attacked by other Friendly units.
Example (Isandhlwana Game): It is the Zulu Melee Phase. A British 1/24 Foot unit and the Rocket Battery unit are in the ZOC of a Zulu inGobamakhosi unit. The Rocket Battery is also in the ZOC of an umCijo unit. If the inGobamakhosi unit attacks, it must attack both British units unless the umCijo unit attacks the Rocket Battery. If the umCijo unit attacks, the inGobamakhosi may choose to attack only the 1/24 unit.
A Friendly unit cannot withdraw, rout, or retreat into an Enemy ZOC. If it must withdraw or rout and cannot do so because of this restriction (and/or terrain or stacking restrictions) the unit is eliminated. For the purposes of retreat, rout, and withdrawal, the presence of a Friendly unit in a hex does not negate an Enemy ZOC.
E. Effects of ZOC on Supply (Isandhlwana Game Only)
The British Player cannot trace an ammunition resupply path through the ZOC of a Zulu unit. However, the presence of a British unit in a hex will negate the Zulu ZOC exerted into that hex for resupply purposes.
Part 9: Stacking
Both players have stacking limitations on their units. Stacking limitations are in effect throughout the Game Turn. A combat unit cannot enter a hex if it would violate the stacking limit of the hex by doing so. If at the end of a Friendly Movement Phase the stacking limit for a hex has been violated, the owning player must eliminate all excess units. He chooses the units to be eliminated.
All units in a single stack must have the same facing. The order of facing for units in a stack can be changed only during the Friendly Movement Phase.
Leaders, officers, and information markers (Routed, Pinned, etc.) do not count against stacking limits. Any number of information markers and Friendly leaders can be stacked with Friendly combat units.
A. Zulu Stacking (Isandhlwana Game only)
A maximum of two Zulu combat units can stack in any one hex. Units of different impis can move through each other during the Movement Phase, but units of different impis cannot end the Movement Phase stacked in the same hex. (EXCEPTION: the uKhulutshane unit can freely stack with any other stack of Zulu units, even if this violates the 2-unit stacking limit.) All units in the same stack must maintain the same facing.
Zulu stacking has no effect on combat.
B. British Stacking
Isandhlwana Game
A maximum of 8 Melee Strength points can stack in any one hex at any one time. (EXCEPTION: The 7-pounder gun units and the Rocket Battery can stack freely in any stack of regular units, even in excess of the 8 Melee Strength Point limit. The artillery are regular units, and a 7-pounder gun unit must be stacked with an RA foot unit in order to move, change formation, or fire.)
Regular units cannot stack with colonial units. (EXCEPTION: A routed or withdrawing British unit can stack with types of British units it could not normally stack with if the only retreat path available to the routed or withdrawing unit would require it to stack with prohibited units.)
If colonial and British units are forced to stack together as a result of rout or withdrawal movement, the British Player must unstack the units by the end of the next British Movement Phase unless the prohibited stack cannot move at all as a result of being surrounded by Enemy units, Enemy ZOC's, or impassable terrain. The British units can remain stacked if unable to unstack.
Only the top two units in any stack can fire, although each unit can fire at a different target. All units in a stack defend together when in melee combat.
For stacking purposes, the supply wagons unit is the equivalent of four Melee points for stacking purposes. (It has no actual Melee Strength.)
Omdurman Game
Both units from the same foot regiment can stack in the same hex; otherwise only one foot unit is allowed per hex. In addition, one artillery unit (includes Maxim unit) can stack in any hex with foot units. The Royal Engineer unit can also stack with any foot units.
Only one mounted cavalry unit is allowed per hex, and mounted cavalry cannot stack with foot, artillery, or engineer units. Dismounted cavalry are treated as foot units for stacking purposes.
The top unit in a stack can fire, in addition to one artillery unit in the stack. If the top unit in the stack is an artillery unit, only it can fire.
Only one artillery unit is allowed per hex, although it can be stacked with units. Horse artillery is treated as artillery for stacking.
C. Dervish Stacking (Omdurman Game only)
The Dervish Player can stack two foot units per hex, if both are from the same tribe; otherwise the stacking limit is one foot unit per hex. In addition, one artillery unit can also be stacked with any stack of foot units.
Only one mounted cavalry unit is allowed per hex. A mounted cavalry unit cannot stack with foot or artillery units.
The top unit in a stack can fire, in addition to one artillery unit in the stack. If the top unit is an artillery unit, only the artillery can fire.
Only one artillery unit is allowed per hex, although it can stack with foot units.
Part 10: Fire Combat
All combat units with a Fire Strength can fire at enemy units that are within Range and Line of Sight. The range and effectiveness of fire depend upon the weapon carried by the firing units. A unit can fire in both the Offensive Fire Phase (during the Friendly Player Turn) and the Defensive Fire Phase (during the Enemy Player Turn). All fire combat is resolved on the Fire Combat Results Table.
A. Fire Strength and Weapon Type
The Fire Strength of each unit is printed on the unit, along with a letter that represents the type of weapon used by the unit. The lettercodes are explained on the Range Effects Chart. Any piece that has no Fire Strength or weapon type printed on it cannot engage in Fire Combat. To find the range from the firing unit to the target, count the distance, in hexes, between the two units. The firing unit's hex is not counted; the target's hex is counted.
B. How to Fire
The firing player announces which of his units are firing at which Enemy units. He then resolves all fire attacks one at a time, in any order he pleases. He totals the Fire Strength being directed at the target hex, using section E to determine what happens if more than one unit can and is firing. He then takes the total and finds the corresponding column on the Fire Combat Results Table. Referring then to the Range Effects Chart he checks to see if there is any adjustment to the Fire Column because of range. He then includes any terrain adjustment and notes whether or not there is an adjustment due to the unit type of the firing unit or the target. Taking all these possible adjustments into effect he shifts (if necessary) the Fire Strength Column and rolls one die. He then checks the result for that column and die roll, applying that result immediately. (If the Isandhlwana Game is being played, the firing player marks one box on the firing unit's Ammunition Supply Roster.)
Once a unit has been announced as going to fire it must fire even if another unit has already eliminated that target.
C. Line of Sight
A unit's ability to fire from its hex to another hex depends on the terrain crossed by the Line of Sight (LOS). This is represented by a straight line drawn from the center of the firing hex to the center of the target hex. If the LOS is blocked, the unit cannot fire.
The terrain elevation within a hex has no direct effect on LOS, except in cases in which the LOS could be blocked by the presence of units or by other types of terrain.
If the LOS passes through a hex containing a combat unit or wagon, the LOS is blocked unless both the firing unit and the target hex are on a higher level than the blocking hex. In effect, LOS can be traced into, but not through, a hex containing a combat unit or wagon. (EXCEPTIONS: 1. If the firing unit is at a lower elevation than the target hex, an intervening unit blocks LOS only if it is halfway between the firing unit and the target unit or if it is closer to the firing unit. 2. If the firing unit is at a higher elevation than the target hex, an intervening unit blocks LOS if it is halfway between the firing unit and the target hex or if it is closer to the target. 3. In the Omdurman Game, an intervening unit does not block the Line of Sight of a British unit firing G weapons if the range to the target is at least 3 hexes.)
The LOS is blocked if it passes through a hex containing an elevation that is higher than the elevation of both the firing unit and the target.
Woods hexes block LOS in the same way as combat units do.
The LOS is blocked if it passes through a ridge hexside, unless the ridge hexside forms part of the hex containing the firing unit or part of the hex containing the target unit.
Crests block LOS at all times.
Ruins and villages have no effect on LOS.
D. Column Shifts in Fire Combat
No adjustments are ever made to the actual Fire Strength of a unit. However, because of range and/or terrain in the target hex, the column used on the Fire Combat Results Table can be shifted to the left (benefiting the target) or right (benefiting the firing unit). All adjustments to the Fire Combat Results Table are cumulative, and all available adjustments must be taken. Note that there is a column on the Fire Combat Results Table labelled "0". This applies only to those units firing whose adjustments take them to the left of the 1-2 Strength Column. No adjustment can be made further left than "0", and any unit capable of firing can always fire using that column regardless of the number of adjustments to the left.
The Range Effects Chart lists the column shift applied to a specific weapon at a given range. The shift is shown as a number-and-letter combination. The number is the number of columns to be shifted on the Fire Combat Results Table. The letter indicates the direction of the shift (L = left, R = right).
E. More Than One Unit Firing
Units can total their Fire Strength together when firing into the same hex only under the following circumstances (also check the Special Firing Restrictions to see if any apply):
- All units firing into the hex must be able to use the same column on the Range Effects Chart.
Example: A unit firing on the 1-2 column cannot combine fire with a unit firing on the 5-6 column. However, several units firing on the 1-2 column could combine fire.
- Artillery units can never combine their Fire Strength with that of non-artillery units when firing.
If more than one unit is firing into a given hex, the firing units must combine their Fire Strengths into one attack, if they are able to do so. If some of the units in a combined attack have different weapon types, the weapon-type with the greatest number of Fire Strength points is used to determine any column shift on the Range Effects Chart. If there is a tie, use the weapon with the greatest maximum range for resolution.
A target unit can be fired on more than once in a Fire Phase, but only if the firing units are unable to combine their fire. In such cases, the firing player must decide which unit will fire first. Since the firing player must choose targets for all his firing units before actually rolling for results, if several Friendly units are firing separately at one Enemy unit and the first to fire eliminates the target (or makes it impossible for other units to fire at it), the remaining firing units cannot switch their fire to other targets; they are required to fire into the original hex.
F. Fire Restrictions
A unit that moves in the Friendly Movement Phase cannot fire in the Friendly Offensive Fire Phase of the Game Turn in which it moves, although the unit can fire in the Friendly Defensive Fire Phase of the Game Turn. A unit that changes formation in the Friendly Movement Phase cannot fire in the Friendly Offensive Fire Phase of the Game Turn in which it changes formation, although it can fire in the Friendly Defensive Fire Phase if its formation makes fire possible.
When a unit fires, it must fire at a single Enemy target. A unit can never split its Fire Strength in order to fire at more than one target at a time.
If more than one unit in a stack is able to fire, each unit may fire at a different target if they so wish, as long as all firing is through frontal hexsides.
No fire can be directed through a crest hexside. Fire can be directed through a ridge hexside if it satisfies the Line of Sight rules, but ridges have no other effect on fire combat.
When a Friendly unit fires, the target hex must contain at least one Enemy combat unit. A unit is not allowed to snipe at a hex containing only an Enemy leader or a supply wagon.
Special Firing Restrictions
Isandhlwana Game
Ammunition: A unit without ammunition cannot fire until it is resupplied.
Formation Restrictions: Mounted horse units and limbered artillery units cannot fire. Their melee strength remains unaffected by the status of the unit.
Nationality: Regular units cannot combine fire with colonial units. Anytime that at least one-half of the units firing at the same target at the same time are units of the Natal Native Contingent (NNC), apply a 1-column shift to the left on the Fire Combat Results Table.
Stacking: The top two units in a stack can fire in a single Phase.
Woods: If the target unit is in a woods hex, apply a 1-column shift to the left on the Fire Combat Results Table.
Big Donga: If a unit is fired upon while adjacent to the west bank — the elevated bank side — of the Big Donga through that elevated bank hexside, apply a 1-column shift to the left on the Fire Combat Results Table.
Omdurman Game
Nationality: Regular units can freely combine fire with colonial units. Egyptian and Sudanese units can combine fire with each other. Colonial and Dervish units (except for artillery units) shift 1 column to the left when firing. This column shift also applies when colonial units are combining fire with regular units, and half or more of the units are colonial.
Maxim Guns: Maxim gun units can never combine fire with any different type of unit, including other artillery (G's).
Gunboats: A gunboat unit that moves in the Friendly Movement Phase is able to fire in the Friendly Offensive Fire Phase of the Game Turn in which it moves. (This is an exception to the normal rules.) A gunboat with artillery and Maxim guns can fire both in the Offensive or Defensive Fire Phases, but can fire only the Maxims in the Maxim Defensive Fire Phase. A gunboat unit can never combine fire with any other unit, including other gunboats. Gunboats can be attacked only by artillery. If a "1" result is rolled when Dervish artillery fires at a gunboat, the gunboat is sunk. Any other result has no effect.
Cavalry: Units firing at a mounted cavalry unit receive a 1-column shift to the right. The shift applies to artillery, as well as small arms fire. Cavalry units can fire while mounted. Mounted units firing shift 1 column left.
Stacking: Only the top unit in a stack can fire in a single Phase, except that if there is an artillery or a Maxim gun unit in the hex that, too, can fire. If the top unit of the stack is an artillery unit, only the artillery can fire.
Trench: If the target unit is in a trench hex, the firing unit shifts 1 column to the left, in favor of the target.
Ruins and Villages: These terrain features have no effect on Fire Combat.
G. Fire Combat Results
M = The defender rolls the die and finds the result on his Morale Check Table under the column that corresponds to the Morale Rating of the affected unit. If more than one unit is affected, each unit checks individually. The result for each unit has no effect on the remaining units involved. The possible results are:
-
WD = The unit must Withdraw, retreating one hex away from the firing unit(s) that caused the WD result. A Friendly unit cannot Withdraw into the ZOC of an Enemy unit. If a unit cannot Withdraw because of ZOC/terrain/stacking restrictions, it is eliminated. If a Zulu or Dervish unit Withdraws off the map it cannot return, but it is not considered eliminated for victory purposes. (EXCEPTION: A Zulu or Dervish unit that Withdraws or Routs off the map can return if there are other units of that impi or tribe that have not entered the map for the first time. Once all units of an impi or tribe enter the map, any unit of that impi or tribe that Withdraws or Routs off the map cannot return. The Zulu/Dervish Player cannot deliberately keep units off the map to take advantage of this exception.)
-
RT = The unit is Routed, and a Rout marker is placed on the unit. A Routed unit must retreat three hexes away from the firing unit(s) that caused the Rout result. A Routed unit cannot retreat into the ZOC of a Enemy unit. If a unit cannot retreat because of ZOC/terrain/stacking restrictions, it is eliminated. A Routed unit cannot initiate melee nor can it move in the Friendly Movement Phase. A Routed unit cannot be Pinned, and any Pinned unit that becomes Routed is no longer Pinned. A Routed unit remains Routed until it is rallied in the Friendly Rally Phase by the leader for that unit. During the Friendly Rally Phase, any Routed Friendly unit that is not rallied must retreat three hexes in a specified direction (see PART 13, section E, for rules and exceptions).
-
PN = The defending unit, and all remaining units in the hex, are Pinned. Place a Pinned Marker on the top unit in the hex. Pinned units cannot move, withdraw, or initiate melee and have no ZOC. A Pinned unit remains Pinned until the next Friendly Pin Removal Phase (or until it becomes Routed by additional Enemy fire).
-
— = No Effect (unless there is a Pinned result for another unit in the hex).
1 = Eliminate the top unit of the stack. Each remaining unit in the stack must undergo a Morale Check.
2 = Eliminate the top two units of the stack. Each remaining unit must undergo a Morale Check.
PN = See the explanation of the M combat result for the effects of a PN result.
PN* = The firing Player rolls the die again. If the result is 1-5, treat the result as Pinned. If a 6 is rolled, eliminate one defending unit. All other units in the hex must undergo a Morale Check.
— = No Effect (unless there is a Pinned result for another unit in the hex).
Part 11: Ammunition (Isandhlwana Game only)
The ammunition available to each British unit (except artillery) is represented by boxes on the unit's Ammunition Roster. Each time a unit fires it checks off a box on its Roster. When a unit has used at least half of its available ammunition, it can attempt to get more ammunition from the Supply Wagon during the British Ammunition Supply Phase. The distance from the unit to the Supply Wagon affects the unit's chance of getting more ammunition. When all the boxes on a unit's Ammunition Roster are marked off, the unit is out of ammunition and cannot fire until resupplied.
The Supply Wagon unit actually represents a group of ox-drawn wagons in which the ammunition boxes were stored. For game purposes, the Supply Wagon carries an unlimited amount of small-arms ammunition. The supply wagon moves on its own and does not need to be stacked with a combat unit to move. The wagon has no Fire or Melee Strength, and if a Zulu Player Turn ends with a Zulu unit in the same hex as the Supply Wagon, the wagon is destroyed.
Each time that a British foot or dismounted cavalry unit fires, place a mark in a box; if the unit gets more ammunition, erase the last-recorded mark. When all boxes are marked, the unit is out of ammunition. The British Player places an Out of Ammo Marker on the unit.
To obtain more ammunition, a British unit must meet these conditions: the unit must not be Pinned or Routed. It can be in an enemy ZOC itself, but the path it traces to the Supply Wagon cannot go through an enemy-controlled hex. (Friendly units negate enemy ZOC's for this purpose.)
In the Ammunition Resupply Phase the British Player rolls one die for each unit he is trying to resupply. He refers to the Ammunition Resupply Table. If the number rolled is within the number range specified for the type of unit and the range from the wagon, the British Player erases the last marked box on the unit's Ammunition Supply Roster. The British Player can roll only once for each eligible unit per Ammunition Supply Phase, but there is no game limit on the amount of times he can roll.
Artillery units never run out of ammunition and never have to be resupplied.
Part 12: Melee Combat
During the Friendly Melee Phase, a Friendly unit can attack adjacent Enemy units that are in the Friendly unit's ZOC. A unit is never forced to attack, but if it does, it must attack all Enemy units in its ZOC. Melee results are determined by comparing Melee Strengths, rolling a die and finding the outcome on the appropriate Melee Combat Results Table.
A. Melee Strength and Capability
British units in the Isandhlwana Game cannot attack by melee; their Melee Strength can be used only for defense. British units in the Omdurman Game can attack or defend in melee, normally. Zulu and Dervish units can attack or defend in melee, normally.
Pinned and Routed units cannot attack when in melee combat.
Leaders and the Supply Wagon unit have no Melee Strength and can neither attack nor defend in melee. If a Leader or Supply Wagon unit is stacked with an Enemy unit at the end of the Enemy Player Turn, the leader or Supply Wagon is automatically eliminated.
B. How to Attack
Any Enemy unit that is in a Friendly ZOC can be attacked in the Friendly Melee Phase by the Friendly unit. To determine the odds of the attack, the attacker totals the strength of all his attacking units and compares it to the total strength of all defending units in a given melee. The comparison is expressed as an odds ratio on the Melee Combat Results Table. Remainders, if any, are rounded in favor of the defender. Thus a 24-3 comparison rounds down to 8-1, while 14-4 would be a 3-1. Each game has its own Melee Combat Results Table. Attacks at odds less than the lowest column on the table use the lowest column. Attacks at odds higher than the highest column on the table use the highest column. Any column shifts due to terrain and the unit type of the attacking unit are applied. The attacking player rolls the die, finds the result under the correct odds-column, and applies the result.
If the attack causes the defender to vacate the hex, the victorious attacker can advance after combat.
C. Melee Restrictions
To engage in Melee a Friendly unit must begin the Friendly Melee Phase adjacent to an Enemy unit, which must also be in the ZOC of the Friendly unit. The Friendly unit is not required to attack but if it does, it must attack all units in its ZOC that are being attacked by some other Friendly units.
If there is more than one Friendly unit capable of melee attack in a hex, the Friendly units can choose to attack one or more Enemy-occupied hexes. If a Friendly unit attacks defending Enemy units in more than one hex, the Melee Strengths of all defending units must be added together. When resolving multi-unit melees all attacking units must be adjacent to all defending units.
All Enemy units in one hex must be attacked as a single stack. The attacker must attack all units in the hex. The Melee Strength of all defending units is totalled into a single number. The defender cannot withhold units in a hex under attack.
A Friendly mounted unit that is being attacked only by Enemy infantry or dismounted cavalry can avoid melee with the Enemy units by retreating one hex (terrain permitting) before the Enemy Player resolves the attack. This retreat is optional, and the mounted unit does not spend Movement Points. However, the retreating mounted unit cannot move into an Enemy ZOC when retreating. The Enemy units avoided by the mounted unit cannot advance into the vacated hex. A mounted unit cannot retreat to avoid melee if any of the attacking Enemy units are mounted cavalry units.
Special Melee Restrictions
Isandhlwana Game
British Restriction: British units cannot attack in melee; they use their Melee Strength only for defense.
Zulu Impis: Units from different impis cannot participate in the same attack. (EXCEPTION: the uKhulutshane impi can freely combine its Melee Strength with that of other attacking Zulu units.)
Automatic Elimination: If a British unit or stack of units is attacked at odds of 18-1 or greater, and those units are completely surrounded by Zulu units, Zulu ZOC's and/or impassable terrain, that unit or units is automatically eliminated.
Omdurman Game
Automatic Elimination: If the attack odds are 7-1 or greater, the attacker does not roll the die to determine the combat result; instead, the defender loses one unit automatically. If there is more than one defending unit in a hex, the top unit is eliminated. When the attack odds are 10-1 or greater, all defending units are eliminated if they are surrounded by Enemy units, Enemy ZOCs, or impassable terrain.
Cavalry Charges: Mounted cavalry units are able to make "charge" attacks against Enemy foot, dismounted cavalry, or artillery units. In order to make a charge attack, the attacking unit must be within the Command Radius of its Leader. The leader's Command Radius (in hexes) is the number printed on the leader's piece. A unit cannot charge if the unit's leader has no Command Radius printed on its piece. If a unit is outside the Command Radius of its leader, the unit cannot charge, but can attack normally in melee. (EXCEPTION: The 21st Lancers do not have to be in the Command Radius of their leader in order to make a cavalry charge.) If a mounted cavalry unit is charging, apply a 1-column shift to the right on the Melee Combat Results Table. If the attacking unit is the 21st Lancers, the shift is 2 columns to the right. Enemy units in rough terrain (Level 2 and higher) cannot be charged.
Nationality: Regular and colonial units cannot participate in the same melee attack, although Egyptian and Sudanese units can combine. Dervish units from different tribes cannot participate in the same melee attack. This restriction applies to an attack only, not defense.
Gunboats: Gunboat units have no Melee Strength and cannot attack or be attacked in Melee Combat.
D. Terrain Effects on Melee
Isandhlwana Game
Ridges: If all Zulu units in an attack are attacking across a ridge hexside and all defending British units are at a lower elevation, apply one 1-column shift to the right on the Zulu Melee Combat Results Table. If all Zulu units in an attack are attacking across a ridge hexside and all defending British units are at a higher elevation, apply a 1-column shift to the left on the Melee Combat Results Table.
Crests: There is no melee through the crest hexsides.
Big Donga: The west bank of most of the Big Donga had an elevated bank with a pronounced "lip" which greatly aided any units defending on that side of the streambed. If all Zulu units in an attack are attacking across elevated bank hexsides of the Big Donga against a British unit on the west side of the Big Donga, apply a 3-column shift to the left on the Melee Combat Results Table. Units defending on the east side of an elevated bank hexside do not receive this defensive benefit.
Omdurman Game
Prohibited Terrain: Units cannot melee across crests or all-Nile hexsides.
Thorn Hedge: If all attacking units attack through a thorn hedge hexside, apply a one-column shift to the left.
Trench: If the defending unit(s) is in a trench hex, and the attacking units are not, apply a one 1-column shift to the left, on the Melee Combat Results Table.
Ridge: If all attacking units are attacking uphill through a ridge hexside, apply a one 1-column shift to the left on the Melee Combat Results Table.
Villages and Ruins: The two villages and the ruins have no effect on play. They are included for historical accuracy.
E. Pre-Melee Morale Check
When the Phasing Player announces an attack, all defending units with Morale Ratings of C or D must undergo a Morale Check before the attack is resolved. The defending player rolls the die for each unit with C or D morale, subtracting 2 from the die roll. The defender checks his Morale Table for the result of each roll and applies the roll to the affected unit. Units with A or B morale are never affected by a Pre-Melee Morale Check, even if they are stacked with C or D morale units.
F. Results of Melee Combat
Many of the possible results of melee combat are identical to the possible results of fire combat. See PART 10, section G, for explanations of the following results: M, WD, RT, PN, —.
WD = All attacking units must Withdraw one hex. If they are unable to Withdraw, they are Pinned, not eliminated.
1 = Eliminate one defending unit. If there is more than one unit in a hex, eliminate the top unit. (EXCEPTION: If this result occurs in the Isandhlwana game, and the top unit in the stack is a 7-pounder gun unit, eliminate the next non-gun unit in the stack, if any.)
Advance After Combat: If the defender's hex is vacant after Melee Combat, the attacker can advance into the vacant hex with up to two attacking units, regardless of the presence of Enemy ZOC's. The attacker is not required to advance, but if he wants to, he must do so immediately after combat, before any other melee is resolved. Artillery units cannot advance after combat.
Part 13: Leaders
The primary function of leaders is to rally Routed units. In the Omdurman Game, leaders also have an effect on mounted cavalry charges.
A. British Leaders
Isandhlwana Game
Lieutenant Colonel Pulleine is the officer in command of the British Army, and he can be used to rally any British unit. Captain Degacher commands the 1/24 battalion; he can rally any unit from that battalion. (He cannot rally any unit of G/2/24.) Major Durnford commands Durnford's Basutos: Edendale, Sikali/H, Sikali/V, baTlakwa, and Jantzi cavalry; and the 1/1 Natal Native Contingent foot units. He can rally any of those units, and no others.
Omdurman Game
The British Army is commanded by General Kitchener, who can rally any British unit. Most British units have a brigade designation listed on them. The regulars belong to I Brigade and II Brigade; the colonial troops belong to I Egypt, II Egypt, III Egypt, and IV Egypt Brigades. All cavalry units, including the Camel Corps, belong to the Cavalry Brigade, commanded by Colonel Broadwood. British artillery units are independent of any brigade. The brigade commanders can rally only the units of their respective brigades. Artillery units can be rallied only by Generals Kitchener and Gatacre.
The British Player has two special leaders: General Gatacre and Captain Baring. General Gatacre starts on the map but has no historical command. Gatacre can rally any British unit he stacks with. If General Kitchener is killed, Gatacre assumes command of the British Army and can rally all units adjacent to him, as well as units he is stacked with. (See also section E.) Captain Baring does not start the game on the map. If Colonel Broadwood is killed, Baring assumes command of Broadwood's units and is placed on the map immediately with any unit of Broadwood's brigade. Baring does not enter play unless Broadwood is killed.
B. Zulu Leaders (Isandhlwana Game only)
Tshingwayo is the commander of the Zulu Army, and can rally any Zulu unit. The commander of a Zulu impi is called an inDuna. Each impi has its own inDuna, and that inDuna can rally only units from his own impi.
C. Dervish Leaders (Omdurman Game only)
The Khalifa commands the Dervish Army and can rally any Dervish unit and lead any Dervish charge. The Dervish tribal commanders and their forces are listed in PART 15. Tribal commanders can rally and lead charges for only the units listed for them. (EXCEPTION: Any Dervish leader can rally a Dervish artillery unit.)
The Khalifa's Bodyguard: The Khalifa had a personal bodyguard, his Taiasha tribesmen. The Khalifa has a Command Radius, although the Taiasha are not mounted. He can lead other units in charges. However, when he is not leading a charge all Taiasha units must remain within his Command Radius and can never voluntarily move outside it. If any Taiasha units are forced to move outside the Khalifa's Command Radius they must move as directly as possible back into range. While outside the Khalifa's Command Radius, they cannot attack in melee or fire in their Offensive Fire Phase. If the Khalifa is killed, the Taiasha tribe must move directly towards the southern edge of the map and attempt to leave the game (actually heading towards Omdurman). Once they leave they cannot return, but they are not considered eliminated for victory purposes.
D. Death of Leaders
If all combat units in a hex are eliminated by Fire or Melee Combat, all leaders in that hex are killed. If a unit is eliminated from a stack, but at least one combat unit remains in the hex, the defending player rolls two dice for each leader in the hex. A leader is eliminated on a roll of 2 or 12.
If a leader is in a hex with no Friendly combat units, he can be killed in either of two ways:
-
The leader is killed if an Enemy combat unit moves through the Friendly leader's hex during the Enemy Movement Phase. Eliminating the leader does not cost any Movement Points for the moving unit.
-
The leader is killed if an unrouted, unpinned, Enemy combat unit is adjacent to the Friendly leader's hex at the beginning of the Enemy Melee Phase. If the adjacent Enemy unit is pinned or Routed, or if the hexside connecting the two hexes is impassable for either the leader or the combat unit, the player owning the Friendly leader moves the leader one hex away from the combat unit. The moving leader cannot move adjacent to an Enemy unit or into impassable hexes or across impassable hexsides. If the leader cannot move due to terrain or the presence of Enemy units, the leader remains in place.
A unit cannot fire at a hex containing an Enemy leader but no Enemy combat units.
With the exceptions of Gatacre and Baring (see section A), there are no replacements for killed leaders. If a leader is killed, his units can be rallied only by the army commander. If the army commander is killed, units of that army cannot be rallied.
If the Khalifa is killed, all Dervish units lower their Morale Ratings permanently by one level (from A to B, B to C, etc.) The Khalifa's death also has special effects on the Taiasha tribe (see section C).
E. Rallying Routed Units
Routed units can be rallied (returned to normal status) only during the Friendly Rally Phase. A commander can automatically rally any unit in his command with which he is stacked or to which he is adjacent (EXCEPTION: General Gatacre, see section A).
A Routed unit that is not rallied in the Friendly Rally Phase moves three hexes in the Rally Phase toward a specified location. The Routed unit continues to move three hexes per Friendly Rally Phase until it is rallied or it leaves the map.
Routed Zulu Movement (Isandhlwana Game only)
A Routed Zulu unit that is not rallied in the Zulu Rally Phase must move towards its entry area. A Zulu unit that routs off the map is not considered eliminated for victory purposes; however, it cannot re-enter the map. (EXCEPTION: A Zulu unit that Routs or Withdraws off the map can return if there are other units of that impi that have not entered the map for the first time. Once all units of an impi enter the map, any units of that impi that retreat off the map cannot return. The Zulu Player cannot deliberately keep units off the map to take advantage of this exception.)
Routed British Movement
In the Isandhlwana game, a British routed unit moves toward Hex 1934, until it is rallied or it leaves the map. A routed British unit that leaves the map cannot return. A regular unit that routs off the map is considered eliminated for victory purposes.
In the Omdurman Game, British units inside the Zariba do not Rout. When a Rout result is rolled, the unit Withdraws 1 hex and becomes Pinned. When a unit outside the Zariba Routs, it moves towards the Zariba and once inside the Zariba (not the Trench) it stops moving and becomes Pinned. However, if a British unit within six hexes of 2501, 2601, or 2701 becomes Routed, it moves towards one of those hexes. If a British unit Routs or Withdraws off the map or into an all-Nile hex or across an all-Nile hexside, it cannot return and is considered eliminated for victory purposes.
Routed Dervish Movement (Omdurman Game only)
A routed Dervish unit moves towards the southern mapedge until it is rallied or until it leaves the map. If a unit routs off the southern mapedge it cannot return, but is not considered eliminated for victory purposes.
Part 14: Exiting the Game-Map
Isandhlwana Game
Zulu Exiting: Zulu units and leaders cannot voluntarily leave the game-map. If they are forced to leave the map because of a combat result or because they have routed off the map they cannot return, in most cases (see PART 10, section G, PART 12, section F, and PART 13, section E, for exceptions). Zulu units forced to leave the map are not considered eliminated for victory purposes.
British Exiting: No British unit can voluntarily leave the game-map. All British units forced to leave as a result of melee or routing off the map are considered eliminated — and apply towards the victory conditions.
British Retreat Restriction: No regular unit or British leader can end the British Movement Phase west of the British Retreat Line. A regular unit or leader unit can cross the line during movement, as long as it ends its move east of the line. If a regular leader or unit is forced to move west of the line due to rout movement or a combat result, it is no longer restricted by the presence of the British Retreat Line and can freely move west of the Line.
Colonial Units: Colonial units can voluntarily leave the game-map through any hex south of the Nqutu Plateau along the western edge of the game-map. They cannot return.
Omdurman Game
British Exiting: Any British unit or leader forced to leave the map due to rout movement or a combat result is eliminated and is counted for victory purposes. After a certain point, the Dervish Player gains Victory Points if the British Player does not exit units (see PART 5).
Dervish Exiting: Dervish units and leaders cannot voluntarily exit the map. If they are forced to exit due to rout movement or a combat result, they cannot return, but are not considered eliminated for victory purposes.
Part 15: Unit Arrivals and Reinforcements
Isandhlwana Game
Zulu Arrival: No Zulu units start the game on the map. Zulu impis enter, either in turn 1 or 2, through the hexes of their assigned Entry Areas, as listed below. Units can enter in each hex of an Entry Area during a Game Turn. Each unit pays the Movement Point cost for its entry hex, plus the Movement Point cost paid by each previous unit that entered through that hex in the same Game Turn. In effect, the units are entering the hex one behind another. (EXAMPLE: The fourth unit to enter the same hex in Entry Area A would pay 4 Movement Points, 1 to enter the hex and 3 for the units that entered before it.)
All units of an impi must enter through the same Entry Area on the same Game Turn. If it is impossible to bring all units of an impi onto the map in the same Game Turn, any remaining units must enter in the next Game Turn. Zulu impis enter through the following areas:
| Area | Turn | Impis |
|---|---|---|
| A | 2 | uDududu, uNokenke |
| B | 2 | umKhulutshane, isaNgqu |
| C | 1 | umHlanga, umCijo |
| D | 1 | uVe |
| B | 1 | inGobamakhosi, uMbonambi |
InDunas enter stacked with any unit in their impi. Tshingwayo enters in any turn in the game through either C, D or E.
British Reinforcements: All British reinforcements enter the map on Game Turn 1. All horse units enter in mounted formation. Units pay the Movement Point costs of their entry hex when they enter, and the second unit to enter hex 2201 must pay an additional Movement Point.
Units enter in the following hexes:
| Unit | Hex |
|---|---|
| Jantzi Horse | 0125 |
| baTlakwa Horse | 0114 |
| Sikali/V Horse | 1934 |
| Edendale and Sikali/H Horse | 2201 |
| Major Durnford | 2201 |
Omdurman Game
Dervish Arrival: No Dervish units start the game on the map. Dervish tribes are assigned to specific leaders, and a tribe enters the map when its leader enters. The Dervish Player chooses the Game Turn in which each leader enters. Each leader can enter in any Entry Zone the Dervish Player chooses, but no more than 2 leaders can use the same Entry Zone. The units of the tribes assigned to a leader enter at the same Entry Zone and on the same Turn that the leader enters. The units of a tribe can use all hexes of the Entry Zone. Each unit pays the Movement Point cost for its entry hex plus the Movement Point costs for all previous units that entered through that hex on that Game Turn.
The list shows the tribes assigned to each leader. The letter designations show the Entry Zone used historically by each leader.
- Ali Wad Helu (D): Degheim foot; Kehena foot; Kehena horse
- Sheikh el Din (C): Mulazemin foot; Mulazemin horse; Jehadin foot
- Emir Yakub (A): Jaalin camels; Baggara horse
- The Khalifa (A): Taiasha foot
- Osman Digna (B): Hadendowah foot
- Sherif (B): Danagla camels
(The 3 artillery units can enter with any leader, either all at once or split between leaders.)
Orders of Battle
Opposing Forces at the Battle of Isandhlwana, January 22, 1879
Zulu Army (Commander: Tsingwayo)
Units: uDududu; uVe (named after a bird); inGobamakhosi (The Bender of Kings); umCijo (The Sharp-Pointed); umKhulutshane (The Straight Lines); isaNgqu (The Vaal River); uNokenke (The Dividers); uMbonambi (The Evil See-ers); umHlanga (The Reeds).
British Army (Commander: Lieutenant Colonel Henry Pulleine)
- 1st Battalion, 24th Regiment of Foot (Captain Degacher): Companies A, C, E, F, H
- 2nd Battalion, 24th Regiment of Foot: Company G
- Attached: Guns and Rocket Battery
Colonial Units
- Natal Native Horse (Durnford's Basutos) (Commander: Col. Durnford): Edendale Horse (mounted; African); Sikali/H Horse (mounted; African); Sikali/V Horse (mounted; African); baTlakwa Basuto Horse (mounted; African); Jantzi Horse (mounted; African); 1/1 Natal Native Contingent (infantry; African)
- Other Colonial Units: 1/3 Natal Native Contingent (infantry; African); 2/3 Natal Native Contingent (infantry; African); Natal Native Pioneers (infantry; African); A/Natal Mounted Police (mounted; European); B/Natal Mounted Police (mounted; European); Royal Natal Carabineers (mounted; European); Newcastle Mounted Rifles (mounted; European)
The British Army at the Battle of Omdurman, September 2, 1898
Commander: General Horatio H. Kitchener, commanding general, and Sirdar of the Egyptian Army.
The British Division (Lieutenant General Sir William Gatacre)
- I Brigade (Brigadier A.G. Wauchope): 1st Battalion, Warwickshire Regiment; 1st Battalion, Cameron Highlanders; 1st Battalion, Seaforth Highlanders; 1st Battalion, Lincolnshire Regiment
- II Brigade (Brigadier N.G. Lyttleton): 2nd Battalion, The Rifle Brigade; 1st Battalion, Lancashire Fusiliers; 2nd Battalion, Northumberland Fusiliers; 1st Battalion, Grenadier Guards
The Egyptian Division (Major General Archibald Hunter)
- I (1st) Brigade (Lieutenant Colonel H. A. MacDonald): 9th (IX) Sudanese Regiment; 10th (X) Sudanese Regiment; 11th (XI) Sudanese Regiment; 2nd (II) Egyptian Regiment
- II (2nd) Brigade (Lieutenant Colonel J.G. Maxwell): 13th (XIII) Sudanese Regiment; 14th (XIV) Sudanese Regiment; 8th (VIII) Egyptian Regiment; 12th (XII) Sudanese Regiment
- III (3rd) Brigade (Lieutenant Colonel D.F. Lewis): 3rd (III) Egyptian Regiment; 4th (IV) Egyptian Regiment; 7th (VII) Egyptian Regiment; 15th (XV) Egyptian Regiment
- IV (4th) Brigade (Lieutenant Colonel J. Collinson): 1st (I) Egyptian Regiment; 5th (V) Egyptian Regiment; 6th (VI) Egyptian Regiment; 16th (XVI) Egyptian Regiment
The Cavalry Brigade (Colonel R.G. Broadwood): 21st Lancers; The Egyptian Cavalry; The Camel Corps
Other Units: Royal Engineers; 2nd Company, Royal Artillery; 21st Royal Field Battery; 37th Royal Field Battery; attached Horse Artillery; attached Maxim Gun batteries.
River Gunboat Force: 9 armored steam gunboats, armed with Krupp and Nordenfelt guns, as well as Maxim machine guns.
The Dervish Army at the Battle of Omdurman, September 2, 1898
Commander: Abdullahi, The Khalifa.
- Emir Yakub (brother of the Khalifa): Jaalin, Baggara, various smaller tribes (approximate total 14,000)
- Osman Sheik el Din (son of the Khalifa): Jehadia, Mulazamin (approximate total 28,000)
- Ali Wad Helu: Degheim, Kehena (approximate total 5,500)
- The Khalifa: Taiasha, various smaller tribes (approximate total 7,000)
- Osman Digna, The Sherif, Osman Azrak: Hadendowah, Dangala, various smaller tribes (approximate total 8,000)
Notes on the Participants
The Zulus
Of all the African armies that the British faced during the colonial wars, the most formidable opponents were the Zulus. With a society seemingly geared toward constant warfare, the individual Zulu warrior was a hardy physical specimen. Trained from early boyhood, capable of running long distances at high speeds, and formed into regiments grouped by age, each with its own leader, or inDuna, the Zulu warrior was an opponent to fear. He excelled in melee combat, carrying several assegais, or stabbing spears. Many also carried a heavy, brutal club, known amongst the British as a knobkerrie. For defensive purposes, the Zulus used an oval, cow-hide shield, effective against native opponents, but decorative against the British.
The Zulu tactics were legendary. They never took the defensive, unless it was unavoidable. When attacking, the Zulus always attempted to implement the "Horns of the Buffalo," using one impi as a "chest," to engage and pin the enemy, and several more impi as "horns," to sweep forward on each flank. Other impi would remain behind the "chest" as the "loins," or reserves, to exploit advantages. These tactics, well known to the British, were precisely what the Zulus used at Isandhlwana.
The Dervishes
The various tribal inhabitants of the Sudan were grouped by Europeans under the collective title, Dervishes. In fact, they belonged to a wide variety of tribes, many of whom rarely spoke to each other. Only a leader of immense strength and charisma, such as Mohammed Ahmed Abn Al Sayid Abdullah, The Mahdi, or Abdullahi, The Khalifa, could weld together these disparate forces. To the British, they were known as "Fuzzy-Wuzzies." The Dervishes were a fairly motley lot, led by emirs of widely varying skills. They sometims carried old flintlocks or captured European guns of dubious vintage. Mostly they hefted spears and swords, with which they were brutally effective infighters. They believed that their small, round shields were capable of deflecting bullets.
Tactically, the Dervishes had not gotten past Basic Viking 101; they simply massed together all available warriors and then ran pell-mell at the enemy. If the Dervishes could reach their foe — and with their amazing speed and fanatical courage they often did — the Dervishes' fighting abilities could often carry the day. If they couldn't prevail, the Dervishes were simply poorly-dressed target practice. The average British soldier had remarkable respect for this hardy desert fighter, for if the British soldier respected anything, it was sheer, raw courage. Of that, the Dervishes had plenty.
The British
The British Army of the late Victorian era was, considering the territory it had to cover, quite small. An all-volunteer force, it depended on rigid, unquestioning discipline, hard training and the strength of its noncommissioned officers to carry the day. Given the basic British defensive tactics of the day, and the fanatical courage of their native opponents, this was probably for the better.
Most British infantrymen carried the most modern weapons possible. In the Zulu War, they were equipped with Martini-Henry rifles, a single-shot, breech-loading weapon with exceptional range, accuracy and impact. Twenty years later, in the Sudan and South Africa, they carried Lee-Metford rifles, with even better range and reliability. The only problem with the Lee was that the nickel-plated bullet heads had little effect at great range; the "Tommies" simply filed them down and made them into dum-dums, as they did at Omdurman. Native levies, such as the Natal Native Contingent in the Zulu War, were often armed with surplus, 20-year-old weapons. Many British commanders were afraid that, given enough weapons, the Africans would simply turn them on their masters. So it was not unusual to see only one out of ten in a native company with a rifle, and then given only six or ten cartridges to fire. This practice created major problems at Isandhlwana, although by Omdurman the Khedive's army (the Egyptian Division) was fully armed, trained and supplied.
The basic British tactics against Africans were defensive in nature and quite simple: they rarely had the numbers to attack, preferring to wait for the natives to come to their line. If time allowed, the field of battle would be marked at 100 yard intervals to indicate range and the British unit would form behind some sort of defensive perimeter. In such a position they were virtually impregnable, as can be seen from Omdurman and Rorke's Drift. The idea was to maintain a solid, steady stream of fire, which they could do over extended distances, as the enemy rarely had the firepower to disrupt the British ranks. The steady hail of bullets would then create such a high rate of casualties in the oncoming enemy that they would incur losses they could not withstand. The key was to avoid hand-to-hand combat, at which most natives excelled. It says much for their tactical system that the British usually won.
Counter Section (Page 16 of the Scan)
Transcription note: page 16 of the scan is the printed counter sheet (front and back, 200 die-cut pieces, "Soldiers of the Queen Game Counter Section Nr. 1"), not rules text. Its unit, leader and marker designations are graphic and are not reproduced here; the rules above refer to them by name, type and Morale/Fire/Melee values.
Charts and Tables Not Included in This Transcription
Transcription note: the printed Terrain Effects Charts, Range Effects Chart, Fire Combat Results Table, Melee Combat Results Table, Morale Check Tables, Ammunition Resupply Table and the Isandhlwana/Omdurman map are not part of the 16-page rules scan this transcription was made from. The rules above refer to these charts (e.g. Part 6, Part 10 section D, Part 12 section B, Part 11) and the play values they hold are therefore not reproduced. Consult the full magazine issue for the charts.