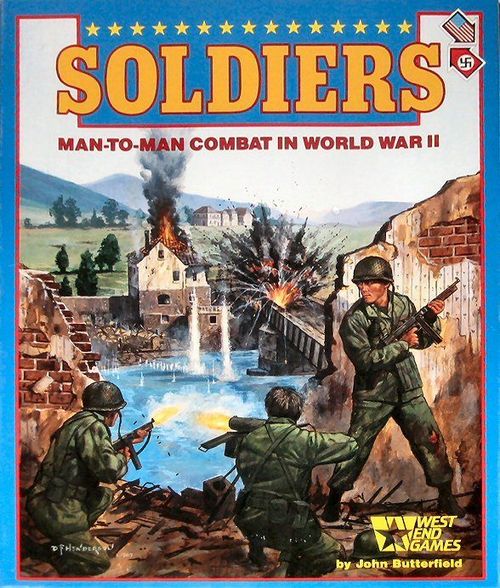
Soldiers: Man-to-Man Combat in World War II
Soldiers: Man-to-Man Combat in World War II Rulebook
Table of Contents
Table of Contents
- 1. Introduction
- 2. Game Components
- 3. Sequence of Play
- 4. Ending the Command Cycle
- 5. The Command Phase
- 6. Action Phase
- 7. Actions
- 8. Combat Actions
- 9. Capture
- 10. Introductory Scenario
- ADVANCED RULES
- Introduction to the Advanced Rules
- 11. Equipment and Carrying Limits
- 12. Grenades
- 13. Overwatch
- 14. Medium and Heavy Machineguns
- 15. Flamethrowers
- 16. Combat Engineers
- 17. Artillery
- 18. Defensive Preparations
- 19. Playing the Scenarios
- THE SCENARIOS
- 20. The Vire Bridges
- 21. Hedgerow Assault
- 22. Street Fighting in Grave
- 23. Pre-Dawn Pillbox Assault
- 24. The Beaufort Crossroads
- 25. Counterattack
- 26. Airborne
- Designer's Notes
- Risk Levels
- Bidding and the Command Track
- Leader Turns and Independent Turns
- Sequentiality
- Orders
- Sight and Movement
- Alertness
- Scenario Missions
1. Introduction
SOLDIERS covers US involvement in Western Europe in 1944. One player controls US soldiers and the other controls German soldiers in scenarios taking place from D-Day to V-E Day.
The players command opposing infantry squads, fighting front line actions, recon missions, and commando raids. Each player controls nine to thirty individual soldiers that use small arms, crew weapons, explosives, artillery, and other special equipment.
The game focuses on command, heroism, and confusion. Squad and platoon leaders make everything happen, inspiring men to move and fire, giving commands with varying levels of risk. Experienced leaders get their men to take greater risks; however, the opportunities and uncertainties of combat can make a veteran hesitate or spark a rookie to carry the day.
SOLDIERS is played in scenarios, taking from one to five hours to play. Each scenario presents a different situation, and the players choose their victory conditions and "buy" the forces they believe they need to fulfill them. Therefore, each time a scenario is played it may be radically different.
How to Use These Rules
The rules are divided into two major sections, called the Standard and Advanced games. The Standard game rules end with a learning scenario in which the weapons and systems presented in the Standard rules are used. The Advanced game uses the Standard rules but adds other weapons and systems, giving players a wider range of options. However, since players "buy" forces at the beginning of a game they may choose to use only weapons and systems presented in the Standard rules at any time; so even a so-called "Advanced" game may be played using only "Standard" rules and section 19.
Read the Standard rules and play the learning scenario once. Then read rules from the Advanced game when you choose to use them in future scenarios.
2. Game Components
A complete copy of SOLDIERS includes:
- 300 Counters
- four maps
- one Command Display
- four Chart Cards (two different, two identical)
- one 32-page Rules, Scenarios, and Background Book
- one 10-sided die
- one 6-sided die
- one Counter Tray
2.1 Playing Pieces
The 300 playing pieces consist of soldiers (or men), weapons, equipment, and various markers.
(2.11) The Men: Each German and US man is represented by a counter. In a given scenario, only a few of the men are used.
- Initiative Rating: Each man has an initiative rating from 0 to 6, representing his ability and willingness to operate under fire.
- Front and Back Sides: Each man has a front and back side. The front side represents the man standing up; the back represents the man when he is lying prone (suppressed). Note that a suppressed man's initiative rating is reduced by one (except those that are rated zero on the front; these remain zero when suppressed).
- Weapon: Each man carries the weapon listed on his counter. The following are the abbreviations used to designate weapons:
- MP: German Machinepistol
- M: German Mauser Rifle
- AR: German Assault Rifle
- LMG: German Light Machinegun
- G43: German G43 rifle
- 98K: German 98K carbine
- FT: Flamethrower
- MMG: Medium Machinegun
- HMG: Heavy Machinegun
- C: US Carbine
- SMG: US Submachinegun
- M1: US M1 rifle
- BAR: US Browning Automatic Rifle
- M1A1: US M1A1 rifle
- Squad Designation: German men are gray and US men are green. Every man is part of a squad containing 9 to 12 men. Squads are delineated by a squad code and colored silhouette. There are 5 US and 6 German squads in the counter mix. The following are the codes:
(2.12) Leaders: Every man with a command rating is a leader. Every squad has two leaders.
- Initiative Rating: A leader's initiative rating is used in determining the "risk level" of men he commands (6.1).
- Command Rating: Only leaders have command ratings. A leader's command rating is the number of orders he may give when active.
- Rank: Men whose names start with "A" are squad leaders; those whose names start with "B" are assistant squad leaders. Men whose names start with "W" are platoon leaders.
(2.13) Equipment Markers:
- Weapon marker: These are placed on the map when a weapon is abandoned or when a man is carrying a weapon other than the one listed on his counter. Different weapons are represented by the front and back of each marker.
- Medium or Heavy Machinegun marker: These show the location and status (prepared or dismantled) of a heavy or medium machinegun (14).
- Radio: These are used for calling artillery strikes (17).
(2.14) Command Chits: These are placed on the Command Track to show the relative momentum of the opposing forces, and are used to determine who will perform actions and when they'll be performed.
- Each squad has three command chits: one for each leader and one independent.
- Each platoon leader has a command chit.
(2.15) Status Markers: Status markers are placed on top of men to show special conditions. The fronts and backs show different conditions.
(2.16) Map Markers and Defensive Preparations: These markers are placed on the map to locate special features.
(2.17) Record Markers: These markers are placed on the Command Display to show game conditions.
2.2 Maps
The four maps (labelled A, B, C, and D) may be used separately or joined together in a variety of configurations, allowing players to create many different battlefields in France and Germany. Each scenario has a map diagram showing how to set up the maps for play.
(2.21) The Hexgrid: A hexagonal grid is superimposed over the terrain features to regulate the placement of playing pieces. Each hexagon (hex) has a 4-digit identity number.
- References to hexes in the rules are preceded by a letter code indicating which map the hex is found on (for example, hex A/1917 is hex 1917 on map A).
(2.22) Zones: Each map is divided into nine zones (numbered 1-9). Zones are used during scenario set-up and for certain game functions.
- Map edges are considered to be zone boundaries.
(2.23) Scatter Indicator: Each map has a scatter indicator (surrounding each map's label), used to determine the direction that errant grenades and artillery shells travel (12.41 and 17.4).
(2.24) Terrain Categories: Each map shows a variety of natural and man-made terrain features which are defined on the terrain key (on the Command Display). The terrain types are divided into categories which rate a hex's relative safety for men who are in them. These categories are important for movement, fire, and other actions.
There are three categories of hexes: open, covered, and protected. The Terrain and Fire Summary lists all hexes in the appropriate category.
- Open hexes: Included in this category are clear, road and bridge, and water hexes.
- Covered hexes: This category includes broken, crater, and brush hexes; hexes bordered by a hedge are "covered" under certain conditions (see the Terrain and Fire Summary).
- Protected hexes: This category includes woods, buildings, rubble, and pillbox hexes; hexes bordered by a wall or ridge are "protected" under some conditions (see the Terrain and Fire Summary).
2.3 Command Display and Player-aid Cards
There are four player-aid cards in the game; two are identical and two are different. The German player uses the German Weapons card; the US player uses the US Weapons card. Each player uses one of the Charts and Tables Cards.
(2.31) The Command Display: The Command Display is used by both players and should be placed next to the map during play. It contains the terrain key, the Command Track, and charts, tables, and summaries most commonly used by both players.
(2.32) German Weapons Card: The front side of this card contains Weapon Tables for all German weapons in the game. In addition, it contains a Weapon Check Summary (indicating when the German player checks for weapon malfunction), the Hand-to-hand Damage Table, and the Grenade/Satchel Charge Combat Modifiers Chart.
- The reverse side contains all charts and tables pertaining to artillery fire.
(2.33) US Weapons Card: The US Weapons Card is identical to the German one, except that the weapon tables describe US weapons.
(2.34) Charts and Tables Cards: This card contains the Terrain and Fire Summary, the Force Costs Chart, and the Unusual Event Table and Event Summary.
2.4 Dice
A 10-sided and a 6-sided die are included. Different game procedures require players to roll one or the other, or both.
- When rolling the 10-sided die, a result of 0 is always considered a 10.
2.5 Glossary
The following terms are used throughout the rules.
- Able Man: Any man that is not incapacitated, killed, or captured.
- Active Player: The player currently conducting an Action Phase.
- Active Man: Any man on the active player's side currently performing actions.
- Alertness Die-roll: A die-roll that is compared to the highest initiative rating in a hex to determine how alert the men are and, therefore, what they may do.
- Disabled Man: Any incapacitated, killed, or captured man.
- Equipment: Anything (usually weapons) a man can carry.
- Group: Men stacked in the same hex that receive the same order.
- Reactive Man: Any man belonging to the player not conducting an Action Phase.
- Reactive Player: The player who is not conducting an Action Phase.
- Stack: All the men and markers in one hex.
- Target: A hex (or the enemy men in a hex) that a player is attempting to hit with fire, thrown grenades, artillery, or other weapon system.
2.6 Game Scale
Each hex represents 10 meters from side to side, each Command Cycle approximately 20 minutes of actual time, and each counter an individual man, weapon or pillbox.
3. Sequence of Play
SOLDIERS is played in Command Cycles, each of which consists of a variable number of turns. Each turn is divided into three Phases: Command Phase, Action Phase, and End Phase. During each Command Phase the players determine who will conduct the next Action Phase. During the Action Phase the player conducting the Action Phase performs various actions with his men on the map. During the End Phase players do some bookkeeping, completing one turn. Play then proceeds to another Command Phase and a new turn. Turns repeat until both players decline (or are forced to decline) to conduct another Action Phase or until a random event forces the end of the Command Cycle.
Turn Sequence
A. Command Phase
- First Player Commitment: The player who conducted the last Action Phase may pass or "commit" one command chit by flipping it to its "committed" side and moving it one space down (toward "0") the Command Track.
- If this is the first turn of a Command Cycle, the player with the "advantage" (5.11) commits first.
- Second Player Commitment: The other player may now pass or commit a command chit by flipping it to its committed side and moving it one space down the Command Track.
- If he already has a chit committed it may remain committed but is not moved; he may not commit another chit. If he passes, his committed chit is flipped over (indicating that it is no longer committed).
- Bidding: If both players passed the Command Cycle ends (4). If only one player has a chit committed he conducts the next Action Phase. If both players have chits committed each may try to outbid the other by moving his committed chit down the Command Track as far as he wishes (the player whose committed chit occupies the higher-numbered space bids first; if both chits occupy the same space, the player without the advantage bids first).
- The players alternate bids until neither wishes to continue.
- The player with the advantage wins the bid if his chit is in the same or lower-numbered space as his opponent's.
- The player without the advantage wins the bid if his chit is in a lower-numbered space than his opponent's.
- The player that wins the bid conducts the ensuing Action Phase.
B. Action Phase
The player conducting the Action Phase is the active player and his opponent the reactive player. The active player conducts the following steps:
- Declare an operational turn or tactical turn.
- An operational move allows men to move only, and only under certain restricted conditions (6.3).
- A tactical turn allows men to receive orders and perform various "actions" (movement, fire, and so forth).
- If conducting an operational move: make the move then return to the Command Phase. If conducting a tactical turn:
- a. Determine the risk level for the turn (6.11).
- b. Determine this turn's event (6.12).
- c. Conduct Actions (7 and 8) by giving orders to men "in command" of the active leader or to a selected independent man or group (6.2). (Movement and fire actions by active men may trigger enemy reaction, see 8.6.)
- d. Proceed to the End Phase.
C. End Phase
The players remove Reaction Fire markers from the map and the active player (only) flips his committed command chit to its front (uncommitted) side.
- Return to the Command Phase.
4. Ending the Command Cycle
Players repeat turns until the Command Cycle ends. The Command Cycle ends if:
- both players pass in the same Command Phase,
- the End Command Cycle event (see the Event Summary) occurs when the reactive player is unable to commit any command chits (all his command chits are in exhausted spaces and/or in the "0" space on the Command Track).
When the Command Cycle ends, conduct the following, in sequence:
- Remove all Smoke and Overwatch markers from the map.
- If either player has now fulfilled his Victory Conditions, the game ends.
- Advance the Time marker one space along the Time Track.
- Move every command chit in a numbered space of the Command Track back to the Start space.
- Move every command chit in an Exhausted space to the space on the Command Track directly below. (Move a chit in the "4" Exhausted space, for example, to the "4" space.)
- Flip suppressed men of your choice back to their front (non-suppressed) sides.
- Start a new Command Cycle.
5. The Command Phase
"... We weren't trying to make history. We were trying to carry out orders and, above all, to survive."
During the Command Phase of each turn, players use the Command Track and Command chits to determine who will be the active player in the next Action Phase. Command chits are moved down the track as a result of commitment and bidding; the lower down the track a command chit is moved, the more likely it becomes that the men the chit represents will be reluctant to act, and the less they will be able to do.
Developer's Note: The Command Track and chits track the momentum of a side's force. As a chit moves down the track its force's momentum begins to slow down. Moving a command chit quickly far down the track represents a player's desire to act right now and a willingness to chance pushing his men too far. A player that is more conservative, moving his chits slowly but steadily down the track, can be fairly confident of accomplishing a great deal, but at the cost of allowing his opponent to act first.
5.1 Setting Up the Command and Time Tracks
At the start of each scenario, three command chits for each squad in play should be placed in the start space of the Command Track: one each for the squad leader, assistant squad leader, and the squad's independent chit. Place all chits with their committed side down.
(5.11) Time/Advantage Marker: Place the Time/Advantage marker in the "0:00" space of the Time track with the US or German side up, depending on which side starts the scenario with the advantage as indicated by the scenario instructions. In some scenarios, advantage is a straightforward assignment. In others it is determined by the players' "intelligence expenditures" (19.41).
- Advantage is used to break ties during bidding (5.33). The advantage may change as a result of an Advantage Check event.
5.2 Commitment
During the Command Phase, each player may commit one command chit, representing a leader or independent group he wishes to "activate," or he may pass.
- In the first turn of a Command Cycle, the player with the advantage commits first; in subsequent turns the player who conducted the last Action Phase commits first.
- Once committed, a command chit remains committed until used to activate men on the map or until the owning player passes.
Developer's Note: Committing a leader's command chit represents a player's intention to use that leader to order men in his squad to do something. A leader can give orders to several men during the same Action Phase. Committing an independent command chit represents a player's intention to use a single man or selected men in a single stack (a group) to do something.
(5.21) Commitment Procedure: To commit a command chit, a player flips it to its "Committed" side (to show that it is committed) and moves it one space down the Command Track.
(5.22) Commitment Restrictions: A player may not commit a command chit if:
- he already has a committed chit on the Command Track (no more than one of a player's command chits may be committed at a time).
- the chit is in the "0" space, or an exhausted space on the Command Track.
- the chit represents a leader who was active in the immediately previous Action Phase.
(5.23) Passing: During the Command Phase, a player may pass instead of committing a command chit. A player must pass if all his command chits are in the "0" space and/or in exhausted spaces.
- If a player passes when he has no command chit already committed, he does nothing.
- If a player passes when he has a command chit committed the committed chit is flipped over; it is no longer committed.
- If one player passes and the other commits a chit the committing player conducts the next Action Phase.
- If both players pass in the same Command Phase the Command Cycle ends (4).
5.3 Bidding
If both players commit command chits in a Command Phase, or if one player commits a chit and the other already has one committed and doesn't pass, the players may bid to determine who will conduct the next Action Phase.
(5.31) Bidding Procedure: Players bid by alternately moving their committed chits down the Command Track. The player whose committed chit occupies the higher-numbered space on the Command Track bids first, or if both chits occupy the same space, the player without the advantage bids first. The players continue alternating bids until both are unwilling to continue.
- A player may move his committed chit as far down the track as he wishes, until unable or unwilling to continue.
- When both players are unable or unwilling to move their chits farther, the bidding ends.
- A player is never required to bid at all.
Example (first Command Phase): It is the first Command Phase at the beginning of a Command Cycle. Both players have 3 command chits in the Start box of the Command Track. The German has the advantage and must commit a chit or pass.
He commits his squad's independent chit by flipping it to its committed side and moving it one space down the track. The US player responds by committing his Independent chit, and since the German has the advantage he begins the bid by moving his chit to the 4 space. The German then moves his chit to the 4 space as well.
At this point, if the US player refuses to bid, the German will win the bid (he has the advantage); if, however, the US player pushes further down the track, he risks an increased possibility of caution (which would push him another space down the track) or exhaustion when he rolls for risk level (6.1). The US player decides not to take the risk and allows the German to go ahead. The German conducts his Action Phase and in the End Phase flips his committed independent chit to its uncommitted side.
(5.32) Bidding Restrictions: After committing a command chit, a player may move his committed command chit only when bidding and may move it only to lower-numbered spaces.
- A player may not move a command chit past the "0" space.
(5.33) Winning the Bid: When the bidding ends, the player with a committed command chit in the lower-numbered space becomes the active player and conducts an Action Phase.
- If both chits are in the same space, the player with the advantage becomes active and conducts an Action Phase.
Example (second Command Phase): It's now the 2nd Command Phase. The US player's independent chit is still committed in the 4 space, but since the German conducted the last Action Phase it is up to him to commit another command chit or pass. If he commits another chit it must be one of his leader command chits because he cannot commit the same chit (his independent) in two consecutive Command Phases; if he passes his chits will not move and the US player could either pass or use his committed independent chit in the ensuing Action Phase.
The German decides to commit his squad leader's command chit so he flips it to its committed side and moves it to the 5 space. The US player may now pass (flip his committed independent chit to its uncommitted side) or announce that his chit is still committed; he announces that his chit is still committed. Since the German chit is in the higher-numbered space it's up to the German to begin the bid. He does so by moving his squad leader's chit to the 4 space. The US player responds by bidding his independent chit to the 3 space. This time the German, not willing to push his best leader so far down the track so soon in the Cycle, allows the US player to win the bid. The US player conducts the Action Phase and in the End Phase flips his committed independent chit to its uncommitted side.
Example (third Command Phase): It's now the 3rd Command Phase. The German squad leader chit is committed in the 4 space, but it's up to the US player (since he took the last Action Phase) to commit a chit or pass. He commits his assistant squad leader. The German may now pass or announce that his chit is still committed; he says that it is still committed. The US player begins the bid by moving his chit to the 3 space (since he doesn't have the advantage, a bid to the 4 space would gain him nothing - the German could announce that he's still committed and, if the US player wanted the next Action Phase, he'd have to move to the 3 space anyway). The German again allows the US player to conduct the next Action Phase. He does so and at the end flips his chit back to its uncommitted side.
6. Action Phase
"... it seemed so simple, but then my men started asking questions. Are we really going to be able to do that? And I began to have my first doubts."
There are two types of turns: leader turns and independent turns.
- If the active player won the bid with a leader command chit that leader is the active leader and a leader turn must be conducted.
- If the active player won the bid with an independent chit an independent turn must be conducted; the active player then selects an individual man or "group" (selected men in a single hex; 6.24) to activate during this Action Phase (6.23).
The active player may then declare either type of turn to be operational or tactical. (The declaration of an operational turn is allowed only under certain conditions; see 6.3).
In a tactical turn, the active player must determine his "risk level" and then may activate men on the map by issuing orders. In an operational turn the active player does not determine risk level.
6.1 Determining Risk Levels and Events
At the beginning of a tactical turn, the active player determines his risk level and what (if any) random event occurs by rolling the 10- and six-sided dice together and consulting the Risk Level and Event Tables.
- The 10-sided die result is used to determine the risk level for the turn.
- The 6-sided result plus the 10-sided result determines the event for the turn.
Developer's Note: The four risk levels represent the "bravery" of actions that active men may perform during the turn. The risk levels are, from most timid to most reckless: Cautious, Wary, Bold, and Aggressive.
(6.11) Risk Level Determination: After the active player rolls the dice, he does the following to determine his risk level for the turn:
- Determine the modified initiative: Add the number in the committed command chit's space on the Command Track to the initiative rating of the active leader or selected independent man or group.
- If a leader turn is underway use the leader's initiative as printed on the leader's counter. (If the leader is not suppressed, the initiative on his counter is that which is printed on his command chit; if he is suppressed, however, the initiative on his counter is one less than what appears on his command chit.)
- If an independent turn is underway and a group was selected, use the lowest initiative in the group (as printed on the counters).
- Find the risk level: Refer to the Risk Level Table and locate the column with the modified initiative at the top, then locate the row in that column containing the 10-sided die result. The risk level listed for that row is the active player's risk level for the Action Phase.
- Place the Risk Level marker in the appropriate risk level box of the Action Summary, as a reminder.
(6.12) Events: After the active player determines his risk level, he adds the 10-sided die result and the 6-sided die result together and locates the sum on the Event Table. If the event is anything other than "No Event," he consults the Event Summary on the Player-aid card to determine what happens (see the Event Summary).
(6.13) Cautious Command Chit Adjustments: When Cautious risk level occurs, the Active player must move his committed command chit in one of two ways:
- If the 10-sided die-roll was 1, he must check his 6-sided die-roll and move his chit down the track that number of spaces; if this is impossible because it would place the chit in a space below the "0" space, he moves his command chit to the Exhausted space directly above the space his chit currently occupies.
- If the 10-sided result was higher than 1 (but still within the range for "cautious"), he moves his committed chit one space down the track; if this is impossible because the chit is already in the "0" box, it is placed in the "0" Exhausted space instead.
Developer's Note: Essentially, each space on the command track represents one possible activation. Cautious risk level represents not only a reluctance to act aggressively, but a loss of time as a result. This time loss is simulated by moving the command chit down the track, forcing a player to forfeit some of his future activations.
Example:
- The US player won the bid in the Command Phase with a leader command chit, which he bid to the 3 space on the Command Track, and has declared a tactical turn. The leader's initiative rating is 4 so the modified initiative is 7 (4+3=7). The US player locates the column on the Risk Level Table labeled 7-8 and rolls the 10- and 6-sided dice. The result on the 10-sided die is 7, indicating that the risk level for this Action Phase is "Bold." The 6-sided die result was 3 so he adds this to the 10-sided die result (7+3=10) and refers to the Event Table and sees that the Event this turn is "No Event."
- The German player won the bid with an independent chit in the 4 space and declared a tactical turn. He selects a stack of three men from the independent chit's squad to be active. Examining the men in the stack he sees that the lowest initiative rating in the group is 1, so the modified initiative is 5. He locates the 5-6 column on the Risk Level Table and rolls the dice. The 10-sided result is 3 indicating that the risk level for the Action Phase is "Cautious." Because it is cautious, and the 10-sided result was not 1, the German player must move his committed chit one space down the track, which he does, placing it in the 3 space. Referring to the 6-sided die he sees that it resulted in 2, 3+2=5 so he refers to the Event Table and finds the event labeled 5. This is an Artillery Strike so he refers to the Event Summary and follows the instructions for an Artillery strike.
- In example 2 above, had the 10-sided result been 1, the German would have had to move his committed chit to the 2 space (two spaces down the track) instead of one because of the cautious risk level and 6-sided die result of 2.
6.2 Being in Command and Giving Orders
During a tactical turn the active player's men may be given orders. Each order activates the ordered man or group and confers 5 Action Points (APs) which the ordered man or group may expend to perform actions. The type of actions that ordered men may perform depends upon the risk level for the current Action Phase.
- During a leader turn the active leader may give a number of orders equal to his command rating to any man or group in his squad that is "in command" - including himself (6.21 and 6.22). Only the active leader may give orders during a leader turn.
- During an independent turn the active player may give one order to his selected man or group (6.23). The man or group need not be in command to receive an independent order.
- All orders confer 5 APs unless the ordered man or a man in the ordered group is wounded, in which case they confer 3 APs (7.11 and 8.44).
(6.21) Active Leader Command: During a leader turn, a man or group is in command and therefore eligible to receive an order from the active leader if:
- in the leader's squad,
- within two hexes and in sight (6.4) of the leader, and
- did not receive an order or was not the active leader during the immediately preceding Action Phase.
A man that does not meet these requirements is out of command and may not receive an order. (The active leader must give himself - or the group he is with - an order to receive APs; he does not automatically receive APs.)
A man or group in command at the start of an Action Phase is in command for the entire phase. Conversely, a man or group out of command at the start of an Action Phase may not be put into command during the phase.
Example: Adams, the squad leader of the US veteran squad is the active leader and has the men in the following hexes in command: 1209, 1409, 1410, and 1511. Adams' command rating is "4" so he may give an order to men in each of these hexes. Note that the man in 1110 is not in command - he's not within two hexes of the active leader. The man in 1508 is not either because, while within two hexes of Adams, he is not in sight of Adams (6.4). The man in 1509 is not in command because he's not a member of Adams' squad.
(6.22) Squad Leader/Assistant Squad Leader Restriction: When an assistant squad leader (name beginning with "B") is the active leader and 7 or more hexes from his squad leader (name beginning with "A") and his platoon leader (name beginning with "W"), his command rating is reduced to 1.
- If the squad leader is disabled while within six hexes of the assistant squad leader, the assistant leader is no longer restricted (command of the squad passes to him); if not, the assistant squad leader's command rating is permanently reduced to 1.
- Assistant squad leaders of US and German Elite squads always have their printed command ratings and are thus exempt from the above restrictions.
(6.23) Independent Command: At the beginning of an independent tactical turn, before determining risk level, the active player must select an individual man or group to be active during the Action Phase. Any man (even a leader) or group in the committed independent command chit's squad may be selected. The only restriction is that the selected man or group may not have been the active leader nor received an order in the immediately preceding Action Phase.
- The lowest printed initiative in the selected group is used to determine the group's modified initiative for risk level determination, even if the group contains a leader.
- After determining risk level, the active player gives a single order to the selected man or group.
(6.24) Ordering Groups: Any or all men of the same squad stacked in the same hex may be considered a group and receive the same order (either a leader order or an independent one). In this case the group as a whole receives APs.
- When ordering a group in an independent turn, the player must specify which men in a stack constitute the group before rolling for risk level.
- When ordering a group in a leader turn, the men that constitute a group must be designated at the time the order is given from the active leader.
(6.25) Order Sequence and Limits: Orders are given one at a time. Each man or group that receives an order must complete actions for the turn before the next order is given.
- A man or group may be given no more than one order per turn.
(6.26) Leader Considerations During Leader Turns:
- Leader-to-Leader Command: A leader may receive an order only from a leader of higher rank. Thus, an assistant squad leader may receive an order from a squad or platoon leader. A squad leader may receive an order only from a platoon leader.
- Platoon Leaders: A platoon leader may receive orders only from himself and may issue orders to any friendly man even if those men are currently in the command of other leaders.
- The active leader, of course, may always give himself an order.
(6.27) Disabled Leaders: Whenever a leader is disabled (killed or incapacitated), his command chit stays on the Command Track but functions as an independent command chit for his squad for all purposes.
- If both leaders in a squad are disabled, men in the squad may continue to receive independent orders or orders from a platoon leader.
- If there are other friendly squads on the map, men in the leaderless squad may receive orders from leaders of one other squad. If more than one other squad is in play, the owning player chooses the reassignment.
- If a platoon leader becomes disabled, his command chit remains on the track only if there are heavy weapons men in play and is used as an independent chit for those heavy weapons soldiers only. If no heavy weapons men are in play or due to enter as reinforcements, the command chit is removed.
(6.28) Catastrophic Loss: If at least 50% of a squad's men (including any leader) have been disabled, remove one of the squad's command chits (your choice) from the Command Track.
- If 75% of the squad's men (including any leader) have been disabled, remove another of the squad's chits.
Developer's Note: Command chits do not represent actual men or leaders in a squad, but rather a squad's overall "command power" or capacity to act. This command power is influenced and driven by the initiative of the squad's leaders and men, and how much risk they are willing to take in "expending" this power. Therefore, when a squad takes excessive loss in battle it also loses some of its capacity to act.
(6.29) Heavy Weapon Soldiers: A man with a heavy weapons designation "H" may receive orders from any friendly leader or independent chit.
6.3 Operational Moves
If the active leader or selected independent group is at least 8 hexes away from and not within sight (6.4) of any enemy man at the beginning of the Action Phase, the active player may declare an operational turn instead of a tactical turn. All men that are given an order receive 8 APs (but see 7.11) which may be spent only for movement actions (7.2) under the following restrictions:
- They may not enter enemy sight (6.4 and 7.23) at any time during the move.
- They may not enter a hex that is within 8 hexes of an able enemy man.
Developer's Note: You'll usually want to declare an operational move when your active leader or independent group is far from the enemy and you want to close the gap. Operational moves represent marches in which the men know there is no danger in the immediate vicinity; they are therefore willing to move at a faster pace than they would in the direct presence of the enemy.
(6.31) Leader Turn Restrictions: If conducting a leader operational turn, any man that is in command of the active leader and 8 or more hexes from and out of sight of all enemy men may receive an order to conduct the operational move.
(6.32) No Dice Roll: The active player does not roll for risk level or events when he declares an operational turn. An operational turn is declared instead of rolling for risk level and events.
(6.33) Scenario-Start Operational Moves: In some scenarios, one or both players are allowed to conduct operational moves with all their men before the first Command Cycle begins.
- If allowed, all men or groups may conduct one operational move before the first Command Cycle begins (see the scenario instructions).
6.4 Sighting
Most activities in the game require men to be able to "see" other men or terrain: for a man to receive an order from a leader, for example, he must be able to see the leader; for a man to fire a weapon at an enemy man the firer must be able to see his target; actions performed within enemy sight usually require a high risk level; and, in some cases, a man must be able to see a hex before he may move there.
- The ability to see another man, or a hex, is defined as having a clear line of sight (LOS) to that man or hex.
(6.41) Determining Sight: A clear LOS exists between two hexes if a straight line drawn between their centers does not pass through any part of a hex containing blocking terrain and the hexes are within maximum sighting distance of each other.
- Terrain in the observer's or target's hex never blocks LOS.
- Sight is always reciprocal: if man A can see man B, B can see A.
(6.42) Maximum Sighting Distance: Maximum sighting distances depend upon the battle conditions currently in effect. If the scenario is occurring:
- at Night, the maximum sighting distance is 6 hexes.
- in Mist, the maximum sighting distance is 10 hexes.
- in Clear weather, the maximum sighting distance is 15 hexes.
(6.43) Blocking Terrain: The following hexes block LOS:
- Brush
- Woods
- Rubble
- Building
- Pillbox
An LOS may go into a blocking hex but not through one.
(6.44) Blocking Hexsides: In addition to blocking hexes, certain hexsides also block LOS. An LOS may not be traced across such a hexside unless the hexside borders the target hex or observing man. The following hexsides have the potential to block LOS:
- wall (including the walls bordering bridges).
- hedge
- ridge
An LOS that runs directly along such a hexside is blocked unless both the sighting and target hexes are adjacent to the hexside (an LOS from C/1809 to C/1710 is not blocked, for example, but one from C/2212 to C/1612 is). Note that the walls bordering bridges on map C are considered to run along only the following hexsides:
- 1412/1413 and 1512/1413
- 1414/1413 and 1313/1413
- 1507/1508 and 1608/1508
- 1509/1508 and 1409/1508
(6.45) Close Calls: If an LOS crosses a "corner" of a blocking hex, sight is blocked.
- If the LOS crosses only a "corner" of a blocking hexside the LOS is not blocked.
- If an LOS passes directly along a hexside of a blocking hex, sight is blocked only if blocking terrain is in both hexes that form the hexside.
- If a situation arises in which a close call seems to be unsolvable, always consider the LOS to be blocked.
- Players should use a straight edge to help resolve close calls.
Developer's Note: If an LOS question simply cannot be satisfactorily resolved because one player or the other will not concede the point, a "friendly roll of a die" will be in order.
Example (LOS): A man in 2212 can see 2012 because both hexes are adjacent to the wall hexside; however, he could not see 1612 because both hexes are not adjacent to the hexside and the LOS runs directly along the wall hexside. The man could see 1709 because a man can always see the hex immediately beyond a blocking hexside (but no farther). He could not see 1909 because the brush in 2010 blocks his view; nor could he see 2208 - the building in 2209 blocks. He could not see 2309 because neither 2212 (his hex) nor 2309 is adjacent to the blocking wall hexside. He cannot see 2008 because his LOS crosses a "corner" of 2009.
7. Actions
In a tactical turn, each man or group that receives an order becomes active and receives 5 APs which may be expended to perform actions. Actions are conducted one at a time, and all of one man's or group's actions must be completed before the next order is given.
Each action costs a number of APs, as indicated on the Action Summary; the active player keeps a running count of the number of APs spent from a man or group's allotment and stops when all the man's or group's APs are exhausted, or when he chooses to stop.
The actions a man or group may conduct are limited by the active player's risk level for the Action Phase (6.11). The Action Summary lists all the Risk levels and the actions that may be performed under each in order of risk (from least to most risky within each category; see the Action Summary on the display).
7.1 Group Actions
All members of an ordered group must start and end the Action Phase stacked in the same hex (but see 7.11).
- When men in a group perform actions the group as a whole pays APs for every action any man in the group performs. Each man in the group may use those APs to perform an action of the same type and same cost (combat, maintenance, or suppression) or do nothing. Except for movement actions, not all men in a group need perform the exact same actions.
Examples:
- Three men are performing actions as a group; they move to an adjacent hex (they all have expended 1 AP). Two of the men fire their weapons at the same hex (they all have expended 3 APs). They all move to another adjacent hex (they all have expended 4 APs). They all move to another hex (they all have expended 5 APs).
- The risk level is bold. Two men are performing actions as a group. One is suppressed and must unsuppress before performing other actions. The group spends 1 AP to unsuppress. One of the men is assigned to overwatch (13) which costs 4 APs; since the only other combat action costing 4 APs is throw satchel charge and since no man in the group has a satchel charge the group may do nothing else.
- Three men are performing actions as a group. They move to an adjacent hex (costing the group 1 AP). The owning player declares that two of the men will fire. The third man could only perform combat actions costing 2 APs; his weapon is out of ammo so he throws a grenade at the same hex instead (each of these combat actions cost 2 APs so they cost the group 2 APs; the group has now expended 3 APs). Next, the owning player announces that the man whose weapon is out of ammo will reload. The other two guys may only perform maintenance actions, but reload and clear jam is the only maintenance actions that costs 2 APs, so they do nothing (the group has now expended all 5 of its APs and is no longer activated).
(7.11) Wounded Men in a Group: If a wounded man (or group containing a wounded man) is given an order, the man (or group) receives 3 APs instead of the normal 5.
- If a man is wounded by enemy reaction fire (8.6) while performing actions, he may perform no more actions during that Action Phase; other members of his group, though, may abandon him and continue performing actions.
7.2 Movement Actions
A movement action is any move from one hex to an adjacent hex. Each movement action costs a number of APs as indicated on the Terrain and Fire Summary. Movement actions may be mixed with any other actions during an Action Phase as long as the active man or group has the APs to spend.
- The type of hex a man may enter is restricted by the active player's risk level and by terrain (7.22).
(7.21) Movement AP Costs: Most hexes cost 1 AP to enter. However, rubble costs 2 and hedge hexsides cost an additional AP to cross. (Thus, entering a woods hex through a hedge hexside costs 2 APs.) AP costs are listed on the Terrain and Fire Summary.
- A man may not enter a hex if he does not have enough APs.
- A man may enter half hexes at the map's edges.
Developer's Note: When in combat men spend a great deal of time crawling and walking crouched - in short moving cautiously. This is true regardless of terrain. At the scale of the game - 10 meters/hex - a woods hex, for example, takes about as long to cross as open ground. In addition, each Action Phase represents a short but flexible time period. To avoid complexity, then, we averaged most terrain costs to 1. The hedges in Soldiers are not like the hedges in your backyard; these are hedgerows from the Bocage country of Normandy which represent truly significant obstacles to movement - tall, thick hedges atop sometimes very tall mounds of earth.
(7.22) Risk Level Restrictions: The type of hex a man may enter depends on his risk level.
When a man's (or group's) risk level is:
- Cautious, he may enter:
- any hex in friendly sight that is not in enemy sight, and
- any protected hex in friendly and enemy sight that is neither enemy-occupied nor adjacent to an able enemy man.
- Wary, he may enter:
- any hex in friendly sight that is not in enemy sight, and
- any protected or covered hex in friendly and enemy sight that is not enemy-occupied.
- Bold, he may enter:
- any hex that is not enemy-occupied.
- Aggressive, he may enter:
- any hex.
These restrictions are summarized on the Action Summary (under Risk Level Restrictions). Note that a man may conduct any movement action listed for his current or lower risk level (if the risk level is bold, for example, he could enter hexes allowed under bold, wary, and cautious restrictions.)
(7.23) Friendly and Enemy Sight: Friendly and enemy sight is judged at the start of each ordered man's or group's actions.
- A hex is in friendly sight for risk level purposes if the ordered man or group can see it, or if any friendly non-suppressed, able man in the ordered man's or group's sight can see it.
- A hex is in enemy sight if any able, non-suppressed enemy man can see it.
- If the ordered man or group begins actions suppressed, sight is not judged until after they unsuppress.
(7.24) Stacking: Any number of men may move through and end their movement "stacked" in a hex.
- Note, however, that while large stacks (3 or more men) are easy to command, they are also easy to kill. Be wary of large stacks (8.32).
(7.25) Water Hexes: A water hex is either a stream, river, or pond and is defined in the scenario instructions. Water hexes do not block LOS (6.4).
- A stream hex is considered clear terrain for movement purposes.
- A river hex is impassable. A man may enter a river hex only if that hex contains a bridge and he enters through a road hexside.
- The pond hex (B/1119) is impassable and is considered clear for sighting purposes. The pond hexsides (1118/1219, 1218/1318, 1218/1219, and 1317/1318) may not be crossed. This is true in all scenarios.
Example (movement under Cautious risk level): It is the beginning of an Action Phase. Adams is the active leader and the risk level is cautious. Under this risk level, active men may not enter hexes that are not in friendly sight at the moment they receive the order that activates them, and may enter enemy sight only if the hex is protected.
Adams' first order goes to Daily (and the man he's stacked with as a group). They move as shown. When they reach 1406 they could not enter 1407 because it was not in friendly sight when Daily received his order. When in 1506 they cannot enter 1507; it is covered (not protected) and Hauber can see it. Daily's group ends the move in 1607. Although Daily could not see 1607 when he received his order, Adams could, and Daily could see Adams at that time. Although 1607 is in enemy sight it doesn't matter; it is protected terrain and therefore safe enough for cautious men to enter while in enemy sight.
The second order goes to Ferris who moves as shown, ending his move in 1506. Again, note that when Ferris received his order he could not see 1505 or 1606 but Adams could and Ferris could see Adams; therefore Ferris knows that these two hexes are safe and therefore he may enter them even though he is cautious.
The third order goes to Canton who moves as shown to 1407. He can enter 1407 because Ferris can now see it and Canton can see Ferris.
Adams' fourth order goes to himself and the man he is with. They move as shown, ending with Ferris in 1506. That is the end of this Action Phase and play proceeds to the End Phase.
(7.26) Moving off the Map: A man may move off the map only if allowed by the scenario instructions and then only from specified areas.
- It costs 1 AP to move off map from a hex or half-hex on the map edge.
7.3 Maintenance Actions
Some maintenance actions cost all of a man's APs and some cost only a portion. Those that cost a portion of a man's APs may be mixed and combined with other actions during an Action Phase; those that cost all of a man's APs, obviously, may not.
Developer's Note: Many maintenance actions do not play a role in the learning scenario (10), so they are explained in the Advanced rules as they become necessary. Only clear jam (7.32), exchange equipment (7.33), and the general rules that apply to all maintenance actions are explained here.
(7.31) Risk Level Restrictions: The active player's current risk level determines the type of hex in which a maintenance action may be performed.
When a man's or group's risk level is:
- Aggressive or Bold, he may perform the action in any hex.
- Wary, he may perform the action in:
- any hex not in enemy sight, and
- any covered or protected hex in enemy sight that is not enemy-occupied.
- Cautious, he may perform some maintenance actions only in hexes not in enemy sight, and others only in:
- hexes not in enemy sight, and
- covered or protected hexes in enemy sight but not enemy-occupied (see the risk level restrictions on the Action Summary).
(7.32) Clear Jam: A man with a jammed weapon (8.51) may attempt to clear the jam by performing the Clear jam action:
Clear Jam Procedure: The active man expends the required APs (2 APs) and the active player rolls the 10-sided die and refers to the weapon check line of the jammed weapon's Weapon Table.
- If the result is "NE" or "Ammo" the jam is cleared and the weapon may again be used for fire; remove the Jam marker.
- If the result is "Jam" the weapon remains jammed and may not be used until a later attempt is successful.
(7.33) Exchange Equipment: A man in a hex with any friendly man or with a disabled or captured enemy man may take or give equipment and weapons to or from any of those men. Any amount of equipment may be exchanged as long as no active man ends up with more than he can carry (11).
- Exchange equipment costs all of an active man's APs (3 or 5; see 7.11).
- If a man is exchanging equipment with an able friendly man, both men must conduct the exchange equipment action.
- Place the appropriate weapon marker on a man that is carrying a weapon other than the one on his counter.
- When the exchange is made, mark the change on your squad sheet (Advanced game only; see 19.5 and 19.6).
7.4 Suppression Actions
When a man is suppressed he is considered to be taking maximum advantage of the terrain he occupies (he's hiding). A man may become suppressed as a result of enemy fire or he may voluntarily suppress himself. Regardless of how a man becomes suppressed the effects are the same (8.44).
Suppression bestows benefits and penalties: a suppressed man is much harder to hit with fire, but his initiative is reduced, he cannot see out of his hex, and must unsuppress before performing any other action (including reaction fire; 8.6).
- When a man is suppressed his counter is flipped face-down; when he unsuppresses, it is flipped face-up.
(7.41) Self Suppression: Self suppression is "free" (costs no APs); an active man may suppress himself at any time. However, a man may not perform any further actions in an Action Phase after voluntarily suppressing himself.
- Any man may suppress himself during an artillery strike (17).
- A reactive man may suppress himself in reaction to enemy actions (8.64).
(7.42) Unsuppress: A suppressed man must unsuppress himself before performing any other action. Conduct of the unsuppress action and the AP cost to perform it is affected by the active player's current risk level.
A suppressed man that is:
- Cautious, may unsuppress in any protected or covered hex, not enemy occupied, at a cost of 2 APs.
- Wary, may unsuppress in any hex at a cost of 2 APs.
- Bold, may unsuppress in any hex at a cost of 1 AP.
- Aggressive, may unsuppress in any hex for free (0 APs).
8. Combat Actions
"... Winters spiraled a puff of cigarette smoke and clipped off this remark: 'Jokers, we've been lucky! Why we aren't all dead, bedamned if I know.'"
Active men may conduct combat actions but are restricted by their risk level for the turn. Reactive men may conduct "reaction fire" in response to observed moves and "sustained fire" by active enemy men but the type of fire they may conduct depends upon their individual initiative (8.6).
8.1 Fire Actions
Active men may fire their weapons at enemy men they can see. There are three types of fire actions: quick, aimed, and sustained:
- Sustained Fire: A steady stream of fire against one enemy-occupied hex. Sustained fire is allowed from automatic weapons only and may affect all men in the target hex.
- Aimed Fire: A deliberate, aimed shot conducted with a non-automatic weapon. Aimed fire is directed at a single target hex and affects only one man in the hex.
- Quick Fire: A fast shot taken without deliberate aim. Quick fire is directed at a single target hex and affects only one man in the hex. All weapon types may quick fire.
(8.11) Risk level: Risk level affects a man's ability to conduct fire actions. An active man that is:
- Cautious or Wary, may conduct only quick fire (but see 18.52).
- Bold or Aggressive, may conduct quick, aimed, or sustained fire, depending upon the type of weapon he's carrying.
(8.12) No firing at Friendlies: A man may not fire through a hex containing only friendly, non-suppressed men (but see 8.84).
8.2 Declaring Fire
An ordered man or group may expend any or all APs to conduct fire actions at enemy men in sight. Fire actions may be conducted before and/or after other actions performed during the Action Phase if the required APs are available.
- If more than one man in a group is firing, using the same APs, all must fire into the same hex (not all fire need be the same type, however). Fire into different hexes requires different AP expenditures.
Fire Declaration Procedure
- Declare which man (or men) is firing.
- Declare the type of fire being conducted - quick, aimed, or sustained.
- Specify the target hex. Any hex the active man or group can see that contains at least one able enemy man may be specified. Do not specify which men will be targets, just the hex.
- If an active man has moved during this Action Phase and wishes to fire at a hex that was not in friendly sight (7.23) when he received his order, he may have to make an alertness roll to "spot" the enemy.
(8.21) Alertness Rolls and Spotting: If an active man (or group) wishes to fire at an enemy man that:
- (a) was not in friendly sight (7.23) when he received his order,
- (b) has not been fired at during the current Action Phase, and
- (c) does not bear a Reaction Fire marker (8.65),
he must make an alertness roll before resolving the fire. Spotting is required only if (a), (b), and (c) are true; otherwise, no spotting is necessary.
Spotting Procedure: The active man (or group) spends 2 APs (for the fire action), rolls the 6-sided die, and compares the result to the highest initiative in the active group.
- If the result is equal to or lower than the highest initiative in the group the enemy was spotted, and the moving men may fire.
- If the result is higher than the highest initiative in the group the enemy was not spotted and the moving men may not fire; the APs, however, are still spent.
Example: It is the beginning of an Action Phase. Goode has been activated by an independent order and his squadmate Hayes can see Hauber (the German man in 1402). Goode moves as shown; when he reaches 1603 Hauber is in Goode's LOS. The US player sees Hauber and would very much like for Goode to see him and to fire at him, but Goode may or may not have noticed Hauber. The US player expends 2 more of Goode's APs and makes an alertness roll with the 6-sided die; the result is 3. Since Goode's initiative rating is 2 he did not notice Hauber and he may not fire. Goode has 1 AP remaining which he spends to enter 1603. Note that had Hauber conducted reaction fire (8.6) at Goode before the spotting attempt (which he has the option of doing), and missed, Goode would not have had to roll; Hauber would have been spotted automatically.
(8.22) Fire Limits: A man may fire at a hex up to twice in the same Action Phase. He could also fire once at one hex, and once at another.
Example: Three US men acting as a group move into a building hex (1 AP) and the US player announces that two of the men will fire at a German group 3 hexes away using aimed fire (2 APs). The target hex was not in friendly sight when the group received its order, has not been fired at during this Action Phase, and does not contain a Reaction Fire marker. The US group must attempt to spot the German group first. The highest initiative rating in the US group is 5 (the squad leader is in the group); the US player rolls a 3 on the 6-sided die so the German group was spotted. The US player rolls for his first fire - which misses. He then rolls for his second fire - which misses also (the US player is having a bad day).
The third man could not now announce that he will fire using the same APs because those APs are already spent; he would have to spend 2 more APs to fire and the other two guys could use those APs to fire again.
8.3 Resolving Fire
To resolve a fire action, the firing player refers to the Weapon Table of the firing weapon to determine his hit chance. The hit chance is a number that the firing player must roll equal to or less than to hit enemy men in the target hex and depends upon the weapon being fired and the range to the target. The hit chance may be modified for various reasons - terrain, number and status (suppressed/non-suppressed) of men in the target hex, and so on.
Fire Resolution Procedure
- Determine the Hit Chance: Refer to the Weapon Table for the firing weapon, and cross-index the type of fire the firer is conducting (quick, aimed, or sustained) with the range to the target hex; the result is the hit chance.
- Modify the Hit Chance: Refer to the Terrain and Fire Summary and apply all applicable hit chance modifiers to the hit chance.
- If the modified hit chance is less than 1, the fire is not resolved but the APs are still spent.
- Roll the 10-sided die:
- If the result is higher than the modified hit chance the target is unaffected.
- If the result is equal to or less than the modified hit chance a man in the target hex is hit and damage must be rolled for (8.4).
- If the result equals a weapon check number for the firing weapon (see the Weapon Check Summary on the same card), determine damage if necessary and roll again on the weapon check line of the Weapon Table (8.5).
(8.31) Determining Range: To determine the range, count the number of hexes from the firing to the target hex (including the target's hex but excluding the firer's hex).
(8.32) Hit Chance Modifiers: The chance to hit a target (hit chance) is modified to show the effects of terrain, defensive preparations in the target hex, the target's status (suppressed or non-suppressed), the number of enemy men in the target hex, and the battle condition. All hit chance modifiers are listed on the Terrain and Fire Summary.
- Terrain Modifiers: All terrain modifiers are cumulative.
- Example: If the target is in a building, and the LOS crosses a wall hexside adjacent to the building hex, 3 is subtracted from the hit chance (-2 for the building, -1 for the wall).
- Battle Condition Modifiers: These modifiers apply to the hit chances of all fire and are cumulative with all others. (Exception: If the firing and target men are in adjacent hexes, the mist modifier does not apply.)
- Example: If firing into a building hex at night the cumulative hit chance modifier would be -4.
- Number of Men: If the target hex contains 3 or 4 non-suppressed men, +1 is added to the hit chance. If a hex contains 5 or more men (regardless of suppression), +2 is added to the hit chance.
- Example: If the target hex is a brush hex containing 1 suppressed and 3 non-suppressed men the cumulative modifier is 0; the -1 for being in brush is cancelled by the +1 for three non-suppressed men and the suppressed man is not considered when making the calculation.
- Suppression Modifiers: Suppression modifiers are applied only if all men in the target hex are suppressed. Suppression modifiers are cumulative with other terrain modifiers.
- Example: If firing at a woods hex containing 1, 2, 3, or 4 suppressed men, 5 is subtracted from the hit chance (-1 for the woods and -4 for suppression in protected terrain). If the hex contained 5 or more suppressed men 5 would still be subtracted, but 2 would be added (for 5 or more men in the hex), for a total modifier of -3.
- Unusual Firer Situations: These modifiers apply to the hit chance when the firer is firing under certain unusual circumstances; these are cumulative with all other modifiers (8.72 and 14.13).
Examples:
- A US man is conducting aimed fire with an M1 against 3 non-suppressed German men in a woods hex. The range is 4 hexes so the unmodified hit chance is 4. The hit chance is modified as follows: -1 for the woods; +1 for the three non-suppressed men in the target hex; the net modifier is 0 so the modified hit chance is still 4. The US player rolls a 6 with the 10-sided die - which is a miss.
- A German man is conducting sustained fire with a machinepistol at six US men in a building 6 hexes away; the unmodified hit chance is 6. Three of the men in the hex are suppressed and the battle condition is misty. The hit chance modifiers are as follows: -1 for the mist; -2 for the building; +2 for the 6 men (note that suppression is irrelevant because not all of them are suppressed). The net modifier is -1 so the modified hit chance is 5. The German player rolls a 5 - which is a hit.
- A US man is conducting quick fire with a carbine at a German man in a building 6 hexes away. The LOS between the men crosses a hedge hexside adjacent to the target; the weather is clear. The chances of hitting the target are real bad - the unmodified hit chance is 3. There is a -2 for the building and a -2 for the hedge. The modified hit chance is -1 which means the US man has no chance to hit the target, but the 2 APs spent to attempt the fire are still spent.
(8.33) Disabled Targets: Disabled men may not be the target of fire and are not counted when determining how many enemy men occupy a target hex; an able man in a hex with only disabled men is considered one target.
(8.34) Separate but Simultaneous Resolution: Resolve each fire separately, even when the same man fires more than once into the same hex or when all men of a group fire into the same hex; men may never combine their fire. The firing player decides the order of his resolution.
- When more than one man in a group fires at the same hex using the same AP expenditure, they are considered to be firing simultaneously so the same hit chance modifiers apply to all fires. (The hit chance for the second and subsequent fire against the hex are unaffected by the results of the first fire.)
Example: Two German men in a group fire at four non-suppressed US men in a building. The first man is firing an LMG using sustained fire; the other is firing a G43 using aimed fire. The LMG fire suppresses two of the US men; when the G43 fires the +1 modifier for the 4 men in the hex still applies because the Germans are firing using the same APs and the effects of suppression do not yet apply.
8.4 Damage
When fire results in a hit, the damage the fire caused must be determined immediately. Each quick or aimed fire affects a single man in the target hex; sustained fire may affect all men in the hex. To determine damage, the damage line on the firing weapon's Weapon Table is consulted.
(8.41) Who Takes the Damage: If the result of the fire roll was 1, the firing player chooses which enemy man takes the damage; if not the target player chooses who is damaged.
- A non-suppressed man must be chosen over a suppressed man unless the suppression was caused by fire paid for with the same APs. Otherwise, any man may be chosen.
Example: Two German men in a group fire (using the same APs) at a hex containing two non-suppressed US men. The first man's fire wounds (and therefore suppresses) one man; when determining damage for the next man's fire (assuming he also hits) the wounded/suppressed man is treated as if he is not yet suppressed and may be chosen to take damage.
Assume the second man's fire misses. A German man in another hex now fires at the same hex (with different APs, of course) and hits. When determining who is damaged for this fire the wounded/suppressed man may not be chosen.
(8.42) What is the Damage: Conduct the following procedure to determine what the effect of a hit is:
Damage Procedure
- Roll the 10-sided die and subtract from the result any applicable modifiers for the terrain and/or defensive preparations in the target hex (see the Terrain and Fire Summary).
- Refer to the damage line of the firing weapon's Weapon Table. Find the modified die result across the top and the damage result in the box below.
- An unmodified roll of 10 is always a kill; a roll of 1 or less is always Suppression.
- Apply the result to the damaged man.
- If the result is Sup (suppress), flip the affected man to his suppressed side.
- If the result is Wound (wounded), Incap (incapacitated), or Kill, flip the man to his suppressed side and place the appropriate status marker on him.
(8.43) Damage Procedure for Sustained Fire: If the fire was sustained fire there is a good chance that more than one man in the hex will suffer damage. Determine damage for the first man normally, then roll again:
- If the unmodified result is equal to or less than the unmodified result of the first damage die-roll, modify the second roll (in the same way as for the first) and apply the result to another man in the hex; roll again.
- If the unmodified result is equal to or less than the second unmodified result, modify the third roll and apply the result to another man; roll again.
This process continues until the player's next unmodified roll is greater than his last, or until all men in the hex have taken damage. The choice of who takes damage after the first man is always up to the target player.
Examples:
- A US man (part of a group of two) has conducted sustained fire against a hex containing 3 German men, and has hit by rolling a 1. He rolls for damage: his first roll is a 6 which wounds a German man of his choice in the target hex. His second roll is 7 (which is higher than 6) so no one else in the target hex is affected. The next man in the group now conducts aimed fire using the same APs as the first man. His fire hits also and wounds as well. The German player could choose to wound the wounded man again (which would incapacitate him) or he could choose to wound another man.
- The same US man conducts sustained fire again against a different hex, this one containing 5 Germans. He hits by rolling a 2 so the German will choose which of his men will be affected by the first damage roll. The US player rolls for damage: his first roll is a 6 which wounds the German player's chosen man. The next roll is a 5 which wounds another German (of the German player's choice). The US player - beginning to enjoy this - rolls again. This time he rolls a 2, which causes him to laugh, because it means that yet another German man is affected - this one is suppressed. He rolls again and this time rolls a 5, which means that no one else in the target hex is affected. The US player smiles smugly and the game continues.
(8.44) Damage Effects:
Suppressed: A suppressed man:
- cannot see out of his hex.
- must perform an unsuppress action before performing any other action.
- may not conduct reaction fire (8.6).
- gains defensive benefits in the form of hit chance modifiers on the Terrain and Fire Summary.
- is unaffected by additional suppression results from enemy combat actions.
- A suppressed leader's (and his command chit's) initiative rating is reduced by 1; his first order in a leader turn must go to himself (or his group) and his first action must be to unsuppress himself.
Wounded: A wounded man:
- becomes suppressed.
- may not reaction fire, but may self-suppress in reaction (8.64).
- receives only 3 APs when given an order.
- becomes incapacitated if wounded again.
- may not perform any additional actions in the Action Phase in which he was wounded; other members of his group may abandon him (exit the hex and leave him behind or perform other actions without him).
- A group containing a wounded man receives only 3 APs when given an order.
Incapacitated: An incapacitated man:
- is disabled and may do nothing.
- may be abandoned by the other members of his group.
- is killed if wounded or incapacitated.
Killed: A dead man:
- is disabled (seriously) and may do nothing.
8.5 Weapon Checks
Certain fire die-roll results require the firing player to check whether his weapon has malfunctioned. These results, and the conditions under which they are relevant, are listed on the Weapon Check Summary on each player's Weapons Tables card. When a weapon check result is rolled when firing, conduct the following procedure after determining any damage caused by the fire:
Weapon Check Procedure: Roll the 10-sided die and refer to the weapon check line on the firing weapon's Weapon Table. Find the result in the box below the die result.
(8.51) Weapon Check Results:
- Jam: Place a Jam marker on the man with the affected weapon. The weapon may not be fired again until the man performs a successful clear jam action (7.32).
- Ammo: Your weapon has run out of ammo; place an Ammo Out marker on the man.
- Note: Ignore all Ammo results when playing the Learning Scenario (10).
- If the man is carrying more clips, he must conduct a reload maintenance action before firing again.
(8.52) Reload Maintenance Actions: A man who is out of ammo but has more clips on his squad sheet must perform a reload action in order to fire his weapon. The man must be active and expend 2 APs to reload: mark off one clip of ammo on your squad sheet (19.62).
- Like other maintenance actions, the ability to perform the action is influenced by risk level and terrain (see the Action Summary).
8.6 Reaction Fire
When an active man (or group) moves or conducts sustained fire in sight of reactive men, those reactive men may conduct reaction fire at the active man (or group).
- The reactive player declares and resolves reaction fire immediately after an enemy man enters a sighted hex or conducts sustained fire, and before the active player may conduct any other actions.
- All reaction fire is considered to occur simultaneously, so the hit chance of one fire is unaffected by the results of other reaction fire against the same target.
(8.61) Reaction Eligibility: A man may conduct reaction fire if he:
- can see the hex the enemy has just moved into or sustain fired from.
- is not in the hex that was the target of the sustained fire to which he is reacting.
- is neither suppressed, wounded, nor disabled.
- has not conducted reaction fire already in the current Action Phase (unless he's on "Overwatch"; see 13).
- is not in an enemy-occupied hex.
(8.62) Declaring Reaction Fire: All reaction fires to be conducted in response to a given enemy move or fire must be declared before any are resolved. All declared fire must be resolved even if the active man or group is killed before all reaction fire is executed (weapon checks might still occur).
- Reaction fire in response to enemy sustained fire is declared and resolved after all fire initiated by a single AP expenditure is resolved but before any other APs are spent by the active player.
- Reaction fire is strictly voluntary at the choice of the reacting player. If a reactive man declines to reaction fire in response to a given enemy action he is perfectly free to reaction fire in response to another in the same Action Phase.
Example (reaction fire): It is the beginning of an Action Phase. The US player won the bid with Allston's command chit in the Command Phase of this turn, so a leader turn is underway and Allston is the active leader. Allston's risk level is Bold.
1st Order: Allston gives his first order to Gilbert and the man with him. Gilbert's group moves as shown. When they enter 2114, though, Cramer (the German in 1818) sees Gilbert and his buddy and announces that he will open up with his LMG. But first the German player must determine how alert Cramer was at the time Gilbert moved into 2114 (if he was on his toes he saw him soon enough to get off a long burst of fire - sustained fire - if not he will only be able to get off a quick shot). The German player rolls the 10-sided die and compares the result with Cramer's initiative rating (2). The result is a 5, so Cramer will be able to quick fire. He does, but misses. The German places a Reaction Fire marker on Cramer (to show that he may not reaction fire again during this Action Phase).
Gilbert continues his move and stops in 2115. At this point Diebler and Friebel (1617) could reaction fire. The German player checks to find the best initiative rating in the hex before he makes the alertness roll; it is a 1. If the alertness roll is a 1, Diebler and Friebel could conduct aimed fire at Gilbert in 2115. The German player rolls the 10-sided die, but rolls a 10 (which indicates that neither Friebel nor Diebler noticed Gilbert - sigh) and therefore may not even fire; no reaction marker is placed. Gilbert and his buddy suppress themselves and their activation is complete.
2nd Order: Allston gives his next order to Crane who moves as shown. When he enters 2015 Hansen (2118) and Anger (2219) probably see him, but the German player decides they will hold their fire. (He's hoping Anger will get a better shot, and Hansen would probably be ineffective anyway - his initiative is 0).
When Crane enters 2115 Hansen is threatened. Crane (having spent only 2 of his APs and having seen Hansen at the beginning of his actions), could sustain fire at Hansen, while Hansen (with initiative of only 0) could only quick fire at Crane. The German announces that Hansen will try to suppress himself in reaction and that Diebler and Friebel will try to fire again. He makes an alertness roll for Hansen; he rolls a 6 and immediately suppresses. (Had he rolled a 10 he could not have done so.) The German player now makes another alertness roll for Diebler and Friebel. This time he rolls a 2 which is not quite enough for aimed fire but they do take quick fire - and miss; the German places a Reaction Fire marker on them.
Crane continues his move to 2216 at which point Anger could attempt to reaction fire at him; the German declares that Anger will hold his fire. Because Crane has 2 APs left (and the US player knows he could see Anger if he'll only look for him) he attempts to spot Anger in 2218 (he has to attempt to spot because Anger was not in friendly sight at the beginning of Crane's actions and has not fired in reaction nor been fired at). The US player makes an alertness roll for Crane with the 6-sided die. Crane's initiative is 3 (and by all that's fair should be alert enough to see Anger). The US player rolls a 6 though, so Crane is oblivious to Anger. Having spent his last 2 APs looking for Anger Crane's activation is over.
(8.63) Alertness Rolls and Types of Reaction Fire: The type of fire - quick, aimed, or sustained - that may be conducted in reaction depends upon the type of weapon a man has - automatic or non-automatic - and an alertness roll.
Reaction Fire Procedure: Roll the 10-sided die for each hex from which reaction fire is to be conducted and compare the result with the highest initiative in the hex.
- If the result is equal to or less than the highest initiative rating in the hex, the reacting men in the group may conduct quick, aimed, or sustained fire - any type of fire allowed by their weapon types.
- If the result is higher than the best initiative in the group (but not 10) the men in the group may only quick fire.
- If the result is 10, no fire is allowed from that stack.
Note that Overwatch Fire may modify this alertness roll; see 13.
(8.64) Suppression Reaction: A man eligible to conduct reaction fire (including a wounded man in this case) may suppress himself instead. When declaring which men will reaction fire, the reactive player must also announce which men will suppress themselves instead of firing. Again, an alertness roll with the 10-sided die is required.
- If the result is 9 or less the selected men in the hex may self suppress.
- If the result is 10 the men may not.
(8.65) Reaction Fire Markers: A man may reaction fire only once per Action Phase. As a reminder of who has and has not reaction fired in an Action Phase place Reaction Fire markers on men that fire.
- A man with a Reaction Fire marker is automatically spotted if an active man moves into sight during an Action Phase (8.21).
- Reaction Fire markers are removed from the map during each End Phase.
8.7 Special Weapons Rules
(8.71) Assault Rifle Fire Options: The German assault rifle may be fired as either automatic or non-automatic. Each time a man fires this rifle, the firing player must declare which mode it is firing in. It must be used in the same mode throughout an Action Phase.
- This weapon has Weapon Tables for both modes.
(8.72) Unfamiliar Automatic Weapons: If a man is firing an automatic weapon of his nationality other than the one listed on his counter (he has exchanged equipment with a friendly man), the hit chance is reduced by 1, and any weapon check die-roll is increased by 1. (Also, see 14.3: firing an HMG or MMG with incomplete crew, and 15.21: firing an unfamiliar flamethrower.)
(8.73) Enemy Weapons: If a man is firing an enemy weapon (he has exchanged equipment with an enemy man), the fire chance is reduced by 2, and any weapon check die-roll is increased by 2.
8.8 Hand-to-Hand Combat
Hand-to-hand combat may occur only when opposing men occupy the same hex and only when the active player's risk level is Aggressive. All active men must participate and are called attackers; all enemy men in the hex must participate and are called defenders.
- A man or group that performs hand-to-hand combat may not perform subsequent actions in the turn, but may perform actions prior to hand-to-hand combat.
(8.81) Resolving Hand-to-Hand Combat: When hand-to-hand combat is declared, both players remove their able, participating men from the map and place them in opposing lines, retaining each man's status (suppressed or wounded).
- If players have equal numbers of participating men the defender lays out his men first and then the attacker places each of his men opposite one defending man of his choice.
- If one side has more men than the other the player with fewer men places his in a row first, then the other player places one or more of his men opposite each enemy man. (In this way men of the larger force may "gang up" on men of the smaller force.)
(8.82) Hand-to-Hand Combat Resolution procedure: For each set of men (consisting of one man on one side and one or more men on the other), conduct the following steps:
- The attacking player rolls the 10-sided die and adds the result to the initiative of his man.
- Add 3 if the man is an engineer.
- Subtract 3 if the man is wounded.
- If more than one man is attacking in this set of men, roll separately for each and keep track of each adjusted result.
- The defender rolls the 6-sided die and adds the result to the initiative of his man.
- A suppressed man's initiative is 0 when defending hand-to-hand.
- Add 3 if the defender is a combat engineer.
- Subtract 3 if the defender is wounded.
- If there is more than one defender in this set of men, roll separately for each and keep track of each adjusted result.
- Compare the adjusted results to determine who is hit.
- If the set is one-on-one, the man with the lower adjusted result is hit; if the results are equal, both are hit.
- If the set involves one against many, and the single man's result is greater than all enemy results, one enemy man of the single man's side's choice is hit; all others are unaffected.
- If the set involves one man against many, and any result on the larger side equals or exceeds the single man's, the single man suffers one hit for each enemy result that equals or exceeds his. All other men are unhurt.
- For each man hit, roll the 10-sided die on the Hand-to-Hand Damage Table.
- Refer to the line on the table corresponding to the number of hits the man received.
When all four steps have been conducted for all sets of opposing men, place them back into the hex from which they were removed, with their new statuses.
Example: With an Aggressive risk level, the US player moves three men into a hex occupied by three German men (one of whom is suppressed). All of the Germans capable of reaction fire have done so already, so the US men enter the hex safely. The US group has 3 APs remaining; the US player announces that his men will engage in hand-to-hand combat (expending 3 APs to do so). The players remove their men from the hex and place them in a row facing each other.
The US player rolls the 10-sided die for his man in the first set, resulting in 4; he adds the man's initiative rating (1) to the die-roll for a total of 5. The German player rolls the 6-sided die for his man, resulting in 3; he adds the man's initiative rating (2) for a total of 5 also. Both men are hit and take damage on the Hand-To-Hand Damage Table; they both are suppressed as a result.
For the next set the US player rolls 7 and adds the man's initiative (2), and the German rolls 2 and adds the man's initiative (1); the German man in this set is hit.
The next set contains the German suppressed man. The US player rolls 7, adds 2 (the man's initiative rating) for a total of 9. The German rolls 5 and adds nothing because the man is suppressed. The suppressed German man is hit and becomes incapacitated by the Hand-To-Hand Damage Table. The players place their men back into the hex.
(8.83) Actions in Enemy-Occupied Hexes: A man that begins his activation in a hex with a non-suppressed enemy man may perform only the following actions if allowed by his risk level.
- hand-to-hand combat
- any fire action (at enemy men in the hex only)
- unsuppress
- self suppress
If active friendly men in the hex outnumber enemy men, excess friendly men may perform any actions allowed by their risk level (the owning player decides which men will be considered excess).
A man in a hex with only suppressed enemy men may perform any of the above actions and/or move out of the hex. (This is an exception to 7.22, prohibiting cautious men from entering hexes adjacent to able enemy men; in order to leave a mutually-occupied hex they would have to enter such a hex. Cautious men in this situation may do so.)
(8.84) Firing at Mutually-Occupied Hexes: You may fire at hexes occupied by friendly and enemy men, but there is a chance of hitting your own men.
-
If your fire die-roll is exactly equal to the modified hit chance you have hit one of your own men; the enemy player chooses which man. (If the modified hit chance is 1, it is impossible to hit an enemy man; but, cheer up - you could choose which of your men you hit if successful.)
-
If you hit when conducting sustained fire at a mutually-occupied hex resolve damage as follows:
- (a) Resolve damage against the first man normally (8.43).
- (b) On the second and subsequent rolls, if you roll exactly the same damage number as the last roll, a man of the nationality opposite the initially-damaged man's is affected.
Example: The US player conducts sustained fire against a hex containing two German and two US men. The modified hit chance is 5 and the US player rolls a 5, hitting one of his own men. He rolls for damage against his man and rolls 8 which kills him. The US player sneers and rolls again to see if someone else is damaged. He rolls another 8. Since the first damaged man was US, and the same damage number was rolled again, a German man in the hex is affected - killed.
- Had he rolled 9 or 10 no one else in the hex would have been affected because both 9 and 10 are higher than 8 and he would stop rolling.
- Had he rolled a 7 or less the other US man would have been affected.
The US player rolls again, this time rolling a 3, which suppresses the other US man. He rolls again and gets 5; no one else is affected.
- Had he rolled a 3 on this last roll the other German would have been affected.
9. Capture
A man may be captured as a result of hand-to-hand combat, automatic capture, or surrender; when a man is captured, place a Captured marker on him. Once captured, a man remains so while in a hex with an able enemy man (his guard). A captured man moves only when his guard moves and may perform no other actions.
9.1 Capture in Hand-to-Hand Combat
When rolling damage for a man hit in hand-to-hand combat (8.81), a player may declare a capture attempt before rolling for damage. If he does so, 3 is subtracted from the die-roll.
- If the result on the Hand-to-Hand Damage Table is "Captured," the man is captured instead of damaged.
9.2 Automatic Capture
When an able man occupies a hex containing only incapacitated enemy men, he captures them.
9.3 Guards
When a man is captured, the capturing player must assign one of his men in the hex to guard the prisoner; any able man may be assigned.
- A single man may guard any number of prisoners.
- The capturing player may assign a different man to guard duty any time more than one friendly man occupies the hex with the prisoner(s).
9.4 Guard Actions
A guard receives only 3 APs when given an order instead of the normal 5 and may not conduct combat actions.
- If the guard received an order with a group, the other members of the group receive 3 APs as well, but may conduct actions without restriction.
9.5 Captured Equipment
When a man is captured, the capturing player is informed of all equipment the prisoner carries.
- Friendly men in the prisoner's hex may take any or all of his equipment by performing an exchange equipment action.
- A man may destroy any or all equipment in a hex by expending 1 AP.
9.6 Escape
If a prisoner is left alone in a hex (with no guard), the owning player may give him an order (either independent or, if in command, a leader order) and activate him. If this occurs, remove the Captured marker.
- Until the prisoner actually conducts an action, he remains captured.
- Note that an escaping man will probably have no equipment (unless the captors did not take it from him). An escaped prisoner has an Unarmed marker placed on him.
9.7 Killing Prisoners
Although not allowed by the Geneva Code, men may opt to kill their prisoners. To do so costs 1 AP per prisoner executed.
9.8 Surrender
A man may be forced to surrender (becoming captured) at the start of any enemy Action Phase if he is in the following situation:
- (a) He is in a hex containing at least twice as many able, non-suppressed enemy men as friendly able (including himself) men.
- (b) The hex is not in sight of any other friendly man on the map.
If both these conditions exist, roll the 10-sided die.
- If the result is higher than the initiative of all friendly men in the hex, they all surrender.
- If not, none surrender.
10. Introductory Scenario
Play this scenario to help you learn the rules presented in sections 1-9. After mastering these, proceed to the rest of the rules and the other scenarios. The Squad sheets are not needed to play this scenario.
DAWN PATROL
Normandy, July 1944
German and American elite troops have been sent to patrol a small French town that sits in no-man's land between the front lines. Both sides, aware of the other's presence, are advancing along the banks of a small river and would like to gain control of the crossings.
10.1 Map Set-Up
Use map C oriented as shown (map diagram not reproduced). Zone 7 is in the northwest corner. The water is a river and impassable except across the two bridges.
Battle Condition: Mist. Remember, visibility is limited to 10 hexes.
10.2 Forces and Deployment
- US: The Elite Squad ("E"), 12 men - 3 command chits.
- German: The Elite Squad ("E"), 10 men - 3 command chits.
Force Deployment: Deploy your forces simultaneously. Place a screen across the map so that you can't see your opponent's half of the board during deployment.
- US Deployment: Anywhere in Zones 7 or 8.
- German Deployment: Anywhere in Zones 1, 2, or 3.
Command Track Set-Up: Place six command chits in the start space of the command track - 3 for the US Elite (Austin, Black, and the elite Independent chit) and 3 for the German Elite squad (Adler, Bach, and the elite Independent chit).
- After determining who starts with the advantage (10.4), place the Time/Advantage marker on the 0:00 space of the Time Track, with the appropriate side up.
- Place the Event A and Event B markers in the "0" boxes of their tracks.
10.3 Operational Moves
Neither side may make operational moves before the first Command Cycle begins.
10.4 Play
- Roll the 10-sided die before beginning play (but after deployment) to determine who starts with the advantage: higher roll wins. If the advantage rolls are equal, the US starts with the advantage.
- Continue playing until the completion of the second Command Cycle.
- In this scenario ignore all Event rolls calling for Artillery Strikes and smoke dissipation.
10.5 Victory Conditions
Both players have the same objective in this scenario - establish a position covering the bridge in Hex 1508. Therefore, the victory conditions are the same for both sides: At the end of the second Command Cycle the player controlling any two of the following three buildings wins:
- 1710-1811-1911
- 1209-1210
- 1809
If neither player manages to achieve victory the game is a draw.
Control of Buildings: In this scenario, control of a building is defined as follows:
- If both players have equal numbers of able men in a building neither controls it.
- If both players have able men in the building, the one with the greater number controls it.
- If a player has able men occupying the building and his opponent does not, he controls it.
- If neither player has able men in the building, the one with more men with sight to any hex of the building controls it.
10.6 Events
When Event A or B occurs advance the appropriate marker along its track to indicate that the event has occurred.
First Event A: The Weather Clears. The battle condition becomes Clear.
- Maximum sighting distance is now 15 hexes.
First Event B: Unusual Event. Roll the 10-sided die on the Unusual Event Table.
Second Event A: Fuel Dump Ignited. The building in 2209 turns out to contain a German fuel dump. If any hex within two hexes of the building was the target of fire at any time during the previous two Action Phases it explodes and burns for the remainder of the scenario. If not, ignore this event.
- If any men occupied hex 2209 at the time of the explosion, remove them from the map - they were killed.
- Men may not enter hex 2209 for the remainder of the scenario.
- Place a smoke marker in hex 2208, roll the 6-sided die, and refer to the scatter indicator (to determine in which direction the smoke from the burning building drifts): place a second smoke marker in the hex adjacent to the building in the direction indicated by the scatter die-roll (if the die-roll were 5, for example, place the second smoke marker in hex 2109).
- The hex into which the smoke drifts becomes a smoke hex for all purposes for the rest of the scenario (see 12.51 for the effects of smoke).
Second Event B: Bridge Demolition Triggered. One of the bridges was wired for destruction before the firefight began, and an errant bullet sets off the charge; roll the 6-sided die:
- on a roll of 1-3 the bridge in 1508 is destroyed.
- on a roll of 4-6 the bridge in 1413 is destroyed.
A destroyed bridge hex becomes an impassable river hex for the remainder of the scenario.
ADVANCED RULES
Introduction to the Advanced Rules
At the beginning of each scenario players must buy forces to use in the scenario. The scenario instructions assign each player a number of Force Points (FPs) which he may spend to buy squads, artillery support and radios, extra ammunition, grenades, heavy weapons, satchel charges, and engineers. The rules which follow explain the uses of the various equipment and actions available.
11. Equipment and Carrying Limits
Every man starts each scenario with the weapon listed on his counter and two "clips" of ammo (unless his squad is depleted: 19.21). By expending FPs, you may buy additional equipment at the beginning of a scenario. Men may also take equipment from disabled men and/or exchange equipment with friendly active men as often as they wish by performing exchange equipment actions.
Developer's Note: The term "ammo clip" as used in the game does not refer to actual clips of ammo - of course a man in a fully-equipped squad would have more than 2 clips of ammo. Instead, it is a convenient way of referring to a man's ammo supply in increments. So a "clip" is an abstract unit of ammunition supply.
11.1 Carrying Limits
A man may carry only one weapon at a time. In addition, a man may carry:
One item from this column:
- radio
- one part of a dismantled HMG or MMG
- a disabled man (11.3)
And two items from this column:
- satchel charge
- pistol
And any number of items from this column:
- ammo clips
- grenades
There is one exception to the above limits: flamethrower (15.2).
All equipment carried by a man is recorded in the man's box on the squad sheet (19.5).
11.2 Weapon Markers
If a man carries a weapon other than the one listed on his counter, place the appropriate weapon marker on him. He is then considered to be carrying the weapon on the marker only.
- If a man abandons a weapon in a hex place the appropriate weapon marker in the hex to show that the weapon is there.
11.3 Carrying a Disabled Man
A man in the same hex as a disabled man may pick up that man by performing an exchange equipment action.
- A man or group that moves while carrying a disabled man must spend one additional AP for each hex entered.
- A man may drop a disabled man for free, at any risk level.
- A man that suffers damage while carrying a disabled man automatically drops the man.
- A man may perform only movement actions while carrying a man.
12. Grenades
A player may spend FPs to give his men explosive and/or smoke grenades. Grenades carried by a man are recorded on the squad sheet (19.5) and each time a grenade is used it is noted on the squad sheet.
- US men with a grenade and an M1 rifle, and German men with a Mauser, 98K, G43, or assault rifle may fire a grenade by performing the fire grenade maintenance action.
12.1 Throwing a Grenade
An active man may throw an explosive grenade at any hex in range by conducting a throw grenade action. The man may move and fire in the same turn.
(12.11) Grenade Range and Target Hex Restrictions: A man may throw a grenade no more than five hexes if he is throwing into a hex that he himself can see, and no more than four hexes if throwing into a hex that he cannot see (see the Grenade Weapon Tables).
- A man in a building may not throw a grenade at an unseen target if the LOS would pass through a hex containing part of the same building.
- A man may not throw a grenade at an unseen target if the LOS would pass through more than one woods hex.
(12.12) Group Grenade Actions: If a man in a group is throwing a grenade, other men in the group need not throw grenades but all must expend 2 APs which may be used to pay for other combat actions (7.1).
- If one man in a group throws a grenade into one hex and another man in that group throws a grenade or fires into a different hex, those actions are considered different and each costs the group separate AP expenditures.
(12.13) Risk Level Restrictions: The risk involved in throwing a grenade depends upon the terrain the throwing man occupies, and whether or not his hex is in enemy sight.
A man that is:
- Cautious, may throw a grenade from any hex not in enemy sight.
- Wary, may throw a grenade from:
- any hex not in enemy sight, and
- any covered or protected hex that is not enemy occupied.
- Bold or Aggressive, may throw a grenade from any hex.
12.2 Resolving an Explosive Grenade Throw
After declaring an explosive grenade throw and a target hex, conduct the following procedure:
Explosive Grenade Throw Procedure
- Refer to the Grenade Weapon Table. Use the "seen" line if the thrower can see his target hex; use the "unseen" line if the thrower cannot. Look under the range of the throw to find the hit chance.
- Modify the hit chance according to the Grenade/Satchel Charge Combat Modifiers chart. No other modifiers affect the hit chance.
- Roll the 10-sided die.
- If the result is 10, the grenade misses the target and may malfunction (12.3).
- If the result is greater than the hit chance (but not 10), the grenade scatters (12.4).
- If the result is equal to or less than the hit chance, the grenade explodes in the target hex and all men in the hex must check for damage (12.23 [sic; printed as 12.23, the damage rule is 12.22]).
(12.21) Modifiers to the Hit Chance: Use the modifiers on the Grenade/Satchel Charge Modifiers chart only; do not use those on the Terrain and Fire Summary.
- If the thrower is adjacent to the target, the reduction is -1 for a building and -2 for a pillbox.
- If the thrower is not adjacent to the target, the reduction is -3 for a building and -5 for a pillbox.
- If the target is a woods hex there is a -1 to the hit chance.
- If throwing at a seen target at night, there is a -2 to the hit chance.
- If throwing at a seen target in the mist, there is a -1 to the hit chance.
If the hit chance for a grenade throw is reduced below 1 the grenade may still be thrown but will automatically scatter (12.4), unless it malfunctions (12.3).
(12.22) Grenade Damage: When a target hex is hit by an explosive grenade, roll the 10-sided die for damage separately for each man in the hex. If the man is indoors, refer to the "Dmg/in" line on the Grenade Table; if the man is outdoors, refer to the "Dmg/out" line.
- When checking for damage of a suppressed man subtract 2 from the damage die-roll; no other modifiers apply.
- An unmodified damage die roll of 10 is always a kill; a result of less than 1 is suppressed.
12.3 Explosive Grenade Malfunctions
When a 10 is rolled while resolving a grenade throw, a possible grenade malfunction occurs. Roll the 10-sided die again and refer to the Weapon Check line of the Grenade Table to get one of the following results:
- Scatter: The grenade scatters, then explodes (12.4).
- Dud: The grenade does not explode (but is still expended).
- Explode: The grenade explodes while in or near the thrower's hand. Roll the 10-sided die again and refer to the "Dmg/in" line of the Grenade Damage table (regardless of the thrower's location) to see how the thrower is affected. If there are other men in his hex, roll the die for each one and refer to the appropriate line of the table to see how each of them is affected.
12.4 Grenade Scatter
If a thrown grenade scatters, the active player rolls the 6-sided die and locates the result on the map's scatter indicator to find in which hex adjacent to the target hex the grenade lands.
(12.41) Reading the Scatter Indicator: The scatter indicator shows the direction from the target hex in which the grenade travels. The grenade explodes in the hex adjacent to the target in the direction indicated by the 6-sided die result.
- A grenade may not scatter into the hex from which it was thrown. If the scatter die result calls for this, the grenade lands in the target hex and explodes there instead.
- A grenade may not scatter into a building or pillbox hex. If such a scatter is called for, the grenade is assumed to bounce off a wall and explode harmlessly.
- If there are men in the hex the grenade scatters to, roll for damage for each man as described in 12.22.
12.5 Smoke Grenades
A smoke grenade does not inflict damage on men; instead, it creates a temporary sight obstruction. The active player conducts a smoke grenade throw as follows:
Smoke Grenade Throw Procedure:
- Determine the wind direction. If the wind direction has already been determined it does not change.
- If the wind direction has not been determined for a previous smoke grenade throw, roll the 6-sided die and refer to the scatter indicator to determine the wind direction; place the Wind marker on the map with the arrow pointing in the direction indicated by the die-roll to show the wind's direction.
- Declare a target hex. The hex need not contain any enemy men and may contain friendly men.
- The range restrictions of 12.11 apply.
- Roll the 10-sided die to resolve the throw as if throwing an explosive grenade.
- Roll the 6-sided die for scatter if called for.
- If a weapon check occurs and the resulting roll is 10, the smoke is released in the thrower's hex; he is not harmed.
- Place two smoke markers: one in the impact hex and one in the hex adjacent to the impact hex in the current wind direction.
(12.51) Effects of Smoke: A hex with a smoke marker has the following characteristics:
- Sight through the hex is blocked.
- The hex is considered protected terrain.
- In addition to normal terrain modifiers, all hit chances are reduced by one when firing into or out of the hex.
(12.52) Smoke Dissipation: Smoke markers remain in play until, at the start of a tactical Action Phase, the active player rolls a Smoke Dissipates event. At that time, all smoke markers on the map are removed.
- All smoke markers are removed at the end of each Command Cycle.
(12.53) Smoke Inside Buildings and Pillboxes: When throwing a smoke grenade at a building or pillbox hex, the modifiers of 12.21 apply. If the throw is successful, the grenade emits concentrated smoke inside the structure. Place a smoke marker in the hex but not in an adjacent hex (the smoke does not drift).
- Smoke in a building or pillbox hex does not have the effects described in 12.51. The only effect is that men in the hex may not conduct fire actions and may not "see out" of the hex.
- Smoke in a building or pillbox does not dissipate as described in 12.52. The smoke remains until the end of the current Command Cycle or until a man in the hex throws the smoke grenade out of the hex by performing a remove smoke maintenance action (12.54).
- If smoke thrown into a non-building or pillbox hex is required to drift into a building or pillbox hex, the drift does not occur; do not place a second smoke marker.
(12.54) Remove Smoke Actions: A man in a building or pillbox hex with a smoke-emitting grenade may throw it out of his hex into an adjacent non-building, non-pillbox hex by performing a remove smoke maintenance action.
- The active man spends the required 3 APs and moves the smoke markers to an adjacent non-building, non-pillbox hex. Adjust the smoke drift accordingly.
12.6 Rifle Grenades
A US man with an M1 or M1A1 rifle or German man with a Mauser, 98K, G43, or assault rifle and a grenade (explosive or smoke) may fire the grenade from his rifle by conducting the fire grenade maintenance action.
(12.61) Rifle Grenade Target Hexes: Any hex on the map that meets the following requirements may be the target of a fired grenade:
- The hex must be at least four hexes away from the firing man.
- The hex may not contain a building or pillbox.
(12.62) Resolving Rifle Grenade Fire: Resolve rifle grenade action as if resolving a grenade throw action, using the Rifle Grenade Weapon Table to determine the hit chance.
- Use the "seen" line if the target hex is in sight of the firer; use the "unseen" line if not in sight.
- No modifiers affect the hit chance.
- Conduct a grenade malfunction check if the unmodified fire die result is a 10.
- Effects of smoke are the same as for thrown grenades.
- If the target was seen, use the "seen" damage line. If the target was unseen, use the "unseen" damage line.
(12.63) Rifle Grenade Scatter: When a rifle grenade fire result calls for scatter, the scatter result (17.4) equals the difference between the fire die result and the hit chance, but never more than five.
- The scatter procedure is identical to that for Artillery scatter (17.4).
Example: If the hit chance is 1 and the die result is 4, the scatter result is three. If the die result is 8, the scatter result is five.
13. Overwatch
"Hadley was a good typical American on the verge of battle; but he had to have one of his closest friends critically wounded, a man with whom he'd played, worked, trained, suffered, before he was deeply moved by the war..."
During a leader turn, a man or group with a wary or higher risk level may be put on overwatch. A man remains on overwatch until he receives another order or until the current Command Cycle ends. Overwatch fire modifies the alertness rolls of all enemy reaction fire attempts conducted in sight of the overwatching man and an overwatching man may reaction fire any number of times during an Action Phase.
- A man may not be assigned to overwatch during an independent turn.
13.1 Overwatch Procedure
The active player conducts overwatch fire as follows:
- Choose a man or group in command of the active leader. The men must be eligible to receive orders. Give the man (or group) an order from the active leader, and expend four of his APs.
- Place an Overwatch marker atop the man or group to show that they are conducting overwatch.
- Check for weapon malfunctions: Roll the 10-sided die and consult the Weapon Check summary to see if a weapon check occurs. Any die result other than one calling for a weapon check has no effect.
- If a weapon check is called for, conduct the check. A weapon that runs out of ammo may contribute to overwatch during the current Action Phase (remove the Overwatch marker at the end of the current Action Phase); a weapon that jams may not (do not place an Overwatch marker).
- You must check for weapon malfunction at the beginning of each friendly Action Phase that a man remains on overwatch.
- The Overwatch Fire marker is removed when an overwatching man is given another order, and at the end of the Command Cycle.
13.2 Effects of Overwatch
When a man conducts reaction fire in sight of enemy men on overwatch, +1 is added to the alertness roll of reaction firing men for each enemy overwatching man in sight with a non-automatic weapon, and +2 for each overwatching man in sight with an automatic weapon.
- A man on overwatch may conduct reaction fire any number of times during an Action Phase; do not place a Reaction Fire marker on the man.
- A man on overwatch is always spotted: active men are never required to spot an overwatching man.
Examples:
- A group of two US men are conducting overwatch fire. One has an M1 and the other a BAR. +3 will be added to the alertness rolls of all men in their sight attempting reaction fire.
- A German man with a machinepistol is on overwatch. Another German moves across open ground into a building. The US player announces that two of his men with BARs (in two different hexes) saw the German move and will attempt reaction fire at him. They are in sight of the overwatching man, so when they make their alertness rolls, 2 will be added to their rolls. The first US man's initiative is 2; the 10-sided die is rolled resulting in 2. Ordinarily, the US man would be able to conduct sustained fire at the moving German man, but because 2 is added to the die roll for the overwatch, the man may only quick fire; he does so and misses. The second man's roll is 8; ordinarily he would be allowed to quick fire, but because of the +2 for the automatic overwatch fire the die-roll is 10: he can't even fire.
(13.21) Effect Limits: Overwatch additions to enemy reaction fire alertness rolls are cumulative, up to a maximum of +5. Ignore overwatch additions in excess of five.
- A reaction fire may be affected by overwatch fire from any number of hexes in sight. An overwatching man or group may affect any number of reaction fires in their sight.
14. Medium and Heavy Machineguns
"... four of them yelled 'Kameraden'... and walked forward as if to surrender. But when our men arose to make them prisoners, they dropped to the ground and an MG 42 behind them wounded six out of ten boys."
Players may purchase Medium Machineguns (MMGs) and Heavy Machineguns (HMGs), and the crews to man them, at the start of a scenario by spending Force Points (see 19.45). Machinegun crews are heavy weapons soldiers, designated with an "H."
14.1 MMG and HMG Crews
Each MMG and HMG is represented by a weapon marker and two or three men - the crew. If the US player purchases an HMG, he gets the HMG marker and soldiers Reed, Scott, and Taylor. Each man in the crew is considered to be carrying or operating part of the weapon.
- Each US MMG has a 2-man crew, labelled "a" and "b."
- Each US and German HMG requires a 3-man crew (labelled "a," "b," and "c").
- A machinegun crewman may receive an order from any friendly leader or an independent order from any independent chit.
(14.11) Initial Deployment: HMGs and MMGs and crews may be deployed hidden at the start of a scenario. If so, write the hex location of the weapon and crew on the squad sheet (19.5).
- The weapon may be deployed "prepared for fire" (weapon side-up) or "dismantled" (dismantled side-up); you must indicate its status on your squad sheet.
(14.12) Revealing a Hidden MG: A hidden HMG or MMG (and crew) is placed on the map the first time it moves, fires, or is sighted by an enemy man.
- If enemy men are ordered to conduct an operational move, but would not be allowed to make the move if they knew about a hidden MMG or HMG (because of the 8-hex range restriction; 6.3) the owner of the hidden HMG or MMG has the option of revealing it before the move is made (thus preventing the operational move altogether) or waiting until an enemy man enters sight of the hidden MG (thus stopping the operational move immediately at that time). If the MG's owner chooses the latter option, he may attempt reaction fire at the moving enemy men as soon as he reveals its location. This is the only case in which reaction fire may occur during an operational move.
- If a cautious or wary man enters a hex prohibited by his risk level restrictions (7.22) because he didn't know of a hidden enemy HMG or MMG, the MG's owner must immediately reveal the MG (and attempt reaction fire if he so chooses); the moving man or group must immediately stop in the hex and suppress after any reaction fire. The man or group may move no farther during that Action Phase.
- Once a hidden MG is revealed, it remains revealed for the remainder of the scenario.
(14.13) Non-Crew Members: Any man not originally assigned as a crewmember may become a crewmember at the player's option. A man performs an exchange equipment action with a crew member to take part of the weapon and the player notes the exchange on his squad sheet.
- Note that a crewmember has no weapon other than his part of the MG (unless you gave him a pistol or grenades), and, if relieved, will be unarmed.
- When a non-original crewmember participates in the firing of the HMG or MMG, -1 applies to the hit chance for firing an unfamiliar automatic weapon.
14.2 Moving and Preparing an MG
When any member of an HMG or MMG crew moves, the weapon is automatically considered dismantled; flip the weapon marker to its dismantled side. If the crewmembers move into different hexes, keep the weapon marker with any one crewmember. Make sure the squad sheet clearly shows which men are carrying parts of each MG.
- A dismantled MG may not be fired until it is prepared.
When all parts of a dismantled HMG or MMG are in the same hex, all its crewmembers may prepare the weapon for fire by performing the prepare HMG/MMG action. When the weapon is prepared, the weapon marker is flipped to its weapon side to show that it may now fire.
- A prepared MG remains prepared until moved.
(14.21) Fire Arcs: Each time an HMG or MMG is prepared, the owning player must point the arrow on the marker toward a specific hexside or hex corner. The weapon will only be able to fire at targets in a 120 degree arc centered around the arrow (see the HMG or MMG Fire Arcs diagram, not reproduced).
- If a hidden HMG or MMG is prepared at the beginning of the scenario, the owning player must indicate its facing on his squad sheet.
- An HMG or MMG may not be fired at a target in the same hex.
(14.22) Changing the Fire Arc: The owning player may change the fire arc of a prepared MG by having a number of men in the hex equal to the weapon's crew perform a prepare MG maintenance action during a turn in which the weapon is not fired. The weapon remains prepared when this is done.
14.3 Firing an MMG or HMG
A prepared HMG or MMG with a full crew may conduct quick, sustained, or overwatch fire like other automatic weapons, but only at targets in the weapon's fire arc.
A prepared MG may be fired with one less man than its full crew but the following penalties are applied:
- The hit chance is reduced by two, in addition to any terrain modifiers.
- If a weapon check occurs, the ensuing die-roll result is increased by three. A result above 10 is considered 10.
15. Flamethrowers
A player may purchase a flamethrower and the man to use it at the start of a scenario by spending Force Points. A man equipped with a flamethrower is a heavy weapon soldier and is represented by a single counter ("Murphy" for the US; "Marck" for the Germans).
- Marck and Murphy may receive an order from any friendly leader or independent command chit.
15.1 Firing a Flamethrower
A man with a flamethrower may conduct sustained or continuous fire if his risk level is bold or aggressive. A man may not conduct quick fire with a flamethrower.
(15.11) Flamethrower Sustained Fire: Sustained fire with a flamethrower affects every man in the target hex as with grenades.
- Conduct a weapon check each time the flamethrower fires.
(15.12) Flamethrower Continuous Fire: Continuous fire with a flamethrower represents a long stream of fire against a single target.
- A man must spend 4 APs to conduct continuous fire.
- Continuous fire is resolved in the same way as sustained flamethrower fire, using the "Continuous" row of the Flamethrower Weapon Table.
- When making the required weapon check after conducting continuous fire, add +1 to the die result.
- As with sustained fire, continuous fire may trigger enemy reaction fire.
(15.13) Flamethrower Range: The maximum range of a flamethrower is noted on the Weapon Table. The minimum range of a flamethrower is one hex; a flamethrower may not fire against a target in its own hex.
(15.14) Effects of Terrain: Terrain does not affect the hit chance or damage roll when using a flamethrower. However, use of a flamethrower is prohibited in the following situations:
- A flamethrower may not be fired into a building or pillbox hex unless the hex is adjacent to the firer.
- A flamethrower may not be fired through a wall hexside unless the hexside borders the firer's hex.
(15.15) Suppressed Targets: A man receives no benefits for being suppressed when fired upon by a flamethrower; do not reduce the hit chance.
(15.16) Flamethrower Damage: The Flamethrower Weapon Table includes two damage rows: "light" and "heavy."
- Use the "heavy" row if the target is hit by sustained fire from 1 or 2 hexes distant or by continuous fire from 1, 2, or 3 hexes distant.
- Use the "light" row if the target is hit by sustained fire from 3 or more hexes distant or by continuous fire from 4 or more hexes distant.
(15.17) No Reaction Fire: A flamethrower may not be fired in reaction fire.
15.2 Carrying a Flamethrower
No extra "ammo" may be purchased for a flamethrower. A man with a flamethrower may carry pistols, pistol ammo, and grenades, but nothing else. This is an exception to 11.1.
(15.21) Exchange: A man may take a flamethrower from a friendly man to which it was originally assigned by performing the exchange equipment action when in the same hex.
- Place a flamethrower marker on the man taking the weapon and note the change on the squad sheet (make sure the man taking the flamethrower is not carrying too much; he may trade equipment of course, or drop stuff).
A man other than the man originally assigned a flamethrower fires less effectively (he's firing an unfamiliar weapon).
- The hit chance is reduced by three, after all other modifiers.
- Add four to the weapon check die-roll.
16. Combat Engineers
Both players may purchase combat engineers at the start of a scenario by spending Force Points. Combat engineers have special combat abilities, and are capable of using satchel charges.
- Each engineer has his own weapon (a machinepistol or sub-machinegun).
- An engineer may receive orders from any friendly leader or independent command chit.
16.1 Combat Engineer Abilities
Combat engineers receive specialized assault training, giving them the following extra abilities.
(16.11) Hand-to-Hand Combat Advantage: When a combat engineer is participating in hand-to-hand combat, add three to his die roll (8.82).
(16.12) Minefield Detection: A hidden minefield is exposed when an engineer enters a hex adjacent to the minefield (instead of the minefield hex itself). The detection is automatic; no alertness die-roll is required (18.42).
(16.13) Cutting Wire: A wire marker is removed from the map if an engineer performs the remove wire maintenance action in two of the three hexes the wire covers instead of all three (18.32).
16.2 Satchel Charges
A player may equip a man with one or two satchel charges at the start of a scenario by spending Force Points (in addition to the cost of the engineer).
(16.21) Carrying a Satchel Charge: Any man may carry a satchel charge, but only engineers may use them.
- A man may carry a maximum of two satchel charges in addition to his other equipment.
- A satchel charge is not represented by a counter; it is recorded on the squad sheet only.
(16.22) Throwing a Satchel Charge: An engineer may throw a satchel charge when his risk level is bold or aggressive, much like throwing a grenade. Use the procedure for resolving a grenade throw, scatter, weapon checks, and damage, with the following exceptions:
- An engineer must spend 4 APs to throw a satchel charge.
- An engineer may throw a satchel charge no more than three hexes.
- Use the Satchel Charge Weapon Table to resolve the throw.
(16.23) Satchel Charge Peripheral Damage: If a satchel charge explodes in an outdoor hex, all men in outdoor hexes adjacent to the impact hex suffer peripheral damage. Roll for each man on the "Dmg/Adj" line of the Satchel Charge Table.
- Peripheral damage does not occur when a satchel charge explodes in a building or pillbox hex.
- Peripheral damage does not affect men in buildings or pillboxes.
17. Artillery
A player may spend Force Points at the start of a scenario to give his side light or heavy artillery support. Artillery support represents single guns and batteries deployed off map. Light artillery support allows a player to call "artillery strikes" on enemy positions during play. Heavy artillery support allows a player to call artillery strikes too, but with a greater chance of success, and also allows a player to conduct an "artillery barrage" (17.6) before the start of a scenario.
17.1 Radios
When a player purchases artillery support, he receives a radio and assigns it to any one man in his force (the assignment must be noted on the squad sheet). The radio is used to call artillery strikes.
(17.11) Carrying a Radio: Any man may carry a radio in addition to his other equipment.
- The radio marker is not placed on the map until the man carrying it is in sight of an able, non-suppressed enemy man.
(17.12) Eligibility to Use a Radio: The man to which a radio is assigned at the start of the scenario, and any leader stacked with the man (or who takes the radio from the man), may use the radio to call artillery strikes. Non-leaders other than the man initially assigned the radio may not.
- Men may not use enemy radios.
17.2 Calling an Artillery Strike
An eligible man with a radio may make an artillery call by performing the use radio maintenance action when active (or when an Artillery Strike event occurs under certain conditions; see 17.25). An artillery call represents a request for an artillery strike; when the request is made the hex number of the target must be recorded on the squad sheet. The actual strike lands when an Artillery Strike event occurs at the beginning of a tactical turn.
- Any hex the man with the radio can see (or a forward observer can see - 17.22) may be the target.
(17.21) Recording an Artillery Call: The target hex of an artillery call is secret; the player writes down the hex number on his squad sheet. If there are other artillery calls yet to be resolved on his sheet, he writes down the call on the first available line on the squad sheet.
(17.22) Forward Observers: If a man with a radio cannot see a given hex, but can see a friendly, non-suppressed man that can, an artillery strike may be called against the hex by having the man with the radio perform the use radio maintenance action while the other man acts as an observer.
(17.23) Double Call: An artillery call against a given hex may be repeated any time before the first called strike impacts, by performing the use radio action again. This is called a double call and increases the chance of the call going through (17.3).
- When a double call is made, add a "x2" notation to the original call on the squad sheet.
(17.24) Cancelling a Call: An eligible man with a radio may cancel any unresolved artillery call made previously by his side by performing the use radio action.
- When a call is cancelled, cross out the target hex number on the squad sheet.
(17.25) Event Call: In addition to the normal call method, as outlined above, each player may make a "free call" if he rolls an Artillery Strike event when he currently has no unresolved request recorded on his squad sheet. If a player could resolve an artillery strike when the event occurs (he has an unresolved call recorded), he must resolve it. If he has no call recorded he may make a free call instead.
17.3 Resolving an Artillery Strike
A player resolves one of his recorded artillery calls each time an applicable Artillery Strike event occurs at the beginning of a tactical turn. Refer to the Event Summary for details on who resolves what type of strike when. When an Artillery Strike event occurs, the player who made the call immediately conducts the following steps:
Artillery Strike Procedure
- Determine Artillery Type: Refer to the appropriate Artillery Call Table (according to the level of support bought). Roll the 10-sided die to determine if the call got through and, if so, what type of artillery is being fired.
- Add 2 to the die result if a double call is being resolved.
- If the result is a lost call, the call is wasted; cross out the hex number on your squad sheet and stop this procedure.
- Voluntary Suppression: Announce to your opponent the map zone that contains the target hex. Both players may now voluntarily suppress any or all their men on the map.
- Determine Impact Hex: Announce the target hex and refer to the Artillery Strike Table corresponding to the type of artillery determined in step 1; roll the 10-sided die to determine if the strike lands on target or scatters. If the target hex contains a Target Acquisition marker (17.31), subtract the value on the marker (2 or 4) from the die result.
- If the result calls for scatter, conduct the artillery scatter procedure to determine the impact hex (17.4).
- Determine Damage: Determine the effects of damage on men, equipment, and structures in and near the impact hex (17.5).
- Cross out the target hex number on your squad sheet.
(17.31) Target Acquisition: If an artillery strike is observed by a qualified friendly man, subsequent strikes against the intended target hex will be more accurate:
- If any leader or the radioman is in sight of the target hex (not the impact hex) when an artillery strike by his side is resolved, place a Target Acquisition marker in the target hex ("-2" side up).
- If a second strike against that hex occurs, subtract two from the Artillery Strike die-roll and, if the intended target hex is still in sight of a qualified man, flip the marker to the "-4" side.
- The third, and subsequent strikes against the hex benefit from a -4 adjustment to the roll.
17.4 Artillery Scatter
If an artillery strike scatters, the player who called the strike conducts the following procedure to determine the actual impact hex.
- Note that the following scatter procedure is also used to resolve rifle grenade scatter but the scatter result is determined differently (12.6).
Scatter Procedure
- Roll the 6-sided die and locate the result on the map's scatter indicator.
- In the direction of the scatter, count a number of hexes from the target hex equal to the scatter result (obtained on the Artillery Strike table if resolving artillery scatter; or from the difference between the hit chance and fire die-roll if resolving rifle grenade scatter).
- Then, roll the 6-sided die again and refer to the scatter indicator.
- Count a number of hexes equal to the scatter result minus 1 in the direction indicated by the second roll. This is the impact hex.
Example: The US player is resolving an artillery strike against a target hex in zone 2 of map A; he purchased heavy artillery support at the beginning of the scenario. He refers to the Artillery Call Table labeled "Heavy Support" and rolls the 10-sided die; the result is 6 indicating that he will receive light shells. (Had he made a double call against this hex, 2 would have been added to this die-roll which would have given him heavy shells.) The US player now announces that artillery is incoming in zone 2 of map A, and the German player suppresses all his men in zones 2 and 3 (they hit the dirt!). The US player now refers to the "Light Shell" Artillery Strike Table and rolls the 10-sided die again; he rolls a 7 (S3) which indicates the shells scatter 3. He rolls the 6-sided die and refers to the scatter indicator on map A; he rolls a 4, indicating south (assuming "1" is north). He counts 3 hexes south of the target hex and rolls again on the scatter indicator; this time he rolls a 5 (southwest). From the new hex, he counts two hexes southwest; this is the impact hex.
17.5 Artillery Damage
When an artillery strike occurs, determine the levels of damage in and near the impact hex by referring to the Impact Diagram for the type of artillery actually fired. Each diagram shows the level of damage incurred in the impact hex and in the hexes surrounding the impact hex: D (destroyed), H (heavy damage) or L (light damage).
- For every hex containing a man within three hexes of the impact hex, locate the corresponding hex on the appropriate Impact Diagram to find the level of damage incurred in that hex.
(17.51) Destroyed: All men in the hex are killed. If the hex contains a building or pillbox, the structure becomes rubble; place a Rubble marker in the hex. If the hex has no structure, a blast crater occurs: place a Crater marker.
(17.52) Heavy and Light Damage: Damage is resolved for each man as if hit by weapon fire. Roll the 10-sided die and consult the "light" or "heavy" line of the Artillery Damage Table.
- If rolling for a suppressed man subtract 2 from the die-roll.
- Apply damage modifiers for terrain as if for fire damage.
Example: Continuing the example from above: The US player has determined the impact hex and sees on the impact diagram that all men in the impact hex are killed, all those adjacent suffer heavy damage, and all within two hexes of the impact hex suffer light damage. There is a building in the impact hex (but no men) so the US player places a Rubble marker in the impact hex. There is a German man adjacent to the impact hex, and, unfortunately, a US man two hexes from the impact hex. For the German man the US player rolls a 9 on the Artillery Damage Table (which is reduced to 7 - the Germans in that zone suppressed themselves) which kills him. For the US man the US player rolls a 9 as well (the US men did not suppress themselves - although they should have) which incapacitates him.
17.6 Artillery Barrage
If the player designated as "the attacker" in a scenario (19) purchases heavy artillery support, he has the option to conduct a barrage during the enemy's deployment. If a barrage is declared, the defender may not stack any of his men in his initial deployment and may not conduct operational moves prior to the start of play (even if otherwise eligible). The scenario instructions may list additional barrage effects and limitations.
18. Defensive Preparations
The player designated as "the defender" in a scenario (19) may spend FPs to buy defensive preparations such as camouflage, entrenchments, barbed wire, minefields, and pillboxes. These are deployed with his forces at the beginning of a scenario and are represented by markers which are placed on the map.
- Defensive preparations may be placed anywhere in the area specified by the scenario deployment instructions except building or water hexes, and only one defensive preparation may occupy a given hex.
18.1 Camouflage
Camouflage markers are placed in hexes at the beginning of a scenario, and may not be moved. Men pay no extra APs to enter a camouflaged hex and defending men in a hex with a camouflage marker are always considered camouflaged.
Camouflage has the following effects:
- An open hex with a camouflage marker is considered covered; a covered hex with camouflage is considered protected; a protected hex remains protected.
- The hit chance against a camouflaged hex is reduced by 1, in addition to other modifiers.
- Camouflage does not block LOS.
- Soldiers belonging to the player designated as the attacker in a scenario receive no benefits from camouflage.
18.2 Entrenchments
Entrenchment markers are placed on the map during deployment and may not be moved. Men pay no extra APs to enter entrenchments and a man in a hex with an Entrench marker is always considered inside the entrenchment.
Entrenchments have the following effects:
- An open hex with an entrenchment is considered covered terrain; they have no additional effect upon covered and protected terrain.
- The hit chance and damage roll against targets in entrenchments are modified (-1 to the hit chance and -2 to damage rolls) in addition to other modifiers for the hex (including suppression).
- An entrenchment does not block LOS.
- The benefits of entrenchments are received by soldiers of both attacking and defending players.
18.3 Wire
A wire marker is placed on the map at the beginning of a scenario and represents barbed wire laid across three hexes: the hex the marker occupies and the two hexes the arrows on the marker point toward. Wire markers stay in place on the map until removed by remove wire maintenance actions.
(18.31) Placing Wire: The defensive player places his wire markers on the map during deployment for a scenario. He orients the marker to show which three hexes the wire occupies by pointing the two arrows on the marker toward hexes adjacent to the marker's hex.
- Once placed, a Wire marker's facing may not be changed.
(18.32) Removing Wire: A wire marker is removed from the map if men perform remove wire maintenance actions in all three hexes covered by the wire marker.
- All three remove wire actions need not be performed in the same Action Phase, but until all three have been performed the effects of the wire continue to apply in all three hexes. When a man performs the remove wire action, the owning player should note on his squad sheet the hex in which it was performed, thus keeping track of when to remove the marker.
- If engineers perform the remove wire action in two of a wire marker's three hexes, the wire marker is removed.
(18.33) Wire Effects: Wire affects movement actions only; it has no effect upon other actions. The three hexes covered by a wire marker have the following effects upon friendly and enemy movement:
- A man must expend 3 APs to enter a wire hex and may move no further in that Action Phase (he may perform non-movement actions, however, if he has APs remaining).
- A man must expend 1 AP to leave a wire hex, in addition to the normal cost to enter the adjacent hex.
18.4 Minefields
Minefields bought by the defender are deployed at the beginning of a scenario secretly: they are not actually placed on the map, but their locations are noted on the owning player's squad sheet. Once a minefield is assigned to a hex it may not be moved. A Minefield marker is actually placed on the map during play when "revealed" to the enemy player.
- Minefields have no effect upon LOS or fire.
(18.41) Revealing Minefields: A minefield's position is revealed when an enemy man enters the hex containing the minefield. When this occurs for the first time the enemy player's move is interrupted by the following procedure:
Minefield Revelation Procedure:
- The reactive (defending) player announces the presence of the minefield and places a minefield marker in the hex.
- The active player makes an alertness roll with the 10-sided die:
- If the result is less than or equal to the highest initiative rating in the moving group, the minefield was noticed before they entered the hex and they are placed back into the hex from which they entered. The APs spent to enter the hex are still spent.
- If the result is higher than the highest initiative rating in the group, the men enter the minefield and one man in the group (defender's choice) undergoes a minefield attack; the other men enter the hex unharmed.
(18.42) Engineers and Minefields: If an engineer enters a hex adjacent to a hidden enemy minefield, the minefield is automatically revealed.
- If the defending player fails to announce the presence of a minefield when an enemy engineer comes adjacent or when an enemy man attempts to enter the hex, the minefield is lost; it may not be announced later.
(18.43) Minefield Attack: A man that undergoes a minefield attack immediately suffers grenade damage as if indoors. Roll the 10-sided die and refer to the damage "indoors" line of the Grenade Weapon Table.
(18.44) Revealed Minefield Entry: A man may enter a revealed enemy minefield only if his current risk level is wary or higher.
- A man must expend 2 APs to enter a revealed enemy minefield, and may move no further that Action Phase (he may, however, perform non-movement actions if he has APs remaining).
- For each man that enters a revealed enemy minefield, the active player rolls the 10-sided die: if the result is 9 or 10, the man undergoes a minefield attack.
(18.45) Friendly Minefields: A friendly man may enter a revealed or hidden friendly minefield with no danger, but must expend 2 additional APs to do so and may move no farther that Action Phase.
18.5 Pillboxes
Pillboxes may be bought by the defending player and placed on the map during deployment; once placed they may not be moved.
(18.51) Entering a Pillbox: Any man that enters a pillbox hex is considered to be inside the pillbox.
- Up to five men may occupy a pillbox.
- A man may not enter an enemy-occupied pillbox unless all enemy men inside are disabled.
- A man in a pillbox can see in all directions.
(18.52) Pillbox Effects: A pillbox cancels the effects of all other terrain in the hex, except hexside terrain.
- A man inside a pillbox may conduct aimed or sustained fire if his risk level is wary or better; and his initiative rating is increased by 2 when attempting reaction fire.
- Men inside pillboxes are always spotted; the active player never has to spot to fire at a pillbox.
- Like buildings, a pillbox blocks LOS and is protected terrain.
- Fire against men in a pillbox is modified according to the Terrain and Fire Summary.
- A grenade or satchel charge throw at a pillbox is modified according to the Grenade/Satchel Charge Modifiers chart.
19. Playing the Scenarios
Each scenario is a basic situation capable of developing into a different combat encounter each time it is played. The players are assigned roles of attacker and defender. The defender is given a number of Force Points (FPs) which he may expend to buy the forces he feels he needs to win. The attacker is given a choice of what mission he wants to attempt and assigned a number of FPs and a set of victory conditions according to his choice. The defender may not know what the attacker's goal is until the attacker announces that one player or the other has fulfilled his victory conditions or until a draw occurs.
Scenario Set-up Sequence
Choose a scenario. Read the entire scenario briefing! (This is very important; there are many unknowns during play, but the information in the briefing is for both players to read.) Decide who will control the US and German forces, then conduct the following steps to prepare for play:
- Set-up: Set up the maps as indicated, and give each player the appropriate squad sheet (make photocopies of the original - you have our permission).
- Mission Selection: The attacker secretly chooses a mission and writes down his choice in the space provided on the squad sheet; his choice determines how many force points he is allowed to spend; the defender's force points do not vary.
- Buy Forces: Both players secretly expend their FPs to buy squads, extra weapons and equipment, intelligence - in short, any items listed on the Force Costs Chart.
- Each player notes his expenditures on his squad sheet.
- Men and equipment are not placed on the map at this time; secretly set your purchased forces aside for the moment.
- Intelligence Levels: The players announce their intelligence expenditures and refer to the scenario's Intelligence Summary. The difference between the players' intelligence expenditures determines the order and method of deployment, who has the advantage at the game's beginning, who (if anyone) gets to conduct operational moves before the first Command Cycle, and other intelligence benefits.
- Deployment: The players place their men and equipment on the map in the sequence and manner described in the deployment section as determined by their intelligence expenditures. If the attacker has purchased heavy artillery support he may declare a barrage at this time to force a scattered defensive deployment (17.6).
- Operational Moves: If the scenario instructions or intelligence levels permit, players may conduct operational moves now.
- Start Command Cycles: The first Command Cycle begins. The player with the advantage commits a command chit first in the initial Command Phase.
19.1 Attacker Missions
Each scenario has two or three mission choices for the attacking player. Each mission grants a different number of FPs and a different set of victory conditions - the more FPs granted, the more difficult the victory conditions. After both players have read the scenario materials, the attacker secretly chooses a mission and notes his choice on his squad sheet.
(19.11) Objectives: Some missions give the attacker additional choices concerning the mission's objectives. For example, in the Vire Bridges scenario (20) if the attacker chooses "Raid" as his mission he then must choose whether his objective is destruction of the munitions depot or the division HQ facility.
19.2 Purchasing Squads
A player must expend at least half of his FPs on squads (if he has 30 FPs, for example, at least 15 must be spent to buy squads). A player may purchase any number of squads as long as he has the FPs to pay for them and the squads are available in the counter mix. All costs are listed on the Force Costs Chart.
(19.21) Depleted Squads: A player may buy squads that start a scenario with combat losses. These are called depleted squads and cost significantly less than fully-equipped ones.
- To determine a depleted squad's losses, put all men of the appropriate squad into a cup (or other such receptacle) and blindly draw men out, one at a time, until you've drawn five men, or the sum of the drawn men's initiative ratings is at least 5 (whichever comes first). The men remaining in the cup constitute the depleted squad; the drawn men are lost.
- No more than one of the squad's leaders may be lost in this way. If both leaders are drawn out of the cup, replace the second one drawn and continue drawing.
- The command chit of any lost leader functions as a second independent chit for the squad.
- If a depleted squad has only its assistant squad leader, that leader is not restricted by 6.22; the assistant leader has his printed command rating.
- Men lost to depletion do not count towards catastrophic loss (6.28).
Example: A player drawing for losses in a depleted squad draws a leader with 4, then a man with 0, then another leader with 5 (which he places back in the cup), then a man with 2. The last man drawn made the total initiative 6 so he stops drawing; the men left in the cup constitute the depleted squad and the lost leader's command chit will function as an independent chit during the scenario.
19.3 Reinforcements
(19.31) Reinforcement Squads: If the scenario instructions allow, you may buy reinforcement or depleted reinforcement squads for the reduced price listed on the Force Costs Chart; you may also buy reinforcement heavy weapons soldiers for the price listed on the chart.
- You may buy any number of reinforcement squads and/or heavy weapons soldiers, but expenditures for reinforcements may not exceed expenditures for initially-deployed squads.
- FPs spent on reinforcement squads do count toward the required half of a player's FPs that must be spent to buy squads.
(19.32) Entry of Reinforcements: When reinforcement events are rolled (events A or B; see the scenario sections entitled Events), roll the 6-sided die once for each reinforcing squad and place the squad's command chits in the numbered space on the Command Track corresponding to the die result; if the result is 6 place the chits in the start space.
- Thereafter, command chits of the reinforcing squads may be committed. The men enter the map by performing movement actions and paying APs for the map edge hex onto which they enter.
- For purposes of risk level restrictions all map-edge hexes are considered to be in friendly sight of reinforcing men.
- Reinforcements may not perform combat, maintenance, or suppression actions until they are actually on the map.
(19.33) Reinforcement Command: When reinforcements enter the map they may be given either a leader or independent order. Reinforcements may enter singly or in groups at the option of the owning player.
In some cases, part of a reinforcing squad will be on-map and part off-map; in this case:
- As long as a leader remains off-map he may give orders only to men that are also off-map.
- If a leader is in a map-edge hex he may give orders to men on the map that are in command (6.21), and those that are still off map. In this case, off-map men that receive an order from an on-map leader must enter the map in a hex that is in the leader's command.
- If a leader is on-map but not in a map-edge hex, he may give orders only to men on-map that are in command.
- Assistant squad leaders that have not yet entered the map always have their printed command rating.
- If reinforcements include only heavy weapons soldiers, they must receive an independent order from any independent chit in play to enter the map. Once on the map, of course, they may receive orders normally.
(19.34) Delaying Reinforcements: Reinforcements that enter the map during the Command Cycle in which the reinforcement event occurs must enter the map in the zone(s) specified by the scenario instructions. If they are held off map until subsequent Command Cycles, they may enter in any map-edge zone adjacent to those specified.
- You may not delay some members of a squad and not others. If any member of a reinforcing squad enters the map, the squad as a whole is required to enter in that zone.
19.4 Other Force Point Expenditures
(19.41) Intelligence: You may spend up to half of your FPs on intelligence. After FPs are spent, and before deployment, both players reveal how many points they spent for intelligence. The lesser expenditure is subtracted from the greater to determine the intelligence difference. (The US player spends 5 points on intelligence, for example, and the German spends 8. The intelligence difference is a German 3.)
- The intelligence difference determines the order and manner of deployment and gives the player who spent more some initial advantages (see individual scenario instructions).
(19.42) Artillery Support: You may spend FPs to purchase Light or Heavy artillery support.
- Players with artillery support receive a radio and may call for strikes during play (17.2).
- Players with heavy artillery support may conduct a barrage during deployment (17.6).
(19.43) Defensive Preparations: The defender (only) may spend FPs to buy defensive preparations - camouflage, barbed wire, entrenchments, and so on. All defensive preparations are placed on the map during deployment, except minefields, whose locations are noted on the player's squad sheet.
(19.44) Extra Weapons and Ammo: Either player may expend FPs for extra weapons (satchel charges, grenades, pistols, and extra ammo clips) which may be distributed to his men as the player sees fit. Make sure to mark your squad sheet carefully to indicate who is carrying what (19.5).
(19.45) Heavy Weapons Soldiers: Both players may spend FPs to buy men and teams (those marked with an "H" ID code) equipped with heavy weapons (flamethrower, HMGs or MMGs, or engineers). You may not buy these soldiers as a squad; you must buy them individually.
(19.46) Platoon Leaders: If you spend at least 3 FPs on Heavy Weapons soldiers, you may buy your platoon leader for 5 FPs or a reinforcement platoon leader for 2 FPs.
- A platoon leader comes equipped with two ammo clips for the weapon he carries.
- Note that each side has only one platoon leader.
19.5 Filling in the Squad Sheet
At the beginning of a game of Soldiers each player should take a copy of the appropriate squad sheet. The squad sheets are used to record the forces a player buys for the scenario and to update the status of the forces during play. Use a pencil to mark the squad sheet (so you can change it easily); keep it secret from your opponent until the end of the scenario. Each player notes the following information on his squad sheet at the beginning of each scenario.
(19.51) Scenario Situation: Note the name of the scenario. If you are the attacker note the mission you choose to attempt. If the mission has more than one objective, note the objective.
(19.52) Force Point Expenditures: Note the total number of force points you have to spend and the following expenditures:
- The number of points spent on intelligence.
- The level of artillery support purchased (none, light, or heavy).
(19.53) Squad Composition: Each squad sheet has rows of boxes for each squad in the game. Each box corresponds to a man in the squad and has spaces for marking the equipment the man is carrying. Note the following for each squad purchased:
Squad ID: Each squad row on the Squad Sheet has a small box at the extreme left; color in this box if you purchase the squad fully-equipped.
- If you purchase a squad depleted, put an "X" in the box and cross out the boxes corresponding to the lost men.
- If the squad is a fully-equipped reinforcement put an "R" in the box.
- If a depleted reinforcement put an "R" and an "X" in the box.
Ammo: Mark the appropriate number of ammo clips each man is carrying in his ammo space. Note that ammo comes in types according to the weapon it is for. At the start of a scenario each man is assumed to be carrying ammo only for the weapon he carries. If the man exchanges equipment, taking ammo of a different type, or is carrying a pistol, you must indicate how much of each type he is carrying.
- If the squad is fully-equipped, each man is automatically carrying two clips for the weapon marked on his counter.
- If the squad is depleted, each man comes equipped with only one.
- You may, of course, buy any number of extra ammo clips (within the restriction of 19.2) and distribute them to your men as you see fit. Just mark the appropriate number in each man's ammo space.
Grenades: Note any grenades each man is carrying. The grenade space is divided into two spaces, one for explosive (the left hand box) and the other for smoke grenades. Mark the appropriate number of each.
Pistols: If a man is carrying a pistol, indicate this (and how much ammo he has for the pistol) in one of the blank spaces provided.
Radio: If you purchased artillery support, assign the radio to one man by writing it into one of the blank spaces provided.
Satchel Charges: If a man is carrying a satchel charge mark this into one of the blank spaces.
(19.54) Heavy Weapons Teams: The squad sheet also has a row for heavy weapons soldiers. These boxes are identical to normal squad boxes and are filled in similarly. All heavy weapons soldiers come equipped with 2 ammo clips for the weapons they carry except machinegun teams:
- If an MMG or HMG was purchased assign a total of 3 ammo clips for the weapon, distributed among the crewmembers as you like. (You may, of course, buy extra ammo for the HMG or MMG).
(19.55) Hidden Equipment: Note the hex locations of all HMGs, MMGs, and minefields you purchased in the "Hidden Equipment" section of the squad sheet.
19.6 Updating the Squad Sheet
During play the players note all loss, gain, and exchange of equipment that occurs.
(19.61) Killed Men: When a man is killed, we suggest you simply write the hex number the dead man occupies in his box of the squad sheet. In this way you can remove the dead from the map, keeping the map as uncluttered as possible. If you do this you may want to note the weapon he was carrying so that it may be picked up later in the game. Also, when an enemy man enters the hex you must announce that the dead man is there and what he is carrying. (Of course, you may leave the dead on the map beneath Killed markers.)
(19.62) Ammo and Grenade Expenditure: Each time a man expends a clip of ammo or throws a grenade, you must indicate this on your squad sheet.
(19.63) Artillery Calls: Each time you make an artillery call write the number of the target hex on the first blank line of the "Artillery Calls" section of the squad sheet.
- If you make a double call mark a "x2" beside the hex number.
- When an artillery strike is resolved or cancelled, cross the hex number off.
(19.64) Etiquette Rule: At the end of play the players may examine each other's squad sheets to insure honesty.
19.7 Time and Victory Conditions
Time: Some scenarios last a set number of Command Cycles; others last an indefinite number. After each Command Cycle advance the Time marker one space on the Time Track and check the scenario instructions to see if any special conditions occur at the time indicated on the time track.
Victory Conditions: There is a different set of victory conditions for each side depending on which mission the attacker chooses. The terms below are used in the scenario victory conditions:
- Force: In every case, force refers to the sum total of a side's men that have actually entered the map at any time during the game.
Example: The US player will win at the end of the third Command Cycle if at least 50% of the German force is disabled. During the third Command Cycle, the US player disables 75% of the Germans on the map. But, before the end of the Cycle, Second Event A occurs, which brings a fresh German squad onto the map. So, when the Command Cycle ends, the German now has twice as many men to consider when determining what percentage of his force has been disabled.
-
Had the German been unable to get enough of his reinforcement men onto the map before the Command Cycle ended, the US player may still have won.
-
Had Second Event A not occurred before the end of the cycle the US player would have won.
-
Controlling Buildings: Unless otherwise indicated in the scenario instructions, control of a building is defined as follows:
- If one player has at least one able man in a building and the other side does not, the occupying side controls it.
- If both players have able men in a building the side with the greater number of able men in the building controls it.
- If neither side has at least one able man in a building, the side that last had an able man there controls it.
- If neither side has able men in a building nor ever has, or both sides have equal numbers of able men in the building, neither side controls it.
-
Victory: In most cases victory occurs at the end of a Command Cycle. In others, however, scenario instructions indicate that victory occurs the moment a given objective is achieved. Refer to the instructions for specifics.
Developer's Note: Since the attacker chooses his mission and objective secretly, it is possible that only he will know the victory conditions for both players. It is, therefore, the attacker's responsibility to keep an eye on the victory conditions and announce if either player has achieved victory or if the scenario has been played to a draw. Obviously this requires a certain amount of trust between the players. We suggest not playing this game with someone you don't trust.
"... As long as we manipulated our own weapons individually and faced weapons manipulated individually by the enemy, we could feel the confidence of self-courage and heroic determination."
THE SCENARIOS
(Map set-up diagrams in the scenarios are illustrations and are not reproduced.)
20. The Vire Bridges
Normandy, June 12, 1944
Allied forces have landed; the front has stabilized a few miles in from the coast. Behind the lines in the village of Launay, a German garrison guards bridges across the Vire, a munitions depot, and a division headquarters. It's been quiet in this sector in recent days; a rumored renewal of the US offensive has not materialized.
20.1 Map Set-Up
Maps C and D are arranged as shown. The water on map C is the Vire; the water on map D is a stream.
Battle Condition: Clear.
- If the US player is conducting the Commando Assault mission, he has the option of declaring night conditions after both sides have deployed and prior to any Operational moves or Command Cycles. (He thus reveals his intentions in trade for the cover of darkness.)
20.2 Defender Force Points
The German player is the defender and receives 30 Force Points.
20.3 Missions and Victory Conditions
The US player is the attacker and has a choice of three missions:
Raid: 36 Force Points
Your men have infiltrated the front under the confusion of an artillery barrage and must disrupt German communications and withdraw with minimum loss.
Objective: Destroy either the division HQ (1 hex building in zone 6 on map C) or the munitions depot (2-hex building in zone 1 of map C). Note your choice secretly on your Squad sheet. The target may be destroyed by a satchel charge exploding in any hex of the target or by an artillery impact occurring in any hex of the target.
Suggestion: Purchase engineers and satchel charges, and/or artillery support.
Special Rules: The US player may not purchase reinforcements. US men may move off the map from the north edge of map D after their objective is destroyed or after three Command Cycles, whichever occurs first.
US Victory: The US player's chosen target is destroyed and more than half of his force moves off the north edge of map D by the end of the fifth Command Cycle.
German Victory: The target is not destroyed and more than 25% of the US force is killed or captured at the end of any Command Cycle.
Draw: Can occur two ways:
- The target is destroyed but at least 50% of the US force is killed or captured, while all other US men have moved off the north edge of map D. (An incapacitated man is considered killed if he is still on the map when there are no other able US men on the map.)
- The target is not destroyed but at least 75% of the men in the US force move off the north edge of map D.
Advance Patrol: 40 Force Points
The US offensive has resumed! Your men have advanced through a gap in the thin German front.
Objectives: Reconnoiter Launay and drive all Germans from the north side of the Vire. Your advance is to stop only if you encounter "overwhelming enemy resistance."
Special Rule: US men may move off the map from the north edge of map D after three Command Cycles.
US Victory: At the end of any Command Cycle, both bridges are in sight of an able US man and no able Germans are on the bridges or north of the river. Furthermore, at least 50% half of the US force must be on the map and able. [sic - printed this way]
German Victory: Can occur two ways:
- At least 50% the US force is disabled or captured and at least 25% of the German force is still able at the end of any Command Cycle. [sic - printed this way]
- There are no able US men on the map and the number of disabled US men exceeds the number of disabled German men at the end of any Command Cycle.
Draw: More than half of the US force has moved off the north edge of map D and the number of disabled German men at least matches the number of disabled US men on the map.
Commando Assault: 45 Force Points
In concert with the renewed US offensive, your men have infiltrated through the confusion of the front lines.
Objective: Seize and hold both bridges until relieved, so that advancing US armor can sweep through the village.
Special Rules: The US player may not purchase reinforcements nor move men off the map.
US Victory: At the end of any Command Cycle before the fifth, no German man can see either bridge and US men are in or were the last to pass through both bridges; at least 25% of the US force must still be able.
German Victory: The US has not achieved victory at the end of the fourth Command Cycle, or more than 75% of the US force is disabled at the end of any Command Cycle.
No draw possible.
20.4 Intelligence Summary
US 6+
- The German deploys first revealing hidden equipment (except minefields).
- The German uses "scattered" deployment.
- The US may conduct operational moves before the first Command Cycle.
- The US starts with the advantage.
US 3-5
- Deploy simultaneously.
- The German uses "scattered" deployment.
- The US may conduct operational moves before the first Command Cycle.
- The US starts with the advantage.
US 0-2
- Deploy simultaneously.
- The German uses "free" deployment.
- The US may conduct operational moves before the first Command Cycle.
- The US starts with the advantage.
German 1-3
- Deploy simultaneously.
- The German uses "free" deployment.
- No operational moves before the first Command Cycle.
- The US starts with the advantage.
German 4-6
- Deploy simultaneously.
- The German uses "prepared" deployment.
- No operational moves before the first Command Cycle.
- The German starts with the advantage.
German 7+
- The US deploys first.
- The German uses "prepared" deployment.
- The German may conduct operational moves before the first Command Cycle.
- The German starts with the advantage.
20.5 Deployment
Men may start stacked within the following deployment restrictions. If the players are deploying simultaneously, place a screen across the two maps until their deployments are complete. If one player is deploying first, he deploys openly, then the other player deploys openly.
German Deployment: The German player sets up his men according to one of the following deployment restrictions, whichever is called for in the Intelligence Summary:
- Scattered: In at least 7 zones on map C. At least one man must be placed in each zone.
- Free: In any zones on map C.
- Prepared: In any zones on map C and/or in any of zones 3, 5 and 9 of map D.
US Deployment: The US player sets up his men in zone 7 of map D.
20.6 Events
First Event A: Munitions Catch Fire. If any target within one hex of the munitions depot (C/1206 and 1306) was fired upon in the immediately previous Action Phase, a series of explosions sets the building ablaze. All men in the building are killed. Both hexes of the building burn for the remainder of the scenario and may not be entered.
- If the US player chose the munitions depot as his objective in the Raid mission, it is considered destroyed for victory purposes.
First Event B: Unusual Event. Roll on the Unusual Event Table.
Second Event A: German Reinforcements. All German reinforcements are now eligible to enter play from any hexes along the south edge of map C.
Second Event B: US Reinforcements. All US reinforcements are now eligible to enter play from any hexes along the north edge of map D.
Third Event A or B: Dusk or Dawn. The Battle condition becomes Mist.
21. Hedgerow Assault
Normandy, June 20, 1944
American forces are battling Germans yard by yard in the Bocage of Normandy. On this typical day, German troops are holding out in a patch of farm land surrounding a road the Allies dearly need.
21.1 Map Set-Up
Arrange map D as shown (zone 7 is in the northeast corner).
- The water in zone 1 is an impassable river.
Battle Condition: Clear
21.2 Defender Force Points
The German Player is the defender and receives 25 Force Points.
21.3 Missions and Victory Conditions
The US player is the attacker and has a choice of three missions:
Limited Advance: 30 Force Points
In support of a large US offensive to the east, your men are to engage the enemy, disrupt their position, and pin them down.
Objective: Inflict German casualties; take and hold the building in zone 5 if possible.
Special Rule: The US player may not purchase reinforcements.
US Victory: Can occur three ways:
- At the end of the second Command Cycle, the building in zone 5 is occupied by two or more able US men and no able German men are within 3 hexes of the building.
- At the end of any Command Cycle at least 50% of the German force is disabled or captured.
- The German fails to achieve victory or a draw by the end of the Command Cycle following the one in which second Event B occurs.
German Victory: At the end of any Command Cycle, at least 50% of the US force is disabled.
Draw: More than 50% of the German force exits the map. German men may exit the map only after Second Event B occurs and only from a map-edge hex in zone 3 south of the small road.
Infiltration: 35 Force Points
Your men are to push through enemy lines and link up with French Resistance fighters.
Objective: Get a team of your men through the farms and off the map area, exiting either zone 3 or 2. Note your choice of exit zones secretly on your squad sheet before the first Command Cycle begins.
US Victory: At least five US men exit from the selected area, including at least one US leader and one automatic weapon with ammo.
German Victory: The US player has not achieved his victory condition after four Command Cycles.
No draw possible.
Full Attack: 40 Force Points
As part of the main US offensive, your men must force the Germans from the area.
Objective: Gain undisputed control of the road from D/1010 to D/2515 and the buildings in zone 5 and 3.
US Victory: Can occur two ways:
- At the end of any Command Cycle before the fifth, no able German men are in zones 4, 5, 6, 7, 8, or 9 and able US men occupy the building in zone 5 and have the building in zone 3 in sight.
- At the end of any Command Cycle before the fifth, at least 75% of the German force is disabled or captured and no able German can see the road.
German Victory: Can occur two ways:
- At the end of any Command Cycle at least half the US force is disabled or captured.
- The US has not won by the end of the fourth Command Cycle.
21.4 Intelligence Summary
US 3+
- The German deploys first, revealing hidden equipment (except minefields).
- The German uses "normal" deployment.
- The US starts with the advantage.
US 0-2
- Deploy simultaneously.
- The German uses "normal" deployment.
- The US starts with the advantage.
German 1-3
- Deploy simultaneously.
- The German uses "normal" deployment.
- The German starts with the advantage.
German 4+
- Deploy simultaneously.
- The German uses "ambush" deployment.
- The German starts with the advantage.
21.5 Deployment
Men may start stacked within the following deployment restrictions. If the players are deploying simultaneously, place a screen across the two maps until deployments are complete. If one player is deploying first, he deploys openly, then the other player deploys openly.
German Deployment: The German player sets up his men according to one of the following deployment restrictions, whichever is called for in the Intelligence Summary.
- Normal: In any of zones 2, 3, 4, and 5.
- Ambush: In any of zones 2, 3, 4, 5, and 9, and the building in zone 6.
US Deployment: In zone 7.
21.6 Events
First Event A: Early German Reinforcements. If the German player currently has the advantage, all German reinforcements are now eligible to enter play from any map-edge hexes in zone 3 south of the small road.
First Event B: The Wind Changes. If the wind direction has been determined already, roll the 6-sided die again and adjust the marker accordingly. If any smoke is on the map it dissipates.
Second Event A: German Reinforcements. If German reinforcements have not yet entered, all German reinforcements are now eligible to enter play from any map-edge hexes in zone 3 south of the small road.
Second Event B:
- If the US player chose Limited Advance, a strong US offensive to the east (across the river) threatens the German position. German men may now begin withdrawing from a map-edge hex in zone 3, south of the small road.
- If the US player chose Infiltration or Full Attack, all US reinforcements are now eligible to enter play from any map-edge hex in zone 7.
22. Street Fighting in Grave
Holland, September 17, 1944
As part of Operation Market-Garden, elements of the 82nd Airborne Division have landed east of the Dutch town of Grave. In the confusion following the airdrop, commanders on both sides are anxious to get control of the Maas River Bridge. Lead elements of the US forces approach from the north-east while German patrols come from the south, across the bridge. They meet in a surprise firefight.
22.1 Map Set-Up
Maps B and C are arranged as shown. The water on map C is the Maas River; that on map B is a pond and stream.
Battle Condition: Clear
22.2 Special Rules
Both players are attackers. Play continues until one player or the other achieves his victory objectives. The first player to do so wins, regardless of how the other player is doing.
- Neither player may buy intelligence, artillery support, or defensive preparations.
- Both players may conduct operational moves prior to the first Command Cycle - US player first.
- Make an advantage check at the beginning of the scenario to see who starts with the advantage (see Event Summary).
22.3 German Missions and Victory Conditions
The German has a choice of two missions.
Determined Assault: 50 Force Points
Your men are to deny the enemy the bridge by taking control of the surrounding town at any cost. Occupation of buildings in the northern approaches to the town is essential.
German Victory: At the end of any Command Cycle after the first, no able US men occupy any buildings on map C.
Infiltration: 40 Force Points
German high command wants a team of men to scout the rear areas of the paratroopers before they organize.
Objectives: Infiltrate past the US patrols to the north of the town, and keep the enemy from crossing the Maas bridge.
German Victory: Exit at least 5 men off the north edge of map B. At least one of the men exited must be a leader.
- The German wins the moment his fifth man exits.
22.4 US Missions and Victory Conditions
The US player has a choice of two missions:
Advance Patrol: 50 Force Points
Your men are to establish a presence in the town and get a close look at the bridges, in preparation for future operations.
US Victory: At the end of any Command Cycle, control one building in at least three zones of map C.
Defensive Patrol: 40 Force Points
Your men are to set up a defensive cordon in the town that will prevent the enemy from advancing on the main US force.
US Victory: At the end of any Command Cycle, occupy, or be the last to have occupied, one building in at least three zones of map C.
Automatic US Victory: Regardless of the US mission selected, the US player wins if at least three able US men are south of the river at the end of any Command Cycle.
22.5 Deployment
Both players deploy their men simultaneously; place a screen across the two maps until deployment is complete. Men may start stacked.
German Deployment: In any hexes in zone 4 on map C.
US Deployment: In any hexes in zone 9 on map B.
22.6 Events
First Event A: Maas Bridges Wired for Demolition. German high command has ordered both bridges (in zone 4 and 7 of map C) destroyed. At the end of the current Command Cycle, roll the 6-sided die and apply one of the following results:
- 1-2: Both demolition attempts fail; nothing happens.
- 3: The bridge in C/1413 is destroyed.
- 4-5: The bridge in C/1508 is destroyed.
- 6: Both bridges are destroyed.
If Bridge Demolition occurs, all men and equipment in the bridge hex are removed from the map. The hex may not be entered for the rest of the scenario.
First Event B. If First Event A has not yet occurred, consider bridge C/1508 not to be wired for demolition; when Event A does occur for the first time, this bridge cannot be destroyed.
- If Event A has already occurred, ignore this event.
Second Event A: German Reinforcements. All German reinforcements are now eligible to enter play from either road hex leading off the map in zone 4 or 7 of map C.
Second Event B: US Reinforcements. All US reinforcements are now eligible to enter play in zone 9 on map B.
23. Pre-Dawn Pillbox Assault
The Lorraine, November, 1944
The GIs are slogging forward yard-by-yard on the German frontier. North of the French border city of Metz, where the German line is heavily fortified but undermanned, US squads are approaching a German pillbox at night.
23.1 Map Set-Up
Arrange map B as shown (zone 9 is the northeast corner).
- The building in zone 6 is a German pillbox; place a Pillbox marker there.
Battle Condition: Night.
- Remember that men can see no further than 6 hexes at night.
23.2 Defender Force Points
The German Player is the defender and receives 27 Force Points.
- At least 5 FPs must be spent on defensive preparations.
- The pillbox in zone 6 costs no FPs; it's "free."
23.3 Missions and Victory Conditions
The US player is the attacker and has a choice of three missions:
Frontal Assault: 35 Force Points
Your men are to disrupt the German line of defense in preparation for an upcoming offensive.
Objective: Take the pillbox in zone 6 or all three hexes of the building in zone 3. Note your choice secretly on your squad sheet.
US Victory: Can occur two ways:
- At the end of any Command Cycle, every hex of the chosen objective is occupied by an able US man and no hexes of the objective are occupied by an able German man.
- At the end of any Command Cycle at least 75% of the German force is disabled or captured.
German Victory: Can occur two ways:
- At the end of any Command Cycle, at least 75% of the US force is disabled or captured.
- The US player has not achieved victory after three Command Cycles.
Note: If each player achieves one of his victory conditions, the German player wins.
No draw possible.
Two-Pronged Attack: 35 Force Points
Your men are to destroy the German line of defense, with the support of a coordinated advance on your flank (see First Event B).
Objective: Take the pillbox in zone 6 and all three hexes of the building in zone 3.
Suggestion: The US player may want to purchase reinforcements; they enter play in an advantageous location.
US Victory: At the end of any Command Cycle, the pillbox in zone 6 and every hex of the building in zone 3 is occupied by an able US man and no hexes of either objective is occupied by able German men.
German Victory: Can occur two ways:
- At the end of any Command Cycle, at least 75% of the US force is disabled or captured.
- The US player has not achieved victory at the end of three Command Cycles.
Note: If each player achieves one of his victory conditions, the German player wins.
No draw possible.
Raid: 30 Force Points
The OSS wants German personnel from this sector for questioning concerning a rumored German offensive.
Objective: Capture two German men or one German leader and move them off the map in zone 2.
Special Rules: The US player may not purchase reinforcements. US men and captured German men may move off the map from any map-edge hex in zone 2, but only after the prisoner(s) required for victory have been captured or after two Command Cycles.
US Victory: Can occur in two ways:
- Move two captured German men or one captured German leader and at least 50% of the US force off the map as described above.
- If 75% of the German force is disabled, the remainder is considered to surrender (taken prisoner) automatically and the US player wins immediately.
German Victory: Can occur two ways:
- At the end of any Command Cycle, more than 50% of the US force is disabled or captured.
- The US player has not achieved victory or a draw after four Command Cycles.
Draw: Occurs if the US player moves at least 50% of his force off the map and has not won. US men may not exit until after the second Command Cycle if no Germans are captured.
23.4 Intelligence Summary
US 4+
- The German deploys first, revealing hidden equipment (except minefields).
- No operational moves before the first Command Cycle.
- The US starts with the advantage.
US 1-3
- The German deploys first, revealing hidden equipment (except minefields).
- No operational moves before the first Command Cycle.
- The German starts with the advantage.
German 0-2
- Deploy simultaneously.
- The German may conduct operational moves before the first Command Cycle.
- The German starts with the advantage.
German 3+
- Deploy simultaneously.
- The German may conduct operational moves before the first Command Cycle.
- The German starts with the advantage.
23.5 Deployment
Men may start stacked within the following deployment restrictions. If the players are deploying simultaneously, place a screen across the map until deployments are complete. If one player is deploying first, he does so openly, then the other player deploys openly.
German Deployment: In any hexes in zones 3, 6, 7, 8, or 9. The German player may also place minefields and wire (but not men) in zones 1, 4, and 5.
US Deployment: In zone 2.
23.6 Events
First Event A: Advantage Swings? If the intelligence difference was 0 or in the German favor, the German gains the advantage immediately.
First Event B: Possible US Reinforcements. If the intelligence level was 0 or in the US player's favor, all US reinforcements are now eligible to enter play.
- In the Frontal Assault, reinforcements enter from any map-edge hexes in zone 2.
- In the Two-Pronged Attack, reinforcements enter from any map-edge hexes in zone 3 or 5. All must enter in the same zone, selected by the US player when they enter.
Second Event A: German Reinforcements. All German reinforcements are now eligible to enter play from any map-edge hex in zone 7, 8, and/or 9.
Second Event B: US Reinforcements. If US reinforcements have not yet entered, they are now eligible to enter, following the restrictions listed in First Event B.
Third Event A or B: Dawn is breaking! Battle conditions change from Night to Mist.
24. The Beaufort Crossroads
Luxembourg, Dawn, December 16, 1944
At a US outpost in a quiet sector of the front, squads of the 12th Regiment, 4th Infantry Division awake to the sound of distant artillery. Just as they are setting up the day's watch on the Germans across a stream feeding the Our river, enemy troops pour over the frozen creek.
24.1 Map Set-Up
Maps A and B are arranged as shown. All water on both maps is frozen and considered open, clear terrain.
Battle Condition: Mist
24.2 Defender Force Points
The US player is the defender and receives 50 Force Points.
24.3 Missions and Victory Conditions
The German player is the attacker and has a choice of three missions:
Determined Assault: 60 Force Points
The Ardennes Offensive is underway! Your men are to destroy the enemy front and advance as far as possible with minimal regard for casualties.
Objective: Move men off the map through zone 3 on map B or zone 8 on map A. Note your choice of exit area secretly on your squad sheet.
German Victory: Exit 10 able men from the map edge area chosen for the mission. At least two of the men exited must be leaders, and one must have an LMG with ammo.
US Victory: Reduce the number of able German men to below 10 or prevent the German player from achieving victory for four Command Cycles.
Draw: Occurs if the US player exits at least 50% of his force from any map-edge hex in zones 3, 7, or 8 of map B before the German wins. No US men may exit the map before the third Command Cycle.
Limited Attack: 50 Force Points
In support of the major attacks of the Ardennes offensive getting underway elsewhere, your men are to disrupt US logistics.
Objective: Take and hold the crossroads on map B.
German Victory: Have at least three German men within five hexes of the crossroads hex on map B and no US men within 5 hexes of that hex at the end of any Command Cycle.
US Victory: Can occur two ways:
- Occupy, or be the last to have occupied, all building hexes at the end of the second or later Command Cycle. All buildings have already been US occupied at the start of the scenario.
- Prevent the German from achieving victory for four Command Cycles.
Draw: Same as Determined Assault.
Raid: 40 Force Points
The Ardennes Offensive has been delayed. In the meantime your men are to harass the enemy.
Objective: Reconnoiter US positions in the area and kill the enemy when possible.
German Victory: Have the cross roads hex and at least 5 building hexes (not buildings) in sight (not necessarily at the same time), then exit at least 10 German men from any map-edge hexes in zones 2 and 3 of map A before the end of the fourth Command Cycle. The exit requirement is reduced by one for each US man disabled. No German men may exit until the sight requirement has been met.
US Victory: Kill or capture at least 10 German men. Each man captured counts as two men killed; incapacitated Germans on the map are considered killed if no able Germans are on the map.
Draw: Occurs if no able Germans are on the map and neither player has achieved victory. This is possible only if the German player exits all his surviving men off the map but not enough to win.
24.4 Intelligence Summary
US 4+
- The German deploys first.
- The US uses "forward" deployment.
- No operational moves before the first Command Cycle.
- The US starts with the advantage.
US 1-3
- Deploy simultaneously.
- The US uses "forward" deployment.
- No operational moves prior to the first Command Cycle.
- The US starts with the advantage.
German 0-2
- Deploy simultaneously.
- The US uses "bivouacked" deployment.
- No operational moves before the first Command Cycle.
- The German starts with the advantage.
German 3-5
- Deploy simultaneously.
- The US uses "bivouacked" deployment.
- The German may conduct operational moves before the first Command Cycle.
- The German starts with the advantage.
German 6+
- The US deploys first, revealing all hidden equipment (except minefields).
- The US uses "bivouacked" deployment.
- The German may conduct operational moves before the first Command Cycle.
- The German starts with the advantage.
24.5 Deployment
Men may start stacked within the following deployment restrictions. If the players are deploying simultaneously, place a screen across the map until their deployments are complete. If one player is deploying first, he deploys openly, then the other player deploys openly.
German Deployment: In zones 2 and/or 3 of map A.
US Deployment: The US player sets up his men according to one of the following deployment restrictions, whichever is called for by the Intelligence Summary.
- Bivouacked: In any building or woods hexes in zones 3, 6, 7 and 9 on map B, and zone 8 on map A.
- If the German player conducts an artillery barrage (see 17.6), US men may also be placed in hexes adjacent to building or woods hexes (but not outside designated zones).
- If the US player purchases defensive preparations they may be placed in any of the above zones and zones 1, 4, and 5 on map B, and zones 4, 5, and 7 of map A; no men may be placed in these zones, however.
- Forward: In zones 4, 5, 7, 8 and 9 on map A, and anywhere on map B, except zone 2.
24.6 Events
First Event A: Wind Changes Direction. If the wind direction has been determined already, roll again on the scatter indicator and adjust the Wind marker accordingly; if there is any smoke on the map, it dissipates.
- If the wind direction has not yet been determined, ignore this event.
First Event B: Possible Early US Reinforcement. If the US used forward deployment, all US reinforcements are now eligible to enter any map-edge hexes in zones 3, 7, or 8 on map B.
Second Event A: German Reinforcements. All German reinforcements are now eligible to enter play from any map-edge hexes in zones 2 or 3 of map A.
Second Event B: US Reinforcements. If US reinforcements have not yet entered, all US are now eligible to enter play from any map-edge hexes in zones 3, 7, or 8 of map B.
25. Counterattack
Normandy, June 1944
So far the Germans have been content to allow the Americans a tenuous foothold in Normandy, but a gap in the US line has been uncovered and the order has come down to engage them in battle. In an attempt to regain control of a vital transportation network, the Germans are trying to drive through the gap to dislodge the American hold in this area of the bocage.
25.1 Map Set-Up
Use maps A, B, and D as shown.
- The waterway on maps A and B is a stream. That on map B is also a stream flowing out of the pond.
Battle Condition: Clear
25.2 Defender Force Points
The US Player is the defender and receives 33 force points.
25.3 Missions and Victory Conditions
The German Player is the attacker and has the choice of 3 missions.
Recon in Force: 30 Force Points
You are to probe enemy positions prior to a full offensive in the area.
Objective: Sight the crossroads and bring back intelligence to Battalion HQ.
German Victory: By the end of the third Command Cycle, move men within sight of the crossroads on map B (1307) and then exit 50% of the German force from any map-edge of map A.
US Victory: At the end of any Command Cycle more than 50% of the German force is disabled, or at the end of the third Command Cycle if the German has not won.
No draw possible.
Full Advance: 40 Force Points
As part of a general assault on US positions in this area, your men have been ordered to control roads leading to the US rear areas at all costs.
Objective: Control buildings dominating the roads leading north.
German Victory: Can occur 2 ways:
- The Germans control the 3-hex building plus one other (except D/1210), or any three buildings on the map area (except D/1210) at the end of the fourth Command Cycle.
- At least 75% of the US force is disabled or captured at the end of any Command Cycle before the fifth.
US Victory: Prevent the German victory conditions.
No draw possible.
Infiltration: 47 Force Points
Cut through enemy lines and disrupt rear-area communications.
Objective: Exit zone 9 on map B.
German Victory: Can occur two ways:
- At least 75% of the US force is killed or captured at the end of any Command Cycle.
- 50% of the German force exits map B before the end of the fourth Command Cycle.
US Victory: Prevent the German from winning.
No draw possible.
25.4 Intelligence Summary
German 5+
- The US deploys first, revealing hidden equipment (except minefields).
- The US uses "surprised" deployment.
- The German may conduct operational moves before the first Command Cycle.
- The German starts with the advantage.
German 2-4
- The US deploys first.
- The US uses "restricted" deployment.
- The German starts with the advantage.
German 0-1
- Deploy simultaneously.
- The US uses "restricted" deployment.
- Make an advantage check to determine who has the advantage.
US 1-3
- Deploy simultaneously.
- The US uses "normal" deployment.
- The US starts with the advantage.
US 4+
- The German deploys first.
- The US uses "normal" deployment.
- The US starts with the advantage.
- The US may conduct operational moves before the first Command Cycle.
25.5 Deployment
Men may start stacked within the following deployment restrictions. If the players are deploying simultaneously, place a screen across the two maps until their deployments are complete. If one player is deploying first, he deploys openly, then the other player deploys openly.
German: In any zone of map A and zones 1 and 7 of map D.
US: Before the US deploys his force he must secretly roll the 6-sided die to determine which side of the map the gap in his line is on: on a 1 or 2 deploy in zone group 1; on a 3-6 deploy in zone group 2.
- Zone group 1: 2, 3, and 5 on map D and 1 on map B.
- Zone group 2: 8, 9, and 5 on map D and 7 on map B.
- Normal: At least 3 men in 2 of the above zones.
- Restricted: At least 3 men in 3 of the above zones.
- Surprised: At least 3 men in 4 of the above zones.
25.6 Events
First Event A: Unusual Event. Roll on the Unusual Event Table.
First Event B: Early Reinforcements
- If First Event A has already occurred the US player now gains the advantage and his reinforcements (if any) are eligible to enter play.
- If First Event A has not already occurred the side currently having the advantage receives reinforcements (if purchased).
- German: Enter any south map-edge zone of map A.
- US: If zone group 1 was used, reinforcements enter zone 2 map B. If zone group 2 was used reinforcements enter zone 9 map B.
Second Event A: Artillery Strike
- If the active player has artillery support he may resolve one strike against any hex in his radioman's sight. Use the normal artillery strike procedure with the chosen hex as the target hex; no call is needed.
- If the active player does not have artillery support ignore this event.
Second Event B: Other Reinforcements. If either player purchased reinforcements that have not yet entered, they are now eligible to do so.
26. Airborne
Normandy, June, 1944
Prior to the Normandy landings, US paratroopers have dropped behind the beach areas to secure stream crossings and important road junctions in an effort to speed the beachhead. In a typical mission, a platoon of the 82nd Airborne has dropped into mixed terrain and is attempting to link up with the rest of its company.
26.1 Map Set-Up
The four maps are arranged as shown.
- The water on maps C and D is a river (an impassable creek actually). There is a ford across the creek at D/1107. It costs 1 extra AP to enter this ford.
- The water on maps A and B are streams.
Battle Conditions: The battle condition depends upon the US player's choice of drop times:
- If the US player chooses to drop at night, Night conditions are in effect.
- If he drops at dawn, Mist conditions are in effect. (Note that his choice will have an effect upon German deployment.)
26.2 Defender Force Points and Special Rules
The German player is the defender and receives 38 force points.
German Special Rules: The German player may not purchase defensive preparations and may spend no FPs on intelligence. Although all the German player's men enter as reinforcements in this scenario, he pays FPs for initially-deployed squads, as if they started on the map. Any reinforcements he buys cost the FPs as for normal reinforcements and enter according to the Events as usual.
Bridge Destruction: The German may need to blow the bridges on map C so he'll want engineers and satchel charges.
To blow up a bridge, a German engineer must carry a satchel charge into the bridge hex and perform an exchange equipment maintenance action (this maintenance action represents the engineer beginning to wire the bridge). When he performs this action, place a camouflage marker on him (to represent the additional protection of being beneath the bridge on the scaffolding). At the end of the command cycle in which the maintenance action was performed the bridge is wired. It may be exploded by an engineer or any leader within 3 hexes of the bridge hex during any Action Phase that the man performs another exchange equipment action.
To explode the charge roll the 10-sided die on the following table:
Bridge Destruction Table
| Roll | Result |
|---|---|
| 1-7 | Bridge destroyed |
| 8-10 | Bridge is unaffected - want to rewire? |
26.3 Missions and Victory Conditions
The US player is the attacker and has a choice of three missions.
US Special Rules: The US player may not spend FPs for intelligence.
- All US leader command chits may function either as leader or independent chits for the entirety of the first Command Cycle; during the second and subsequent Command Cycles, leader command chits may initiate only leader turns (unless, of course, the leader is disabled).
- The US player may not purchase heavy artillery support.
- The US player has the choice of dropping at night or at dawn (see deployment).
- Note that in this scenario the US player must always take both airborne squads and receives additional FPs to spend as he sees fit. He may use the additional FPs to upgrade a depleted squad to full strength (as in the Reconnaissance), or he may deplete one of his full strength squads and take the extra FPs as more "additional" points.
- All squads other than airborne must be purchased as reinforcements which enter play as normal reinforcements.
Reconnaissance: Both Airborne squads (1 depleted) and 7 FPs
Your men must quickly move to the edges of the town (map C), scout a suspected command center (the 4-hex building in zone 8 and the 3-hex building in zone 9), and withdraw, linking up with other units of the company to the north. You are to take prisoners for interrogation if possible.
Special Rules: The US may not purchase reinforcements.
US Victory: The US can win in two ways:
- Move at least 8 men onto map C, in sight of both buildings of the command center (at least two hexes of each) then move at least the same number of able men off the north edge of map A or B by the end of the fourth Command Cycle. At least three men who were among the original eight sighters must be among those that exit. No man may leave the map until at least eight have sighted the buildings.
- If the US player manages to get an able German prisoner off the north edge of map A or B with 5 men before the end of the fourth Command Cycle he wins. No men may exit until the prisoner has been taken. In this case, sighting the buildings is irrelevant.
In either case the US wins the moment the required men exit the map.
German Victory: Prevent US victory and have at least 1 bridge intact.
No draw possible.
Secure the Approaches: Both Airborne squads and 9 FPs
A Battalion of US infantry is expected to move in from the north and enter the village. German squads are known to be patrolling both north and south of your drop zone.
Objective: Your men must secure the northern approaches to the town for passage of the infantry.
Special Rules: The US player may purchase reinforcements of any type; they enter from the North edge of map B.
US Victory: Have the intersection at hex A/2411 in sight with no German men within 6 hexes of that hex at the end of four command cycles, and at least 50% of your force remaining.
German Victory: If after four Command Cycles the US player has not won, and the German still has at least one bridge intact, he wins.
Any other result is a draw.
Secure the Bridges: Both Airborne squads and 12 FPs
To organize the Airborne Regiment's operations, the bridges across an otherwise insignificant creek must be held intact.
Objective: Your men must seize the bridges across the creek.
Special Rules: The US player may purchase reinforcements of any type; they enter from the north edge of Map B.
US Victory: The US player wins if at the end of the fifth command cycle at least 50% of the German force is disabled, at least one bridge is still intact, and the US controls buildings C/1209-1210 or C/1612.
German Victory: The German can win in two ways:
- Disable at least 60% of the US force and have at least one bridge intact.
- If the US player has not won at the end of the fifth Command Cycle, at least 50% of the German force is able, and 1 bridge is still intact, the German wins.
Any other result is a draw.
26.4 Deployment
Neither side starts with men on the map. The US initial forces airdrop onto the map area and land in either a "Scattered" or "Compact" deployment. This factor is determined by a die-roll on the US Airdrop Deployment Table and is influenced by the US player's choice of whether to drop at dawn or at night.
Initial German forces enter as reinforcements. The time of entry of the German forces is dependent upon whether the US forces drop at night or at dawn, and a die-roll on the German Deployment table.
US Airdrop
After the US player has made his mission decision and both players have spent their FPs to buy their forces, the US player declares whether his drop is occurring at night or at dawn. He then rolls the 10-sided die on the Airdrop Deployment Table; the result determines whether the drop results in "Scattered" or "Compact" deployment.
Airdrop Deployment Table
| Roll | Result |
|---|---|
| 1-5 | Scattered |
| 6-10 | Compact |
(-2 if dropping at night)
Landing: After determining the deployment, the US player divides his forces into two-man groups and does the following for each pair:
- Roll the 6-sided die and refer to the appropriate Map Table to determine which map the pair lands on.
- Roll the 10-sided die on the appropriate Zone Table to determine which zone the group lands in (ignore rolls of "10").
- Place each man of the pair in the indicated map zone in a clear or broken hex not adjacent to any other US man.
- If this is not possible the man lands in a woods or brush hex and immediately rolls the 10-sided die on the Airdrop Damage Table.
Scattered Map Table (as printed; the overlapping "1-5" is printed that way in the scan)
| 6-sided roll | Map |
|---|---|
| 1-2 | Map A |
| 1-5 | Map B |
| 6 | Map D |
Compact Map Table
| 6-sided roll | Map |
|---|---|
| 1-3 | Map B |
| 4-6 | Map D |
Scattered Zone Table
| 10-sided roll | Zone |
|---|---|
| 1 | Zone 1 |
| 2 | Zone 2 |
| 3 | Zone 4 |
| 4 | Zone 5 |
| 5-6 | Zone 7 |
| 7-8 | Zone 8 |
| 9-10 | Zone 9 |
Compact Zone Table
| 10-sided roll | Zone |
|---|---|
| 1-2 | Zone 3 |
| 3-4 | Zone 4 |
| 5-6 | Zone 5 |
| 7-8 | Zone 6 |
| 9 | Zone 8 |
| 10 | Zone 9 |
Airdrop Damage Table
| 10-sided roll | Result |
|---|---|
| 1-4 | has no effect |
| 5-8 | wounds the man |
| 9-10 | incapacitates him |
German Deployment
Before the US player lands his forces, the German player rolls the 6-sided die on the German Deployment Table. The German will be either "Surprised" or "Prepared."
Entry of German Men: German men enter the map as reinforcements and may enter in Zone 1 and 4 of map C and/or Zone 3, 6, or 9 of map A. All men of the same squad must enter from the same map edge, and the German player must write down on his squad sheet which squad(s) will enter from which edge before the US airlanding.
German Deployment Table
| 6-sided roll | Result |
|---|---|
| 1-3 | Surprised |
| 4-6 | Prepared |
(-2 to die-roll if US dropping at Night)
Surprised: No German command chits are placed on the Command Track at the beginning of the game. They are placed on the Command Track according to results on the German Command Chit Activation Table.
- After all US forces have landed on the map the first command cycle begins: the US player has the advantage and gets the first Action Phase in the first turn. During the End Phase of each turn, the German rolls the 6-sided die on the German Command Chit Activation Table; the result is the number of command chits, in addition to those already on the track, that may be placed on the Command Track. Once a command chit is placed on the track, it may be committed in the immediately-following Command Phase. The German player rolls in the End Phase of each turn until all his command chits are on the track.
German Command Chit Activation Table
| 6-sided roll | Chits placed |
|---|---|
| 1 | 0 |
| 2-5 | 1 |
| 6 | 2 |
| 7 | 3 |
(+1 on 5th and subsequent rolls)
Prepared: All German command chits start on the Command Track. After all US forces are on the map the first Command Cycle begins. Both players roll the 10-sided die; the higher roll wins the advantage.
26.5 Events
First Event A: German Surprise Corrected. All German command chits are placed on the Command Track. If all are already there, ignore this event.
First Event B: Dawn. Weather conditions change from Night to Mist, or from Mist to Clear, whichever is applicable. If already clear - no change.
Second Event A: US Reinforcements. Any or all US reinforcements are available to enter the map at this time. They may enter from any north-edge map zone on map B.
Second Event B: Sniper Fire and German Reinforcements. If the US platoon leader is in play and in sight of any German man capable of aimed fire, the platoon leader takes damage on the appropriate Damage Table.
- If the German bought reinforcements they are now eligible to enter play.
Third Event A or B: The Sun Rises. If it is the third or later Command Cycle, Battle Condition becomes Clear. If it is the first or second Command Cycle, ignore this event; it's a rainy day.
Designer's Notes
Soldiers was a tough design. Some games spring from a designer's head and are smilingly presented to a publisher: a labor of love looking for a home - RAF, my previous design for West End, was such a project. Other games spring from a publisher's marketing plan and are presented to a designer; a hot topic looking for a system - such was the case with Soldiers.
My preliminary research included two excellent books by John Keegan, The Face of Battle and Six Armies at Normandy. The infantrymen's view of battle in those works were vastly different from the pictures of battle presented in existing board games.
When war gets down to the level of individual men, the soldier's will to fight and his awareness of what's happening around him far outweigh the differences in weapons. Often, the simple decision by a seemingly insignificant team of soldiers to get up and do what is necessary changes the entire complexion of a battle - the enemy may be caught by surprise and react without coordination and is overwhelmed. There are even cases of individual men killing or capturing whole groups of enemies in a spontaneous aggressive charge.
What matters to a man whose life is in danger is deciding moment-to-moment when to move, when to stay put, when to shoot, when to take cover, and when to give up. What doesn't matter are rates of fire, shell diameters, radio ranges, and movement allowances. When a trained soldier is ordered to act in a perilous situation, loyalty, logic, and emotion come into conflict in his mind as he decides how far he is willing to go in carrying out those orders.
Risk Levels
The concept of risk levels is central in Soldiers and went through many manifestations while evolving into the current elegant solution.
- In my first design (seen by no one) the player selected men to act and then drew action chits that said such things as aimed fire, move, run, freeze, quick fire, and so on. The number of chits drawn equaled the leader's initiative rating. The player used the chits he drew to assemble a sequence of actions for his men. The idea was to limit the player's options to what his men might think of doing; it was too limiting as it turned out. The actions a player drew rarely made any sense for a man's specific situation.
- The second time around, the chits were replaced by a list of possible actions, much like the current list. Each action was assigned a risk point cost, based on the amount of danger involved. The player selected men and declared all their actions for the turn before conducting any. Then the risk point total of the actions was compared to the leader's initiative plus a die roll. If the modified initiative was higher, the men conducted the actions; if the risk point total was higher, the men did nothing. This made the players plan their orders carefully; they could make the orders as dangerous as they wanted but that increased the chance of men deciding not to do them. It looked good on paper but the game was slow and frustrating - players would laboriously declare marvelous orders, only to find their best laid plans foiled by a die roll.
- Version three softened version two. The player declared how many risk points he wanted to spend but didn't specify actions until after rolling the die to see if the declared points could be used. This didn't really solve the problem though - players still spent a lot of time working out actions and calculating how many risk points to declare.
- Version four reversed version three. Instead of declaring a number of risk points, the player added a die roll to his leader's initiative to determine how many risk points he got. Then he gave an order by declaring all the actions for a man or group before conducting any. This version of the game got a lot of playtesting which showed a big problem: calculating risk point expenditure for a number of actions before any were conducted required much abstract thought as players weighed all the possible outcomes.
- So, in version five, we allowed players to declare actions as the men moved, responding to the situation as it developed. The problem here was that players often forgot how many risk points they had spent as their actions progressed.
- Finally, in version six, it came together. In the previous versions each possible action cost risk points. Now each action was categorized by the "risk level" a man needed to perform an action. Risk was no longer a matter of spending a variable point allowance on actions of variable costs; now the allowance (5 APs) and costs were constant, while the menu of available actions changed with the risk level. This gave risk an across-the-board simplicity and drama that players quickly absorbed. The differences between the capabilities of men at different risk levels was easy to understand and fun to play.
Bidding and the Command Track
The command and bidding system force players to weigh the need to get the jump on the enemy against the confusion caused by hasty orders. The "faster" a group moves out, the less prepared it is. A player that moves a command chit many spaces down the track to win an important bid sacrifices that many subsequent activations due to disorganization caused by haste. As command chits are moved down the track, fatigue and disorganization start to take their toll, raising the likelihood that men will "break." The end of each Command Cycle represents a time of regrouping and reassessing the situation. If one side drives most of its men to exhaustion, they take longer to regroup and will be disadvantaged in the next Command Cycle (shown by having their chits start somewhere down the track).
Leader Turns and Independent Turns
Leaders are the heroes in Soldiers. Their importance is most obvious in the differences between a turn commanded by a leader and a turn undertaken by men independent of a leader. In an independent turn, one man or stack can conduct actions of a risk level determined by the worst initiative rating in the group. In a leader turn the player can, in effect, conduct a number of independent turns equal to the leader's command rating, and all these "turns" gain the benefit of the leader's much higher initiative rating. In my initial concept, the game had only leader turns; I added independent turns to allow for small strike teams and to save men who wandered out of command.
Sequentiality
In most simulations, players move all their units each turn, one unit at a time, and the moves are considered to be simultaneous. In Soldiers, men's actions are considered to be simultaneous only when a group of men conduct actions together. In all other cases, actions are sequential. Thus, in a leader turn, orders given to one man or group are completed and the effects noted before orders are given to a second group. The second group benefits from the new position and accomplishments of the first group. This simulates the "leap-frog" tactics commonly used in low-level situations.
Orders
In a leader turn, orders represent a leader barking out one quick objective: "Get up to that ridge and blast that house!" In the game, this is considered one order; it could be given to one man or to a group of men, all doing the same thing. In situations where a leader tells a group of men to do two different things, two orders must be given: "Alright men, you two charge that house, use grenades if you have to, and Clark, get over to that clump of trees and give them some covering fire." In an independent turn, an order represents one man in the hex getting an idea to do something. Since a leader is rarely present to exhort the men in an independent group, their fears take greater hold. Thus, the worst initiative rating in a group of men determines their risk level.
Sight and Movement
For the soldier, the battlefield consists only of what he can see. This is represented in Soldiers by friendly sight, in which men have confidence only in what they and their companions can actually observe. There are three basic sight conditions:
- Friendly Sight Only: A man with any risk level will gladly move into an area that he can see if he knows it is not covered by the enemy. Additionally, if a man can't see an area but he can see a comrade that can, an "all clear" motion from the comrade will suffice.
- Friendly and Enemy Sight: A man's willingness to move into an area that he can see but that is also in sight of the enemy depends on how much protection he thinks the terrain will provide against enemy fire. A cautious man will enter enemy sight only in a protected hex and will not move adjacent to an enemy. A wary man will enter enemy sight in a protected or covered hex. Bold and aggressive men will move into enemy sight in any terrain.
- Not in Friendly Sight: A man will assume that an area he cannot see or that no other friendly man in his sight can see is crawling with enemy men, making him very reluctant to dash into such an area. Only bold and aggressive men will enter such a hex.
Alertness
Throughout the design and development of Soldiers a number of different systems for observation were tried. There were sighting modifiers and lots of die-rolls, there were observation chits, and there were hidden-men rules. Ultimately, all the effects that terrain, distance, visibility, and number of men have on observation were included in the fire combat rules as modifiers to the chance to hit; if the chance falls below 1, the enemy cannot be seen. This still left us with the need to show how chance and a soldier's relative abilities determine the fire opportunities a soldier notices while moving and when he sees enemy movement. The Alertness roll does this quite nicely and is a lot of fun for players.
Scenario Missions
After risk levels, the structure of the scenarios in Soldiers is the statement I most wanted to make. In just about every account of battle on any level, a deciding factor has been that one side did not know what the other was trying to accomplish and did not know what forces they had available. Yet in most war games, scenarios are structured with set forces in set deployments with one set goal. Such scenarios have two big problems: the players' decisions are based almost entirely on historical hindsight and the scenario is not very interesting to play more than once. Soldiers uses three elements to make scenarios unpredictable and replayable:
- Force Points: Forces are purchased freely and secretly by the players. A player may buy elite soldiers or green soldiers. He can spend a lot on support and planning (artillery, heavy weapons, and intelligence) or go in "lean," spending everything on squads. He can delay his punch by purchasing reinforcements, trading time for more quality.
- Missions: The attacker secretly chooses from a variety of missions. This makes a single scenario equal to two or three traditional ones, and prevents the defender from setting up a "perfect" defense. He must deal with the possibility that the attacker may be attempting any of a number of things and so must stay flexible enough to respond to events as they develop.
- Intelligence: Players can spend Force Points on the "soft" aspects of battle - planning and information gathering - but this subtracts from points available for squads. Intelligence determines how opposing forces are deployed and who gets the "jump" when the action begins. A scenario can open differently each time it is played, depending on intelligence expenditures.