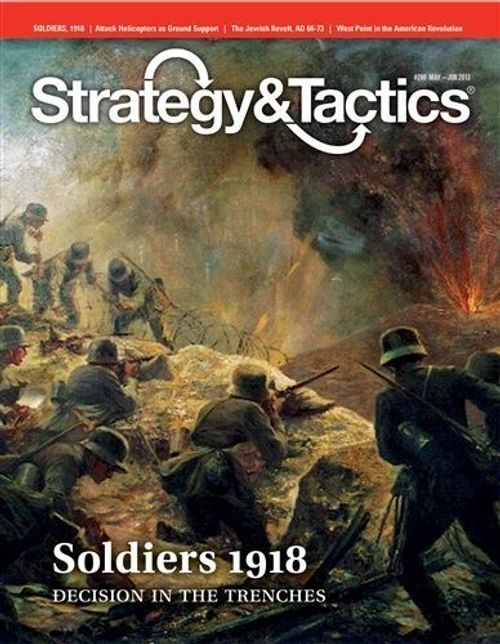
Soldiers: Decision in the Trenches, 1918
Soldiers: Decision in the Trenches, 1918 Rulebook
Table of Contents
Table of Contents
1.0 INTRODUCTION
1.1 Context
Soldiers: Decision in the Trenches, 1918 (Soldiers for short) is a two-player tactical wargame of low-intermediate complexity simulating the first 30 to 60 minutes of a hypothetical (though typical) attack by an American infantry division somewhere along 1st US Army's area of operations on the Western Front in the late summer or early autumn of that year. The American player is on the offensive, attempting to use his division to break through the German defense line that covers almost the entire map at the start of play. The German player—in the historical role of a Kampftruppenkommandeur or "K.T.K."—commands, in total, a reinforced infantry regiment that's fighting to prevent a breakthrough, or any significant penetration, of its position. The game is won by playing once, noting the depth of the American penetration (failing a "sudden death" breakthrough victory), then switching sides, playing again, and comparing that game's depth of penetration with that of the first match. Draws are possible and solitaire-play is doable.
1.2 Scale
Each game turn of Soldiers is equal to five to 10 minutes of "real time," depending on the tempo of action in each turn. (It's likely each turn will actually take you somewhat longer to play than the "real time" represented by it.) Each hexagon represents 25 yards (22.8 meters) from side to opposite side. Each unit-counter represents a platoon of infantry or heavy machineguns. Tactical support units—such as light artillery ("one pounders"), mortars, engineers, etc.—are assumed to have been broken up and parceled out among the infantry squads, as was the usual practice historically. Field artillery and airpower make their presence felt from off-map via the bombardment rules (see section 12.0). Similarly, the effect of omnipresent chemical warfare is built into the visibility rules (see section 8.0).
1.3 Designer's Note
This wargame is to the reality of a US infantry division attacking in 1918 the same way Marcel Duchamp's "Nude Descending a Staircase No. 2" is to an actual naked person walking down stairs. That is, in order for Soldiers to perceptually and emotionally simulate the movement and dynamism of a horrific event like the one depicted in it, I synthesized some elements and fragmented others, brought forward some and recessed others. I hope the result contributes to the further disintegration of the idea of simulation as merely a concept of mechanical analysis while at the same time further enabling it to explore the realms of the mythic and emotive. Effective design transcends the mere exposition of numeric data and procedural structure—no matter how well executed—and goes on to provide players with a broader and more full palette for understanding the history being simulated.
In showing this game around during its design and development process, the comment I got more than any other was: "You could really design a large number of follow-on games and scenarios for this!" The truth of that matter is, I really inaugurated this system with my earlier "First Blood: Second Marne, 15 July 1918" design (S&T 248, Mar/Apr 2008). In the systemic sense, I designed the "follow-on game" first and retrograded the system here in order to belatedly get the more general parent design. By that, I don't in any way mean this is a step back; it's a step in the direction of a broader presentation that lacks the specifics of any one historic engagement. It's also a step down in scale in that FBSM was a game of platoons fought at company-level, whereas this is a game of squads fought at platoon-level.
The most frequently asked question was: "But where are the tanks?" My answer to that is the game is titled "Soldiers," not "Soldiers & Tanks." As you'll come to understand when you play, at this scale the tanks of 1918 really weren't anything more than glorified, semi-mobile, wire-cutters. That's not to say they weren't of value in that much-needed role (again—as you'll soon see); it's just that the idea here—as was the case historically in the vast majority of battles of this size in 1918—was to recreate the mainstream tactics of that year, which pitted flesh and will against steel and explosives. That's what's modeled.
2.0 COMPONENTS
2.1 Units
The components to a complete game of Soldiers include these rules, the 34x22 inch mapsheet and one sheet of 228 die-cut unit-counters. Players will need to provide themselves with one or more regular (six-sided) dice to use in resolving combat and other probabilistic events that will occur throughout play. All die rolls in the game are made using one or more six-sided dice.
2.2 The Map
The map illustrates the militarily significant terrain found in and around a typical section of the German front in France in 1918 when viewed at this scale. (Its particular features are actually adapted from a stretch of the line that existed historically around Arras.) A hexagonal ("hex") grid is printed over the map to regulate the placement and movement of units across it, much as the squares on Chess and Checkers boards. A unit is considered to be in only one hex at any one instant.
Each hex contains natural or manmade terrain features that can affect the movement of units and combat between units. The various terrain on the map have had their exact real-world configurations altered slightly in order to make them coincide with the hex-grid. The relationships among them from hex to hex, however, are accurate to the degree necessary to present players with the same space/time dilemmas faced by their historic counterparts in such situations.
Also note every hex on the map has a unique four-digit identification number printed within it. They're provided to help find exact locations more quickly and to allow for the recording of unit positions if a match has to be taken down before it can be completed. For example, German bunker complexes are located in hexes 1911, 2808 and 3603.
2.3 Seating
The US player should sit off the map's south edge, facing north, with the German player sitting and opposite him off the north edge.
2.4 Counters
There are 228 unit-counters in the game, most of which represent combat formations. Other counters are provided as bombardment markers and memory aids. After reading these rules at least once, carefully punch out the counters. Trimming off the "dog ears" from their corners with a fingernail clipper will facilitate easier handling and stacking during play and also enhances their appearance.
2.5 Sample Combat Unit
Each combat unit-counter displays its nationality and service branch by its color scheme, and its exact unit type by its icon. Other unit characteristics are presented on the Movement & Fire Factors Chart (see 13.2).
2.6 Carnage
The reverse sides of the units show carnage. That is, they present a depiction of the human wreckage remaining when units of these sizes are eliminated in combat. Whenever a unit suffers that fate, players simply turn it over in place, so its carnage side thereafter shows upward within the hex of its elimination. When flipped to their carnage sides, units permanently cease to be "units" for all game purposes, thereafter serving primarily as reminders of the recent horror that took place in that location. Note, though, the presence of carnage also affects the ability of still-functional units to move into and through such hexes (see 13.1). Carnage markers have no combat effect. Alternatively, if your tastes don't run to an appreciation of carnage, you may choose to ignore the reverse sides of the units and simply remove each unit to a traditional off-map "dead pile" as they suffer elimination.
Designer's Note: Players should understand that, even more so than in operational-level and strategic-level designs, when units are "eliminated" and flipped to their carnage sides, it doesn't necessarily mean every man in them has been killed. A good number of the men in such units will have been wounded while still remaining ambulatory. They're making their own way toward the rear area to get treatment, and so are out of play for the remainder of the game. Further, a good number of men won't even have been wounded, but will have simply decided to "go to ground" for the remainder of the time represented in the game. (In truth, though, another good number of them are dead or mortally wounded.)
2.7 Units Background Colors
- German Infantry: gray-green
- German Machineguns: leaf-green
- US Army Infantry: blue
- USMC Riflemen: brown
2.8 Function Markers
Other counters are provided as markers and memory aids. Details of their uses are given in the sections noted below.
- Game Turn Marker (see section 5.0)
- Phase Now Marker (see section 5.0)
- Chaos of War Markers (see section 7.0)
- Current Visibility Markers (see section 8.0)
- Bombardment Markers (see section 12.0)
3.0 SET UP
3.1 Prepare to Play
Players should first decide who commands which side. Place the "Phase Now" marker in the empty box to the left side of the "US Bombardment Execution Phase" box of the Phase Sequence Track (see 13.3). Place the Game Turn marker in the first box of the Game Turn Record Track from page R10 (players can copy before play). Temporarily place off to the side, but within easy reach, all the other counters shown above in 2.6. Players should be sure to have read through these rules in their entirely prior to moving on from here in setting up.
3.2 US Complete Bombardment Plot
The US player secretly pre-plots all six game turns of his artillery bombardment prior to the start of play (as well as prior to going through the rest of the set up procedure given below). To do that he should use six separate pieces of paper or note cards, one for each game turn's plot, labeling each one with a unique and sequential game turn number from "1" through "6." For any given turn's bombardment he may plot up to a total of 12 hexes anywhere on the map. (That would be the case if he wanted to fire each of his 12 available markers into 12 different hexes.) Alternatively, he might decide to concentrate some or all of those markers into just one or a few hexes. Those decisions are made by him solely on his appreciation of where he wants his artillery to be bombarding throughout his overall assault. Once the plots for all six game turns have been completed, the US player should set them aside, facedown and within easy reach, being careful not to let the German player see any of the data. Note, once the total US bombardment plot has been completed it may not be altered, only cancelled (see 5.2 and section 12.0 for more details).
3.3 German Game Turn 1 Bombardment Plot
While the US player is writing his overall bombardment plan, the German player should secretly do the same, but only for his own side's Game Turn 1 bombardment. That is, while the US player must begin play with his total artillery effort pre-planned, the German player will merely be required to plan his side's effort one game turn in advance. The German player has available the same 12 markers, and he may plot them into any hex or hexes on the map in the same way as the American player. When he's done making that single turn's plot, he should set it aside, facedown and within easy reach, being careful not to let the US player see the data.
Designer's Note: The above rules reflect a historical advantage inherent in defense in 1918. That is, the German position is straddled with observation posts and redundant landline communications that allow relative flexibility in their artillery use. The Americans are pressing forward into enemy territory, leaving behind their communications net. US attempts at timely communication with flares and signal flags were easily frustrated by the limited visibility and false enemy counter-signaling.
Example: A typical German artillery plot for Game Turn 1 might look like this, containing hex-numbers along with the number of markers to be fired into each targeted hex: "4300x3, 4400x3, 4500x2, 4600x4." That would mean he intends to fire three bombardment markers into both 4300 and 4400, while firing two markers into 4500 and four markers into 4600 during Game Turn 1's German Bombardment Execution Phase. Also note that neither player is required to plot all his available markers, though there is certainly no logical reason not to do so.
3.4 German Division-Level Determination
The German player should next openly determine the quality level of the division of which his regiment is a part. That level is determined once, by consulting the second note beneath the Movement & Fire Factors Table (13.2). That determination sets the German infantry's fire strength (FS) for that entire game (see section 10.0) and also influences each turn's Chaos of War outcomes (see section 7.0).
[Transcriber's note: the "Movement & Fire Factors Table" (13.2) and its second note are not in the source text; see section 13.0.]
3.5 German Set Up
Once the steps above have been completed, the German player should take all his side's infantry (24) and heavy machinegun units (nine) and set them up anywhere on the map within his overall defensive position. That defensive position is bounded on its south edge by the Main Trench line shown on the map. That is, for example, German units may set up in the "outpost" in 3801, but not in any No Man's Land hex nor in any xx01 hex that doesn't contain an outpost. Stacking rules are in full effect during German set up; see section 6.0 for more details.
Designer's Note: "Outpost" hexes are simply far-forward Main Trench hexes; they have no special characteristics beyond those inherent in that kind of trench hex (see 13.1).
3.6 US Set Up
The US player sets up second, after the German player has completed the other side's set up. All US Army and USMC units in the counter-mix begin play on the map. The US player should first separate that totality of units into two piles: one containing all 144 of his Army infantry platoons and a second containing all 12 of USMC rifle platoons. He should then stack all of them within the hexes of the No Man's Land hex row (xx00). Stacking rules are in full effect during US set up; see section 6.0 for more details.
3.7 Phase I
After step 3.6 has been completed, the set up is done. Go to Phase I of the turn sequence (see 5.2) and begin play of the first game turn.
4.0 HOW TO WIN
4.1 US Sudden Death Victory
If, during any US Movement Phase (see 5.2), that player moves one or more of his units off the north edge of the map (via hexes 1020 through 4919, inclusive), play stops immediately and he's declared to have won the game. No German sudden death victory is possible unless the US player for some reason decides to capitulate.
4.2 Winning on Points & Drawn Games
Failing the attainment of a US sudden death victory, play to the end of Game Turn 6. Note the hex number of the farthest-north US unit at that time. Record the last two digits of that hex number. The players then switch sides and play another match using the same German division quality determination level determined in step 3.4 of the first game's set up. Failing that second game's termination via a US sudden death victory, at the end of Game Turn 6 make a similar US hex-field penetration check. The player who scored the highest hex-field penetration number wins the overall two-game set. If the two numbers are identical, the two-game match is considered a draw. Note that losses are never a factor in reckoning victory and a sudden death victory trumps all penetration point awards.
4.3 Moving Off-Map
The movement point (MP) cost for a US unit to move off the north edge of the map is one or two, based on the absence or presence of a trench-line crossing the exit hexside (see 13.1). No other kind of off-map movement is allowed by units of either side.
Designer's Note: To all German commanders: Don't expect to break, repel or otherwise stall out the American drive. At the same time, though, assuming competent play on your part, a US sudden death victory should be extremely rare.
5.0 SEQUENCE OF PLAY
5.1 Phases
Each game turn of Soldiers is divided into a series of sequenced steps called "phases." Every action taken by a player must be carried out in the appropriate phase as described below. Once a player has finished his activities for a particular phase, he may not go back to perform some forgotten action or redo a poorly executed one unless his opponent graciously permits it.
5.2 Turn Sequence
The turn sequence outline is given below. At the end of each phase, move forward the "Phase Now" marker one box on the Phase Record Track. Each time a "German Movement Phase" (Phase X) is concluded, move the marker back to the first box in the track, the "US Bombardment Execution Phase," and begin a new game turn by moving that marker one box along that track located on page R10. Keep up that process and sequence until the US player achieves a sudden death victory or the end of Game Turn 6 is reached, whichever occurs first; then see section 4.0.
I. US Bombardment Execution Phase All US bombardments for all game turns are pre-plotted by that player prior to the start of play (see 3.2). The US player may at this time attempt to cancel ALL future bombardments (succeeds on roll of 1-3). Once cancelled, US bombardments may not be restarted during that match. Also note, when plotting his bombardments, the German player isn't required to write a plot for each turn.
II. German Bombardment Plot Phase At this time the German player secretly plots his bombardment for the next game turn's Phase III (not for Phase III of the present game turn).
III. German Bombardment Execution Phase At this time the German player executes the bombardments he plotted during the previous game turn's Phase II. The German player may not cancel bombardments; however, he may choose to refrain, decided by him on a game turn by game turn basis, from plotting a bombardment for the next game turn.
IV. US Chaos of War Phase The US player rolls one die and consults the Chaos of War Table (13.4) and places the resulting number of COWed markers on German units (see 7.0).
V. German Chaos of War Phase The German player rolls one die and consults the Chaos of War Table (13.4) and places the resulting number of COWed markers on German units (see 7.0).
[Transcriber's note: this phase places COWed markers on German units in the source text; this is printed as written. Section 7.2 says the German player's COW roll places markers on US units. The source is inconsistent here; see section 7.0.]
VI. Visibility Determination Phase The US player rolls three dice. The cumulative result is the maximum visibility for the turn, with a maximum of 16 (see 8.0).
[Transcriber's note: section 8.2 of the source says the German player rolls the three dice for visibility. The source is inconsistent; both are printed as written.]
VII. US Movement Phase The US player may move some, none, or all of his units (see 9.0).
VIII. German Fire Phase German units may fire at US units (see 10.0).
IX. US Fire Phase US units may fire at German units (see 10.0).
X. German Movement Phase The German player may move some, none, or all of his units (see 9.0).
XI. Mutual COWed Marker Removal Phase Remove all COWed markers from the map.
6.0 STACKING
6.1 Stacking
Stacking is the word used to describe the piling of more than one friendly unit into the same hex at the same time. In general, stacking only counts at the end of each phase and the end of each advance after combat. Note, though, the +1 penalty for moving into a hex containing one or more Carnage markers and/or friendly units (see 13.1) is in effect whenever units are moving and is paid immediately each time it is incurred.
6.2 Over-stacking
If a hex is ever found to be over-stacked at the times mentioned above, correct the situation in such a way as to satisfy the offended player, either by the conversion into carnage of the over-stacked unit(s), or by simply allowing the offended player to move it/them to the nearest legal hex. (It's always the offended player's choice of solution).
6.3 German Stacking Limits
German stacking limits are as follows: The German may usually stack up to (any) three of his units in the same hex. If, however, his division-quality level roll during set up (see 3.4) is a six—meaning his force is part of a still-functioning shock troop division—that limit is raised to four units per hex. Within those overall limits, German infantry and machinegun units may stack and/or move together. Make just one unit-stacking-count determination per each stacked hex, combining both types in each hex's single count.
6.4 US Stacking Limits
US stacking limits are as follows: The US player may stack up to four US Army units per hex or he may stack up to four USMC units per hex; he may not combine the two types in the same stack. Note, however, that the particular times stacking rules are in effect are given above in 6.1. In between those times, USMC and US Army units may move through each other's hexes. See section 11.0 for more on this aspect of US force structure.
6.5 Fog of War
The scale of the game obviates the need for the usual fog of war rules concerning stacking. Instead, that crucial element of warfare is dealt with via the Chaos of War (see 7.0) and Visibility (see 8.0) rules.
6.6 Stacking during Set Up
Normal stacking is enforced for both players during set up.
Designer's Note: Here's a tactical tip for the German player: Avoid stacking, except in pillbox hexes.
7.0 CHAOS OF WAR
7.1 German COW Determination
At the start of Phase IV of each game turn, the US player should roll a die to determine the number of Chaos of War (COWed) markers he will deploy atop German units at that time. That die roll result is modified according to the German division quality level determined during set up as described in rule 3.4. The particulars are as follows also (see 13.4).
If German infantry fire strength is "2", the formula is 1 die roll +1.
If German infantry fire strength are "3," the formula is 1 die roll.
If German infantry fire strength are "4," the formula is 1 die roll -1.
If German infantry fire strength are "6," the formula is 1 die roll -2.
Example: If German infantry fire strengths are "2," the US player would, during each Game Turn's Phase IV, roll one six-sided die (1d6) and add one (+1) to that result. That would mean he would be allowed to deploy from two to seven COWed markers atop German units that turn.
7.2 US COW Determination
At the start of Phase V of each game turn, the German player goes through a process like that of the US player in Phase IV. The German player's die roll formula for generating COWed markers to place atop US units is always 1 die roll -2 (See 13.4).
7.3 COWed Marker Effects
The effect of a COWed marker is to render all the units beneath it immobile and unable to fire for the rest of that game turn.
7.4 COWed Strictures
No more than one marker may be placed per hex to be COWed. A COWed marker in a hex effects all units eligible to be COWed in that hex throughout the remainder of that game turn. COWed markers may not be placed in empty hexes. Non-COWed units may move into and/or through hexes containing COWed units but must immediately check to see if they will themselves become COWed. In such situations an unmodified die roll of one through three means the moving units are immediately COWed in that hex and remain so for the rest of game turn; a four through six means they may continue on their way. If a moving unit or stack stops its move in a COWed hex, it automatically becomes COWed there for the rest of the game turn (exception: see 7.6 below).
7.5 Bunker Immunity
German units in bunker hexes never become COWed, and this rule supersedes rule 7.4. Note that there is no concept in the game of being in a bunker hex while not being in the bunkers. Further, bunkers are never destroyed or otherwise converted into non-bunker status.
7.6 Devil Dogs
USMC units never become COWed, and this rule supersedes rule 7.4.
7.7 Removing COWed Markers
Players should remove all COWed markers from the map during each game turn's Phase XI. Also note that for ease of use the markers are printed in a German color on the one side and the US Army color on the other side. Also see rule 10.9.
Designer's Note: The rules above aren't meant to indicate that, in the real world, opposing commanders get to pick which of the enemy formations attacking them will fail at critical times. The reality is, however, such occurrences, when viewed intrinsically from the perspective of each side's commander, always take place at the worst possible moment in the worst possible location. In game terms, the smoothest and most direct way to simulate that overarching truth is to allow the opposing players to pick each other's trouble spots.
8.0 VISIBILITY
8.1 Gas
In addition to the high explosive bombardments represented by the rules in section 12.0, there's a huge mass of gas shells being constantly fired onto the battle area by both sides' off-map artillery. By this time in the war both sides' combat units were equipped and trained to deal with chemical warfare; however, no amount of preparation could overcome the gas effect on overall visibility. From moment to moment the ability to see into the distance could vary greatly.
8.2 Visibility Distance
At the start of each game turn's Phase VI, the German player should roll three dice and total that result (three through 18). That number determines the "Current Visibility" for that game turn. However, a roll of 17 or 18 is considered to yield a visibility of 16. Visibility is never less than three or more than 16.
[Transcriber's note: see the note at Phase VI in section 5.2; the source names the German player here and the US player there.]
8.3 Visibility Effects
Visibility limits affect range (see 10.6) and maximum movement allowances (see 9.7). Use the markers provided to keep a constant display of the Current Visibility limit in the box provided for that located on page R10.
9.0 MOVEMENT
9.1 Movement Points (MP)
Each unit is moved from hex to adjacent hex, expending movement points (MP) from their movement allowance for each hex entered. MP may not be saved from one phase or turn to the next, nor may they be given or loaned from one unit to another. Each unit's or stack's movement must be completed before the movement of the next unit or stack is begun. Once you've moved a unit or stack, you may not redo its movement that phase or turn unless your opponent graciously permits it.
9.2 Movement Allowances
Both players generally only move their own side's units during their own movement phases (see 10.10 for the exception), and no friendly movement takes place during the opposition's movement phases. It's not required you move all your units in each of your movement phases. You may choose to move none, some, or all of them within the strictures given below, in each of your movement phases. Further, a moving unit need not expend all its MP before stopping and no moving unit may ever exceed its MP during a move.
9.3 Movement Restriction
No unit may move into a hex in a friendly movement phase unless it has sufficient MP available to pay all involved costs.
9.4 Stack Movement
Units may be moved singly and/or as stacks. In general, stacking only counts at the end of each phase and the end of each advance after combat. Note, though, the +1 penalty for moving into a hex containing one or more carnage markers and/or friendly units (see 13.1) is in effect whenever units are moving and is paid immediately each time it is incurred.
9.5 Terrain Costs
Terrain costs are shown on the TEC (see 13.1). Note that—except in regard to the presence of carnage markers and/or friendly units in a hex—all hexes have an MP cost of either one or two points.
9.6 Enemy Occupied Hexes
Enemy occupied hexes may never be entered by your units. Bombardment markers may be placed in enemy occupied hexes to signal artillery attacks there; see section 12.0.
9.7 Movement & Visibility
No unit may ever move farther during a single friendly movement phase than the current visibility limit. Make that reckoning simply in terms of counting hexes without regard to actual movement point costs.
Designer's Note: To all American commanders: Get your units into the German trench system as quickly as possible, and keep them there. Once into the trenches, only move cross-country when you can get back into a trench hex at the end of the same move. To do otherwise is to court destruction.
To all German commanders: A good deployment technique is to use your infantry platoons in pairs, keeping one in the hex directly behind the forward unit. That will prevent the American from being able to dash out of the trench and then jump back in immediately behind you.
10.0 FIRE (Combat)
10.1 Combat
During your side's fire phases, your units may fire at enemy units within their range. Combat is executed by totaling the fire factors of all the units firing into a given hex, then dividing that total by the defense strength of the hex being fired into in order to get an odds ratio. Each enemy unit in a hex receiving fire from your units has a separate die roll made for it on the basis of that same odds ratio. Each of your units may fire into one hex in every one of your side's fire phases throughout the game.
10.2 Strictures
Each unit may fire no more than once per friendly fire phase, but no unit is ever forced to fire. You may choose to fire with some, none, or all of your units during each of your fire phases throughout the game. The firing player need not declare all his fires at the beginning of his fire phase; he announces and executes them one targeted-hex at a time in any order he chooses. The resolution of the fire into one hex must be completed before that of the next hex being fired into is begun. If you need a memory aid to help recall if a given unit has already fired during a fire phase, maintain a common facing among all your units and rotate each one 180 degrees when it fires.
A target hex must contain at least one enemy unit in order for you to be able to fire into that hex. No fire may ever have as its target more than a single enemy occupied hex.
10.3 Firing Procedure
First designate the target hex and your in-range units that you want to fire into it. Total the fire factors of those firing units, which gives the attacking fire strength. Divide that number by the defense strength of the hex being fired into. That number is based on the terrain in the target hex. Round down any remainder, then set that resultant whole number next to a one on its right to obtain an odds ratio.
Example: If 50 fire factors are firing into a support trench target hex (defense strength: 15), that calculation would go as follows: 50 divided by 15 equals 3.33, which would be rounded down to just 3. That three is then set next to a one, to give a final combat odds ratio of 3:1 ("three to one"). Note that targeted enemy units' fire strengths in no way affect this procedure. Units in this game have no "defense factors"; terrain has defense strengths.
10.4 Multi-Unit Fires
In general, units may fire by themselves or in groups, as long as the single target hex is within the range of all firing units. If attacking in groups, use the combined total fire strength to make just one odds computation for that target hex. See 11.2 for the single exception to this rule.
10.5 Targeted Hex
A given target hex may not be fired into more than once in a single fire phase; however, each unit within a targeted hex has a separate resolution die roll made for it.
10.6 Range
Each unit's range—the distance, counted in hexes, through which it may project its fire—is theoretically a maximum of 16. That is, all units, infantry (including USMC riflemen) and heavy machineguns alike, may potentially fire to a distance of 16 hexes from their location hexes. (Don't count a firing unit's location hex; do count the target hex.) In practice, though, no unit may fire any distance greater than the current visibility. Further, infantry (including USMC riflemen) firing at a target hex that's at any distance equal to half or more of the current visibility have their FS halved for doing so. Round down remainders, and make just one grand division for all firing units affected by that consideration. Even further, infantry (including USMC riflemen) firing into hexes immediately adjacent to their own location have their FS doubled.
10.7 Lines of Fire
If firing at an odd angle across the hex grid, count the range in hexes the most direct possible route to the target hex. Neither terrain nor units, friendly or enemy, block or otherwise inhibit lines of fire.
10.8 Combat Results
There are two combat results: defender eliminated ("D-Elim") and no effect. Eliminated units are simply put into the dead pile or flipped in place so their carnage sides show upward (see 2.6). Units receiving a no effect result aren't affected in any way. Firing units are never affected by their own fire; only targeted enemy units may be affected by the fire of your units. If you're firing at an enemy unit in a target hex and you have a combat odds ratio of 1:1 or less, that unit is eliminated on a roll of one. If firing with a 2:1 odds ratio, the D-Elim result is achieved with on a roll of one or two; at 3:1 a D-Elim is achieved with a roll of one, two or three; at 4:1 the "hit numbers" are one, two, three and four; and at 5:1 or higher they're one through five, inclusive. Thus a rolled one always "hits," while a rolled six never "hits."
[Transcriber's note: "with on a roll of one or two" is printed as written in the source.]
10.9 Fire & COWed Markers
The presence of a COWed marker in a targeted hex in no way alters the combat odds and resolution calculations explained above. See section 7.0 for more details.
10.10 Advance After Combat
The participation of one or more infantry/rifle units in an attack from a position immediately adjacent to the target hex requires those units to advance after combat into the defender's vacated hex (providing all defenders are eliminated). Such advances after combat are mandatory.
Resolve fire normally, except if the combat result is D-Elim against all the defending units in the target hex, then all of the adjacent participating infantry/rifle units involved in that fire must enter the newly vacated hex up to the normal stacking limit. If excess eligible units are on hand, the advancing player has his choice from among them.
Advance after combat is always mandatory when the circumstances described above pertain, and it must be carried out prior to beginning the resolution of the next fire. Note such advances don't in any way use normal movement phase MP.
Also note that German heavy machineguns are not doubled like infantry when they are adjacent (per 10.6), and nor do they ever advance after combat. (They may certainly fire into directly adjacent hexes,they simply never get the bonuses that would otherwise be attendant were they adjacent infantry).
10.11 Trenches
If two kinds of trenches exist in the same hex, that hex always defends using the strongest type (in defense factors).
11.0 MARINE Esprit de Corps
11.1 Setting Up USMC Units
Both players should note the position of every USMC unit at the start and end of every US Movement Phase throughout the game. USMC units must end each US Movement Phase at least one hex farther north than the hex in which they started that phase, as determined by the last two digits of each one's starting-hex number. For example, a USMC unit starting in a hex ending in "03" would have to end that phase in a hex ending in "04" or higher. Marine units failing that check are converted to carnage for "having died while trying." The single exception is: Marine units that start a phase in a hex immediately adjacent to one or more German-occupied hexes aren't checked for esprit during turns in which that situation applies.
11.2 USMC/US Army Cooperation Restriction
USMC & US Army units may not fire at the same target hex unless the involved fire-mixing units are immediately adjacent to that target hex.
11.3 Supplemental Rules
For further details on USMC esprit, see 6.4 and 7.6.
12.0 BOMBARDMENT
12.1 Bombardment Markers
During each of your side's bombardment phases throughout the game, you may use the 12 bombardment markers included in the counter-mix to fire ("attack" or "bombard") into enemy occupied hexes anywhere on the map.
12.2 Bombardment Attack
Each bombardment attack is conducted in generally the same manner as normal fire. Once all your Bombardment markers for that phase have been placed in their target hexes (see 3.2, 3.3 and 5.2), resolve each bombardment as given for regular fire in rule 10.8. Note there is never any advance after combat as a result of successful bombardment, even if there are friendly infantry/rifle units in hexes immediately adjacent to emptied target hexes.
12.3 Bombardment Usage
Each marker may be used once by each player in every one of his own bombardment phases throughout the game. Also note, though both players plot their bombardments in secret, they both should reveal each turn's plot to their opponent at the time of marker placement.
Designer's Note: No "spotting" of any kind is required for artillery bombardment. The Americans used aerial reconnaissance to map out their effort prior to the start of the ground attack, and the Germans have observers with landline communications hidden across the map.
12.4 Bombardment Fire Strength
When used by the American player, each Bombardment marker has an FS of eight. When used by the German player, each Bombardment marker has an FS of four. Remove Bombardment markers from the map (for reuse later) as each bombarded hex's attack is resolved.
Designer's Note: The German guns are weaker in their total firepower because their barrels are worn out and inaccurate and the US Army Air Corps has planes attacking their gun parks behind the lines.
12.5 Sergeant York (Optional)
One US infantry unit is printed with a sergeant's stripes symbol, which is included merely as an optional rule. If not playing with this optional rule, that unit is to be included in the game nonetheless, but simply ignore the stripes (in which case, the American player can assume that the infantry unit is a personification of himself during World War 1. Will you survive?).
If playing with this optional rule, the US infantry unit that is printed with the stripes (colloquially known as the Sergeant York unit) is assumed to have exactly double the fire strength of a normal US infantry unit. Furthermore, the Sergeant York unit never becomes COWed, exactly per 7.6. No other special rules apply.
13.0 CHARTS & TABLES
[Transcriber's note: section 13.0 is listed in the source contents, but its text is not in the source download (the RTF and the plain-text conversion both end at 12.5). The charts it contains are not reproduced here. The rules above cite them as follows, and the values they hold (terrain costs and defense strengths on the Terrain Effects Chart 13.1; the Movement & Fire Factors Table and its division-quality note 13.2; the Phase Sequence Track 13.3; and the Chaos of War Table 13.4) are not available in this transcription. The Game Turn Record Track, Phase Record Track and Visibility box on page R10 are likewise absent. Consult the printed issue for these.]