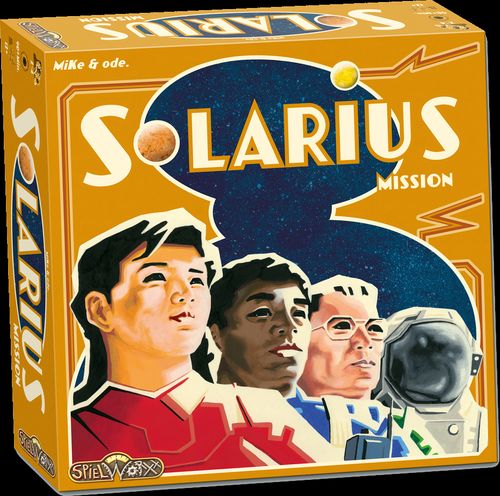
Solarius Mission
Solarius Mission Rulebook
Table of Contents
Table of Contents
2.0 Game Components
Each Solarius Mission copy contains:
- 7 space game board tiles
- 1 dice holder (the "bridge", with 2 bonus wheels as replacements)
- 4 player mats
- 20 action dice
- 1 bag (for the action dice)
- 16 tech dice
- 8 colonies (discs, 12 each in the player colors)
- 16 space stations (octagons, 4 each in the player colors)
- 24 mission markers (cubes, 6 each in the player colors)
- 4 fuel markers (small black discs)
- 4 SpaceBucks markers (small yellow discs)
- 70 resources (cubes, pink)
- 50 space contamination (cubes, grey)
- 24 outpost markers (6 each in the player colors)
- 4 space ships (plastic, 1 each in the player colors)
- 36 planets (cardboard)
- 4 drive markers in player colors (cardboard)
- 16 common drive markers (cardboard)
- 6 commercial hubs (cardboard, with letters A to F)
- 32 progress cards
- 2 holders for progress cards and commercial hubs (each consisting of 2 parts)
- 24 space station cards (4 identical player sets of 6 cards each)
- 4 game start cards
- 1 starting player token
- 4 play aids (backprinted, English-German)
2.1 The Space Game Board Tiles
In Solarius Mission space consists of a center and six outer tiles that are placed next to the center in any alignment selected by the player.
The center contains the home planet in the middle; it is the starting space for all players' space ships. The center also has four spaces for planets.
The outer space tiles have spaces for planets, portals (for space "jumps") and commercial hubs to be built.
2.2 The Bridge
The bridge holds the action dice. The spaces of the bridge also show bonuses and penalties for the players.
2.3 The Player Mats and the Tech Dice
The player mat and the four technology ("tech") dice of each player are the "engine" that drives a Solarius Mission match.
The four tech dice will be placed, one per row on the mat according to their colors. They will be shifted to the right and increased in value during the game.
The edges of the mat hold more information that we explain, together with the rules on tech dice, later in this booklet – specifically 5.0–8.0.
2.4 The Action Dice
The twenty action dice are drawn out of the bag by the players, one after the other, during a game turn and are then placed on the bridge. Each player always has a choice between four dice.
2.5 Further Player Materials
In addition to player mat and tech dice, each player has one fuel and one SpaceBucks marker, a play aid (listing important steps of the turn sequence and the end game scoring) and, in his player color, twelve colonies, four space stations, one space ship, six mission markers and six outpost markers.
2.6 The Playing Cards
Solarius Mission contains a total of sixty playing cards – thirty-two progress cards, twenty-four space station cards and four game start cards.
In the "introductory" game each player receives a random hidden game start card containing his individual starting position.
Moreover, each player has an identical set of six space station cards that give advantages during a game.
The thirty-two progress cards are used either as missions or developments by the players. Both the drawing deck and the discard deck are located on the card holders.
2.7 Commercial Hubs, Planets, and Drives
The flipside of the commercial hubs have the letters "A to F" – this letter determines on which outer board tile four of the commercial hubs will be placed during the game. At the start of the game they are put on the commercial hub holder. The players may fulfil missions at commercial hubs.
Planets are settled by the players to earn victory points at the end of the game.
The drive markers allow the space ship to increase its range.
2.8 Scoring Pad and Glossary
The scoring pad is used during end game scoring and helps add the victory points. If necessary, its sheets may be copied by the players.
The glossary has a summary of the progress cards, the space station cards, the outposts, and the planets.
2.9 The Resources, the Space Contamination and the Starting Player Token
Further wooden components in Solarius Mission are the starting player token and small cubes representing resources and space contamination. Resources have just one color – their spot on the player mat (see 5.0) determines which kind of resource they are.
Example: If a resource is in the topmost (black) row, Marion has a black resource.
3.0 Aim of the Game
With their space ship, the players explore far away planets, develop new technologies with their tech dice, and send settlers into space. They try to prevent space contamination.
Solarius Mission is a very eclectic game – it is important to think ahead and to optimize the personal strategy. Who acts especially prudent, who will win in the end?
4.0 Game Preparations
The players put together space with the seven interlocking space board tiles. They start with the center showing the home planet of the players in the middle. The other six tiles are placed circularly and in any alignment around the center. It does not matter which outer board tile is at which place. In this way the game board is different in each match.
One player shuffles the planet tiles. Afterwards he sorts out planets according to the number of players – remaining tiles are put back into the game box without looking at them.
- In a 4-player game he sorts out one planet per color.
- In a 3-player game he sorts out two planets per color.
- In a 2-player game he sorts out four planets per color.
Now the players put one planet per planet space on the game board (space) – according to the number of players.
- Center: It shows the home planets in the center. It is the starting space of all players. In addition, it has four planet spaces. Spaces showing a "3" are only used in a 3 player game. In a 2- or 4-player-game these two spaces are not occupied.
- Outer space tiles: The players always put planet markers (hidden) on planet spaces without numbers; planet spaces with number "3" are used only in 3- or 4-player-games, planet spaces with number "4" are used only in 4-player-games.
The players pool resources and space contamination markers next to the space.
One player places the commercial hub holder next to the space and shuffles the six commercial hub markers. Afterwards he puts two markers back into the box without looking and places the other four markers, hidden, on the four game turn spaces of the commercial hub holder.
Each player receives:
- One player mat, which he puts in front of him. The mats depict a color marking at their base.
- 4 tech dice (one in each color) that he puts, "1" side up, on the spaces of column I according to their color.
- The player material in his color: four space stations, twelve colonies, one space ship, six mission markers, six outposts and one drive. The space ship is placed on/next to the home planet in the center of space. The space stations are placed on their four spots on the left side of the mat, and the drive at the bottom in the notch of the same color.
- Two small discs (one yellow and one black): These are placed on space "2" of the fuel/SpaceBucks track at the top of the mat – so each player starts with two fuel and 2 SpaceBucks (the "currency" in Solarius Mission).
- One set of six space station cards.
- One Play Aid.
One player places the two card holders next to space. He shuffles the remaining progress cards and places this hidden deck onto one card holder. With less than four players, unused progress starting cards are also shuffled into this deck.
One player shuffles the game start cards and gives each player one. They depict the individual starting position of a player:
- The player shifts one tech dice one space to the right to column II.
- He upgrades another tech dice to 2 points.
- He receives two resources each in the other two colors that he places on the depicted empty storage spaces.
- The cards also show the numbers of two progress cards. According to these numbers the player receives two progress starting cards – his initial hand.
Afterwards all game start cards are put back into the game box.
Example: Marion receives her game start card and adjusts her starting position accordingly. In addition, she receives progress cards 4 and 5 into her hand.
With 4 players all 20 action dice are put into the bag. With 3 players only 16 dice are used; one die per color is put back in to the box. With 2 players only 12 dice are used; two dice per color are put back in to the box.
One player places the bridge (the dice holder) with the bonus wheel next to space in such a way that the arrow of the bonus wheel is pointing to the edge of any space.
A starting player is determined randomly. He receives the starting player token.
The starting player draws 4 action dice out of the bag and rolls them. He places the dice according to their values on the bridge (see also 6.0). To determine the value of a "star" symbol, the starting player uses his tech dice of the same color. Afterwards he places the die or dice with the highest value in the space next to the arrow with value "-1". A die or dice with the next highest value are placed on the second space with value "0" etc. At the start of the game several action dice may be put in the same space of the bridge.
Now the game may begin!
Game Preparations Without Game Starting Cards!
After a few games the players may play without the game start cards. They begin in this way:
One player shuffles all progress cards and gives each player three. Each player selects two of them to keep and puts the third one on the discard pile.
Then each player chooses his starting position himself. A player shifts one tech die one space to the right to column II and upgrades another tech die to 2 points. He takes two resources in the other two colors.
In this way each player may select a starting position according to the selected progress cards.
5.0 Player Mat
The player mat is a central element of Solarius Mission. Each player has their own mat showing the development of his space ship.
At the top there are the "reminders" for the exchange rates. Each player may exchange two fuel and/or SpaceBucks points for any resource (left) and/or any two resources for one fuel or SpaceBucks (right) in his player turn.
Below that is the fuel/SpaceBucks track. With a black fuel and yellow SpaceBucks disc the player shows how much fuel and how many SpaceBucks he has. A player may never have more than 10 fuel or SpaceBucks. To the left of this track is the "reminder" that each player may purchase an additional space ship range for two fuel points each in his player turn; to the right is the reminder that he may buy an additional die point for two SpaceBucks each. At the end of the game, each player receives two victory points for 10 fuel and 10 SpaceBucks each; one victory point each for five to nine fuel or SpaceBucks each.
At the top of the left side of the mat there are three spaces for space contamination and the "reminder" that the player gets minus points when he has contamination cubes next to the mat at the end of the game.
Below this are the spaces for the four space stations with their costs – how many resources of which sort the players need for the space stations. The first space stations, e.g., costs resources of one kind and a value of 3 and resources of another kind and a value of 2. A player always has to build his space stations in sequence from top to bottom!
At the end of the game he receives victory points for the second to fourth built space station (for building all four space stations a maximum of 6 victory points). The accompanying space station cards are placed to the left of the mat by the player.
At the right side of the mat there are four spaces for the action dice selected by the player.
Below of these spaces is the transformation space. Here the player may place one action die per game turn. This die then takes any other color and the effects of that color. However, the player immediately has to take one space contamination cube and put it on a legal spot (or next to his mat) - the number of points of the selected die does not matter.
To the right of the four standard dice placement space is the research space. If the player places any action die here, he may draw one progress card or play one from his hand. However, as with the transformation space, the player immediately has to take one space contamination cube and put it on a legal spot (or next to his mat) - the number of points of the selected die does not matter.
The player places progress cards to the right of the mat – mission cards at the top, development cards below. He gets minus points for unfulfilled missions at the end of the game.
At the bottom left next to the mat the player puts planets that he intends to settle. At the bottom right he puts planets that he has successfully settled. As "reminders" it is listed that planets not settled at the end of the game bring minus points (left) and that a player receives 2 victory points per three settled planet colors and 4 victory points for all four planet colors settled (right).
The players mark the speed (=range in hexagon spaces in space) of their space ship at the lower side of their mat. Each space ship starts with a drive in player color already installed (=range 1) and has room for three further drives that a player may buy with fuel. By payment with fuel, too, a player may increase the range of his drives from "1" to "2".
The heart of the mat is the four central rows. In each of the four rows there is always one tech die. Pink spaces in all rows always have room for one resource. Resources have, according to the column of the mat, a value of 1, 2, or 3 (shown by Roman numbers).
All resource spaces that are to the left of a tech die are storage spaces for resources of a player. All resource spaces that are to the right of a tech die are "blocked" though.
The black tech dice in the top row brings fuel and black resources. The yellow tech die in the row below brings "money" (SpaceBucks) and yellow resources. The turquoise green tech die in the row below brings turquoise green resources and upgrades all tech dice (see the next paragraph). The brown tech dice in the bottom row brings brown resources and shifts all tech dice to spaces in columns further to the right (each column is marked with Roman numbers I-V at the bottom).
The player may upgrade each of his tech dice with his turquoise green; i.e., he turns it to the next higher tech level with the next higher points value. "Higher" points values allow a player more extensive actions. Turning a die to the next highest value costs as many action points as the die had pips before turning (e.g., turning a die from 1 to 2 costs one action point).
If a player uses the brown die to shift tech dice to spaces in columns further to the right, he receives, among other things, storage spaces for additional and more valuable resources. Shifting a die costs action points – as shown in the top left of all spaces starting in column II. For example, shifting a die from column II to column III costs 2 action points. If the player manages to shift a die to the columns IV and V spaces, he receives the victory points listed in column IV – see 10.0.
6.0 The Action and Tech Dice
Action dice have the sides 1, 2, 3, star (twice) and star + 1. The rolled number is the number of available action points which the player can use for his action. A star brings a player as many action points as the value of his tech die in the same color. A star +1 means that a player gets as many action points as the value of his tech die in the same color is plus one.
Example: Marion selects a black action die with star + 1. Her black tech die has a value of "2" - therefore she receives 3 action points.
The player increases the values of his tech dice by actions of the turquoise green die during the game. Tech dice have the following sides: 1, 2, 3, 4, 4 + 2 victory points and 4 + 4 victory points. Upgrading above value "4" earns the players victory points at the end but do not bring further advantages during the game. The player only uses the value of his tech dice when he has to determine the value of the star of an action die.
7.0 Resources
The players store their resources at their player mats like a "pyramid".
At the start of the game the players only have the storage spaces to the left of the tech dice available for resources: in three rows only two, in one row three spaces.
If a player shifts his tech dice, by actions of the brown die, to columns further to the right, he has additional storage spaces available to the left of the action die. Resources in storage spaces in column I have the value 1, in column II value 2 and in column III value 3.
The player may only place resources in a row in column II when he has more filled storage spaces in column I of the same row. This means that he must have at least two resources in column I before he may place his first resource in column II. If a player would like to place a second resource in column II, he needs all three resources in column I. To place the resource in column III a player must have all three resources in column I and both resources in column II ("like a pyramid").
Example: Marion has already stored three yellow resources at her mat in earlier turns. She receives two more yellow resources and puts them in her storage spaces.
If a player removes resources from his player mat, he does not have to use the "system" mentioned above! This means, he may remove a resource from column I in a completely filled row. If a row is filled anew, the "system" is in effect again! Resources placed on the mat may not be repositioned on the mat.
In Solarius Mission all "prices" have two different listings:
- 2, 5 etc.: The player needs resources of a certain kind with the total value of 2, 5 etc. Not necessarily 2, 5 or more individual resource cubes are meant; it is only important that the value of these resources is identical to the total value!
- III, 2 II etc.: The player needs resources of a certain kind and a certain value; e.g., a resource with the value of 3, two resources with the value of 2 each etc.
8.0 Space Contamination
By conducting various actions a player receives space contamination (grey cubes) in Solarius Mission.
Each player has three spaces for space contamination in the top left of his mat. Here he places contamination cubes he has. If all spaces are filled, the player has to put additional space contamination next to his mat.
During the game a player may get additional spaces for placing space contamination by building space stations. Moreover, in specific circumstances, he may remove contamination cubes from spaces again.
Space contamination cubes that are next to a player's mat can never be removed again. A player will have it till the end of the game – each cube is minus 1 victory point.
In the Sequence of Play section we mention Attention: Space Contamination when a player receives contamination cubes.
Example: Marion already took 5 space contamination cubes during the game. Therefore her three spaces on her mat are full and two cubes are already next to her mat. After her building of a space station she again has room for two more space contamination. Unfortunately she may not transfer the two cubes next to her mat and will get 2 minus points at the end of the game for sure!
9.0 Sequence of Play
Solarius Mission is played over the course of a total of four game turns.
At the start of each game turn a new commercial hub is erected in space.
Afterwards the players conduct four player turns each. Each turn consists of three phases:
- a. Select action die and conduct die action (mandatory)
- b. Conduct supplementary action (voluntary)
- c. Refill action die and hand bag to next player (mandatory)
Moreover, the players may always do in their player turn:
- d. At Any Time actions
When the players have conducted all player turns of a game turn and the action dice bag is completely empty, the end of turn segment begins. All players may use their built space stations now and must conduct a few administrative tasks.
After four game turns Solarius Mission ends with the final scoring. The player who now has the most victory points wins the game!
9.1 Start of a Game Turn – Commercial Hub
At the start of a game turn the starting player takes the commercial hub from the space of the current game turn, turns it and places it on the corresponding hexagon in space. The letter on the flipside (A-F) tells the players on which space the commercial hub is placed.
When the fourth commercial hub is placed, the last game turn begins.
Example: Marion turns over commercial hub B and places it on the corresponding hexagon of one of the outer tiles in space.
9.2 A Player Turn
The player conducts the three phases of his player turn.
A. Select Action Die and Conduct Die Action (Mandatory)
First, the player selects one action die from the bridge and places it on his mat – either on one of the four standard die spaces or on the transformation space or on the research space. This die may not be selected by any other player anymore!
First, the die bonus is determined. The number on the bonus wheel pointing to the space of the taken action die shows how much fuel or SpaceBucks the player has to subtract from his track at a red -1 or receives at white numbers. If he gets a bonus of 2 or 3 the player may take any combination of fuel and SpaceBucks. Fuel and SpaceBucks are immediately adjusted on the track of his mat.
Example: Marion selects a black die and places it on her first normal dice space on her mat. Because of the "-1" she pays 1 fuel.
With this action die the player now conducts a die action. He uses the action points of the action die. Only when the action die shows a star, the player uses the value of his tech die of the same color (see 6.0). The color of the action die determines the kind of action.
Buying additional action points: Always when a player conducts a die action, he may buy additional action points with his SpaceBucks. Each additional action point costs 2 SpaceBucks. The player has to use these purchased action points immediately.
Example: Marion has taken the black action die that brings her 3 action points. However, she would like to use 4 action points and buys the fourth point with 2 SpaceBucks.
Attention: Space Contamination: Each player taking an action die that brings him 3 or more action points immediately receives 1 space contamination. He does not get space contamination when the action die points are 3 or more after buying additional points or by certain development cards.
Transformation space: Once per game turn, the player may place a selected action die in the transformation space (instead of a "normal" space). The player may change the die on the transformation space in any other color to conduct an action of his choice. If the die shows a star, the player uses his tech die of the "new" color to determine the action points. The die remains in this space till the end of the game turn; therefore this function may only be used once per game turn.
Attention: Space Contamination: If the player uses this space, he receives 1 space contamination.
Research space: Once per game turn, the player may place a selected action die in the research space (instead of a "normal" space). Before the player conducts his normal die action, he draws a progress card from the deck (please keep in mind the hand limit of 3!) or he plays a progress card he already has in his hand (see below, "playing a progress card"). The die remains in this space till the end of the game turn; therefore this function may only be used once per game turn.
Attention: Space Contamination: If the player uses this space, he receives 1 space contamination.
Some progress cards have a space to place a selected action die to trigger certain effects. As above, a die remains in such a space till the end of the game turn; therefore a function may only be used once per game turn.
The player may always choose between two die actions:
I. Taking resources in the color of the action die
According to the available action points the player takes a number of resources in the color of the action die and places them in empty warehouse spaces of the same color (see 7.0). If he does not have enough empty warehouse spaces, surplus action points are forfeited. If the player receives 3 resources, he takes 3 cubes and distributes them on warehouse spaces. He does not necessarily receive resources of value 3; according to their placement space their value may be higher.
Example: Marion places 2 resources on warehouse spaces in column I and the third one on a warehouse space in column II. These new resources have a value of 4.
II. Conducting an action in the color of the action die
The color of the action die determines the possible action:
-
Black action die: The player receives a number of fuel points according to his available action points and adjusts the fuel marker on his track. The track has a maximum of 10 fuel points; surplus points are forfeited.
-
Yellow action die: The player receives a number of SpaceBucks according to his available action points and adjusts the SpaceBucks marker on his track. The track has a maximum of 10 SpaceBucks points; surplus points are forfeited.
-
Turquoise green action die: The player uses his action points to upgrade any of his four tech dice (see also 6.0). Upgrading an action die costs action points according to the "value" of the tech die. To upgrade a tech die, the player has to spend as many action points as the tech die had pips before upgrading. If the player has more than one action point he may upgrade a die or dice more than once. Surplus points are forfeited.
Example: Marion has 3 turquoise green action points and therefore may upgrade the black tech die twice. The first upgrade costs 1 action point, the second one 2 points. Her die now has a value of 3. Instead, Marion could have upgraded three different dice of value 1 to 2.
-
Brown action die: The player uses his action points to shift any of his four tech dice to columns farther to the right. Shifting a die costs different amounts of action points according to the column of the die. The shifting costs are listed in each space of the columns. As long as a player has action points, he may shift one die several columns or shift more than one die with this action. Surplus points are forfeited.
Example: Marion has 3 brown action points – she shifts the black tech die (1 action point) from column I to II, then the yellow tech die (2 action points) from column II to III.
B. Conduct Supplementary Action (Voluntary)
After the die action the acting player may do a voluntary supplementary action. He either upgrades his space ship without space flight or he decides to do space flight.
I. Without space flight – upgrading the space ship
The player does not do space flight – his space ship stays at its hexagon in space. Now he may either upgrade his space ship drive (I.1), draw 2 progress cards (I.2) or play 1 progress card (I.3).
I.1 Upgrading the space ship drive
At the start of the game each player already has one drive marker in player color. This marker has the value 1 and may not be upgraded.
With a supplementary action the player may purchase up to three drive markers for 3 fuel points each. He subtracts the total costs from his fuel track on his mat. He takes the drive marker(s) bought from the pool, turns them to value 1 and places them at the notches at the bottom of his mat.
The drive markers determine the range of the space ship, see "space flight".
Example: Marion purchases 2 additional drive markers and places them at her mat. She pays 6 fuel and subtracts them from her fuel track.
I.2 Drawing progress cards
The player first draws the two topmost cards from the drawing deck and takes them to his hand. Then he puts one of his hand cards on the progress cards discard stack. If the deck of progress cards is ever empty, the discarded cards are shuffled and form the new drawing deck.
Hand card limit: Each player may have a maximum of 3 progress cards in hand. During an action, i.e., for example while drawing new cards, a player may temporarily have more than 3 cards. However, he immediately has to discard surplus cards to stay within the limit – this is the only exception!
I.3 Playing a progress card
The player plays one progress card from his hand.
Each card gives him two possibilities. He may play it as a mission or, turned by 180 degrees, as development.
The player places missions at the top right of his mat; developments are placed below. After placement of the card only the selected function should be visible (half of the card). The order in which cards have been placed does not matter; additional cards are put below already played cards.
If the player places a card as a mission he immediately places one of his colored mission markers onto the small square with the green check mark. This shows that the player has not completed the mission. Only when he has completed the mission he removes the cube from the card again. The player may only have a total of six missions during the whole game. Then his supply of mission markers is exhausted.
Example: Marion plays a progress card as a mission and puts it partly below her mat. She puts a mission marker on the square with green check mark to show that the mission has not been completed yet.
The effects of developments may be immediately used after playing the card. Details on all effects may be found in the glossary!
II. Space Flight
The player first flies into space with his space ship, afterwards he may either settle a planet (II.1), build a space station (II.2) or complete a mission (II.3). Under certain circumstances he may build an outpost (II.4). All these actions earn the player victory points at the end of the game. Moreover, he will get additional points when he places his space stations, colonies and mission markers near commercial hubs and in close distance to each other.
Space flight: The space ship of the player has a certain range according to its available drives.
Before the start of his flight the player decides if he wants to activate the portals by reducing his range by 1. This is only possible when the player's space ship already has at least one "standard" drive. The drive in player color always stays with the space ship! To reduce the range of the space ship the player flips one drive with a value of 2 to its front (value 1) or he removes one drive of value 1 to the pool of markers.
If the player has reduced his range, he immediately activates all portals in space till the end of his turn.
Now he determines his range by adding up the value of all drives his space ship has. Each "point of range" allows the space ship to move to an adjacent hexagon in space. A player never has to use the maximum range; i.e., with a range of 3 he may fly between 0 and 3 hexagons. If he does not use his full range he may not save steps from turn to turn.
Range increase: Always, when a player conducts space flight, he may buy additional points of range with fuel. Each additional point of range costs two fuel. The player has to use purchased points immediately and adds to his "standard" range.
Portals: If the player has reduced his range to activate the portals in space, he may "jump" from one portal hexagon to any other portal hexagon. This jump costs 1 range.
Each hexagon in space may only hold one player figure and one space ship of one player at the end of space flight. The player may, however, fly over any hexagon with his space ship; he may not end his flight in hexagons containing:
- Player figures of another player (space ship, space station, mission, colony)
- Commercial hub
The player may end the flight of his space ship on a hexagon with one of his own player figures (space station, mission, colony).
Example: Marion has activated the portals and removed one of her drives with a value of 1 – her space ship now has a range of 4. She moves the space ship to the first portal, from there to the second portal and then with her last two points next to the commercial hub.
At the end of space flight the player may conduct one of the following supplementary actions.
II.1 Settle planets
If the player ends his space flight on a planet, he may try to settle it.
If the planet is still concealed (on its back), the player turns it and puts it back (open) on its hexagon. This is mandatory!
Each planet has a precondition that the player has to fulfill in order to settle it.
After turning the planet the player has two options:
-
He decides to not settle it. In this case he immediately receives the explorer bonus (resources). The explorer bonus is the number of victory points of the planet. A planet bringing 2 victory points allows the player to take any 2 resources. He has to place these resources on any empty warehouse spaces, see 7.0.
Example: Marion discovers a yellow planet and decides to not settle it. She puts it openly back to its hexagon and takes the explorer bonus of 2 resources instead.
-
The player decides to settle the planet. He does not get any explorer bonus; instead he takes the planet and puts one of the colonies (discs) in his player color in the planet's spot. This symbolizes the settlement on the planet. The planet piece is put at the bottom left of his mat. The planets do not have to be placed in any certain order. To show that the settling of the planet is not completed, the planet stays on the left side of the mat. If the player fulfills the precondition to settle the planet immediately or later, it is transferred from the left to the right side of the planet at that moment.
Example: Marion decides to settle the newly discovered planet. She does not get any explorer bonus. Instead she places one of her colonies on the planet hexagon and puts the planet at the bottom left next to her mat.
The player may settle several planets already discovered and turned up (both by other players or himself in an earlier turn) in one turn.
The explorer bonus is only given to the player who turned the planet when he discovered it and if he decides to not immediately start settling it.
The player may fulfill the settlement preconditions of planets at any time in his player turn. The preconditions for settling a planet are explained in the glossary. A planet is successfully settled when the player has fulfilled the precondition till the end of the game. The player moves the planet immediately to the bottom right of his mat. Again, the order of placed planets does not matter.
If the player does not fulfill the settlement precondition till the end of the game, he gets, according to the number of not settled planets next to his mat, an increasing number of minus points. Each successfully settled planet brings the player the listed victory points listed on the planet at the end of the game.
II.2 Building space station
If the player ends his space flight on an empty hexagon in space neither containing player figures, nor a planet, nor a portal, he may build one of his space stations in that spot. Space stations are represented by cards. Each player has six cards; however, he may only build up to four during a game.
To build a space station the player has to pay a certain amount of resources from his mat. The two kinds of resources that the player needs to build the space station are listed on the cards. The value of the resources is listed at a player's mat next to the space station octagons. The player can choose which color he uses for a certain value. The player builds his space stations "from top to bottom"; he starts with the "cheapest" space station. After paying the required resources, the player moves his space station octagon from his mat to the hexagon occupied by his space ship.
All space station cards have an immediate effect and a permanent effect. The player does the immediate effect immediately after building the station. After using the immediate effect he puts the card in such a way from the left below his mat that the part with the immediate effect is covered but the part with the permanent effect is visible.
Afterwards the permanent effects of all his space stations built earlier are triggered, in any order, once. Moreover, the permanent effects are triggered in the Turn End phase of each game turn.
All effects of space stations are explained in the glossary.
For building the second, third, and fourth space station the player receives victory points at the end of the game.
Example: Marion builds her first space station and pays resources with a value of 3 and 2. She returns yellow resources with a value of 3 and brown resources with a value of 2 from her mat (she misses a brown resource, otherwise she could have paid the other way around). She places the space station in the hexagon of her space ship and conducts the immediate effect of her space station before placing the card at her mat.
II.3 Completing missions
If the player's space ship ends its space flight on an empty hexagon in space next to a commercial hub that neither contains a player figure, a planet or a portal, he may complete missions.
When completing a mission it does not matter if the commercial hub hexagon is still empty or if it already has been transferred from the holder to space (and therefore has been built).
To complete a mission, the player must pay the resources listed on the mission card from his mat and then moves his mission marker from the mission card to the hexagon where his space ship is located. As a reminder for the completed mission the green check mark on the mission card is now visible.
If this is the first mission that a player completes at a specific commercial hub and if the commercial hub is already in space ("it has been built"), the player may use a bonus. Per commercial hub a player may receive one bonus – it is like one of the outpost bonuses (see also II.4 and in the glossary on page 3). Each time, the player may freely select any one of the six outpost bonuses, no matter if he has already built the corresponding outpost or not.
Completed missions bring the player victory points at the end of the game, non-completed missions bring minus points.
Example: Marion's space ship is located adjacent to a commercial hub that already has been built. She completes her mission and places the mission marker on the hexagon of her space ship. At this commercial hub it is her first mission – therefore she receives one of the six outpost bonuses.
If, in very rare circumstances, all hexagons adjacent to a commercial hub are occupied, the player may still complete a mission. In this case he needs an empty hexagon that is next to a playing figure (space station, colony, mission) of another player that is next to the commercial hub or is connected by an uninterrupted chain of playing figures to the commercial hub. If this special case is the first completed mission at the commercial hub the player does not get a bonus.
If the player has completed a mission adjacent to a commercial hub that has not been built and if that hub gets into space later, he receives the bonus at that time. If more than one player receive a bonus at the same time, they may choose their bonus in turn order.
II.4 Building outposts
Each player has six outpost markers: two each with the colony symbol, the space station symbol and the mission symbol. Moreover, each outpost lists an outpost bonus (see in the glossary on page 3).
The player places the outpost into the hexagon in addition to one of his playing figures (space station, colony, mission). He may build an outpost when he has not built another outpost on the outer space tile (named A to F) where his space ship is located. In addition, the playing figure that is supposed to get the outpost has to be the first of its kind in this outer space tile. The player immediately uses the outpost bonus.
Example: Marion builds a space station on the outer space tile where her space ship is located. This is the first space station on this space tile. Marion does not have an outpost on this tile, therefore she may place such a marker by her space station. It does not matter if another player already has a colony or a mission marker on this outer tile. She takes a neutral drive as her outpost bonus.
The second outpost of a kind may only be built after the player has already built one outpost of each kind (space station, colony, mission).
Example: Marion has built a colony and a space station outpost. To build a second colony-outpost she first has to build her first mission-outpost.
Each player figure that is in the same hexagon as an outpost earns double the amount of victory points at the end game scoring.
C. Refill Die and Pass the Bag (Mandatory)
Finally, the player turns the arrow of the bonus wheel at the bridge by one position in counter-clockwise order. Then he draws one action die from the bag and rolls it. Now he places the action die on the space with the red 1 behind the arrow at the bridge.
If, before turning, there is a die on the "last" space with the white 3 directly in front of the arrow, the player shifts it one space with the arrow.
He hands the bag to the next player in clockwise order who now conducts his turn.
D. Conducting Anytime Actions
Solarius Mission is a very flexible game. During his own player turn (and only then!) the player may conduct certain actions without having to follow a "strict sequence".
d.1 Exchanging
At any time during his player turn the player may exchange stuff with the "pool". He transfers a certain amount of his resources/fuel/SpaceBucks to the pool and receives a certain amount of resources/fuel/SpaceBucks in exchange from the pool. The player mat shows the "terms of trade" at the top.
There are the following options:
- Fuel or SpaceBucks into resources at the rate of 2:1
- Resources into fuel or SpaceBucks at the rate of 2:1
Note: The resource value according to the column counts, not the number of cubes.
Example: Marion has 1 resource in column I (value of 1) and 1 resource in column III (value of 3). With these resources and a value of 4 she may either get 2 fuel, 2 SpaceBucks, or 1 fuel and 1 SpaceBucks each.
d.2 Upgrading drive
At any time during his player turn the player may remove 3 fuel from his fuel track to turn one of his drive markers from the "1" to the "2" side. The drive marker in player color has a value of "1" on both sides and may not be upgraded.
d.3 Completing the settlement of a planet
At any time during his player turn the player may settle a planet and move it from the left side to the right side of the mat if he fulfills the precondition listed on the planet.
Fulfilling the precondition often happens "automatically", however, with black and yellow planets often fuel or SpaceBucks have to be paid. The player pays the resources from the fuel/SpaceBucks track of his mat.
10.0 Turn End
When the players have used their 4 dice each and the last die has been put from the bag to the bridge, the action phase ends. For now, all dice stay where they are.
Now all players may use the permanent effects of all of their space stations in any order once. This is done simultaneously by all players.
Last game turn: Now the players may complete the settlement of planets if they have needed resources by space station "payments". This is only possible with fuel and SpaceBucks.
Afterwards the players conduct the following steps together. At the end of the fourth game turn these steps are omitted.
- The players put their dice from their mats or research cards back into the bag. The action dice at the bridge stay there; they are used in the next game turn.
- The current starting player hands the start player token to the next player in clockwise order.
If there is still a concealed commercial hub on the holder, the new starting player begins the next turn by entering that hub into play. If all four hubs are already on the outer tiles of space, the game ends with the end game scoring.
11.0 End Game Scoring
After four game turns the players take one sheet of the scoring pad and determine their number of victory points by adding them. The players move through the various "scoring categories" from top to bottom and write down the victory points for each player, as explained in detail below.
The player who has won the most points is the winner and the absolute and dominating leader of the galaxy!
If there is a tie, the player among the leading ones who has earned more points by settling planets is the overall winner. If there is still a tie, there are two (or more) winners.
Scoring Categories
-
Each successfully settled planet earns the player the listed points. Depending on the number of not settled planets the player gets minus points. For 1, 2, 3 not settled planets a player gets 1, 3, 6 minus points – as listed in the bottom left corner of the player mat.
-
The player receives bonus points when he has settled planets of different colors. For each "set" of 4 planets of different colors he receives 4 bonus points; for each set of 3 planets of different colors he receives 2 bonus points – as listed in the bottom right corner of the player mat. Each planet may be part of only one set.
-
The second, third, and fourth built space station earn the player the victory points listed on the player mat each – the second space station earns 1 victory point, the third 2, and the fourth one 3 victory points. The player therefore may score a maximum of 6 points for his space stations.
-
Completed missions earn the player the printed victory points; not completed missions bring the player, as listed in the right top corner, 1 minus point each.
-
For each of his own playing figures (colony, space station, mission marker but not his space ship) next to a built commercial hub the player receives 1 victory point.
-
Each of his own tech dice that is on its 2 or 4 victory point side brings the player that number of victory points.
-
Each of his own tech dice that is in column IV or V of his mat earns the player 1 victory point each (as listed on the mat).
-
In each row where the tech die is in column V, the player receives, as listed in column IV of the mat, victory points for stored resources. For each column of a row where all warehouse spaces are filled, he receives 1 victory point.
Example: Marion has shifted the tech die in the black row to column V and filled the warehouse spaces in column I and II completely. She receives 2 victory points.
-
If the fuel and SpaceBucks markers are at least in space 5 of the track, the player gets 1 victory point each (as listed below the track on the player mat). If the markers are in space 10, he gets 2 victory points each.