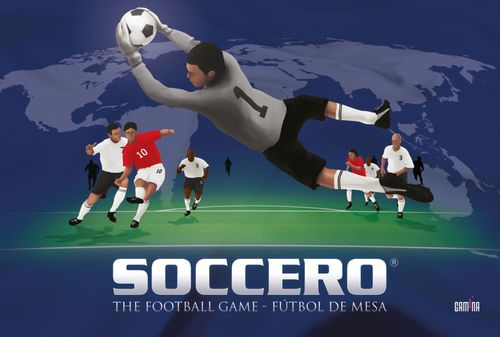
Soccero (Second Edition)
Soccero (Second Edition) Rulebook
Table of Contents
Table of Contents
Components
- 22 player figures
- 1 game board with square spaces
- 4 dice
- 1 ball
- 2 kick dice
- 2 goals
- 2 hourglasses
Overview
The game is played by 2 competitors (managers) who move their players and the ball on the game board. Movement is determined by the die. The manager who has scored the greater number of goals by the end of the game is the winner.
Before starting the game, the goals must be placed in position. Both managers have a team consisting of 10 field players and a goalkeeper.
In the first session the BASIC RULES should be followed. Later, managers may choose to follow the EXTENDED RULES. The extended rules add more realistic football features to the game and make it more challenging. The extended rules contain features for: Goal Kick, Corner Kick, Throw-In, Free Kick and Penalty Kick.
Basic Rules
Match Duration: 2x45 min
An official match lasts 2x45 minutes. (Managers may also freely choose the match duration, for example 2x20 minutes.) There is a short half-time break, during which the teams switch sides. The INITIAL FORMATION for the second half of the match is similar to that of the first, except that the other team takes the kickoff.
Starting the Game
The managers toss a coin (or roll a die) to determine which team gets the ball and the kickoff after setting up the initial formation. The manager of the team opposite the winner decides which goal his team will be kicking towards.
Initial Formation
The manager of the team with the ball places all of his players first, in his half of the field, on the squares of his choice. These restrictions must be followed:
- One player must be placed next to the center mark, and another player may choose to be adjacent to the left or right square (A).
- There must be at least one empty square in every direction between all members of the team. (This rule is not followed for the two players who are inside the center circle.)
- Only the goalkeeper may be placed inside the PENALTY AREA (B).
The manager of the team without the ball places his players with similar restrictions, except that:
- Players must not be placed in the center circle or in any square crossed by the center circle. (The forbidden squares are shown in red in the figure) (C).
(THE ABOVE RESTRICTIONS ONLY CONCERN THE INITIAL FORMATION.)
Restrictions on Player Positions During Play
At the end of each turn:
- Only the goalkeeper and a maximum of 3 field players from each team may be inside the PENALTY AREA.
- Only the goalkeeper may be inside the GOALKEEPER'S AREA.
- In the same horizontal row or vertical column, there may not be more than 4 members of the same team on adjacent squares. (4 or more adjacent players are allowed on diagonal squares.)
Kickoff
First, the manager moves the ball from the player in the center circle to the adjacent player. After the kickoff he takes a normal turn. Then the manager of the opposing team takes his turn, and turns alternate from then on.
Turns
The manager of the team with the ball must decide at the start of each turn (before rolling the die/dice) between moving players or kicking the ball. It is not allowed to KICK THE BALL and MOVE PLAYERS in the same turn! The manager of the team without the ball can only move players when it is his turn.
Moving Players
The manager rolls one die. He then moves one or more of his players across the squares of the field so that the total number of squares moved equals the number shown on the die (he may not move more or less than the total obtained on the die).
When moving players, the following rules must be followed:
- Players may only move in a straight line: horizontally, vertically or diagonally.
- A player may only move once per turn.
- A player may not pass through a square occupied by another player.
- A player may move onto a square occupied by a player from the opposing team only in order to steal the ball from him. That is, each square may be occupied by only 1 player, and temporarily by 2 while stealing the ball. THE SAME SQUARE MAY NEVER BE OCCUPIED BY 3 OR MORE PLAYERS.
In this example the manager rolled a "6" and chooses to move three of his players.
Stealing the Ball
If the die allows a player to move (with an exact number) onto a square where an opposing player has the ball, he may move him onto that square and steal the ball. This is the only moment when 2 players can be on the same square (the one who had the ball and the rival who stole it from him).
This is when a team loses the ball and it passes to the possession of the rival who, if he stole the ball, ends his turn there (since he has already moved to steal the ball). The manager of the team that lost the ball must use at least the first point of his move to force his player to leave the square where the ball is and move to another empty one (since 2 players cannot be on the same square, except at the first moment of the ball steal). If he still has movement points remaining (because he rolled more than 1 on the die needed to move), he may use them to move another player or players (he cannot choose the same player who had to leave the square after losing the ball, because that player has already moved, and a player is not allowed to move twice in the same turn).
Stealing the ball prevents the rival player (who lost possession) from stealing the ball back on his very next turn after losing it, since stealing it requires an exact number on the die, and before that he must use at least his first point to forcibly move his player out of the square of the new ball holder. Also, while only 1 player may occupy a square, and exceptionally 2 at the first moment of a ball steal, THE SAME SQUARE MAY NEVER BE OCCUPIED BY 3 OR MORE PLAYERS. (There is a double obstacle to stealing the ball back on the turn right after losing it.)
In the figure, only a "3" on the die allows the red player to move onto the square where the opposing player is and steal the ball from him.
Carrying the Ball
The player with the ball moves according to the same rules as a player without the ball.
Players may move with the ball all the way, or, alternatively, leave the ball on one of the squares crossed during their move. Another player may also pick up the ball and carry it if he crosses the square holding the ball and there is no other player on that same square.
Each time a player with the ball moves and ends his move on a different square, the red side of the ball is turned face up (alternatively a marker can be placed as a reminder). This indicates that this player cannot carry the ball again. He must kick the ball (to another player or to any point on the board), or leave the square where the ball is (and leave it there). That is, the same player cannot move with the ball twice without first fulfilling one of the conditions mentioned (kicking it, or leaving it and moving away), but he may remain on the ball's square for as many turns as he wishes, and move his other players (to try to reposition them).
The ball cannot be carried into the goal.
Kicking the Ball
In addition to the regular die, the special kick die is used when the ball is kicked. The symbol on the kick die determines the possible route of the ball. To determine the distance (and power) of the kick, the manager must choose to roll either one or two regular dice (his choice). This must be rolled at the same time as the kick die. The symbols on the kick die:
- 2x Direct kick along the ground. The ball may only be moved in a straight line (horizontally, vertically or diagonally). The ball cannot pass over other players: it will be stopped by the first player in its path.
- 3x Curve kick along the ground. The direction of the ball may be changed once, at a 45-degree angle. The ball will be stopped by the first player in its path.
- 1x Curve kick in the air. The direction of the ball may be changed once, at a 45-degree angle. The ball may pass over other players. The ball may be stopped by one of the players in its path (either team's), but it may also travel as far as the number on the die shows (if no one chooses to stop it).
Notes: with a curve kick it is not mandatory to change its direction — in every case the ball may be moved in a straight line for the whole distance.
- If there are no players in the ball's path, it must be moved as far as the number shown on the die (or dice).
- If the ball is kicked past the edge of the field (either the touchlines or the goal lines), the ball is left on the edge square. The nearest player of the opposing team is moved onto that square. The match continues with the turn of the team that now has the ball.
Taking a Shot on Goal
- A shot on goal must be declared before rolling the die.
- Apply the rules for kicking the ball.
- If the die allows the ball to reach (and cross into) the goal, the team scores a goal (unless the goalkeeper actually saves the shot).
Extended Rules
It is recommended to try these rules one by one.
EXTENDED RULES add more realistic elements to the game which make it feel like real football. The game will become more challenging and the significance of good football strategy is increased.
Game designers: Martti Ojalainen & Jarmo Kuitunen. Produced under license of Soccero Ltd - Finland. Copyright of the Game rules © Soccero Ltd. All rights reserved. Soccero® is a registered trademark of Soccero Ltd.
Goalkeeper's Attempt to Save a Shot
Goalkeeper's attempt to save a shot works as in BASIC RULES with these additions and exceptions:
- When the manager of the goalkeeper rolls a die and succeeds in saving a shot (die number 5 or 6), the goalkeeper doesn't catch the ball, but he deflects it over the byline, and a CORNER KICK is awarded to the opposing team.
- The goalkeeper is also able to save shots and headers from the air — but with less probability than with shots on the ground: when the ball is going towards the goal either in the air over the goalkeeper or through either of the horizontal squares next to the goalkeeper, the goalkeeper is allowed to attempt to save the shot. Goalkeeper's manager rolls a die and he succeeds in saving a shot with the die number 6, the goalkeeper deflects the ball and it crosses over the byline, and a CORNER KICK is awarded to the opposing team. (If the number on the die is 1-5 the goalkeeper can't reach the ball and the opposing team scores a goal.)
Weak Shots
- When taking a shot on goal and the dice do not enable the ball to reach the goal, the ball must be moved towards the goal as many squares as the dice indicate. At the same time the manager of the defending team moves his nearest player into the square of the ball to block the shot. (OBS! In this situation the player is moved freely.)
- Depending on where the players are on the field, one can move either a field player or the goalkeeper. If the ball enters the goal area, the goalkeeper must be moved.
- If there are more than one player at the same distance from the ball, the manager may choose which player to move.
- The game continues with the turn of the team that gets the ball.
Headers
- If the ball comes to a player in the air with an exact number of the dice (or a die), the player may within the same turn head the ball in any direction in a straight line (the ball can come to a player in the air after a CURVE KICK IN THE AIR, THROW-IN or HEADER).
Procedure:
- The header is taken by throwing one die. The ball moves in the air over the players and must be moved as many squares as indicated by the die. The ball cannot be stopped by players in between.
- The ball may also be aimed on the goal (with the header managers don't have to indicate this before rolling the dice). The goalkeeper can attempt to save the header.
- A player who gets the ball after a header may attempt to head the ball further during the same turn.
- When playing with hourglasses, players must complete all the headers within the time given by the hourglass.
Fouls and Sanctions
Fouls when stealing the ball:
- When playing with the EXTENDED RULES, players can commit fouls when stealing the ball. In the worst case a penalty kick can be awarded. When the team which has lost the ball continues the play in their next turn after the steal and the manager rolls number 6, the opposing player stealing the ball has committed a foul. A DIRECT FREE KICK (or a penalty kick) is awarded to the team that lost the ball.
- When an OFFSIDE is called, the sanction is an INDIRECT FREE KICK from the square of the fouling player for the opposing team.
- The player who has played a set-piece may not touch the ball until another player has touched the ball. If this happens the sanction is an INDIRECT FREE KICK.
- If players violate THE RESTRICTIONS ON PLAYER'S POSITIONS, the sanction is a DIRECT FREE KICK for the opposing team in the square where the foul was committed.
Special Situations (Set Pieces)
Rules for all special situations
Preparations for special situations: the manager places one of his players with the ball on the square where the special situation (set piece) is to be taken. The normal RESTRICTIONS ON PLAYERS' POSITIONS have to be taken into attention in special situations. There are also many extra restrictions on players' positioning in special situations.
Free moves:
- Before a special situation is taken each of the managers may freely move two players of his choice to new (permitted) squares. The number of freely transferable players is raised to more than two if moving players on forbidden squares onto permitted squares, or some other special situation rule, requires it. Both managers may always move equally many players. Freely transferable players are set up by turns; the team taking the special situation begins.
Kicking the ball in special situations:
- In the case of all the kicks in special situations the following rule applies: the CURVE KICK ON THE FIELD SURFACE signs are interpreted as CURVE KICK IN THE AIR signs, but these kicks cannot be stopped for any player before the numbers on the dice are fully used. (OBS! The CURVE KICK IN THE AIR sign functions in the normal way.)
- The manager may apply the normal KICKING THE BALL rules to special situations. However, that must be announced before the special situation is played; if the manager does not announce in advance that he is applying normal kicking rules, he automatically applies the KICKING THE BALL IN SPECIAL SITUATIONS rule.
- After the special situation is over the player involved must not touch the ball before another player has touched it. (The sanction is an INDIRECT FREE KICK from the site awarded to the opposing team.)
- Following a special situation the match continues with the opposing team's turn.
Goalkeeper's Punt Kick
- On his turn the manager may announce that the goalkeeper is picking up the ball and continuing the game with a punt kick, if the goalkeeper has control of the ball inside the penalty area (and the ball is not kicked to him by a teammate). After announcing that the ball will be picked up, FREE MOVES are taken.
- During the goalkeeper's punt kick no field players are allowed in either penalty area.
Procedure:
- See RULES FOR ALL SPECIAL SITUATIONS.
- The off-side rule is applied during the goalkeeper's punt kick.
Goal Kick
- If the ball from an attacking player crosses the byline, the opposing team gets a goal kick.
- The manager places the goalkeeper together with the ball on one of the squares in the goal area. After that the FREE MOVES are taken.
- During a goal kick no field players are allowed in either penalty area.
Procedure:
- See RULES FOR ALL SPECIAL SITUATIONS.
- The off-side rule is not applied during the goal kick.
Corner Kick
- If the ball from a defending player or goalkeeper crosses the byline, the opposing team gets a corner kick.
- The corner kick is taken from a corner square of the field nearest to the place where the ball crosses (or would most naturally cross) the byline. If the ball crosses the line in the middle over the goal, the team taking the corner kick may decide on which square the corner kick is taken.
- The manager places a player of his choice with the ball in the corner square. After that the FREE MOVES are taken.
- During a corner kick no player from the defending team is allowed to be in the corner square or in adjacent squares.
- It is not allowed to score a direct goal from a corner kick.
Procedure:
- See RULES FOR ALL SPECIAL SITUATIONS.
Throw-In
- When the ball passes over the touchline, throw-in is awarded to the opposing team of the player who last touched the ball.
- The manager places a player of his choice with the ball beyond the touchline beside the square through which the ball crossed the line. After that FREE MOVES are taken.
- With throw-ins there are no special restrictions on the placing of players.
Procedure:
- The manager throws one die. The number on the die shows the length of the throw. The ball can be thrown in a direct line in three different directions as shown in the adjacent figure.
- The ball flies over the players, and it can't be stopped in flight before the whole number on the die is used up.
- After the throw-in the thrower is moved to the nearest free square.
- The off-side rule is not applied during throw-ins.
Free Kicks
- A free kick is given from the square where the foul occurred.
- The manager places a player of his choice with the ball in the square from which the free kick is taken.
- Before taking FREE MOVES the manager of the defending team may freely place up to three players to form a wall. If there are opposing players in the squares where the wall is to be placed, the opposing manager places them after the wall is constructed in the desired (permitted) squares. After that FREE MOVES are taken.
- When a free kick is given no player from the opposing team is allowed on the free kick square or on its adjacent squares.
Implementation:
- See RULES FOR ALL SPECIAL SITUATIONS.
- With indirect free kicks the ball may not be kicked directly on the goal.
- With direct free kicks attempts may be made to kick the ball directly on the goal, but the attempt to take a shot must be announced in advance.
Free Kicks Awarded from Goal Area or Penalty Area
In cases of free kicks awarded from goal area or penalty area the following additional rules and exceptions apply:
- A free kick from team's own goal area may be given from any goal area square.
- When a free kick is given from team's own penalty area, no player from the opposing team is allowed to be inside that penalty area.
- A free kick from team's own penalty area must be kicked out of the penalty area. If the dice value does not enable this, the kick must be taken again.
- An indirect free kick from the goal area of the opposing team is kicked from the nearest square outside the goal area, which is in the same vertical column as the square where the foul was committed.
Penalty Kicks
- When a player commits a foul which would lead to a DIRECT FREE KICK inside his own penalty area, the opposing team is awarded a penalty kick.
- The player taking the penalty kick is placed with the ball to the penalty spot and the opposing goalkeeper in the middle square directly in front of the goal line. After that FREE MOVES are taken.
- During the penalty kick no other players are allowed in the penalty area or in the squares that the penalty arc crosses. Other players must also be further away from the byline than the penalty square.
Procedure:
- See the RULES FOR ALL SPECIAL SITUATIONS.
- Goalkeeper may attempt to save the shot in the normal way.