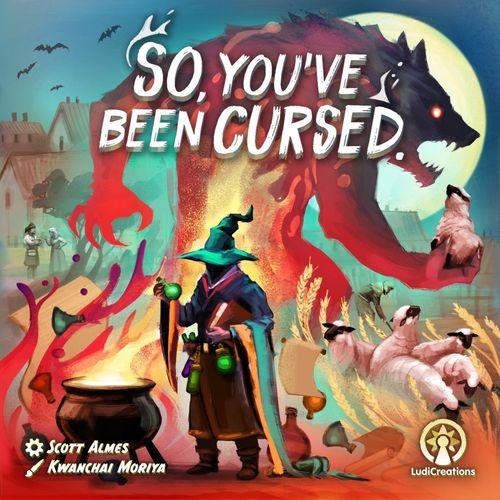
So, You've Been Cursed.
So, You've Been Cursed. Rulebook
Table of Contents
Table of Contents
Gameplay
So, You've Been Cursed. can be played as:
- A game for 2 players, with the Wizard player against the Monster player.
- A game for 1 player, with the Wizard player against a Rabid Monster.
- A game for 1 player, with the Monster player against a Possessed Wizard.
- A game for 0 players, with a Rabid Monster against a Possessed Wizard.
NOTE: The rules for a game with 2 players are in this rulebook - please read these first.
The rules for games with 1 and 0 players can be found in the Solo Survival guide.
Rules for -1 player are still being playtested.
Game Overview
The game takes place over a series of turns, with the Wizard player taking the first turn. Players alternate in taking turns until one player has achieved their victory condition.
The Wizard player must obtain ingredients, steal coins, and cast spells in order to find a cure before they fully succumb to the curse. Their victory is achieved if the token on the Cure track has reached the final space at the top.
The Monster player must eat as much as possible in its quest to satisfy its hunger and grow in strength until it has transformed into a legendary creature. Their victory is achieved if the token on the Curse track has reached the final space at the top.
During the game, the Wizard and the Monster share the same token.
The location that the token is in at the end of the Monster's turn is where the token will be at the start of the Wizard's turn. Likewise, where the token is at the end of the Wizard's turn will be where the token starts during the Monster's turn.
Components
- 1 Village board
- 1 Wizard board
- 1 Monster board
- 1 Bag
- 1 Player token
- 1 Panic tile
- 1 Cure tile
- 1 Curse tile
- 9 Energy tiles
- 5 Coins of value 1
- 4 Coins of value 5
- 18 Ingredient tiles: 3 Mandrake Root (Green), 3 Wolf Claw (Black), 3 Ash Twig (Brown), 3 Wishbone (White), 3 Gold Dust (Yellow), 3 Silk Thread (Purple)
- 12 Town Guard tiles
- 27 Villager tokens: 7 Farmers (Green), 6 Hunters (Black), 5 Woodcutters (Brown), 4 Butchers (White), 3 Merchants (Yellow), 2 Nobles (Purple)
- 27 Villager cards
- 15 Sheep tokens
- 24 Spell cards
- 24 Power cards
- 12 Possessed Wizard cards
- 12 Rabid Monster cards
- 1 6-sided die
- 1 20-sided die
NOTE: The components are limited, and the players may never accumulate more than the number available in the game.
Not included: Silver bullet, Wooden stake, Holy water.
Setup
These setup instructions are for a game with 2 players. Setup instructions for games with 1 or 0 players are outlined in the Solo Survival Guide.
Note that the following icons appear in these rules and on boards, cards and other components included in the game: Wizard, Monster, Possessed Wizard, Rabid Monster. If you see any other icons, they may or may not be hallucinations. Check for any signs of a curse.
- Choose who will be the Wizard player, and who will be the Monster. In case of disagreement, the older player is the Wizard.
- Place the Village board in the middle of the table, making sure that the side with the Wizard icon is facing up.
- Place the Player token on the Wizard's Laboratory space.
- Place the Panic tile on the first space ("1") of the Panic Track.
- Place the 6-sided and 20-sided dice next to the board.
- Place a number of Sheep tokens in each pasture equal to the number of sheep icons shown.
- Place the remaining Sheep tokens, the Energy tiles, the Coin tiles, and the Ingredient tiles next to the board to form a supply.
- Shuffle the Town Guard tiles and place one face-down tile on each path between districts. These are the bridges and the passages through the walls.
- Place all the Villager tokens in the bag. Randomly draw 20 villagers from the bag, one at a time, placing them on the Village board house spaces, starting from the space marked "1" and proceeding to the one marked "20". NOTE: See VILLAGER CARDS VARIANT on page 4 for an alternative method of placing villagers on the board.
- Prepare the Spell card deck by selecting all cards with the Wizard icon. Return the cards that do not have the Wizard icon to the box. Shuffle the cards into a face-down deck and place it next to the Wizard board. The Wizard player draws 4 cards into their hand.
- Prepare the Power card deck by selecting all cards with the Monster icon. Return the cards that do not have the Monster icon to the box. Shuffle the cards into a face-down deck and place it next to the Monster board. The Monster player draws 4 cards into their hand.
- Wizard:
- A. Place the Wizard board next to the Village board, making sure that the side with the Wizard icon is facing up.
- B. Place the Cure tile next to the Wizard board.
- C. Place 3 Coin tiles on the wallet area of the Wizard board.
You are now ready to begin, starting with the Wizard!
Villager Cards Variant
To ensure that players do not determine the shape of Villager tokens when drawing them from the bag, the Villager cards may be used instead:
- During Setup, shuffle the Villager cards and place the deck face down next to the board. Reveal 20 cards from the deck one-by-one and place the corresponding Villager tokens on the numbered spaces, starting from 1 and proceeding to 20. Keep the revealed cards in a face-up discard pile, which may be examined at any time by either player.
- Whenever a new villager is to be placed, draw the top card of the Villager deck to determine the type, place that villager, and discard the card.
- IMPORTANT: Whenever a Villager token would be returned to the bag (usually at the end of the Monster's turn), instead place the token in the supply and take a matching card from the discard pile to shuffle back into the deck.
- NOTE: The Villager cards in the discard pile should match the Villager tokens present on the board at all times!!
The Wizard's Turn
On the Wizard's turn, two things happen: a new villager arrives, and then the Wizard takes up to 3 actions.
After the Wizard has completed their turn, then it is the Monster's turn. Be sure to leave the token where it is! That will be the starting location for the Monster.
NOTE: The Wizard's turn may be affected by the Panic track (see Panic track effects on page 13).
A New Villager Arrives
The Wizard draws a random villager from the bag and rolls the 20-sided die. The house marked with that number is where the new villager is placed.
If that house is already occupied, then the Wizard may place the villager in any empty house of their choice.
A villager does not arrive whenever all 20 house spaces are occupied, e.g. in the first turn of the game.
The Wizard Takes Actions
The Wizard may take up to 3 actions each turn. There are 4 available actions: Buy Ingredients, Mix Cure, Cast Spell, Steal Coins.
The Wizard may choose to take any of them in any order, and may take the same action more than once.
Look out for Noble / Merchant hybrids - they are more ruthless than the Monster.
Buy Ingredients
The Wizard needs ingredients in order to mix potions that will help them find a cure.
To buy ingredients, the Wizard must be at a house occupied by a villager or at the Market.
If the Wizard buys an ingredient from a house space, then they may buy ingredients that match the color and type of the villager occupying it. The cost of each ingredient is noted in coins next to the house, and may be 1-4 coins. The Wizard may buy multiple ingredients from a villager using one action.
If the Wizard buys an ingredient from the Market location, then they pay 5 coins to buy exactly one ingredient of any type. If the Wizard wants to buy more ingredients from the Market, they must spend another action for each purchase.
The Wizard can only hold up to 3 ingredients at a time, placed on the pouches on the Wizard board.
NOTE: Ingredient tokens may be freely discarded at any time and returned to the supply to make space for others.
Mix Cure
This action allows the Wizard to advance on the Cure track and towards winning the game.
The Mix Cure action must be taken by the Wizard at the Laboratory (the starting space).
In order to Mix Cure, the Wizard may spend an ingredient they hold that matches the ingredient shown on the next space of the Cure track. The spent ingredient is returned to the supply and the Cure tile advances to that space.
The Wizard may repeat this any number of times without spending an extra action if they have the required ingredients.
If the Cure tile reaches the last (top) space of the Cure track, the Wizard instantly wins the game!
EXAMPLE: MIX CURE. The Wizard takes a Mix Cure action and spends one Silk Thread and one Wolf Claw. The Cure tile advances accordingly.
Locations
To take an action, the Wizard must be at a specific location. If already at that location, they simply take the action.
If the Wizard must move between locations, they may freely do so if those locations are within the same district - the area of matching background and enclosed by a wall or river. The distance between the locations is not important.
If the Wizard must move to a location in a different district, they must hire a carriage to take them through a gate or a bridge. Each time that a gate or bridge is crossed, the Wizard must pay 1 coin.
If the Wizard is not able or willing to pay to cross into a different district, they may spend an action (if they have one) instead of the total coin cost of moving.
EXAMPLE: WIZARD MOVEMENT. The Wizard wishes to Buy Ingredients from the Farmer in house 15. To do so, they pay a coin to cross into the adjacent district. They then visit the villager and buy a mandrake root.
Cast Spell
The Wizard spends ingredients to cast spells, gaining new abilities and earning coins.
In order to be cast, some spells may require the Wizard to be located in a specific space, and some require certain ingredients to be spent.
Most spells confer a special ability to the Wizard player, while a few impose an impediment on the Monster player. Every Spell card indicates an amount of coins gained as a byproduct of casting the spell.
To cast a spell, the Wizard player reveals a Spell card from their hand, indicates that they are in the correct location if necessary, spends any required ingredients and applies its effects, including gaining coins.
Each card effect may be one of the following types:
- An immediate effect. The effect is applied and the card is immediately discarded.
- An ongoing ability. The card is placed in front of the Wizard player, unless it shows any Monster icons, in which case it is placed in front of the Monster player. It remains in place and in effect until another effect causes it to be discarded.
NOTE: Spell card effects may cause villagers to be moved. A villager must always end up in an unoccupied house space, and no house space may hold more than one Villager token.
After applying the Spell's effect, the Wizard then takes the number of coins indicated on the Spell card and adds them to their wallet.
The number of coins held by the Wizard is open information.
NOTE: The number of coins is limited to the total value included in the game. If there are not enough coins in the supply for a Spell's effect to be fully applied, the Wizard may take as many as there are available.
All discarded Spell cards are placed in a face-up discard pile.
Card layout (diagram labels): GAME MODE (see setup step 10), CARD NAME, CARD TYPE, SPECIAL PLACEMENT, REQUIREMENTS, EFFECT, COINS GAINED.
Steal Coins
The Wizard may obtain coins by trying to steal them from houses.
To steal, the Wizard must be at a house space.
If that house is empty: The Wizard automatically succeeds at stealing 1 coin.
If that house is occupied by a villager token: Stealing from villagers is dangerous, as the Wizard may be noticed.
- The Wizard player must declare how many coins they attempt to steal: at least 1 coin and up to the number shown next to the house.
- They then roll the 6-sided die to check if they were noticed:
- If the number rolled is higher than the declared number, then stealing is successful and the Wizard takes that number of coins from the supply.
- If the number rolled is equal to or lower than the declared number, then the Wizard has been noticed. The Wizard player may then spend an additional action to create a distraction and avoid being detected. If they do, they may take that number of coins.
- If this Steal attempt was the final action of their turn, or if they are unwilling to spend that additional action, then the attempt was unsuccessful, and the Wizard does not take any coins.
NOTE: The Wizard should never attempt to steal more than the value of coins remaining in the supply.
EXAMPLE: STEAL COINS ACTION. The Wizard is out of coins and decides to take the Steal Coins action. They move to this 4-coin house with a Farmer present so they can attempt to steal up to 4 coins. They declare that they will attempt to steal 3 coins and roll the die. They roll a 3 which is a failure. Fortunately that was their second action so they decide to spend their third action in order to take the 3 coins that they really need.
The End of the Wizard's Turn
If the Wizard player is holding fewer than 4 Spell cards, they draw enough new cards to refill their hand to 4 cards.
If the Spell card deck is empty and a card needs to be drawn from it, the discard pile is shuffled to form a new face-down deck.
The Player token remains wherever it is at the end of the Wizard player's turn, and it is now the Monster player's turn.
The Monster's Turn
On their turn, the Monster can either take a Feeding turn, moving around the village and trying to feed on villagers and sheep, or take a Quiet Night turn.
Monster Turn Option 1: Quiet Night
During a Quiet Night, the Monster does not take any actions, and the following effects are resolved:
- The Panic level is reduced by 2.
- The Curse level is reduced by 1.
- The Monster may play one Power card from their hand, ignoring any costs or requirements, and applies its effects. This is the only way the Monster token may move during a Quiet Night. If the Monster played a card it draws a new Power card.
- Two new random villagers arrive, regardless of the effect of current Panic level - see Panic track effects below.
After these effects are resolved, the Monster's turn ends, and the Wizard's turn begins.
Monster Turn Option 2: Feeding
To feed, the Monster may take up to 3 actions.
An action consists of two phases: moving and eating.
When eating, the Monster gains Energy, which can be spent to enhance its abilities.
The Monster may also develop special powers by playing Power cards (see Power Cards below).
EXAMPLE: MONSTER MOVEMENT. The Monster moves once and reveals the Town Guard token that shows its movement icon, so it loses its second movement. The Monster could spend Energy to gain more movements. It does not, so movement ends in house 18. Since there is no villager there nor sheep in the adjacent pasture, the Monster does not eat during this action.
Moving Phase
Each moving phase can include up to two movements into adjacent locations.
IMPORTANT: Entering a house with a villager ends the moving phase for that action.
Locations are connected by the paths shown on the board as roads.
The Monster may move between districts (through gates in the walls or bridges across rivers).
Whenever such a move is made, if a Town Guard token is present, it must be picked up, revealing the effect noted underneath, resolving that effect, and removing the token from the game.
The Town Guard tiles are:
- No Effect (x2)
- -1 Energy (x3)
- -2 Energy (x3)
- -1 Movement (x2)
- +1 Panic (x2)
NOTE: Town Guard token effects only ever apply to the Monster, never to the Wizard.
After concluding any movements and resolving any Town Guard token effects, the Monster may eat a villager or a sheep.
NOTE: If the Monster begins their turn in a location with a villager, it may eat that villager without moving. This completes one action.
Eating Phase
To eat a villager, the Monster must be occupying the same house space as that Villager token.
To eat a sheep, a Sheep token must be present in a pasture adjacent to the Monster's current location.
As villagers and sheep are eaten, their tokens are placed in the leftmost empty stomach slot on the Monster board, and generate Energy for the Monster.
Energy
As the Monster eats, it gains Energy per villager or sheep eaten. This is represented by Energy tokens that are immediately awarded:
- Sheep / Farmer / Hunter: 1 Energy
- Woodcutter / Butcher: 2 Energy
- Merchant / Noble: 3 Energy
The Monster may not have more than 9 Energy at a time.
The amount of Energy is open information.
Energy can be freely spent by the Monster during any of its actions in order to enhance them:
- 2 Energy: The Monster gains an additional movement for this action.
- 4 Energy: The Monster may discard an ongoing effect Spell card from in front of either the Monster or the Wizard player.
- 6 Energy: Reduce Panic by 1.
The Monster player may spend Energy on multiple enhancements during their turn, including multiple of the same one. For example, it may spend 4 Energy to make 2 additional movements before eating.
Power Cards
The Monster begins the game with a hand of Power cards which can be played before or after a Feeding action.
In order to be played, some Power cards require the Monster to have visited a specific location, some require a specific Villager or Sheep token to be present in a stomach slot, some require Panic to be increased, and some require Energy to be spent.
Most Power cards confer a special ability to the Monster, while a few impose an impediment on the Wizard.
To play a Power card, the Monster player reveals it and indicates that they fulfill the requirements:
- If a location is shown, that location must have been already visited by the Monster at least once this turn.
- If a villager or sheep is shown, at least one Villager token of that type or Sheep token must be present on one of the 3 stomach spaces on the Monster board.
- If a Panic icon is shown, the Panic level must be increased by 1 step. Such a Power card may not be played if the Panic level is already at maximum.
- If an amount of Energy is shown, that number of Energy tokens must be spent by the Monster.
Each card effect may be one of the following types:
- An immediate effect. The effect is applied and the card is immediately discarded.
- An ongoing effect. The card is placed in front of the Monster player, unless it shows any Wizard icons, in which case it is placed in front of the Wizard player. It remains in place and in effect until another effect causes it to be discarded.
- A single-use effect. The card is placed in front of the Monster player, who can activate it at any time during their turn, including the turn in which it was played. The card is then discarded.
The Monster can have at most one single-use effect card in front of them and if they play a second, they must immediately discard the previous one without effect.
All discarded Power cards are placed in a face-up discard pile.
NOTE: Power card effects may cause villagers to be moved. A villager must always end up in an unoccupied house space, and no house space may hold more than one Villager token.
Card layout (diagram labels): GAME MODE (see setup step 11), CARD NAME, CARD TYPE, REQUIREMENTS, MONSTER EFFECT, RABID MONSTER EFFECT.
The End of the Monster's Turn
Panic and Curse Track Adjustments
The level of alarm in the village is adjusted in the Panic track located on the Village board.
The Monster's evolution into a creature of legend is adjusted in the Curse track located on the Monster board.
Both are affected by the number and types of Villager tokens present in the stomach slots:
| Amount & type of villagers | Track Adjustments |
|---|---|
| 0-1 Villager tokens | Panic is decreased by 1 |
| 2 Villager tokens of the same type | Panic is increased by 1; Curse is increased by 1 |
| 3 Villager tokens of the same type | Panic is increased by 2; Curse is increased by 2 |
Eating sheep has no effect on the Panic or Curse tracks.
Eating more than 3 villagers of the same type (made possible by Power cards or special powers) has no further effect on the Panic or Curse tracks.
Only one type of villager is considered when determining adjustments in the Curse and Panic tracks. For example, if the Monster eats 2 Woodcutters and 2 Butchers in a single turn due to some card effects, Curse and Panic will each increase by 1 step.
If the Curse tile reaches the last (top) space of the Curse track, the Monster instantly wins the game!
Digesting
Any Villager tokens eaten are placed back into the bag.
Any Sheep tokens eaten are returned to the supply.
If the Monster player is holding fewer than 4 Power cards, they draw enough new cards to refill their hand to 4 cards.
If the Power card deck is empty and a card needs to be drawn from it, the discard pile is shuffled to form a new face-down deck.
The Monster token remains wherever it is at the end of the Monster player's turn, and the Wizard player's turn now begins.
Panic Track Effects
As the Panic level increases, the villagers get increasingly panicked and will hinder the Monster or give more benefits to the Wizard. These are shown on the Panic track:
- Get busy! The Wizard has 1 additional action on their turn.
- Stay inside! Skip the "A New Villager Arrives" step at the beginning of the Wizard's turn.
- A plethora of potions! Ingredients cost 1 coin less.
The effects of the Panic track are cumulative. Once Panic has reached a certain level that triggers an effect, the effect continues to apply during every round in which it remains above that level.
For example, once Panic reaches level 7, both the Stay Inside! and Get busy! effects apply. After level 9, all effects apply to gameplay.
The End of the Game
The game ends in one of two ways:
- If the Wizard advances to the final, top step of the Cure track - then they instantly win!
- If the Monster advances to the final, top step of the Curse track - then they instantly win!
Quick reference, as printed on the last page:
The Wizard's Turn
- A new villager arrives.
- The Wizard takes actions: 3 actions, from 4 options: Buy Ingredients, Mix Cure, Cast Spell, Steal Coins.
- The end of the Wizard's turn: refill hand to 4 cards.
The Monster's Turn
- Option 1: Quiet Night. Reduce Panic by 2. Reduce Curse by 1. The Monster may play one Power card for free and draw a replacement. Two new villagers arrive.
- Option 2: Feeding. 3 actions. Each action consists of 0-2 movements and then optionally eating a villager or sheep. Eating generates Energy, which may be spent on enhancing abilities. Any number of Power cards may be played.
- The end of the Monster's turn: adjust Panic and Curse tracks. Digest: eaten villagers and sheep are removed from the Monster board. Refill hand to 4 cards.
Spell Card Index
All card effects apply to the Wizard, except where noted by an icon. Transcription note: in the source, entries marked [icon] carry a small game-mode icon that is not reproduced in this text; those lines are labelled "[icon]" below.
- A Village Feast: Remove one sheep from each pasture with sheep.
- Box of Holding: You may store a fourth ingredient on this card. If this card is discarded you may move an ingredient on it to an empty storage slot on the board. If there is no empty slot, return the ingredient to the supply.
- Butcher's Broth: Gain a Wolf Claw and a Wishbone. [icon] If the next step on the Cure track requires a Wolf Claw or a Wishbone, Cure is increased by 1. If the Wizard holds that ingredient, it is returned to the supply.
- Diplosis: Gain an amount of coins equal to the amount of coins you already have. NOTE: Coins are limited to a value of 25.
- Distract: Discard a permanent Power card from in front of the Monster. [icon] Discard the leftmost permanent Power card from in front of the Monster.
- Forager's Feast: Gain a Mandrake Root and an Ash Twig. [icon] If the next step on the Cure track requires a Mandrake Root or a Ash Twig, Cure is increased by 1. If the Wizard holds that ingredient, it is returned to the supply.
- Gift of the Gab: The cost of buying ingredients from the Market is reduced by 1 coin (to a minimum cost of 0 coins).
- Hydrophobia: Place in front of the Monster. The Monster must spend an extra movement to cross a bridge. This card is discarded if the Monster eats at least 2 villagers of different colors during their turn.
- Hypnotize: Choose a specific villager from the bag. Roll the 20-sided die and place it in the corresponding house. [icon] Draw a random villager from the bag. Roll the 20-sided die and place it in the corresponding house.
Power Card Index
All card effects apply to the Monster, except where noted by an icon. Transcription note: as above, entries marked [icon] carry a small game-mode icon that is not reproduced in this text.
- A Taste of Rural Life: Roll the 20-sided die twice. Eat any villager in the corresponding houses. If at least 1 villager was eaten, Curse is increased by 1.
- An Extra Serving: Add one sheep to each pasture. If there are not enough sheep in the supply, you may choose which pastures to add the available sheep. [icon] If there are not enough sheep in the supply, add them to the pasture(s) closest to the Laboratory first.
- Courier Horse: Gain 3 Energy.
- Digestive Mutton Chop: [icon] This turn, if the Rabid Monster eats at least one Sheep, Curse is increased by 1.
- Fast Food: Gaining an additional movement costs 1 Energy (instead of 2).
- Greedy Coachman: Place in front of the Wizard. When moving between districts, the Wizard must spend 2 coins (instead of 1). This card is discarded if the Wizard takes a Cast Spell action.
- Midnight Snack: You have an additional Feeding action.
- Monstrous Leap: Move to any location. [icon] Roll the 20-sided die and move the Rabid Monster to the corresponding house.
- New Moon: This turn, you may cross districts without causing any Guard tiles to be revealed.
- Noble Blood: Curse is increased by 1.
- On the Scent: [icon] Draw an additional Rabid Monster card and add it to the ones that will determine the Monster's actions for this turn.
Solo Survival Guide
The Solo Survival Guide is printed as a companion section of the same rulebook and covers the 1-player and 0-player games.
So, You've Been Cursed to Be a Rabid Monster
A game for one (1) Wizard player against an automated Monster.
In this variant, the Wizard faces off against an automated Rabid Monster.
Setup (Rabid Monster)
- Place the Village board in the middle of the table, making sure that the side with the Wizard icon is facing up.
- Place the Player token on the Wizard's Laboratory space.
- Place the Panic tile on the first space ("1") of the Panic Track.
- Place the 6-sided and 20-sided dice next to the board.
- Place a number of Sheep tokens in each pasture equal to the number of sheep icons shown.
- Place the remaining Sheep tokens, the Coin tiles, and the Ingredient tiles next to the board to form a supply.
- Town Guard tiles and Energy tiles are not used in this game and are placed in the game box.
- Place all the Villager tokens in the bag. Randomly draw 20 villagers from the bag, one at a time, placing them on the Village board house spaces, starting from the space marked "1" and proceeding to the one marked "20".
- Prepare the Spell cards by selecting all cards with the Wizard icon on them. Return the cards that do not have the Wizard icon on them to the box. In addition, return all cards with the [red icon] to the box. Shuffle the cards into a face-down deck and place it next to the Wizard board. Then draw 4 cards into your hand. Transcription note: the icon named in this step is a red game-mode glyph that is not reproduced in the text layer, so it is shown as "[red icon]".
- Prepare the Power cards by selecting all cards with the Rabid Monster icon on them. Return the cards that do not have the Rabid Monster icon on them to the box. Shuffle the cards into a face-down deck and place it next to the Monster board.
- Wizard:
- A. Place the Wizard board next to the Village board, making sure that the side with the Wizard icon is facing up.
- B. Place the Cure tile next to the Wizard board.
- C. Place 3 Coin tiles in the coin-pouch area of the Wizard board.
- Monster:
- A. Place the Monster board next to the Village board, making sure that the side with the Rabid Monster icon is facing up.
You are now ready to begin, starting with the Wizard player!
The Wizard's Turn (Rabid Monster)
A new villager arrives. The Wizard draws a random villager from the bag and rolls the 20-sided die. The house marked with that number is where the new villager is placed. If that house is already occupied, then the Wizard may place the villager in any empty house of their choice.
As in the game for 2 players, a villager does not arrive whenever all 20 house spaces are occupied, e.g. in the first turn of the game.
The Wizard takes actions. When playing against the Rabid Monster, the Wizard player chooses their actions according to the Rabid Monster cards. First, all Rabid Monster cards are gathered and shuffled. Then 4 cards are drawn. Each such card shows a possible Wizard action.
The Wizard may then select up to 3 of those actions to take, in any order.
As an action is taken, the corresponding card is placed face-up next to the Monster board. The cards are arranged in the order their actions were taken. The unused card(s) are then discarded.
For each card that the Wizard selected for an action, the Rabid Monster will then attempt to eat the depicted villager on the Monster's turn.
The end of the Wizard's turn. If the Wizard player is holding fewer than 4 Spell cards, they draw enough new cards to refill their hand. The Player token remains wherever it is at the end of the Wizard player's turn, and it is now the Monster's turn.
The Rabid Monster's Turn
The Rabid Monster develops a Power. The Rabid Monster draws and plays one Power card, ignoring any costs or requirements, and applies its effects.
The Rabid Monster takes actions. The Rabid Monster does not gain or use Energy.
For its first action, the Rabid Monster will try to eat a villager of the type depicted on the first Rabid Monster card used by the Wizard.
- If at least one such villager is in a location at a distance of at most 2 roads away from the Rabid Monster, the Monster moves there and eats the villager. If there are multiple options, the location with the highest number is chosen. The eaten villager is placed in the leftmost empty Stomach slot of the Monster board.
- If there is no such villager in a location at a distance of 2 roads away from the Rabid Monster, but:
- there is such a villager at a distance of 3 roads away, and:
- there is also at least one sheep in a pasture adjacent to the Rabid Monster's location.
- Then the Monster eats that sheep and then moves to the villager's location and eats the villager. If there are multiple options, the location with the highest number is chosen. Both the sheep and the eaten villager are placed on the same leftmost empty Stomach slot of the Monster board.
- Otherwise, the action is skipped and the card is ignored.
The same procedure is followed for each of the next (2nd or 3rd) cards used by the Wizard, if any, or until the Monster has eaten at least 3 villagers and / or sheep.
EXAMPLE: RABID MONSTER MOVEMENT. For its first action, the Monster wants to eat a Butcher. There are two Butchers within 2 roads, in houses 1 and 7, so the Monster will stay where it is and eat the Butcher there.
For its second action, the Monster wants to eat a Farmer. There is no Farmer within 2 roads but there are two within 3 roads, in houses 3 and 11. And since there are sheep in the adjacent pasture, the Monster will eat one sheep from there and move to house 11 and eat the Farmer.
For its third action, the Monster wants to eat a Hunter. There is no Hunter within 2 roads from house 11 and the Monster is not adjacent to a pasture with sheep, so its third action will be skipped.
The end of the Rabid Monster's turn.
Panic and Curse track adjustments:
| Amount & type of villagers | Track Adjustments |
|---|---|
| 0 Villager tokens | Panic is decreased by 1 |
| 1 Villager token | Panic is increased by 1; Curse is increased by 1 |
| 2 Villager tokens | Panic is increased by 2; Curse is increased by 2 |
| 3 Villager tokens | Panic is increased by 3; Curse is increased by 3 |
Digesting: Any Villager tokens eaten are placed back into the bag. Any Sheep tokens eaten are returned to the supply.
The Monster token remains wherever it is at the end of the Monster player's turn, and the Wizard player's turn now begins.
End of the Game (Rabid Monster)
As in the game for 2 players:
- The Wizard wins if they advance to the end of the Cure track.
- The Monster wins if they advance to the end of the Curse track.
So, You've Been Cursed By a Possessed Wizard
A game for one (1) Monster player against an automated Wizard.
In this variant, the Monster tries to satiate its hunger, obstructed by an automated Wizard. The game is set up and played as normal, with the following changes.
Setup (Possessed Wizard)
- Place the Village board in the middle of the table between the two players, making sure that the side with the Possessed Wizard icon is facing up.
- Place the Player token on the Wizard's Laboratory space.
- Place the Panic tile on the first space ("1") of the Panic Track.
- Place the 6-sided and 20-sided dice next to the board.
- Place a number of Sheep tokens in each pasture equal to the number of sheep icons shown.
- Place the remaining Sheep tokens, the Energy tiles, the Coin tiles, and the Ingredient tiles next to the board to form a supply.
- Shuffle the Town Guard tiles and place one face-down tile on each path between districts. These are the bridges and the passages through the walls.
- Place all the Villager tokens in the bag. Randomly draw 20 villagers from the bag, one at a time, placing them on the Village board house spaces, starting from the space marked "1" and proceeding to the one marked "20".
- Prepare the Spell cards by selecting all cards with the Possessed Wizard icon on them. Return the cards that do not have the Possessed Wizard icon on them to the box. Shuffle the cards into a face-down deck and place it next to the Wizard board.
- Prepare the Power cards by selecting all cards with the Monster icon on them. Return the cards that do not have the Monster icon on them to the box. In addition, return all cards with the [red icon] on them to the box. Shuffle the cards into a face-down deck and place it next to the Monster board. Then draw 4 cards into your hand.
- Wizard:
- A. Place the Wizard board next to the Village board, making sure that the side with the Possessed Wizard icon is facing up.
- B. Place the Cure tile next to the Wizard board.
- C. Place 3 Coin tiles in the coin-pouch area of the Wizard board.
- D. Shuffle the Possessed Wizard cards into a face-down deck and place it next to the Monster board. Draw 3 cards and place them facing up in a row below the Wizard's board.
You are now ready to begin, starting with the Possessed Wizard!
Transcription note: the glyph in setup step 10 is a red game-mode icon not reproduced in the text layer; it is shown as "[red icon]".
The Possessed Wizard's Turn
A new villager arrives. If the house where a villager would be placed is occupied, the villager is placed in the empty house with a number closest to the number rolled - if there is a tie for closest house, it is placed in the one among them with the higher number.
As in the game for 2 players, a villager does not arrive whenever all 20 house spaces are occupied, e.g. in the first turn of the game.
The Possessed Wizard casts a spell. The Possessed Wizard draws and plays one Spell card, ignoring any costs or requirements, and applies its effects.
The Possessed Wizard takes actions. The Possessed Wizard performs up to 3 actions. Each action is either a Mix Cure action or a card action.
- If the Possessed Wizard is holding 3 ingredients that match the next steps of the Cure Track, or if they are holding 1 or 2 ingredients that match the last 1 or 2 steps of the Cure track, they take a Mix Cure action:
- Mix Cure. The Possessed Wizard returns to the Laboratory, paying coins normally if they have to cross districts. If they do not have enough coins, they still move back to the Laboratory, spending all that they do have. All ingredients the Wizard is holding are returned to the supply and the Cure advances a number of steps equal to the ingredients spent. The leftmost Possessed Wizard card is then discarded with no effect, ending the action.
- If the Possessed Wizard is holding fewer than 3 ingredients, they take the card action depicted on the leftmost Possessed Wizard card. If it is not possible to take it, the action is skipped and the card is ignored.
The end of the Possessed Wizard's turn. After taking 3 actions, all the Possessed Wizard cards are gathered and shuffled. Then, 3 Possessed Wizard cards are drawn and placed below the Wizard's board. These cards will determine the Possessed Wizard's actions during their next turn. Finally, 1 Possessed Wizard card is drawn and placed next to the Monster board, to be used only for its Feeding effect.
Possessed Wizard Card Actions
The Possessed Wizard's card actions are defined as follows. The number in brackets is as printed on the source.
- Buy Ingredient from any district (x2). If the Possessed Wizard does not already hold the next ingredient needed to advance the Cure track, they will seek to buy it. If there is a villager of that type in a location in any district, the Wizard moves to that location and buys that ingredient. If there are multiple options, they will choose the cheapest one, including any costs for moving between districts. If tied for cost, they will choose the closest location among the tied ones. If still tied, the location with the highest number is chosen. If the Possessed Wizard does not have enough coins to move and buy the ingredient, then the action is skipped.
- Steal from current district (x2). The Wizard moves to the occupied house with the most coins in the Wizard's current district and takes the Steal action. If the attempt to Steal fails, the action ends - the Possessed Wizard may not spend an additional action to create a destruction [sic - distraction] and force a success. If there are multiple options, the location with the highest number is chosen. If there is no occupied house in the Wizard's current district, then the action is skipped.
- Steal from adjacent district (x1). The Wizard moves to the occupied house with the most coins in a district adjacent to the Wizard's current district and takes the Steal action. If the attempt to Steal fails, the action ends - the Possessed Wizard may not spend an additional action to create a destruction [sic - distraction] and force a success. If there are multiple options, the location with the highest number is chosen. If there is no occupied house in the Wizard's current district, then the action is skipped.
- Mix Cure (x1). The Possessed Wizard returns to the Laboratory, even if they do not have enough coins to move across districts (spending all coins they do have). All ingredients the Wizard is holding are returned to the supply and the Cure advances a number of steps equal to the ingredients spent.
- Cast Spell (x1). The Wizard draws and plays one Spell card, ignoring any costs or requirements, and applies its effects.
- Buy Ingredient from current district (x2). If the Possessed Wizard does not already hold the next ingredient needed to advance the Cure track, they will seek to buy it. If there is a villager of that type in a location in the Wizard's current district, the Wizard moves to that location and buys that ingredient. If there are multiple options, they will choose the cheapest one. If tied for cost, they will choose the closest location among the tied ones. If still tied, the location with the highest number is chosen. If the Possessed Wizard does not have enough coins to buy the ingredient, then the action is skipped.
The Monster's Turn (Possessed Wizard)
The Monster's turn works the same way as in the game for 2 players, with one exception:
Whenever the Monster eats a villager of the type depicted on the Possessed Wizard card placed in front of them during the Wizard's turn, the additional effect shown on the card is applied, if possible.
Panic Track Effects (Possessed Wizard)
- Maximum Possession! The Wizard has 1 additional action on their turn. An additional Possessed Wizard card is drawn and placed below the Wizard's board at the end of the Wizard's turn.
- Stay inside! Skip the "A New Villager Arrives" step at the beginning of the Wizard's turn.
- Possession intensifies! An additional Possessed Wizard card is drawn and placed next to the Monster's board at the end of the Wizard's turn (to be used only for its Feeding effect).
End of the Game (Possessed Wizard)
As in the game for 2 players:
- The Wizard wins if they advance to the end of the Cure track.
- The Monster wins if they advance to the end of the Curse track.
So, a Possessed Wizard Was Cursed to Be a Rabid Monster
A game for zero (0) players and an automated Monster against an automated Wizard.
In this game, an automated Wizard is pitted against an automated Monster.
Setup (0 players)
- Place the Village board in the middle of the table between the two players, making sure that the side with the Possessed Wizard icon is facing up.
- Place the Player token on the Wizard's Laboratory space.
- Place the Panic tile on the first space ("1") of the Panic Track.
- Place the 6-sided and 20-sided dice next to the board.
- Place a number of Sheep tokens in each pasture equal to the number of sheep icons shown.
- Place the remaining Sheep tokens, the Coin tiles, and the Ingredient tiles next to the board to form a supply.
- Town Guard tiles and Energy tiles are not used in this game and are placed in the game box.
- Place all the Villager tokens in the bag. Randomly draw 20 villagers from the bag, one at a time, placing them on the Village board house spaces, starting from the space marked "1" and proceeding to the one marked "20".
- Prepare the Spell cards by selecting all cards with the Possessed Wizard icon. Return the cards that do not have the Possessed Wizard icon to the box. In addition, return all cards with the [red icon] to the box. Shuffle the cards into a face-down deck and place it next to the Wizard board.
- Prepare the Power cards by selecting all cards with the Rabid Monster icon. Return the cards that do not have the Rabid Monster icon to the box. In addition, return all cards with the [red icon] to the box. Shuffle the cards into a face-down deck and place it next to the Monster board.
- Wizard:
- A. Place the Wizard board next to the Village board, making sure that the side with the Possessed Wizard icon is facing up.
- B. Place the Cure tile next to the Wizard board.
- C. Place 3 Coin tiles in the coin-pouch area of the Wizard board.
- D. Shuffle the Possessed Wizard cards into a face-down deck and place it next to the Monster board. Draw 3 cards and place them facing up in a row below the Wizard's board.
You are now ready to begin, starting with the Possessed Wizard!
Transcription notes: the source's step 12B reads "Place the Curse tile on the of the Curse track" with the space name missing, so the space is shown as a bracketed gap. The "[red icon]" glyphs in steps 9 and 10 are not reproduced in the text layer.
The Possessed Wizard's Turn (0 players)
The Possessed Wizard's turn works the same way as in the "So, You've Been Cursed By a Possessed Wizard." game.
The Rabid Monster's Turn (0 players)
The Monster's turn works the same way as in the "So, You've Been Cursed To Be A Rabid Monster." game with one exception:
Whenever the Monster eats a villager of the type depicted on the Possessed Wizard card placed in front of them during the Wizard's turn, the additional effect shown on the card is applied, if possible.
End of the Game (0 players)
As in the game for 2 players:
- The Wizard wins if they advance to the end of the Cure track.
- The Monster wins if they advance to the end of the Curse track.
Possessed Wizard Cards and Rabid Monster Cards
Possessed Wizard Cards
| Card | Wizard Action | Villager Eaten & Feeding Effect |
|---|---|---|
| PW01 | Cast Spell | Farmer (Green): The Wizard gains 1 Coin |
| PW02 | Steal from adjacent district | Hunter (Black): The Monster gains 1 less Energy |
| PW03 | Steal from current district | Woodcutter (Brown): The Monster gains 1 less Energy |
| PW04 | Buy Ingredient | Farmer (Green): The Wizard gains 2 Coins |
| PW05 | Buy Ingredient from adjacent district | Hunter (Black): The Wizard gains 2 Coins |
| PW06 | Steal from current district | Butcher (White): The Monster gains 1 less Energy |
| PW07 | Buy Ingredient from current district | Farmer (Green): The Monster gains 1 less Energy |
Rabid Monster Cards
| Card | Wizard Action | Villager to Eat |
|---|---|---|
| RM01 | Cast Spell | Farmer (Green) |
| RM02 | Cast Spell / Steal | Hunter (Black) |
| RM03 | Cast Spell / Mix Cure | Woodcutter (Brown) |
| RM04 | Buy Ingredient | Farmer (Green) |
| RM05 | Buy Ingredient | Hunter (Black) |
| RM06 | Buy Ingredient / Mix Cure | Butcher (White) |
| RM07 | Buy Ingredient / Steal | Farmer (Green) |
| RM08 | Cast Spell / Mix Cure | Hunter (Black) |