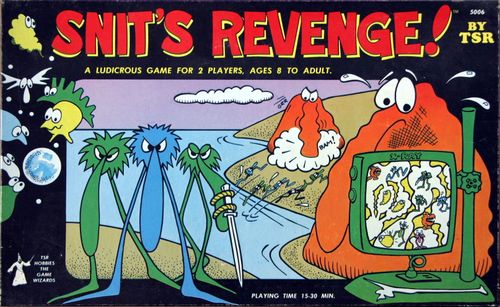
Snit's Revenge!
Snit's Revenge! Rulebook
Table of Contents
Table of Contents
The Playing Pieces
There are four different types of playing pieces:
The invading Snits
The hapless Snorgs
The nasty Makums
The hungry Runnungitms
Snits, Snorg, Makums, and Runnungitms are all capable of movement.
There should be 9 Makums, 15 different Snorgs (one for each organ except the Lapotum), 18 Runnungitms, and 21 Snits in each of 4 different clans. However, unless this is a multi-player game, use only the Snits from one clan.
The Playing Area
The game map shows the inside of a Bolotomus. The major features are the 16 organs and the many passageways connecting them. The wider channels allow either one or two playing pieces to pass though them during each phase. The narrow canals allow only one playing piece to pass through them during each phase. The red canals connecting to the Lapotum are impassable to Snits (they're lined with Snit-resistant cilia.)
About the Snits
Each Snit counter has a name and number.
The number is the Snit's Speed. Speeds range from 4 to 7. Fast Snits are more likely to escape attacks, but are also weaker and less likely to take an attacker with them if they are caught.
Fast Snits
A few Snits are exceptionally fast (Speed 7). They have a lightning-bolt badge on their counter.
These Snits get an extra move after the combat phase. They can move to any adjacent organ, even through a channel or canal that had already been used on that turn.
Strong Snits
A few Snits are exceptionally strong (they have a Speed of only 4; they are slow but mighty). They have a hammer badge on their counter.
These Snits succeed in stomping their target on a roll of 1 through 4.
A "hammer" Snit is not killed when it is CHOMPed. Replace it with a Snit that has a Speed of 4 but no hammer badge. It is now a slow Snit with no special powers, and if it is CHOMPed again, it dies.
Prepare for Play
-
Unfold the map to the Snits' Revenge side and lay it flat on the table. Decide who will be the Snits and who will play the Bolotomus.
-
The Bolotomus places the appropriate Snorg in each of its organs. Note that there is no counter for the Lapotum. Its Snorg is simply printed on the map, because no Snit can ever get to it to attack it.
-
The 9 Makums and the 18 Runnungitms are placed, face up, in a pool next to the playing area for use and reuse throughout the game. The Bolotomus takes one "Duty" Runnungitm and places it in the organ of his choice.
-
The Snit player now chooses the invading Snit force. Start with all 21 Snits of one color. Remove two of the "badged" Snits; you may start with only six Fast and/or Strong Snits. Now remove the four Speed 4 Snits that don't have hammer badges . . . these counters will be used to replace wounded Strong Snits. This will leave 15 attacking Snits, six of which will have hammer or lightning badges.
Sequence of Play
Snits' Revenge is played in game turns. Each game turn is composed of two player turns: a Snit turn, and then a Bolotomus turn. During a turn, players move their pieces about the map, from organ to organ, stomping and chomping at each other, in the following manner:
Snit Player's Turn
The Snit goes through each of these phases, in this order.
1. Move Snits
The Snit player may move any or all of his Snits. Each Snit may move to an adjacent (connected by a channel or canal) organ. Going from outside the Bolotomus into an organ, or vice versa, is a move. On the first phase, then, a maximum of five Snits can enter the Bolotomus: two can come into the Antephellum, two into the Glut, and one brave Snit may attempt a mad dash into the Fleotis (see Getting Into the Bolotomus).
2. Snit Kicking
After all Snit movement is completed, any Snit occupying the same organ as any other thingie may try to stomp the Snot (life) out of it.
When a Snit tries to stomp something, it rolls one die. On a 1 or 2, it succeeds and the target is dead. Otherwise, it missed. (But a Strong Snit, as described above, hits on a roll of 1 through 4.)
If a Makum is killed, it's just dead. Return it to the pool.
If a Snorg (the little thingie with an organ's name on it) is killed, place it in front of the Snit player.
Snits may attempt to kick Runnungitms in the same manner, but there's a rub: if a Snit kicks at a Runnungitm and misses, the Runnungitm immediately gets a free CHOMP (see next page) at the Snit. Resolve that CHOMP (which may end up killing the Runnungitm, too) and then continue with the Snit turn.
Pack Attacks: A group of Snits may declare that they are all going to attack a specific Runnungitm. This is called a Pack Attack. Snits making a Pack Attack all roll their dice at once. If they kill the Runnungitm, it gets no CHOMP. If they all miss, the Runnungitm gets a free CHOMP at any one of the Snits that attacked it.
When multiple Snits encounter several thingies, their Snit Kicks should be rolled one at a time, each against its specified target, unless they are making a Pack Attack. Only one Kick per Snit per turn, please!
3. Second Move for Fast Snits
The Snit player may now move any or all of his fast Snits (the ones with the lightning badge) to adjacent organs. This counts as a new phase for the purpose of moving through canals and channels . . . that is, the speedy Snits may ignore the movement made during the first part of the turn, and use passageways that had already been used. They may even use their second move to retrace their first move. However, fast Snits may NOT enter the Bolotomus on this movement phase. Only those already within the Bolotomus may move.
Bolotomus Player's Turn
The Bolotomus now goes through each of these phases, in this order.
1. Compositors Compose
Each functioning Compositor (that is, each one that still has its Snorg in it) may produce one Makum. Place the new Makum in the Compositor. Thus, if all Compositors are manned, three Makums are created.
2. Move Thingies
The Bolotomus player may move any or all of his Runnungitms or Makums (Snorgs manning their organs may not move). Each may move from one organ to an adjacent organ using the channels and canals, just like the Snits. Bolotomus thingies may never leave the body of the Bolotomus.
3. Chomping
Any Runnungitm in the same organ as a Snit may attempt to catch the Snit and devour it . . . CHOMP!
When a Chomp is attempted, the Bolotomus indicates the target being attacked, and rolls two dice. If he rolls more than the target's Speed, he caught it . . . the target is CHOMPED and dies (unless it has a hammer badge; see previous page). Otherwise, it escaped!
If the CHOMP succeeds, the Snit player now rolls two dice. He is also trying to roll more than the Snit's Speed. If he succeeds, the Snit got in one last kick, and the Runnungitm is also dead! Thus, fast Snits are more likely to escape, but slow, strong Snits are very likely to take their killer with them. (And a Strong Snit who is Chomped and wounded, losing his hammer badge, still gets a chance to kill the Runnungitm that wounded him.)
Dead Snits are removed permanently from play. Dead Runnungitms are returned to the pool for reuse.
If several Runnungitms encounter multiple Snits in an organ, roll the CHOMPs one at a time, specifying targets by name before any dice are rolled.
4. Makums Transform
Any Makum in the Lapotum may transform into a Runnungitm. This is the only place where Runnungitums can be created.
Any Makum in an organ without a Snorg may transform into the Snorg for that organ; replace it with the Snorg counter. Makums may only transform into Snorgs if they are in a Snorgless organ. The Bolotomus is not required to replace Snorgs, but failure to replace enough can be fatal!
Makum transformation is optional. The Bolotomus player never has to transform a Makum.
5. Has Anybody Won Yet?
Both players now check to see how many organs have lost their Snorgs and are not functioning. If nine organs are not functioning (that is, if there are 9 dead Snorgs in front of the Snit player), the Snits have won. If all Snits are dead, the Bolotomus wins. And it is possible to tie, if the Bolotomus has lost 9 organs but got all the Snits on the last turn.
Otherwise, proceed to the next turn.
Keeping Track of Counters
It's a good idea to turn each of your thingies sideways or upside-down as you move it, and again after it attacks, so you will be able to tell which ones have acted during each phase.
Getting Into the Bolotomus
At the start of the game, all Snits are assumed to have run underneath the Bolotomus. Two Snits per turn may attempt to enter each of the orifices underneath the Bolotomus. One per turn may try to enter the Fleotis, but it's risky.
Jumping from the ground into the Glut or the Antephellum is an ordinary move and succeeds automatically. Entering the Fleotis is another story. As long as both the Eye and the Prolobosinator are still functioning, the Bolotomus may smash at a Snit running for the Fleotis. The Snit must roll his Speed or lower on 2 dice. If he succeeds, he's in and safe. If not, he's smashed and dead.
If either the Eye or the Prolobosinator is not functioning, the Snit must roll his Speed or lower on ONE die. If he fails, the Bolotomus got lucky and got him anyway!
If both the Eye and the Prolobosinator are knocked out, the Bolotomus cannot smash, and Snits may freely enter through the Fleotis.
Movement Restrictions
-
Creatures which can move may only move one organ per turn; that is, on each turn, they can move to any organ that is connected to their current location by a channel or canal. Note that there is a canal running from the Lapotum to the Antephellum, behind the Glut.
-
A Snorg may not leave its organ.
-
A maximum of two creatures may pass through a channel on each movement phase (two on each Snit phase, and two on the Bolotomus turn.)
-
A maximum of one creature may pass through a canal on a player's phase (one on each Snit phase, and one on the Bolotomus turn.)
-
Any number of thingies and/or Snits may occupy an organ.
-
The red canals connecting to the Lapotum may not be used by Snits.
-
Only Snits may exist outside the body of the Bolotomus.
How to Win
The Bolotomus wins by killing all the invading Snits. The Snits win by killing nine Snorgs before they can be replaced. Put dead Snorgs in front of the Snit player to let him keep score.
If nine organs are out of action at the end of a Bolotomus turn, the Bolotomus dies!
Strategy Hints
The Snit player should attack as hard and as fast as possible. The longer the invasion takes, the more time the Bolotomus has to build Runnungitms. Choose and deploy your army of 15 Snits to support your chosen strategy. Use fast Snits to strike quickly and strong Snits where a kill is necessary.
The Bolotomus player must balance his creation of Runnungitms (to destroy the invaders) and Makums (to build new Snorgs).
Both players must think about "traffic control," to move their forces effectively through the channels and canals.
Optional Rules
Variations and Game Balancing
We've provided more counters of each type than should be required for the basic game, plus a few blanks. Have fun trying out variations . . . and if you come up with a good one, let us know.
- The easiest way to "fine-tune" the game balance (if one side is winning too often, or if one player is new) is to change the size of the invading force by one or two Snits.
- You can also change the number of organs the Snit has to put out of action, but it's a lot easier to get eight than it is nine . . . and sometimes it's a lot harder to get 10 than it is nine.
- The rules for channels and canals can be changed. If the wide channels will allow three thingies to pass rather than two . . . or if ALL channels and canals will allow two thingies per phase to pass . . . the play of the game becomes very different.
- Adding the Spark of Life (see below) helps the Snits. Adding Splops helps the Bolotomus.
Multiplayer Snits' Revenge
With three, four, or five players, one person assumes the role of the beleaguered Bolotomus. All others take charge of their own clans of Snits.
With two Snit players, each player gets eight Snits, only three of which can have Speed or Strength badges. (Yes, this makes the attacking army larger by one Snit.)
With three Snit players, each player gets five Snits, only two of which can have Speed or Strength badges.
With four Snit players, each player gets 3 Snits, only two of which can have a Speed or Strength badge. This version may take a while to finish . . .
Play is the same as for two players, with the following changes:
-
At the beginning of the game, the Snit players roll dice. The high roll is the Senior Snit Clan (give that player the Senior Snit totem). The Senior Snit Clan always moves first, and play proceeds (among Snits) in a clockwise order. After each turn, pass the Senior Snit totem to the player on your left.
-
Each player moves some, all, or none of his Snits. No kicking is allowed until all Snit players have finished moving.
-
Movement restrictions apply to the Snit players as a whole. Once one player's Snits have used a canal, no other Snits may use it until the next complete turn. Two different players could share a channel.
-
Snit kicking occurs in the same order as did moves.
-
The Bolotomus wins if all the Snits die.
-
If the Bolotomus dies, the last Snorg to be killed is replaced by the Spark of Life piece, which now belongs to the Snit that scored the kill. (If more than one Snorg was killed on the last Snit turn, roll randomly to see which one had the Spark.) All other Bolotomus pieces are removed from the game. The surviving Snit clans now fight among themselves for the Spark. Snits kick each other in the same manner as they kicked Snorgs.
-
Killing the Snit with the Spark gives possession of the Spark to the killer.
-
Once the Bolotomus is dead, each Snit player has his own separate turn. Move first, and then Kick.
-
The victory goes to the Snit who exits the Bolotomus with the Spark in his possession.
The Spark of Life and the Splops
Earlier editions of the game featured this rule, but playtest suggested that it was making the victory a bit too arbitrary. But it was still a lot of fun, so it's included here . . .
The Bolotomus player secretly places three Splops and the Spark, face down, underneath four different Snorgs before play begins. Once in place, they may not move. (Four Splops are provided, to let you change the scenario.)
Note that these counters cannot go into the Lapotum, because Snits cannot enter that organ. To make sure this doesn't accidentally happen, there is no counter for the Lapotom's Snorg! It is just printed on the map . . .
If a Snit kicks the Snot out of a Snorg with a Splop under it, that's just what happens . . . Splop! The Snorg explodes, taking its killer with it. Other thingies in the organ are not affected.
Note that Splops are not replaced if the Snorg is replaced.
The Spark of Life
If the Snorg with the Spark of Life is killed, the Bolotomus dies instantly!
The Bolotomus should carefully consider where to hide the Spark. The Forebosinator is fairly safe because of its inaccessibility. On the other hand, this is an obvious place, and the Snits will be going for it. Other recommended locations for the Spark are the Fleotis or one of the three Compositors.
The Snits can still win a regular victory by killing nine organs, even if they never find the Spark.
Making the Spark Harder to Find
The Bolotomus player may put dummy counters (such as unused Snits) under all Snorgs that don't have the Spark or a Splop. Now the Snit player can't tell which organs might be his objective.
Combining Snit Smashing and Snits' Revenge
After a two-player game of Snit Smashing, the player who won the Snit victory controls the Snits in a game of Snits' Revenge.
After a three or four-player game of Snit Smashing, the player who won the Bolotomus victory plays the Bolotomus in a game of Snits' Revenge, and all the others team up their Snits against the unfortunate Bolotomus.