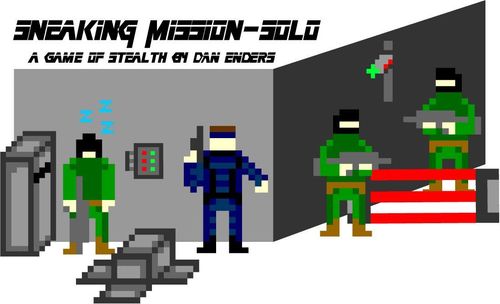
Sneaking Mission: Solo
Sneaking Mission: Solo Rulebook
Table of Contents
Table of Contents
Equipment
To be adequately equipped for this mission, you will need the following:
- Your mission manual (this booklet).
- 104 Game Tokens, included in this booklet. You will only need to print the page once.
- A location for your mission. A standard desk or table is enough space.
- 1 Coin
- A large amount of "blips", such as small coins, beads, scraps of paper, etc. A game can require a maximum of 50 blips, but that is quite rare.
- It is suggested you have a solid container, such as a cup or paper bag, to place your tokens in. However, this is optional.
- You will need to acquire some form of storage if plan on attempting another mission at a later date.
Preparing for your Mission
If this is your first game of SM-S, print out the page of tokens at the end of this booklet. Separate the following tokens from the rest: The Agent Token, The Entrance Token, The Arrow Token, and the 5 Alert Tokens. Set these aside for now. Place the rest of the tokens in a pile, face down, and shuffle them around. If you have a solid container, such as a cup or a paper bag, you may place this pile in that instead. This will be your DRAW pile. Place the Entrance Token in front of you, facing any direction. Then, place the Arrow Token in front you, facing any direction. Set the 5 Alert Tokens aside. Place the Agent Token on the Entrance Token. You have just infiltrated the base. Your mission has now begun!
Playing Sneaking Mission: SOLO
SM-S is played over a series of turns, each following a similar pattern. First, choose a door to enter. Draw a tile from your pile, and place it so that one of its doors connects to the door on your current tile. After you've placed this tile, move the agent onto it. Then, you start the process again.
Your agent continues to explore rooms this way until you reach the SECRET FILES Tile. Once you have found the SECRET FILES, you win the game. You are free to move around any rooms you discover, and you may backtrack whenever you wish.
Of course, the enemy won't simply leave the SECRET FILES just anywhere. Not only are they quite difficult to find, they are plenty of obstacles in the way. The enemy has gone to great lengths to protect them, employing numerous armed guards and plenty of security devices.
Placing Guards
If the tile you draw has a Guard on it, you must place the tile a certain way. Each Guard Tile has a small arrow in one of its corners. When you place the Guard, the arrow in the corner must face the same way as the Arrow Token in front of you. If the Guard is in a 2 Door Hallway, there will not be an arrow. Instead, there will be a small red square near one of the 2 doors. In this case, the door with the red square is the door that must connect to the door you choose to explore. If, for any reason, a tile cannot connect to a door and face the arrow, place the guard so that the arrow connects to the door you are entering from. See the following illustrated examples for a better idea.
Placing Guards: Example A (illustration in the printed manual). In Example A, the Agent wishes to move out of the RIGHT door. When he draws the Guard Tile, he places it with the Arrow facing the same direction as the Arrow Token above the entrance. Example B (illustration in the printed manual). In Example B, the Agent wishes to move out of the RIGHT door and draws a Guard Tile with a red square instead of an arrow. In this case, he connects the door with red square to the Right Door. Example C (illustration in the printed manual). In Example C, if this tile were to face the arrow, it would create a wall. Instead, he places the tile so that the Arrow is facing the door the Agent is leaving from.
If, for any reason, you still cannot place the tile, place it any direction you'd like.
Placing Guards is an exception to regular tiles: Unlike a regular tile, you do not have to move onto the Guard Tile after you place it.
Getting Caught
When an Agent encounters a Guard, he must make sure he is not caught, or his mission is placed in jeopardy! Every Guard Tile, with the exception of Sleeping Guards, will have a Yellow Cone on it. This Yellow Cone represents the direction the Guard is facing. See the following illustrated examples for a better idea. Also, see the LINE OF SIGHT section for more rules.
Getting Caught: Example A (illustration in the printed manual). In Example A, the Agent has placed the Guard Tile, and the Yellow Cone is facing the Agent. This Agent has been spotted! Example B (illustration in the printed manual). In Example B, the Agent was lucky, and the Yellow Cone is facing Away from the Agent. The Agent is safe. Example C (illustration in the printed manual). In Example C, the Yellow Cone is facing UP, and is still considered facing AWAY from the Agent.
Taking out The Guards
Once you have placed a Guard Tile, and determined the direction the Guard is facing, you have a few options when making your next move.
If the Guard is facing AWAY from you, you may attempt to kill the guard or you may continue exploring a different room.
If the Guard is facing you, you have been spotted, and you MUST attempt to kill the guard.
When attempting to kill a guard, first move the agent on to the same tile as the guard. Then, flip a coin.
- On a flip of heads, you have killed the guard. Place a "blip" on the tile. This spot is now considered an empty space.
- On a flip of tails, the guard has survived the attack, and has alerted the base to your presence. The game now enters ALERT MODE.
Having a weapon makes taking out guards much easier. See the WEAPON section.
ALERT MODE
If you have alerted the guards to your presence, such as from failing an attack or setting of a security device, the game enters ALERT MODE. Being in Alert Mode changes a few things about the game:
- For every turn that you remain in Alert Mode, remove 1 Alert Token from the pile. When there are no more tokens in this pile, you lose the game.
- All Sleeping Guards that have not been killed count as normal Guards that are facing ALL DIRECTIONS.
- If you are spotted by a guard, move through a security system, or move through a guard, you MUST remove an extra Alert Token.
- You may still draw and place new tiles, but if you draw a Guard, you MUST attempt to kill it. If you fail, remove an extra Alert Token.
- If you are in Alert Mode when you discover the SECRET FILES, you DO NOT win. You must somehow end Alert Mode first.
When Alert Mode ends, place all the Alert Tokens back into one pile.
Hiding Spots
Obviously, Alert Mode is not a good thing to find yourself in. But, entering Alert Mode is not an automatic death sentence. An Agent can use his surroundings to hide from the enemy. If you can find a HIDING SPOT TILE, Alert Mode ends.
Hiding Spot Tiles are the Box, the Locker, Air Duct Tiles, and the Entrance Token.
Hiding Spot Tiles are considered empty tiles for the purposes of line of sight.
Air Ducts
Agents may find a ventilation shaft that they can use to facilitate their infiltration. A clever Agent can hide from their pursuers in a vent, or even use them to travel through the base.
Some tiles may have an Air Duct picture on them. These are empty spaces, with a helpful special rule.
If you have uncovered multiple Air Duct Tiles, you may move through them as if they were connected rooms. Simply move an Agent on to a Air Duct Tile, and then replace it on any other uncovered Air Duct tile. Using an Air Duct counts as 1 turn of movement.
Security Systems
During you mission, you will likely encounter many Security Systems set up by the enemy.
Security Systems are either Security Cameras or Laser Grids. Just like Guard Tiles, you do not have to move onto these tiles when you place them. You may not attempt to kill Security Systems. If you move through a security system, you automatically enter Alert Mode. Place a "blip" on the activated system. It is now considered a blank tile.
Security Systems may be disabled if you discover a Circuit Breaker Tile. When you discover this tile, you may choose to deactivate the base Security Systems. If you do, place a "blip" on each System that is currently out and this Circuit Breaker. If you choose not to deactivate the systems, you may return to this tile later in the mission to do so. After you have used a Circuit Breaker, newly drawn Security Systems are unaffected. You must find another Circuit Breaker to deactivate these new Systems. Deactivated Systems count as blank tiles.
Sleeping Guards
Sleeping Guards do not count as Guard Tiles. Instead, you may place these just like regular tiles. You do not have to attempt to kill a sleeping guard, and moving through a Sleeping Guard tile does not cause the game to enter into Alert Mode. Failing to kill a Sleeping Guard does, however. After an Alert Mode ends, Sleeping Guards that are still alive fall back asleep.
Weapons
In Sneaking Missions, Agents are sent in without any weapons or extra gear in order to make their presence less known. This does not stop them from using whatever materials they find in the field.
If you discover a WEAPON TILE, you are given 3 Ammo Blips that you may use when you attempt to kill a guard. If you choose to use an Ammo Blip, you automatically kill the guard, no coin flip required. However, once you run out of Ammo Blips, you must find a NEW Weapon Tile to refill your ammo. In addition, using Ammo Blips does not require you to be on the same tile as Guard to kill it. If you can draw a straight line to a Guard through any rooms, you may use an ammo blip to automatically kill the guard. See the following illustrated examples for a better idea.
Weapons: Example A (illustration in the printed manual). Weapons: Example B (illustration in the printed manual).
In Example A, the tiles between the Agent and the Guard form an open, clear hallway. He may use an ammo blip to automatically kill this guard. However, in Example B, the tiles form a hallway, but the second tile does not for a clear opening into the third. The agent may not kill this guard.
LINE OF SIGHT
Agents must be extremely careful when infiltrating a base, because a Guard's vision is not limited to the Tile they are guarding. Line of Sight essentially works exactly like determining the possibility of a killing a Guard from afar, but requires some further explanation. After the direction that a Guard Tile is facing has been determined, it can begin to trace line of sight down any clear, open tiles in the direction it is facing. Walls, and other Guard Tiles, do not count as clear tiles. See the following illustrated examples for a better idea.
Line of Sight: Example A, Example B and Example C (illustrations in the printed manual).
In Example A, the Guard is facing down the Left hallway. Since the three tiles connect to form an open hallway, the Agent in the farthest tile has been spotted. In Example B, the Guard is facing the direction of the Agent, but does not have line of Sight because of the wall formed by the two middle tiles. In Example C, the Agent has Line of Sight to the Guard, but since the Guard is not facing that direction, the Guard does not have Line of Sight to the Agent, even though the path is clear. The Guard's Line of Sight is limited to the one tile in front of him, since the second Guard blocks Line of Sight.
If an Agent steps into Line of Sight of a Guard, you MUST attempt to kill it in the following ways:
- If the Agent is only 1 Tile away from the guard, you MUST move onto the Guard Tile and attempt to kill the guard as normal, or use an Ammo Blip.
- If the Agent is more than 1 Tile Away from the guard, and has any remaining Ammo Blips, it MUST use the Ammo Blip.
- If the Agent cannot kill the guard in either of these ways, the game enters ALERT MODE automatically.
Managing Line of Sight is extremely important to an Agent's survival, so be sure to keep careful track of where you are moving!
Difficulty Levels
You may find that SM-S is either too difficult, or not challenging, enough. If this is the case, you may use one of these difficulty levels.
- Easy: You start them game with 3 Ammo Blips.
- Normal: These rules are currently written for the Normal Difficulty.
- Hard: Weapon Tiles only give you 1 Ammo Blip.
- Extreme: Weapon Tiles only give you 1 Ammo Blip. If you enter Alert Mode, you automatically lose the game.