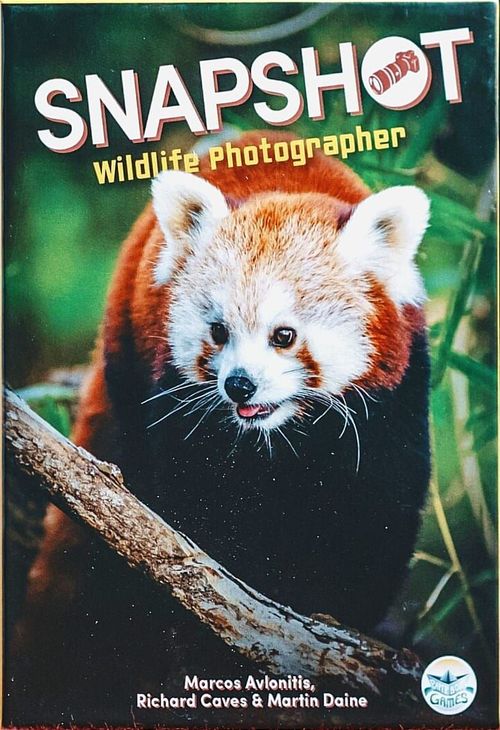
Snapshot: Wildlife Photographer
Snapshot: Wildlife Photographer Rulebook
Table of Contents
Table of Contents
Contents
- 36 x Animal cards
- 1 x Raccoon expansion
- 10 x Assignment cards
- 6 x Dice
- 4 x Habitat cards
- 15 x Photography Award tokens
- 45 x Tracking tokens (1s and 5s)
- 1 x First Player marker
- 3 x Reference cards
- 1 x Score pad
Component Overview
Habitat
Explore habitats to photograph the animals in them.
- Habitat name: the name and symbol of this habitat.
- Explore value: you must roll this result (or above) on one or more of your dice to explore this habitat.
Animal Card
There are 36 unique animal cards (9 per habitat) and their difficulties range from 2-10 (one of each value per habitat).
- Natural habitat: place the animal into this habitat when drawn.
- Difficulty: roll this total (or higher) to photograph this animal.
- Characteristics: look out for symbols that match your assignment card.
- Prestige: add this to your final score.
Photography Awards
These earn you prestige. There are 2 types:
- Specialist Award: photograph 3 animals from the habitat shown.
- Generalist Award: photograph 1 animal from each of the 4 habitats.
Assignment
Each player has a unique Assignment that offers potential prestige bonuses.
- Cover Photo: you get 5 prestige for photographing one of these animals.
- Feature Article: you gain prestige for photographing animals with these symbols. The chart shows how much prestige you earn at the end by summing up all matching symbols.
Tracking Tokens
These represent knowledge gained and can be used to reserve cards and improve dice rolls.
Set-Up
Set up the game as shown.
- Habitats: Place the habitat cards in order of difficulty (2, 3, 4, 5) as shown.
- Photography Awards: Stack the photography awards for each of the 5 categories in ascending order of prestige value (highest on top). The "Specialist" awards are placed above their corresponding habitats. The "Generalist" award (1-of-each habitat) is placed to the side.
- Tracking Tokens & Dice: Form the 'bank' by placing the tracking tokens and the 6 dice within reach of everyone.
- Animal Cards: Shuffle the deck and place it nearby. Draw 3 cards and place them face-up in their natural habitats. Place these cards in ascending order of difficulty, e.g. place a 5 before a 7. Only place cards this way during set-up. Make sure the information at the top of the card is always visible.
- Assignments: Give each player a random assignment. Look at yours but keep it secret! Return the rest to the box.
- Starting Tokens: The starting player is the person who has most recently taken a photograph. They take the Starting Player Marker (the red panda meeple) and 2 tracking tokens. Each subsequent player gets one more token than the previous player (i.e. the 2nd gets 3, the 3rd gets 4, etc).
Overview
Objective: Your goal is to become wildlife photographer of the year for Snapshot Magazine by creating the most prestigious portfolio of animal photographs.
Players take turns photographing animals by drawing cards and rolling dice. Each turn represents a month of work and the cards you collect are your portfolio. Gain extra prestige by claiming awards and completing your secret assignment.
The winner is the player with the highest total prestige at the end of the game.
Game-play
Play begins with the Starting Player and proceeds clockwise. Your turn is split into four phases:
- Phase 1 - Research: You will earn tracking tokens by drawing animal cards and placing them in their natural habitats, ready to be photographed. However, drawing the wrong card might end your turn early!
- Phase 2 - Preparation: You will decide how to assign your 6 dice and any tracking tokens between habitats and animals.
- Phase 3 - Photography: You will roll your dice to see if you succeed in exploring your chosen habitats and in photographing animals.
- Phase 4 - Review: You will check to see if you have won any photography awards or, if you failed to photograph anything, take additional tracking tokens. If you have reached a set number of photographs, the game ends at the conclusion of the current round and you will score up to determine the winner.
Phase 1 - Research
Before planning your expedition, you can research the best spots to find animals. But be warned - if you dither too long, nature will take its course, the animals will leave and all your research will be wasted!
In the RESEARCH phase, you may draw cards from the animal deck to add to the table. For each card you draw, reveal it and choose one of the following options:
- Option A - Place in Habitat
- Option B - Spook
- Option C - Reserve
- Option D - Accept Offer
Once you have drawn as many cards as you wish (if any) proceed to PHASE 2 - PREPARATION (unless you have spooked any animals - see Option B - Spook).
If you need to draw an animal card and there are none left, shuffle the discarded cards to form a new deck.
Option A - Place in Habitat
Placing the card you drew makes it available to photograph. However, you may only place it if it is of higher difficulty than the animals already in its natural habitat (if any).
Stack the drawn card on top of the highest animal in its natural habitat. Make sure the details at the top of the cards are always visible.
Each time you place an animal card into its habitat, you receive 1 tracking token from the bank (reserved or spooked animals do not count).
If you are placing a card that another player has offered to reserve (see Option D - Accept Offer) you must attempt to photograph it this turn. To indicate this, place it sideways into its habitat as a reminder.
Example: The golden eagle has a higher difficulty (8) than the golden pheasant that is already in the habitat (7), therefore it may be placed. The guanaco has a lower difficulty. If no-one wants to reserve it, then all mountain animals are spooked - discard them. Your turn is cut short.
Option B - Spook
If the card drawn is of lower difficulty than the animals already in its natural habitat, the animals are spooked and the card cannot be placed (do not receive a tracking token). If that happens, discard the drawn card and all other animals in that habitat. Your turn is now over!
The RESEARCH phase ends immediately. You now skip the PREPARATION and PHOTOGRAPHY phases and go straight to PHASE 4 - REVIEW.
The only way to stop animals being spooked is if the drawn card is reserved by you or another player (see below).
Option C - Reserve the card
Any drawn card may be reserved to temporarily remove it from play (even if it would not be spooked).
Place the reserved card in front of you. Turn it sideways as a reminder it's not been photographed. You might do this to stop that card spooking other animals or you might simply want to photograph it on a future turn.
Reserved cards are not photographs (yet) and cannot be photographed or reserved by other players.
You can have a maximum of two reserved cards at a time. If you have two already, you can't choose the reserve option until you make space (done in PHASE 2 - PREPARATION).
Option D - Accept Offer
Any player may offer to reserve any of the cards you draw (make sure you give players enough time to make an offer). If you accept an offer, that player reserves the card as above and pays you 1 tracking token from their supply.
A player must have free space in their reserves, and a tracking token to pay with, in order to make an offer.
If there are multiple reservation offers, priority goes in turn order starting with the current player (e.g. you are Player 1 and both Player 2 and Player 3 make you an offer; you can only accept Player 2's offer, even if Player 3 offered first).
Offers must be made before you have carried out one of the other options (e.g. you cannot reserve a card that's already been placed into a habitat).
Refusing Offers
You are not obliged to accept an offer, but if you decline you must either reserve the card yourself (see Option C - Reserve) or place it in its habitat (see Option A - Place in Habitat) and commit to photographing it this turn.
REMEMBER: no-one can reserve an animal once it's been placed into its natural habitat.
Example: Player 2 has reserved the guanaco from Player 1. They pay Player 1 a tracking token and place the reserved card sideways next to themselves. As a result, no animals are spooked and Player 1's turn continues as normal.
Phase 2 - Preparation
You have done your research. Now it's time to plan your expedition! Follow the steps below in order:
- Step A - Place Reserved Animals
- Step B - Place Dice
- Step C - Place Tracking Tokens
Step A - Place Reserved Animals
You may place any of your reserved animal cards into their natural habitats, in order to photograph them this turn. This is also the only way to remove reserved cards from your hand and free up space.
During this step, you may place a reserved card even if it has a lower difficulty score than the highest card in its habitat.
When you place reserved cards, keep them turned sideways to indicate you are going to attempt to photograph them this turn. You will have to place at least one dice on it later.
NOTE: You do not receive tracking tokens for placing them.
Step B - Place Dice
Place the six dice onto your chosen habitat and animal cards. This indicates which habitats you will explore, and which animals you will try to photograph, during PHASE 3 - PHOTOGRAPHY.
You can place dice on as many habitats as you wish. Within each chosen habitat, you can place dice on any number of animal cards. You can also choose any of the animals in that habitat - regardless of their difficulty or whether there are other animals on top of it.
The only constraints are:
- To place dice on an animal card, there must already be at least one dice on its natural habitat card.
- An animal cannot be photographed this turn unless you place at least one dice on it during this step.
- If you are photographing any animals turned sideways (i.e. cards that you had reserved or where you refused a reservation offer) then you must place at least one dice on them and on their natural habitat.
You can always choose how many dice to place. If an animal needs at least 2 dice to photograph it (e.g. it has a difficulty of 7 or above) then you may still place a single dice, knowing that you will fail.
Step C - Place Tracking Tokens
You may now place any number of your tracking tokens onto any animal cards with dice on them.
Each tracking token you place adds 1 to your dice total during the PHOTOGRAPHY phase. In other words, every token placed reduces the total you need to roll by 1. It's also possible to guarantee success by placing so many tokens it no longer matters what you roll for the photograph!
REMEMBER: You must always place at least one dice on an animal you want to photograph. You cannot 'buy' it by only placing tokens.
NOTE: You cannot place tracking tokens onto habitat cards to increase your dice roll.
Preparation Example
- Exploring the savannah requires a result of 3 or higher so placing just one dice might be enough... If they're unlucky, they can pay tracking tokens to re-roll during PHASE 3 - PHOTOGRAPHY.
- The meerkat only has a difficulty of 3 so placing 1 dice should be enough, although some players might consider this risky.
- This player does not want to photograph the nile crocodile, so they do not place any dice on it. All cards left in their habitats at the end of a turn stay where they are. They are available to photograph on future turns.
- A difficulty of 8 makes the white rhino quite hard to photograph so the player places 2 dice and 2 tracking tokens to help tip the odds in their favour.
Phase 3 - Photography
This is what it's all been leading to. Time to head out into the wilderness and get photographing!
First, you'll need to explore each habitat for the perfect spot to hide out. Just be careful not to let the animals know you're coming...
Resolve each habitat you have dice on by following these steps in order:
- Step A - Explore: roll any dice you have on the habitat. If successful, proceed to Step B...
- Step B - Photograph Animals: roll the dice you've placed on animals in this habitat, one animal at a time.
If you are exploring multiple habitats, you may resolve them in any order. However, you must complete both steps listed above before moving on to the next habitat.
Step A - Explore
To explore a habitat, roll all the dice placed on it. At least one dice must roll a result equal or higher to the result pictured on the habitat card.
E.g. for the Rainforest (difficulty 5), at least one of the dice will have to roll a 5 or 6 for you to explore it successfully.
If you roll two dice and one succeeds and one fails, you still succeed - ignore the failed dice.
NOTE: Never total up your dice in this step! If you rolled a 2 and a 3, they do not count as rolling a 5.
Examples: A roll succeeds if both dice are equal to or above the target result of 3. Dice are not added up, so a 2 and a 3 against a target of 5 is a failed exploration. A roll is also a successful exploration if only one of the dice meets the target.
Re-Rolls
If you fail an explore roll, you may use 2 of your tracking tokens to re-roll a single dice. Place the tokens onto the habitat card and re-roll one of the dice you just rolled.
NOTE: Do not pay these tokens to the bank yet. You might get these back (see Failed Exploration below).
You may take these tracking tokens from your own supply or from tokens you have already placed on animal cards. There is no limit to the number of times you can re-roll a failed exploration, but you must place 2 of your tracking tokens on the habitat each time.
NOTE: You cannot re-roll dice on animal cards.
Successful exploration
If you succeed in rolling the result you need, you may now proceed to Step B - Photograph Animals. If you spent tokens for re-rolls, you must now discard all the tracking tokens you placed onto the habitat card back into the bank.
Failed exploration
If you fail to explore the habitat (and don't want to pay for more re-rolls), you cannot photograph the animals in it. Discard all animals in the habitat with dice on them. You keep any tracking tokens you placed on the animals. You also keep tracking tokens placed onto the habitat card for re-rolls (if any). Return them to your supply.
You skip Step B - Photograph Animals for this habitat. You may now explore the next habitat with dice on. If there are none left, proceed to PHASE 4 - REVIEW.
Step B - Photograph Animals
Once you have successfully explored a habitat, you must attempt to photograph each of the animals you have placed dice onto in that habitat (in any order).
To photograph an animal, roll the dice placed on it. If the total value of dice rolled, plus the value of any tracking tokens on the card, is equal to or greater than the animal's difficulty, the photograph was successful!
Successful photograph
Place the animal card face-up on the table in front of you. This is your portfolio. You must discard any tracking tokens you placed on it (even if they were not needed).
Cards in your portfolio are placed vertically (reserved cards are placed sideways).
Failed photograph
Discard the animal you tried to photograph. Keep any tracking tokens on it (return them to your supply).
Breaking camp
Once there are no animals in the habitat with dice left on them, you may move onto another unresolved habitat (return to Step A - Explore). If there are no more habitats to resolve, proceed to PHASE 4 - REVIEW.
REMEMBER: if ever you explore or photograph successfully, you lose the tracking tokens you used. If the explore or photograph roll fails, you get the tracking tokens back.
Example Rolls
- The dice total is 7 which is higher than this animal's target difficulty of 5. The photograph is a success!
- This result is a 2 from the dice roll plus 1 from the tracking token making a total of 3. This is lower than the difficulty of 4 so this attempt fails. DISCARD the animal card; KEEP the tracking tokens.
- Here, the dice roll of 8 would have failed but the 2 tracking tokens increase the total to 10. The photograph succeeds! KEEP the animal card; DISCARD the tracking tokens.
Phase 4 - Review
As the month comes to an end, review your photographs and reflect on your achievements. Follow the steps below in order:
- Step A - Gain Experience
- Step B - Collect Awards
- Step C - Check for Game End
Step A - Gain Experience
If you failed to take any photographs this turn, you learn from experience - take 3 tracking tokens from the bank and add them to your supply.
Step B - Collect Awards
There are five categories of photography award available. They are won by having the required animals in your portfolio (photographed over any number of turns).
- Specialist award: photograph 3 animals from the specified habitat. There are four categories of this award - one for each habitat type.
- Generalist award: photograph 1 animal from each of the 4 habitats.
NOTE: Your photographs can count towards both Specialist and Generalist awards. For example, if you had 3 rainforest animals and also 1 shoreline, 1 savannah and 1 mountain animal, you would win both the Generalist award and the Rainforest Specialist award.
If you have won an award this turn, take the top token of that award category. The prestige of the awards decreases as the stack depletes, representing 1st, 2nd and 3rd place respectively. The prestige for 1st place also varies depending on the difficulty of the habitat.
You may win multiple awards on a single turn. Claiming multiple awards from the same Specialist or Generalist category is also permitted. For example, photographing 3 animals from the rainforest would win you your first Rainforest Specialist award, while an additional 3 rainforest animals (6 in total) would win you a second award.
Step C - Check for Game End
The end of the game is triggered when one player has reached (or exceeded) the target number of photographs, as determined by the player count:
- 2 players: 9 photos
- 3 players: 8 photos
- 4 players: 7 photos
- 5 players: 7 photos (requires "Flora Expansion" to play)
When the end of the game is triggered, play continues until the end of the round so that everyone has had the same number of turns. When the last player (to the right of the Starting Player) has taken their turn, proceed to SCORING.
If the game has not ended, the player on your left now takes their turn (return to PHASE 1 - RESEARCH) and so on.
NOTE: All remaining animals stay on the table.
Scoring
There are four scoring categories.
- Animal Cards: First, add up the prestige shown on all the animal cards you photographed. Do not count any cards you have in reserve.
- Awards: You then add up the prestige on any photography awards you won.
- Assignment: Cover Photo: If you completed your Cover Photo, receive 5 prestige. You only need to photograph one of the animals listed. There's no extra bonus for getting both - there can only be one animal on the cover!
- Assignment: Feature Article: Add up the combined number of symbols on your animal cards that match either of the symbols on your assignment. If an animal card has two matching symbols, count both of them. The scoring chart on your assignment card shows you how much prestige your total is worth.
Use the score pad to total each player's score from all four categories. The winner is the player with the most prestige. In the case of a tie, the tied player with the most tracking tokens wins. If it's still tied, they share the victory.
End-of-Game Scoring Example
- Animal Cards: These animals are worth a total of 17 prestige (2 + 2 + 5 + 2 + 3 + 3).
- Photography Awards: Two awards have been won: "Generalist" and "Mountain Specialist" for 13 prestige total.
- Cover Photo: 5 prestige for the completed Cover Photo (Nile Crocodile).
- Feature Article: There are 4 matching symbols on the animal cards: 2 x "21-30 years" and 2 x "Omnivore." As the chart shows, 4 symbols are worth 9 prestige.
Total: 17 + 13 + 5 + 9 = 44
Raccoon Expansion
To play with this included expansion, simply shuffle the raccoon card into the animal deck during set-up. Treat it like any other animal card, with the following exceptions:
- When drawn, place it in the habitat of your choice. As usual, it must be of higher difficulty than the cards already in that habitat - so it can't be placed where there's already a card with a difficulty of 6 or more.
- It never counts for awards, regardless of the habitat you photographed it in.
- If playing the solo mode (sold separately as part of the "Flora Expansion"), and SnapBot draws the Raccoon, it places it in the habitat shown under "SPOOK".
Simpler Variants
For younger players, or those getting used to board games, you may try the following variations:
- Play without Assignments and Raccoon Card
- Play without Tracking Tokens
- Play without Reserving cards
For the simplest version of the game, remove all three and once the players have grasped the basics, add the missing elements back in one game at a time (in the order shown above) until the players have grasped all the concepts and are ready for the full game.