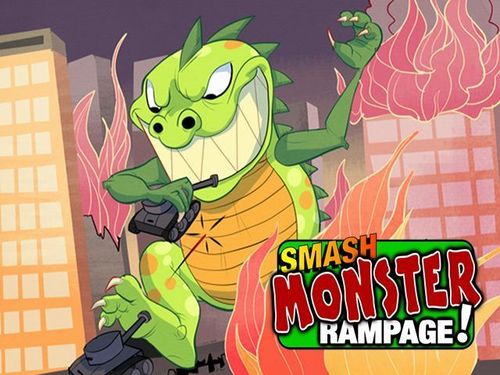
Smash Monster Rampage!
Smash Monster Rampage! Rulebook
Table of Contents
Table of Contents
Game Overview
Players compete to rescue survivors and win the most 'Monster Hit' cards.
The 'Monster Die' generates random actions for the Monster making the beast unpredictable and dangerous. It sets buildings ablaze, creates devastating quakes and destroys everything in its path.
Taking turns to move their Tank and/or Helicopter Units, players get into position to attack the Monster.
Win 'Monster Hit' cards by successfully firing at the Monster and fulfilling the conditions on the cards.
Act fast. If the city is flattened before the Monster is killed, the Monster wins!
Components
- 1 playing board representing the city
- 30 high-rise Buildings
- 1 Smash Monster
- 1 Monster Die
- 6 Helicopter Units - 3 green / 3 orange
- 6 Tank Units - 3 green / 3 orange
- 32 'Monster Hit' cards
- 16 Survivor Markers - 8 green / 8 orange
- 15 Fire Markers
- 2 regular six-sided dice
Set Up
- Place one of the Buildings on each of the thirty squares of debris.
- Remove 'Mission Accomplished' from the 'Monster Hit' deck and place it face down beside the board. Shuffle the remaining cards thoroughly then place those face down on top of the 'Mission Accomplished' card (this is simply to ensure that 'Mission Accomplished' is always the last card drawn).
- Put the 'Survivors' and 'Fire Markers' close by also.
- Each player (orange/green) begins with six 'Reserve' Units, three Tanks and three Helicopters. Units are referred to as Reserve Units while they are off the board, waiting to go into active play.
- The Monster begins at any one of the six spaces indicated on the board; roll a regular six-sided die to determine which.
Order Of Play
A player's turn can be divided into three main phases which must be carried out in the order listed below:
- Phase 1 - Active player moves Tank and Helicopter Units.
- Phase 2 - Active player moves Monster.
- Phase 3 - Active player's Units attack, draw cards if necessary.
Unit Movement
Unit movement is determined by rolling two six-sided dice; the total score is divided between all the current player's Units (you don't have to use the full count).
- Units can never move diagonally.
- Units cannot move onto (or through) the spaces occupied by the Monster.
- Units may only stop on a square occupied by Survivors if they are rescuing them.
- Once in play Units may not move off the board.
When a Unit is destroyed it is out of play until restored as a Reserve Unit.
Helicopter Movement
- Helicopters simply move one square for each spot on the dice (never diagonally).
- They may move freely over all spaces including Buildings and those occupied by any other Units, but they may not stop on spaces occupied by other Units.
- Helicopters may not pass over (or stop on) a burning Building (a Building with a Fire Marker atop it).
Tank Movement
- Tanks may only move forwards or backwards (reverse) - one square for each spot on the dice. They use one die spot to turn 90 degrees (two spots for 180 degrees).
- Consequently Tanks are slower around the board than Helicopters.
- Tanks may not stop on spaces occupied by other Units but may pass through them.
- Tanks may only move onto or through a Building space after the Building has been destroyed and removed from the board.
Reserve Units
Reserve Units are Units owned by players but not yet on the board. There are three ways to get Reserve Units:
- Each player starts with six Reserve Units.
- The 'Critical Hit' card earns you a Reserve Unit.
- You can trade a Monster Hit card (you have already won) for a Reserve Unit. (You may not trade a Survivor Marker.)
You can only trade a Monster Hit card for a Reserve Unit during the Unit Movement Phase (Order of Play - Phase 1). Roll the two dice for Unit movement then decide if you wish to trade. The swap is made instead of moving your Units. The card goes to the discard pile and your new Reserve Unit has to wait until the next Unit Movement Phase to get onto the board.
You may make up to two exchanges at a time.
The type of Reserve Unit you choose to acquire (Tank or Helicopter) will be limited by the Unit Markers available.
Following the trade the 'Order of Play' for that turn continues as normal - roll for the Monster and attack (if you have Units in position).
Players may never have more than four Units on the board and no more than six Units in total.
Reserve Units move into play from any edge of the board, complying with Unit Movement rules as they do so.
Monster Movement/Actions
The Monster always moves using Monster Squares. A Monster Square is a group of four regular squares. Monster movement/action is determined by the active player rolling the special six-sided Monster Die:
[Move forward] The Monster moves one Monster Square forward. Any Buildings, Units or Survivors consequently trampled by the Monster are destroyed and removed from the board.
[Move off the edge of the board] When the Monster moves off the edge of the board continue its move on the opposite side. Only the Monster does this, not Tank/Helicopter Units.
[Turn right] The Monster remains on the same Monster Square and turns 90 degrees to the right. This action causes the Monster's tail to sweep across the three squares behind it. Buildings, Tanks and Survivors on these three squares are destroyed. Helicopters are safe (as they are hovering above the tail).
[Turn left] The Monster remains on the same Monster Square and turns 90 degrees to the left. This action causes the Monster's tail to sweep across the three squares behind it. Buildings, Tanks and Survivors on these three squares are destroyed. Helicopters are safe (as they are hovering above the tail).
[Monster Blast] Monster Blast! The Monster emits an explosive blast that sets all Buildings on fire (and eliminates Survivors) within a two square radius of the Monster - place Fire Markers on all Buildings in this area. Buildings with Fire Markers already present are unaffected. All Helicopters in range are destroyed. Tanks in this area are safe.
Unit Attacks
To qualify for an attack on the Monster a Unit must be in line with one of the four squares occupied by the Monster.
- Tanks must have a clear line-of-sight to the Monster, free of Buildings.
- Helicopters are imagined to be always above the Buildings so they can shoot over Buildings and don't require a clear line-of-sight.
- Other Units never block a line-of-sight, just Buildings.
- Attacks cannot be made diagonally. Tanks can only fire in the direction they are facing. Helicopters may shoot in any one direction of the four available to them.
- Each Unit may only fire once per turn.
It's likely that more than one of your Units will fire in this phase, so the active player must nominate which Unit is shooting before they roll the die. The Unit furthest away from the Monster shoots first. All Units calculate their attacks in the same way:
- Count the number of spaces from the Attacking Unit to the nearest square occupied by the Monster; this is the 'Range'.
- Roll one six-sided die.
- If the number rolled is equal to or higher than the 'Range' your shot has hit the Monster.
- If the number rolled is less than the 'Range' your shot has missed the Monster.
- If the number rolled is a one, that's a Critical Miss. Your misguided shot misses its target and hits the Building nearest the Attacking Unit (without a Fire Marker already on it), setting it ablaze - place a Fire Marker on the Building. If Survivors or Helicopter Units are on that building they are destroyed/removed from play.
- If you hit the Monster take the top Monster Hit card and follow the instructions - see 'Monster Hit Cards' for details.
Unless you draw a card that says otherwise you may now attack with the next Unit in attack position.
Attack Example (diagram)
- Helicopter 1 may attack. Roll a two or higher to hit.
- Helicopter 2 may attack. Roll a three or higher to hit.
- Tank 3 may attack. The Helicopter does not block its line-of-sight; roll a five or six to hit.
- Helicopter 4 may attack. Its line-of-sight is not blocked by the Building, Helicopter or Tank; must roll a six to hit.
- Tank 5 may not attack. It's facing in the wrong direction.
- Helicopter 6 may not attack. It's not in line with the Monster.
- Tank 7 may not attack. It's not in line with the Monster.
- Tank 8 may not attack. There's a Building blocking the line-of-sight.
If Helicopter 4 or Tank 3 rolls a one (a Critical Miss), Building B takes the hit and gets a Fire Marker. If Building B already has a Fire Marker then Building A gets it, destroying Helicopter 1. If Helicopter 2 rolls a one, Building A gets a Fire Marker destroying Helicopter 1. If Helicopter 1 rolls a one it gets destroyed - the Critical Miss hits Building A (beneath it) and the fire fries the Helicopter Unit.
Monster Hit Cards
Draw the top 'Monster Hit' card from the deck when you successfully shoot at the Monster. Win the 'Monster Hit' card by meeting the conditions on the card.
Winning the most 'Monster Hit' cards is the key to winning the game.
The instructions on each card outline the conditions for winning that particular card. More details below:
1 Direct Hit (x4)
Keep this card, it's yours, you've won it - no conditions.
2 Critical Hit (x3)
You win this card with no conditions and a Reserve Unit (Tank or Helicopter, your choice). If you already have the maximum total of six Units you win the card only.
3 Survivors (x8)
If you draw this card your current turn ends (unless the Survivors expire straight away - see 'Unlucky' below).
All your Units must stop shooting immediately (this doesn't affect your opponent). Place a Survivor Marker of your colour on the coordinates indicated. If a Unit (of orange or green) occupies the assigned square then the Survivor Marker is placed on either one of the four spaces adjacent to the coordinates on the Monster Hit Card.
To win this card (and the Survivor Marker) you must rescue those Survivors on your following turn(s).
To rescue Survivors simply move your Unit (as described in Unit Movement) onto the same space as the Survivor Marker; if the Survivors are on top of a building then only a Helicopter Unit can make the rescue.
Once your Unit reaches the Survivors you win the card and the Survivor Marker; you may now continue the current movement phase.
Players may not rescue opponent's Survivors.
Be Quick. If the Survivors get dead before you are able to rescue them discard the Survivor Marker and the Monster Hit Card.
Unlucky
- Survivors cannot survive on a burning Building. Survivors assigned to a Building with a Fire Marker are lost along with the Monster Hit Card.
- If Survivors are assigned to a square occupied by the Monster they are squashed, lose the Survivor Marker and discard the Monster Hit Card.
If Survivors are lost straight away you may continue the current 'Attack Phase' if you have more Units in attack positions.
4 Fire Crew (x2)
Win this card and remove all Fire Markers from the board.
5 Fire Storm (x2)
Current fires spread to all adjacent Buildings. That's all the Buildings in the same 'block'. Win this card if no new fires start.
6 Monster Dazed (x3)
The Monster staggers about in a daze. Roll the Monster Die twice and move the Monster as instructed. If no damage is caused (or new fires started) you win this card.
If the Monster mashes any Units or Survivors, destroys or ignites any Buildings, discard this card.
7 Monster Fly Swat (x2)
The Monster batters your Helicopter. If a Helicopter Unit made this attack it is destroyed and removed from the board - discard this card.
If a Tank Unit made this attack you win this card.
8 Monster Quake (x3)
The Monster stomps about causing all burning Buildings to collapse - remove all burning Buildings (and Fire Markers) from play. Only win this card if there are no burning Buildings on the board.
9 Monster Revenge Attack (x2)
The Monster shoots a Fireball at the attacking Unit (it doesn't need to turn to do this). Calculate the result like this:
- Count the number of spaces from the Monster to the square occupied by the Attacking Unit; this is the 'Range'.
- Roll one six-sided die.
- If the number rolled is equal to or higher than the 'Range' the Monster has hit and destroyed the Unit - remove the Unit from the board and discard the card.
- If the number rolled is less than the 'Range' the Monster has missed - your Unit is safe and you win the card.
10 Monster Rage (x2)
The Monster gets mad and has a 360 degree dizzy fit. His tail sweeps round destroying anything (except Helicopter Units) in the twelve surrounding squares. Only win this card if nothing gets smashed.
11 Mission Accomplished (x1)
This will always be the last card drawn from the Monster Hit deck. Whoever draws this card wins it with no conditions and the game ends. (If any Survivors are awaiting rescue by the opponent they are lost along with the 'Survivors' Monster Hit Card.)
How to Win
The game ends in one of three ways:
- The Monster wins and both players lose.
- When a player draws the last Monster Hit Card - 'Mission Accomplished'.
- When all of one player's Units on the board get destroyed and they have no Reserve Units to deploy - and no Monster Hit Cards to trade, their opponent wins the game.
The Monster wins when all the Buildings have been destroyed/removed from the board; the city is lost and an air strike is authorised. Total annihilation! You both lose.
When either player draws the 'Mission Accomplished' card the game ends and one of the players has won. Each player counts the Survivor Markers they've won and adds that to the number of Monster Hit cards won plus the number of Units they currently have on the board; the result is their 'Mission Score'. The player with the highest Mission Score wins the game.
In the event of a draw, the holder of the last Monster Hit Card - 'Mission Accomplished' - claims the victory.
Update Notes (Revised Rules, July 2012)
Since publishing this game back in 2010 a few small changes were made to improve the gameplay experience:
- Tank Unit Movement: Previously Tank Units always had to move forwards, now they can reverse too; this makes backing away from the Monster less frustrating and more authentic.
- Trading 'Monster Hit' cards for Units: In the original rules the trade would take place instead of rolling dice for Unit movement. Now you can choose to trade after rolling for movement.
- Mission Score: The 'live' Units you have at the end of the game are taken into account. Now you add the number of Units you have on the board to your total 'Mission Score'.